Espresso Molasses Spice Cookies

As Molly said a few weeks ago, sometimes recipes are so good they need no long-winded, story-laced introduction.  These cookies are like that.  You should just go and make them right now.  But for the sake of propriety, or normalcy, or expectations, I’ll just explain how these – perhaps the best cookies I’ve ever made – certainly the best cookies I’ve tinkered with my own recipe for – came about.

Food Blog July 2013-1915Perhaps months ago, a friend mentioned molasses spice cookies on Facebook (incidentally, and perhaps obnoxiously, have you acquainted yourself with the blackberry eating Facebook page?  Come on by, if you’d like), and suddenly I had to have them.  So I poked around, checking one recipe and another, and finally, as I often do, turned to Smitten Kitchen to see what Deb’s take on the issue looked like.

Food Blog July 2013-1890
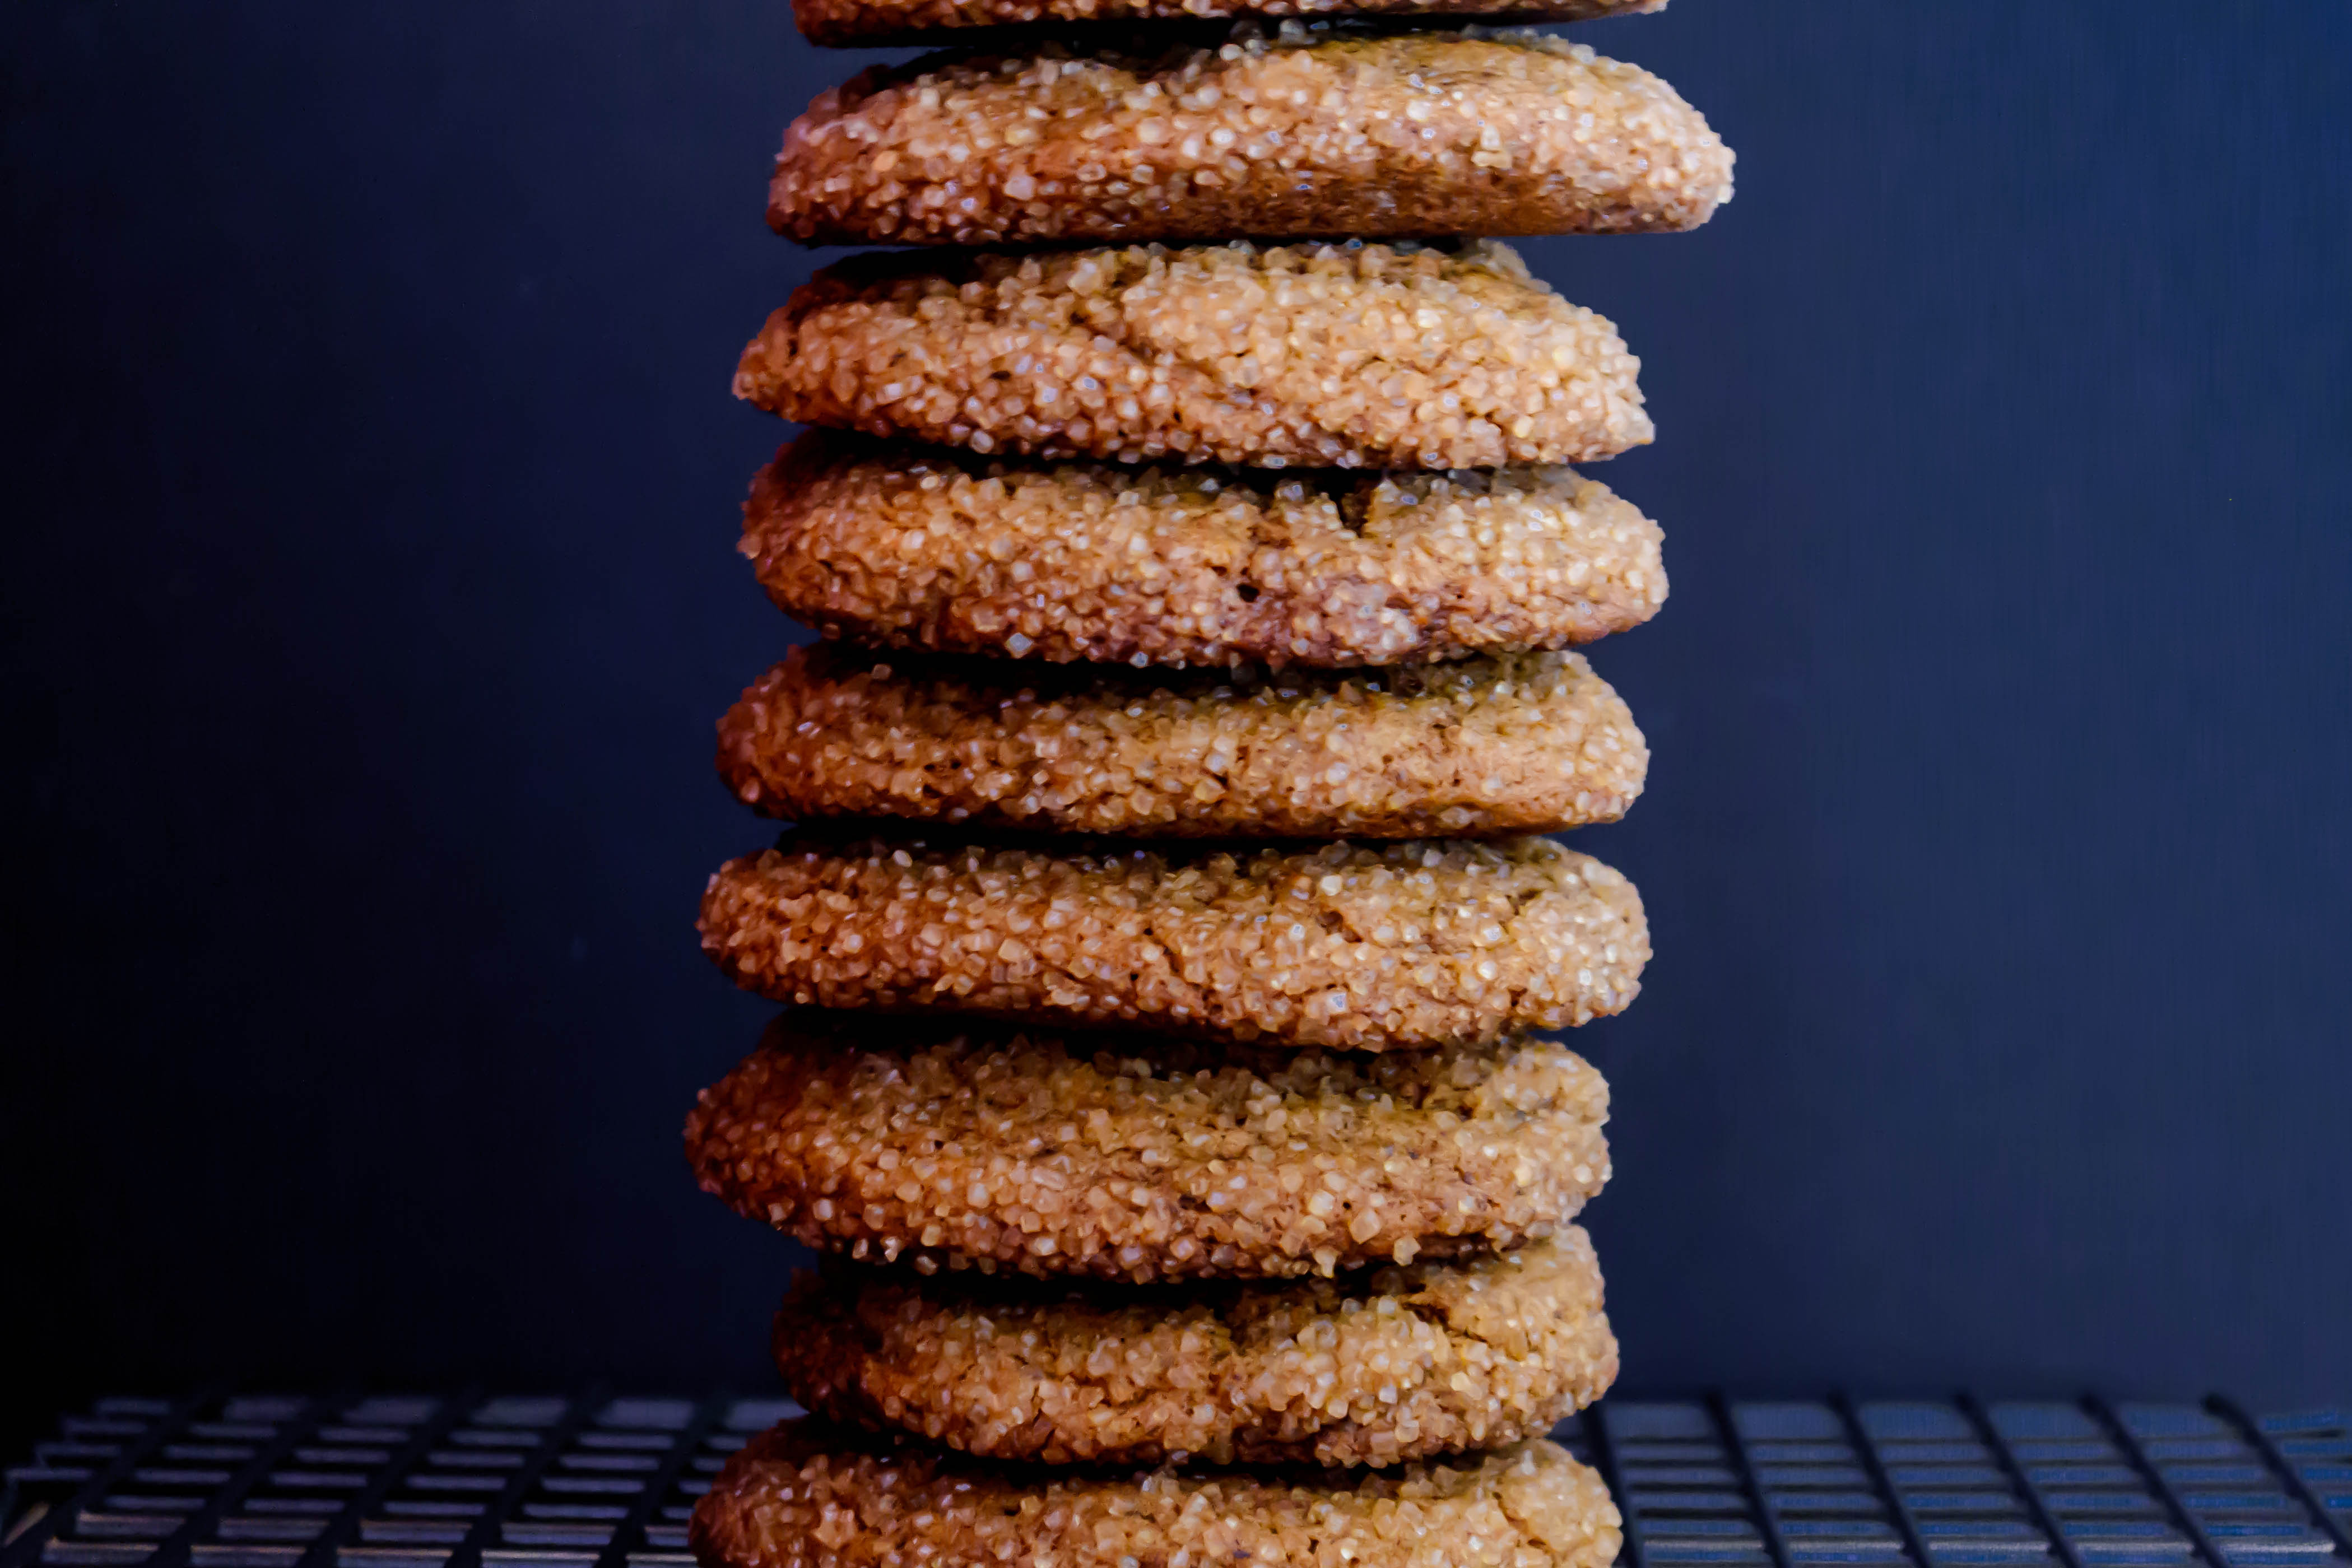
I mixed up a batch of Deb’s recipe, subbing out white sugar for all brown, adding some espresso powder for a bit of kick and rolling the cookies in coarse, crunchy turbinado sugar rather than standard granulated.  And then in between bouts of shoving them into our faces, I sent a stack to a few friends, who proclaimed them some of the best cookies they’d eaten.

Food Blog July 2013-1891For normal people, I’d wager this assessment of “best ever” would be enough to declare the recipe finished.  But I’ve never been entirely normal.  Yes, these cookies were good.  They were soft and spicy and warm, and the crunchy sugar on the outside was a perfect contrast.  They crinkled into little cracks on top and would have made ideal “bread” for a sandwich of ginger ice cream.  But I wasn’t done.  I upped the quantity of espresso powder so you could really taste a hint of it against the molasses.  I added orange zest for perfumed freshness and black pepper for an additional and different kind of zing.

Food Blog July 2013-1894And then I thought about texture.  For years, my dad has been searching for the perfect chewy chocolate chip cookie (more on this achievement in the future, I suspect…), and remains unsatisfied with recipes that churn out cakey or fluffy domes of dough.  The first batch of these molasses wunderkind were like that – lovely spice and flavor, but a bit on the soft side for me.  Some of this softness was my choice of sweetener; using all brown sugar is always going to leave you with a softer product than white sugar.  So will honey.  Both are hydrophilic, which simply means they attract moisture and thus stay flexible and soft, even after a few days (case in point: my friends who received theirs via post had no complaints about stale cookies!).  But some of this textural challenge is also related to flour.

Food Blog July 2013-1895Let’s talk about flour for a moment, if you’ll permit me.  “All-purpose flour” is one of the most misleading claims in the baking universe.  Flour – at least wheat flour – does what it does thanks to gluten, which are the little strands of protein that form snaky, chewy chains that result in the stretchy but still pillowy texture of bread.  The higher protein content your flour has, the more gluten it has and the more developed those chains will be.  The issue is, all-purpose flour is going to have a different protein content depending on the company whose flour you buy, the particular type of wheat used, and, to some extent, the year’s harvest itself.  So if you’ve ever made a batch of cookies that turned out perfectly the first time and then somehow, subtly different in texture the next time, you might have used a different batch of flour with a higher or lower protein content.

Food Blog July 2013-1896So how does this relate to the chewiness I was after?  Here, as should surprise no one (at least no one who knows me), I turned to Alton Brown.  If higher protein flour results in chewier cookies, why not sub in the flour made specifically for gluten development?  Bread flour.  And that was it.  Replacing just a ¼ cup of the all-purpose flour from the original recipe with bread flour produced a cookie that still crackled on top and felt appealing between our teeth, but held up with a bit more resistance, demanding an extra chew or two.  The perfect chewy cookie.  We planned to bring a batch of these to my family when we went to visit them last week, but as we each took yet another from the bag mid-drive, we realized there were only three left from the whole endeavor – enough for my family to each taste just one.

Food Blog July 2013-1905
Espresso Molasses Spice Cookies
adapted from Smitten Kitchen, who got them from the Cooks Illustrated Best Recipe Cookbook
makes 18-20 large cookies
2 cups all-purpose flour
¼ cup bread flour (this makes the cookies a bit chewier.  If you don’t care or you don’t have bread flour, use 2 ¼ cups all-purpose.  The cookies will be a touch softer, but still amazing)
2 tsp baking soda
½ tsp salt
1 ½ tsp cinnamon
1 tsp ginger
¾ tsp cloves
1 TB instant espresso powder
¼ tsp black pepper
12 TB room temperature butter (1 ½ sticks)
2 tsp orange zest
1 cup brown sugar, packed (I used golden brown; I’m sure dark would be delicious as well)
1 egg
1 tsp vanilla
1/3 cup unsulphured molasses
1/3 turbinado or other coarse sugar, for rolling
  • Position your oven racks in the top third of the oven, preheat to 375F, and line two baking sheets with parchment paper.
  • In a medium bowl, whisk flours, baking soda, salt, and spices through the black pepper.  This will leave you with a beautifully flecked mixture.
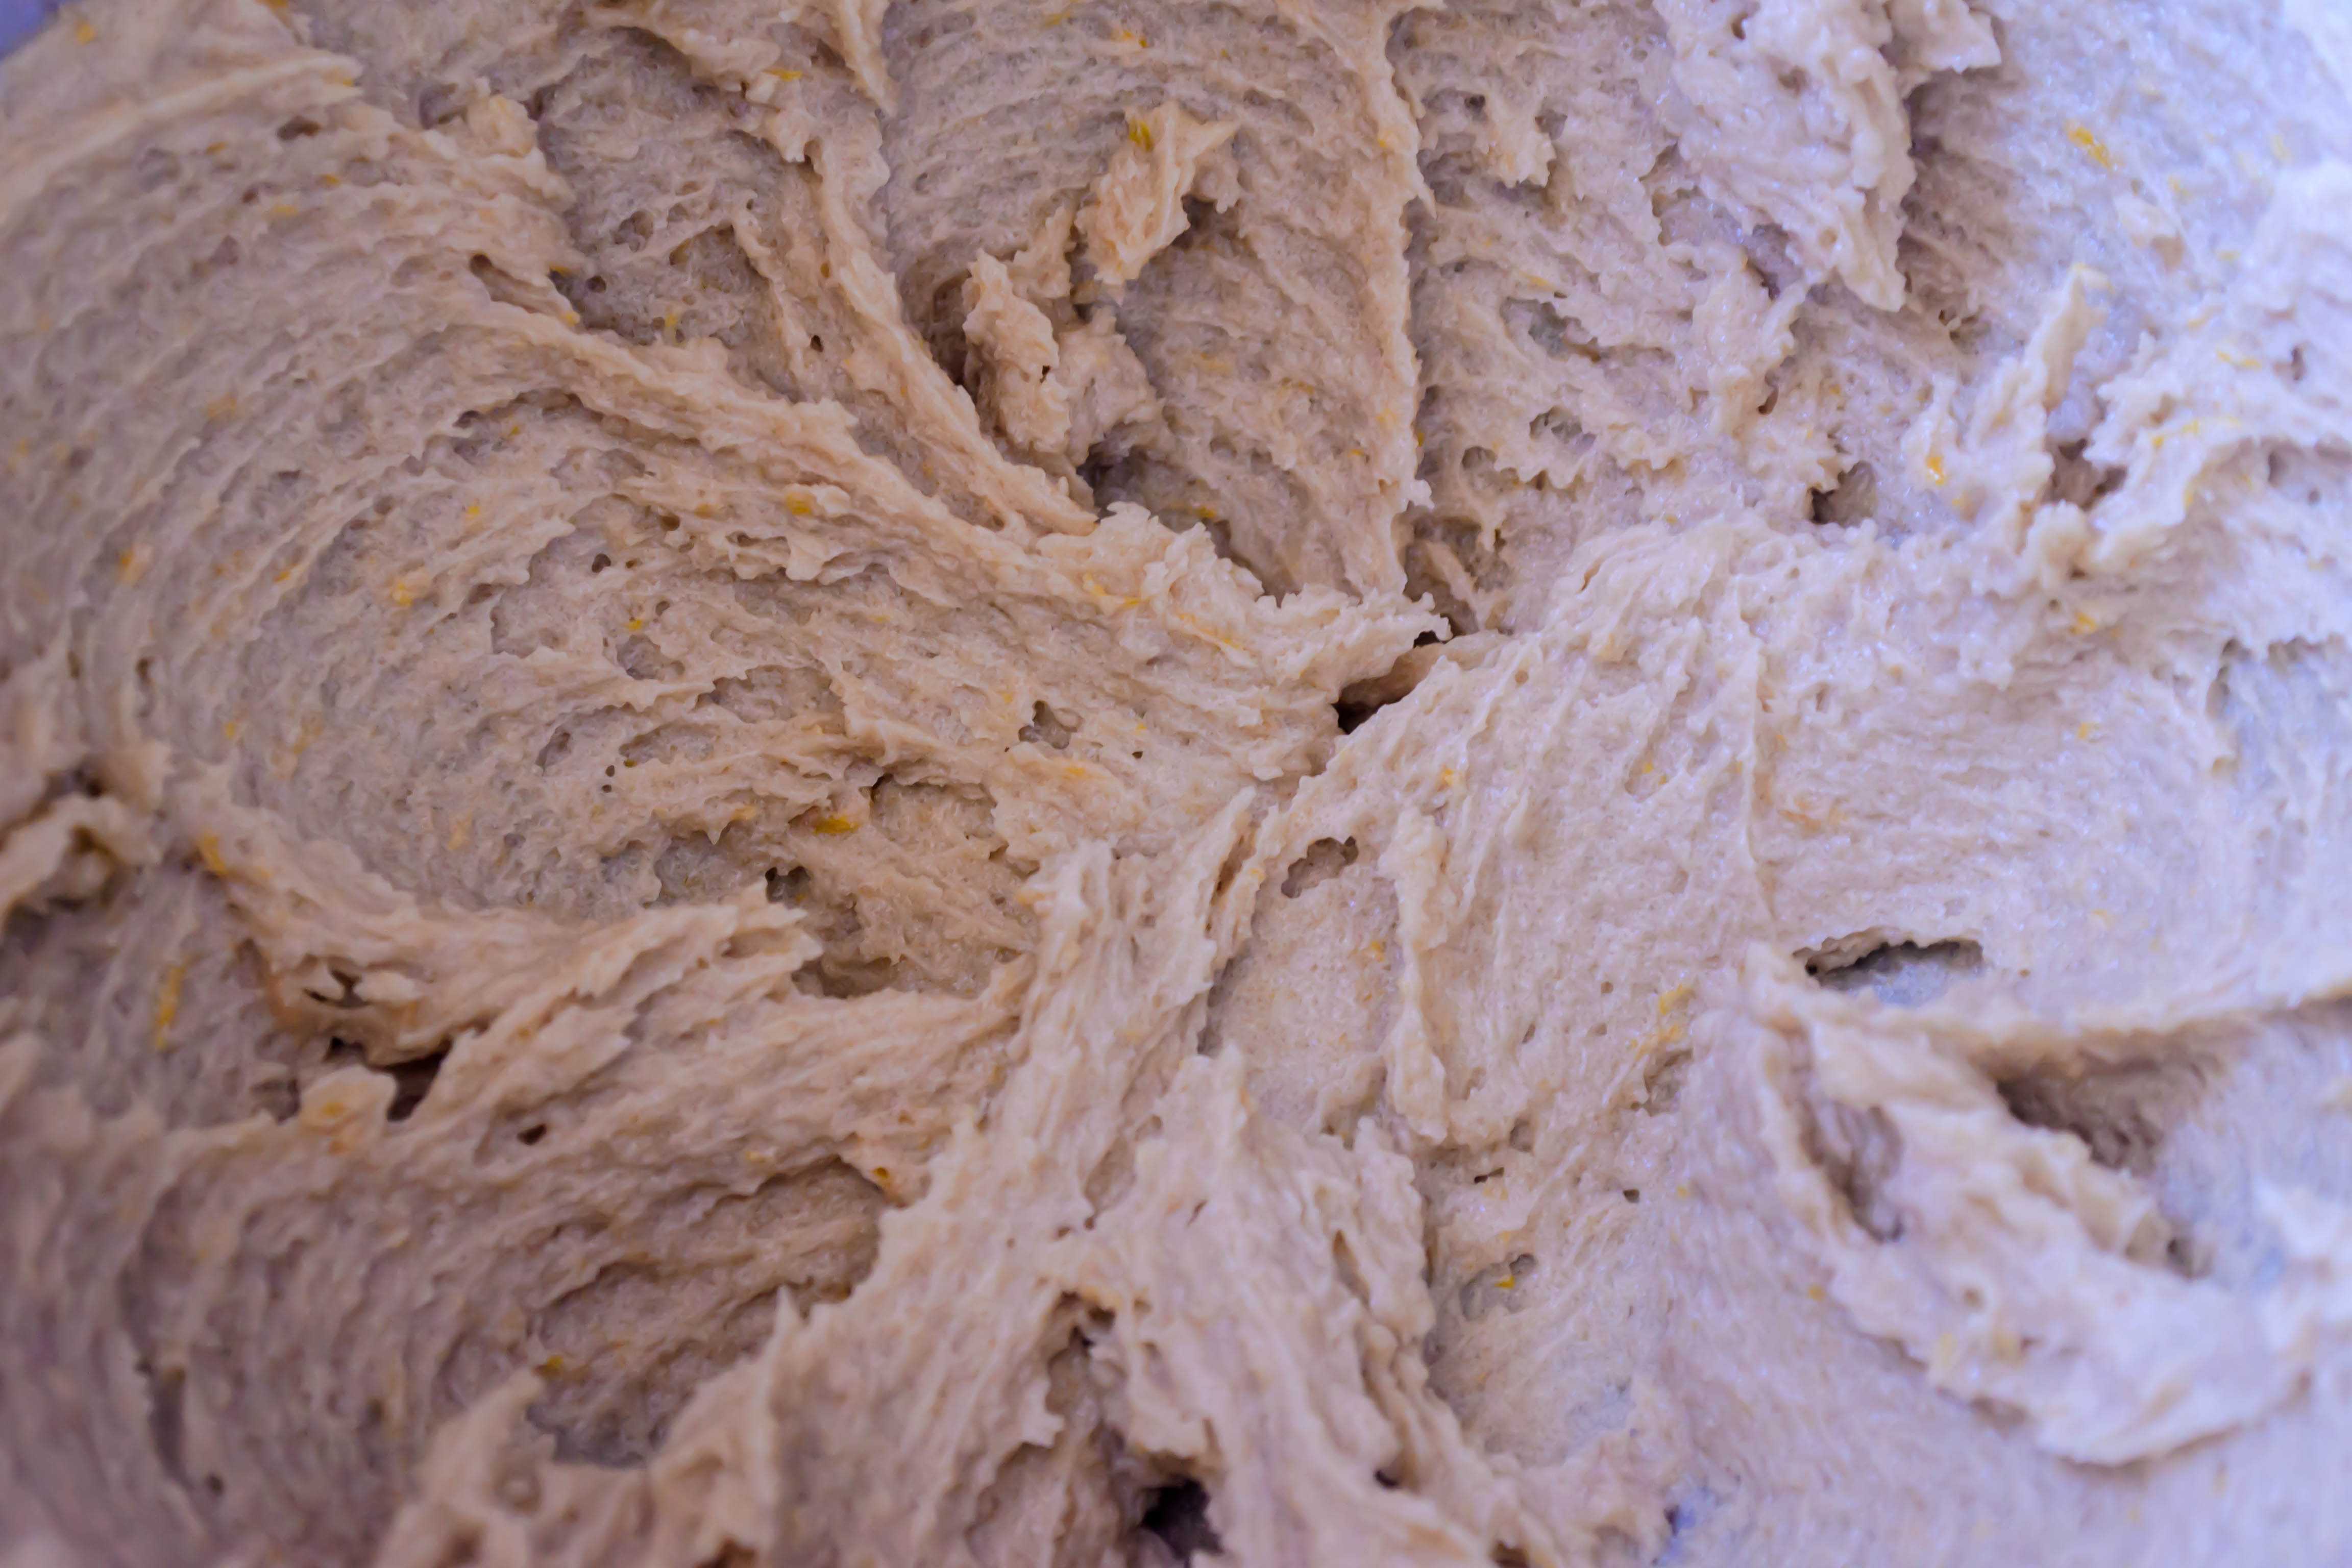
  • In a large bowl (I used the bowl of my stand mixer), cream the butter with the orange zest and the brown sugar for about 2 minutes, or until light and fluffy.  Scrape down the sides of the bowl.
  • Slosh in the vanilla, the egg, and the molasses, and mix well.  Scrape down the sides of the bowl again so everyone is included.
  • Add the dry ingredients to the creamed mixture and beat until all signs of flour are evenly mixed into a thick,sludgy dough.  Again, scrape down the sides of the bowl to ensure full incorporation.
  • Pour the 1/3 cup coarse sugar onto a plate or a shallow bowl.
  • Scoop 2 TB (1/8 cup) portions of cookie dough, roll them in your hands briefly to make a ball, and coat the ball in the coarse sugar on all sides by pushing it lightly around the plate or shallow bowl.
  • When each ball of dough is coated in coarse sugar, set it on your prepared cookie sheets.  Cookies should be spaced an inch or two apart; I wouldn’t do more than 6 per sheet, as they are large and do spread a bit.
  • Bake each sheet 11-13 minutes, or until cookies are puffed and set at the edges.  The middles will still be soft, but don’t despair.  They will continue to cook as they cool.
  • Cool cookies on their sheet for 2-3 minutes, then remove to a wire rack to cool completely before consuming, if possible.
  • You’ll hardly need to know this, I suspect, once you put one in your mouth, but enclosed in a zip-top bag these will stay fresh for up to a week.

Plum Upside Down Irish Soda Bread Cake #TwelveLoaves

Food Blog July 2013-1940As you can perhaps intuit from the title of this post, this month’s Twelve Loaves challenge was just that for me: a challenge.  Called upon to incorporate stone fruit into a bread item, my mind went in a thousand directions at once and came up blank.  For me, stone fruits belong in pies and cakes.  The idea of combining cherries, or peaches, or apricots, or nectarines with the slow, yeasted rising of a bread was an odd one (although now that I’ve considered it, chocolate and cherry bread sounds fantastic.  Inspiration, if anyone still needs an idea for this month?).  So I struggled.  I wrote down ideas that sounded like madness:

Caramelized apricot yeasted mini loaves, baked in muffin tins  too weird.

Plum cobbler  not really a bread.

Peach upside down cake  not a bread at all!

Irish soda bread with… stone fruit… somehow…

And that was where I landed, nibbling at the edges of this idea.  It would be, I decided, a skillet bread: fruit caramelized in the bottom of a cast iron skillet, soda bread dough mounded atop it and then baked and flipped, like the weirdest version of a pineapple upside down cake bread you’ve ever heard of.

Food Blog July 2013-1919Once this weirdness was determined, I settled immediately on plums as my fruit choice.  I always forget how much I love plums as a cooked component.  None of the insistent fuzziness of peaches to deal with, but bursting with juice, brightly veined, and hiding just the right hit of tartness in that secret microscopically thin layer between skin and flesh.  I love that part.

Food Blog July 2013-1923Food Blog July 2013-1926Food Blog July 2013-1929I envisioned bubbling slices of that sweet tartness in a slick of butter and brown sugar, mounding on heaps of gussied up Irish soda bread dough and baking the whole thing into a puffed, flippable cake/bread to have for breakfast, afternoon “tea” (N. and I rarely drink hot tea in the 3pm hour, but love the idea of stopping for a bit of a snack), or maybe even wedges wrapped up in wax paper to take on the road as we head into vacation.

Food Blog July 2013-1931Food Blog July 2013-1932
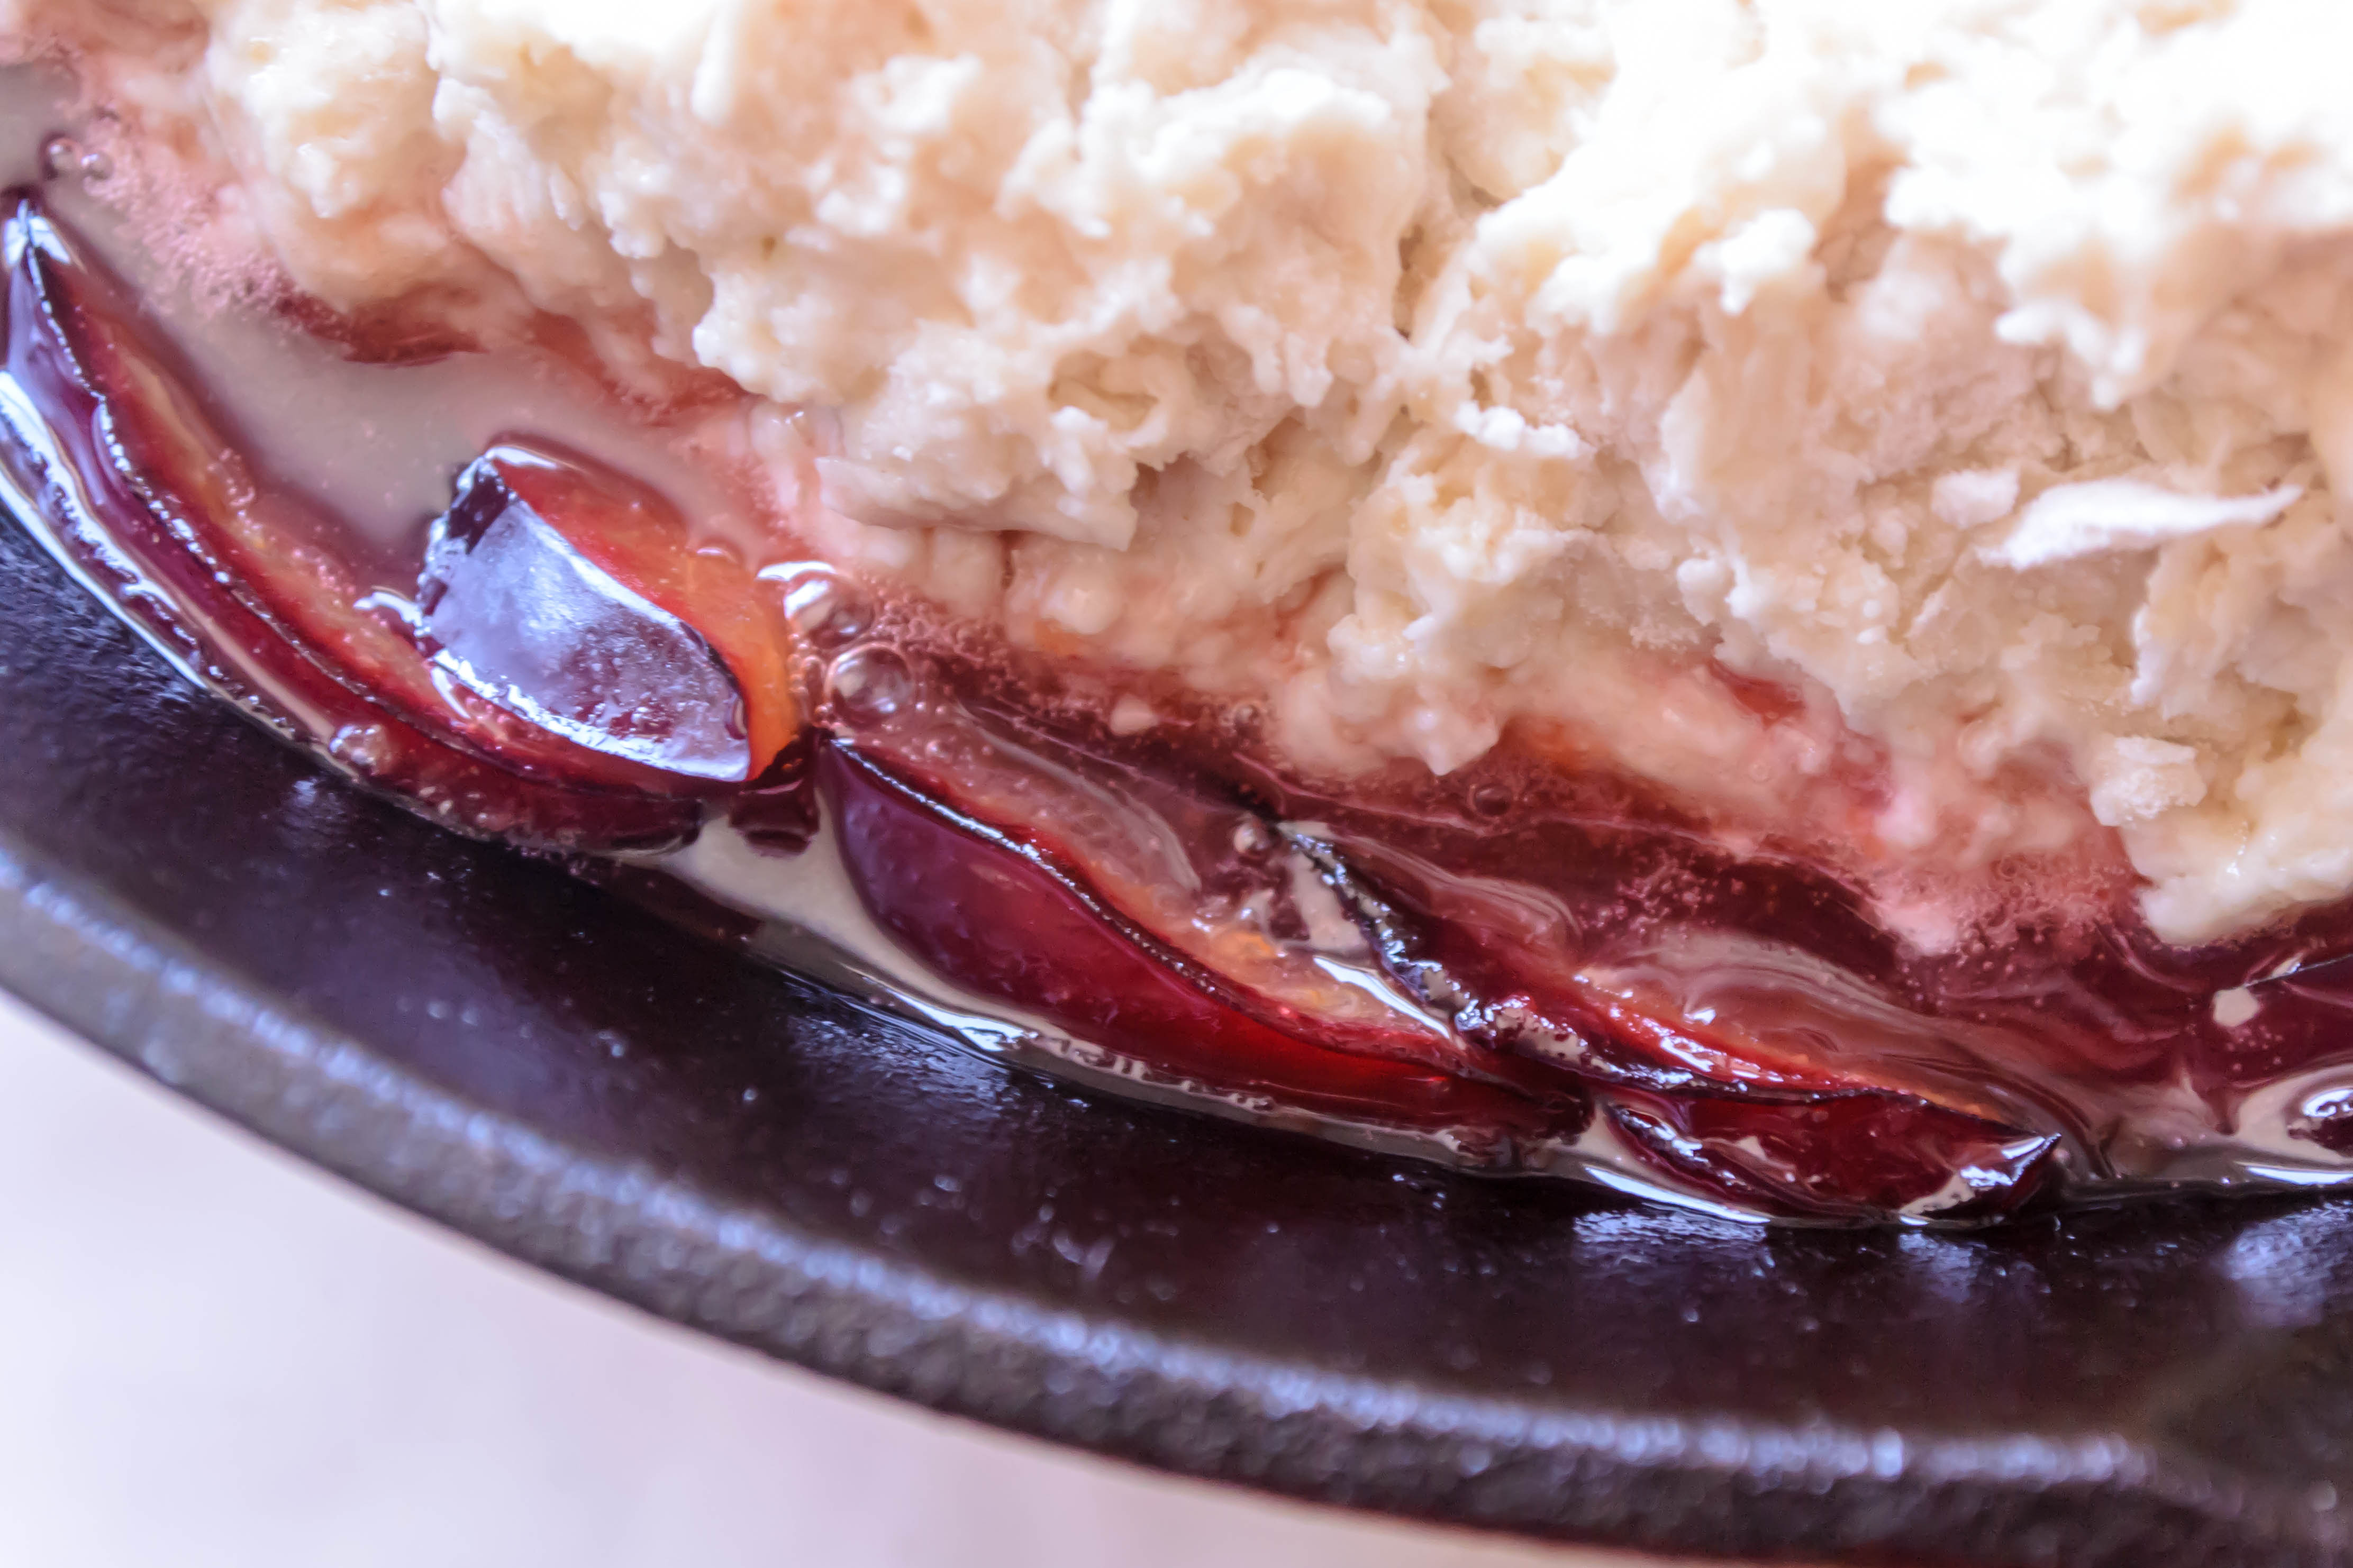
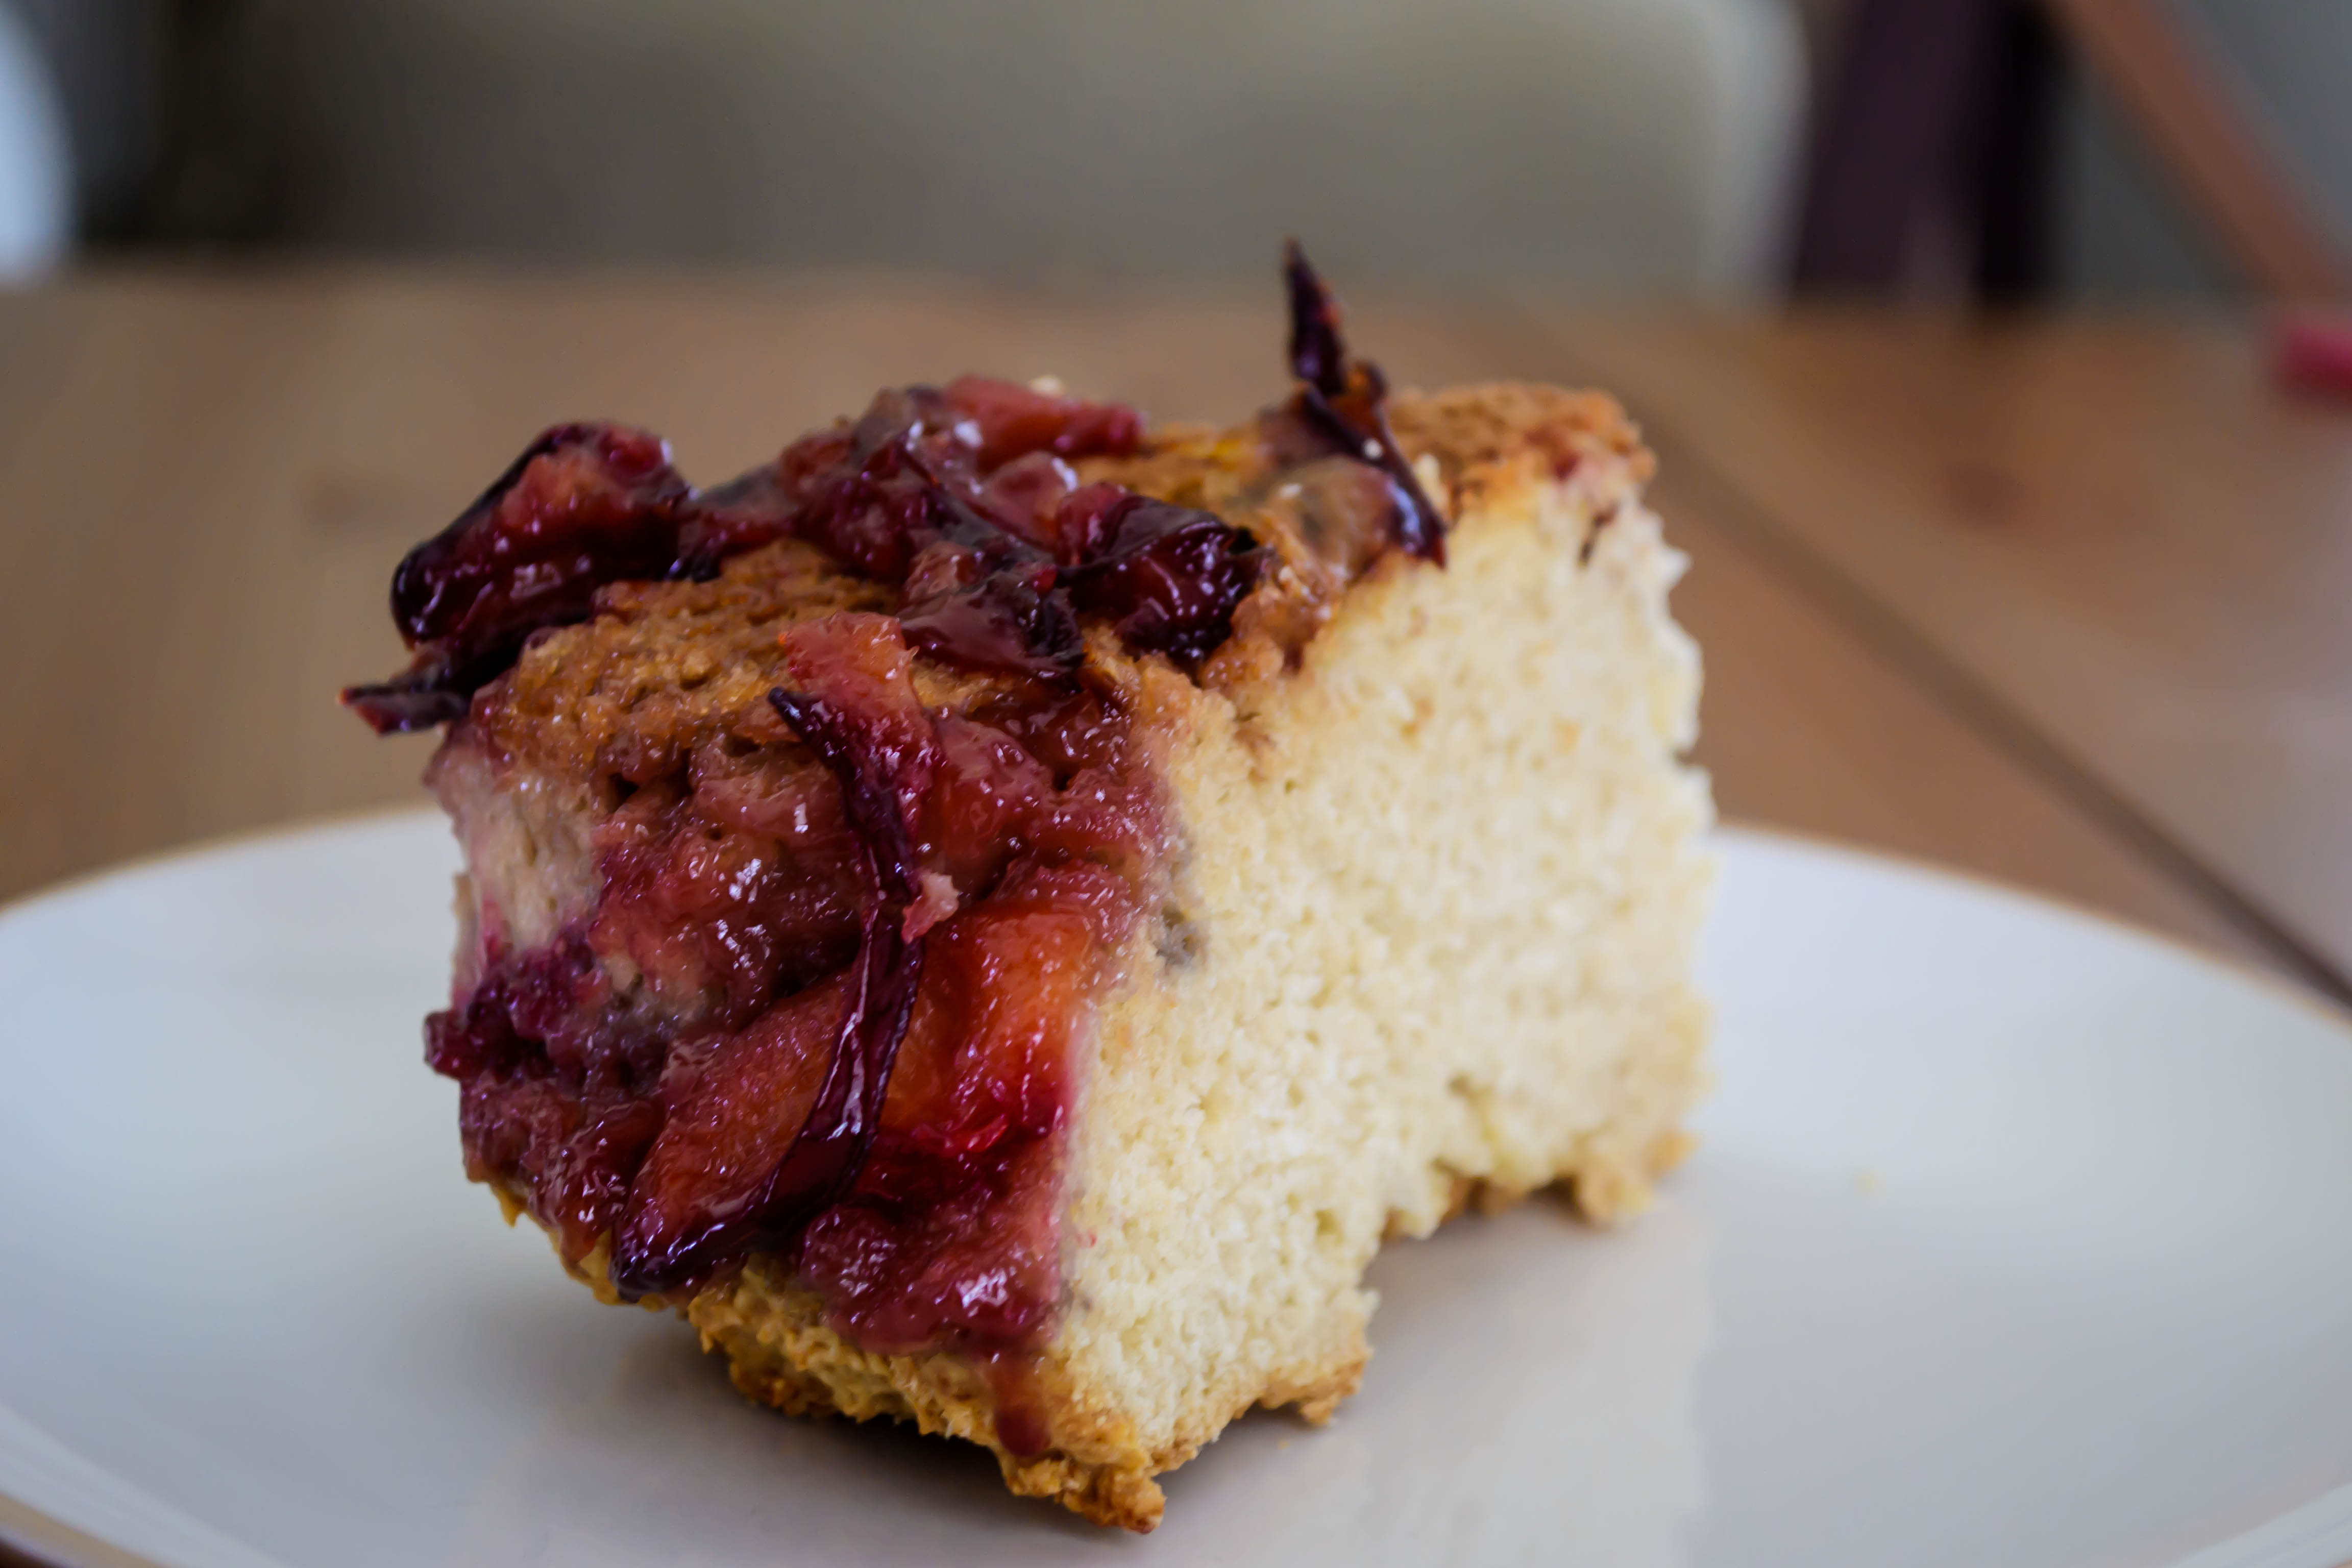
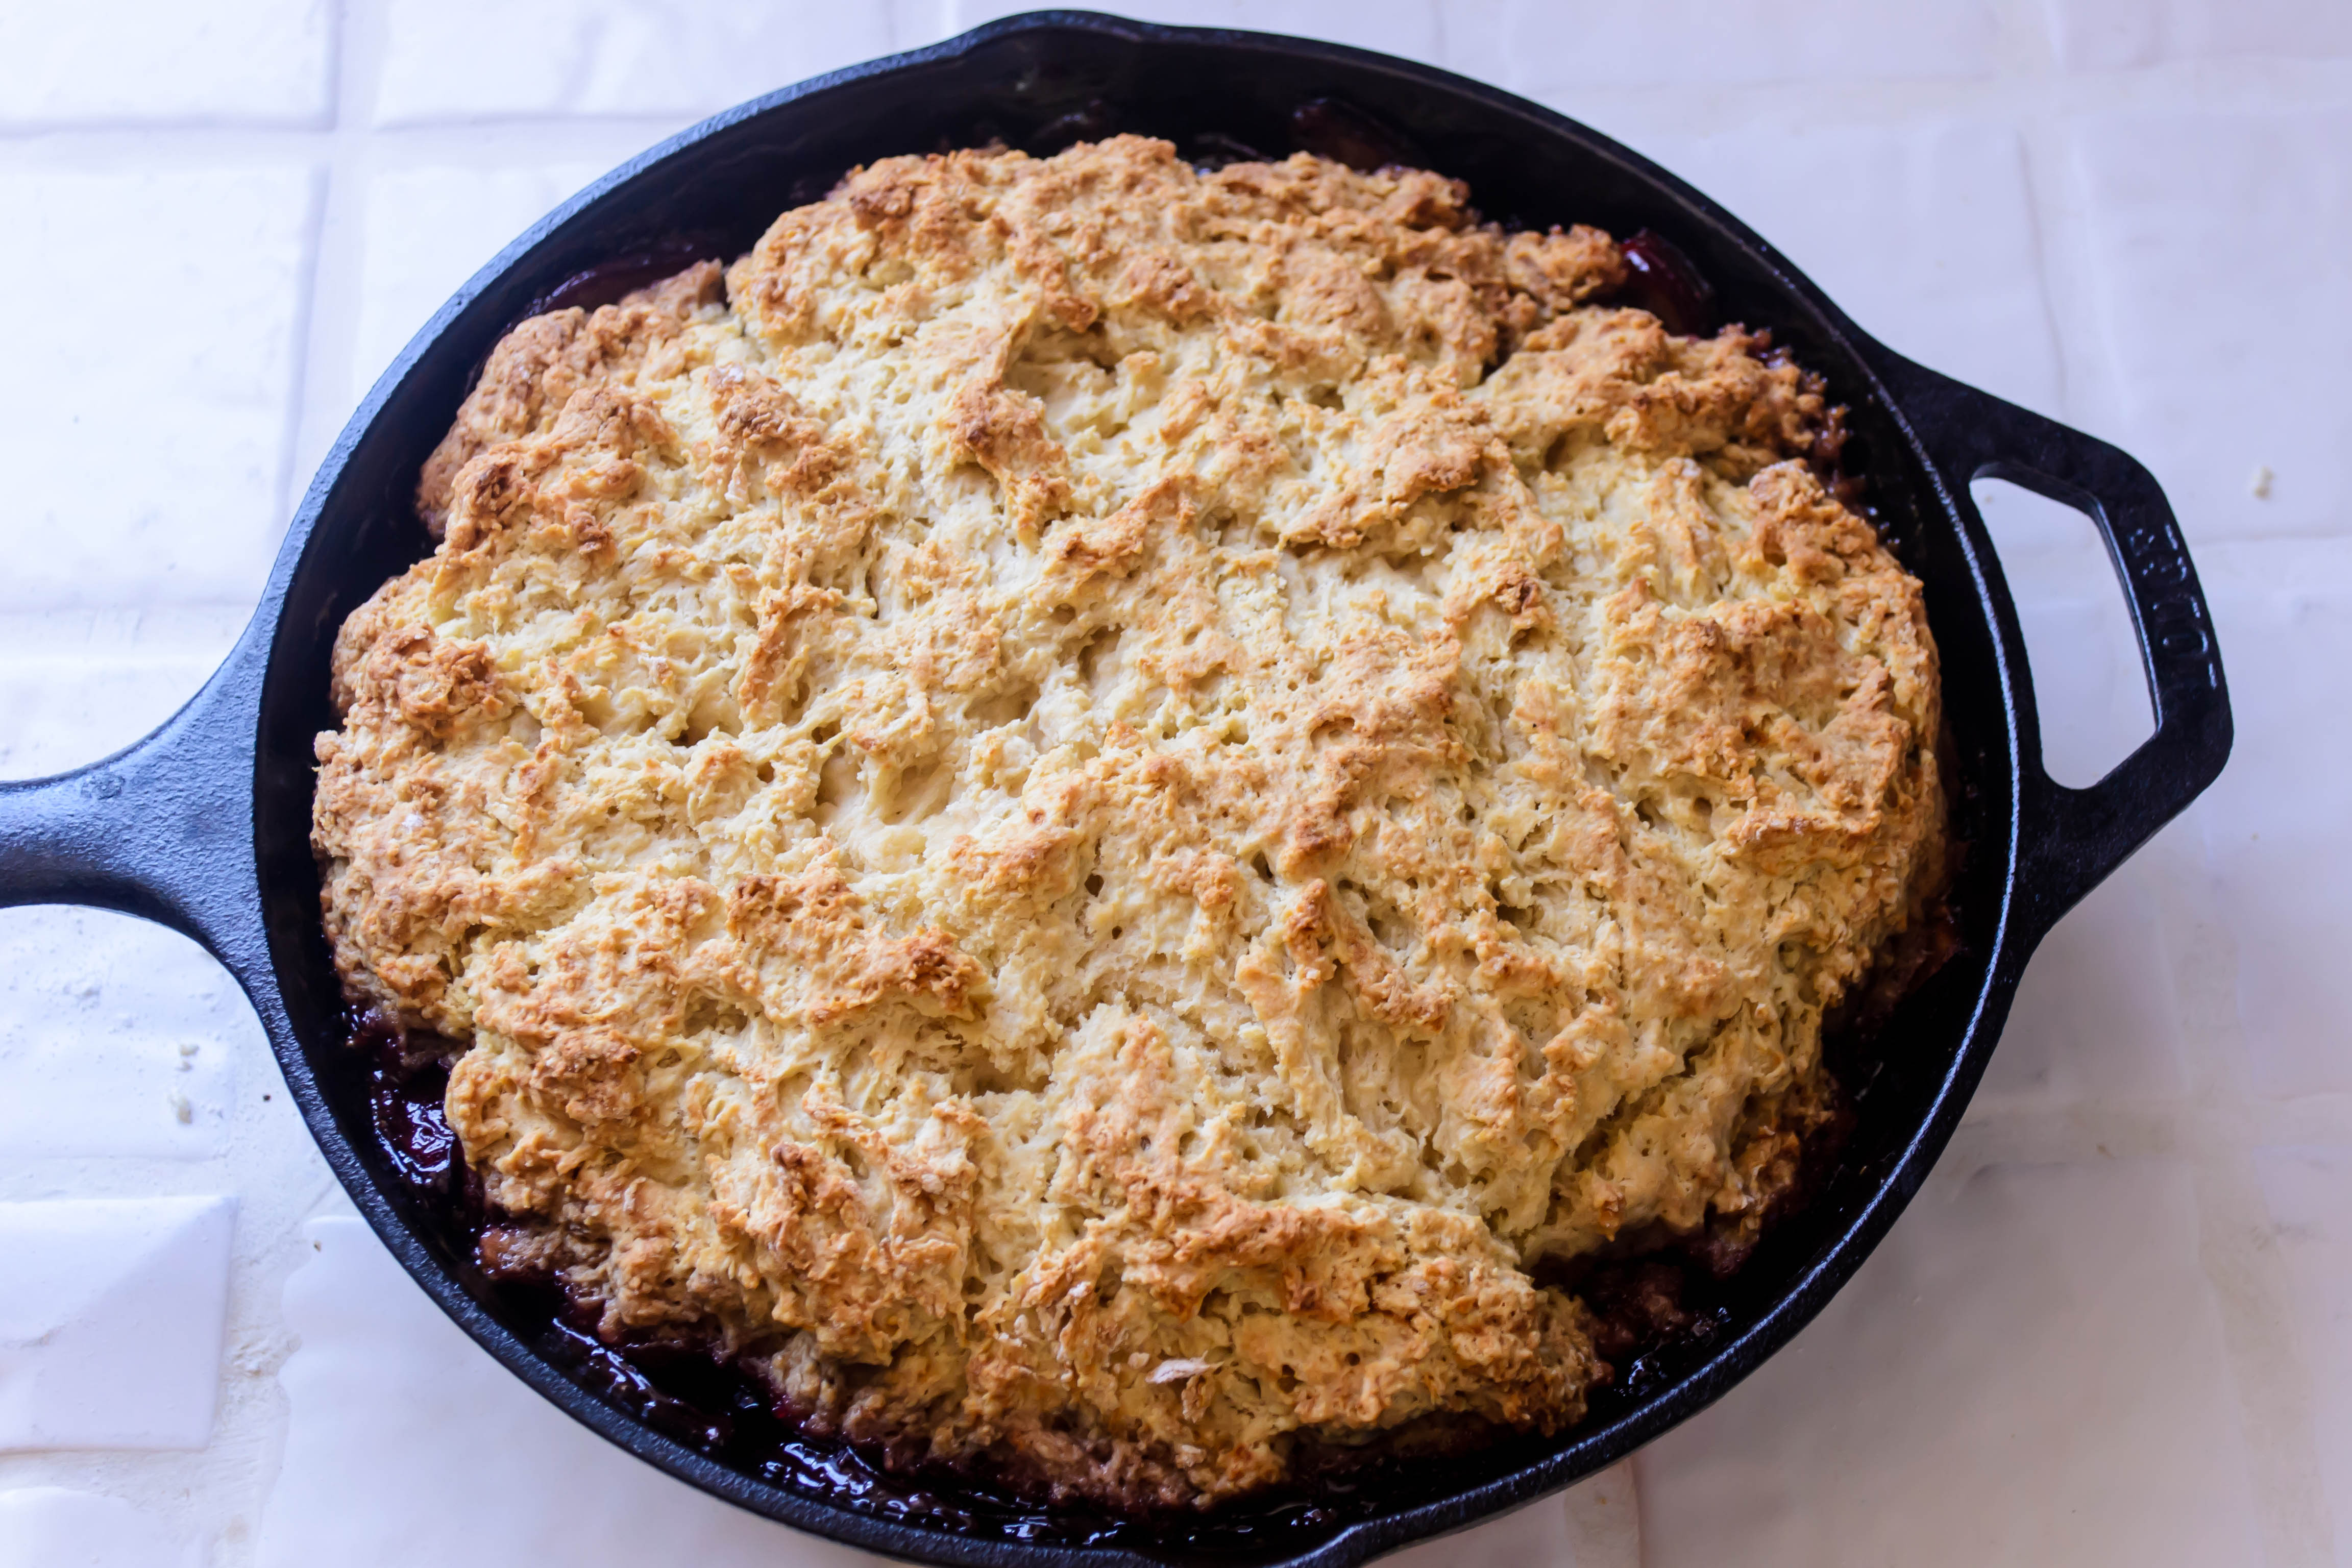
What I got was a stunner-in-progress.  I’m going to give you the recipe for exactly what I made, but I know this is not the final iteration of this dish for me.  The plums were perfect: juicy, melting into the caramel and the bottom of the bread, sticky and jammy and reminiscent of a triumphant batch of plum butter my mom made one summer with pounds and pound of plums delivered to our door in a brown paper bag straight from a neighbor’s tree.  The bread itself was good: solid Irish soda bread, a little richer and a little sweeter from the addition of brown sugar, extra butter, and an egg, perfect for the breakfasts and snacks I envisioned, and better the second day than the first.  But as I dug in, I found myself wanting the bread part to be more like cake: more egg, less flour, a hint of vanilla or nutmeg or maybe cardamom.  The plums were so good, so gloriously gooey and tooth-sticking-ly caramelized, that they deserve a proper dessert – something you can watch a scoop of ice cream melt over.
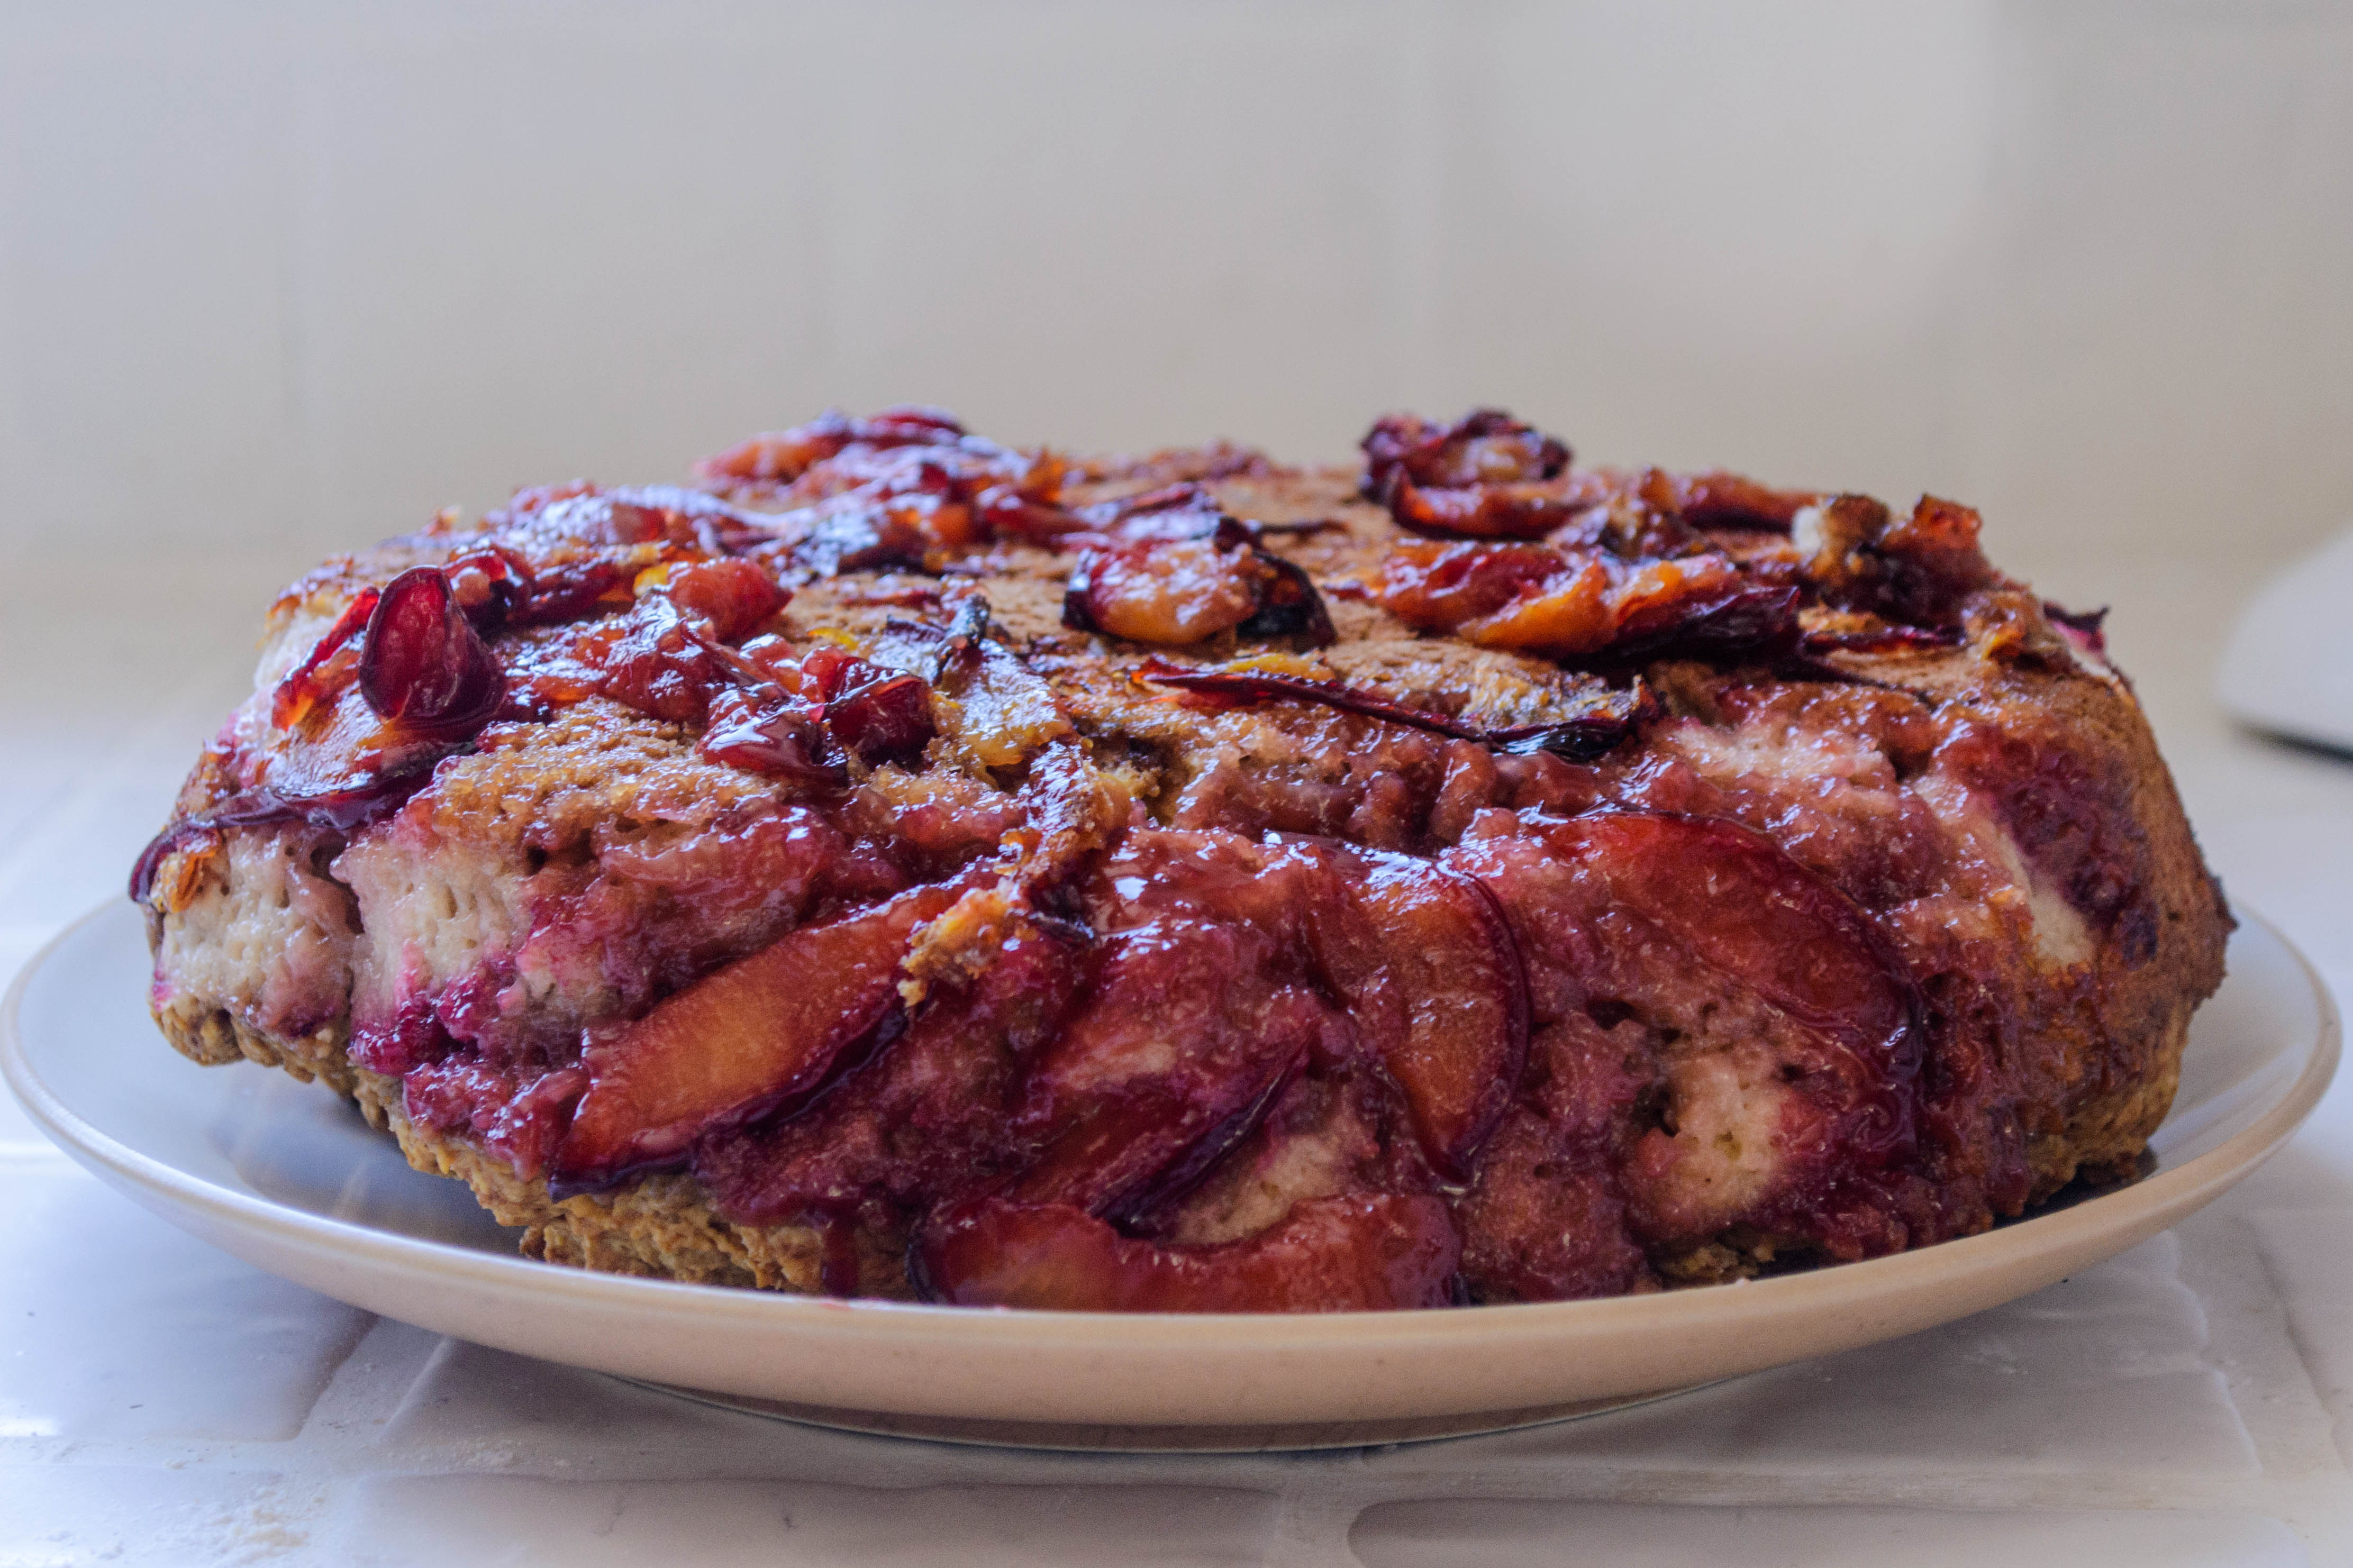
Food Blog July 2013-1938Make this.  It’s solid and scrumptious: the perfectly not-too-sweet energy boosting slice.  But consider yourself warned: this won’t be the last time you see upside down plum something here…

Food Blog July 2013-1945

Plum Upside Down Irish Soda Bread Cake
Serves 8-10
2-3 plums, thinly sliced
2 TB butter
¼ cup brown sugar
2 cups all-purpose flour
2 cups cake flour (this adds some lightness – if you don’t have cake flour, you can use all AP flour instead with slightly denser results)
¼ cup brown sugar (again)
1 ½ tsp baking soda
1 tsp salt
¼ cup melted butter
1 ½ cups buttermilk
1 egg


  • Preheat the oven to 400F.
  • In a cast iron skillet (or other oven-safe skillet), melt the 2 TB butter and toss in the first ¼ cup brown sugar.  Stir around until butter and sugar melt together into a sticky, bubbly mass.
  • Pull the skillet off the heat and add the plums in an even, single layer right on top of the caramel you’ve created.  You can place them in concentric rings if you want, for aesthetics, but so long as you have a complete single layer, you’re in good shape.  Set the skillet aside.
  • In a medium bowl, whisk the flours, the remaining ¼ cup brown sugar, the baking soda, and the salt until well blended.
  • In a small bowl or a 2-cup glass measuring cup (I like it easy), combine the melted butter, buttermilk, and egg.  Beat thoroughly with a fork.  Some of the melted butter will solidify again when the colder buttermilk hits it, but that’s okay.  It will all work out.
  • Pour the liquid mixture into your whisked dry ingredients.  You can make a well in the center first if you want, but the important thing is just to get them in there.  Combine with a fork, as you would with the liquid in biscuits, just until everything is incorporated into a rough, lumpy heap of dough.
  • Plop the dough onto the layer of plums and use a spatula or your hands to press it down a bit into an even layer that covers the fruit below.
  • Bake in a 400F oven for 30-40 minutes, until the bread is puffed, golden, and reaches an internal temperature of about 180F.
  • When the bread is done, let it cool for 5-10 minutes.  You can use this time to gather your courage, because the step that comes next is a little bit scary.
  • Place a large plate over the top of your cast iron skillet.  Being very careful, and using pot holders because that sucker is still smokin’ hot, invert the plate-skillet contraption so that the skillet is resting on the plate, bottom side up.  What we’re after is for the bread to give up its hold on the skillet and drop gently onto the plate with the plum layer on top.  This may take another 5-10 minutes.
  • Once the loaf has unstuck itself from the skillet and landed on the plate, remove the skillet and scrape out any remaining plum slices to add to the top of the cake itself.
  • Serve warm, room temperature, or cold, but I think this bread tastes better on day two, when the flavors have had time to meld and deepen a bit.

Fig and Walnut Swirl Bread

As I continue to write this blog, I think a lot about the kind of person I am, and the kind of person I seem to be becoming.  I don’t mean this necessarily in a deep, philosophical or metaphysical way (although sometimes those things collide in the expanding corner of brain-space I use to think about food), but in a “what sort of food person am I?” kind of way.

Food Blog June 2013-1596Example: probably about five years ago, I wanted to make fried rice but didn’t have one of those seasoning packets, not even when I dug all the way to the back of my pantry (I can hear you gasping in horror that I ever had one in the first place.  What can I say?  We all have guilty secrets about one thing or another), so I tossed a few things together and ended up with a sauce we really liked.  I haven’t bought one of those seasoning packets since.  From there, I added different spices, different quantities, different ratios of garlic and ginger… and suddenly the bags of frozen stir-fry vegetables we were tossing in weren’t good enough anymore.  Fresh vegetables were now a mandate.  Fried rice used to be a quick and easy dinner!  Now it’s a totally from scratch undertaking.  And that’s the kind of (food) person I am becoming.

Food Blog June 2013-1545Example two: I used to subscribe to a number of cooking magazines.  Though I let my subscriptions run out (their cost made them an unjustifiable luxury during graduate school), I continued to use the collection I’d amassed, restricting myself to cooking recipes only from the current month’s issue: no August recipes in April.  This was an attempt to keep myself seasonal and inspired.  Well, this year it stopped working.  As each new month began, I’d eagerly flip through the appropriate month’s issue looking for something to excite me and drive me into the kitchen.  I’d close each issue with a sigh and toss it to the side.  There were many, many recipes I hadn’t tried before, but there just wasn’t anything in there that felt inspiring anymore.  Well, almost.  Once in a while, I’d find a recipe that I’d consider for a moment and then turn to N. and say something like, “this might be good, if you made it into a pasta dish instead of a sandwich and added some sundried tomatoes and herbed goat cheese.”  And I’d do it, and we’d be pleased with the result.

After a few months of this sort of thing, interspersed with a probably indecent amount of complaining about how I was bored by these recipes, N. finally turned back and said, “I think you’ve leveled up.”  Translation: your imagination has moved beyond what these magazines offer and you are now on to bigger and (we hope, for the sake of our taste buds) even better dishes.  And that’s the kind of (food) person I am becoming.

Food Blog June 2013-1552Example three: since I’ve started baking bread, I’ve been trying to plan meals around a yeasty undertaking once a week or so, to keep myself in practice and find “the best” versions of each type of baked good I undertake.  This has resulted in a development I’m not sure I’m entirely comfortable with: though I have continued to buy a weekly loaf of bread (I really like, oddly enough, the plain old sourdough loaf the bakery department at my grocery store produces) when I go shopping, I haven’t bought hamburger buns, or pie dough, or pizza dough, since beginning this little dough experiment.  Am I really the kind of person who no longer considers store-bought burger buns acceptable?  I’m not sure I’m ready for that kind of commitment, but that seems to be the kind of (food) person I am becoming.

Food Blog June 2013-1543Does that make me a snob?  Maybe.  It certainly makes me one of those “oh, I just made it by hand” kind of people you sometimes feel inclined to secretly snarl at.  But no one in the direct friendly fire of these developments is complaining, so maybe it’s not entirely a bad thing.

Food Blog June 2013-1549But it does make things more complicated, and more difficult to achieve, sometimes.  Like when I decided I really wanted cinnamon-raisin bread for breakfast, but instead of picking up a pre-packaged loaf as we shopped, I was determined to make it myself.

And then I forgot to buy raisins.

What’s a girl to do, with the plan in her head and the taste already in her brain and the soft chew of homemade bread aching in her teeth?

Food Blog June 2013-1555Well, she chops up some figs, and some well-toasted walnuts, and some hazelnuts for good measure, because she was almost out of walnuts.  She whirls together a soft, supple dough laced with brown sugar, cinnamon, and sour cream.  Nutmeg and lemon zest find their way in.  And she rolls up a crunchy crumbly sweet layer of fruit and nuts inside the dough, twists it to dispense the swirl, and lets it rise into a triumphant bulging loaf.

Food Blog June 2013-1564Food Blog June 2013-1569Food Blog June 2013-1570Food Blog June 2013-1573And what results, after it’s been rubbed with butter and cinnamon sugar for good measure and baked until golden and puffy, is something that drives standard cinnamon-raisin bread straight out of her mind.

Food Blog June 2013-1583The sour cream adds a beguiling richness to this loaf, making it almost unnecessary to add a slick of butter or cream cheese to a breakfast slice.  The figs and walnuts are a pleasingly earthy combination, and though I wasn’t crazy about the lemon zest I added at the spur of the moment, you might like the brightness it brings to the filling.

Food Blog June 2013-1594So.  Food snob?  Maybe.  But really, when you’re sitting down to breakfast with a loaf of homemade, fig-filled bread, your mouth is probably too full to complain.

Food Blog June 2013-1592Fig and Walnut Swirl Bread
makes 1 large loaf
For dough:
2 tsp yeast
½ cup warm milk
1 egg
1 tsp vanilla
¼ cup butter, very soft, or melted and cooled
¼ cup sour cream (go on and use the full-fat stuff; don’t deny yourself on such a little bit)
1 tsp salt
1 tsp cinnamon
¼ tsp nutmeg
2 – 2 ½ cups bread flour (see instructions below)
For filling:
½ cup toasted walnuts, chopped, or a mixture of walnuts and hazelnuts
(zest of 1 lemon – optional because I didn’t love it, but you might!)
¼ cup melted butter
¼ cup brown sugar
1 cup chopped dried figs (I like black mission figs, myself)
For topping:
1-2 TB butter, melted or very soft
2 TB brown sugar
1 tsp cinnamon


  • Stir the yeast into the warm milk and let it sit for 5 minutes or so to allow the yeast to wake up.  It will begin to get bubbly and smell warm and bready.
  • While you wait for the yeast, plonk the ¼ cup softened butter, the sour cream, the egg, and the vanilla into the bowl of a standing mixer (or into a large mixing bowl).
  • Add the yeast and milk mixture to the combined wet ingredients and mix them together briefly using the paddle attachment, just enough to combine things and break up the egg (if you are not using a stand mixer, an electric handheld or some elbow grease and a whisk will do nicely here).
  • Add the brown sugar, spices, salt, and 2 cups of flour.  Using the paddle attachment (or a sturdy wooden spoon if you aren’t a stand mixer sort of person), mix just until the flour is moistened and you have created a lumpy dough.
  • Switch to the dough hook (or turn your dough out onto a well floured board) and knead for 5-7 minutes.  The dough will be very sticky – we’ve added a lot of fat and a lot of moisture.  Don’t despair.  Add more flour a tablespoon or two at a time just until the dough cooperates (up to 2 ½ cups of flour, though depending on the relative humidity of the day, you might not need that much).  It will still be a bit sticky, but it will become more elastic and supple and much easier to work with.
  • Once your dough is smooth and stretchy and a bit springy, plop it into a greased or oiled bowl, cover it with plastic wrap, and set it aside in a warm place to rise for 90 minutes, or until doubled.
  • Meanwhile, prepare the filling: in a small bowl, combine toasted nuts, figs, brown sugar, and lemon zest, if using.  Melt the ¼ cup butter to prepare for glossing the dough.
  • Once doubled, punch down the dough to release trapped gas by gently deflating it with your fist.  Turn it out onto a floured board and roll it into a rectangle the width of the long edge of your loaf pan and about twice as long.
  • Now it’s time gloss the dough and add the filling.  Dribble the melted butter over your rectangle of dough and rub it all over the surface, right out to the edges.  I’m calling this “glossing” the dough because it leaves everything shiny and glossy and gleaming.  You might have a little extra butter; save it for the topping.
  • Sprinkle the dough with the fig and walnut mixture, leaving an inch or so border on all sides to prevent overflow.  You will likely have extra.  That is a most excellent thing because it goes so well with oatmeal or with Greek yogurt.  Instant snack.
  • Starting on the shorter side of your rectangle (the side that is the same length as your loaf pan), begin to roll up the dough as you would for a jelly-roll, starting with the middle and moving out to the sides.  Continue rolling until all the filling is enclosed, and then fold up the remaining, bare edge and pinch it firmly against the roll to create a seam.
  • Twist your log of dough a few times to ensure that a pretty swirl of filling is formed as it bakes, then settle it into a buttered or greased loaf pan.
  • Rub the top of the dough with soft or melted butter, then sprinkle it all over with the brown sugar and cinnamon.  Cover it lightly with greased plastic wrap and set it aside to rise again for 30 minutes.
  • During this second rise, preheat your oven to 375F.  When the dough has had half an hour to collect itself, remove the plastic wrap and bake it for 35 minutes, or until the bottom sounds hollow when thumped or the internal temperature is between 180-200F (the thump test is the standard way of checking for doneness on bread, but it seems sort of impossible when you are baking a big loaf in a loaf pan.  I prefer to take its temperature).
  • When it tests done, using whatever is your favorite method, remove it from the oven and let it cool for at least twenty minutes in the pan.  This will allow the structure to firm up so it slices nicely, rather than collapsing and squashing into itself when you so much as approach it with a serrated knife.
  • Slice and consume.  The filling can be a bit crumbly, so we ate it with forks like a slice of yeasted coffeecake.  Enjoy!

Jalapeño Cheese Rolls #TwelveLoaves June

Food Blog May 2013-1439Last week I presented you with something both vegan and gluten-free.  Dietary allergen-buster, that’s me!  This week, to prove that I’m a fickle  equal opportunist  flexible sort of cook, I’m giving you something that is neither.  But really, this is the kind of food person I am, and I’ve been thinking about this lately, especially given this post from Shauna at Gluten-Free Girl.  I’ve thought, over this past year as I finished my Bittman Project and moved on to my exploration of dough, what kind of food blog this is, anyway.  I don’t follow a specific dietary regimen.  I don’t cook – or eat – specifically one type of food.  So what am I?  As I wrote to Shauna, what drove me to her blog, and what drove me to one of my own, was the expression of joy through food.  I want food that tastes good and brings joy.  And then, because it has given joy to the tongues and teeth and bellies of the people I made it for, I want to pass that on to people who weren’t in our little house with us.  That’s you, people.  So I guess what it comes down to is: this is a blog about food that brings you joy.  At least, that’s what I hope you feel when you read, and when you eat, if you end up using the recipes here (and if you do, will you tell me?  I’d love to know what you guys think).

These little rolls brought us considerable joy.  They are cheddar infused, jalapeño studded puffs somewhere in between a rich, buttery brioche and a stern, crusty, segmented Kaiser roll.  They are also, given this month’s Twelve Loaves assignment of buns, the perfect choice to slice equatorially, layer with mayonnaise or hot sauce or pickles or onion rings or dripping fresh tomato slices and then cram with a burger of your favorite juicy variety.

Food Blog May 2013-1410I started with my Nana’s sweet roll dough, replacing the sugar with a smaller amount of honey, opting for the tang of buttermilk rather than the roundness of whole milk, and injecting wafer-thin slices of jalapeno and cheddar cheese so sharp it made me – let’s not lie – basically drool when I sampled some.

Food Blog May 2013-1414Food Blog May 2013-1415Though you could just divide your dough into equal sections and let these rise into sweet, uncomplicated burger buns, I decided to take on the familiar lobed shape of a Kaiser roll.  This is, as you might expect, not the most straightforward approach, mostly because there are numerous methods for achieving that instantly recognizable shape.  You can score the dough as it rises, you can use a special press that creates the petal shape, can follow a complex procedure of folds, or, as I learned and executed to my delight, you can roll the dough into ropes, tie them in a simple overhand knot, and then tuck up the ends.  I’ve attempted instructions and accompanying pictures below, but if you are lost, try this recipe, which explains the knotting and tucking process pretty clearly.

Food Blog May 2013-1425Food Blog May 2013-1429Sprinkled with more sharp cheddar and topped with a few more, probably gratuitous slices of pepper (you have to know what you’re in for, I think), these bake into all but perfect imitations of the jalapeño cheese rolls N. and I used to buy from Market of Choice as the occasional treat after a perfect sunny afternoon trip to the dog park in Eugene.  We never put burgers on those, because they never made it through the whole ride home.  But these little Kaiser-roll-buns of mine, burnished with cheddar and lip-tingling with heat, will carry anything you load them with.

Food Blog May 2013-1435Food Blog May 2013-1433Summer’s coming.  That should bring you joy.  If you can stand more, make these for your next barbeque.  This recipe can easily be doubled, and once baked, these will keep in the fridge for a few days or, securely wrapped in airtight packaging, in the freezer for much longer.

Food Blog May 2013-1441Jalapeño Cheese Rolls
makes 8 petite rolls, or 6 larger ones
 2 tsp active dry yeast
1 TB warm water
½ cup warm buttermilk
2 TB honey
¼ cup room temperature butter
1 egg
1 tsp salt
2 cups flour (I like bread flour best for these, because it has a high protein content that stimulates gluten production.  But I think all-purpose would create similarly fantastic rolls)
1 cup shredded extra sharp cheddar cheese, divided
1 medium jalapeño pepper, thinly sliced


  • Stir the yeast gently into the warm water, set aside for five minutes to let the yeast wake up.
  • Add butter and honey to the warm buttermilk, stirring them together until incorporated.  This will make the honey and butter easier to integrate into the dough, and cool the buttermilk so it won’t kill the yeast or scramble the egg.
  • Pour the puffy, bready yeast, the buttermilk mixture, and the egg  into a large bowl (I use the bowl of my electric stand mixer), and whisk or stir together with a wooden spoon or the paddle attachment of your stand mixer.
  • Add the flour and salt to the mixture, and stir just until roughly combined.
  • Add ¾ cup of the cheddar cheese and half of the jalapeño slices to the rough dough and stir again, just until the cheese and peppers are well distributed.
  • If you are using a stand mixer, replace the paddle attachment with the dough hook and knead on medium speed for 8-10 minutes. If you are not using a stand mixer, turn the dough out onto a floured board and knead by hand for about 10 minutes.  Though I think kneading by hand will work fine here (I haven’t tried it, so I’m not positive), there are two things to take into consideration.  First, this dough has cheese it in, so that may make it messier to work with than your average burger bun dough.  Second, it contains jalapeño peppers, which can leach capsaicin onto your hands and sting delicate skin (read: don’t forget and wipe your nose!), so be absolutely certain you wash your hands really well after handling this dough.
  • In either case, the dough starts out sticky, but becomes smooth and stretchy as you continue to work it. Once it is elastic and supple and lovely, place it in a lightly oiled bowl, cover with plastic wrap, and set aside in a warm room (if you have one handy) for an hour and a half, or until it has doubled in volume.
  • Remove the plastic wrap and punch down your doubled dough by gently but firmly pressing your fist into the center.  It will almost gasp as the built-up gasses are released.
  • Divide the dough in 8 equal pieces (for petite buns), or 6 equal pieces (for big, beefy buns).
  • Now would be a good time to do some prep, while the dough-balls get some breath back.  Preheat your oven to 350F.  Line two baking sheets with parchment paper.  If you haven’t already, dust a bread board with flour.
  • Working one at a time, roll each dough ball into a 6-8 inch rope (Picture 1).
Food Blog May 2013-1419

Picture 1: dough rope

Food Blog May 2013-1420

Picture 2: overhand knot

Picture 3: tuck right side into top middle of knot

Picture 3: tuck right side into top middle of knot

Food Blog May 2013-1426

Picture 4: tuck left side under and into bottom middle of knot

  • Tie the rope into a simple overhand knot (the same way you would begin tying a shoelace).  I tie mine left side through right side, probably because I am left-handed.  If you are right-handed and you tie your knot the opposite way, reverse the L and R in the directions below.  You will have a knot in the middle and some lanky excess on either side (picture 2).
  • Now, to form the segmented shape of a Kaiser roll, lift the length on the right side of your knot (which started out as the left end of your original rope) and pull it up over the knot, shoving the end of it down into the middle of the knot itself and pressing lightly to secure (picture 3).
  • Next, lift the left side and tuck it under the knot, pushing it up through the middle from the bottom.  Sometimes it will poke through and make a little button in the top of the roll; sometimes it won’t.  Either is okay (picture 4).
  • With all of your rolls knotted and tucked, set them on your prepared baking trays, spaced evenly.  I did four per sheet tray.
  • Sprinkle each roll with cheddar cheese from the remaining ¼ cup.  Top each with 1-2 slices of reserved jalapeño.  Cover trays with a clean kitchen towel and let rise for 30 minutes.
  • Remove kitchen towel, admire the puffy little buns you’ve created, and bake in your preheated, 350F oven for 20 minutes.  The cheese will melt, the dough will rise, the color will deepen to a lovely golden brown, and the thinnest of your jalapeño slices will barely begin to caramelize.
  • If you eat these immediately, you will burn your mouth.  And it won’t just be the good burn from the jalapeño.  So do what you can to let them cool a little, and then load them up, or just eat them plain.  I think you’ll be happy either way.

Loaded Baked Potato Biscuits

Food Blog May 2013-1406

I’m not going to say that my mom was a hippie or a health nut.  She didn’t stock her pantry with wheat germ or homemade granola, and she didn’t feed us sprouted grains or tempeh (in fact, she probably didn’t know what tempeh was).  But she did make a definite effort to keep food choices healthy when my sister and I were kids.  Her rule for me when picking out breakfast cereal was that sugar had to be third or lower on the list of ingredients tapped out in tiny letters on the side of the box.  I think the first time I tasted Lucky Charms was when I was in high school, where I was quietly surprised that anyone could think of eating this candy for breakfast rather than dessert.  The first time I saw someone put sugar into a bowl of Corn Flakes, I was stunned.  The only kind of cereal I’d ever put sweetener onto, besides oatmeal, was Shredded Wheat.

Food Blog May 2013-1403

Despite the commercials I drooled over for Sunny Delight (back when it wasn’t just a D) and Capri Sun, nothing but 100% juice (and the occasional lemonade concentrate) entered our fridge for a very long time.  Brand name Fruit Roll-ups didn’t fly, but the occasional real pressed fruit leather was okay.  My sister, seven years my junior, somehow managed to get Mom to buy Squeeze-its, but not until they had a “real juice” component.  She also ended up with Lunchables to take to school (I didn’t find out about this until a visit home from college.  I was shocked and felt a weird kind of betrayed jealousy – I didn’t want to eat Lunchables now; they looked disgusting!  But I wanted to have been allowed to have them when I might have thought they tasted good.  Is there even a word for that feeling?).

Given all this, as you might imagine, white bread was not something that appeared in our (paper, please) grocery bags.  But my sister and I were not sold on the breads my parents wanted us to eat.  Whole wheat was pushing it a little, especially if it had cracked wheat spattered across the top crust.  Oatnut and any kind of seven or nine or even five grain compilations were out.  And then Mom found Country Potato bread.  Do you remember it?  It’s golden and mild, slightly sweet but still savory enough to taste good with ham and cheese.  The top was often lightly dusted with some residual flour, which was somehow not offensive in the way the cracked wheat pieces were on the bread we refused.  We ate potato bread for years.  It was soft enough that, once you ate the crust off, you could roll the rest of it up into a mushy little ball, or tear the slice in pieces and make a whole pile of little dough-balls, and then eat those.  They squished against our teeth.

In the years since sourdough replaced potato as my bread flavor of choice, I’ve thought again about that bread my sister and I ate.  How did they (whoever “they” were) get potato into bread?  In what form?  Was it mashed?  Was it baked?  Was it a flurry of potato flakes?  Was it potato flour?  At the farmers’ market in Eugene, OR my husband and I discovered potato donuts: dark brown, dense, sugar-crusted rings that were mercifully only available once a week, and I wondered about these too.  Two beloved starches, baked together, could only be greater than the sum of their parts.

This is all an extremely long way to introduce the idea of putting potatoes in a biscuit.  If they can produce bread and donuts, and of course pasta – gnocchi is not, when it comes right down to it, really so tremendously different from a row of fluffy little miniature biscuits that you boil instead of baking – why not a tall, leavened biscuit?

Food Blog May 2013-1393A little internet research showed me numerous methods of incorporating potato flavor into my biscuits.  I decided early on that I wanted to use a fresh potato, rather than the instant potato flakes some recipes recommend, which meant I had to be careful about moisture.  The potato needed to be cooked and mashed or pureed before adding it to the flour, so that it mixed in easily.  However, boiling potato chunks to mash them does add water, and I wanted to keep my potatoes dry so that the moisture could come from something with additional flavor – I was thinking buttermilk.  Here, gnocchi was the answer.  To avoid adding too much water, here or in those pillowy little nuggets, the potato is baked and then grated into crumbly, starchy strands, which are then easily smashed into smoothness.

Food Blog May 2013-1394I’m rarely contented with a plain old buttermilk biscuit, so I decided some add-ins were in order.  Since I was already playing with the potato idea, I started thinking about loaded baked potatoes: cheese, broccoli, bacon bits, sour cream, green onions… I had a roommate once who liked to top hers with salsa and cubes of fried tofu.  In the end, though, I decided to keep the excess to a (relative) minimum: crisp shards of prosciutto, sharp cheddar, and a pile of roughly chopped roasted broccoli florets.

Food Blog May 2013-1397

This produced a dough that clung together reluctantly, given how jammed with additions it was.  But I was patient, after I’d finished throwing flour everywhere, and gentle, and managed to punch out 12 biscuit rounds jammed with bits of green and pink poking out every which way.

Food Blog May 2013-1399

This is a dense biscuit, so it doesn’t rise a tremendous amount when it is baked, but it will still puff a bit as the chunks of butter struggle to support the spudsy weight.  It emerges speckled with bits of broccoli and browned cheese, and it’s totally worth it in every way.  Guys, you have to try these.  It’s rare that I run out of food words to describe something, but this is one of those times.  If I jammed all the superlatives I was thinking of using into this post, you probably wouldn’t believe me.  I’ll keep it at this: the cheese and the broccoli and the prosciutto all lend a crazy-good saltiness (the prosciutto could easily be taken out to make this vegetarian).  The flavors are perfect together, and though the potato doesn’t have a lot of flavor on its own, it does make this biscuit fairly substantial.  Paired with a salad (as we had), or a nice bowl of soup, it’s basically a complete meal.

Food Blog May 2013-1400

As with all biscuits I’ve ever tasted, these are best on the first day, as hot out of the oven as you can stand to touch them.  They are perfect on their own, though if you wanted to split one open and add a pat of butter, I’d completely understand.  They are, after all, related to baked potatoes.  And if you wanted to top them with a roasted garlic or a white pepper gravy, well, I don’t think I’d be in any position to stop you.

Loaded Baked Potato Biscuits
(for flour and potato quantities, I started with Deb’s sweet potato biscuits, and improvised from there.  This seems like a lot of steps, but trust me…)


For the potato:
  • Bake a medium to large russet or other fluffy, starchy potato at 400F for about an hour, or until a fork sinks easily through the middle.  When it is cooked through, let it cool completely.  Splitting it in half will hasten this process.
  • Using the largest holes on a box grater, grate the potato flesh away from the skin.  In a large bowl, smash or crush the crumbly bits of potato into a smooth mash.
For the broccoli and prosciutto:
1-2 medium heads broccoli, cut into small florets
6 slices prosciutto


  • Preheat the oven to 425F.  On a baking sheet, toss the broccoli with olive oil, salt, and pepper, and roast for 30-45 minutes, flipping the broccoli pieces over halfway through the cooking process.  When done, they should be well browned on the outside and tender in the middle.  The flowery bits will be crisp, like broccoli popcorn.
  • Remove the broccoli to a plate or cutting board to cool.  When cool enough to handle, chop into ½ inch pieces.
  • Place prosciutto strips onto the now-empty baking tray (yes, there will be some broccoli bits and residual oil there.  Don’t worry about it – they are all going into the biscuits together!).  Bake for 10-15 minutes, or until prosciutto is crisp.  Watch it carefully: it burns easily.
  • When crisp and dry, set aside on paper towels or a wire rack to cool and drain a bit.  Once cool, cut or crumble into bits.
For the biscuits:
2 cups flour
2 TB baking powder
½ tsp salt (this doesn’t seem like much, but remember, the broccoli, prosciutto, and cheese are all salty already.  If you’re a salt fiend, go ahead and use a full teaspoon, but otherwise, start small)
1 cup grated baked potato, mashed smooth
5 TB unsalted butter, cut into cubes
½ cup buttermilk
1 – 1½ cups chopped roasted broccoli florets
Crumbled prosciutto from 6 strips (you could easily substitute an equal quantity of bacon)
1 cup shredded cheddar cheese, as sharp as you can find


  • In a large bowl, whisk together the flour, mashed potato, baking powder, and salt.  You want a homogenous mixture: no big potato chunks.
  • Using a fork, two knives, or (my favorite) a pastry blender, cut in the butter until it is the size of large peas.  This will also help break up any remaining hunks of potato.
  • Add the cheese, prosciutto, and broccoli, and incorporate until they are distributed evenly.
  • Add buttermilk and stir with a fork.  You are looking for everything to combine into a rough, shaggy-looking dough.
  • Turn your dough out onto a well-floured board and knead it a few times with the heels of your hands until it is more willing to cling together.  Press it out into a rectangle or circle about 1 inch thick.
  • Using a biscuit cutter or the floured rim of a drinking glass, punch out biscuits by pressing straight down, NOT twisting.  This will help the biscuits rise better by not disrupting their layers.
  • Once you have punched as many as you can from the dough rectangle, gather the scraps, knead them together once or twice, and press the dough out again.  Continue until no more dough remains (making one or two funky-looking biscuit bits is totally acceptable: you can call those the cook’s tax and gobble them while no one is looking).
  • As you punch out biscuits, place them on a greased or parchment lined baking tray.
  • Bake in a preheated 425F oven for 15-18 minutes.
  • Eat while hot, warm, or room temperature, if you can wait that long.

Food Blog May 2013-1407