Lemony Leek Meatballs

I’m sure you’ve been waiting with bated breath for this post. I’ve made you yearn for it for half the month already! But I didn’t want to announce my intent without something to show for it, and now I finally have a triumphant opening act. Can I get a drumroll? The project I’ve decided on for 2015 is…. meatballs.

Food Blog January 2015-0230Meatballs appear in almost every culture. Albondigas find their way into soup in Hispanic cooking. Chinese meatballs are often steamed or boiled. Keftedes are Greek, kofta or kufteh appear in Middle Eastern dishes. A Swedish version coats very small rounds with a sumptuous gravy and serves them with potatoes and lingonberry jam. The classic American meatball, which is in fact of Italian origin, nestles amidst a mound of well-sauced pasta.

But they aren’t just, as the name suggests, balls of meat. Many meatball recipes combine different types of ground meat to maximize flavor but also adjust fat content. Very lean ground meats, like veal, which some meatball preparations use for its flavor, are often combined with something like pork or fattier beef to ensure tenderness and structural integrity. Bread in some form, whether dry and powdered or fresh, springy crumbs, is a frequent ingredient in a meatball. Though this could be to stretch the meat content (think bread crumbs as “filler” in a crab cake), it also absorbs fat and creates a lighter final product – “light” meatballs are often texturally prized above the dense thickness of a meatloaf, for example.

Food Blog January 2015-0222Most meatball recipes also incorporate some sort of aromatics, and sometimes eggs, to the mixture. This isn’t a mere unflattened hamburger; it’s a creation unto itself, and it needs some backup singers to really make the performance impressive. Onions or garlic, sweated or sautéed before incorporating, are common additions. Herbs, parsley perhaps the most common, are also frequent meatball interlopers.

Food Blog January 2015-0220In deciding on meatballs as my project for the year, I am challenging myself with ratios and with flavor combinations. Ratio-wise, the quantities of meat to bread crumbs to eggs to seasoning must be considered; I want a meatball with good structural integrity – it can’t fall apart during cooking – but I also want something light and springy, not tough and dense. Thus quantities, but also mixing and cooking techniques, must be mastered. As for flavor combinations, this isn’t a dish where you can taste a little at a time. It’s not a slice of roast pork that you can eat with or without the vegetable side. Everything in that little sphere must mingle well. Every ingredient must belong, with nothing extra and nothing missing.

Food Blog January 2015-0221I must admit that I am not a huge fan of the most common meatball incarnation in this country. The planet-sized spheres that arrive, drowning in marinara, balanced uneasily atop a plate of spaghetti, have never thrilled me. But outside that standard, pasta-draped option, I love a good meatball. I hope you do too.

So here’s the challenge: once a month, I will present you a meatball recipe. I have some ideas already, but I’m starting myself out gently with a few recipe adaptations before I strike out into unpracticed territory. And if you have any meatball ideas you’d like to see actualized, let me know in the comments or send me an email! I’ll happily cook something up.

Food Blog January 2015-0225For the opening act, I looked no further than Yotam Ottolenghi and Sami Tamimi in their stellar cookbook Jerusalem. I love this volume. When I bought it for myself last year, I gave up marking recipes I wanted to try with a post-it note because, let’s face it, that’s just not helpful when you are marking almost every page. But the Lemony Leek Meatballs, curiously filed in the vegetable section, stood out. First of all, as Ottolenghi and Tamimi note, they are packed with a staggering quantity of leeks which, despite the beef that makes up the “meat” component, really do emerge as stars in the dish. Secondly, the sauce, chicken broth spiked with a tremendous dose of lemon juice, sounded so bright and aggressive with flavor that I just wanted to drink a mugful.

Food Blog January 2015-0226I wasn’t disappointed. The meatballs sear up golden and aromatic, and as they simmer in the sauce they soak up its acidity and turn it into something outrageous – an intensely savory lemon caramel coating around fragrant pyramids (mine wouldn’t stay round). The leeks and beef are a stellar combination, and the addition of fresh bread crumbs as well as the gently pulverized leeks keep the meatballs light and fresh, probably why they are classified as an appetizer or starter in Jerusalem.

Food Blog January 2015-0228I’ve made a few changes from the original, a dicey business with beloved traditional recipes like many of these, but they are minor. Rather than steaming the leeks, I’ve sautéed them gently in a mixture of butter and olive oil for extra flavor. To keep with my project theme, I’ve maintained the ball shape, rather than flattening them into patties as Ottolenghi and Tamimi direct. Finally, as I’ve noted below, I increased the number of meatballs – rather than 8, as in the original recipe, I’ve done 12, and really you could easily make 16 from the same amount of mixture.

Food Blog January 2015-0236Forewarning: this is a lengthy process. Like, if you are really on top of your game and quick on the prep and ready to multitask, “lengthy” means about two hours. The leeks must be cooked down first, which takes a good 20 minutes, and then cooled. The meat mixture, once it’s formed into balls, must be chilled for a full half hour to ensure that they stay together in the pan. After searing, the meatballs simmer in the rich, tart broth for another half hour, and then must cool a bit, as they taste better just warm or at room temperature than scaldingly hot out of the pan. All this means you are looking at almost two hours of prep and cooking time – not onerous, particularly because half an hour of that is just cooling your heels while your meatballs do the same, but worth noting before you charge in hoping to have dinner on the table in the blink of an eye.

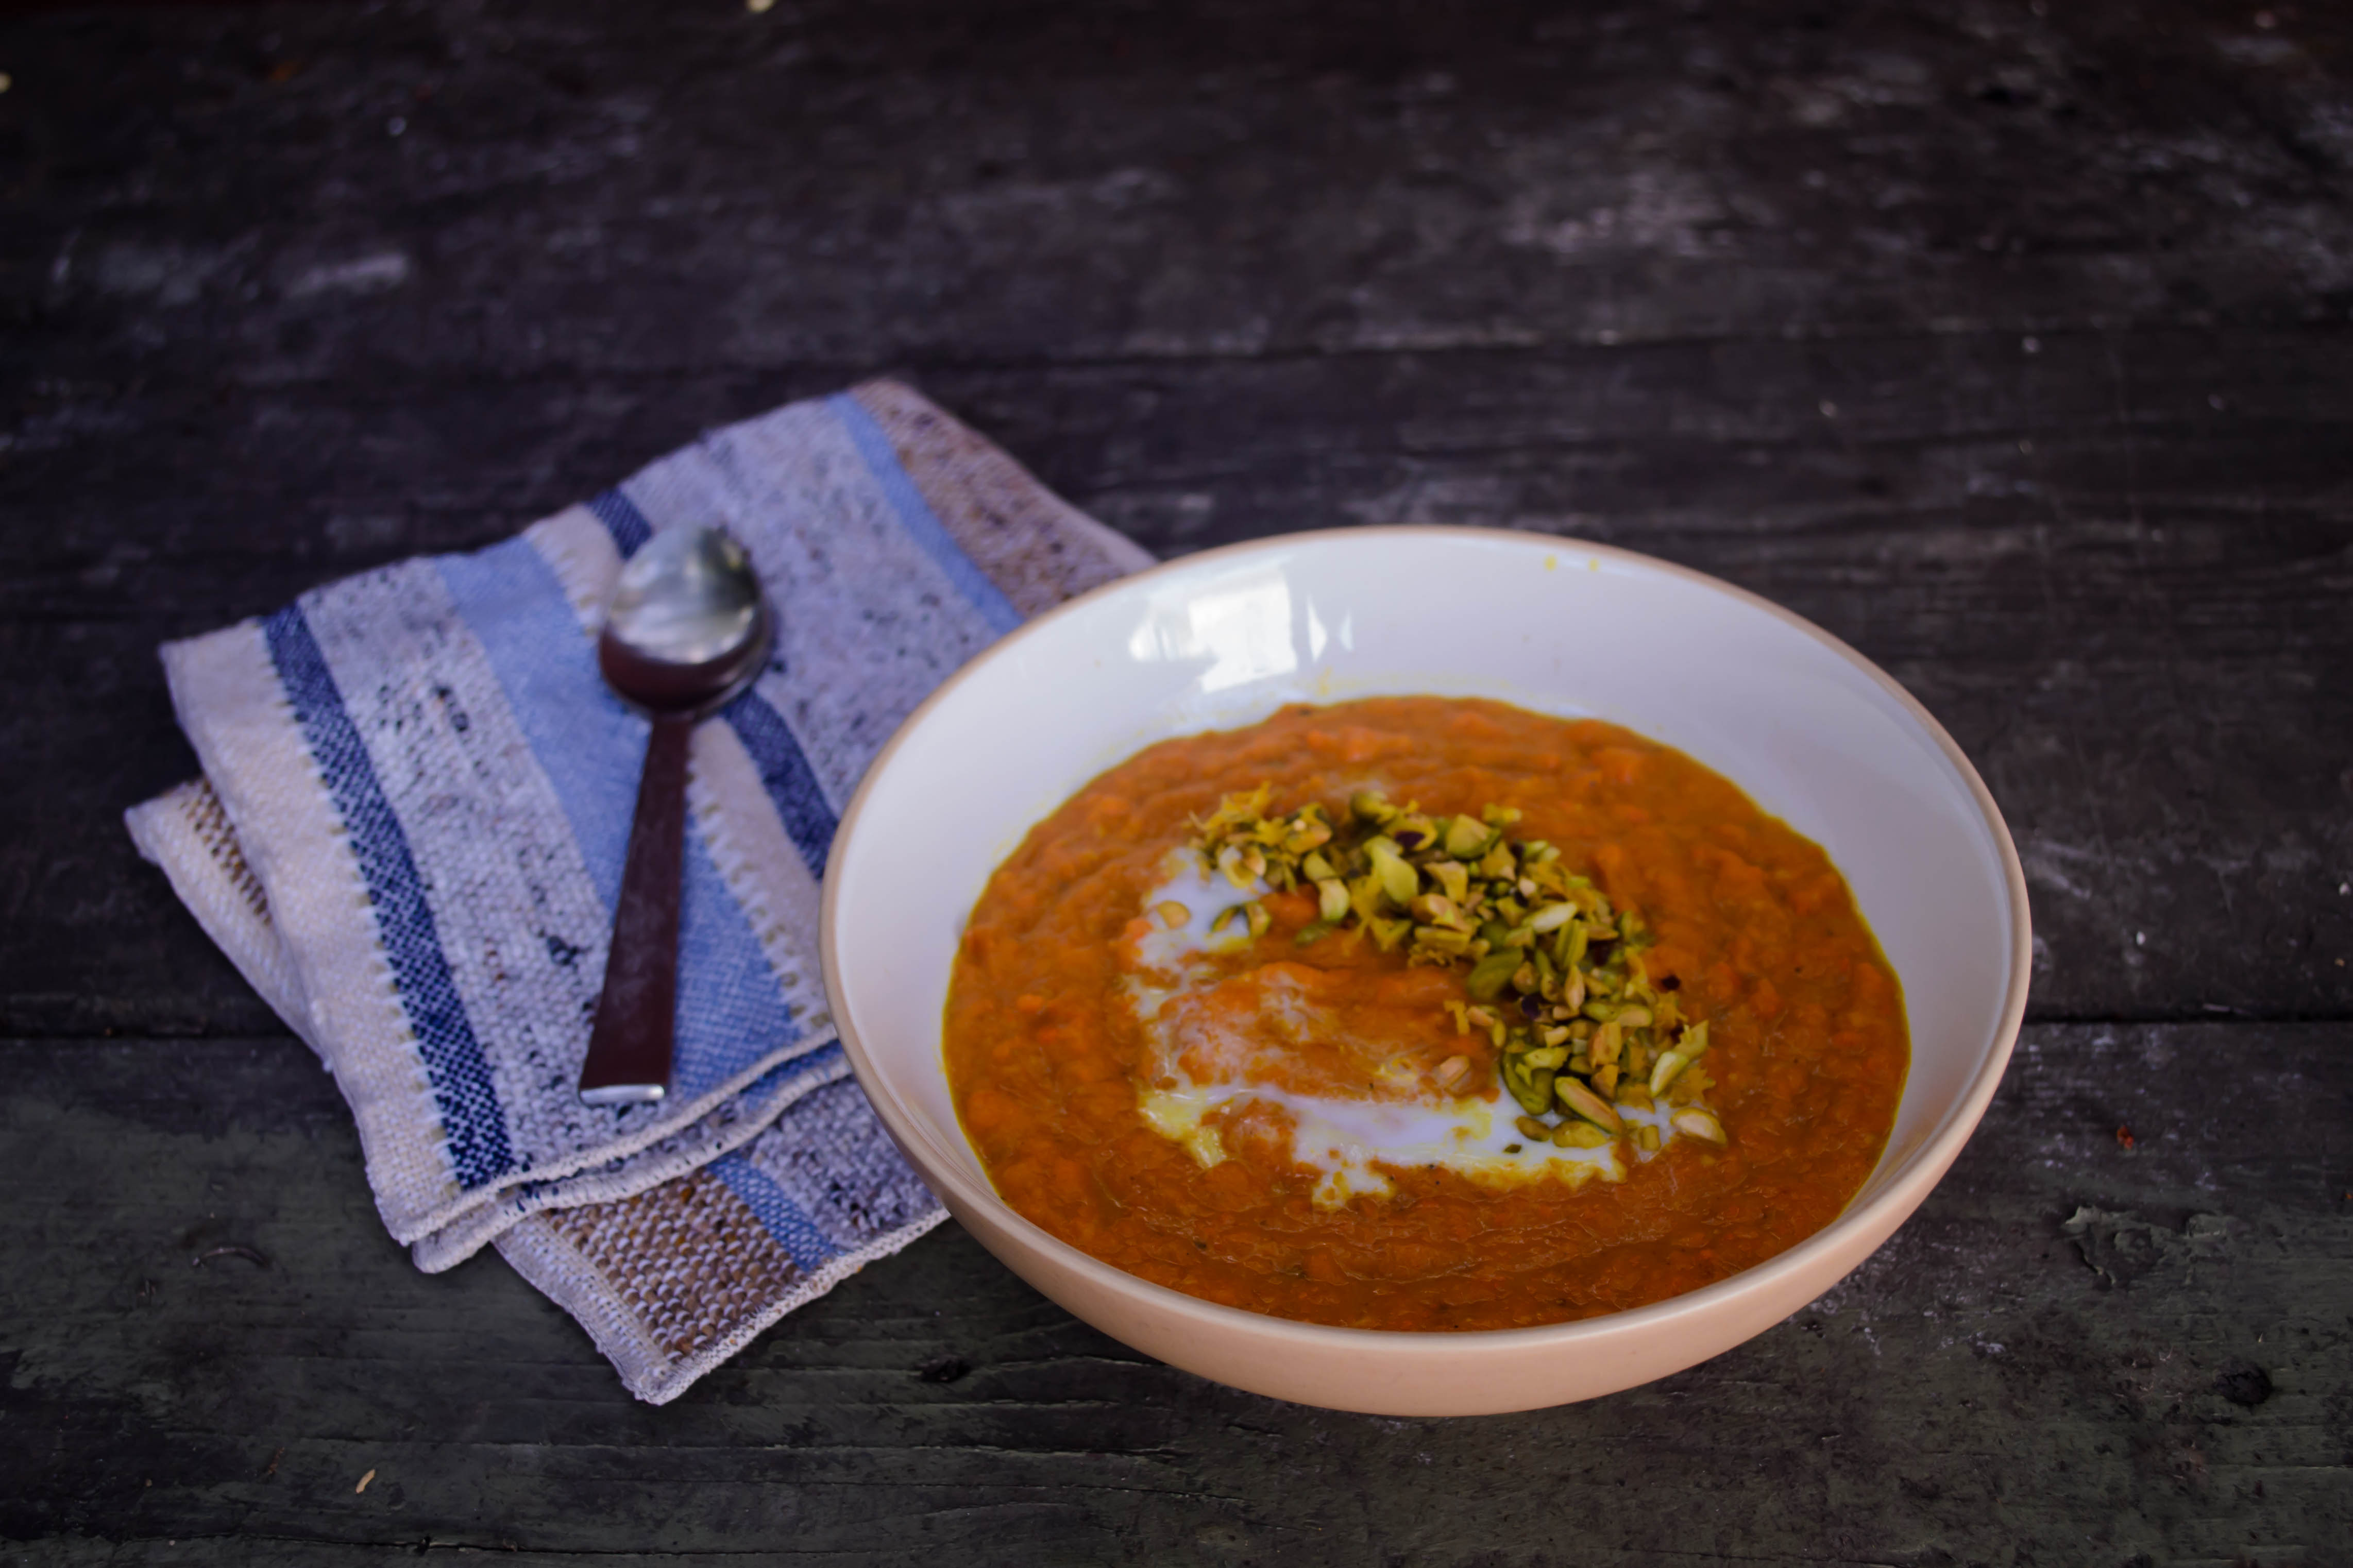
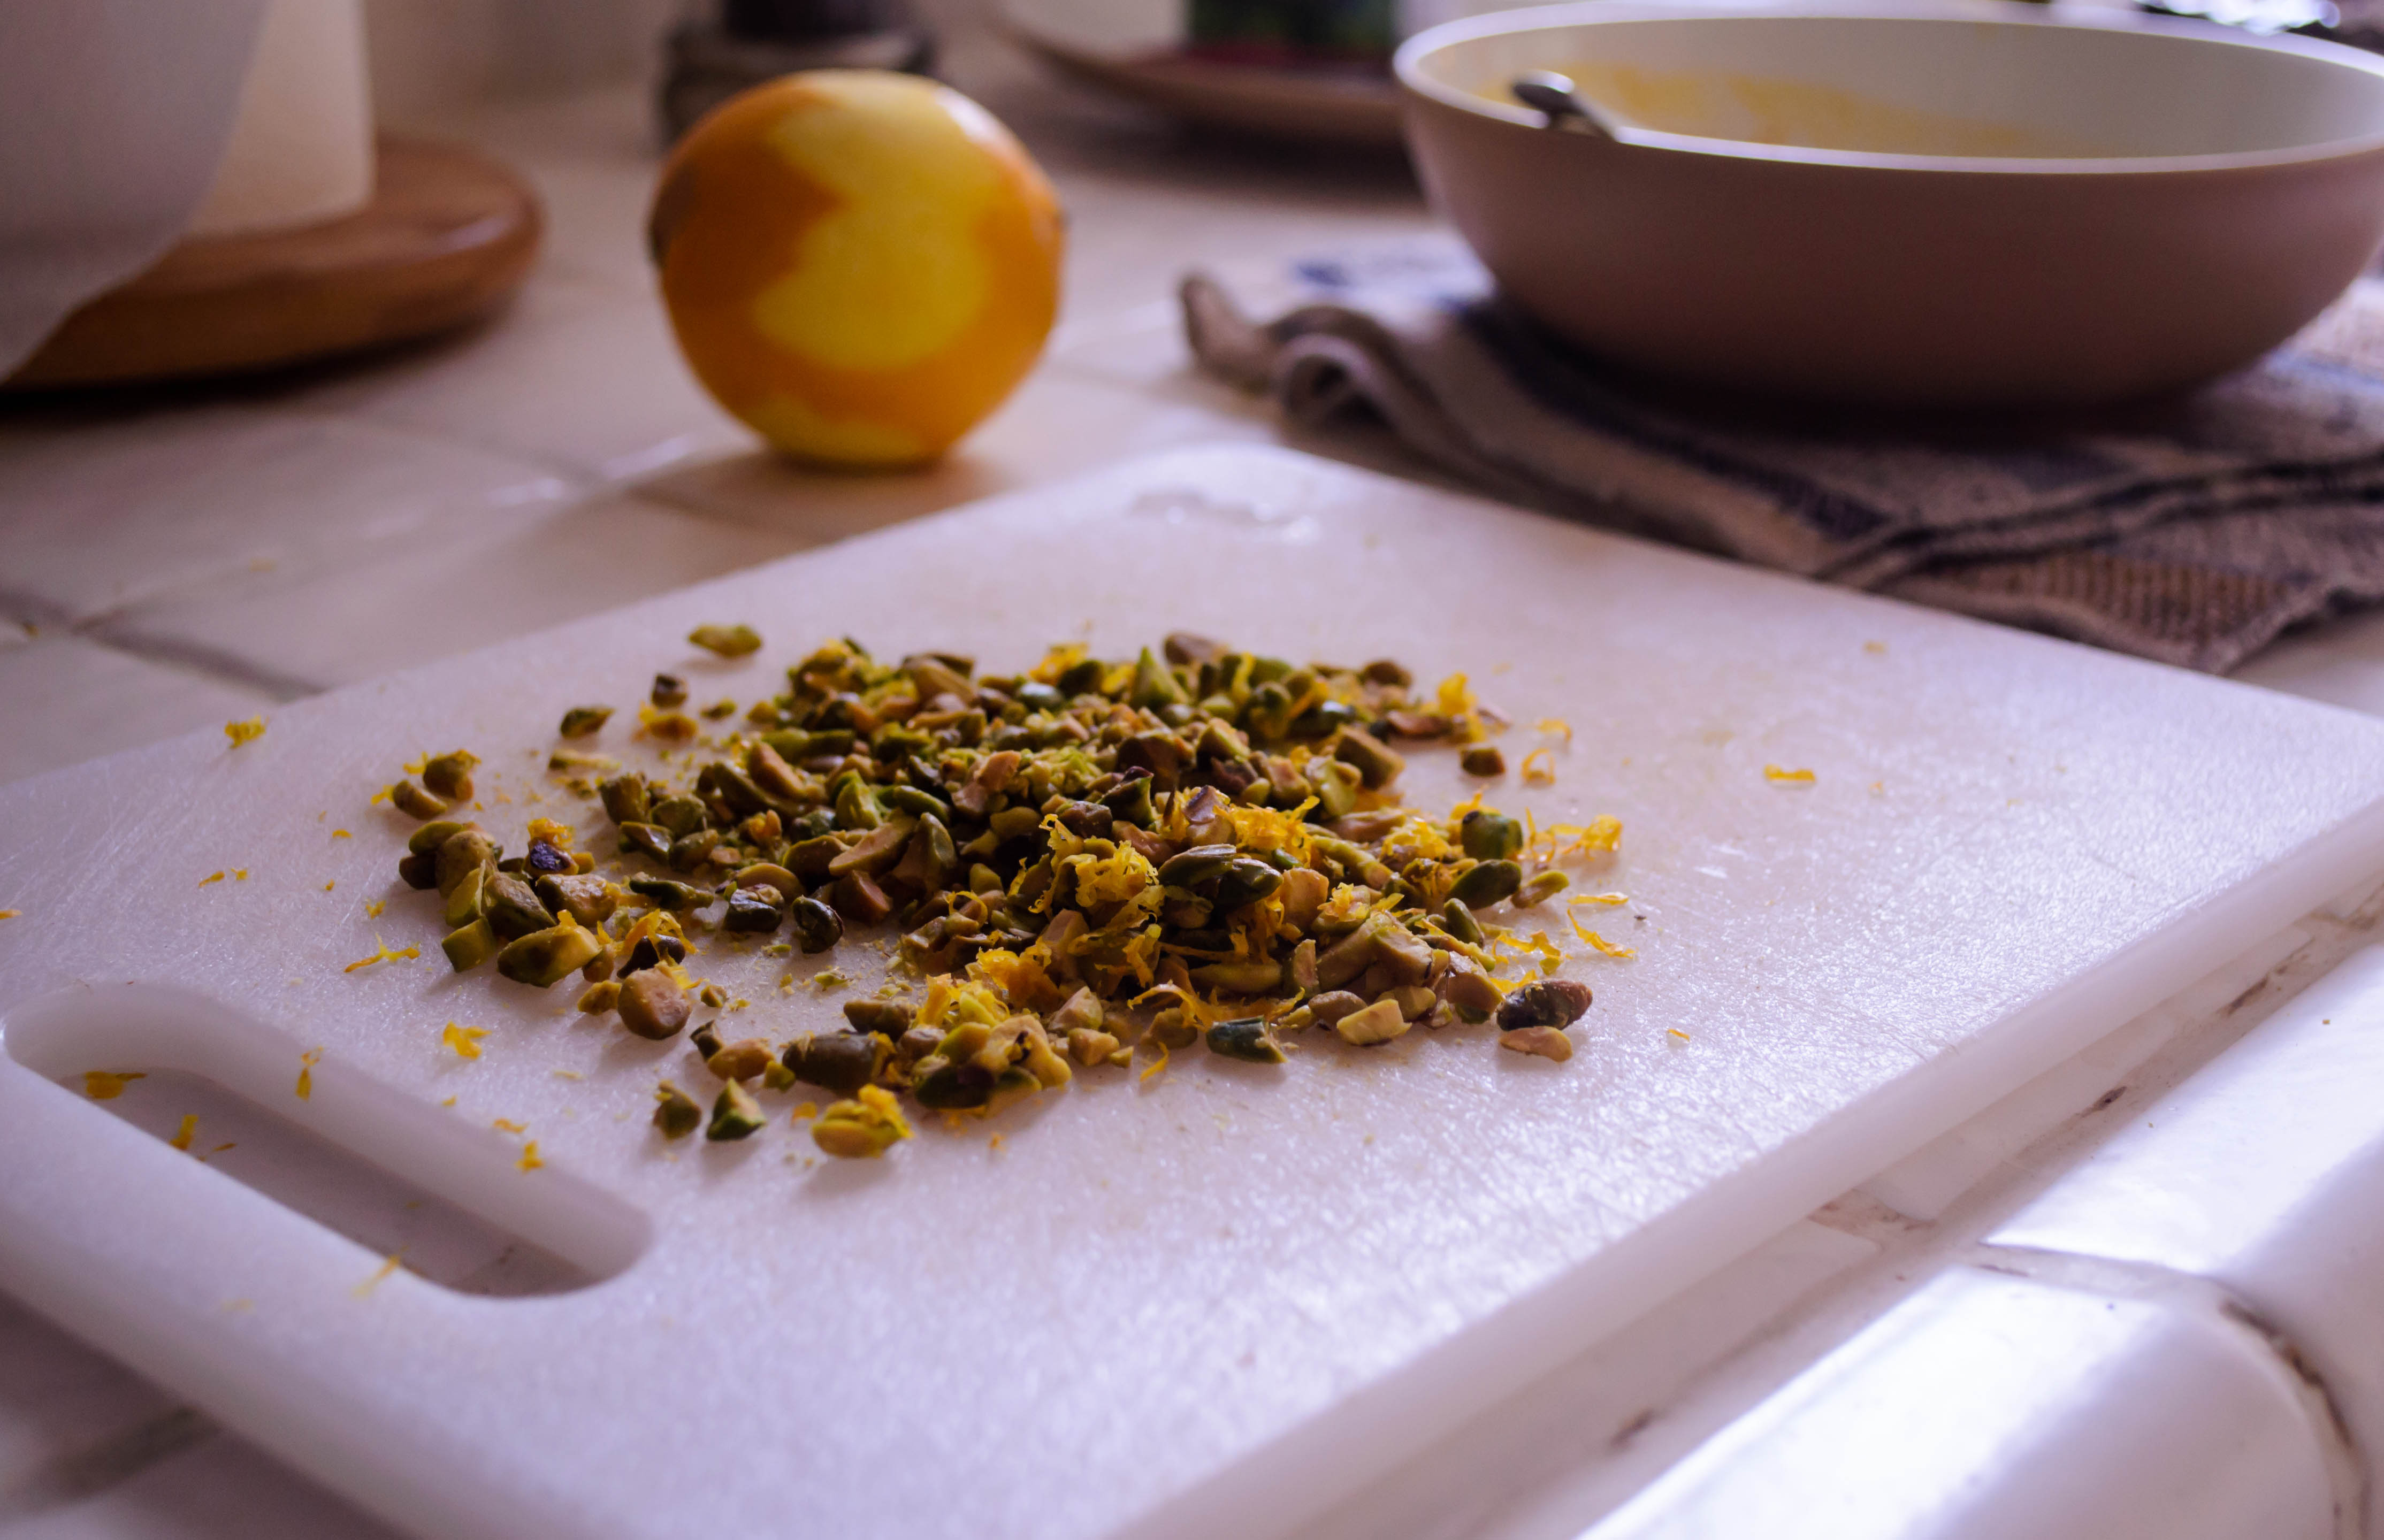
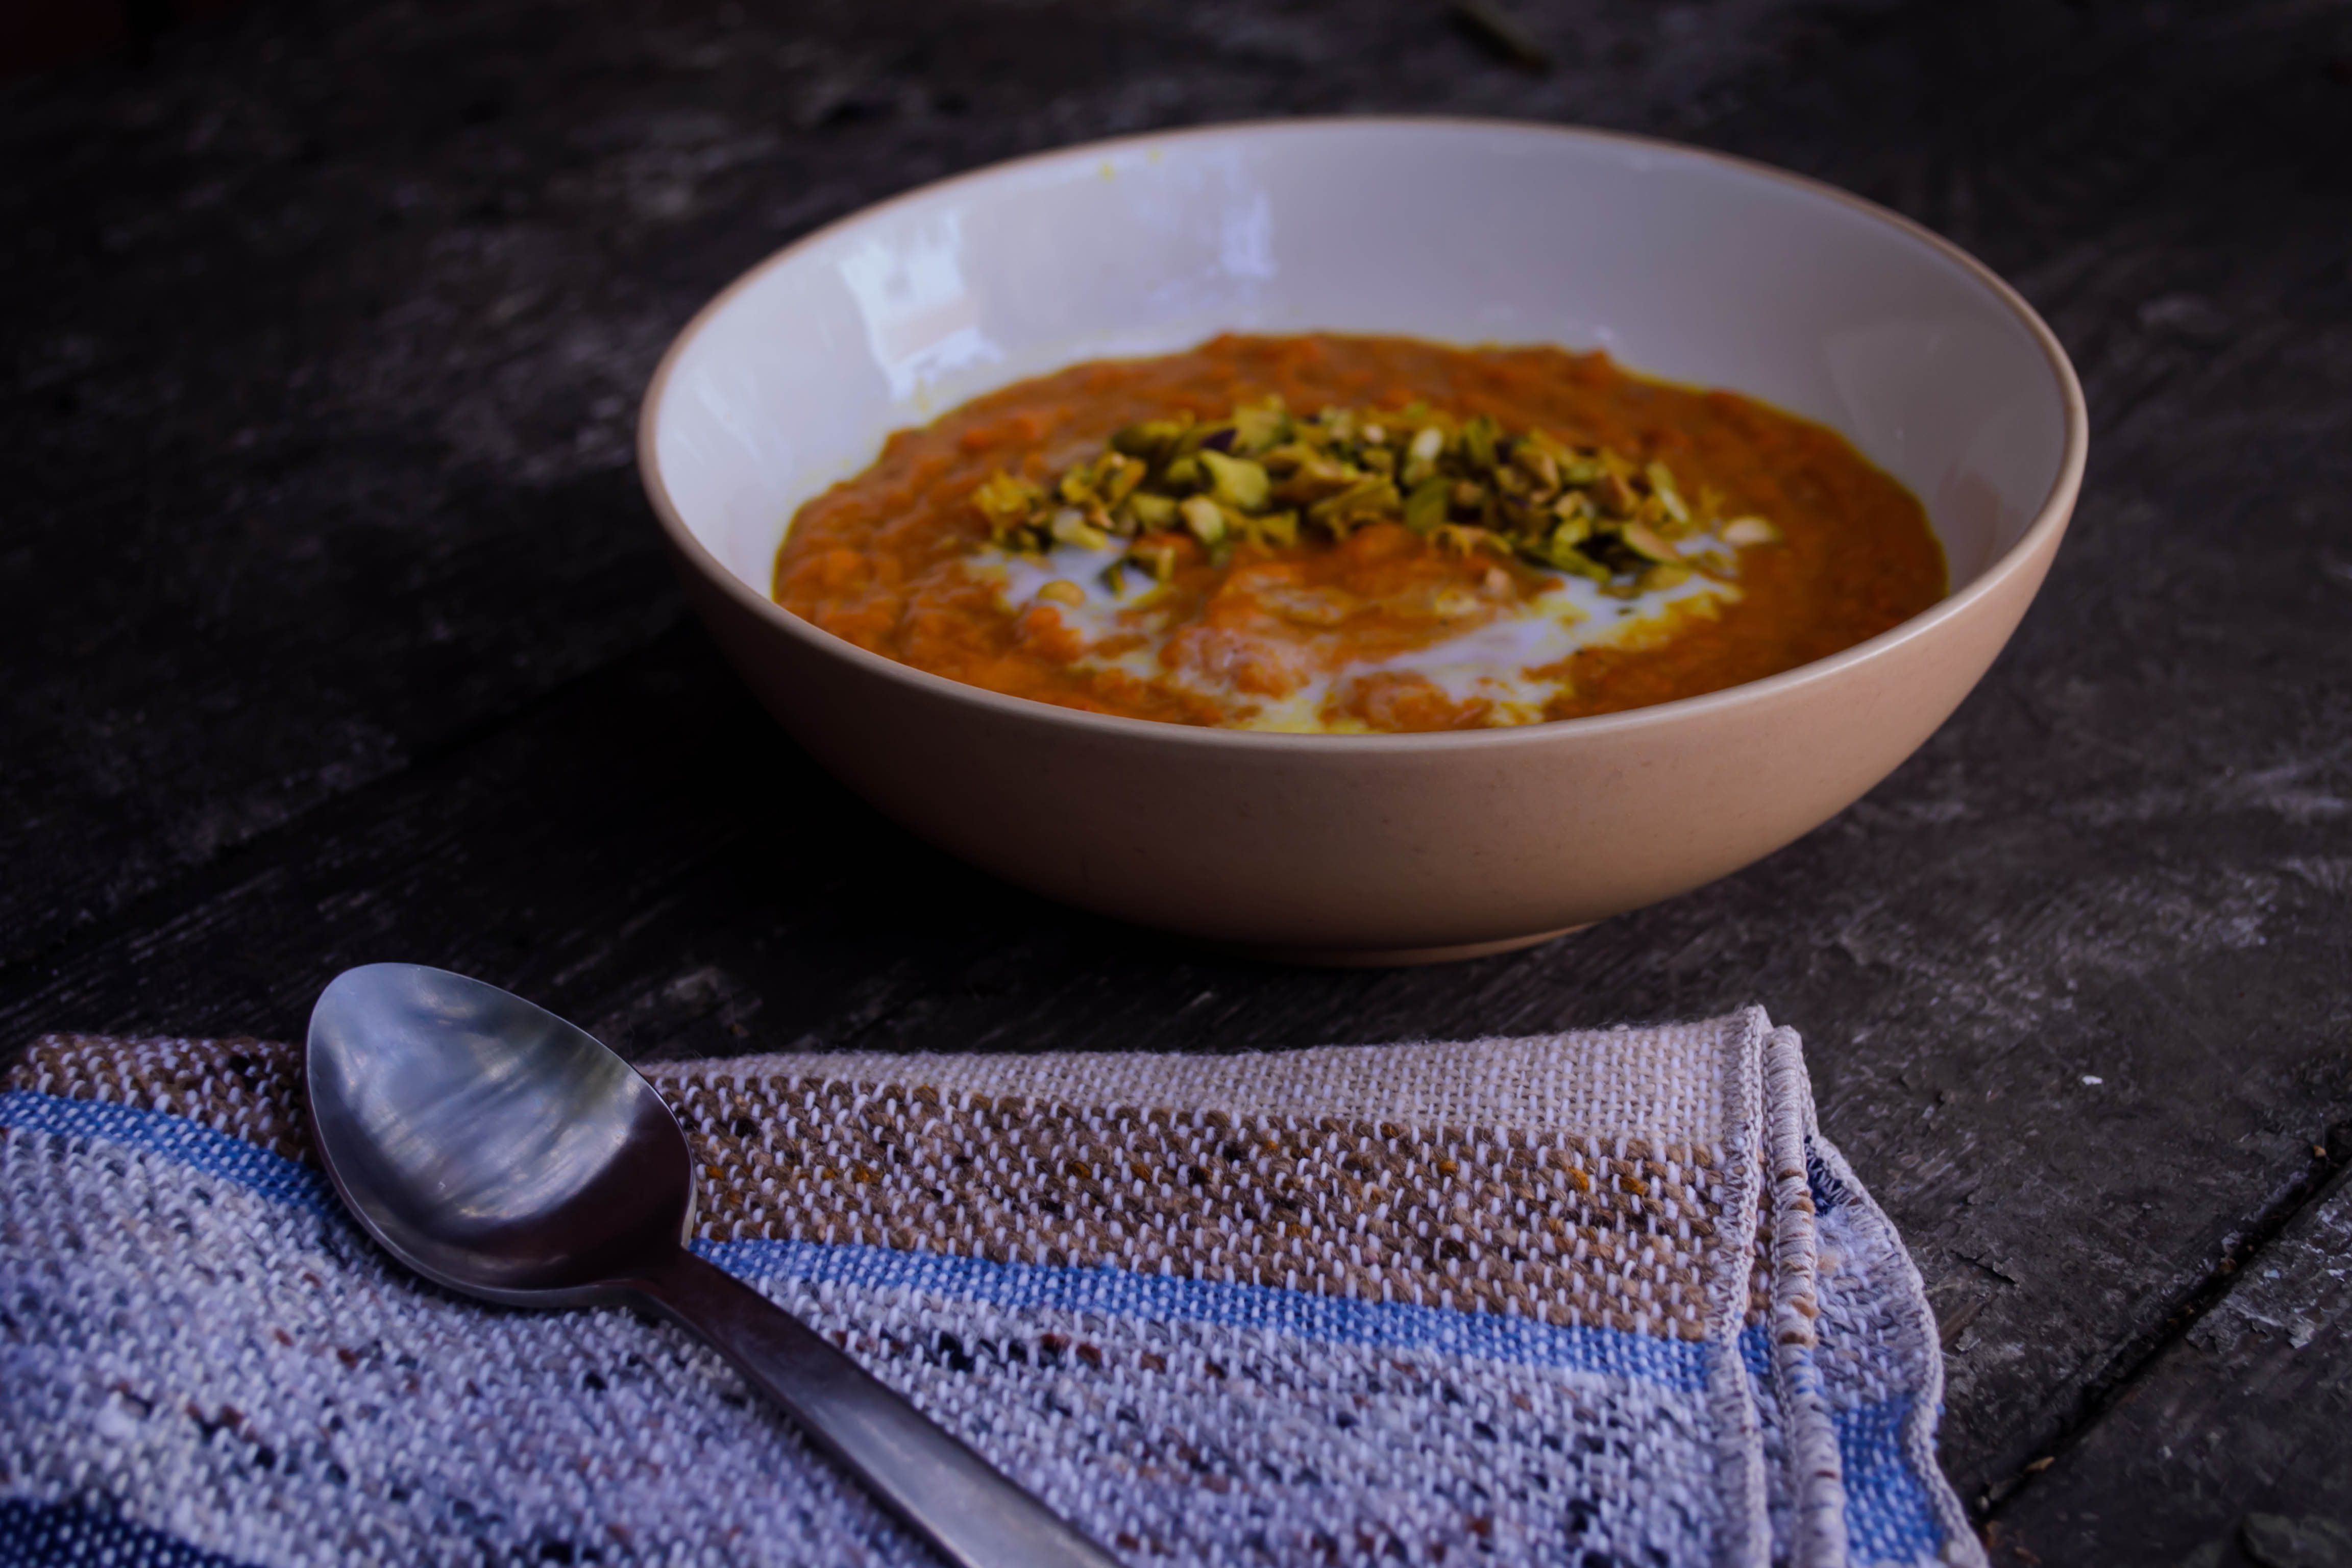
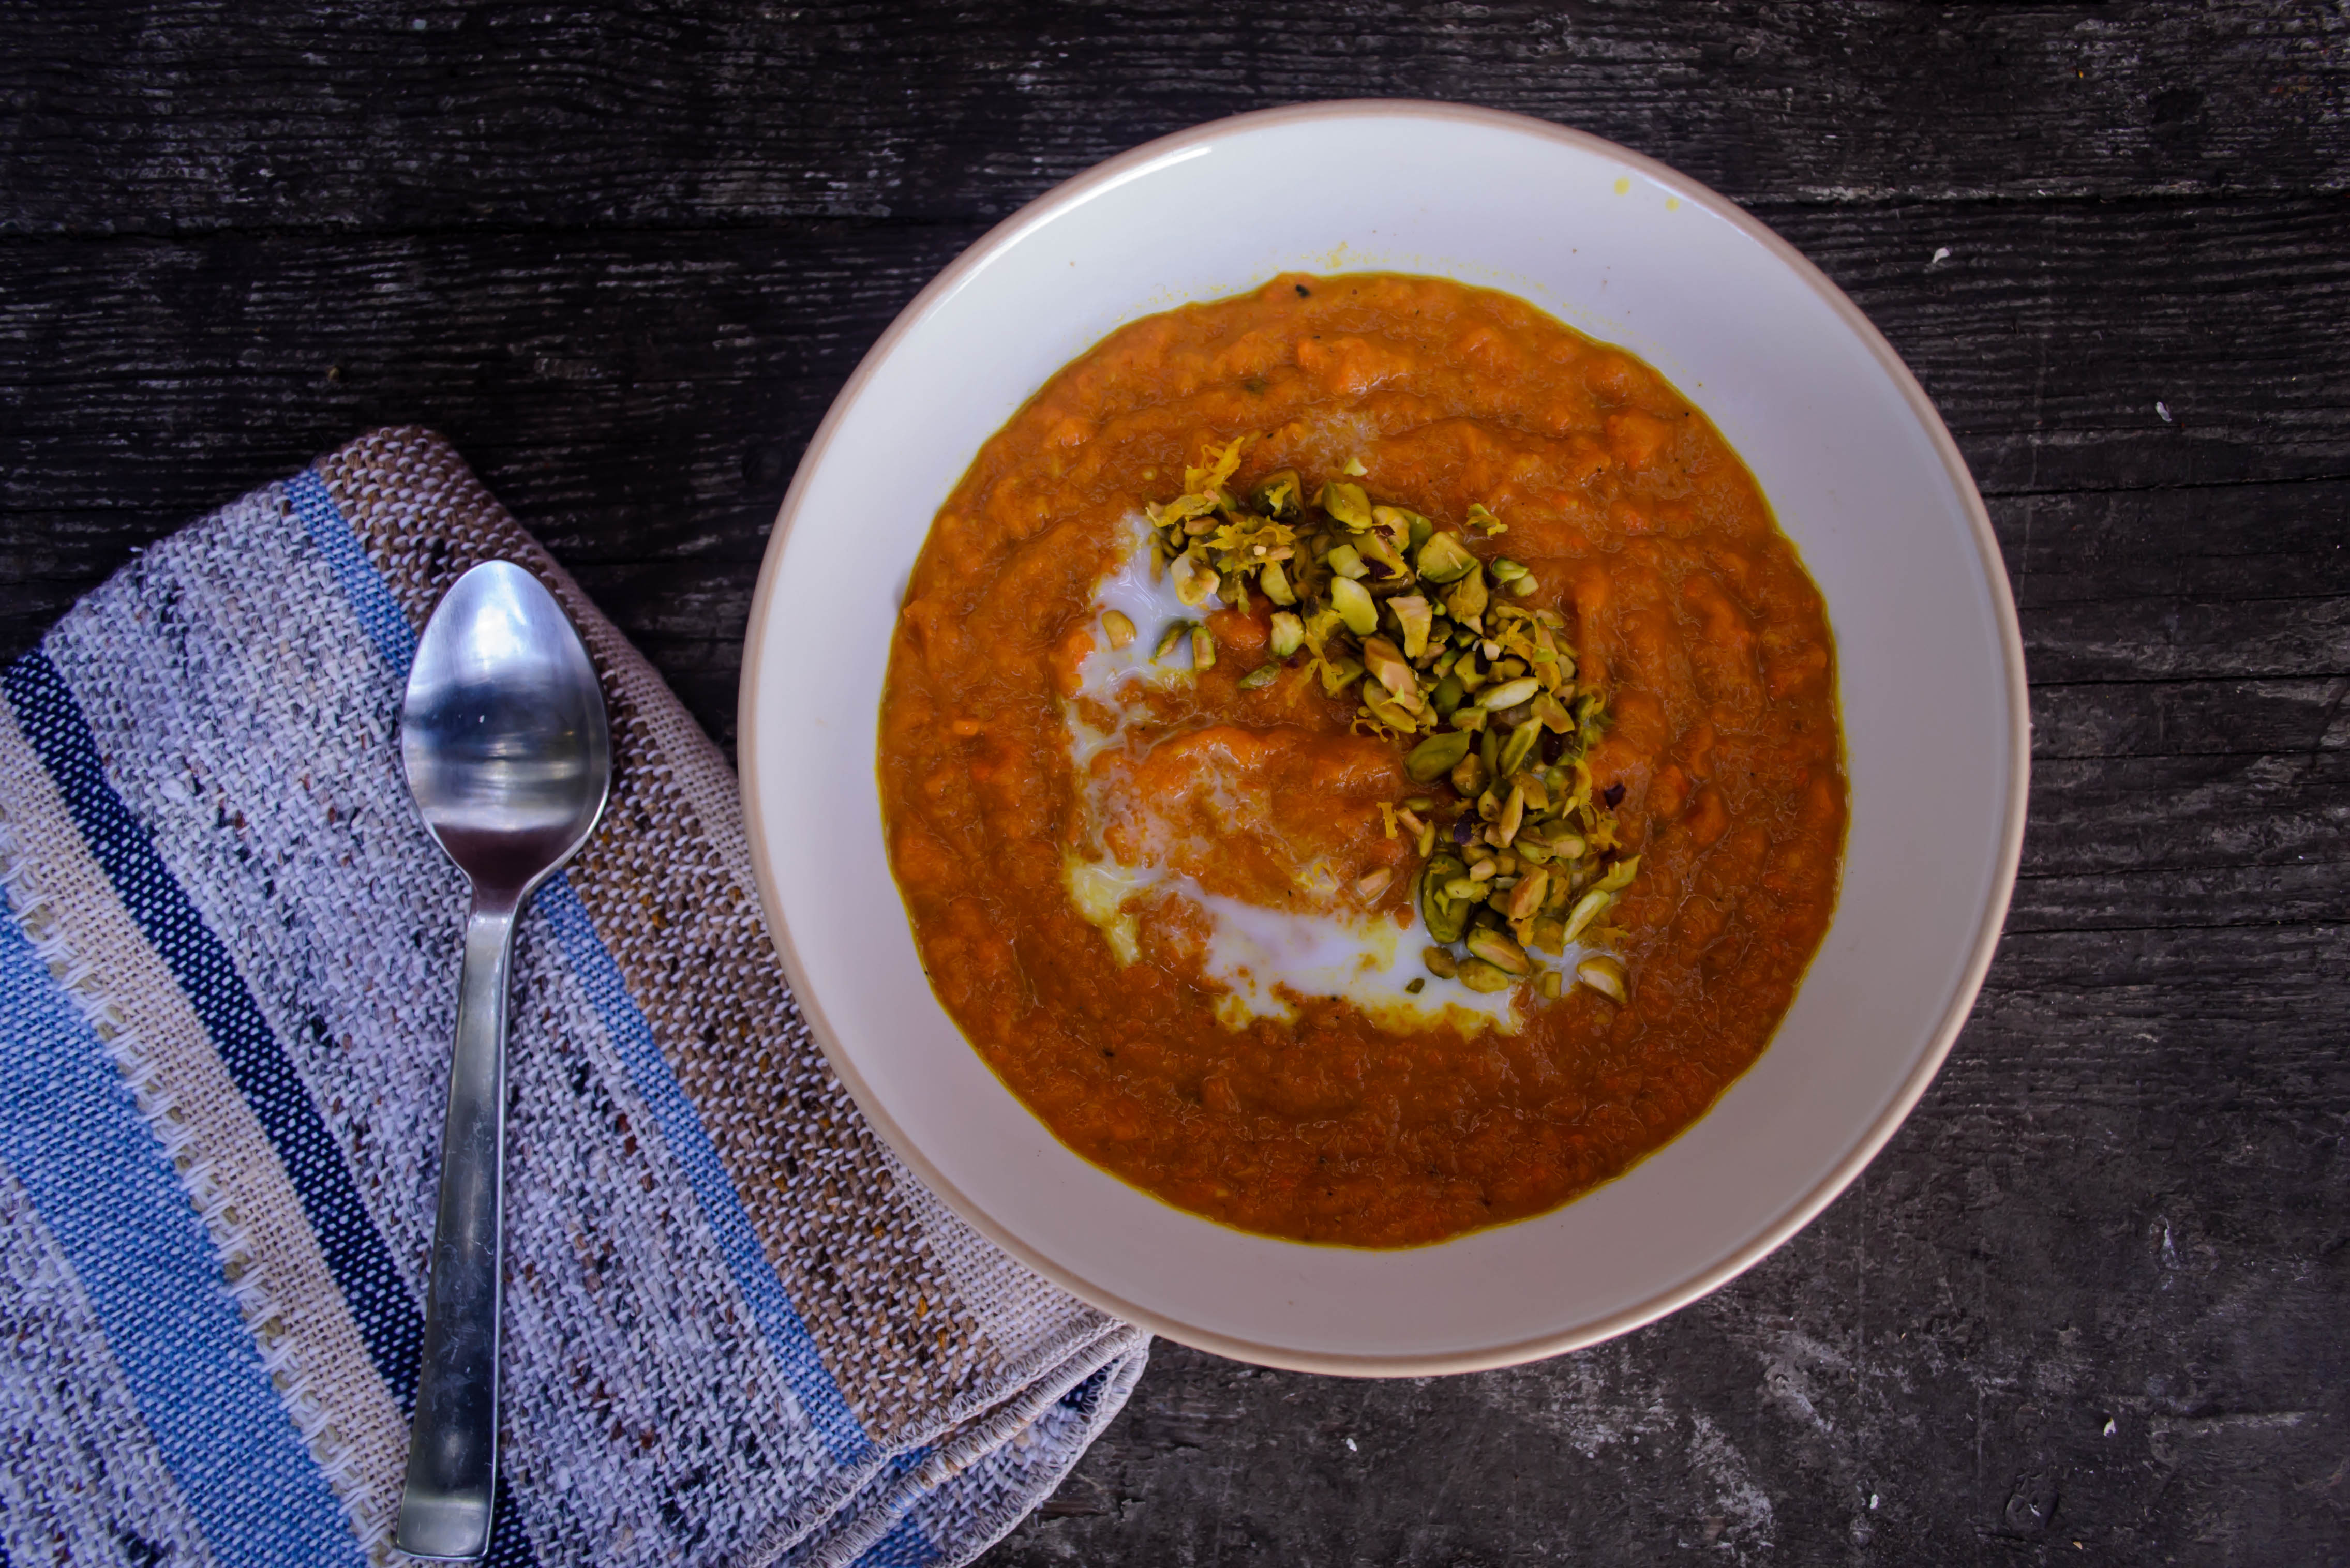
Serving suggestions: tuck them into warm pita or naan with the yogurt and perhaps a few slices of cucumber, or sit them on a bed of fragrant couscous shot through with toasted nuts and green onions, or maybe some finely chopped dried apricots. Add a sprinkle of good, tart feta to the top for some extra zing.

Lemony Leek Meatballs
adapted from Jerusalem
serves 2-3 as an entree, 4-6 as part of an appetizer plate
NOTE! Takes the better part of 2 hours
6 large trimmed leeks, root end and dark green portion removed
1 tablespoon butter
3 tablespoons olive oil, divided
2 teaspoons salt, divided
1 teaspoon freshly ground black pepper
9 ounces ground beef (just over ½ a pound)
scant 1 cup bread crumbs (1-2 slices)
2 large eggs
1¼ cups chicken stock
⅓ cup freshly squeezed lemon juice (about 2 lemons)
⅓ cup greek yogurt
1 tablespoon finely chopped parsley
  • Slice the trimmed leeks in half lengthwise to form long half-cylinders. Rinse well, being sure the water gets in between the layers, where dirt can be hidden. Shake off and slice across into ¾ inch slices.
  • Heat 1 tablespoon butter and 1 tablespoon olive oil in a 12-inch skillet over medium heat. Add the leeks and ½ teaspoon salt, and clamp on the lid. Cook, stirring occasionally, for 20 minutes, until the leeks are completely tender but not browned.
  • Drain leeks in a colander, pushing them against the sides with the flat of a wooden spoon to press out some of the water. Leave to cool, then squeeze out any residual water with a clean kitchen towel.
  • Dump leeks into a food processor and pulse a few times until well chopped, but not mush. Place them in a large bowl with the ground beef, bread crumbs, eggs, 1 teaspoon of salt, 1 teaspoon of black pepper, and use your fingertips to gently combine the ingredients into a homogenous mix. Try not to overwork. The final mixture will be quite soft.
  • Gently form the mix into 12-16 equal balls and refrigerate 30 minutes (this gives the bread crumbs some time to absorb some of the fat and liquid in the mixture, and helps these delicate, soft meatballs stay together).
  • Heat the remaining 2 tablespoons olive oil over medium-high heat in the same large skillet (wipe it out first if there is leek detritus lingering). Gingerly add the meatballs, being sure they don’t touch, and sear until golden-brown on all sides (2-3 minutes for each side); you can do this in batches if necessary.
  • Now, pour on the chicken stock – it should come about halfway up the sides of the meatballs; maybe a bit higher. Add the lemon juice and remaining ½ teaspoon salt. Bring to a boil, then pop on the lid, turn the heat down to medium or medium-low, and simmer gently for 30 minutes.
  • After 30 minutes, remove the lid and cook for a few more minutes, if necessary, until almost all the liquid in the pan has evaporated. Remove the pan from the heat and set it aside to cool.
  • Serve the meatballs just warm or at room temperature, with a dollop of the yogurt and a sprinkle of parsley.

Carrot Ginger Soup with Coconut and Turmeric

I threw away my bathroom scale today. Before you applaud me, this isn’t some kind of new-year-new-me-self-acceptance resolution. No, it’s because unless we have had a 46 pound ghost living in our bathroom for the last month, the scale has stopped working. No amount of fiddling with the dial on the bottom has had any effect, aside from bulking up our imaginary squatter to 77 pounds.

Food Blog January 2015-0205Though I realize there are probably many videos, tutorials, and step-by-step Pinterest boards devoted to fixing this problem (how to evict your imaginary scale-ghost!), I decided it was easier to just throw it away. Then I went out and had chicken and waffles for lunch.

Food Blog January 2015-0210All that being said, it is the time of year when, if we’re invested in this sort of thing, we tend to pay a lot of attention to what our bodies look like and what we put into them. Usually that involves eating less and eating lighter, which is ironic and unfortunate, because so many places in the country this January are having such a harsh winter. We need comfort, we need warmth, we need rich food to sustain us through snow and low temperatures (well, perhaps not in Los Angeles).

Food Blog January 2015-0199The answer to both of these problems seems, to me, to be vegetable soup. I don’t mean a minestrone type concoction, with chunks of various veggies floating in broth, but a pureed soup, featuring a single vegetable star, with minimal back-up supporters and just a bit of spice to keep things interesting. After a recent episode of Top Chef on which one of the contestants made a deep, sunset inspired roasted carrot soup, I knew what my star would be.

Food Blog January 2015-0201Carrots work well with many flavors, but ginger is a particularly nice pairing; carrots are sweet and hearty, and ginger is a warm, spicy kick that keeps it bright. Rather than chicken stock, which I find can muddy flavors a bit, I opted for water as my liquid, with a generous splash of coconut milk to add some richness. Then, on a whim I’m pleased I followed, I sprinkled in a good teaspoon or two of turmeric, which bolstered both the orange glow of the carrots and their earthy flavor.

Food Blog January 2015-0213As I watched my pureed mixture burble in a pot, I started thinking about texture. I’d stopped short of pureeing the carrots to total velvet smoothness, but I still wanted something crunchy to break up the potential monotony of my soup. During the pumpkin madness of autumn, I experimented with some yet-to-be-perfected turmeric-spiced pumpkin bars that featured a pistachio and walnut crumble topping. Pistachios seemed like a good choice again here, and to play with the hint of citrus flavor they carry, as well as add a slight sourness the soup might benefit from, I tossed the nuts with lemon zest before sprinkling them over my vivid orange lunch.

Food Blog January 2015-0209Despite our less-than-wintery weather, this was a comforting, warming bowl. Roasting the carrots brings out their sweetness and concentrates their flavor, but the spices keep it dancing between decadent richness and brightly refreshing. I used some leftover naan to mop up the edges of my bowl, but a crusty piece of baguette or hot pita would, as you might expect, be just as nice.

Food Blog January 2015-0214This is a thick soup – almost passable as a vegetable puree, and you can play with it as you please. Add more or less liquid, replace the pistachio and lemon topping with another toasted nut, or lime zest rather than lemon, or maybe even fried sage and crumbled gingersnaps, to play with the fresh ginger in the soup. My quantities here produce an assertively gingery mix – reduce to just a teaspoon or two for a milder spice.

Food Blog January 2015-0207

Carrot Ginger Soup with Coconut and Turmeric
Serves 2-3
1 pound carrots, tips and tops removed, peeled if desired (I usually don’t – just scrub them off)
1 tablespoon olive oil
½ teaspoon salt
½ teaspoon pepper
1 tablespoon grated ginger (or less, to your taste)
2 teaspoons turmeric
1 cup light coconut milk
1 cup water
2 teaspoons sugar
additional salt and pepper to taste
¼ cup roughly chopped, toasted pistachios
2 teaspoons lemon zest


  • Preheat the oven to 425F while you prep your carrots. Remove their tops and tips, then split down the center for two long half cylinders. On an aluminum foil lined baking sheet, toss the carrot halves with the olive oil and the ½ teaspoon salt and ½ teaspoon pepper for a gleaming, even coat. Roast in the 425F oven for 40 minutes, until nicely browned and quite tender. Set aside to cool slightly.
  • For a standard blender: add the roasted carrots, coconut milk, water, grated ginger, and turmeric to a blender and blend until the mixture reaches your desired consistency. As noted above, I chose to leave mine with a little texture, but you can blend until completely smooth if desired. Pour the mixture into a medium pot.
  • For an immersion blender: add the roasted carrots, coconut milk, water, grated ginger, and turmeric to a medium pot with high sides (otherwise the soup spatters a bit during blending) and blend with an immersion blender until the mixture reaches your desired consistency. As noted above, I chose to leave mine with a little texture, but you can blend until completely smooth if desired.
  • For both methods: once the soup is your desired consistency in the medium pot, place it over medium-low heat until it is heated through. Be careful – because this mixture is thick, if it comes to a boil it will spit.
  • Season to taste with salt and pepper and serve topped with a scattering of chopped pistachios and lemon zest.

Brownie Chunk Cookies

Despite my self-effacing proclamations of cookie-production-failure last week, earlier this week I pushed through my grading, closed down the semester (email? What email?), and made another batch of cookies. These, while not Christmas or holiday themed, per se, are a cookie I’ve been playing with for some time now, and the final result is so big, so decadent and comforting and butter laden and jammed with chocolate, that not including them on a holiday cookie platter feels unacceptable. Unless, of course, that’s because you ate them all before you had a chance to assemble that platter. In which case, carry on. I think you’ve got the right idea.

Food Blog December 2014-0972I found the original recipe for these cookies in an old issue of Bon Appetit magazine – a contribution from a place called Sweet Pea Bakery and Catering – and was bowled over by the concept: brownie chunks folded into walnut-spiked, brown-sugar forward cookie dough, baked into a, what? Brownkie? Cooknie? It means two separate baking projects, but really? If the end result is two casual, much beloved hand-held desserts in one thick, golden, oversized package, I’m willing to put in the extra time.

Food Blog December 2014-0961Food Blog December 2014-0962And yet, as I played, I wanted more. The recipe already calls for walnuts; I wanted mine toasted for that extra, almost bitter buttery richness. The deep chocolate-y squidge of the brownies, on the fudgy side (as opposed to cake-y, as you might expect), is good, but baked into the cookies they don’t have that same melty purity as chocolate chips or chunks might. Easy solution. A handful of chopped bittersweet chocolate joined the party. I replaced some of the all-purpose flour with bread flour to give the cookie some extra chew. And as a final coup de grace, a sprinkle of coarse sea salt over the top of each innocent not-so-little scoop of dough. Chocolate and salt are old friends, suitable for mergers beyond that classic dipped pretzel business. (Seriously, try it. If you don’t like a little salt sprinkled atop a chocolate chip cookie, I’m not sure we can be friends.)

Food Blog December 2014-0966Food Blog December 2014-0967This is a big cookie. I like it that way, because it means the brownie chunks and shards of chopped chocolate inside can be big enough to retain structural integrity. I will admit, though, that devoting almost 1/2 a cup of batter to each cookie makes for a large serving. If you were so inclined, I’m sure you could chop the additions smaller and scoop out more petite dough balls. I just… haven’t. Though I will admit to having thought hard about the opposite: smashing a scoop of vanilla ice cream between two of these monsters and giving up on eating any other food ever again. Because hey, holiday.

Next week I’ll be back with my final sauce offering for the year, and some concluding words on that project. But for now, I’ll keep it short, and wish you joy, warmth, and food as gorgeous on the tongue as it was on the plate. Or maybe more. Happy holidays, friends, no matter what you celebrate.

Food Blog December 2014-0976

Brownie chunk cookies
adapted from the Sweet Pea Bakery and Catering, via Bon Appetit magazine


Old Fashioned Brownies
Makes a 1/2 inch slab of about about 10×15 inches
5 ounces unsweetened chocolate, chopped (unless you’re lazy like me)
½ cup unsalted butter (1 stick), cubed (see parentheses above)
2 cups sugar
2 teaspoons vanilla
4 large eggs
¼ teaspoon salt
1 cup all-purpose flour


  • Preheat the oven to 350F. Line a cookie sheet with aluminum foil, leaving at least an inch overhang on all sides to lift with.
  • Create a double boiler by filling a medium pot about half full of water and setting a glass or metal bowl over the pot, being sure the bottom of the pot doesn’t touch the water. Add the chocolate and butter to the bowl, and bring the water in the pot to a bare simmer over medium heat. Stir frequently until chocolate and butter are smooth, glossy, and completely melted. Set aside to cool for at least 15 minutes.
  • When chocolate is barely warm to the touch, whisk in the sugar and vanilla. The mixture will become clumpy. Add the eggs and salt; whisk firmly until fully combined. Switch to a spatula and stir in the flour until no white streaks remain.
  • Dump and spread the batter over the prepared pan to create a thin, even layer. You may have to manipulate it quite a bit to get it to spread that far.
  • Bake in the preheated oven until a cake tester comes out with just a few moist crumbs; about 20 minutes. Cool in pan, then cover and refrigerate for a few hours or overnight.
  • To remove from the pan, lift using the foil overhang and reserve 3/4 of the slab for the cookies. Use the remainder for your own devious purposes.


Brownie chunk cookies
Makes 2½ – 3 dozen
1½ cups room temperature butter (3 sticks)
1 cup sugar
1½ cups brown sugar
1½ teaspoons vanilla
3 eggs
3 cups all-purpose flour
¾ cups bread flour
1½ teaspoons baking soda
1 teaspoon coarse sea salt, + more for sprinkling
1½ cups walnuts, toasted, then chopped
4 ounces bittersweet chocolate, chopped in chunks
¾ old-fashioned brownie slab, cut into 1-inch chunks


  • Preheat oven to 325F and line 2 baking sheets with parchment paper
  • Cream the butter in a large bowl until it is light and fluffy. Add the sugar and the brown sugar and cream again until well integrated – be sure there are no errant chunks of butter.
  • Add the vanilla and eggs to the creamed butter and sugar and mix well to combine, scraping down the sides to create a homogenous mixture.
  • Stir in the flours, baking soda, and salt to form a soft dough. Add the walnuts and chopped chocolate, stirring well to combine. Finally, gently fold in the brownie chunks – we don’t want to break them up too much.
  • Spray a ⅓ – ½ cup ice cream scoop or measuring cup with non-stick spray and use it to scoop the batter into rounds on the prepared cookie sheets, spacing them about 2 inches apart (this allowed me to fit six balls of dough on each sheet). Once spaced, press down with two fingers to flatten each ball slightly.
  • Sprinkle the top of each cookie sparingly with coarse or flaky sea salt and bake in the preheated 325F oven for 18-20 minutes, until edges of cookies are starting to turn golden and the middle is set but still very soft.
  • Cool on cookie sheets for 5 minutes, then remove to a wire rack to cool completely.

Apricot Ginger Thumbprint Cookies

Food Blog December 2014-0956Up until I was in college, almost every year my family received a heavy box a week or two before Christmas. As soon as we tore through the tape we could smell them: Nana’s cookies. Ladylocks or cream horns, nut-rolls, pizzelles, thumbprints, sometimes chocolate dipped apricots or seven layer bars; everything nestled in its own individual wrapping and ready to be devoured. And she didn’t just send them to us, but to the families of her other two children as well, and who knows who else. I’m sure she saved a few for herself and Pap – who was quite the cookie fiend – to eat as the holidays approached.

Food Blog December 2014-0943I never thought about it when I was a kid, but this must have taken her weeks to do. I can only imagine the organization that went into it – I’m sure dough was made ahead of time and frozen until she was ready to bake, and what a baking day(s) it must have been! How many cookie sheets would that be, all rotating in and out of the oven? How many measuring spoons and bags of flour and sugar and butter?

Food Blog December 2014-0941I had big plans this season. I was going to give you with a week of cookies, presenting my favorite holiday offerings with which you could grace your own dessert bar (and if you have one of those, I politely demand to be invited over). Just one cookie recipe a day, and you and I would both be set for the whole season.

Food Blog December 2014-0944Alas, as usual, that whole having a day job thing took over. Amidst the stacks of papers, however, one cookie managed to sweet talk its way through: a modest tray of thumbprints that, offered up in my department’s mailroom, disappeared in less than two hours. My people are cookie people.

Food Blog December 2014-0946Thumbprints were always included in Nana’s Christmas cookie box. Somewhere between a sugar cookie and shortbread, but with brown sugar rather than white, the soft dough gets rolled into a ball, dunked in egg whites and then coated in chopped nuts. A gentle squash in the middle of the ball gives the cookie its name, and provides a little receptacle for more sweetness – after baking, Nana always filled the little cavity of the cookie with pink or blue royal icing.

Food Blog December 2014-0948I hadn’t thought about thumbprint cookies in years, but at some point this summer, something reminded me of these pretty little sweets and I knew I wanted to make my own version. None of my relatives – good bakers all – had a copy of Nana’s recipe, but one of my aunts told me to start with Betty Crocker, and gave me a few hints about how Nana might have adapted her version. In mine, I’ve replaced the margarine I’m almost sure Nana used with butter, and gone with a fruit-based jammy chutney for the center rather than the sweet icing she favored. Apricot and crystallized ginger, chopped fine or pulverized in the food processor, cooked down with some water, some sugar, and some lemon zest create a beautiful glossy compote reminiscent of those tubs of candied fruit that show up in grocery store produce sections this time of year, but with fresher, cleaner flavor.

Food Blog December 2014-0949It has been a long time since I tasted one of Nana’s thumbprints, but my first bite of these, still warm from the oven, told me I was close. The cookie itself is buttery and crumbly, both features enhanced by its walnut coating, and not overly sweet. The apricot and ginger filling give it a spicy-sweet character that went as well with the walnuts as I’d hoped, and they are actually tastier the day after baking. My recipe wound up making a mere 2 ½ dozen cookies, which doesn’t sound like a pittance, but when I brought home an empty tray after making my offering at work, N. and I wished we’d saved more than the four cookies I’d laid aside for us.

Food Blog December 2014-0952As a friend shocked me by revealing last night, it’s only ten days till Christmas, and Hanukkah starts tomorrow already. I hope your plans are going well, and if you do have the urge to bake something sweet for someone you love, this little gem of a cookie should be hard to resist.

Food Blog December 2014-0955

Apricot Ginger Thumbprints
Adapted from Betty Crocker
Makes about 2 ½ dozen cookies
For the filling:
1 cup dried apricots
¼ cup crystallized ginger
Zest of one lemon
¾ cup water
1 tablespoon brown sugar
Pinch salt
For the dough:
½ cup brown sugar
1 cup butter, soft but not melted (2 sticks)
1 teaspoon vanilla
2 egg yolks
2 egg whites
2 cups all-purpose flour
½ teaspoon salt
1 ½ – 2 cups finely chopped walnuts


  • Make the filling first, since it will need time to cool after cooking.
  • With a sharp knife or a food processor, chop the apricots and ginger until very fine.
  • Place apricot and ginger bits in a small pot with lemon zest, water, brown sugar, and the pinch of salt. Bring to a bubble, then reduce heat to medium-low and simmer until the mixture becomes thick, 15-20 minutes. Stir occasionally.
  • When mixture is a thick, jammy consistency, remove from heat and set aside to cool completely.
  • While apricot ginger mixture cools, preheat the oven to 350F and make the cookie dough.
  • Cream the butter until light and fluffy – about 2 minutes.
  • Add the brown sugar and cream together another 2 minutes, until this, too, is light and fluffy. Add the egg yolks and vanilla, and mix well to combine.
  • Sprinkle in the flour and salt, mix well to combine into a clumpy dough approximately the consistency of wet sand.
  • If at this point the dough is too soft to work with, stow it in the fridge for 15 minutes or so to let the butter harden up a bit.
  • While the dough chills, use a fork to lightly beat the egg whites, reserving them in a small bowl.
  • Chop or process the walnuts into small crumbs.
  • When you are ready to form the cookies, use a spoon or your fingers to portion out and roll 1-inch balls of dough. Dunk each ball in the egg whites, then roll in the walnuts until well coated.
  • Place each ball on a greased or parchment-lined cookie sheet, spacing them about 2 inches apart.
  • When your cookie sheet is full, use your thumb or finger to push down into the center of each cookie ball, making a depression. That’s the thumbprint!
  • Bake at 350F for 15 minutes, until cookies are lightly golden and have swelled up.
  • Upon removing the cookies from the oven, use the back of a spoon to lightly press down on the depressed area again, as it may have puffed up during baking.
  • Let cool on cookie sheet for 1 minute, then remove to a wire rack. While still warm, fill the center with apricot ginger mixture – each cookie should fit about ½ a teaspoon of the fruit filling.
  • Cookies are best cooled completely, and only get better the second day, though I suspect they won’t last much longer than that.


Rye and Mushroom Stuffing with Chestnuts and Hazelnuts

Food Blog December 2014-0936A few months ago, my sister and her boyfriend engaged in a Whole 30 food challenge to help them feel healthier and more in control of their diets before the holiday season. As part of the challenge, and to silence naysayers convinced this would mean a barrage of boring, bland food, my sister took photos of almost every meal they ate. Some of these looked so good I was ready to hop on the bandwagon myself (though, as she admitted, going without cheese for that long was a hardship. First world problems, I know).

Food Blog December 2014-0930One dish in particular caught and held my imagination. R. called it “hazelnutted mushrooms.” The combination of two much beloved, earthy, woodsy ingredients made me think of Oregon and long for its damp autumnal glory as Los Angeles cycled through week after week of 80 degree days.

Food Blog December 2014-0929As the idea simmered in my mind, I kept thinking of other ingredients that would pair well with hazelnuts and mushrooms. Sage, certainly, with its dusty sharpness. Whiskey, to deglaze with that sear of burning honey. Maybe even chestnuts, with their curious texture and meaty sweetness.

Food Blog December 2014-0932Once chestnuts entered the picture, there was no doubt this was destined to become a stuffing. With half a loaf of dark pumpernickel rye bread in the fridge longing for an application, I took action. Butter, onions, celery, deeply caramelized mushrooms, and the crunch and odd sweetness of chestnuts bolstering the broth-moistened bread and toasted hazelnut bits. The whiskey adds just a gentle flavor and a great smell to the stuffing that backs up the flavor of the chestnuts and somehow makes them make more sense as an ingredient – I wouldn’t do without it, but you can if you wish.

Food Blog December 2014-0935You’ve likely noticed there are fewer photos here than usual – it turns out that though “brown food tastes goooood” as Anne Burrell is apt to note in her throaty growl, it doesn’t always produce the most flattering or interesting photograph. Regardless, this brown food is indeed good, and deserves your attention. Though we weren’t willing to put this on the Thanksgiving menu (we are boring sticklers, and this big a shift in the sides might cause turmoil), it has considerable promise as a winter companion to roasted meats at other cold-weather holidays, especially if you tend to go with pork or beef. I think stuffed pork chops would be a particularly nice application. We kept it simple, though, and went (almost) vegetarian, pairing moist, heaping spoonfuls with mashed sweet potatoes and salty, crispy roasted brussels sprouts.

Food Blog December 2014-0936

Rye and Mushroom Stuffing with Chestnuts and Hazelnuts
Serves 6-8 as a side
6-8 slices dark rye bread, preferably stale
¾ cup raw, unsalted hazelnuts
6 tablespoons butter
½ a red onion, diced
2 large ribs of celery, diced
¾ pound (12 ounces) crimini mushrooms, stemmed and quartered
½ cup (6-8 ounces) cooked, peeled chestnuts, roughly chopped
8-12 fresh sage leaves, minced
¼ cup whiskey (I used Jack Daniels – you use what you like, or omit it and use extra broth instead)
2 – 2 ½ cups broth, chicken or vegetable
Salt and pepper to taste (how much salt you use will depend on the sodium content of your broth)


  • Preheat your oven to 350F and position a rack in the middle slot. Fill a baking sheet with your hazelnuts. Place a wire rack in the tray (it should fit over the hazelnuts) and spread out your rye bread on a single layer atop it. Toast in the preheated oven until the bread is quite dry and the hazelnuts are starting to look slightly oily; 10-15 minutes. Remove and set aside to cool.
  • Meanwhile, heat your broth in a small pot or in the microwave – it doesn’t need to be boiling, but it should be quite hot. If it does boil, turn it down to avoid losing too much through evaporation.
  • Melt the butter in a large skillet over medium heat. Add the diced onions and celery and cook until softened and translucent; 5-8 minutes.
  • Add the mushrooms and cook for an additional 5-8 minutes, until the mushrooms have soaked up much of the moisture in the pan and are soft. They may begin to brown a bit; that’s a good thing.
  • Add the chopped chestnuts and the sage and let them warm through for 1-2 minutes.
  • While the vegetables are cooking, chop your hazelnuts into rough chunks (it’s wise to wait until they are cool enough to handle), then add them to the vegetable mixture in the skillet.
  • Turn off the heat and immediately add the whiskey, which should bubble furiously when it hits the surface of the pan. Stir to combine – much of the whiskey will evaporate.
  • Tear or cut the rye bread into small pieces or cubes. It should be quite dry. Add the bread cubes to the pan and stir well to combine.
  • Now, add 2 cups of the hot broth and stir to combine. If the bread still seems fairly dry, add the remaining ½ cup. Season with salt and pepper to taste, then put a lid on the skillet and let the mixture sit for five minutes to allow the bread to absorb the broth.
  • After five minutes (or more – allowing it to sit a while at this stage is fine), deposit the stuffing mixture into a greased 9×9 inch baking dish, spread or pat into an even layer, and bake in your preheated 350F oven for 30-35 minutes, until the top layer is crusty but the interior is still nice and moist.
  • Serve hot, as an accompaniment for meat or veg.

Seared Scallops with Beurre Blanc and Parsnip Puree

Food Blog November 2014-0893It will come as no surprise to you that I am late with this post. I mean, here it is Monday and it’s up and all that, but a quick check of the calendar belies my appearance of timeliness. See, it’s December. It’s December and this is a sauce recipe I owe you from last month. By my twisted, grasping-for-an-apology way of thinking, though, I ate it in November… so that totally counts, right?

Food Blog November 2014-0872This time around, we’re back to butter. There are a lot of butter based sauces, friends. A lot. This one, a beurre blanc, is a sauce made by reducing white wine with aromatics and sometimes a bit of lemon juice or vinegar, then whisking in an unbelievable amount of butter until the sauce turns into this rich, fluffy, thick, pale yellow ambrosia that belongs draped over every kind of substance imaginable.

Food Blog November 2014-0875Food Blog November 2014-0879Most of these sauces have dubious origin stories. Who wouldn’t want to be responsible for a well-loved buttery emulsion as appropriate to green beans as to seared fish? Cooking lore holds, however, that beurre blanc was created by accident – an unintentional simplification of béarnaise sauce that caught on and became beloved. Julia Child writes about it with the affection you might expect for a sauce that is, in her words, essentially “warm flavored butter.”

Food Blog November 2014-0880Food Blog November 2014-0881This is not Julia Child’s recipe. For ease, and for clarity, I went with Alton Brown’s. Mine is a slight adaptation – I halved the recipe, and I didn’t have the traditional shallot so I simply omitted it. Alton’s sauce uses lemon juice instead of white wine vinegar, which suggests it was meant to go with fish or seafood, and this decided my pairings for me. Lemon and butter sauce? Pass the scallops.

Food Blog November 2014-0870The silkiness of this sauce is perfect with shellfish. I can imagine dipping lush hunks of lobster into it. I can imagine a drizzle over soft-shell crab. I would be more than satisfied with a pool underneath a piece of halibut or cod. But scallops won the day for me. These perfect little cylinders, meaty and mild and almost sweet, develop a perfect crust when you pat them dry, season them aggressively, and sear them golden-brown on top and bottom. When you douse them with sauce, or float them in a puddle of it, the buttery smoothness somehow elevates them even more.

Food Blog November 2014-0882Because I was eating alone, I decided to play with plating a bit more than usual. As I see it, there are many ways to serve this dinner. I tried two options. First, and a bit more everyday, is a lovely heap of parsnip puree, a few scallops nestled atop it, and a small pile of steamed slender green beans alongside. A healthy drizzle of sauce, and you are ready to serve.

Food Blog November 2014-0883Food Blog November 2014-0884To amp up the presentation though, I grabbed a long rectangular dish. A few small bundles of green beans at intervals along the plate, small mounds of puree between them, and a tender scallop balanced on each spoonful of puree. Sauce can be applied to the top of each scallop, or poured around the edges of the plate just before serving.

Food Blog November 2014-0893

Seared Scallops with Beurre Blanc and Parsnip Puree
Serves 2

For the parsnip puree:

3-4 large parsnips, peeled and cut into 1-inch chunks
2-3 cloves garlic, smashed and peeled
1 cup milk
salt and pepper to taste
2 tablespoons butter
1 tablespoon chives, finely minced
For the beurre blanc:
4 ounces dry white wine
½ tablespoon lemon juice
½ tablespoon heavy cream
6 tablespoons cold, cubed butter
salt to taste
For the scallops:
2 tablespoons olive oil
salt and pepper to sprinkle
12 large sea scallops, at room temperature


  • Place the milk, garlic cloves, and parsnip chunks into a medium pot over medium heat. The moment the milk begins to bubble, reduce the heat to low and simmer until the parsnips are tender, 10-12 minutes.
  • Remove from heat and season to taste with salt and pepper. Stir in the butter until melted.
  • Blend until very smooth using an immersion blender, a regular blender, or a food processor. Just before serving, fold in the chives.
  • While the milk for the parsnips is heating up, make the beurre blanc.
  • In a small pot, heat the wine and lemon juice to a boil over medium high heat. Reduce the liquid to a bare tablespoon.
  • Turn the heat down to medium and add the half tablespoon of cream, which will help stabilize the mixture.
  • As soon as the liquid begins to bubble again, turn the heat down as low as it will go and begin adding the butter, one cube at a time, whisking until completely integrated into the liquid before adding the next cube.
  • Continue adding the butter, whisking constantly, until it is all integrated. Turn off the heat and continue whisking until the sauce is fully emulsified and has become a fluffy, pale yellow puddle slightly thicker than melted ice cream.
  • Stow the finished sauce in a thermos to stay warm while you cook the scallops.
  • Unwrap your scallops and pat them dry with a paper towel. If they are wet, they will not sear well. Sprinkle both sides of each scallop with salt and pepper.
  • In a large skillet, heat the olive oil over medium high heat. When it is shimmering in the pan, carefully add the scallops in a single layer, taking care not to let them touch one another. This seems fussy, but it is essential for getting a good sear.
  • Once you have placed each scallop, don’t touch them for 2 full minutes. Then, carefully lift one and check the bottom – it should have a deep bronzed crust. If this is the case, flip over each scallop and cook another 2 minutes. If it isn’t deeply bronzed yet, let it cook another 30 seconds before checking again.
  • When the scallops are cooked, they should feel slightly springy but resistant, like a firm mattress. Ideally, they should be the palest, palest pink in the center as in my photo above – they will continue to cook while you plate the rest of the meal.
  • To serve, arrange as desired with scallops atop or beside the parsnip puree, and the beurre blanc sauce drizzle over the top or puddled on the side. Accompany the dish with steamed green beans or pencil asparagus, if desired.