Lambikopita Burgers

Food Blog April 2014-3562
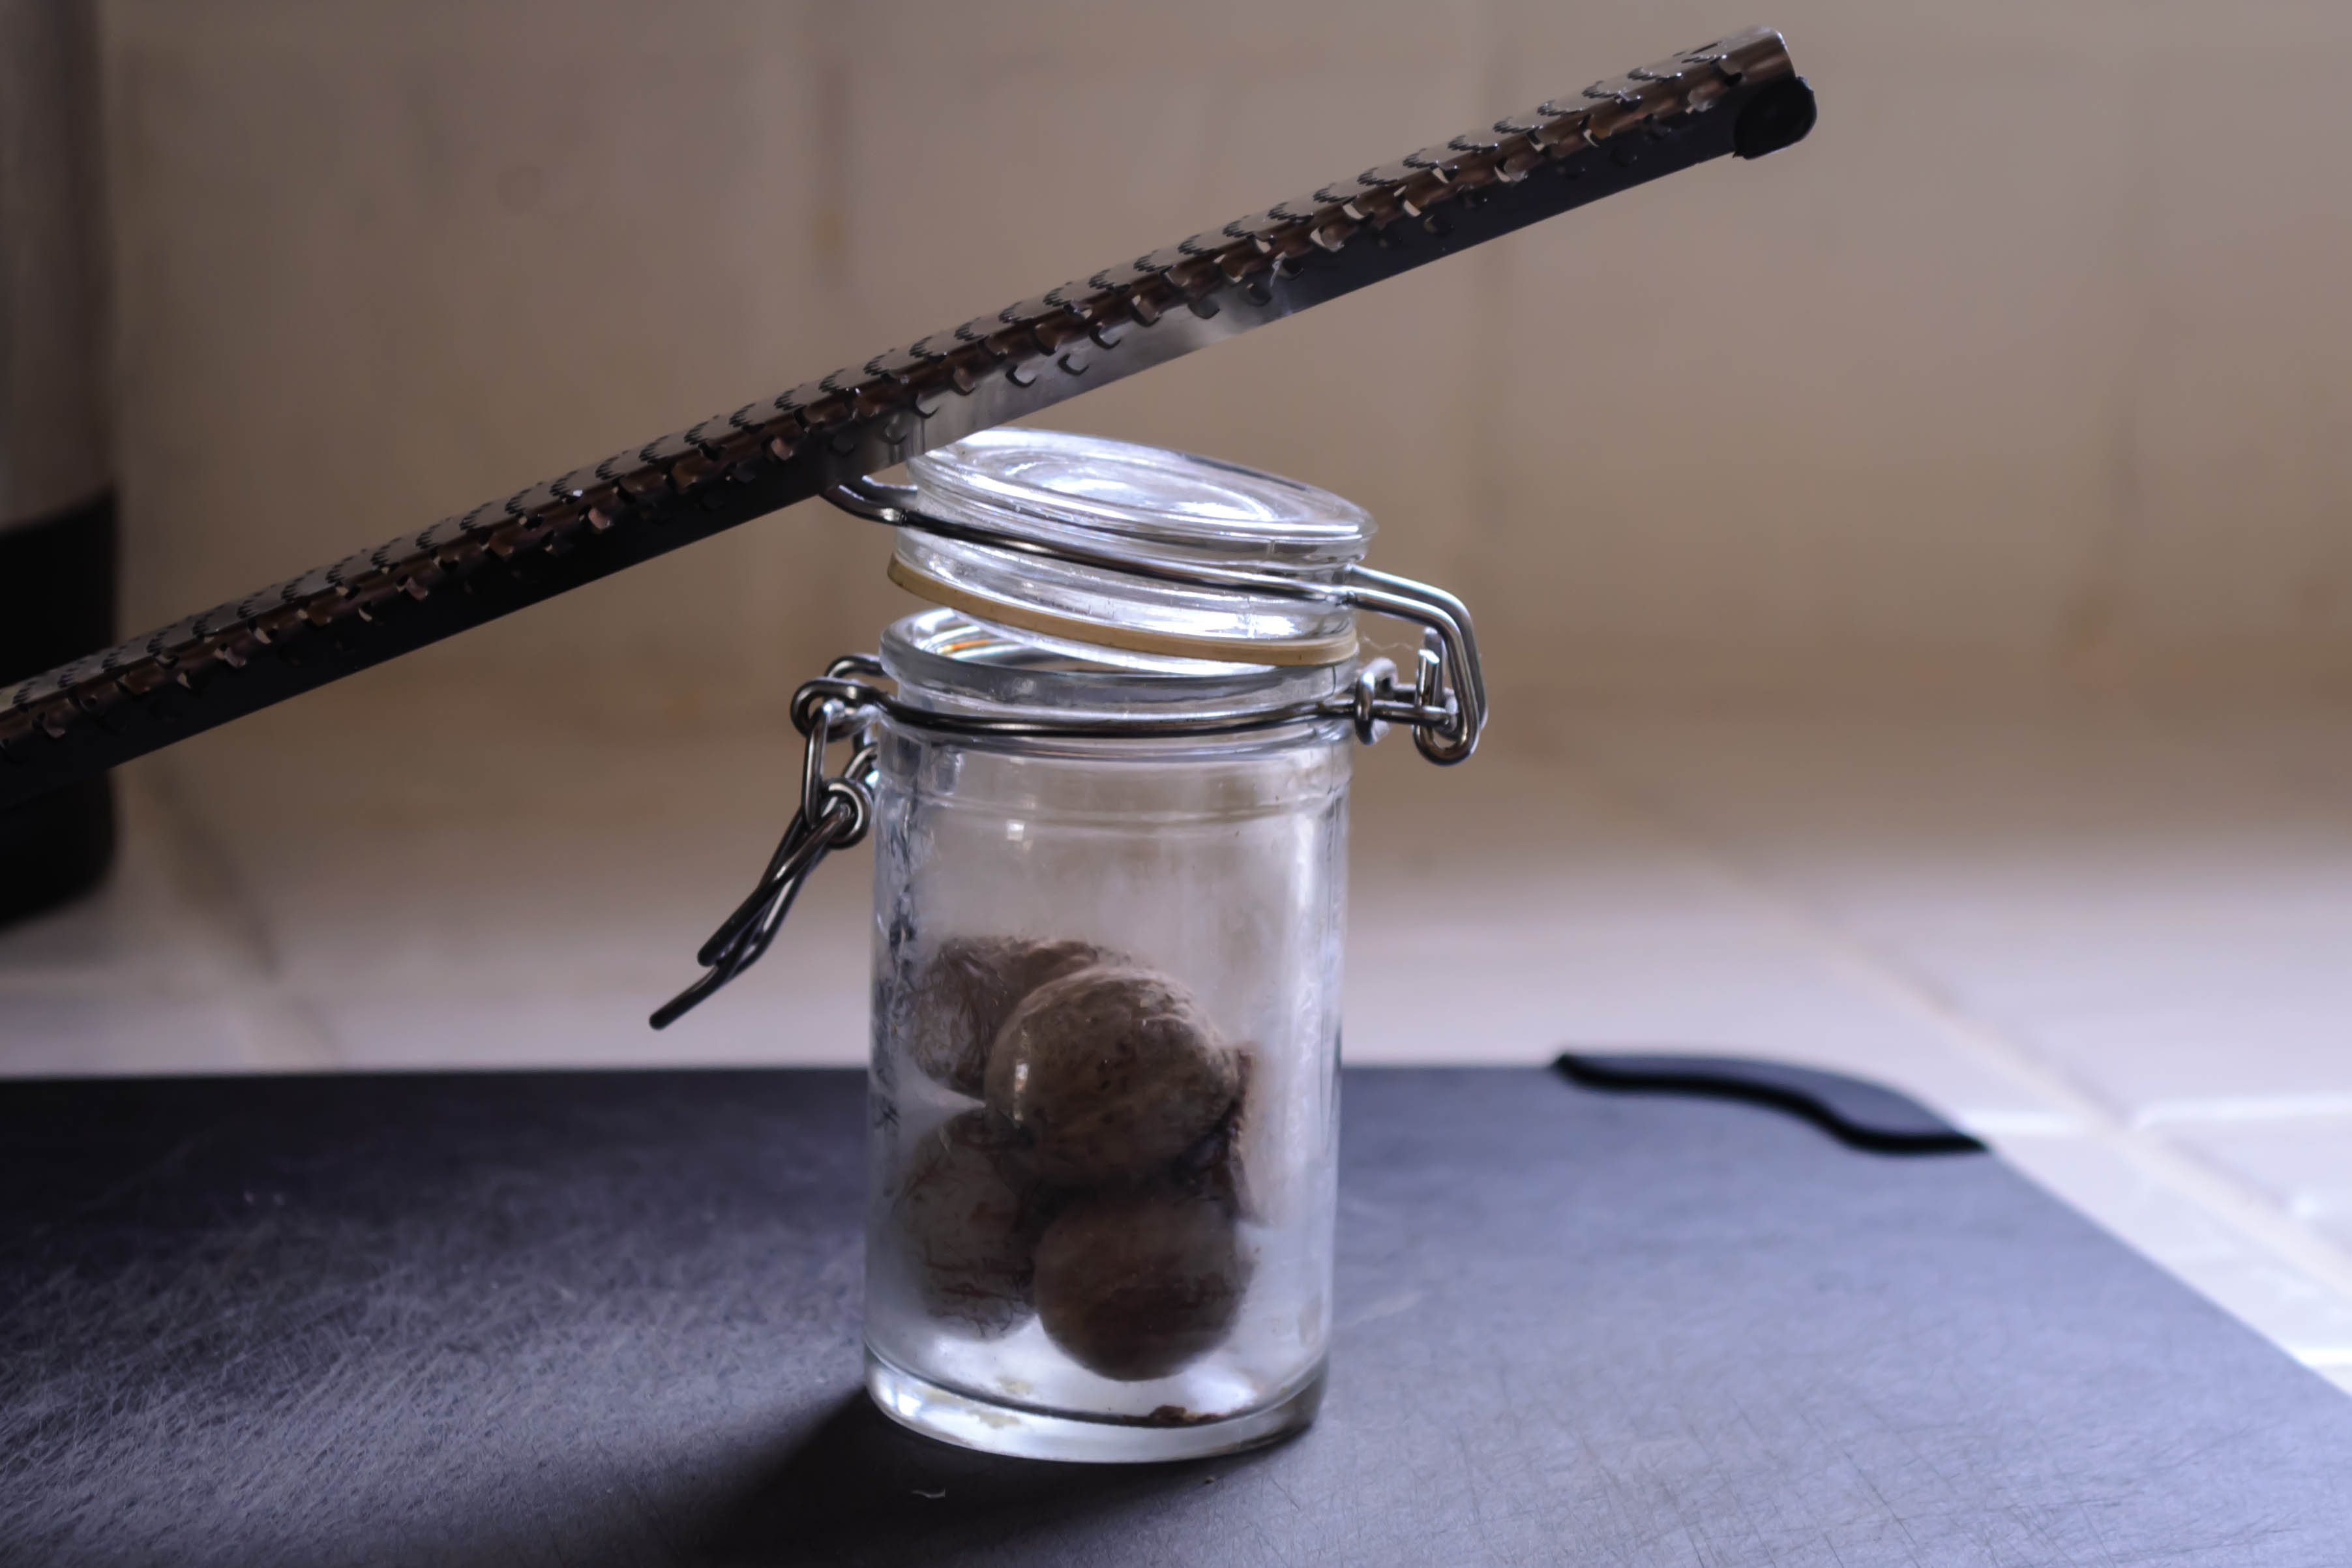
My bachelor habits are unusual. I typically don’t, when I’m making dinner just for my lonesome, go for what’s quick and easy. In fact, I use the rare occasions when I’m dining solo to catch up on cooking and consuming foods N. is not fond of. So when he was out of town last week visiting his parents, I took advantage of the evening alone to rendezvous with one of his major food rivals: lamb.
Food Blog April 2014-3574
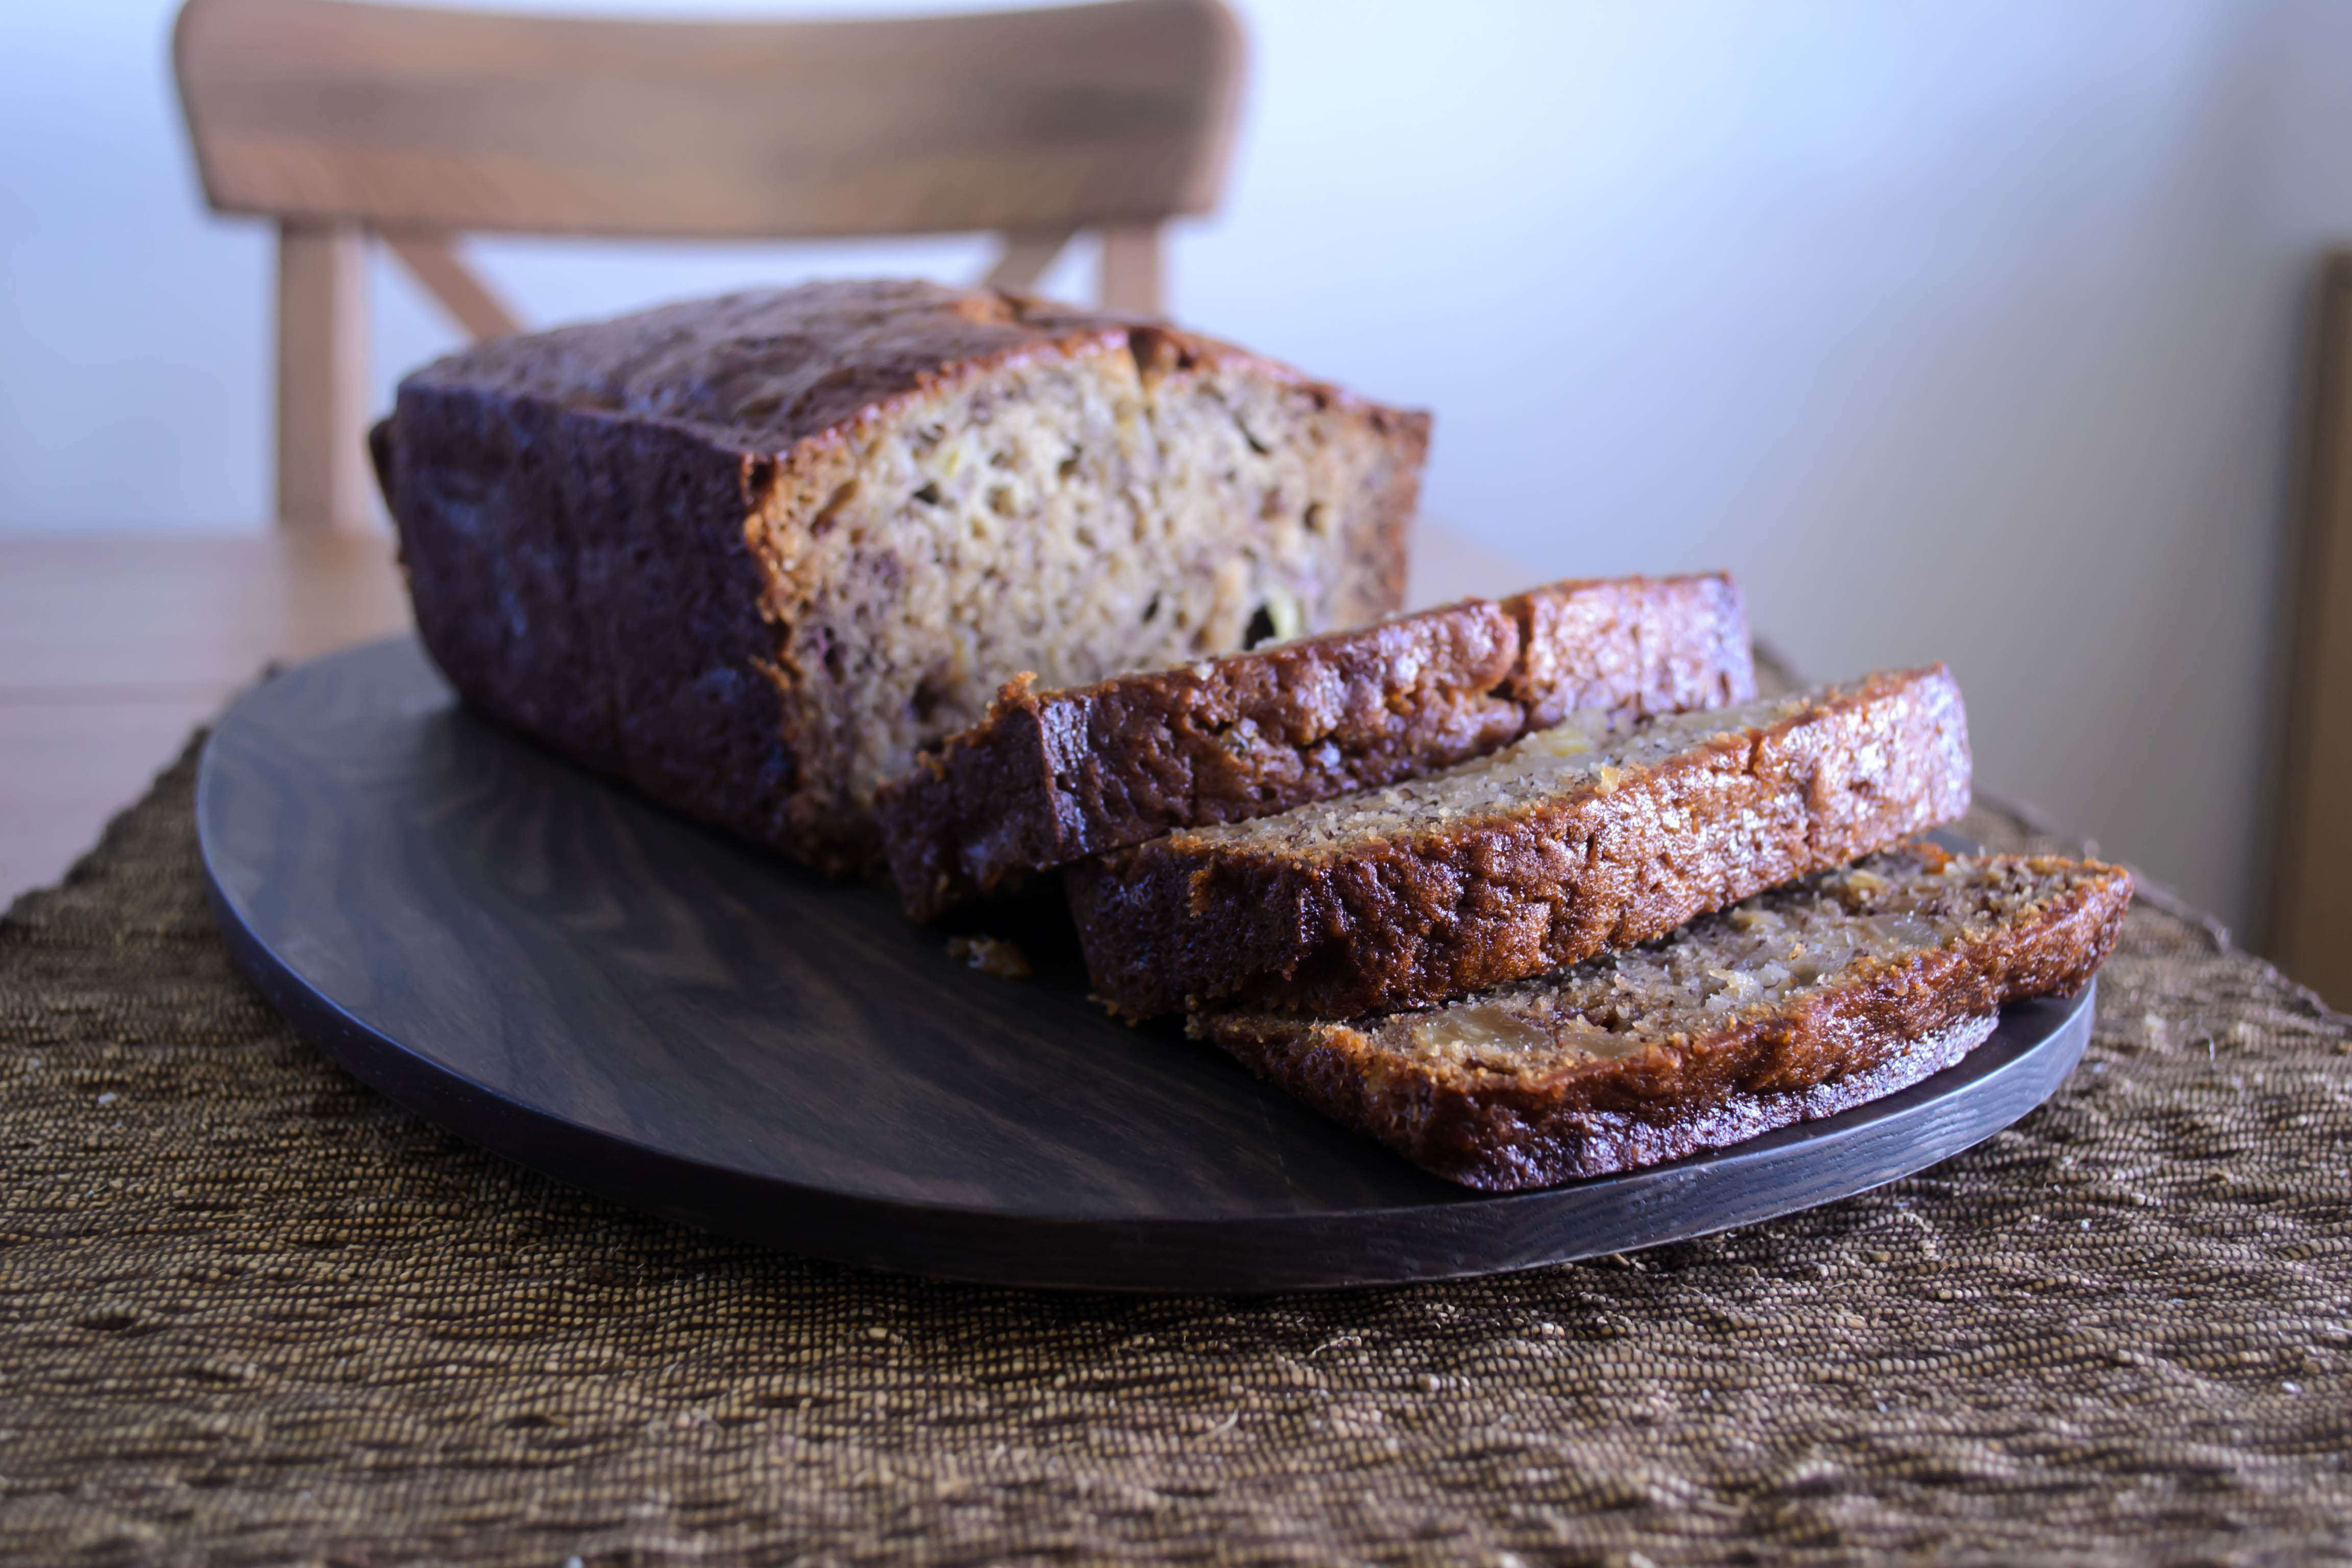
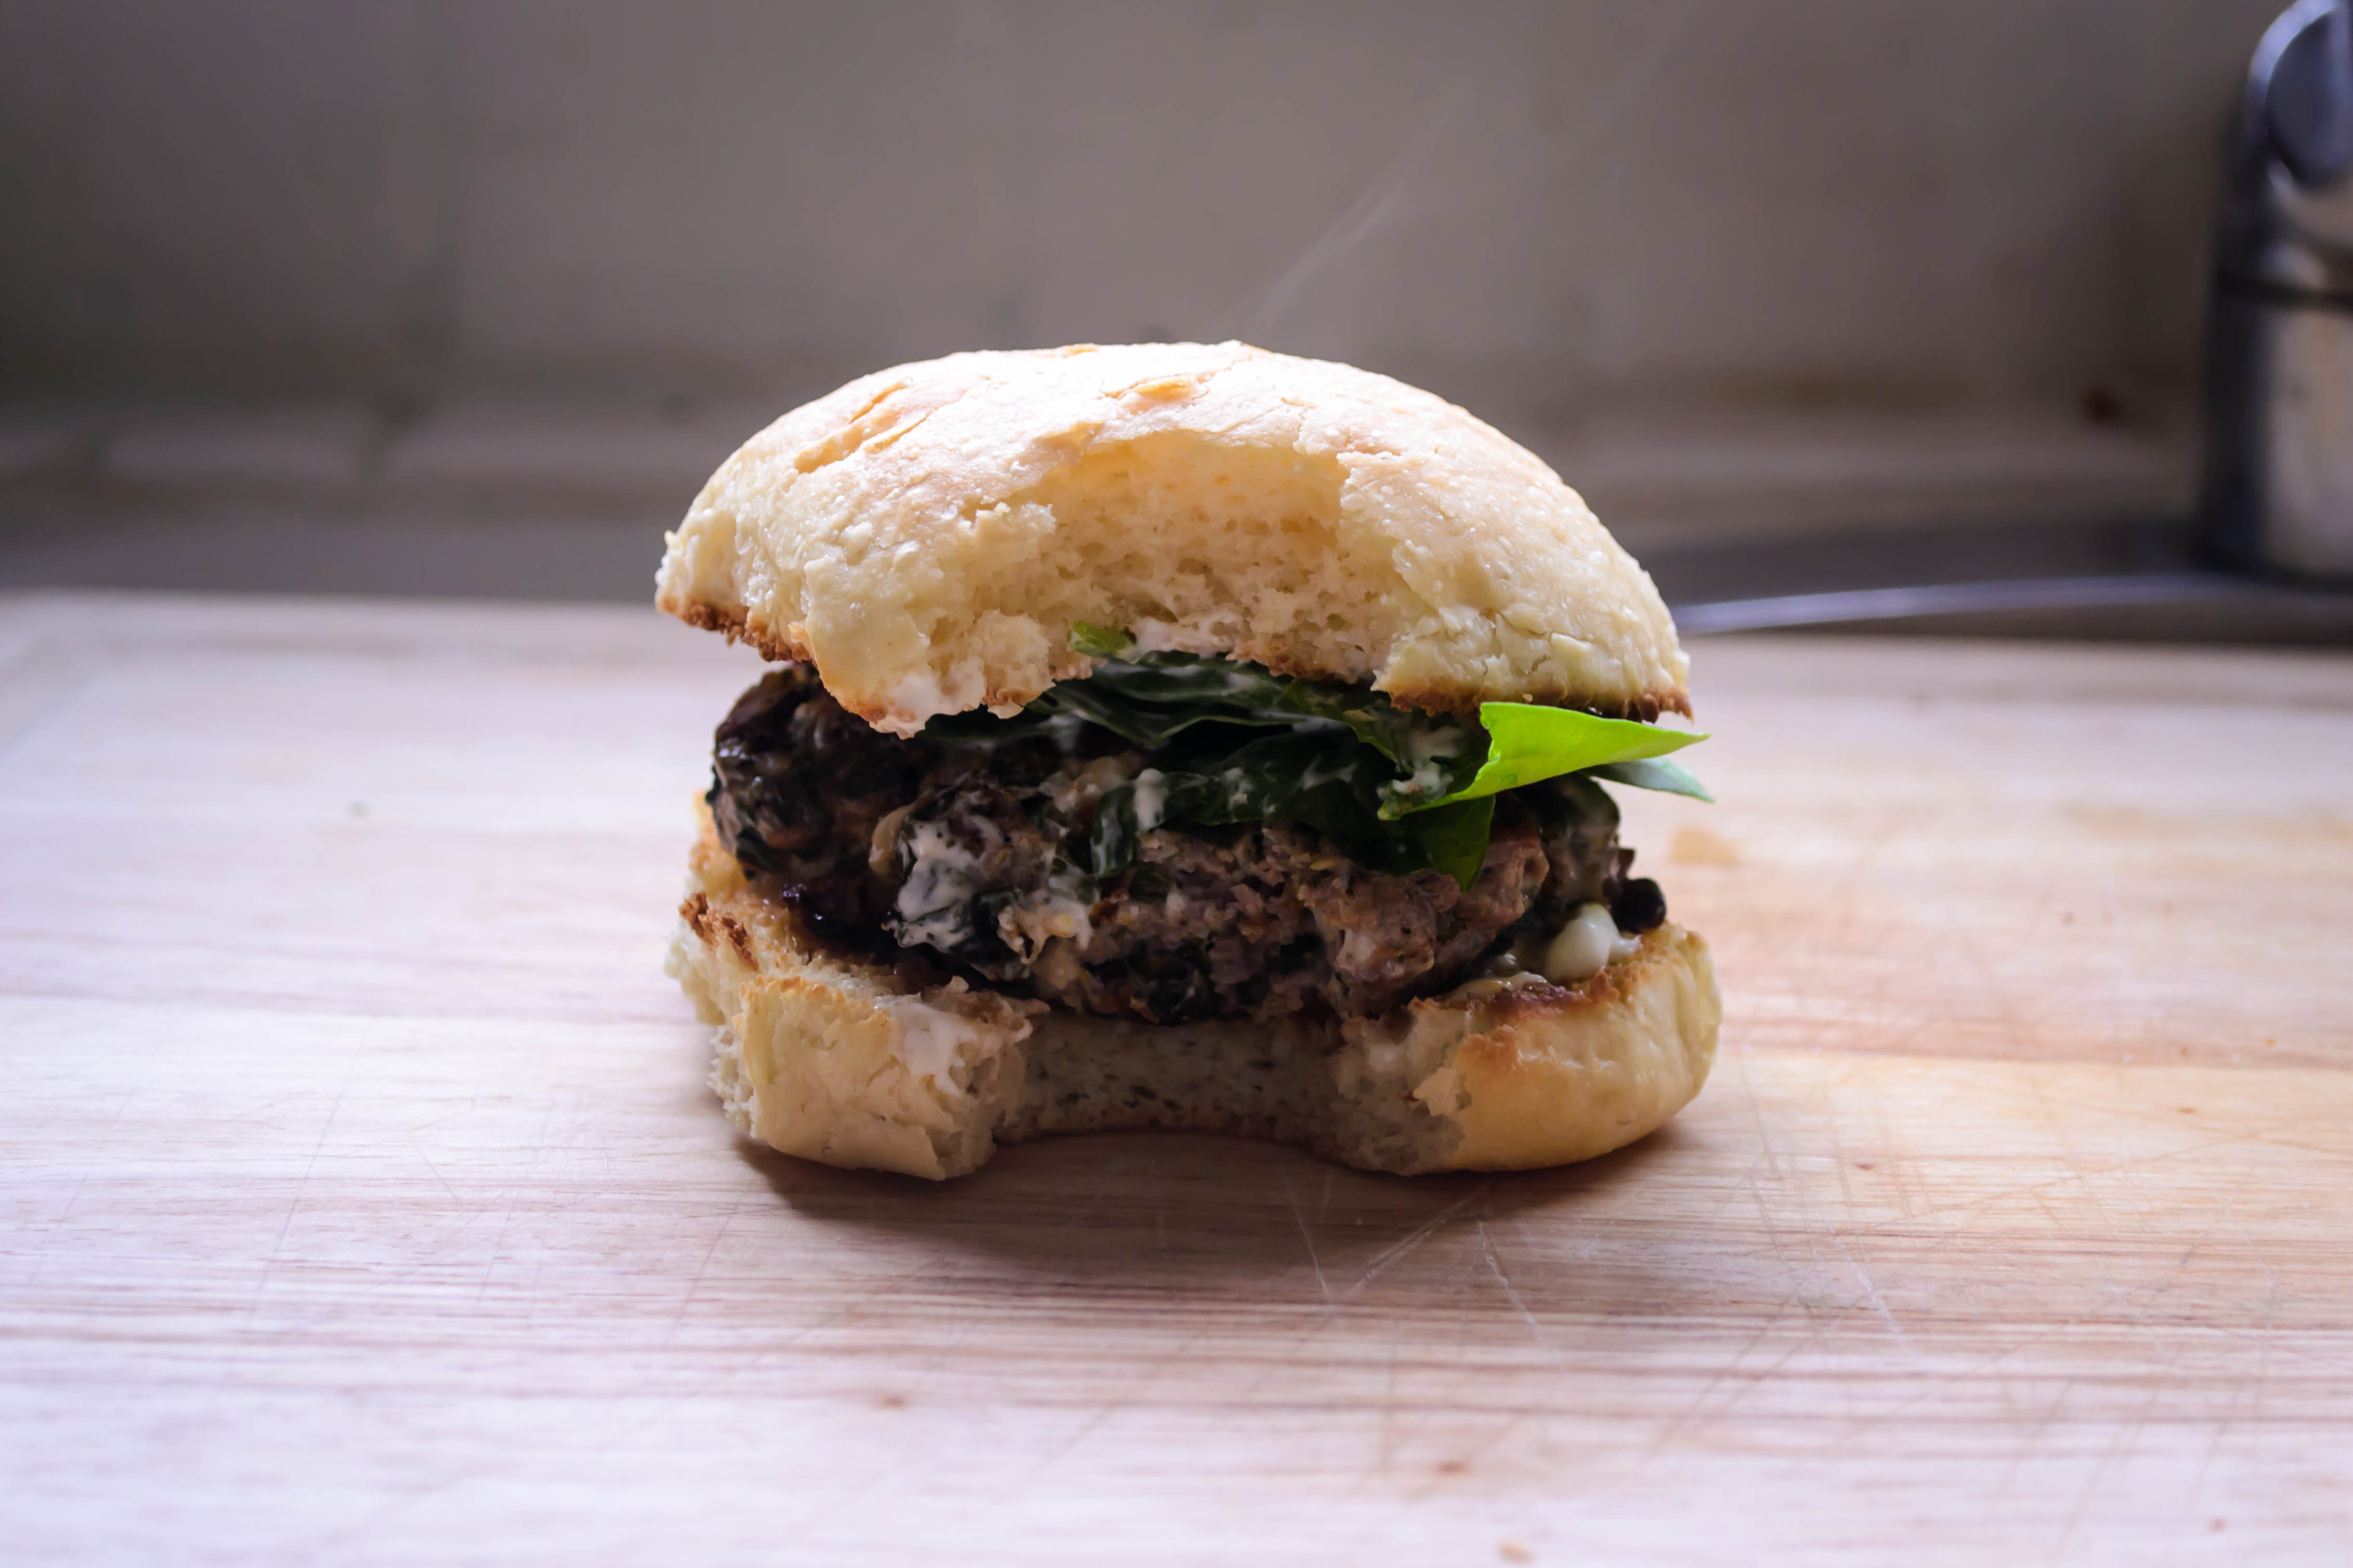
Most of the time (at least lately) I try to shy away from cute titles – I want to make sure you know what you’re getting – but this one was too clever not to use. This is a riff on a dish my sister made for us for Christmas (hi, R!), a version of spanikopita with crumbles of ground lamb and gooey shreds of mozzarella mixed in. Since my first thought upon tasting it was “more,” and then “more, more,” I thought a burger might be the answer. More of everything!
Food Blog April 2014-3544Food Blog April 2014-3548Food Blog April 2014-3551The delightful thing about spanikopita, to me, is the burst of briny saltiness from the hunks of cheese that muddle reluctantly into softness amid the spinach. I love the dill, and I love the earthy hit of nutmeg. Lately I’ve been adding lemon zest to the mix as well, for sour brightness to contrast the salty tang of the cheese.
Food Blog April 2014-3549Food Blog April 2014-3550
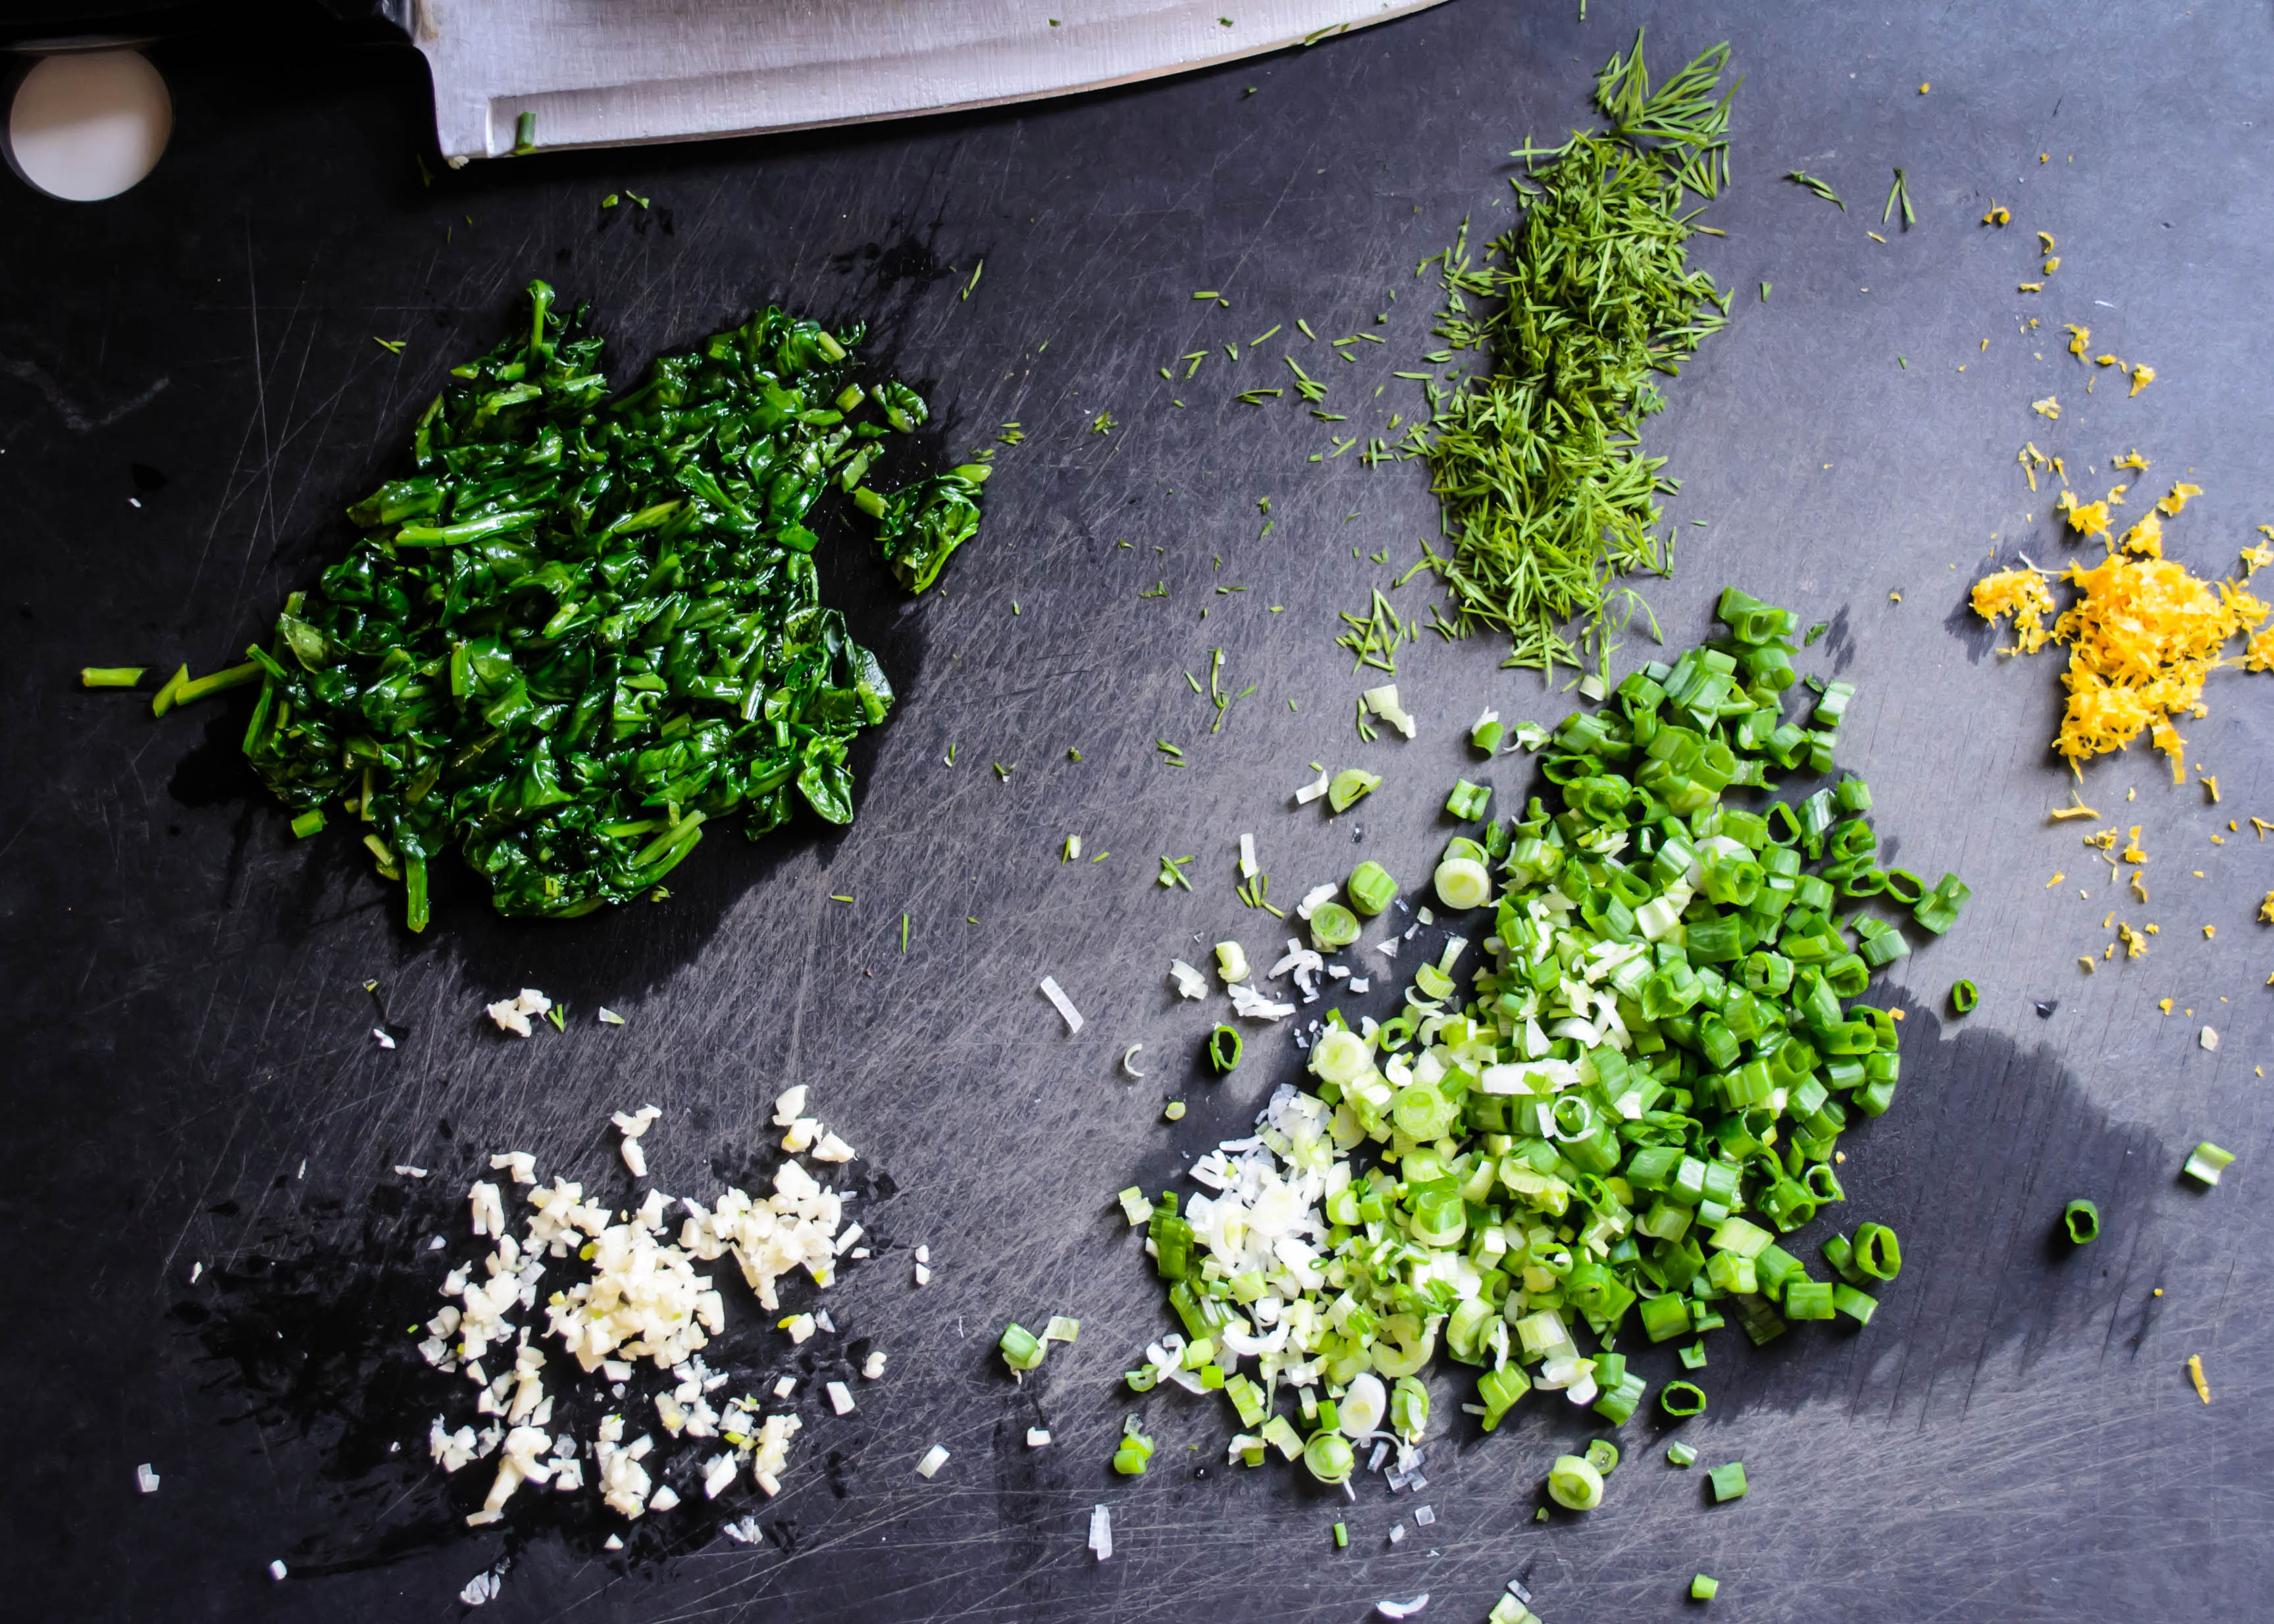
All this, then, would have to go into my lamb burger. I’m not a big fan of massive additions to burgers. They seem, too often, fussy and unnecessary. That’s what toppings are for. But here, I think the incorporation works incredibly well for several reasons. First, lamb has a bit of a gamey flavor. Some of us like that, but for those who don’t, the additions of extra ingredients mean it’s a mild gaminess, not overwhelming. Second, it’s very easy for ground lamb to dry out. Here, where I’ve incorporated not just cheese but a sodden handful of sautéed fresh spinach, producing a dry product becomes a challenge. Third, but no less important, the addition of these extra ingredients bulks up the burgers, making the lamb – not nearly as cheap as everyday ground beef – stretch a bit further. This isn’t like a crab cake stretch, though, where your product is so drenched in seasoned bread crumbs you forget what kind of meat is supposed to be in there. All of these flavors dance well with the lamb, enhancing rather than masking it.
Food Blog April 2014-3554Food Blog April 2014-3558Food Blog April 2014-3556
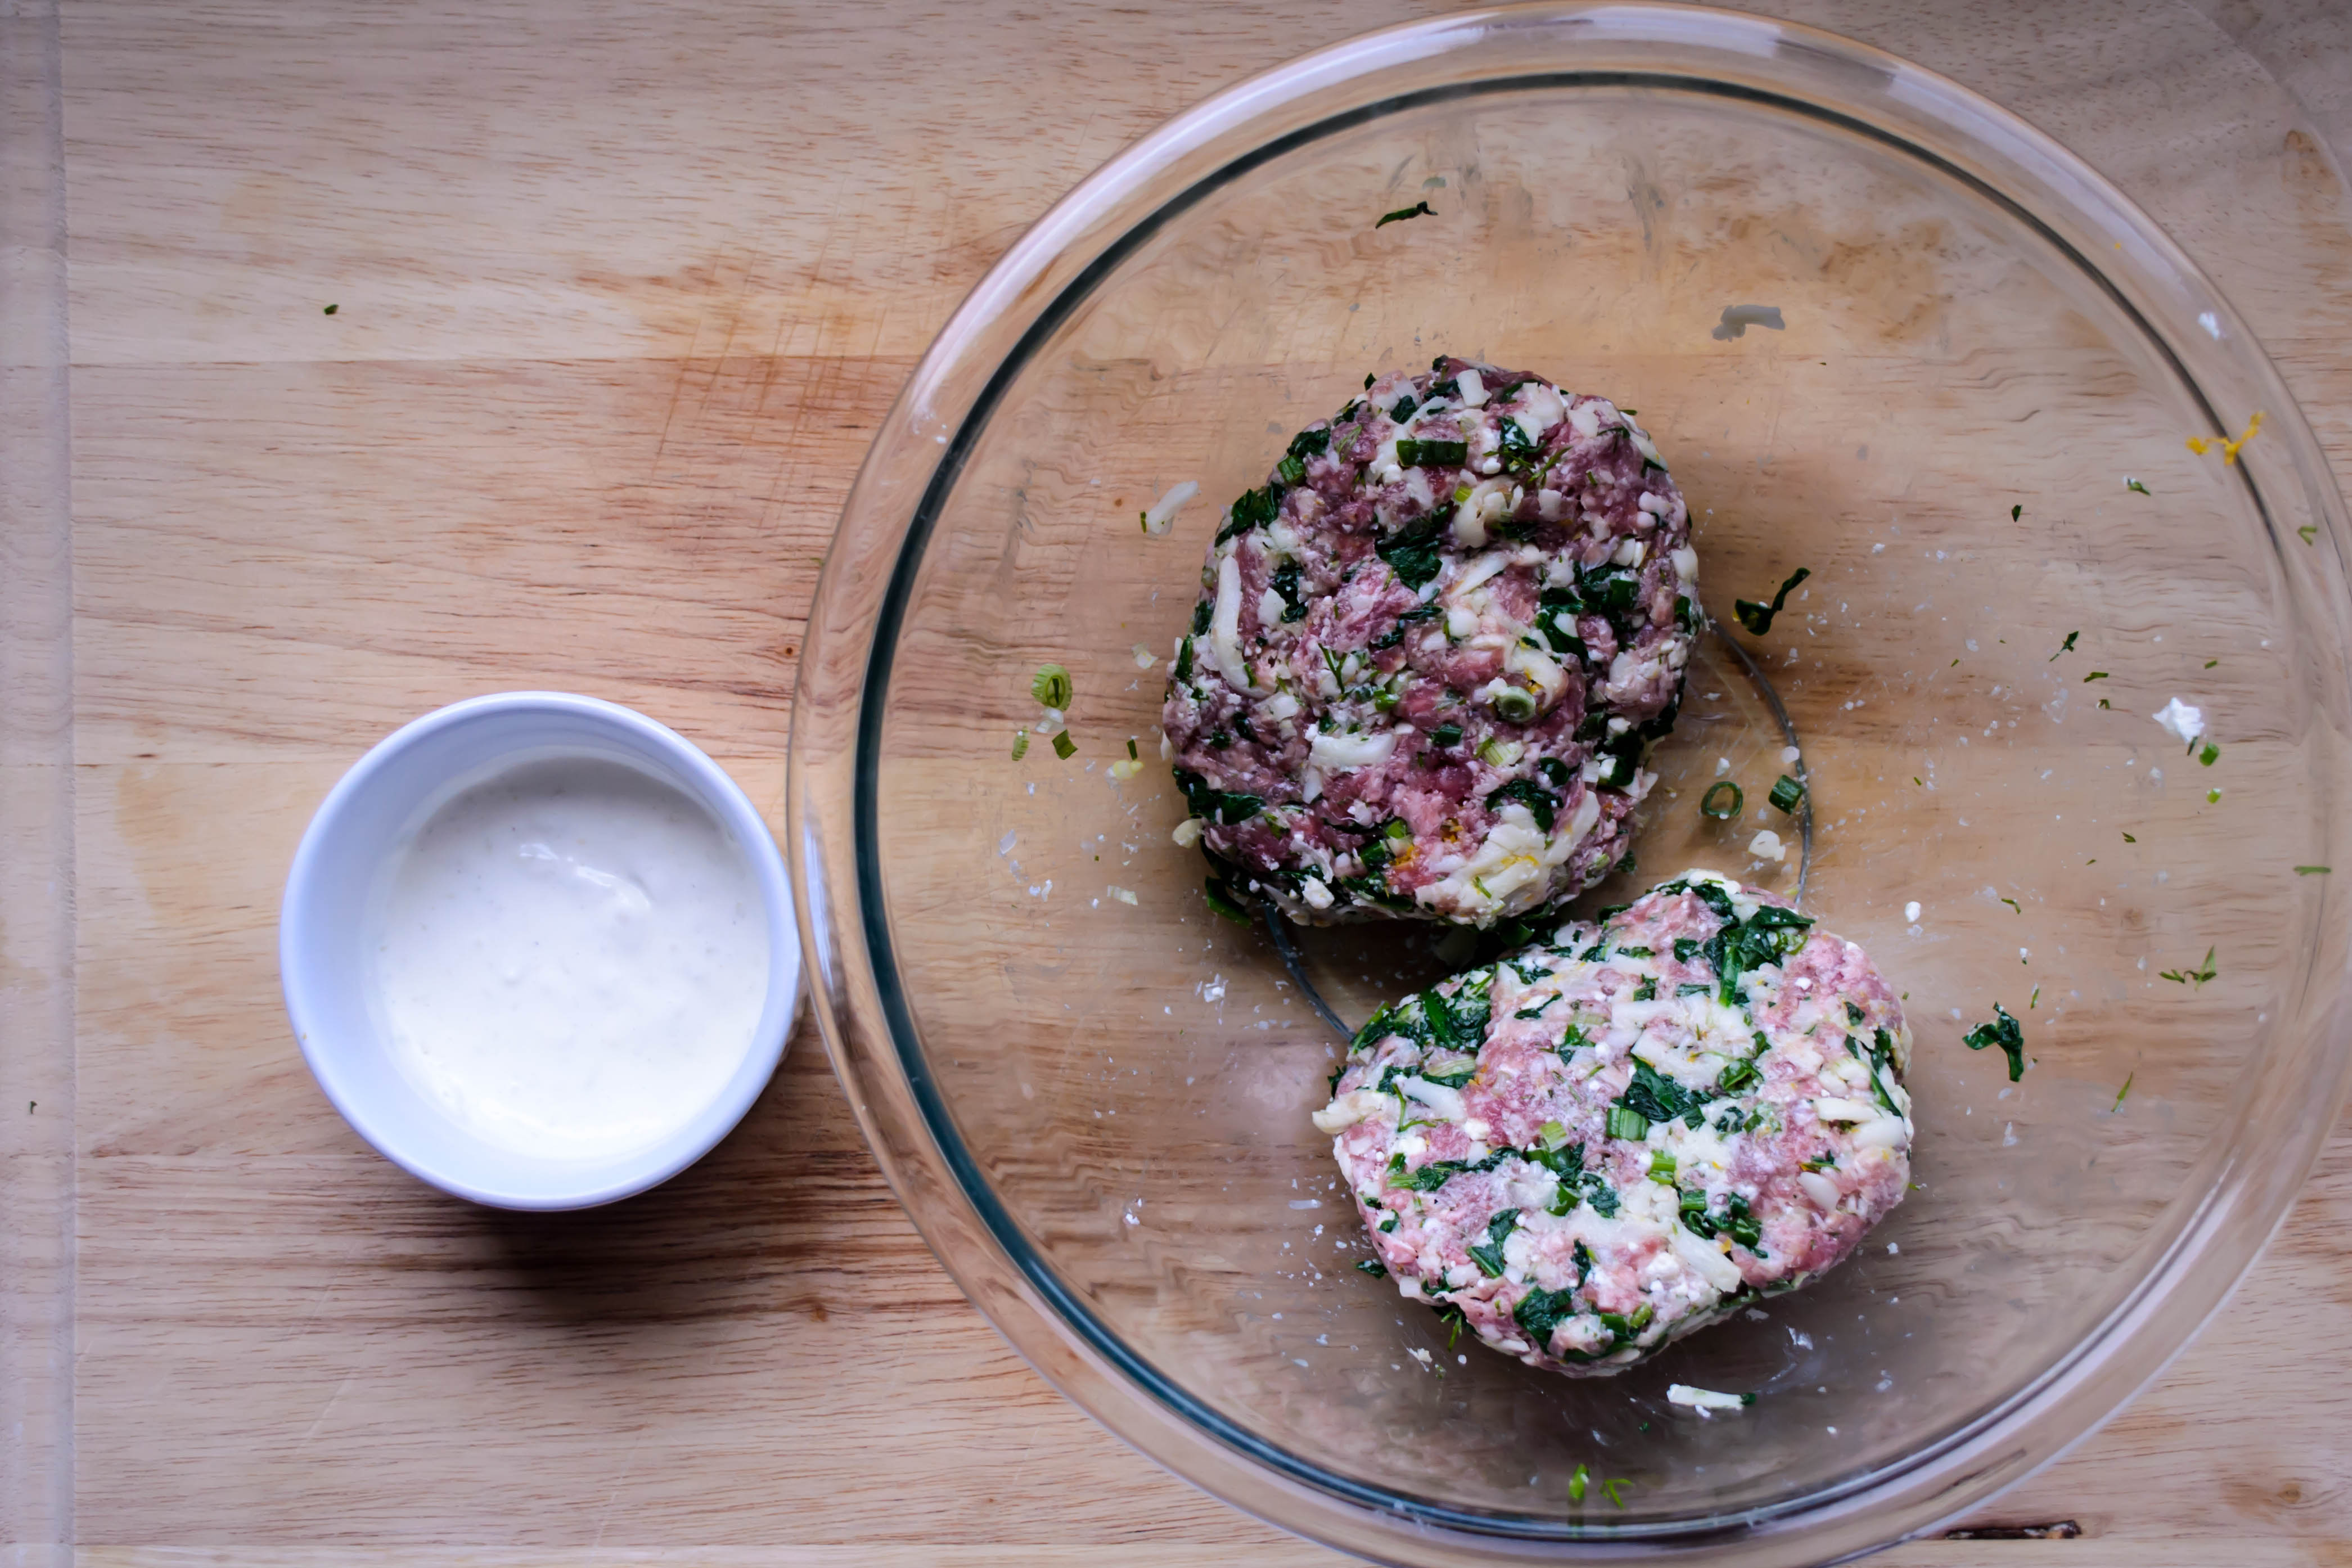
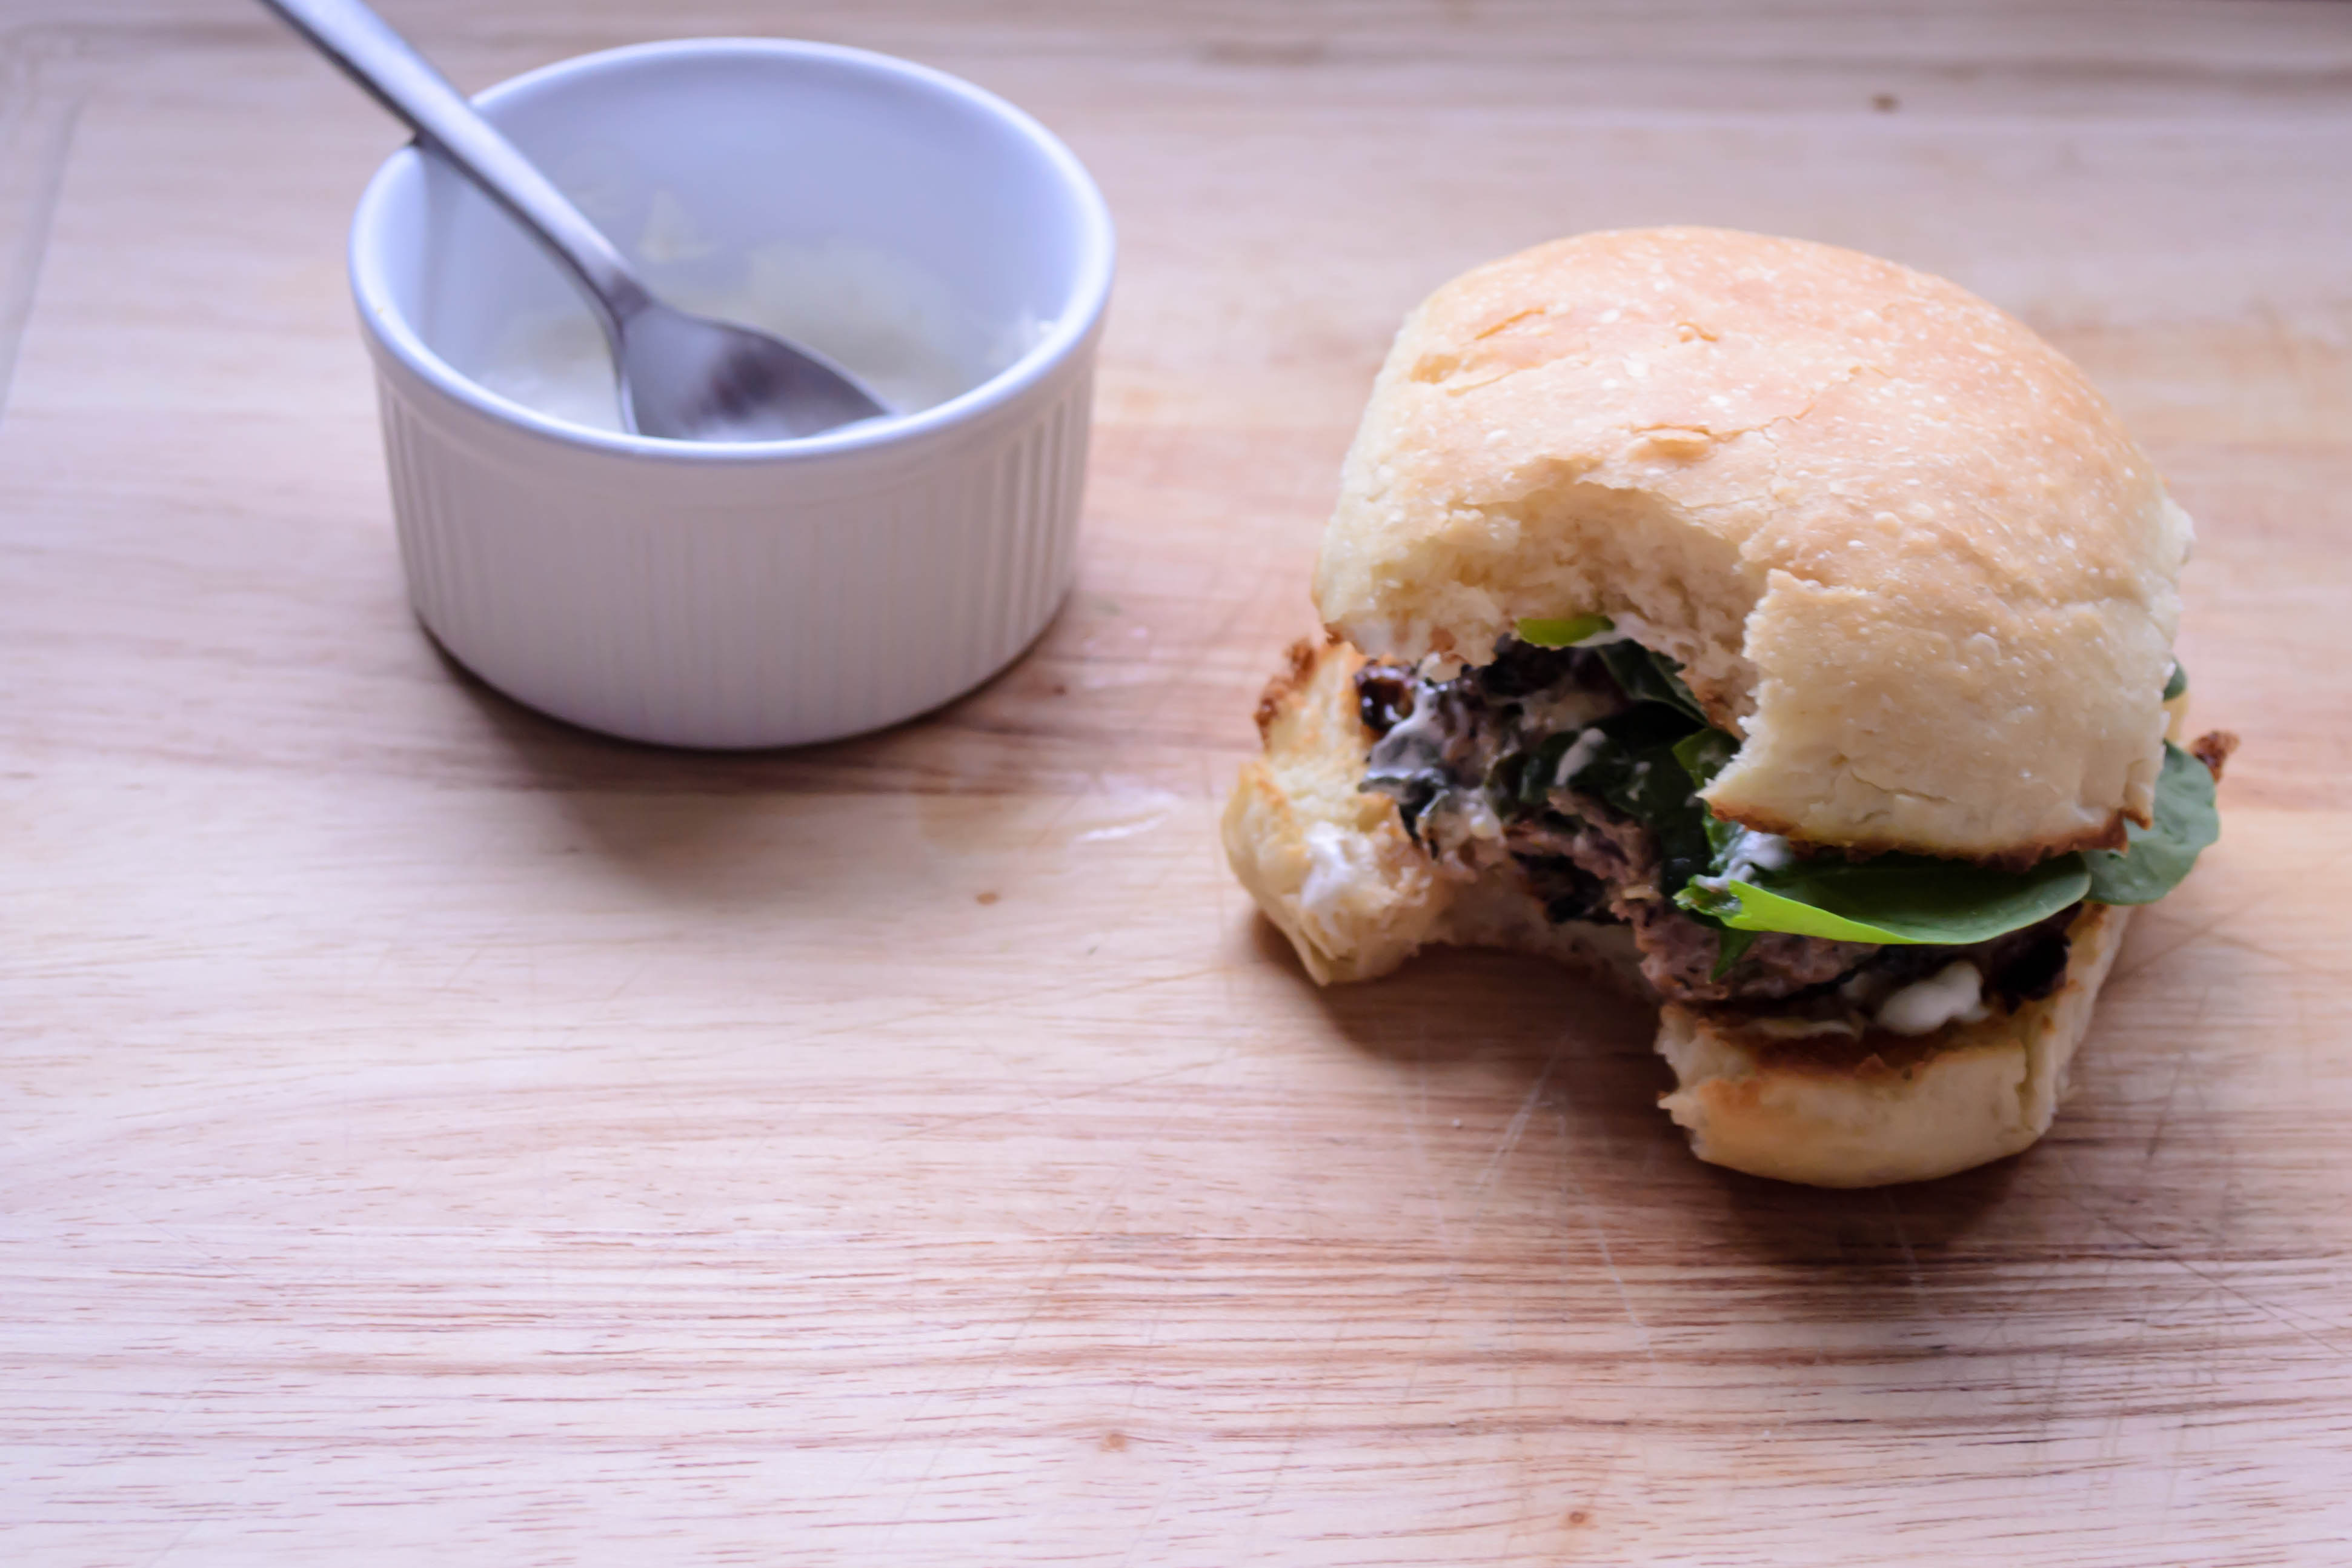
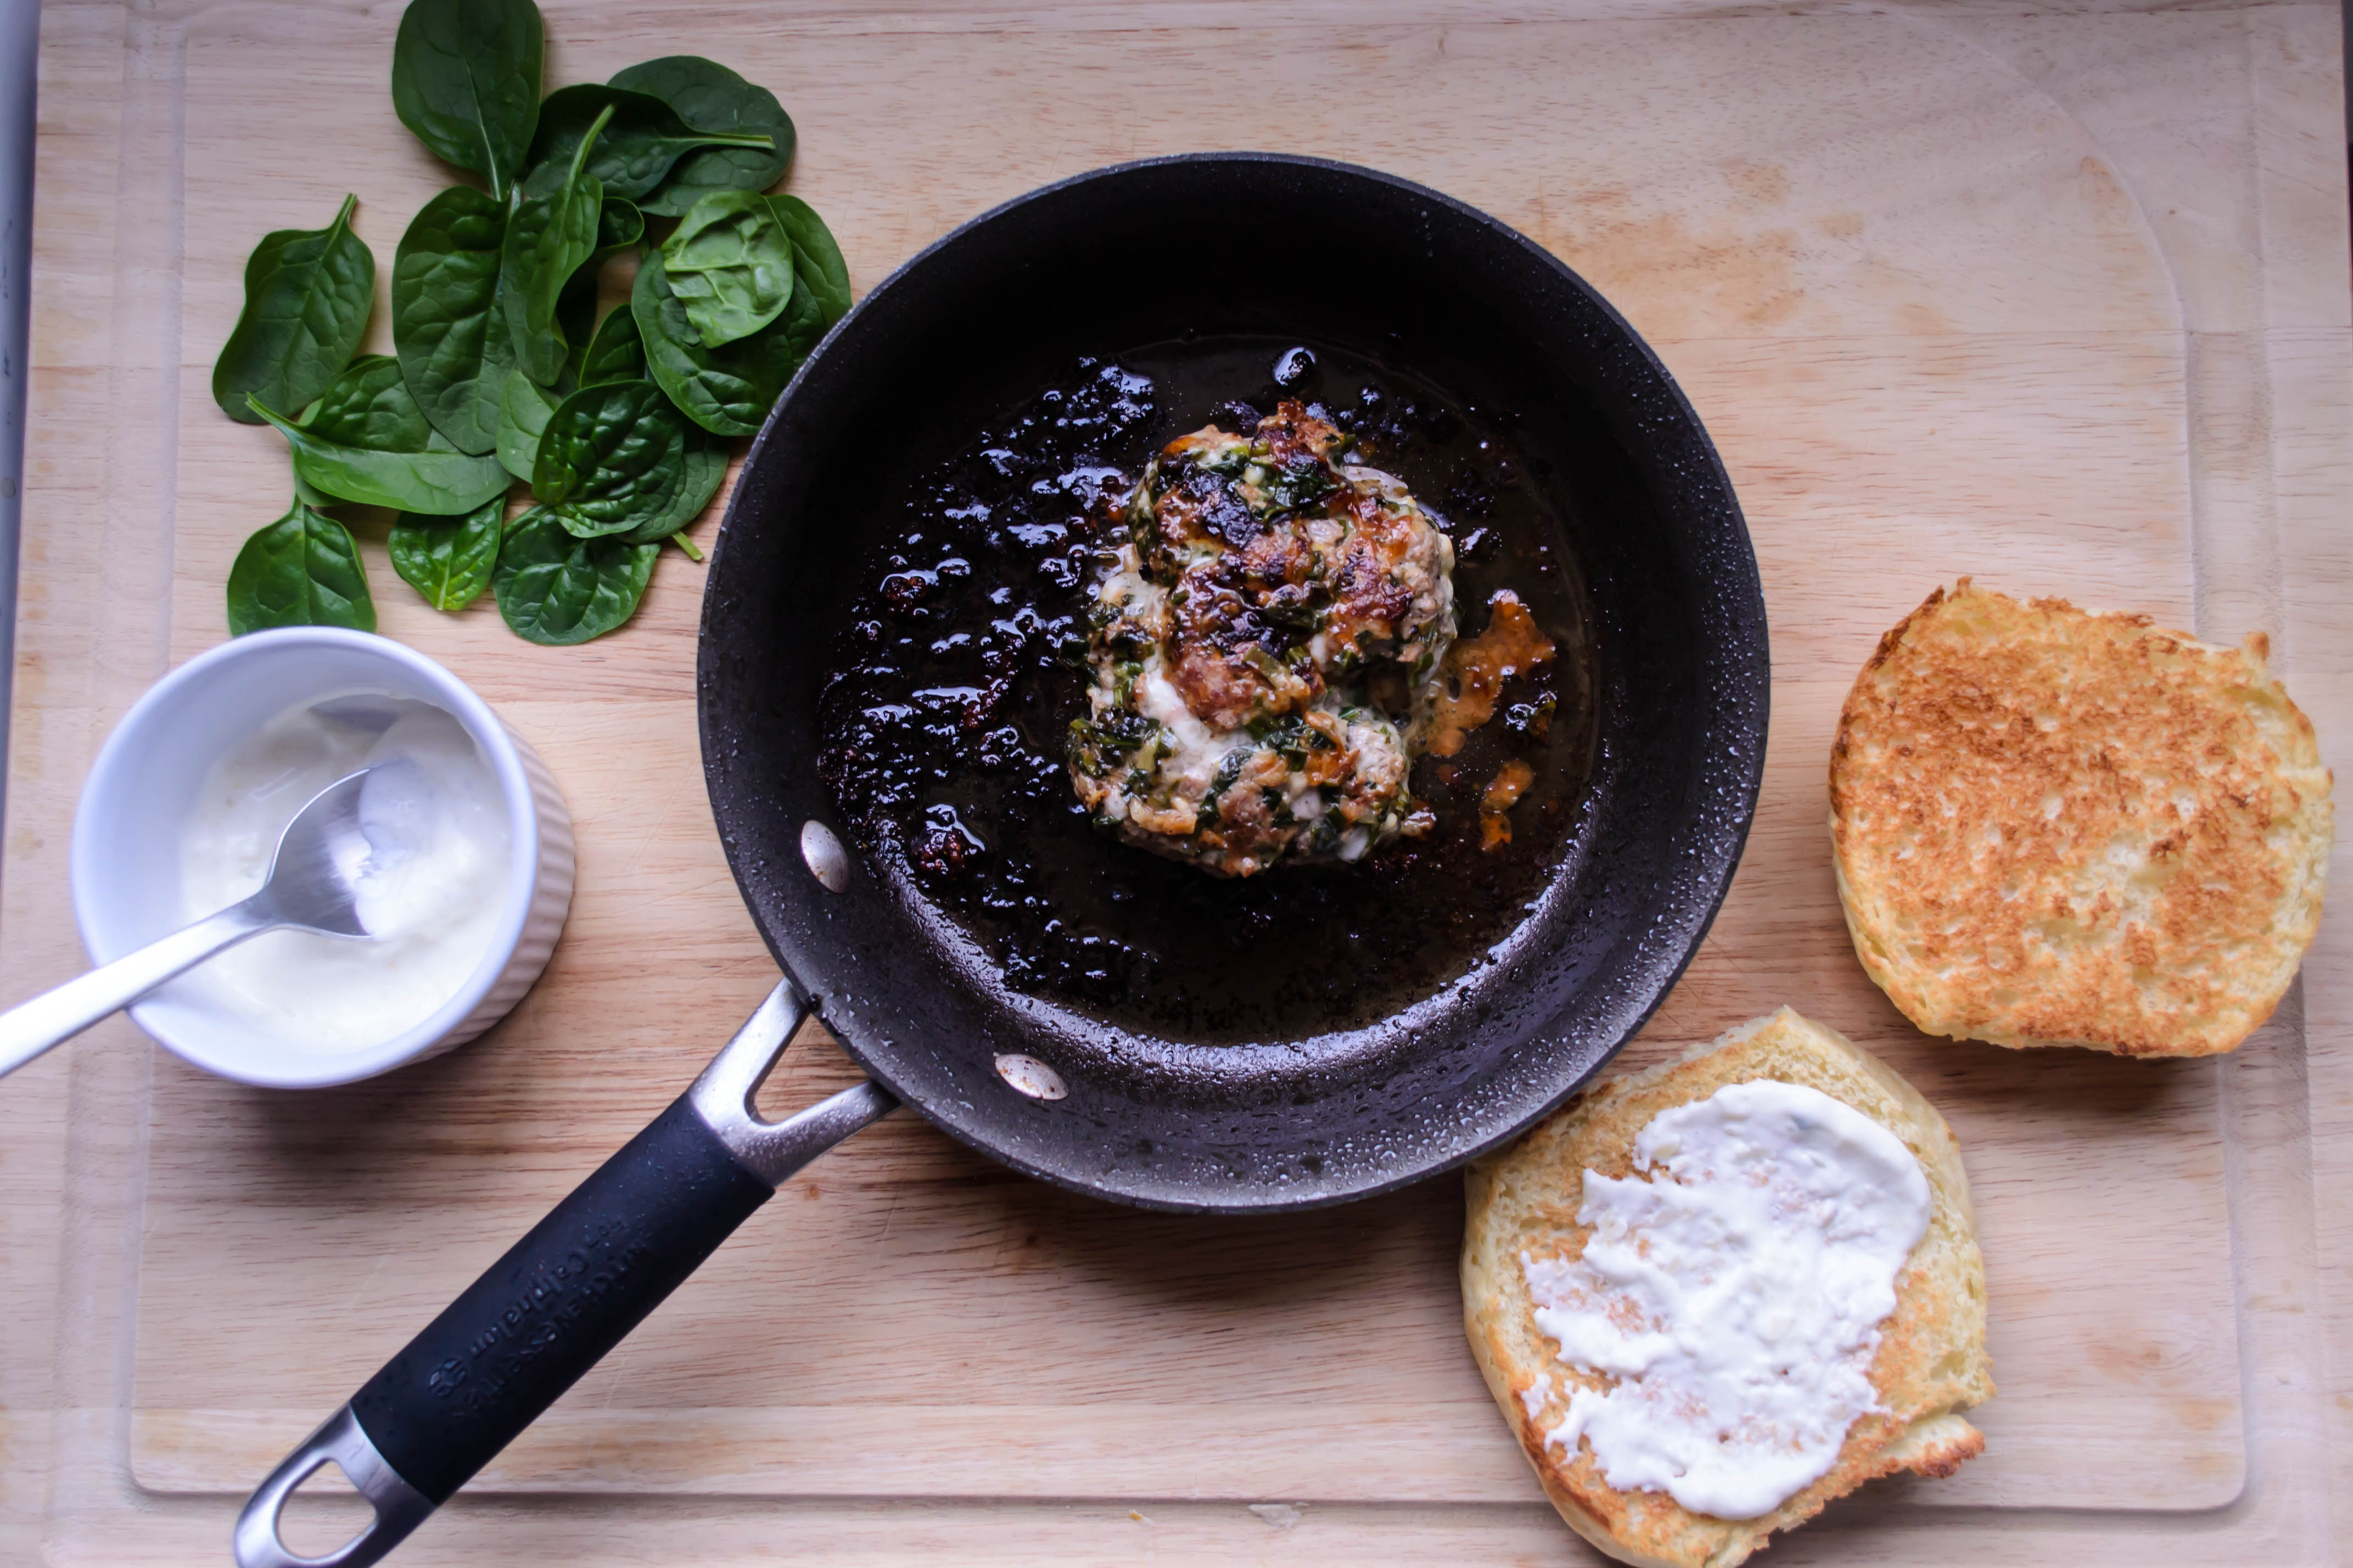
Because you’re cooking with a heady amount of cheese in the mix, these burgers will get crusty and deeply bronzed as the cheese seeps down onto the hot pan to toast. Don’t be alarmed. Settled on a bun with some fresh spinach leaves, to contrast the cooked tumble in the burger itself, this is nearly perfect. Slathered with some Greek yogurt whipped with lemon juice and fresh raw garlic, it turns into lamb burger nirvana.
Food Blog April 2014-3560Just because this isn’t, perhaps, a typical bachelor meal, what with the longish ingredient list and the time taken to prepare it from scratch, doesn’t mean I treated it as fancy. There’s no need for ceremony here; it’s too good. Hasty bites. No napkin. Straight over the sink. I don’t mind telling you, just between us, that I didn’t even bother with a plate.

Food Blog April 2014-3570

Lambikopita burgers
Makes 2
⅓ pound ground lamb
1 clove garlic, finely minced
2 green onions, finely sliced
2 teaspoons finely chopped dill
1 teaspoon lemon zest
2 tablespoons grated parmesan cheese
2 tablespoons crumbled feta cheese
¼ cup shredded or cubed mozzarella
½ cup fresh spinach leaves, plus more, to serve
⅛ teaspoon nutmeg, freshly grated, if possible
Salt and pepper to taste (I suggest ¼ teaspoon salt and ⅛ teaspoon black pepper)
3 tablespoons olive oil, divided


  • In a medium skillet, heat 1 tablespoon of the olive oil over medium heat. When it shimmers, add the ½ cup spinach leaves and sauté gently until they are wilted: 2-3 minutes. Remove from heat and let cool.
  • In a medium bowl, combine the lamb, garlic, onions, dill, lemon zest, and cheeses. Add the nutmeg, salt and pepper. The best way to do this is to get in there and use your hands, gently kneading with your fingertips to mix thoroughly.
  • When the spinach is cool, transfer it to a cutting board and chop finely. Don’t squeeze it out – we want that wetness to keep the burgers moist.
  • Add the chopped spinach to the lamb mixture and mix again to integrate it.
  • Divide the mixture in two and form patties of your desired diameter. Mine were probably 3 inches around. Keep in mind that the thicker your patties are, the longer they will take to cook.
  • In the same skillet you used for the spinach, heat the remaining 2 tablespoons olive oil over medium high heat. When it shimmers, add the lamb burgers, clamp on a lid, and turn the heat down to medium.
  • Cook for 4-5 minutes undisturbed, then cautiously lift with a spatula to check the bottom. When they are deeply bronzed and have a dark crust from the melting and toasting cheese, flip, recover, and cook for another 3-4 minutes, or until your desired doneness is reached.
  • Remove from heat, transfer to a bun of your choice dressed with condiments to your liking (I recommend the Greek yogurt spread below), top with fresh spinach, and serve.
Greek yogurt spread
2 tablespoons Greek yogurt
Squeeze of fresh lemon juice
1 garlic clove, chopped fine and pasted with salt


  • Combine ingredients in a small bowl, mix with a fork, spoon, or small whisk.

Pot Pie Empanadas with Cheddar Crust

Food Blog March 2014-3536Unless you are feeding a large family, or your small family is a bunch of sauce junkies, chances are if you make something like the velouté I shared last week, you are going to have some leftovers. Mine worked out to just under a cup of sauce (you will probably have a touch more – I oversauced my chicken a bit because I was taking photos of the stream of velvet I was pouring), which was clearly too much to trash but, it seemed, not enough to do much with. True, I could have just warmed it up again and scarfed another cutlet, but that didn’t seem very original. Additionally, this sort of flour-thickened sauce doesn’t always reheat particularly well – think about the resolute globs of leftover Thanksgiving gravy. It was going to need some help.
Food Blog March 2014-3537Food Blog March 2014-3543
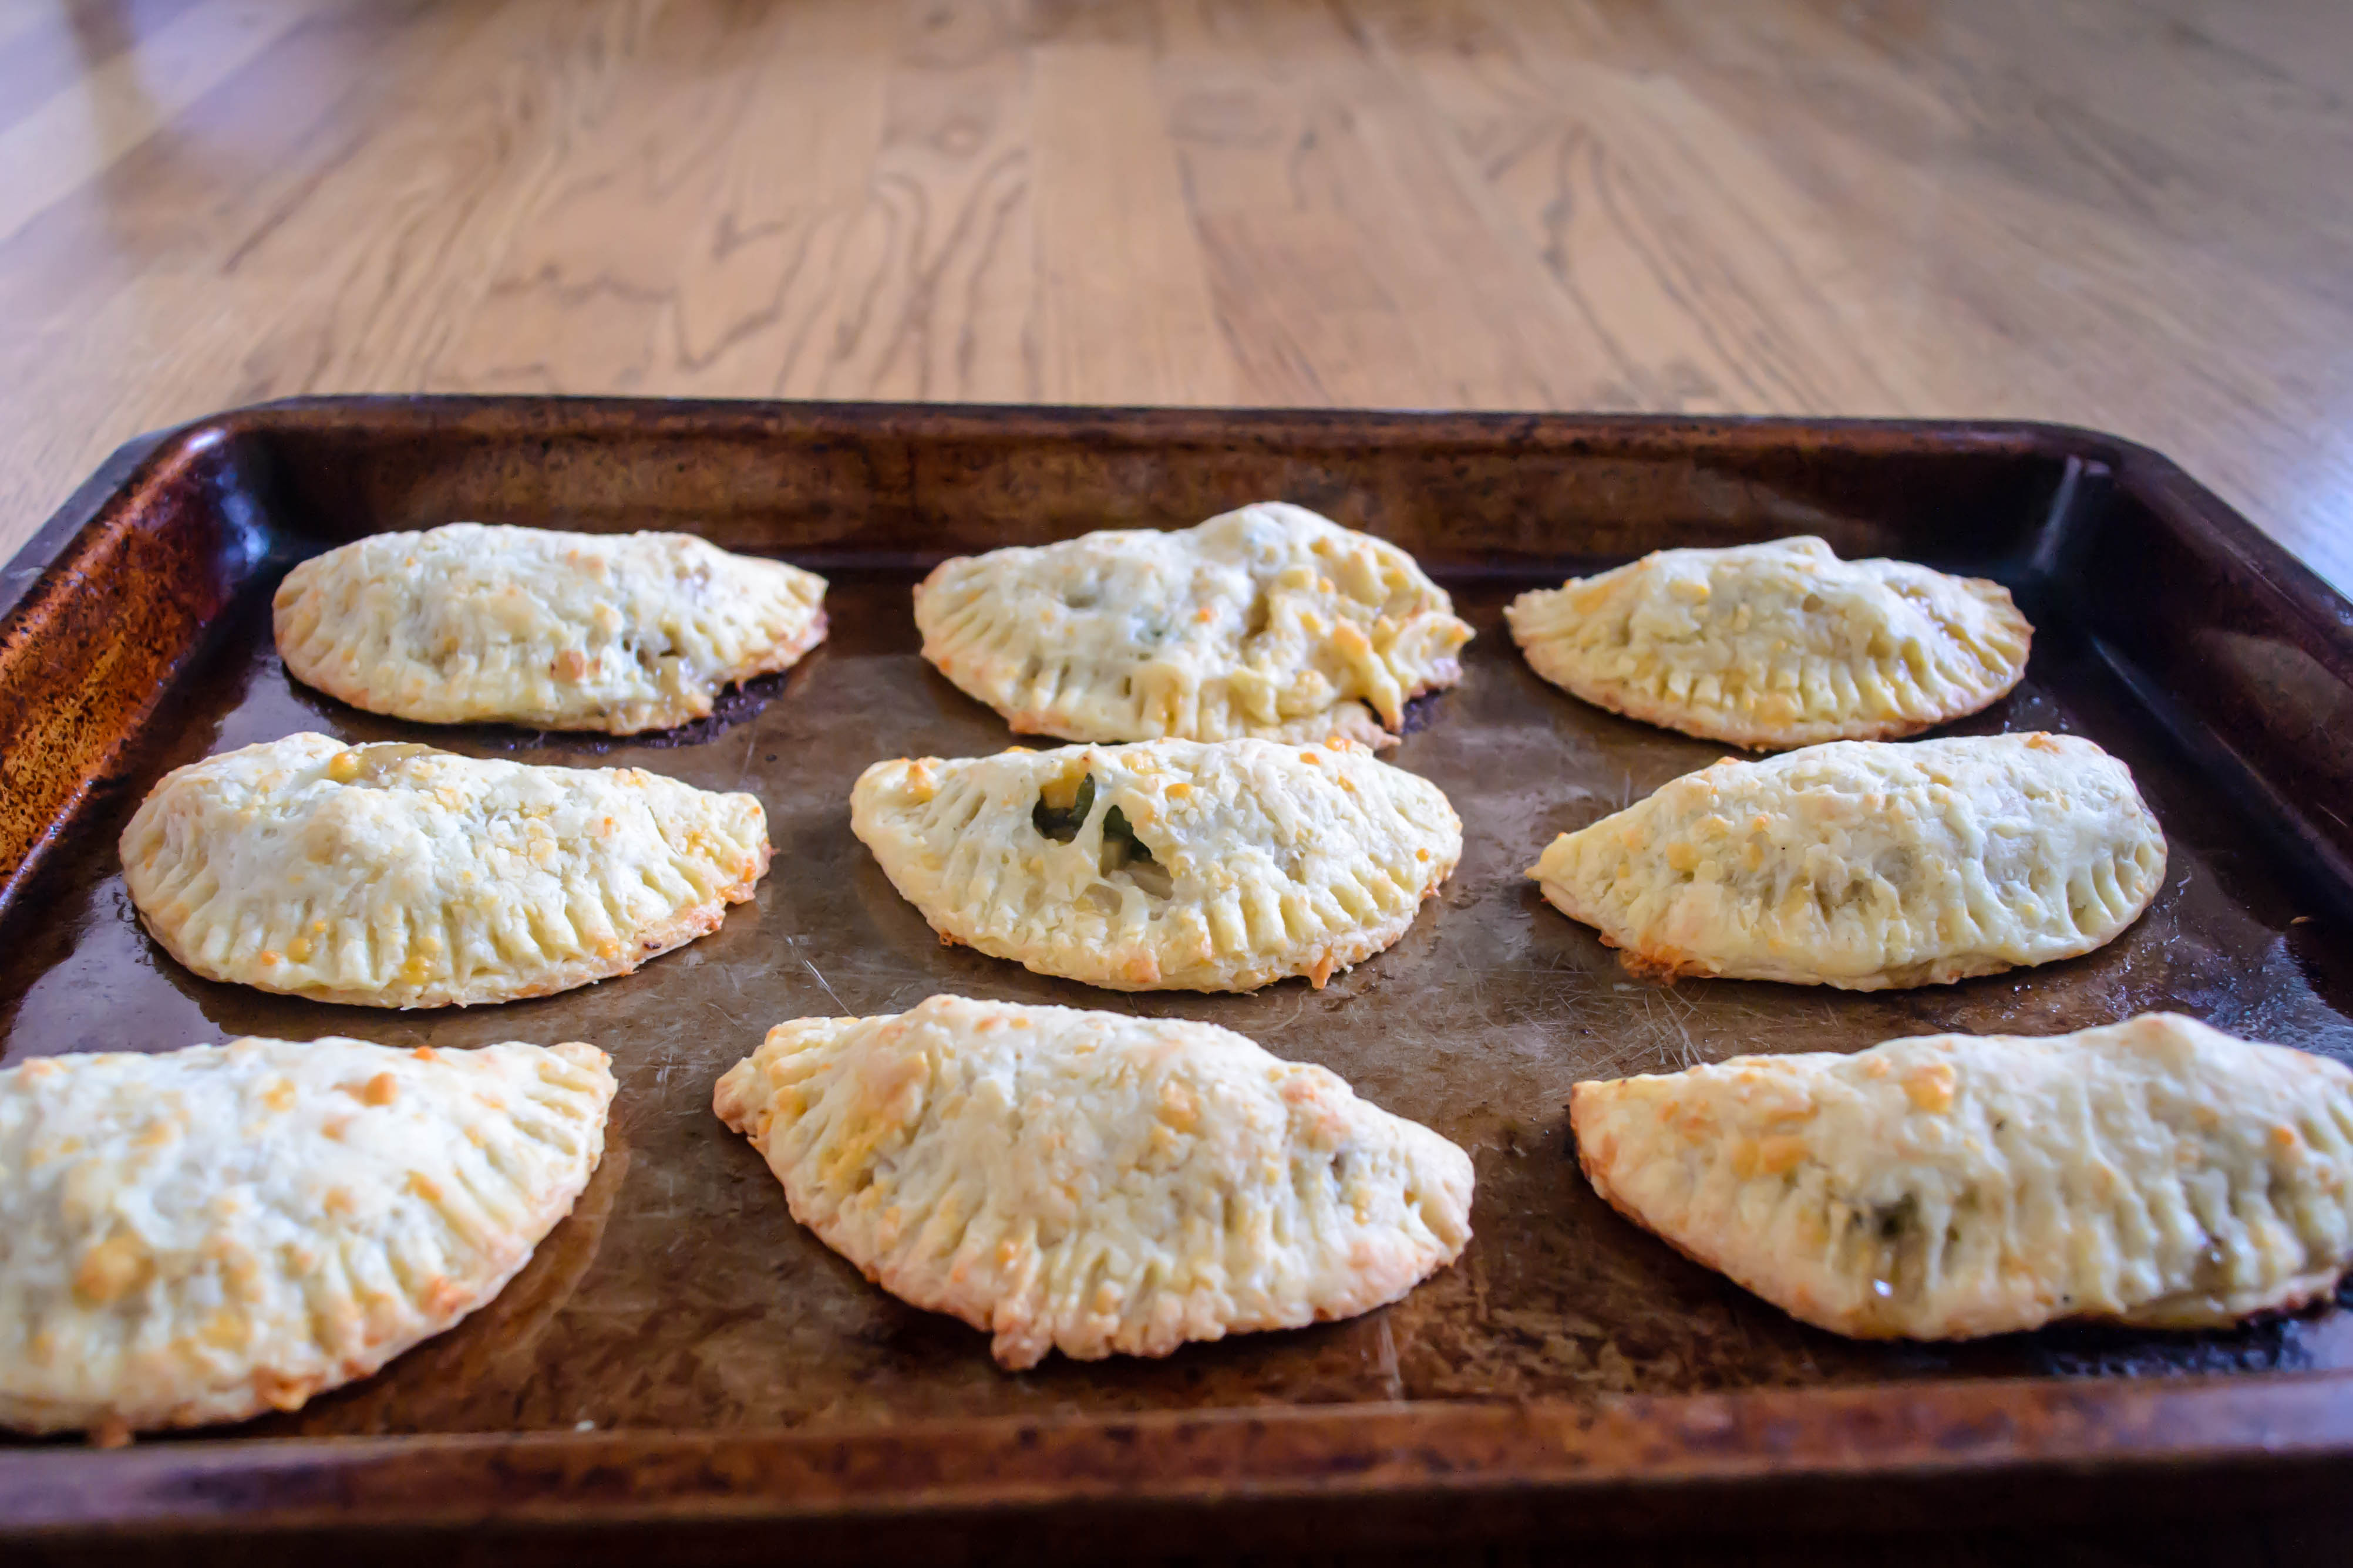
When I thought velouté, I thought pot-pie. However, a mere cup of sauce didn’t seem like enough. Smaller quantities of sauce would require smaller packages. I’ve been tossing around the idea of hand-pies for a while (see what I did there? Yeah.), and suddenly it became clear that this final bit of sauce would become the base for the filling of pot pie empanadas, spiced up with chunks of cheddar cheese in the crust.
Food Blog March 2014-3513Food Blog March 2014-3515Yes. This was happening.

I think every culture has a snack food created by enclosing a savory little morsel in a puff of dough. Samosas, gyoza or pot-stickers, pierogies, Cornish pasties, think about it. For Spain, and for Central and South American cuisines, empanadas are that snack. A tumble of meat, cheese, and spices (with the occasional vegetable – a few summers ago I had a spectacular one filled with cheese and fresh spinach) wrapped up in a lovely soft dough that is sometimes baked but more often lovingly tipped into the deep fryer: it’s quite possibly my dream food.
Food Blog March 2014-3524Food Blog March 2014-3526Food Blog March 2014-3528And here I was about to Americanize it beyond belief. The leftovers of my grad school training screamed things at me about colonization and cultural appropriation, but I swatted them down. It’s improving the classic by acknowledging and incorporating a new angle. Yeah.

And it was so worth it.

The dough here is baked, not fried. I don’t have a deep fryer, and to be honest, crammed with cheddar as it was, the crust did not provide the most airtight of seals. I would have been nervous about dropping these into hot oil.
Food Blog March 2014-3519Food Blog March 2014-3522
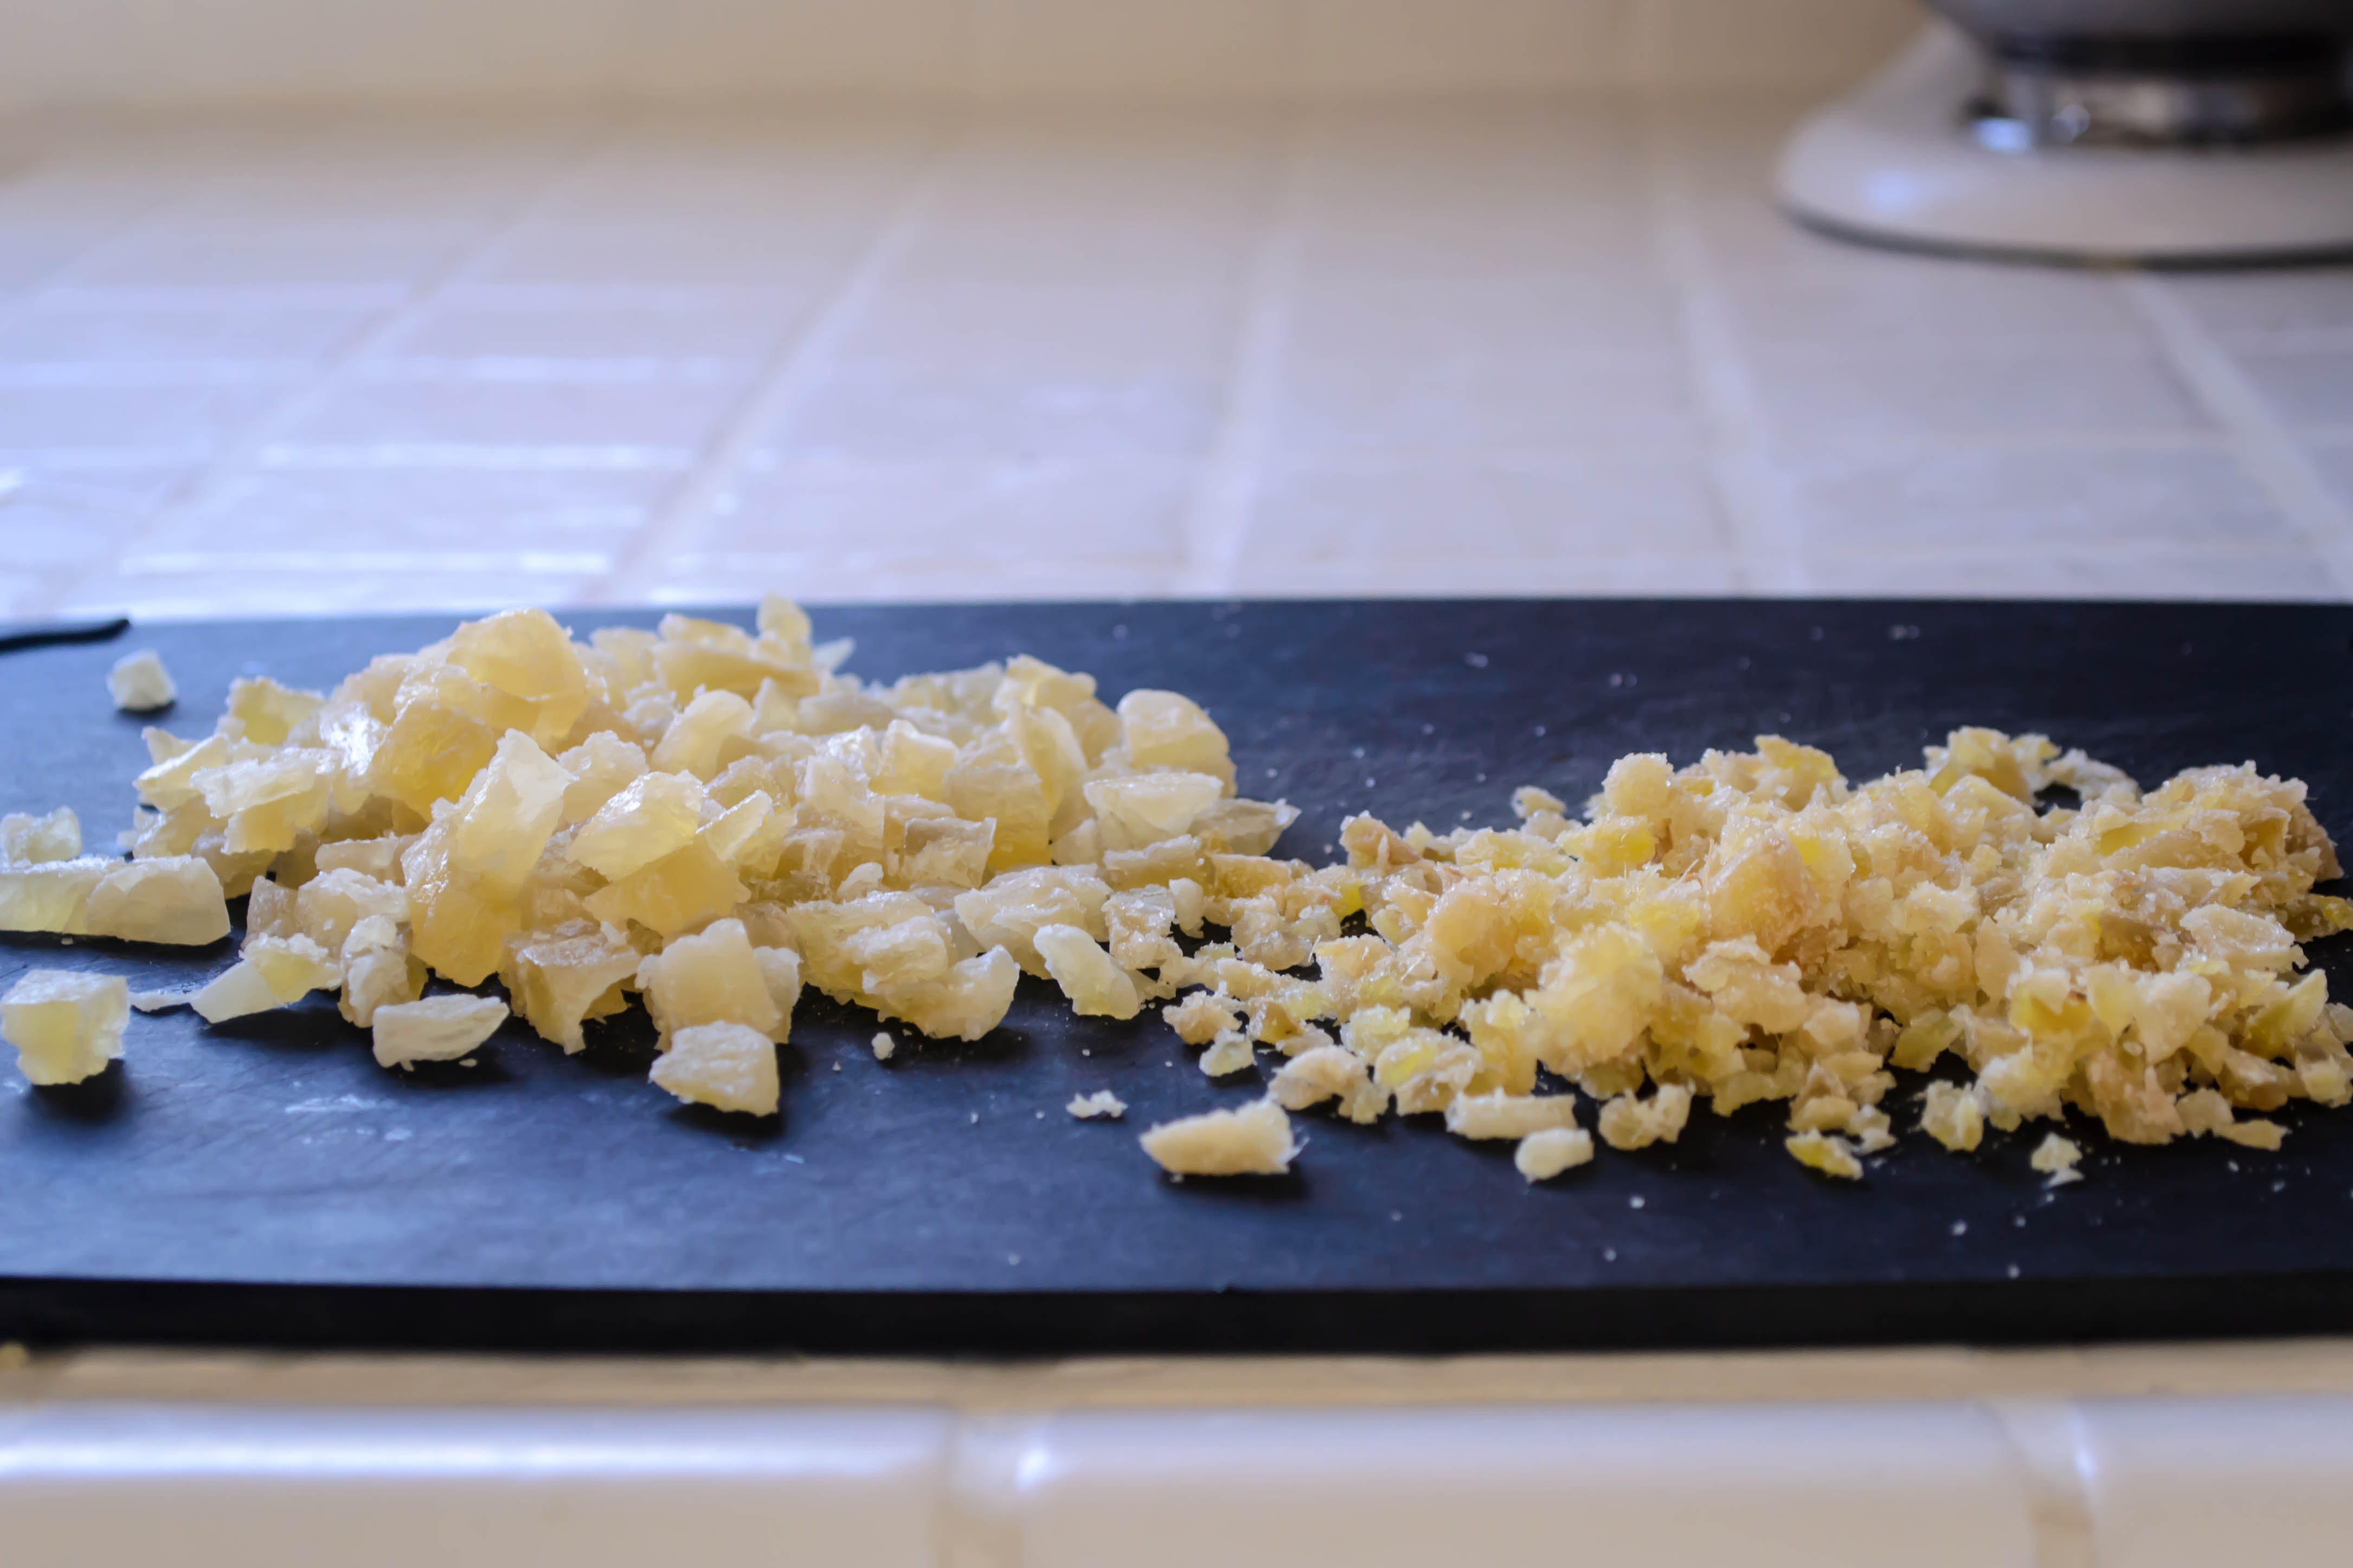
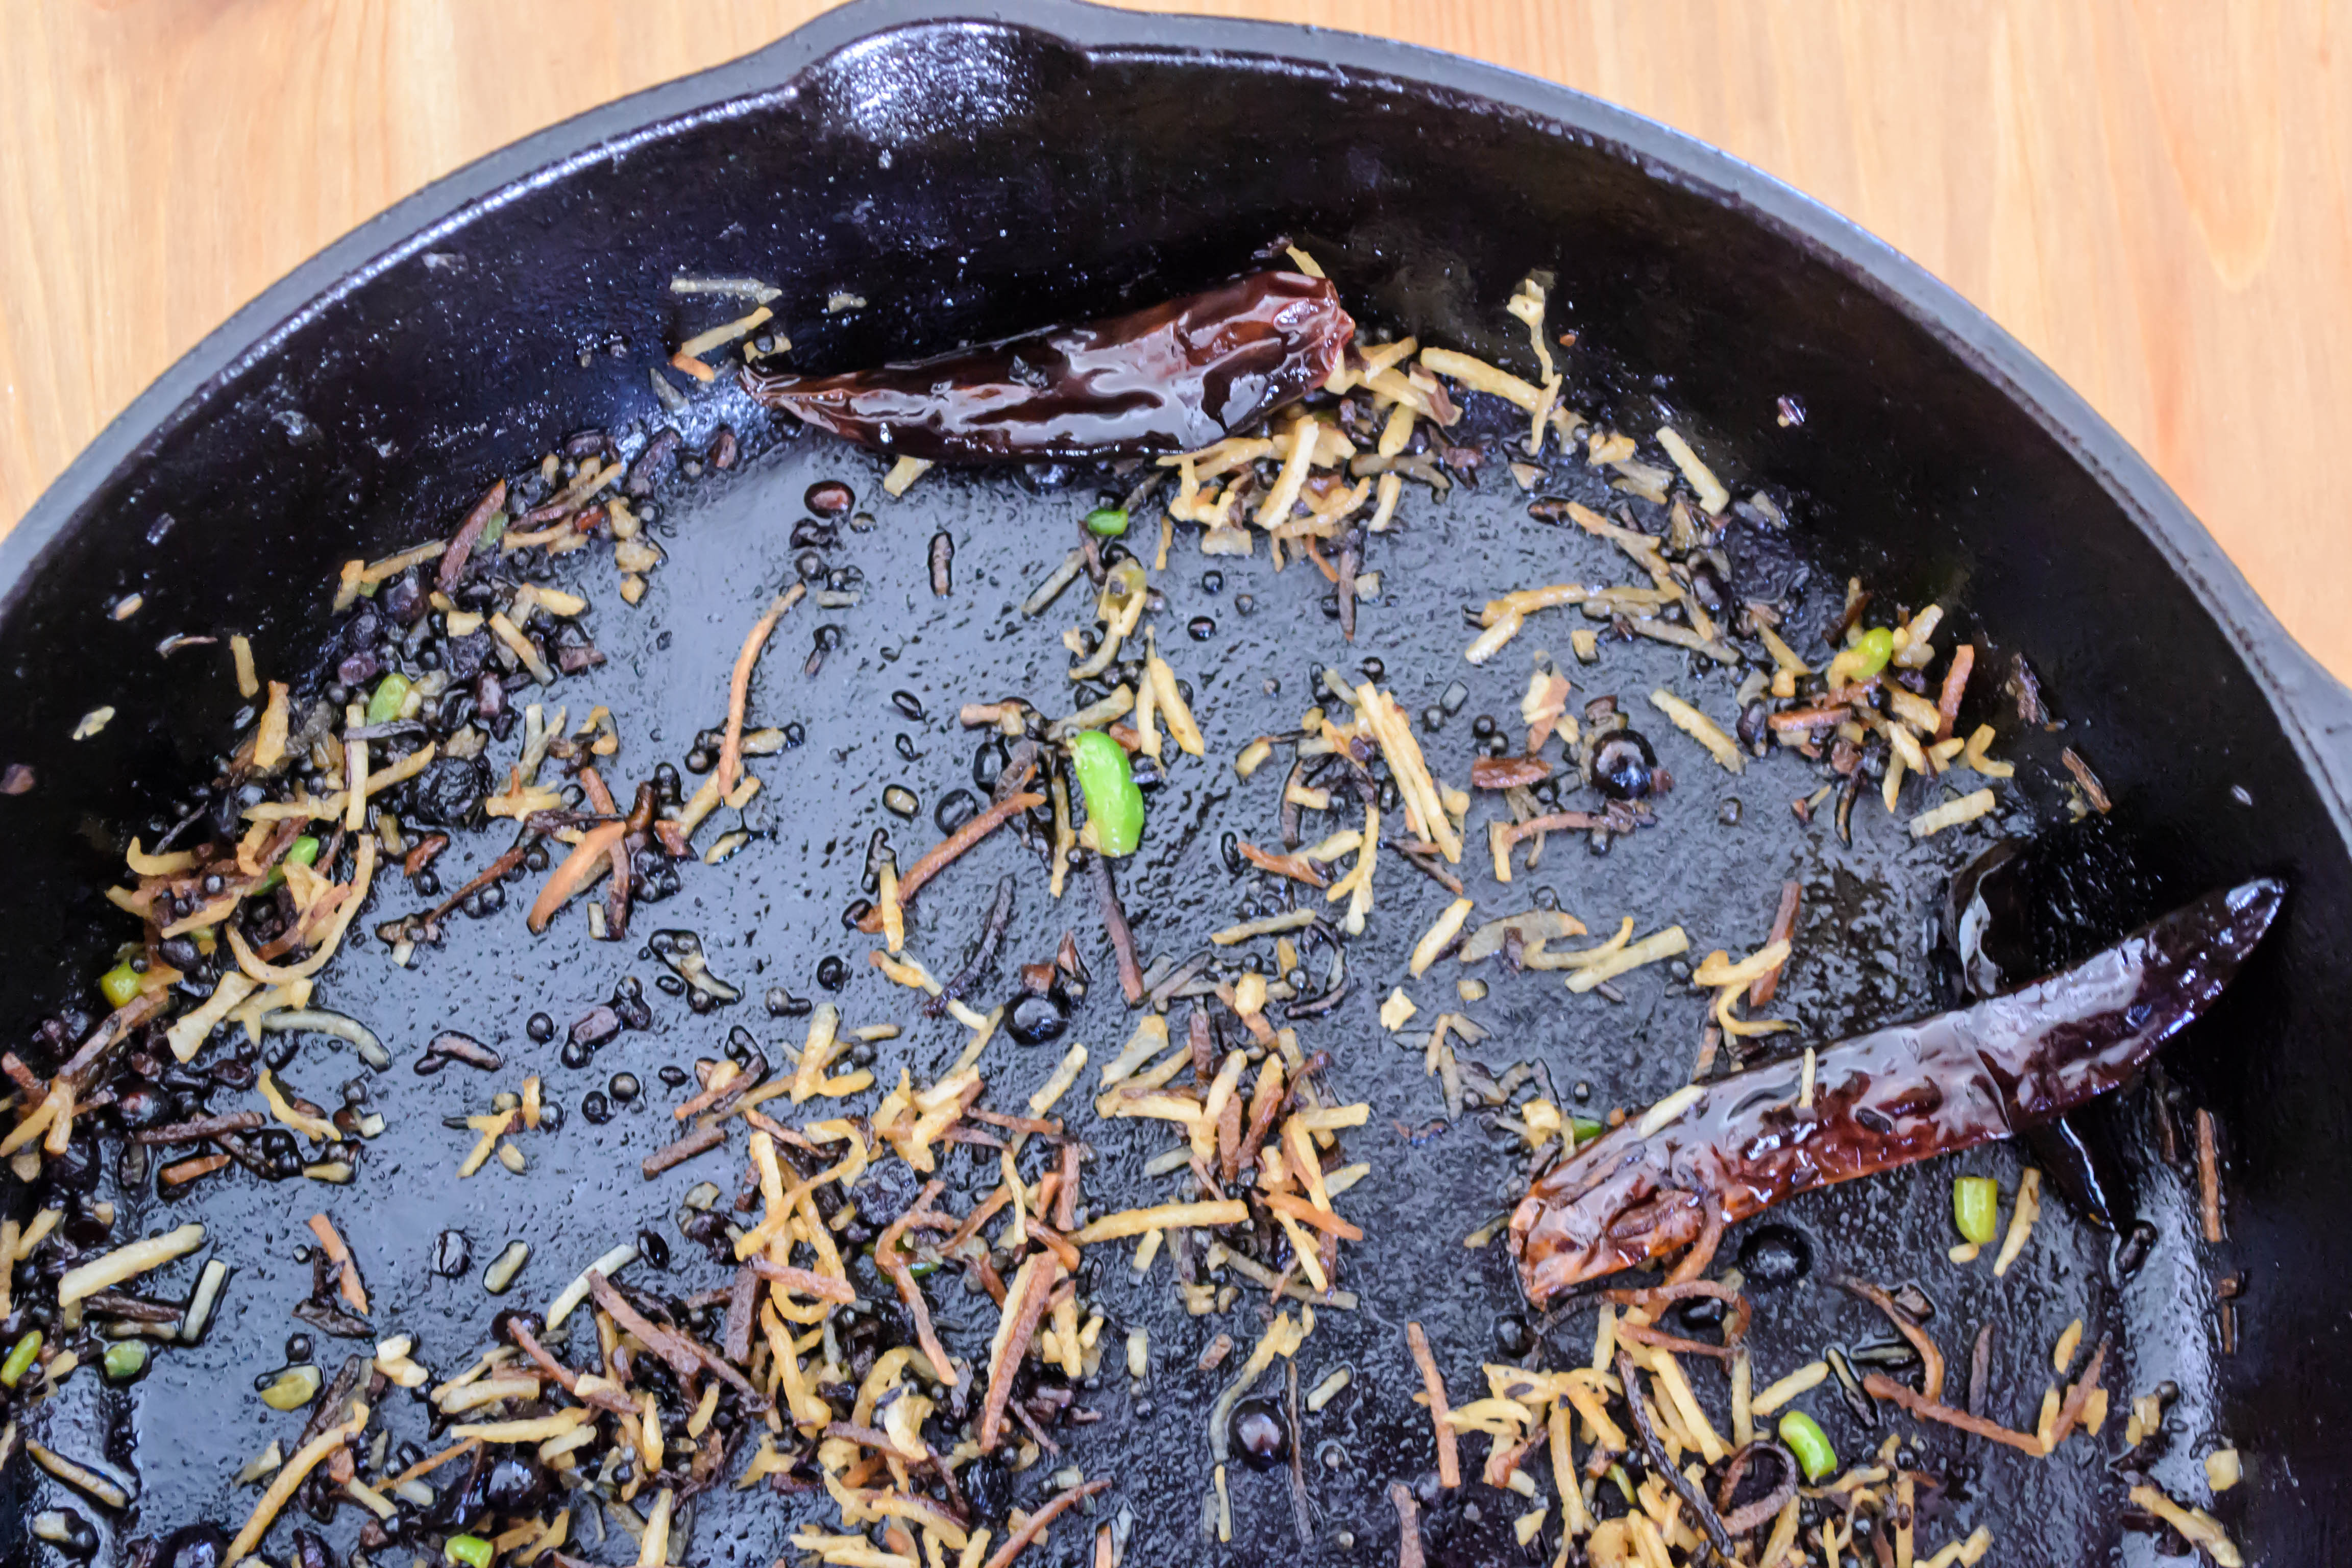
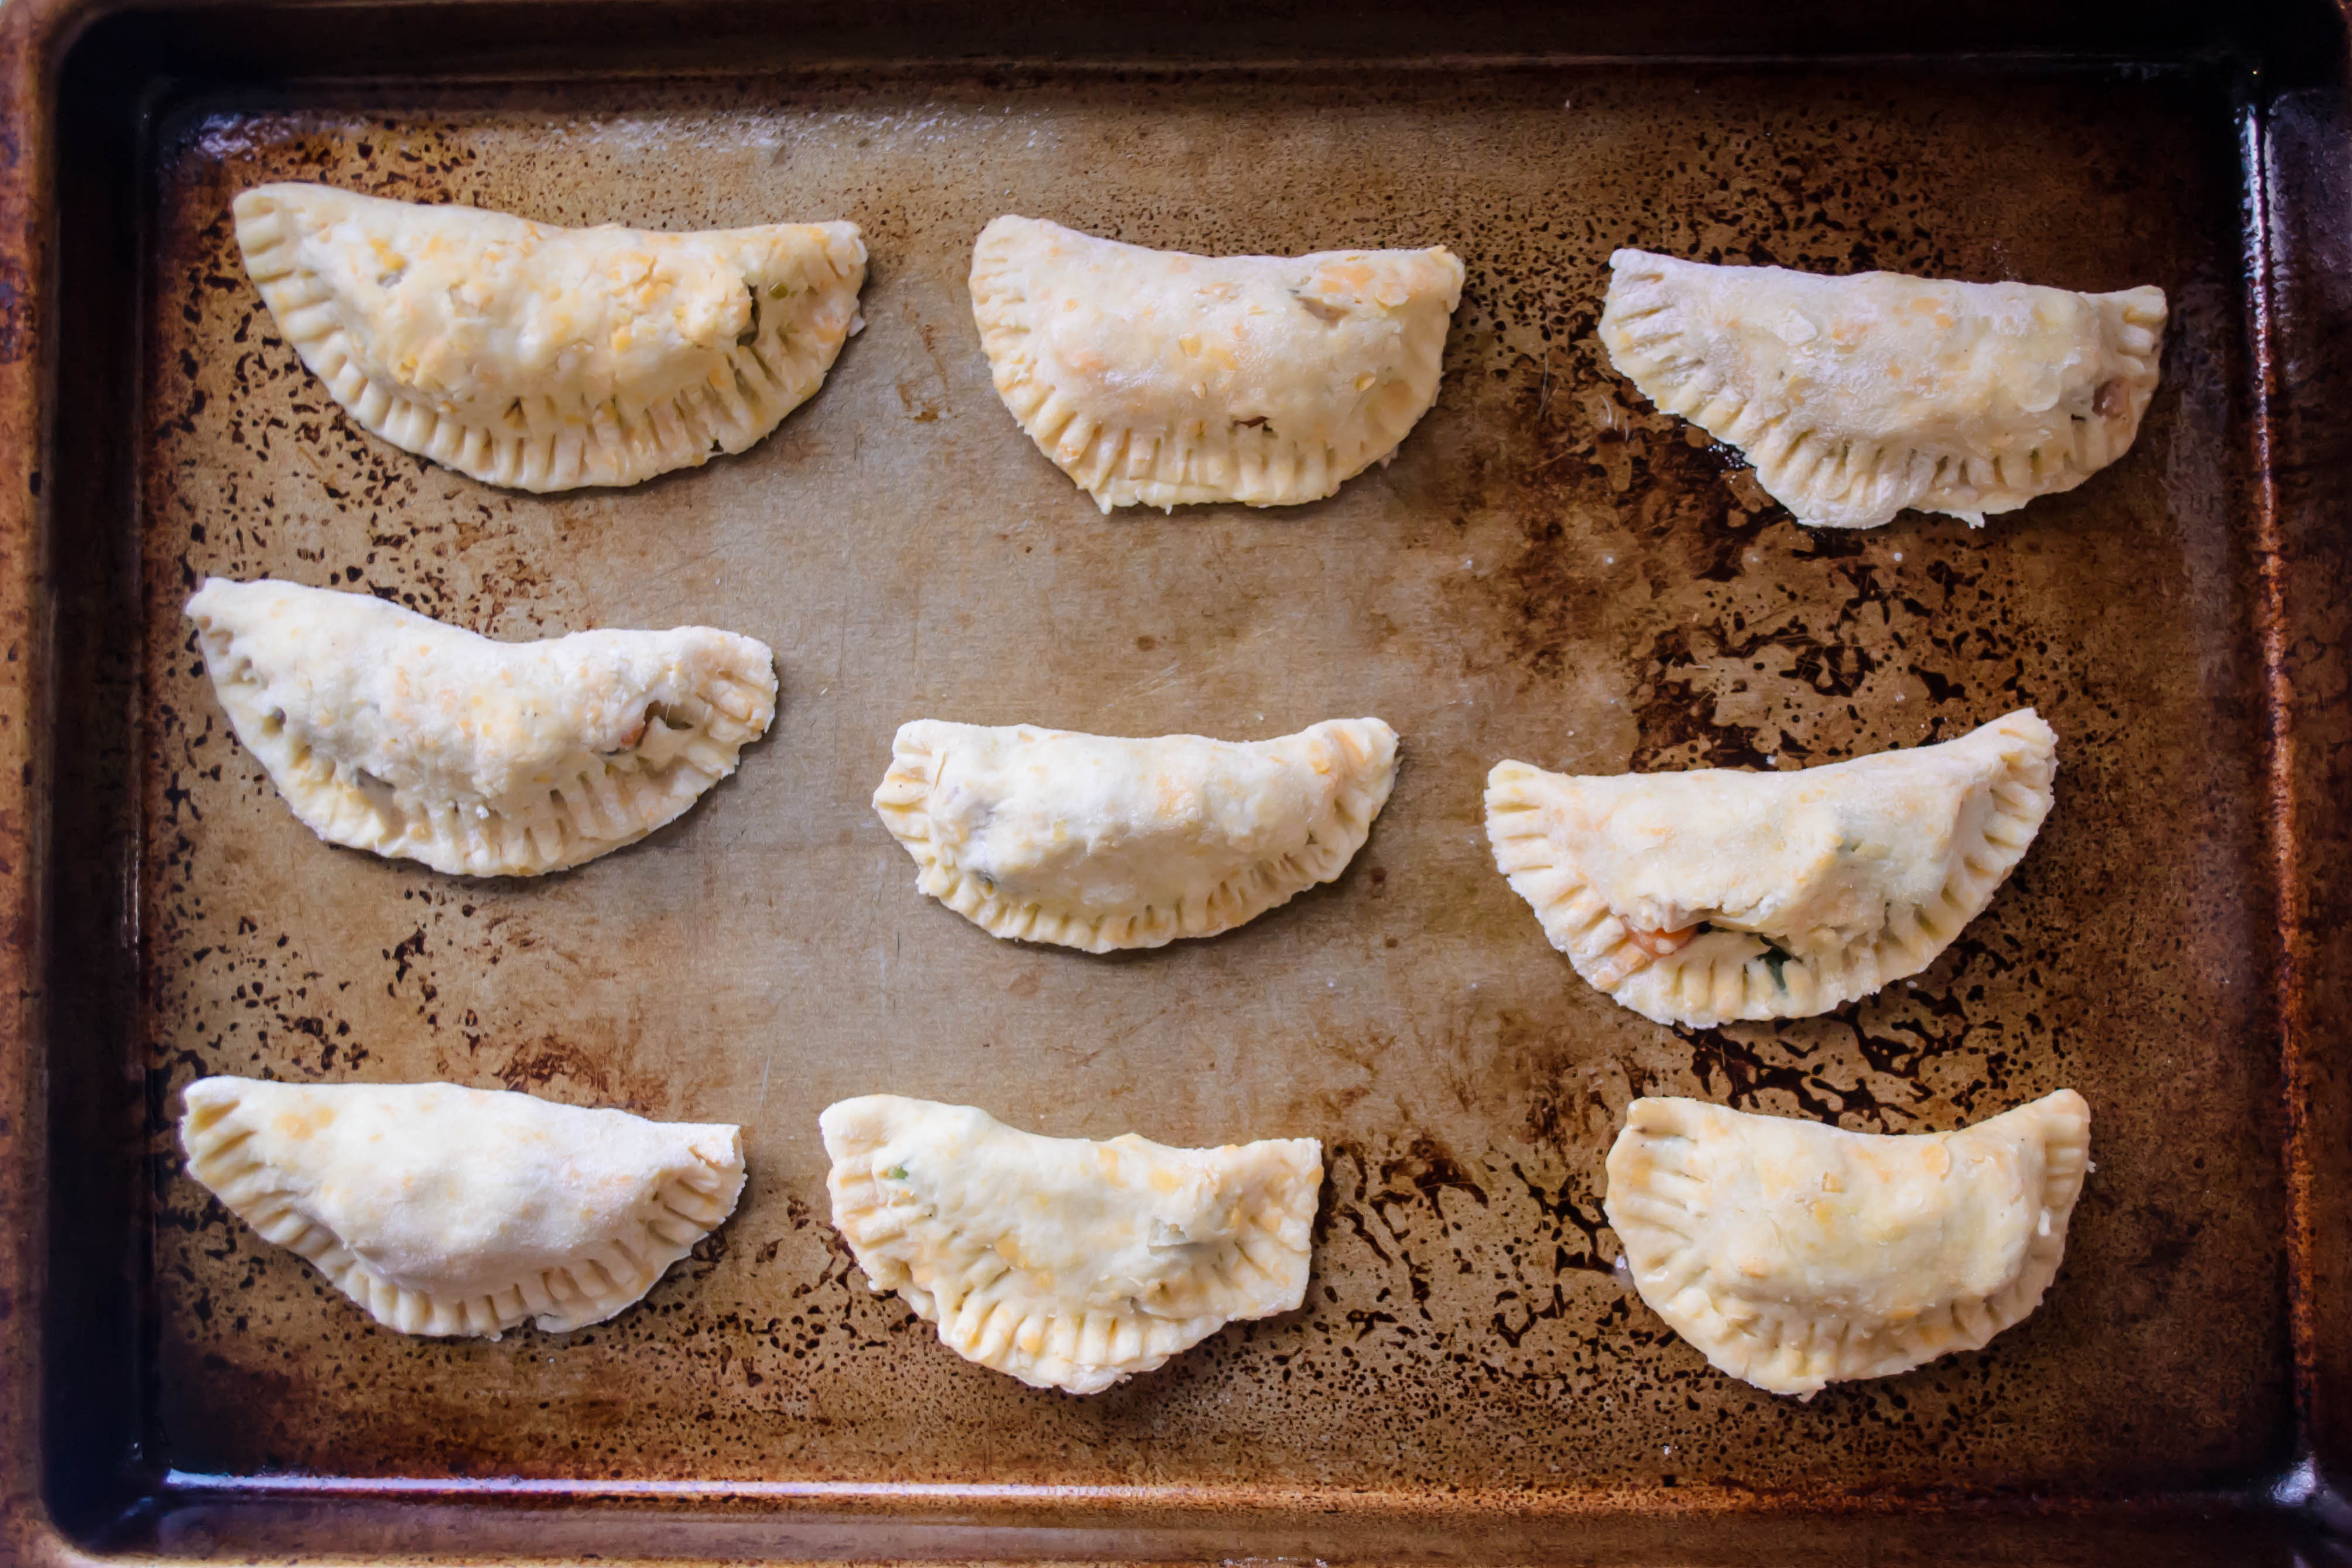
There’s nothing to be nervous about when it comes to the taste, though. You can stuff these with whatever you’d like in a pot pie, meats or vegetables. I opted for potatoes, carrots, a few mushrooms, green onions, a breath of garlic, and some green beans that had been in my fridge for a touch longer than they should have. A bit of shredded up chicken breast completed the pot. These get cooked in the leftover velouté with a splash of white wine (and a bit of water, if you feel there isn’t enough liquid) until they are tender, then, once they are cool, jammed a mere tablespoon at a time into circles of sticky but pliable dough. A quick fold, a squeeze, and a crimp with the tines of a fork, and they are ready to bake.
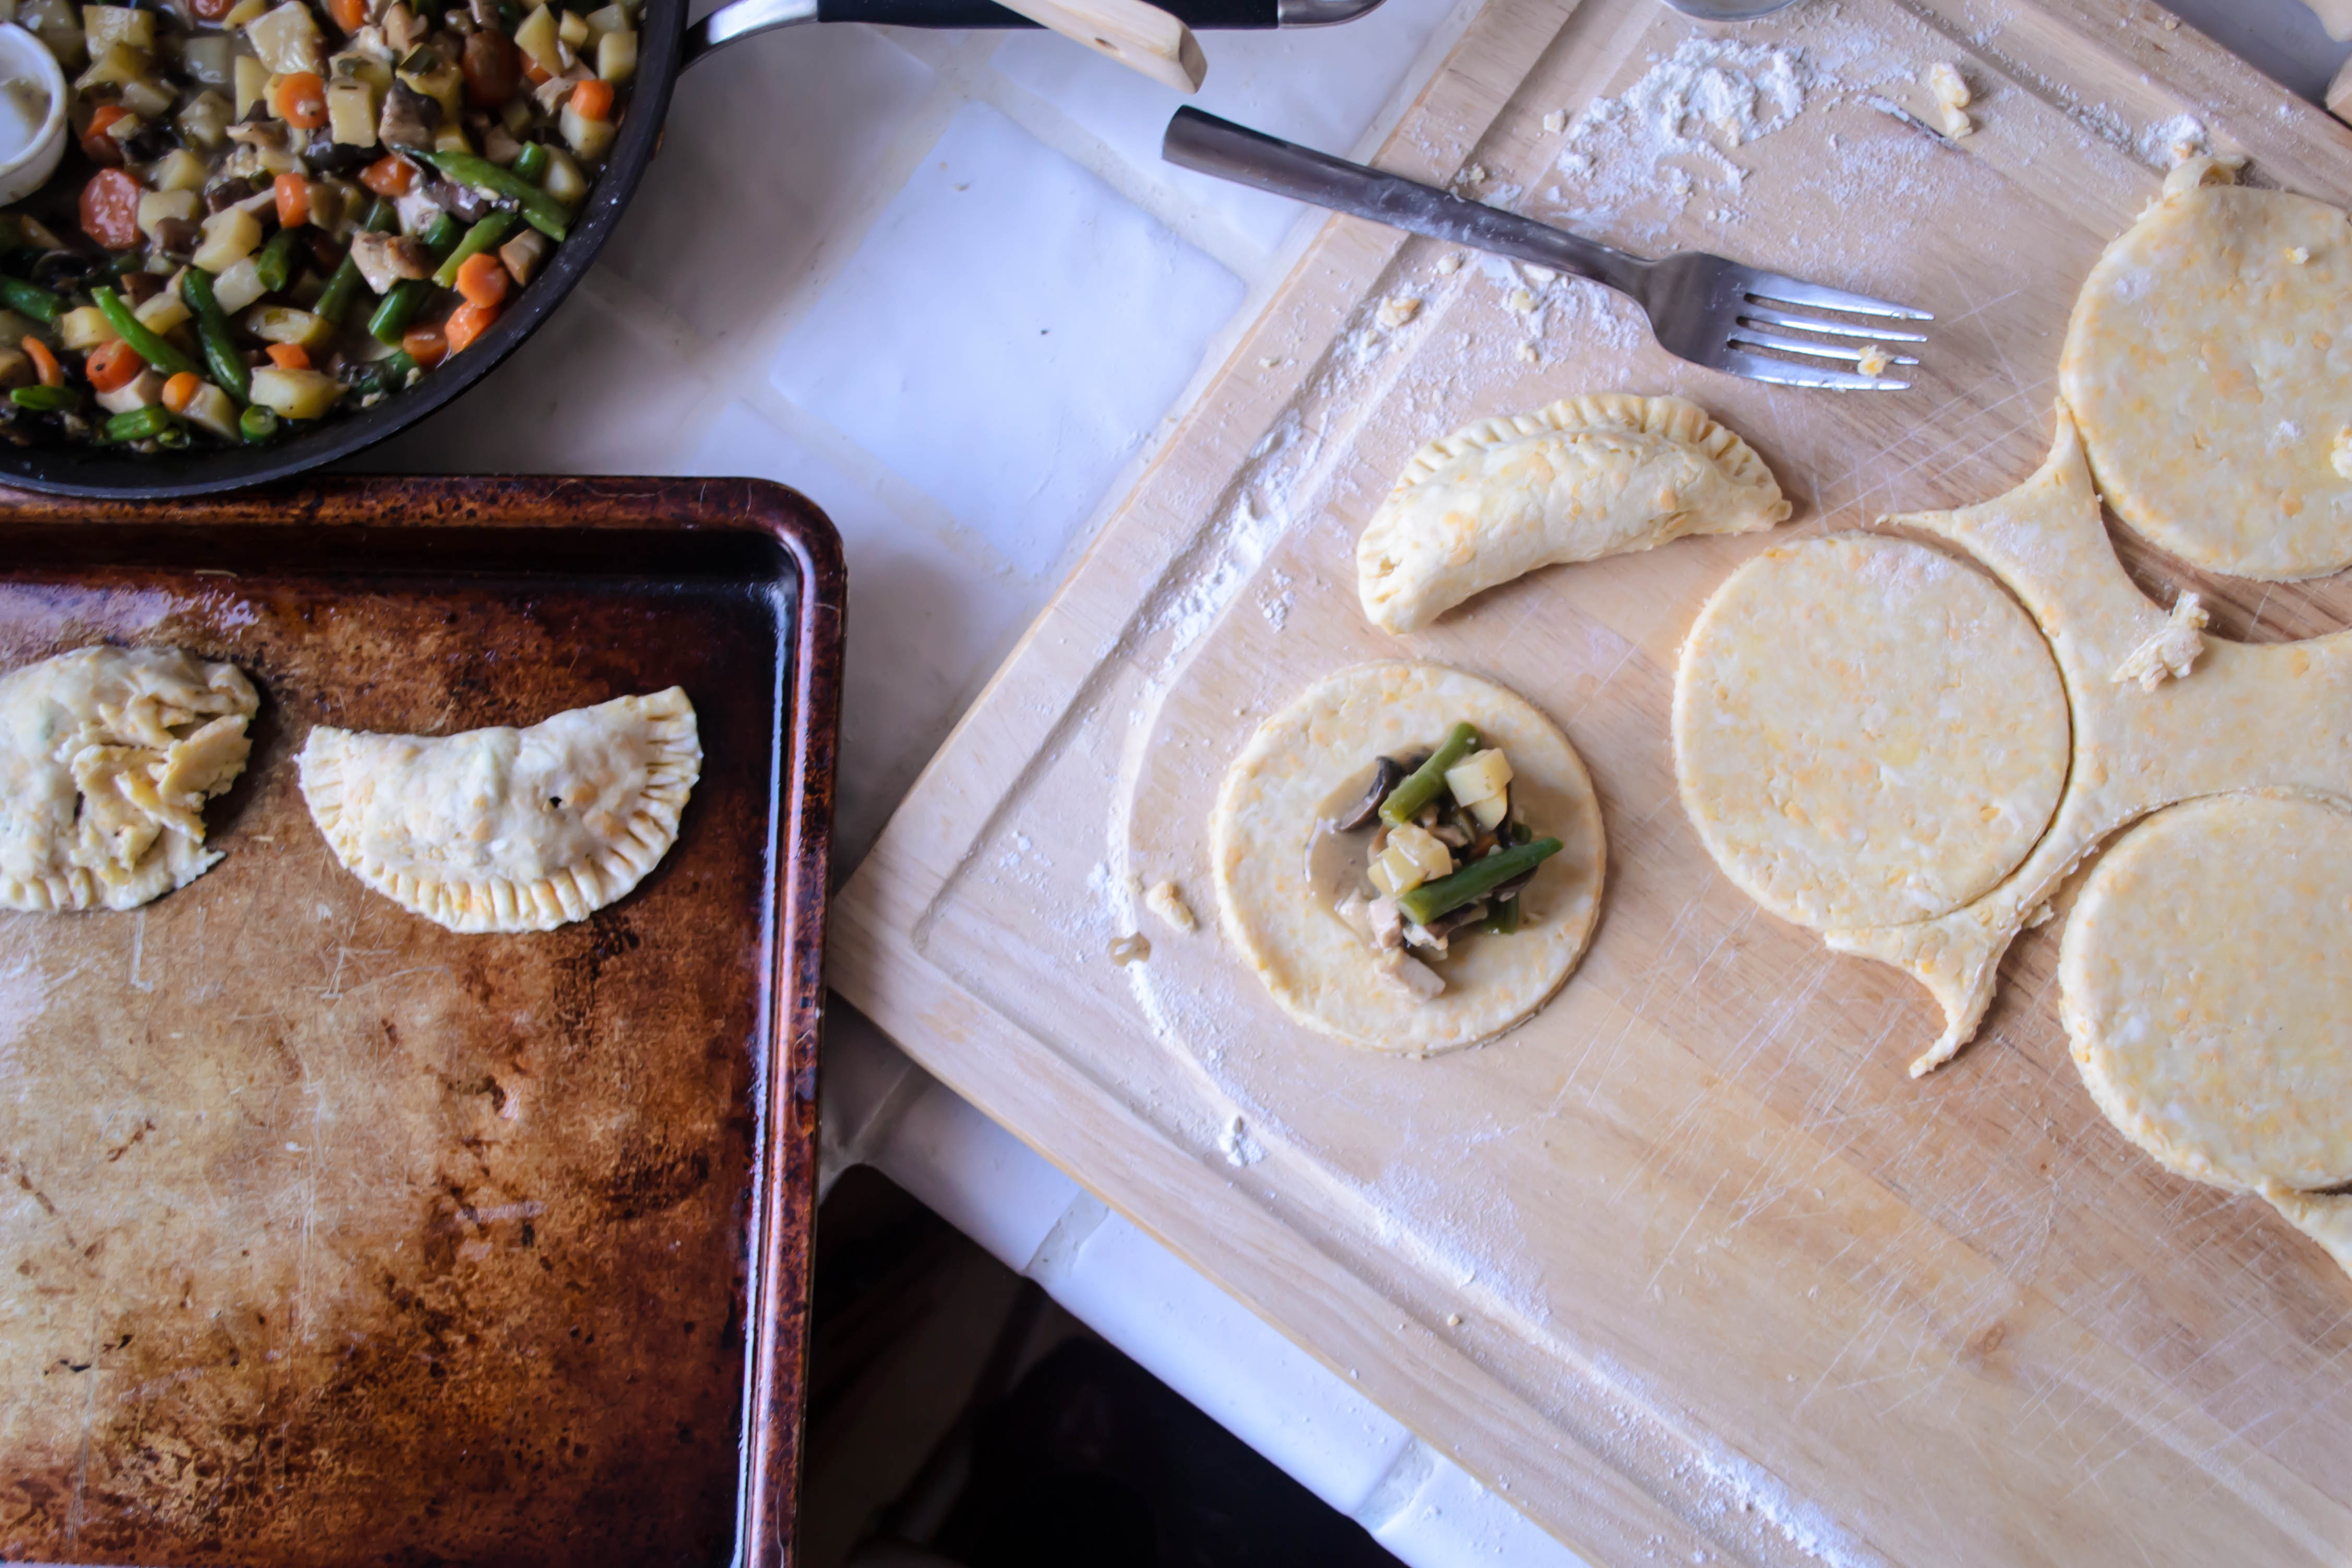
Food Blog March 2014-3529Food Blog March 2014-3532I had designs on serving these alongside a salad for a balanced meal, but we never made it to the salad. We just ate these, burning our fingers and our tongues as we picked up one and another and another. These are pot pies for crust lovers. The dough becomes rich and crisp and flaky, and the cheddar cheese is, I have to admit, a bit of a stroke of genius. It’s a perfect little package, and writing about it now, I desperately want another.

Sometimes leftovers are better than the original. This, friends, is one of those times.

Food Blog March 2014-3534Cheddar dough
Makes enough for 18-20 empanadas, if re-rolled once or twice
2 ¼ cups all-purpose flour
½ teaspoon salt (this doesn’t seem like much, but the cheese is salty and the filling will be seasoned)
8 tablespoons very cold butter (1 stick), cut into cubes
½ cup extra sharp cheddar cheese, cut into cubes
1 egg
⅓ cup ice water
1 tablespoon vinegar

  • Dump the flour and salt into a food processor and pulse once or twice to mix them.
  • Add the cubes of butter and cheese and pulse 4 times for 3 seconds each. This seems fussily precise, but it worked very well.
  • In a small bowl, beat the egg lightly with the water and vinegar. Add to the food processor and pulse once or twice until the mixture comes together in large clumps. You’ll know it’s ready when it stodgily mashes against the side of the processor bowl, reluctant to whiz in circles anymore.
  • Turn this mixture out onto a large square of plastic wrap. Using the plastic wrap to help you, form it into a disc 5 or 6 inches in diameter, then wrap up and refrigerate for at least 60 minutes. This will allow the flour granules to absorb some of the liquid and fat, which makes for easier rolling, and the butter (and cheese) to firm up again, which makes for better texture.
  • While the dough chills, make the filling.

Pot pie filling
These quantities may not seem like enough, but remember, you are using only minute quantities of filling for each empanada. Overfilling dumplings is somewhere in the top ten of my frequent cooking mistakes, so trust me. You will have plenty.
2 tablespoons butter
1-2 cloves garlic, finely minced
2 green onions, thinly sliced in little moons
3-4 mushrooms, diced
2 small carrots (or one large), diced
1 small Yukon gold potato, diced
6 green beans, stems removed, sliced into ½ inch pieces
½ cup cooked shredded chicken
¼ cup white wine
1 cup velouté
Salt and pepper, and herbs of your choosing, to taste

  • In a saucepan, melt the butter over medium heat, then add the garlic, onions, and mushrooms. Cook, stirring occasionally, until the mushrooms begin to brown, 5-8 minutes.
  • Add the potatoes and carrots, stir to combine.
  • Add the wine and velouté. Season with salt and pepper, if needed, and any herbs you feel inclined to add. Simon and Garfunkel’s usual suspects would certainly be welcome.
  • Cook over a healthy simmer until the carrots, which will likely take the longest, are almost tender. If the pan looks dry, add a little water or chicken broth. Depending on how small you have cut the vegetables, this could take anywhere from 10-20 minutes. Mine took about 15.
  • When the carrots are almost tender, add the green beans and simmer until they are just losing their raw crunch.
  • Kill the heat and add the shredded chicken, then let the whole mess cool to room temperature.

To assemble and bake:

  • Preheat the oven to 425F and spray two baking sheets with non-stick spray or line them with parchment paper.
  • Remove the dough from the refrigerator and unwrap it on a floured board. Using a rolling pin or a straight-sided wine bottle (it totally works!), roll it out into a rectangle or oval about ¼ inch thick. With the floured lip of a glass, a jar mouth, or a biscuit cutter, cut out into 4-inch rounds. When you cut, to avoid extra stickiness or tearing the dough, press straight down without twisting all the way through the dough. Once you have cut all the way through the dough, then you can twist the cutter a bit to loosen the round from the board.
  • Once you have made all the circles you can with the dough, gather up the scraps and roll them out again. One or two re-rollings should produce 18-20 dough circles.
  • Add about 1 tablespoon of the cooled filling to each round of dough. You will be tempted to add more. Don’t do it! A solid 1 tablespoon is about all that can fit without making a tremendous mess.
  • As you place each tablespoon of filling in the middle of the dough round, fold it in half and press the edges together with your forefinger and thumb. To seal each little half-moon package, set it down on the floured board again and press down on the edges all the way around with the back of the tines of a fork. This really crimps it closed, but it also looks pretty, which I’m a fan of.
  • Settle each empanada on your prepared baking sheet. They aren’t going to spread, so they don’t need too much room in between them, but you don’t want them touching each other. Each needs to get the full oven experience without its neighbors interfering.
  • Bake in your preheated 425F oven for about 20 minutes, until the crust is golden and crisp to the touch, and any filling that has had the misfortune of leaking out is bubbling assertively.
  • You will probably need to let these cool for 5-10 minutes before eating. Just enough time to, if you’re feeling virtuous, toss together a quick salad. Or, you know, not.

Project Sauce: Veloute with “Blue Plate Special”

I am realizing, as I continue this sauce project, how few of the sauces I’m examining are used “as-is.” Most, including this month’s velouté – the last of the flour-thickened sauces I’ll explore (next month we move on to eggs. I’m scared!) – are made as a base. They are, after all, “mother” sauces, so called not just because they are quite common, but because they are literally mothers: foundations that give birth to more complex sauces.

Food Blog March 2014-3496Velouté is very similar to béchamel, with the exception that here the roux (butter and flour cooked together) thickens a stock or broth, not milk. The stock in question is most commonly chicken or fish stock, which also tells you with which products it is most frequently served. To be technically correct, the stock or broth is supposed to be “white,” that is, made with bones that have not been previously roasted. However, I wasn’t about to make a special batch of stock just for this application, so I dug into my freezer and emerged with some icy golden goodness I’d made from roasting a chicken some months ago. Not exactly traditional (I so rarely am, after all), but manageable for our purposes.

Recipes for velouté vary slightly on particulars. Some begin with mire poix (a French vegetable base consisting of diced onions, carrots, and celery), some recommend herbal accompaniments, some advocate finishing the sauce with a splash of cream, and the quantities of salt and pepper a cook should add differ depending on whose authority you accept. Some recommend adding heated stock to the roux, some call for the roux to be plopped into the heated stock. Either way, you essentially make a roux, combine it with the stock, whisk assertively to banish lumps, and settle in for a long, slow simmer during which time the sauce reduces, thickens, and develops flavor. Velouté means “velvet,” and when your sauce is done simmering you will understand why: it is so silky and fluidly pourable and soft. Mine was a pale matte gold, not quite thick enough to coat the back of a spoon, but sufficiently concentrated to pour in a solid stream rather than a liquid dribble. It smelled incredible – rich and meaty and flavorful – like midafternoon on Thanksgiving, the first time you open the oven to let the turkey aroma escape.

Food Blog March 2014-3486Yet for all its depth of flavor, prolonged cooking time, and high heritage, I couldn’t help but feel comforted by this sauce. There is something fundamentally homey and familiar about it. I realize Escoffier, the father of modern French cooking, will roll over in his grave when I write this, but it’s basically a simple gravy.

In restaurants, it was traditional to have a pot of velouté simmering away, ready to be dipped into to create more complex sauces and flavor bases. I wanted to keep things simple and pure, though, to really understand the sauce and its flavor, so I only made a slight adjustment.

I’ve got two recipes for you. This week, I’m celebrating velouté for its simplicity. Next week I’ll share a preparation that turns this rich, velvety sauce into something a bit more complex, but superbly tasty and comforting.

Food Blog March 2014-3493For the first, capitalizing on velouté’s similarity to a simple poultry gravy, I considered meals that incorporate such a familiar staple, and ended up with a sort of blue plate special: crispy chicken cutlet, buttery smashed potatoes, and lightly steamed green beans.

I often try to trace my thought process as I put dishes together, since the influences I’m incorporating aren’t always obvious. One of the derivatives of velouté is called sauce allemande, which includes egg yolk and mushrooms added near the end of the cooking time. To give this a nod, I decided to incorporate sautéed mushrooms to my sauce. Leery of the egg yolk idea, though, I transferred it to my chicken instead, dusting the breasts with flour and then dipping them in beaten egg before giving them a crisp coating. The mushrooms reminded me of my mom’s rice pilaf, which includes sautéed mushrooms and toasted almonds. Almonds seemed like a good pairing for the chicken, so I chopped them fine and combined them with panko. Almonds are equally nice with green beans, as are mushrooms, so the dish was starting to look cohesive, especially once I imagined my fragrant sauce kissing the whole thing.

Food Blog March 2014-3481Food Blog March 2014-3482Deep and rich thanks to its prolonged simmer, and silky smooth from the flour granules just bursting with all that liquid, this velouté made me realize why the judges on Chopped (don’t laugh, it’s my favorite guilty pleasure show) are always on about how important it is to have a sauce accompanying your dish. This enhanced all of the existing flavors on our plates. I kept going back for different combinations: sauce with chicken, chicken and sauce with potatoes, potatoes and sauce with green beans. All good. It really, as the Dude might have put it, tied the dish together.  Food Blog March 2014-3495

Basic Velouté
Makes about 2 cups
2 tablespoons butter
2 tablespoons flour
3 cups chicken stock or broth
Salt and pepper to taste
1 cup sliced, sautéed mushrooms


  • Heat the broth or stock in a medium saucepan until it comes to the barest simmer.
  • In a small skillet, melt the butter. When it is just melted, sprinkle in the flour and immediately combine with a whisk. I find sprinkling the flour around the skillet, rather than dumping it all in one place, makes for easier combining.
  • Cook the butter and flour together for a minute or two, whisking the whole time, until it takes on the consistency of a loose paste. You’ve now made a blond roux – minimal color, but maximum thickening power.
  • Either scrape the roux directly into the warm stock, or pour the stock slowly into the pan with the roux. Either way, whisk constantly to prevent clumping.
  • Simmer over low to medium-low heat for 30-45 minutes, whisking frequently to break up any lingering clumps or surface residue, until the liquid is slightly thickened, rich, and smells meaty. During this time, it will reduce by about a cup, leaving you with approximately two cups of sauce. You really do need to cook it for this long to achieve the desired consistency and depth of flavor.
  • Season with salt and pepper to taste.
  • Just before serving, stir in the sliced, sautéed mushrooms and warm through.


Sauce Velouté with “Blue Plate Special”
Serves 2
2 chicken breast cutlets (thin cuts of boneless, skinless chicken breasts)
1 cup flour
½ teaspoon salt
¼ teaspoon pepper
½ teaspoon garlic powder
1 egg
1 cup panko bread crumbs
½ cup sliced almonds, finely chopped
Olive oil, to cook chicken
2 large Yukon gold potatoes
2 tablespoons butter
¼ cup heavy cream
½ pound green beans, stem ends trimmed
1 recipe velouté with mushrooms
Additional salt and pepper to taste


For the chicken:

  • First, set up a breading station. I like to use two large plates and a pie pan for this. On one of the plates, combine the flour, salt, pepper, and garlic powder and spread it out to cover the entire plate. If you want additional or different spices, this is your chance to personalize. On the other plate, combine the panko and almonds. Sprinkle some salt and pepper in there as well, if you wish, and again, spread the mixture out for even coverage. In the pie pan, crack the egg and beat it up with a fork. Set these out in order: flour, egg, breading (see above photographs for reference).
  • Preheat the oven to 300F so that the cutlets can stay warm while you cook other elements of the dinner. Place a baking tray with a wire cooling rack on it in the middle of the oven.
  • Now, take a look at your cutlets. We want them no thicker than ½ an inch so they can cook quickly without burning the almonds in the breading. If they are that thin, great. Skip to the next step. If they are thicker, we need to pound them out. To do this, place one cutlet at a time in an unsealed plastic zip-top bag, or just wrap it loosely in plastic wrap. With a meat mallet, a rolling pin, or a heavy saucepan, pound the chicken by beating it with steady, forceful hits that push toward the outer edges of the breast. In other words, you’re not just punching straight down. You’re striking at a slight angle, from the middle toward the outer edges, which helps the meat spread without tearing.
  • When your chicken breasts are evenly ½ an inch thick, it’s time to bread them. Working one at a time, dredge the cutlet in the seasoned flour, pressing it with your fingers to ensure even coating. Flip it over and dredge the other side. Repeat with the egg, then with the panko and almonds, again being sure you press it in firmly to help the breading adhere.
  • Heat a good slick of olive oil in a skillet over medium heat. Once it is glistening, add the first cutlet, placing it down in the middle of the pan and then not moving it for four minutes.
  • After four minutes – no cheating! – peek at the underside of the cutlet. The breading should be golden and crisp but not burned, and thanks to being left undisturbed, not peeling and crumbling off the chicken! Flip the cutlet and sizzle on the other side for another four minutes until cooked through and crisp.
  • While you are cooking this cutlet, dredge and bread the second one.
  • When the first cutlet is golden brown and crisp on both sides, carefully move it from the skillet to your prepared, preheated oven tray. It is already fully cooked (at least it should be, if you’ve pounded it to a true ½ inch), so this will keep it warm and crispy until both pieces are done.
  • Repeat this cooking process with the second cutlet. If you need more time to prepare the rest of dinner, as I always do, these will hold in the warm oven for 15 minutes or so. You don’t want to go much longer than that, lest they dry out, but I was delighted by how moist ours still were.


For the potatoes:

  • Cut the potatoes into small, even sized chunks – the smaller you cut them, the faster they will cook. Plop them into a pot with plenty of salted water, then cover and set over high heat.
  • Bring the water to a boil, and cook, stirring once or twice if the water threatens to boil over, until the potato chunks are fork-tender. Depending on how small you’ve cut your potatoes, this could take anywhere from 10-20 minutes.
  • When the potatoes are done, drain into a colander and set aside.
  • Place the pot back on the stove over medium-low heat and add the butter and cream.
  • As the butter melts and the cream heats, put the drained potato chunks back into the pot and stir to combine. Using a potato masher or the determined back of a spoon, smash up the potatoes to your desired consistency. I like mine just a little chunky, with the thin skins still in there. Season to taste with salt and pepper.


For the green beans:

  • Heat a pan of salted water to a simmer.
  • Add the beans, stem ends trimmed, and simmer for 3-4 minutes, or until they reach your desired tenderness. We like them crisp-tender.
  • Drain the green beans, then return to the empty pan over medium heat with a slick of olive oil or a small knob of butter. Cook, tossing occasionally to distribute the fat, for a minute or two.
  • Season to taste with salt and pepper, and a squeeze of lemon juice or a tiny splash of white wine if desired.


To serve:

  • Consider your plate like a clock face. Position a scoop of mashed potatoes at 9 o’clock. Lay the green beans out in a curved little stack along the top few hours: let’s say 11-1. Now, lay the chicken breast partially atop the mashed potatoes, angling it from 9 down to 5.
  • Pour the warm, mushroom-spiked velouté over the chicken and the potatoes, so it slides and settles, gravy-like. Serve immediately to retain the crispness of the chicken coating.

Strawberry Irish Soda Bread for #TwelveLoaves March

Though I am reasonably certain I have some Irish blood somewhere in my Northern European mongrel veins, the luck of the Irish has never been particularly strong for me. I didn’t end up at the schools I’d crossed my fingers for, my job, while great, wasn’t my initial choice, and my thumbs are, at the best of times, a sickly pea soup color, not truly green. The bare, arid stalks of mandevilla I need to dig out of that pot on my porch speak wonders. I’m not destitute, and I’m far from unfortunate. Yes, things work out, but they mostly work out through just that: work.

Food Blog March 2014-3476This week was no exception. Bound and determined to make something spectacular, I embarked on this month’s Twelve Loaves challenge with plans to produce a tray of flaky, delicate biscuits, tangy with goat cheese and loaded with strawberries, folded and rolled and folded and rolled in the Ruhlman method to produce at least a dozen fluffy, puffy layers. I was going to call them “puff biscuits.” I’d already started writing a post.

Food Blog March 2014-3359But demanding that a full pint of strawberries get jammed into a biscuit dough containing a mere 9 ounces of flour (a scant two cups, if you’re counting) is apparently a recipe for disaster. The berries, juicy and tart, immediately dampened the dough. Every time I chilled, then folded, then rolled the dough, more juice, more moisture, more sticky sodden mess. And when I baked them, even after correcting my mistake of setting the oven temperature too low, they just didn’t rise. I mean, they rose a little, pushing up a half inch or so, but it wasn’t the sky-high triumph I was looking for. No puff. Maybe “button biscuits” would be more appropriate. An investment of over three hours produced a bowl full of terrifically flavored, flat-as-a-pancake discs I deemed, with dough packed under my fingernails and flour streaked in my hair (it was an emotional moment), a complete waste of time.

Food Blog March 2014-3451Except that they were delicious. It took me the rest of the evening, and part of this morning, to decide what had happened, and whether to post about it. In the long run, as I’ve noted, though I want this blog to be about delicious and beautiful food, I also want it to be about learning. In sampling piece after piece (of biscuit after biscuit – honesty is important, people), I was reminded of several puff pastry tarts I’ve made that didn’t cooperate either, and my conclusion is that this is a weight problem. Strawberries, even cut into small pieces, are heavy. Leaking juice and packing the dough, they prevented any kind of substantial rise from taking place, even though, as their flaky surroundings indicated, the baking powder and chunks of butter were doing their work. Additionally, the excessive smears of goat cheese I layered in probably didn’t help matters, overwhelming the dry ingredients with more fat than they could handle. Button-busting biscuits, perhaps.

Food Blog March 2014-3449 Food Blog March 2014-3454 Food Blog March 2014-3456Food Blog March 2014-3460So today, I’m trying my luck in another application that embraces both the strawberry theme and the cultural occasion: Irish soda bread, studded with strawberries, perked up with the added interest of lemon zest and fresh thyme leaves. It’s lousy with springtime.

Food Blog March 2014-3464This soda bread cooks in a pot, rather than on a cookie sheet, a technique I learned a year ago and haven’t gone back on since. Baking in a lidded pot retains the kind of moisture bread likes – the kind that commercial ovens pump in that home cooks have trouble emulating. The final few minutes of baking with the lid off sets a crisp crust, but the dribble of melted butter you brush over the loaf when it emerges from the oven ensures that this crust is tender and flavorful.

Food Blog March 2014-3465When baked like this, strawberries become at once sweeter and tarter (really? tarter? I’d prefer “more tart” but my grammar checker admonished me). Their tartness is enhanced by the lemon zest perfuming this loaf, and the herby note of the thyme makes sure it is not too sweet.

Food Blog March 2014-3467This in-betweennness is, I think, what I like so much about Irish soda bread. It feels eggy and rich, but in fact it has no eggs and only a few tablespoons of butter to it. It feels like a breakfast bread you could spread with jam or honey, but it could just as easily sit beside a thick beef stew (well, maybe minus the strawberries). And you could probably administer a few globs of chocolate hazelnut spread to its tender and willing embrace with no complaints.

Food Blog March 2014-3468In any case, the important thing is that it worked, and it was zingy and springy and delicious. Depending on the juiciness of your strawberries, this loaf may look slightly underdone when you pull it out of the oven. Give it an extra ten minutes, if you must, but once it is between 180-200F it should be fully cooked. The berries may create some doughy-looking pockets here and there, but this is nothing that a quick slick of butter and a toast under a broiler or toaster oven won’t fix.

Food Blog March 2014-3480

Strawberry Irish Soda Bread
Makes one 8-9 inch loaf
3 cups all-purpose flour
1 cup cake flour
2 tablespoons brown sugar
1 ½ teaspoons baking soda
1 ½ teaspoons cream of tartar
1 teaspoon salt
2 teaspoons fresh thyme leaves
Zest from 1 lemon (about 1 tablespoon)
5 tablespoons butter, divided
1 ½ cups buttermilk
1 pint strawberries, roughly chopped
1-2 teaspoons raw sugar, optional


  • Position a rack in the top third of your oven and preheat to 400F.
  • In a large bowl, whisk the dry ingredients, including the sugar, lemon zest, and thyme leaves.
  • Using a pastry blender, a fork, or your fingers, cut in or rub in 2 tablespoons of the butter until it is evenly dispersed in pebbly little bits through the flours.
  • Add the buttermilk and bring the dough together with a fork. It should be damp but a bit crumbly. When there is almost no dry flour remaining, add the strawberries and combine gently.
  • Dump out your dough onto a floured board and knead gently, pressing the dough together into a ball with the heels of your hands. We are looking just to bring this together into a rough, sticky ball, not to knead it firmly. Think of scones, not of yeasted bread dough.
  • Once you are able to form the dough into a ball of about 6 inches in diameter, score the top with a very sharp knife – an x shape is most traditional.
  • Using 2 of the remaining tablespoons of butter, grease the inside of a dutch oven or similar large, oven-safe, lidded pot.
  • Carefully place the loaf in the pot, clamp on the lid, and bake in your preheated 400F oven for 30 minutes.
  • Remove the lid and bake an additional 10 minutes, until the loaf is golden and lightly crisp, and an oven thermometer registers between 180-200F. If it still looks doughy when you peer at the score marks, give it an additional 5-10 minutes in the oven with the lid off. Meanwhile, melt the remaining tablespoon of butter.
  • Immediately upon removing from the oven, brush with the melted butter and, if you wish, sprinkle with the 1-2 teaspoons of raw sugar for a sweet crunch.
  • Let cool in the pot for at least thirty minutes before removing to a wire rack or straight to a bread board for slicing.

Tropical Banana Bread for the Hawaiian Vacation we should all be on

Food Blog March 2014-3354As I type this, I am one week – count it! – one lousy week from Spring Break. That doesn’t sound like much, but as I’m sure any of my students would agree if you asked them, in lived reality it is an eternity. On top of that, the sudden influx of warm weather draping itself all over Southern California this past weekend has enchanted misled my poor little vacation-focused brain into thinking the upcoming break might actually be the onset of summer break. It’s going to be so disappointed.

Food Blog March 2014-3327Because I’m foolishly thinking of summer, it’s finding its way into my cooking. N. and I have promised ourselves a Hawaiian vacation this year, in celebration of various job and life related things, and so I’m feeling a bit tropical in some of my undertakings.

Food Blog March 2014-3330In light of my recent declaration that what I do here inelegantly boils down to messing with classics, I’m bringing you banana bread. Now, my banana bread recipe – the one I’ve used so many times the page in the cookbook is torn and spattered and hard to read – is pretty sacred. I’ve been using it since high school, and it produces a loaf that is thick and moist and golden and just barely crusty on top, and when N. heard that I was going to change it, I am fairly certain he let out a legitimate whimper. Apparently there are some things you just don’t mess with.

Food Blog March 2014-3326But I did it anyway, jamming the moist, fragrant batter with indecent quantities of chopped candied pineapple and crystallized ginger.

To make it even more of a celebration, I finally decided to replace the old, mismatched, stained and eternally sticky-handled (they aren’t dirty, the stickiness just doesn’t wash off anymore) glass bread pans I bought from a thrift store while I was in college with actual 9×5 inch standard loaf pans. Non-stick, too. What a luxury! Unfortunately, the stickers advertising how amazing these pans are had been adhered to the insides with gigantic globs of something that can only be described as superglue derived from elephant snot. When not even liberal doses of rubbing alcohol failed to remove all of the adhesive, I got so angry I actually started hiccuping.

Food Blog March 2014-3335Good thing the resulting bread was so delicious. Truly, with all my recent quasi-failures, this one is a real triumph. It is moist, studded with fruit that softens over the long, low bake. These bits of fruit, especially the ones that sink to the bottom of the loaf, take on an appealing kind of gumminess, and some even attain a whisper of the kind of caramelization you’d find in the fruit of a tarte tatin. Sliced thick, it is rich but not too sweet, making it a perfect companion for morning coffee or mid-afternoon chai (the basic boxed mix combined with vanilla coconut milk is my current favorite, and all the more appropriate for the whole Hawaiian vacation thing). It’s the kind of bread you want to eat barefoot, lightly clothed, on a lanai looking out over the ocean, perhaps after you’ve just enjoyed some –ahem– morning activities that left you wanting a snack. The pineapple and ginger mingle well with the already slightly tropical feel of the banana, and the ginger adds a welcome warmth without being spicy (I used a lot, and the flavor is quite pronounced – see my quantity suggestion below if you are unsure about this).

Food Blog March 2014-3333We should all be on a Hawaiian vacation. We probably all deserve one. But if it’s not possible for you, and if you are still in a part of the country that refuses to let Spring over the threshold, may I humbly recommend this bread? At least your taste buds can hop a quick flight… Food Blog March 2014-3338

Tropical Banana Bread
Makes one 9×5 inch loaf
Adapted from Country Cooking
3 medium overripe bananas
½ cup vegetable or other neutral tasting oil
2 eggs
¼ cup + 1 tablespoon buttermilk (if you don’t have buttermilk, use ¼ cup regular milk + 1 tablespoon white vinegar, stir to combine, and let sit for 2-3 minutes)
1 teaspoon vanilla
1 ¾ cups flour
1 cup sugar
1 teaspoon baking soda
½ teaspoon salt
1 cup roughly chopped candied or crystallized pineapple
½ cup finely chopped crystallized ginger (this results in a strong ginger flavor. If you aren’t sure about this or you’re not overly fond of ginger, reduce to ¼ cup)


  • Preheat the oven to 325F and prepare a 9×5 inch loaf pan. I usually just coat the bottom and sides with non-stick spray, but this time I lined the inside with parchment paper to protect against any lingering elephant snot glue (see above).
  • In a large bowl, or the bowl of your stand mixer, mash the bananas into a pulpy mess. Add the oil, the eggs, the buttermilk, and the vanilla and combine thoroughly.
  • Add the sugar and mix well.
  • Add the flour, baking soda, and salt, and mix just until combined. Be sure to scrape the bottom – sometimes streaks of flour wind up hiding out down there.
  • Add the pieces of pineapple and ginger and combine thoroughly; you want even distribution of the fruit through the batter.
  • Carefully pour and scrape the batter into your prepared loaf pan. Beware: if your pan is smaller than 9×5 inches, you may want to make a few muffins as well, or at least place a cookie sheet under the pan in the oven in case of overflow.
  • Bake at 325F for 80-90 minutes, or until a tester comes out with just a few moist crumbs clinging to it. Check at 80 minutes, but don’t be surprised if it is still a bit raw in the middle. This is quite a large loaf, and depending on the size of your bananas it may take even longer than 90 minutes to bake.
  • Let cool completely (or at least twenty minutes) before removing from the pan and slicing.
  • Keeps wrapped well in foil for at least three days, but I doubt you’ll have that problem.

Stir fried green beans with coconut (green bean poriyal)

Things are getting busy around here. I’m coursing toward midterms, which means piles upon piles of grading, as the students need to know where they stand at the halfway mark. Spring break approaches, and papers must be returned, research topics and methods must be interrogated, and evaluation work must be completed. There’s little time for a mellow afternoon at home, punctuated by soft cheese oozed onto crackers at an impromptu happy hour, rather than the locomotive “just-one-more, just-one-more” echoing in my head as I face thirty-five opinions about whether Beowulf’s choice to take on a dragon single-handed was admirable or foolhardy.*

Food Blog January 2014-3049So I’m thinking back to my winter break, when I cracked the spines of two new cookbooks (does that make you cringe? It makes N. just ache inside, but dammit, I want them to lie flat!) to devour their offerings. One, Yotam Ottolenghi’s Jerusalem, has convinced me our refrigerator should never be devoid of homemade hummus again. The other, Suvir Saran and Stephanie Lyness’s Indian Home Cooking, is a beautiful and fairly accessible interpretation of some classic and some entirely original Indian and Indian-inspired dishes that leave me alternately drooling and scribbling feverish grocery lists to take to my nearest Indian market.

Food Blog January 2014-3037In the vegetable section, Saran and Lyness take on green beans in several ways, almost always doctoring them with chilies and deeply toasted spices. In one, the addition of coconut stopped me in my proverbial tracks. In fact, I’ve now made this recipe three times, as though it’s not possible to turn the page anymore because this one was just too good.

Food Blog January 2014-3039Despite this overwhelmingly positive review, I had my qualms when I first approached the recipe. This dish is called a poriyal in the Tamil language, and as I understand it, this means a stir fry or sauté of vegetables. This one happens to have coconut, split peas, urad dal (black gram beans) and numerous warm, earthy spices along with some dried chilies competing together in a beguilingly spicy umami flavor bath. But the original directions in the recipe call for sautéing the beans for five minutes, then simmering them for ten, and then evaporating the water and stir-frying again for another five – twenty minutes of cook time for green beans! I was horrified by the potential for overcooked, mushy limpness.

Food Blog January 2014-3043But I tried, I really did, to follow the directions, at least as much as I could stand it. I shortened up the cooking time for the green beans a tiny bit, but otherwise left the procedure essentially the same. To my surprise, I ended up with meltingly tender, sublimely flavored beans, with none of the unappealing mushiness I’d feared. They give up any sort of dental resistance, yes, but this is ultimately not a bad thing. The toasty split peas and chewy, deeply bronzed coconut provide sufficient texture, and the beans just give a kind of unctuous, vegetal goodness.

Food Blog January 2014-3045Still, though, there’s something about green beans sautéed until just crisp-tender, and so I revisited the recipe, this time adding the beans later, simmering them a shorter time, and ending up with a just-toasted, still fresh pile of vegetables I couldn’t help but demolish. Though the ingredient list is the same, I’m giving you both sets of procedures, so you can choose how you like your beans. However you want them, though, meltingly tender or still a bit crisp, this combination is worth stopping over.

Food Blog January 2014-3074

* Not really. My students have written on a number of intriguing topics, this only one among them. But sometimes, when I look at my “to be graded” tray, it feels that way.

Food Blog January 2014-3077

Stir Fried Green Beans with Coconut
(Slightly adapted from Indian Home Cooking)
3 tablespoons neutral flavored oil, like canola or vegetable
2 tablespoons split peas (the recipe calls for yellow, but I used green because that was what I had. Both will work fine – you are toasting them thoroughly to provide crunch)
1 tablespoon black mustard seeds (here, though, don’t use yellow instead. The taste is quite different)
1 teaspoon hulled black gram beans (also called urad dal; optional – they are there for the crunch factor, like the split peas)
3 small whole dried red chilies
1 teaspoon cumin seeds
½ cup unsweetened shredded coconut, divided
¾ pound green beans, ends trimmed, cut on a bias into 1-2 inch pieces
1 teaspoon salt, or to taste (I found I liked a bit less)
1 cup water, for meltingly tender beans, or ½ cup water, for crisp-tender beans


For meltingly tender green beans:

  • Add the oil, split peas, and mustard seeds in a large skillet or wok with a lid over medium-high heat. The mustard seeds will pop and splatter, so clap a lid on quickly. Cook, stirring, until the peas turn golden-brown and the mustard seeds begin to crackle, 1-2 minutes.
  • Add the black gram beans, if using, the chilies, and the cumin and cook uncovered, stirring, for one more minute, until the chilies are well oiled and the cumin seeds smell fragrant.
  • Add ¼ cup of the coconut and cook, stirring, 30 seconds. Add the beans and salt and cook, stirring occasionally, for five minutes.
  • Add the remaining ¼ cup coconut and the water. Bring to a simmer, cover, and cook until the beans are tender, about 10 minutes (I tried, I really did, but the best I could manage was five minutes before I got worried about limpness, and the beans were still plenty tender).
  • Uncover and cook, stirring often, until all of the water has evaporated, about five more minutes. Taste for salt and serve piping hot.


For crisp-tender green beans:

  • Add the oil, split peas, and mustard seeds in a large skillet or wok with a lid over medium-high heat. The mustard seeds will pop and splatter, so clap a lid on quickly. Cook, stirring, until the peas turn golden-brown and the mustard seeds begin to crackle, 1-2 minutes.
  • Add the black gram beans, if using, the chilies, and the cumin and cook uncovered, stirring, for one more minute, until the chilies are well oiled and the cumin seeds smell fragrant.
  • Add ¼ cup of the coconut and cook, stirring, 30 seconds. Add ½ cup water, salt, beans, and remaining ¼ cup coconut. Immediately clap on the lid and leave it for at least two minutes, or until the splattering stops.
  • Uncover and cook, stirring often, until the water has evaporated and the beans are barely tender and have had a chance to toast a bit – this should take five more minutes at most. Taste for salt and serve piping hot.