Project Sauce: Peppercorn Crusted Pork Tenderloin with Plum Gastrique

Today’s entry rounds out my eighth month of this sauce project. I’ve learned a number of things thus far, but the one that remains the most challenging is this: sauce is a component, not a complete product. That means you must not only execute the sauce itself, but you also have to decide what to drizzle, spoon, scoop, pour, or dab it over!

Food Blog August 2014-0442
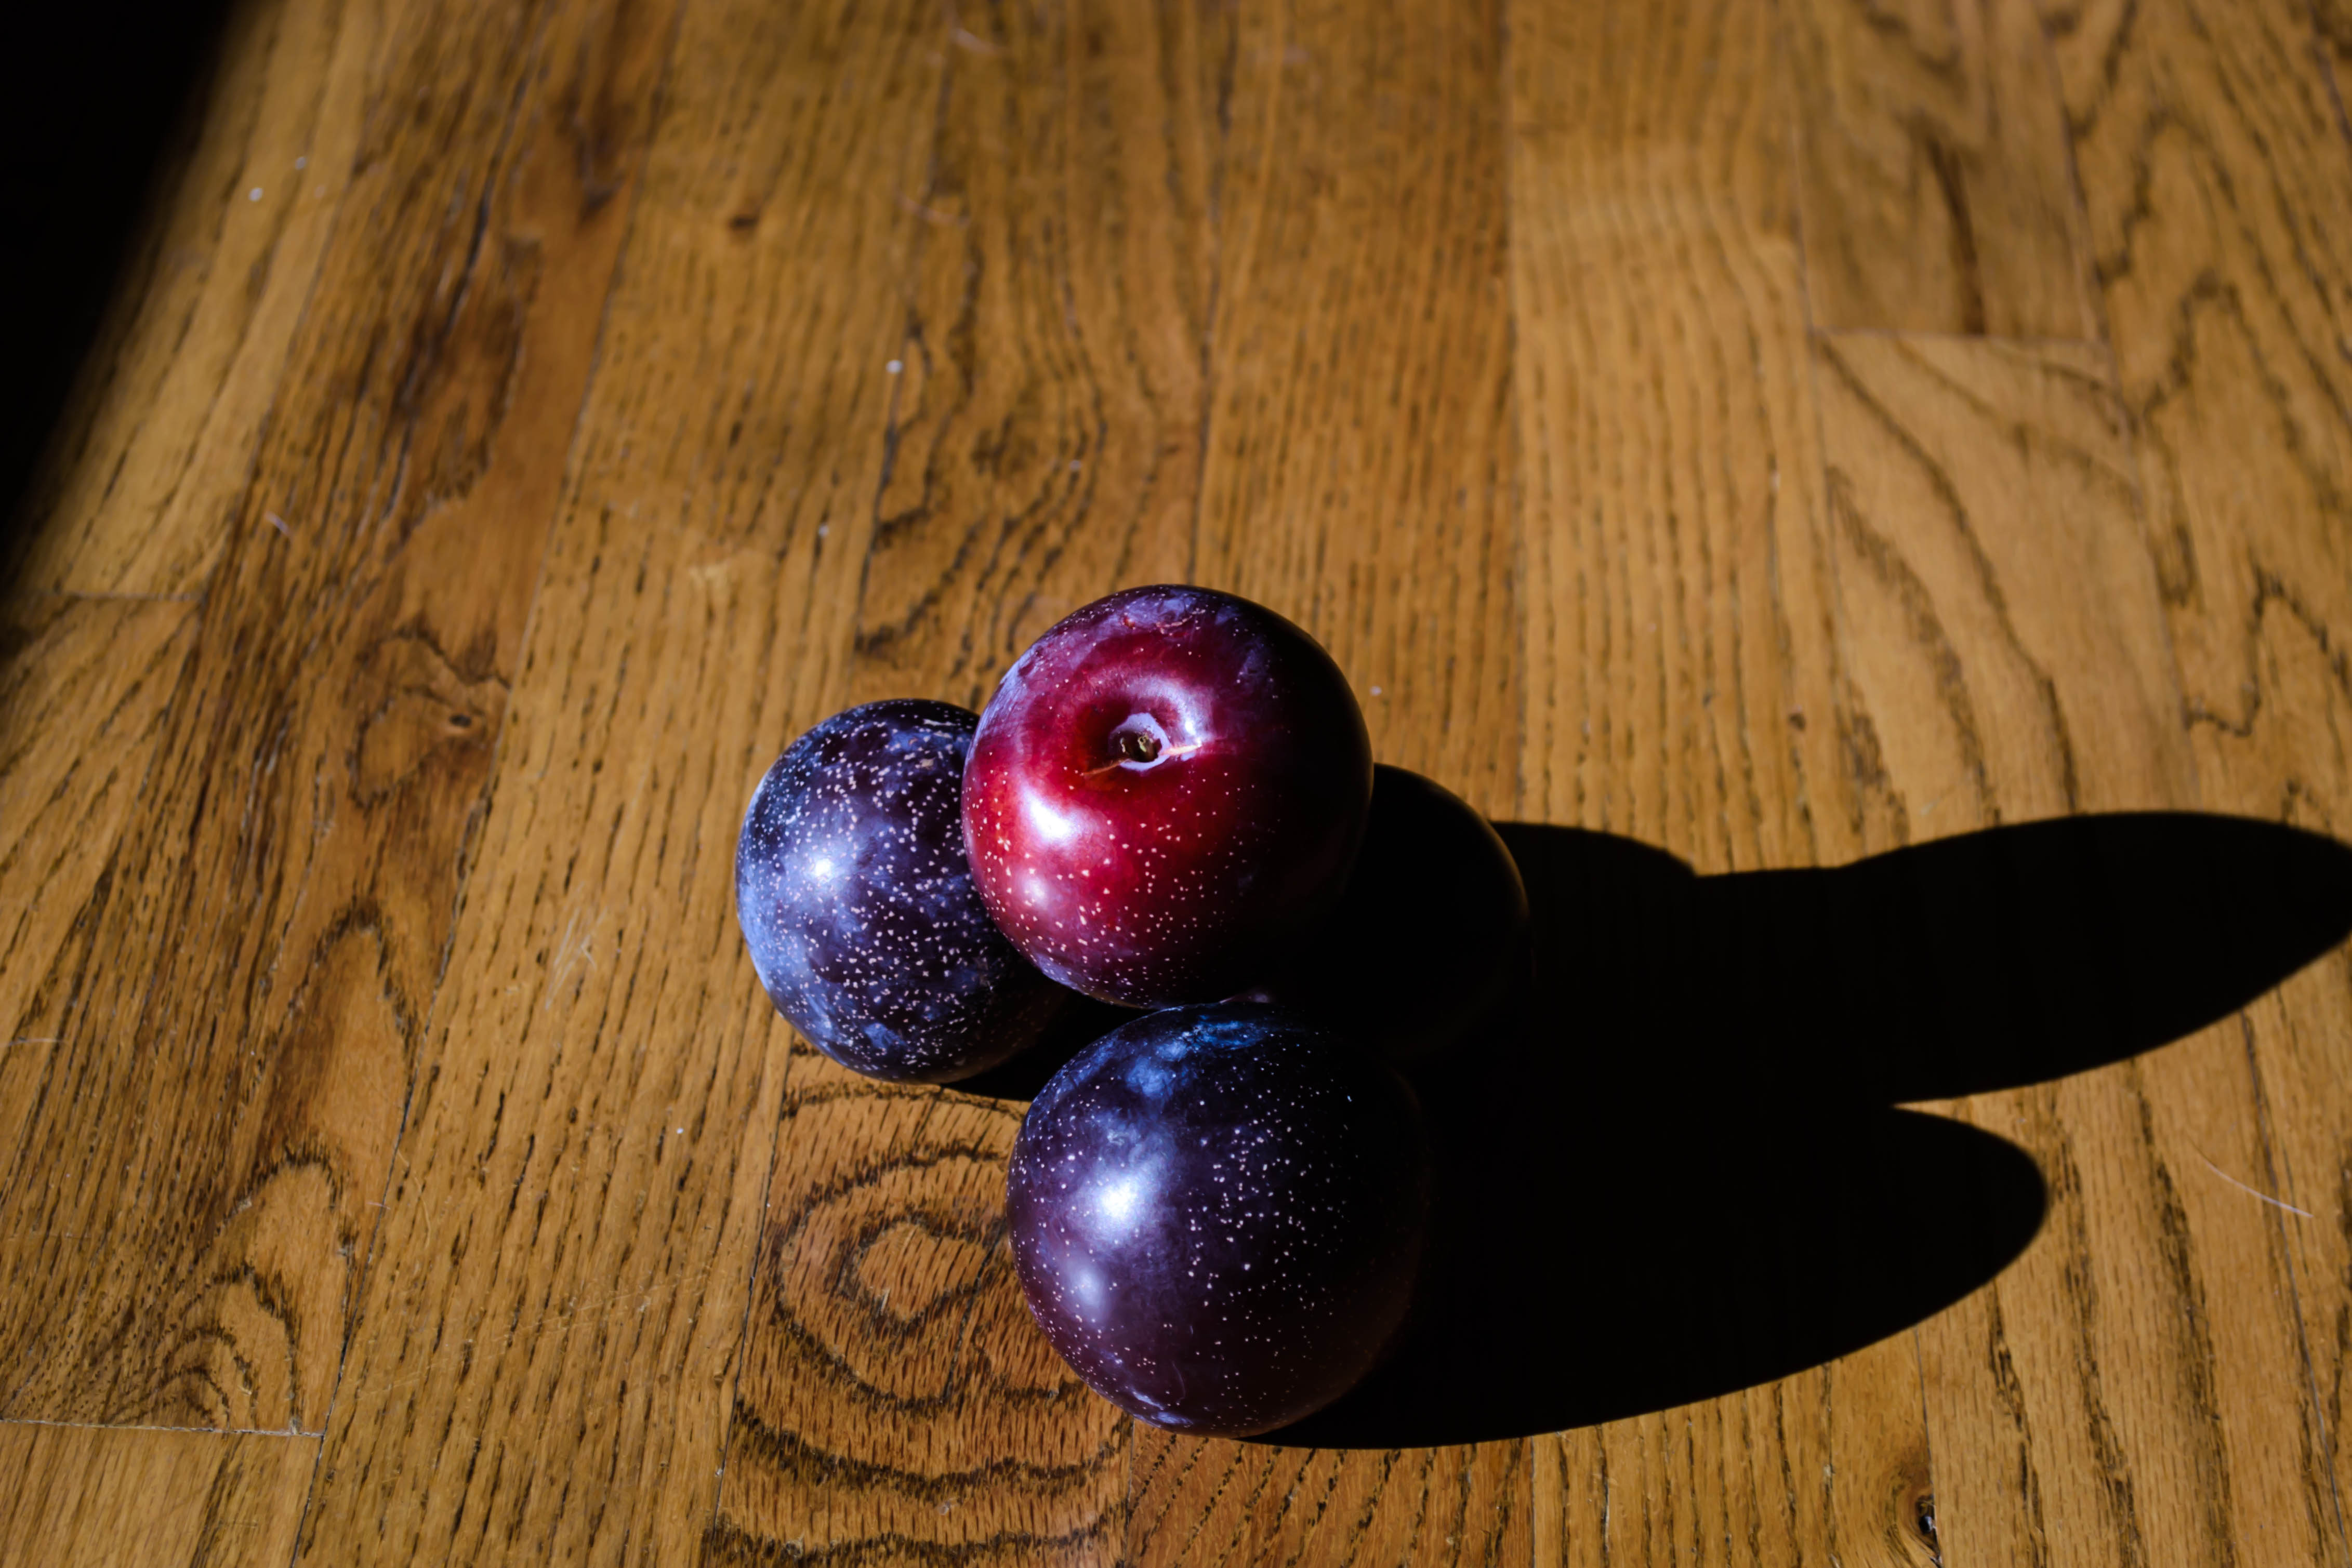
Sometimes this is quite simple. Hollandaise, for example, is such a classic that eggs benedict spring immediately to mind. A few weeks ago, my meunière sauce had a similar effect, demanding as it does a particular fish to moisten and flavor. And in fact, once I figured out what the next entry in my little project would be, I had no trouble dreaming up how I would serve it. It would be a gastrique – a French sauce that melts sugar and vinegar together into a thick, sweet-sour glaze. Mine, since it’s the height of summer and every week I can’t help but fill a bag with stone fruit at our local Farmers’ Market, would be dressed up a touch with the addition of plums. As soon as I knew this, I knew I wanted to serve it over moist lovely slices of pork tenderloin. Easy. Done.

Food Blog August 2014-0440Except.

Let’s straighten out an unfortunate item of business here, friends. N. doesn’t like pork. Oh he loves bacon. Sausage, especially breakfast sausage, is a treat. He’ll eat various smoked and cured pig-based items: prosciutto and pancetta are consumed with gusto and exotics like guanciale or chorizo are just fine. He’ll even tolerate ham, though it wouldn’t be his first choice. But pork itself, not treated with smoke or salt or brine, elicits a sneer. He would never order pork tenderloin in a restaurant. Ribs are more trouble than they’re worth. Even pulled pork had better be swimming in a pretty flavorful sauce to keep him interested. I have to get my pork chop fix when I visit my parents without him. It doesn’t seem to matter if it’s breaded and fried, grilled up, or seared and roasted. He’ll have the chicken, thanks.

Food Blog August 2014-0426
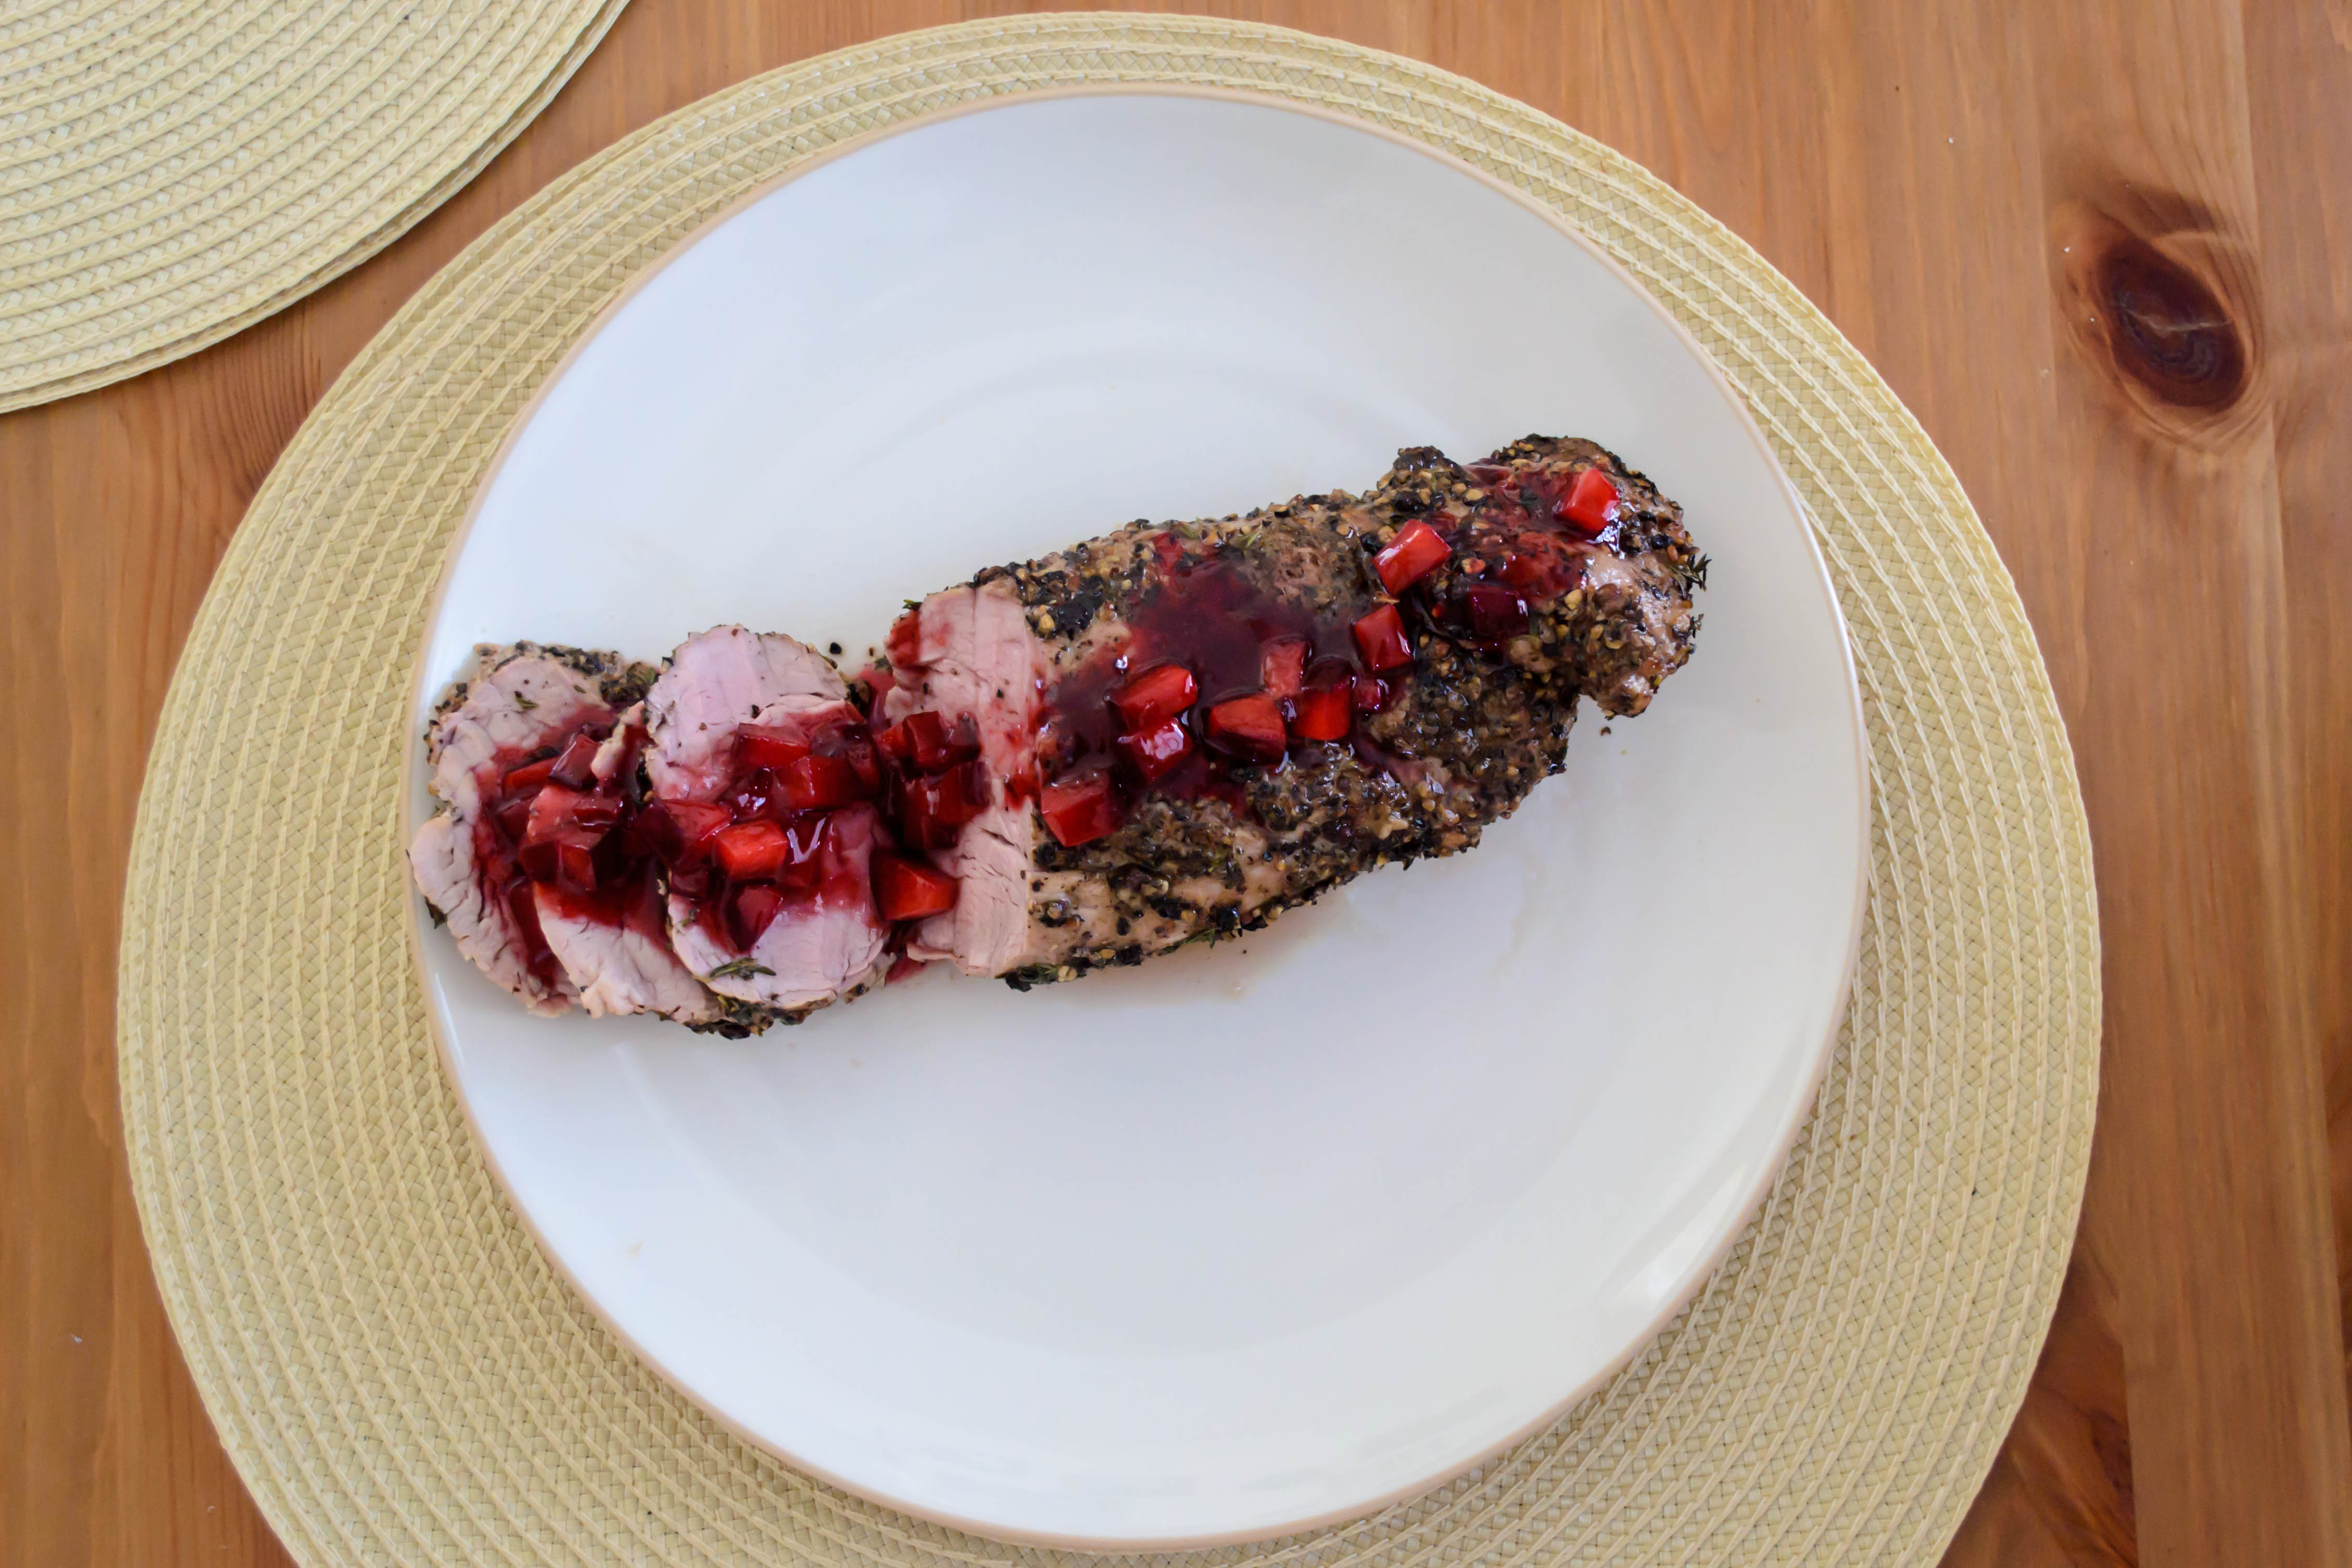
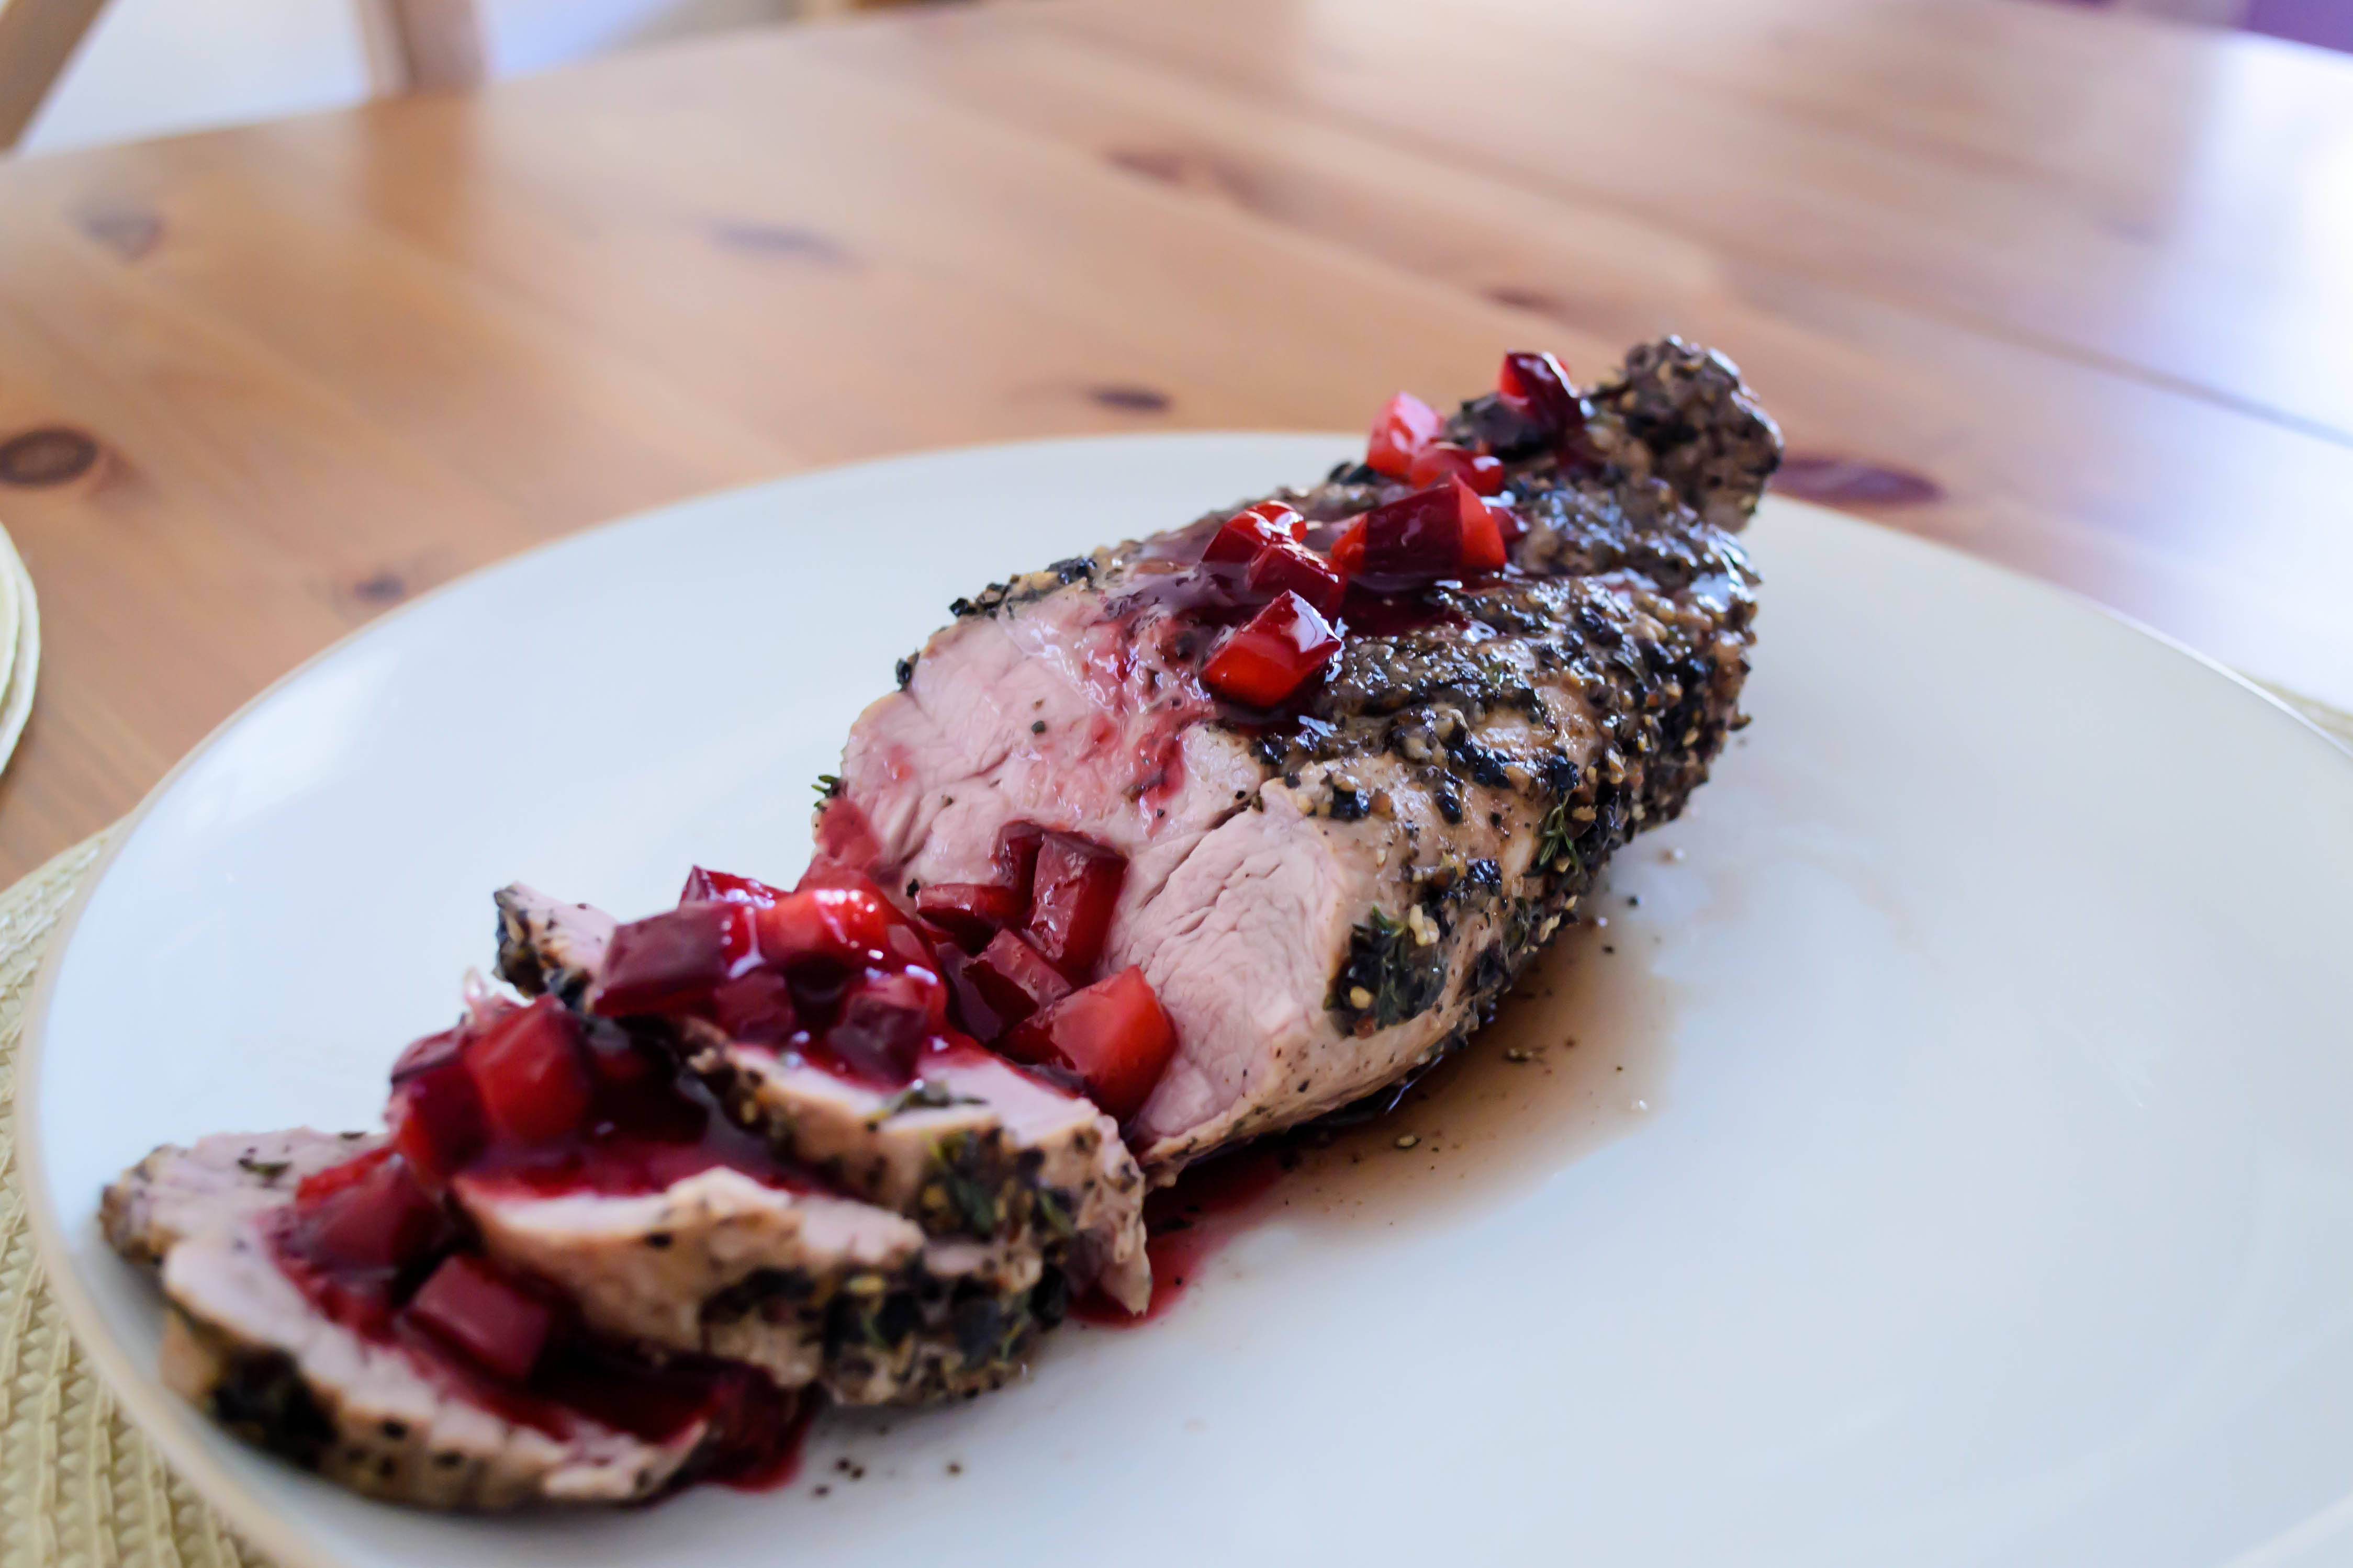
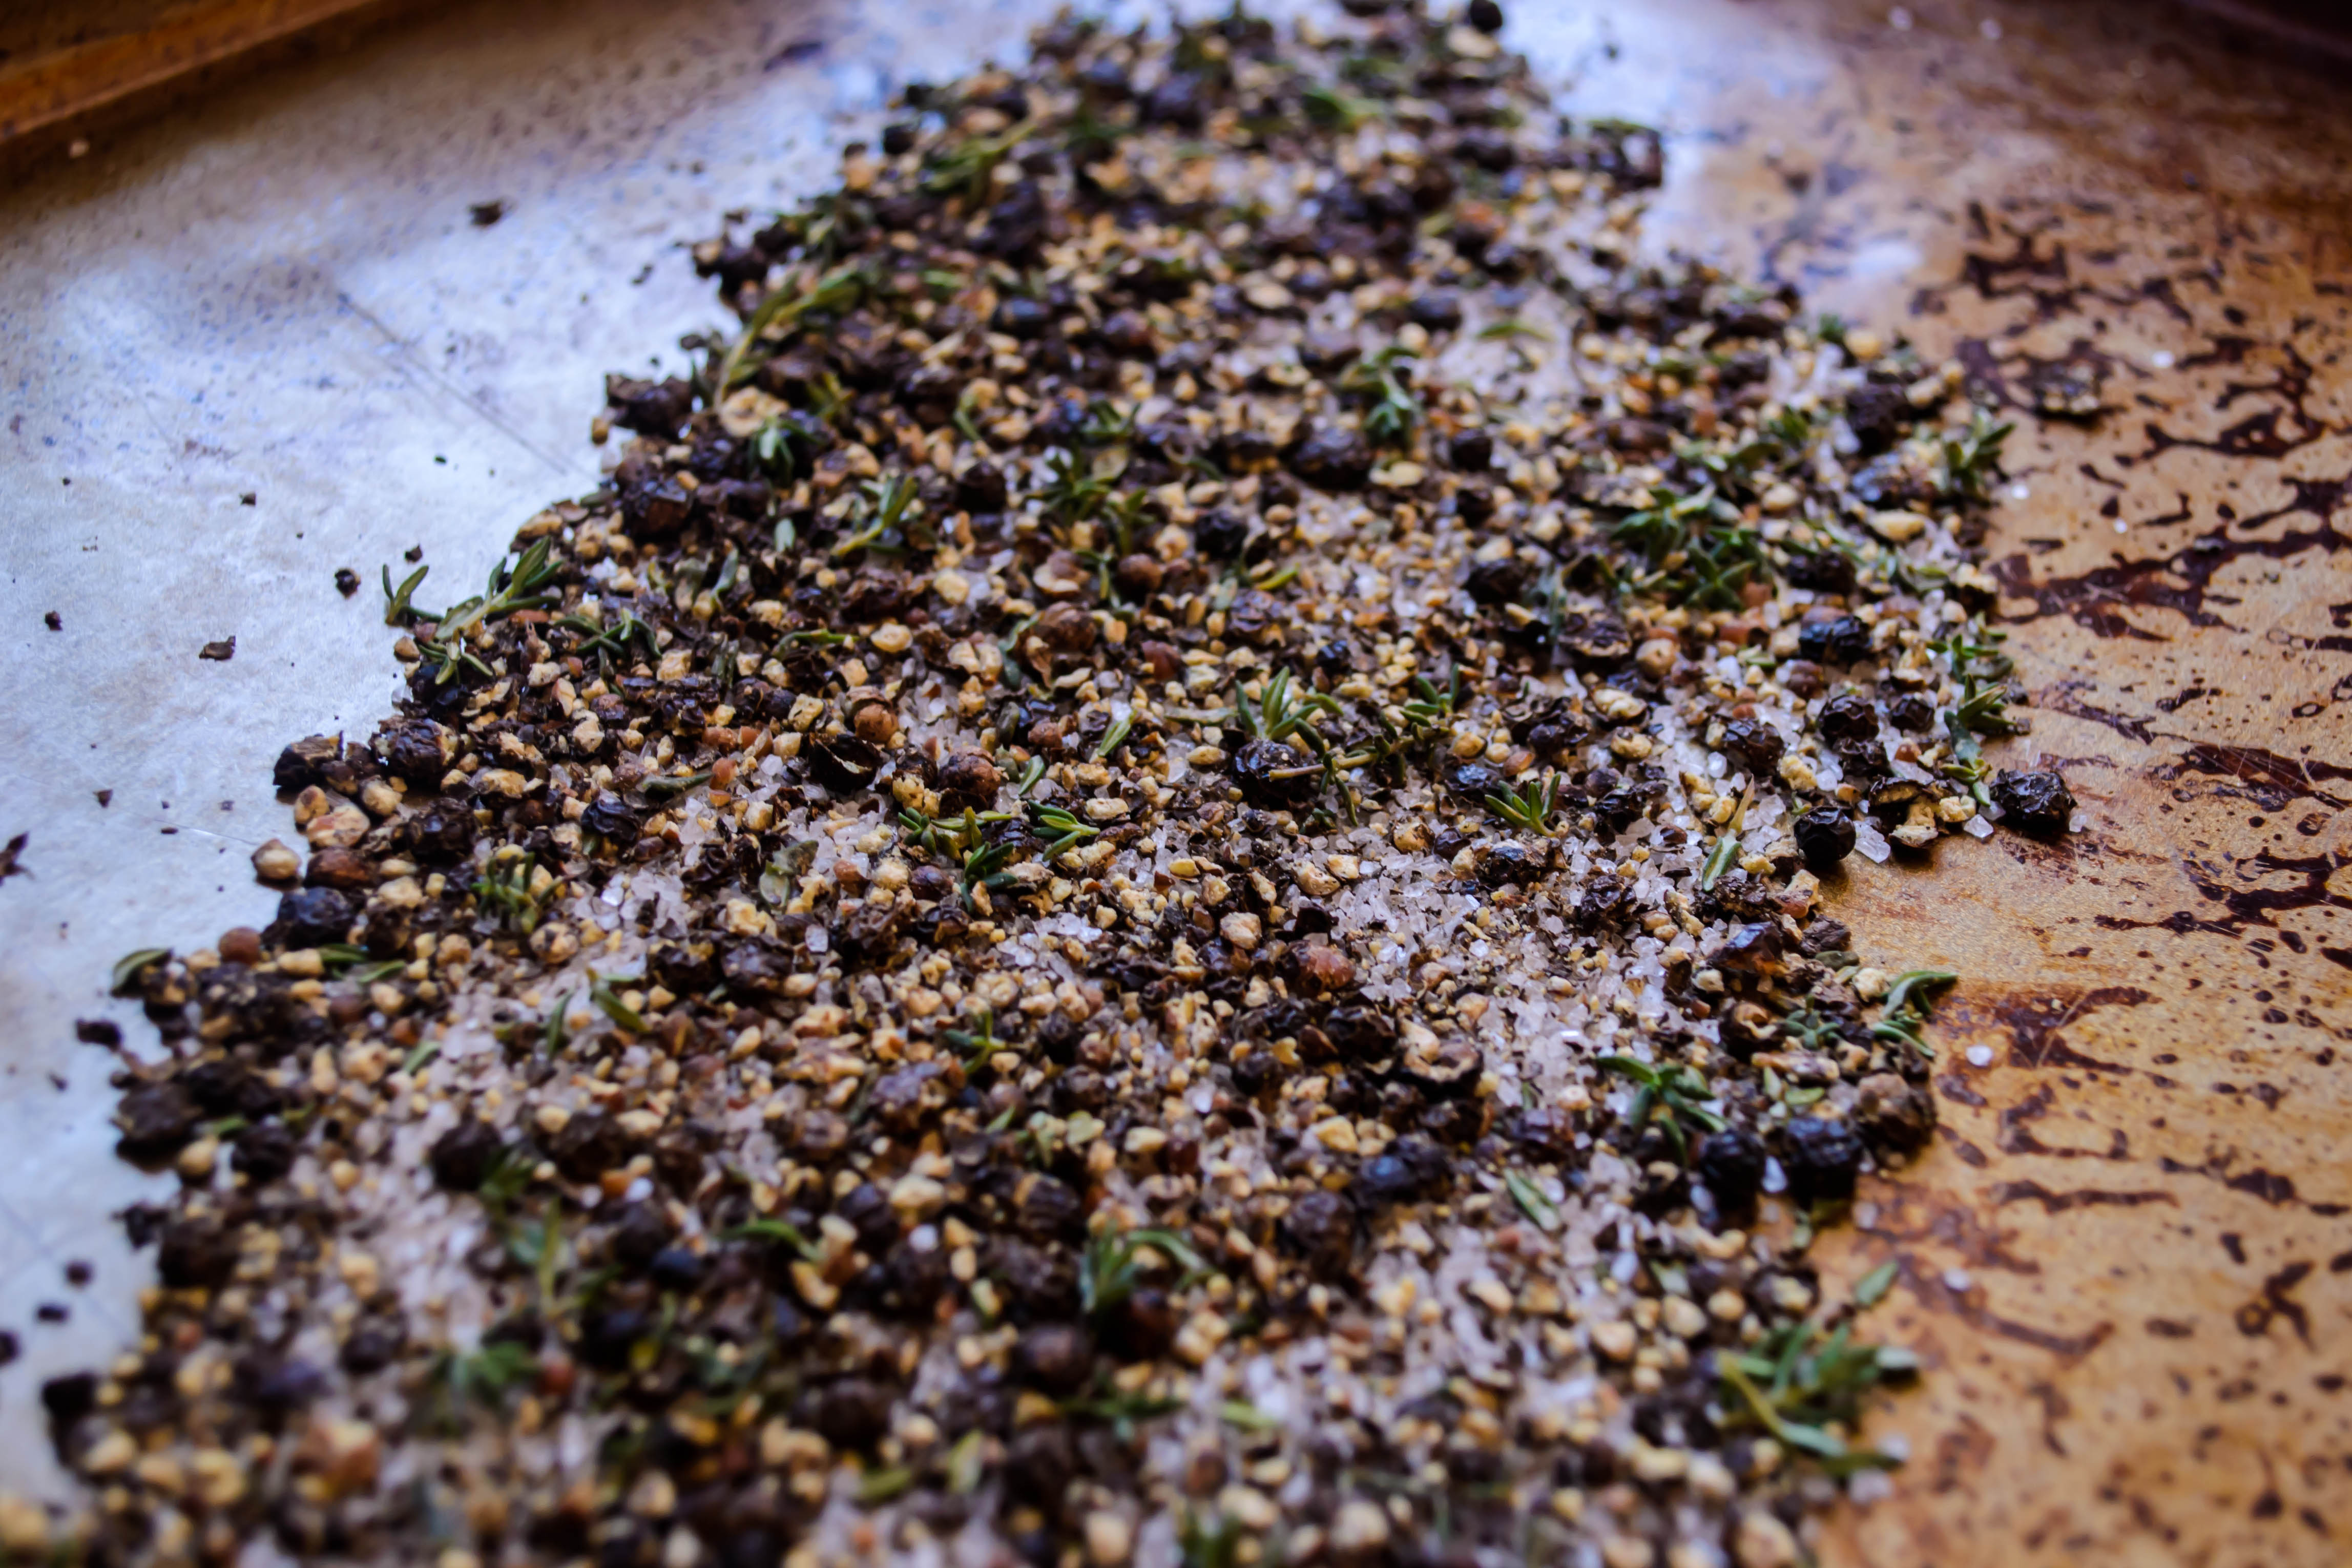
This, as you can imagine, was a considerable wrench aimed at my little plan. But the idea of silky, tangy, liquid plum dribbling over a thick slice of tenderloin sounded too good. I decided he would just have to deal. So I rolled the tenderloin in a blend of crushed peppercorns, coarse salt, and thyme leaves. I seared it, I roasted it, I let it rest. I cut it in thick, moist slices and served him a few with a coating of ruby sauce.

Food Blog August 2014-0428He went back for seconds. Later, I caught him in the refrigerator tasting just one more slice. He considered piling the leftovers onto some sourdough for a lunch sandwich the next day. Um, pork.

Food Blog August 2014-0432I can only figure one of two answers here. One, it could be that the heat from the crushed peppercorns was so powerful that it disguised the porcine flavor he’s so tepid about. Two, and this is the option I choose to believe: the pairing was so perfect, and the gastrique so sublimely flavored, that he couldn’t help himself but to fall hard for the combination.

Food Blog August 2014-0434
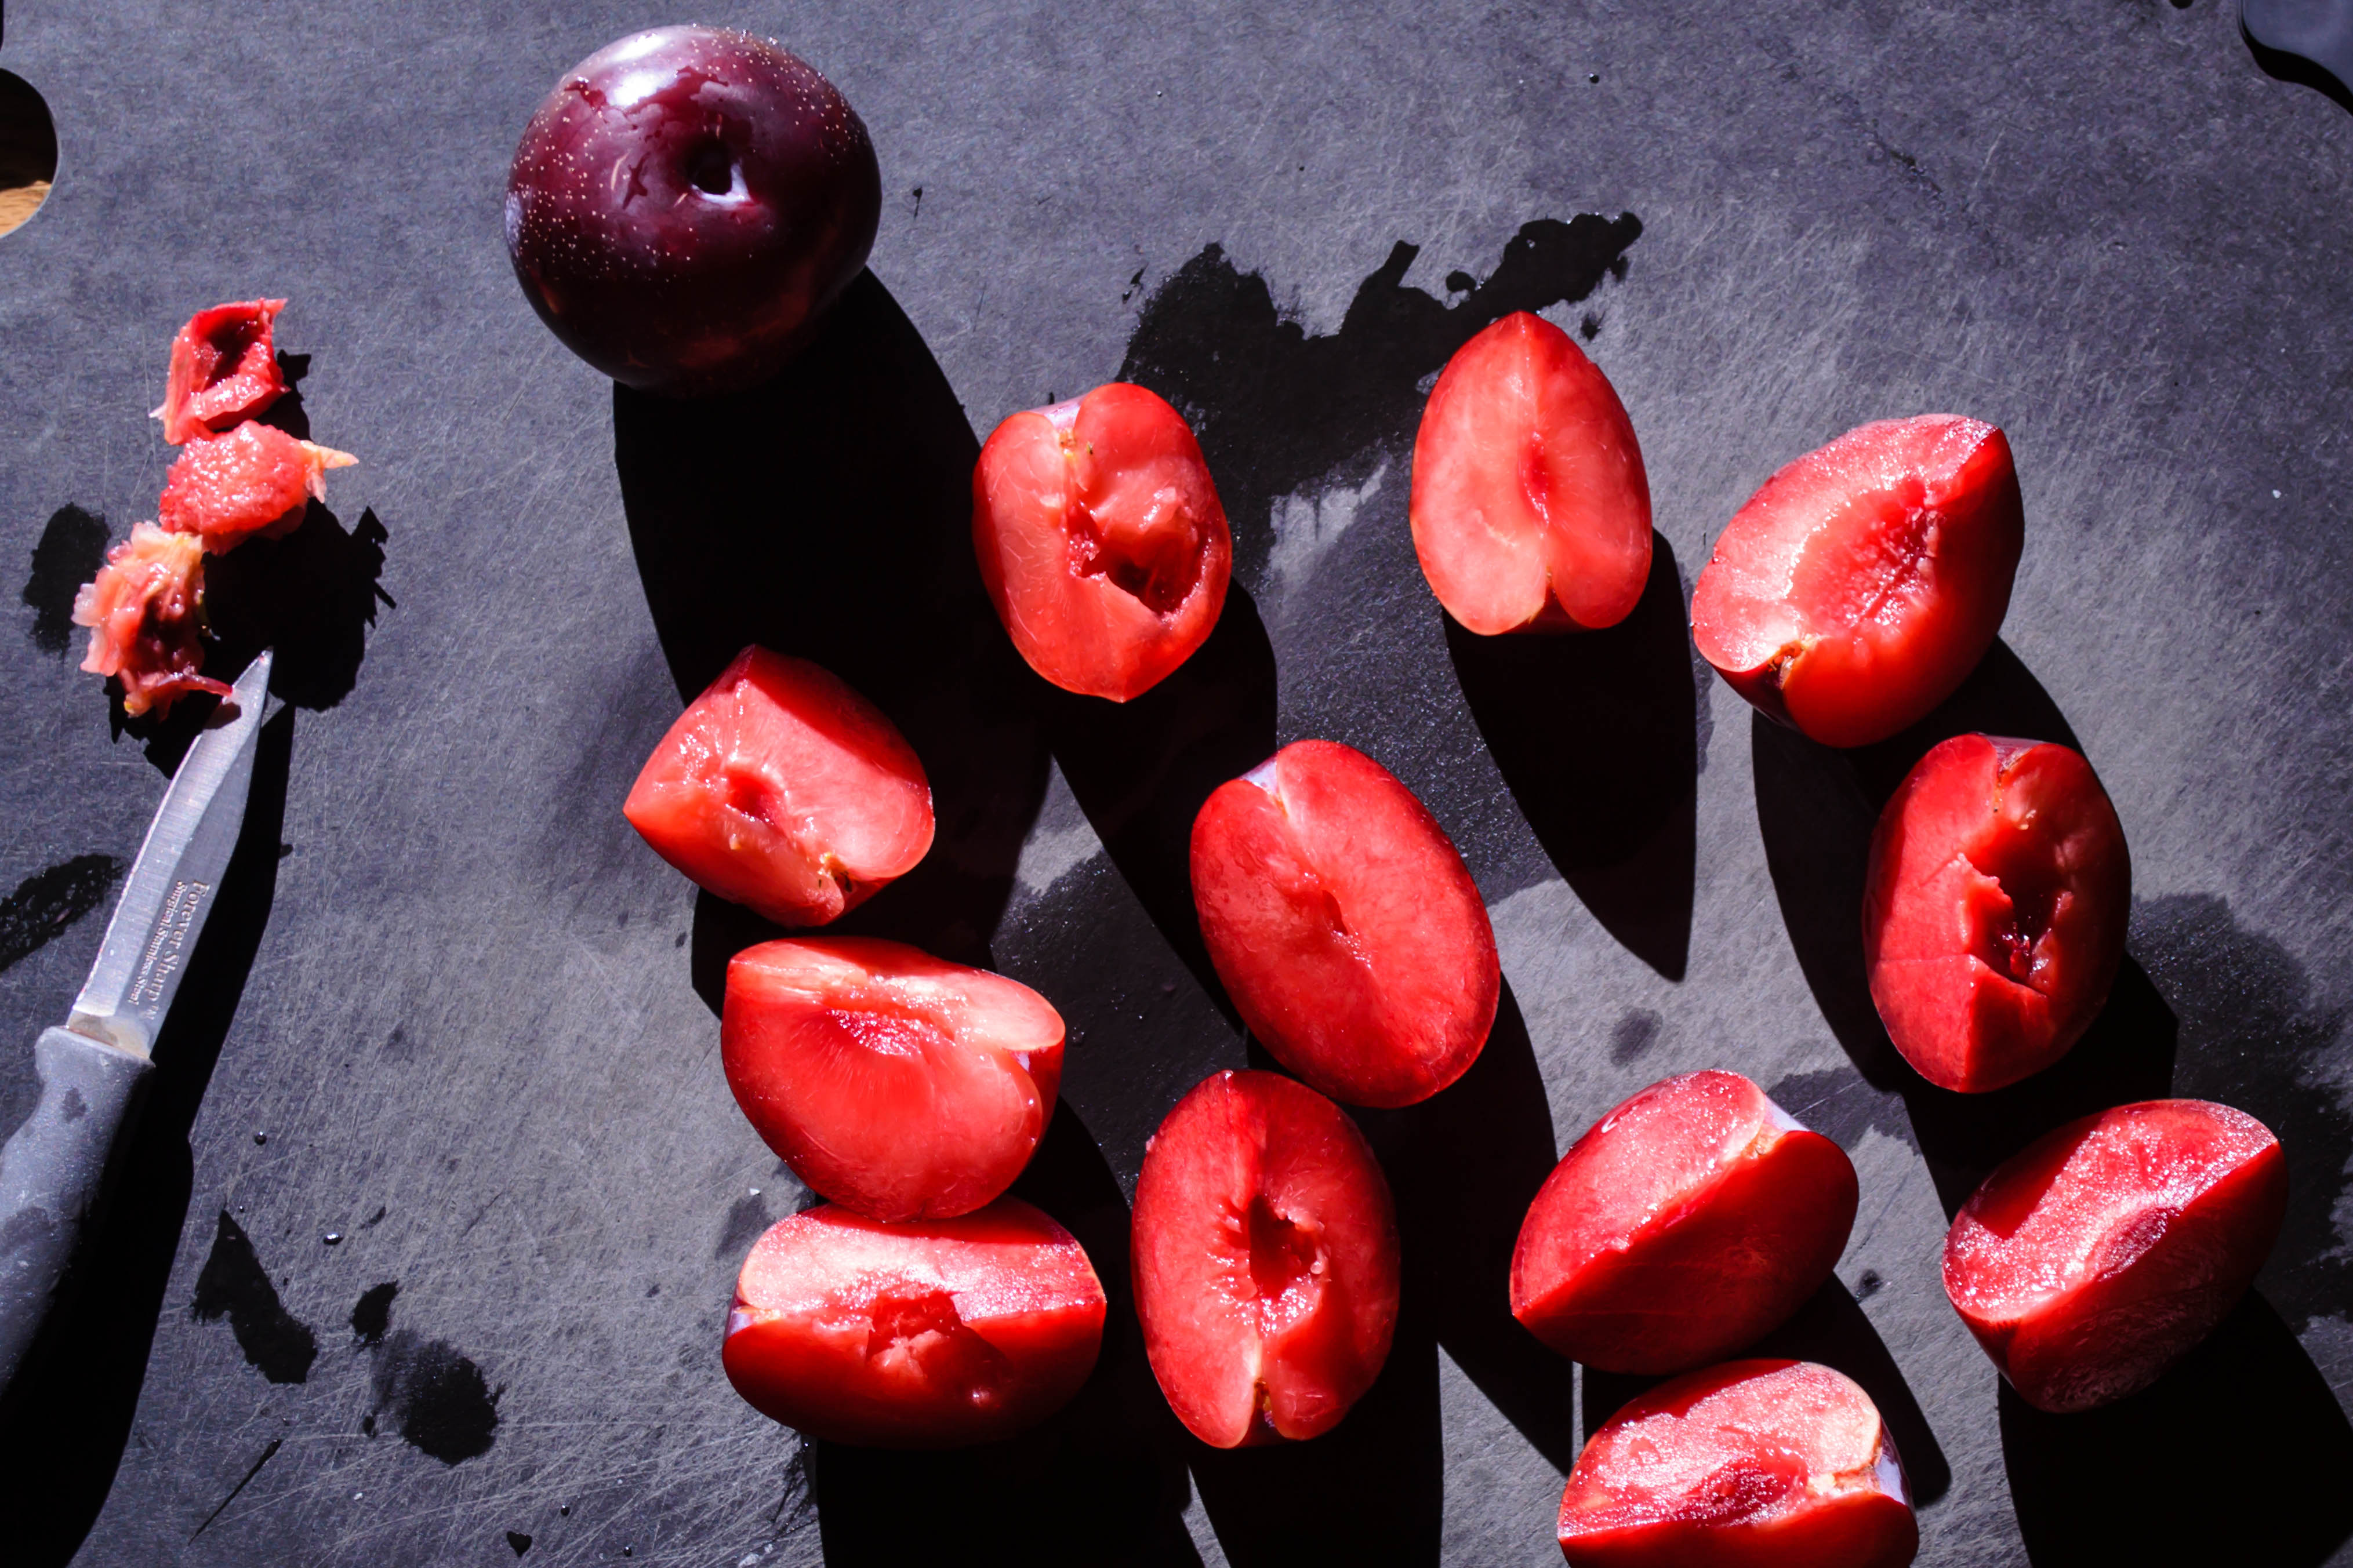
Whichever it was, and however you feel about pork, this sauce is definitely worth trying. No butter this time; this sauce contains no dairy, no eggs, and no flour. It’s completely different from every other sauce I’ve approached thus far, with one exception: it must be simmered to thicken. Here, though, rather than emulsifying butter or letting flour granules soak up liquid or gently cooking egg yolks to coax out their protein strands, we’re contending with melting sugar and evaporating water content. In my version, the sugar and vinegar required to make this a gastrique are joined by gloriously ripe red plums, cooked down into a jammy pulp (helped out with the determined application of a potato masher), strained, and then returned to the pan just to help a few bits of diced raw plum heat through, for some texture. And all of this happens while the pork is cooking, so everything is ready to go at roughly the same time.

Food Blog August 2014-0437Food Blog August 2014-0438
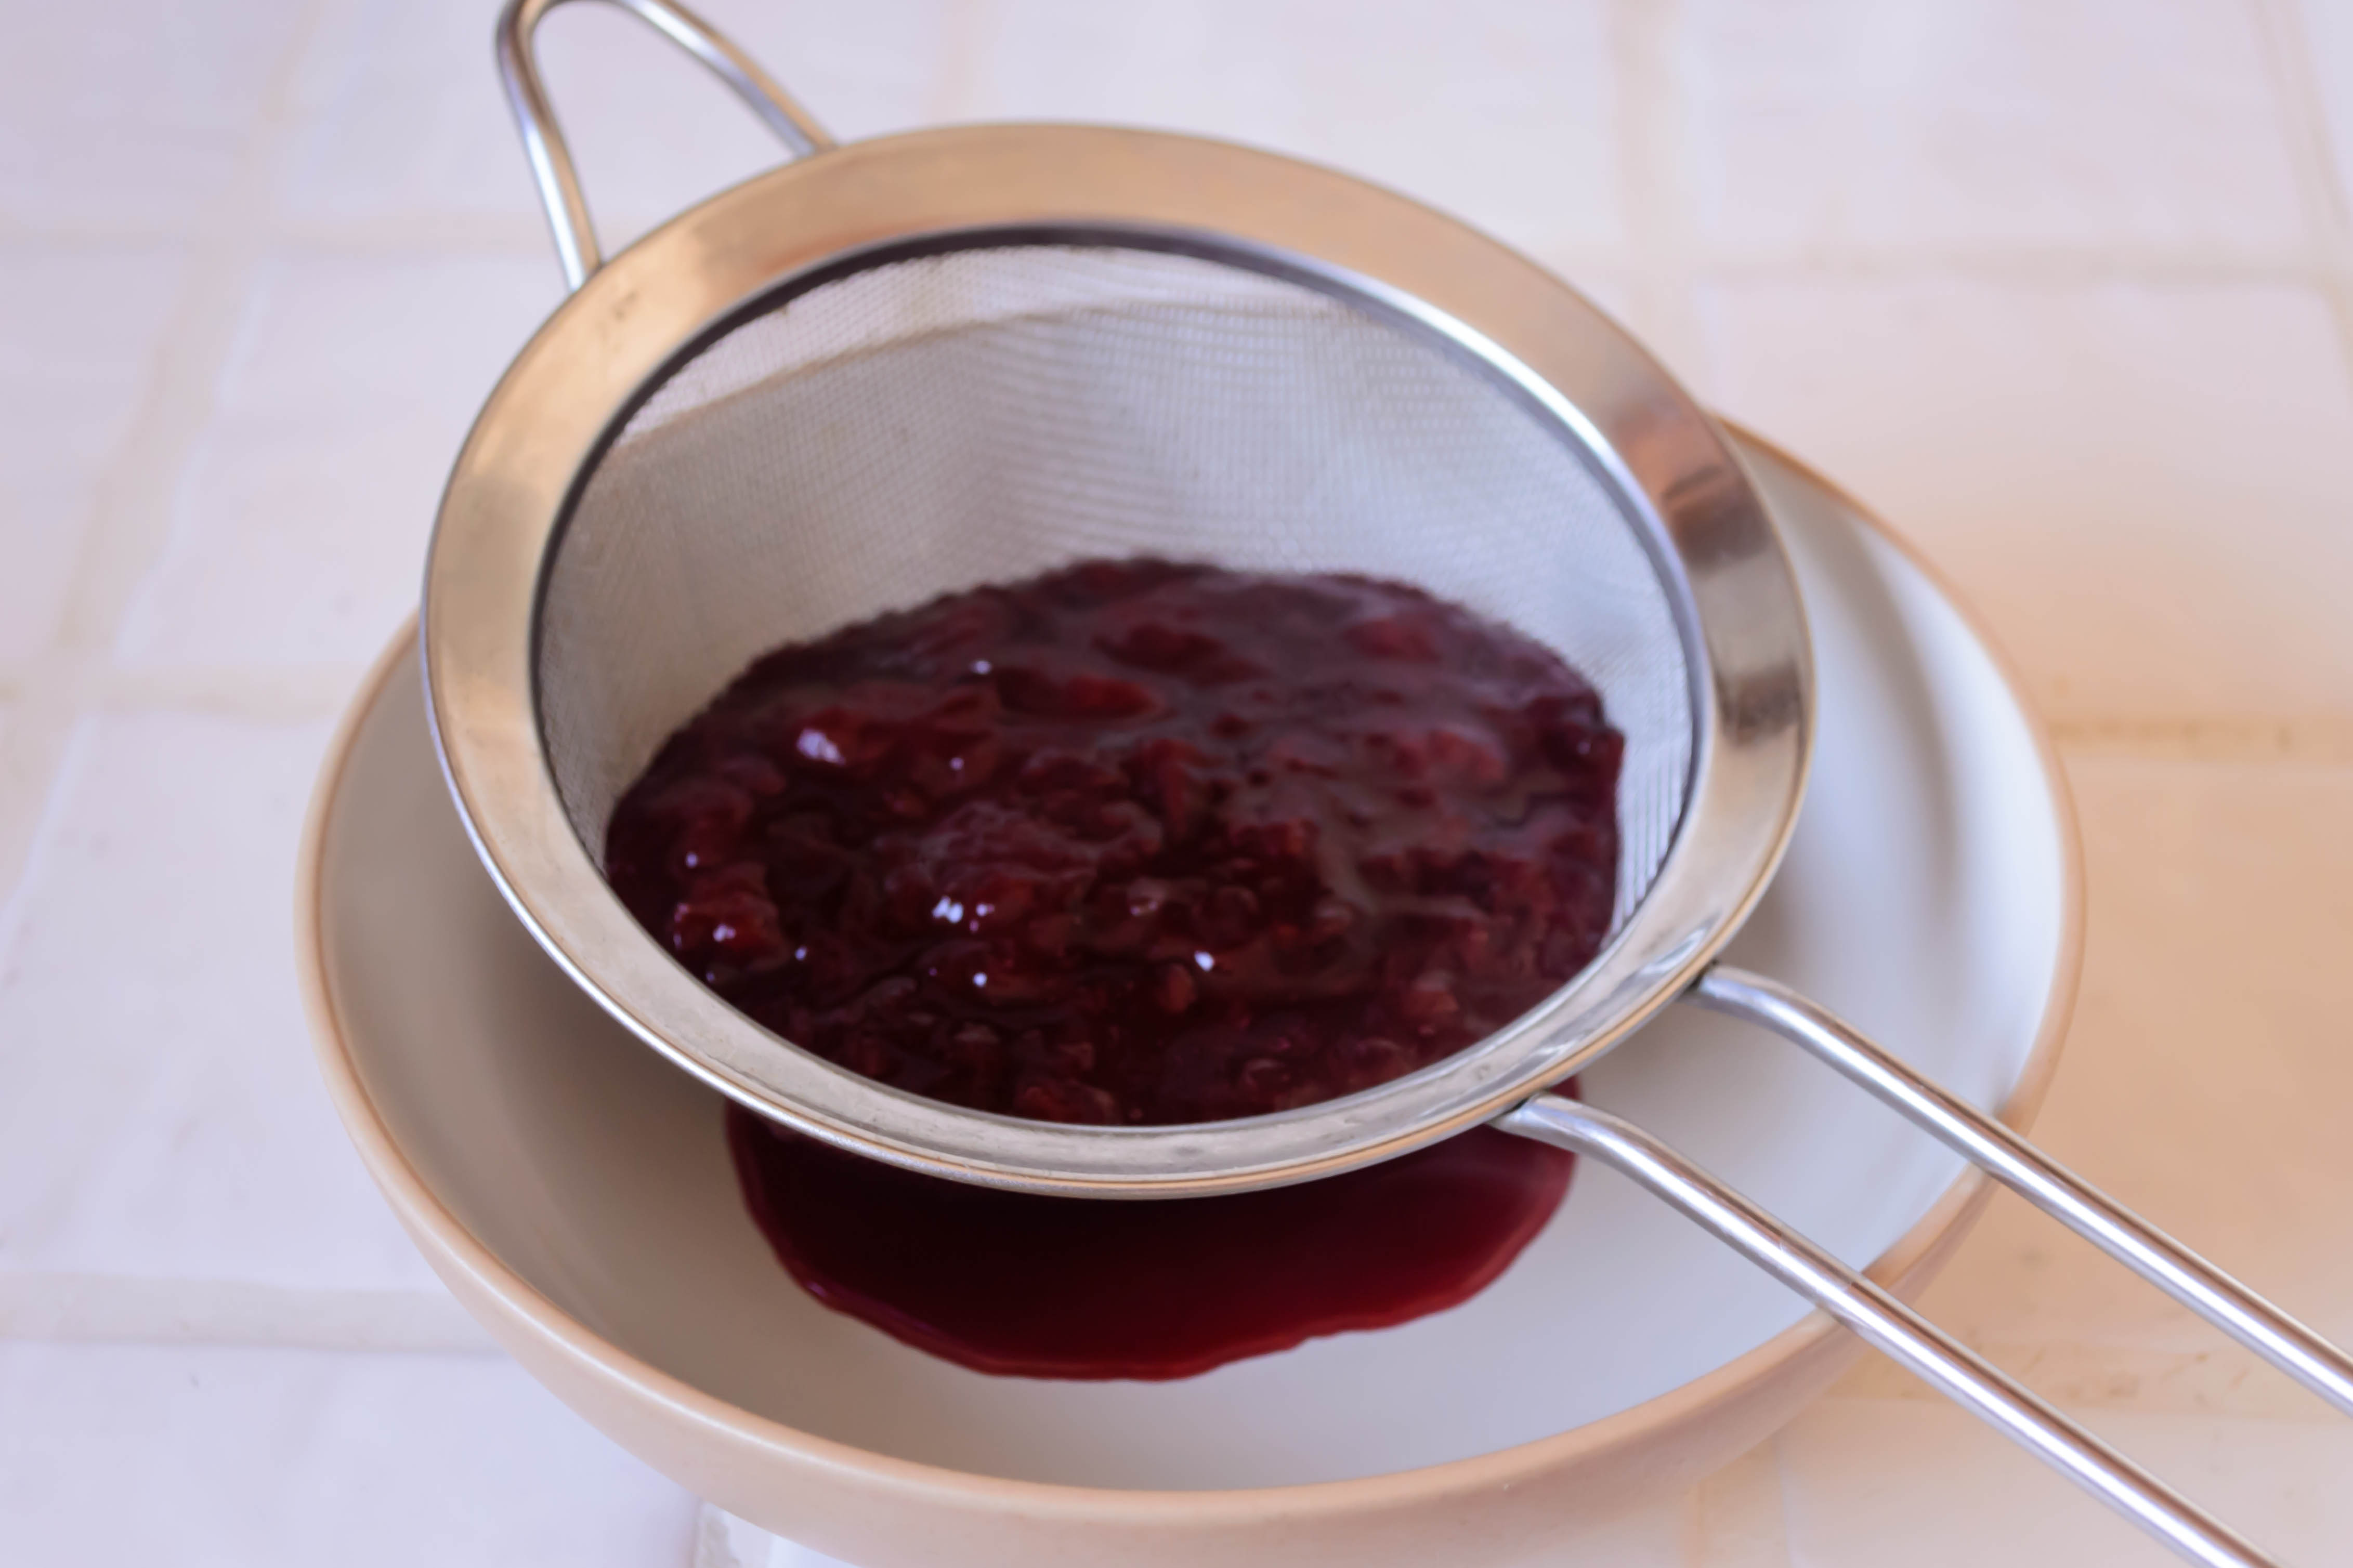
If you’re not a pork tenderloin fan, I think this would also work really well with salmon, or with various varieties of poultry. It would also provide the perfect wilt as the dressing in a warm salad of dark leafy greens; I’d opt for spinach. And save the skins and pulp after you’ve strained out the glorious velvet sauce. Warm or cool, perhaps with an additional sprinkle of sugar, they make a fantastic tart spread for toast.

Food Blog August 2014-0441

Peppercorn crusted pork tenderloin with plum gastrique
Gastrique recipe adapted from The Tomato Tart
Serves 4
 
For the pork:
1 lb. boneless pork tenderloin
1-2 tablespoons whole black peppercorns, crushed (we used 2 tablespoons, which was aggressively peppery. If you are concerned about spice, try 1 tablespoon)
1 tablespoon fresh thyme leaves
1 tablespoon coarse salt
2 tablespoons olive oil, for searing
 
For the gastrique:
4 ripe plums, divided (the riper they are, the faster they will cook down)
½ cup red wine vinegar
3 tablespoons sugar
Pinch of salt


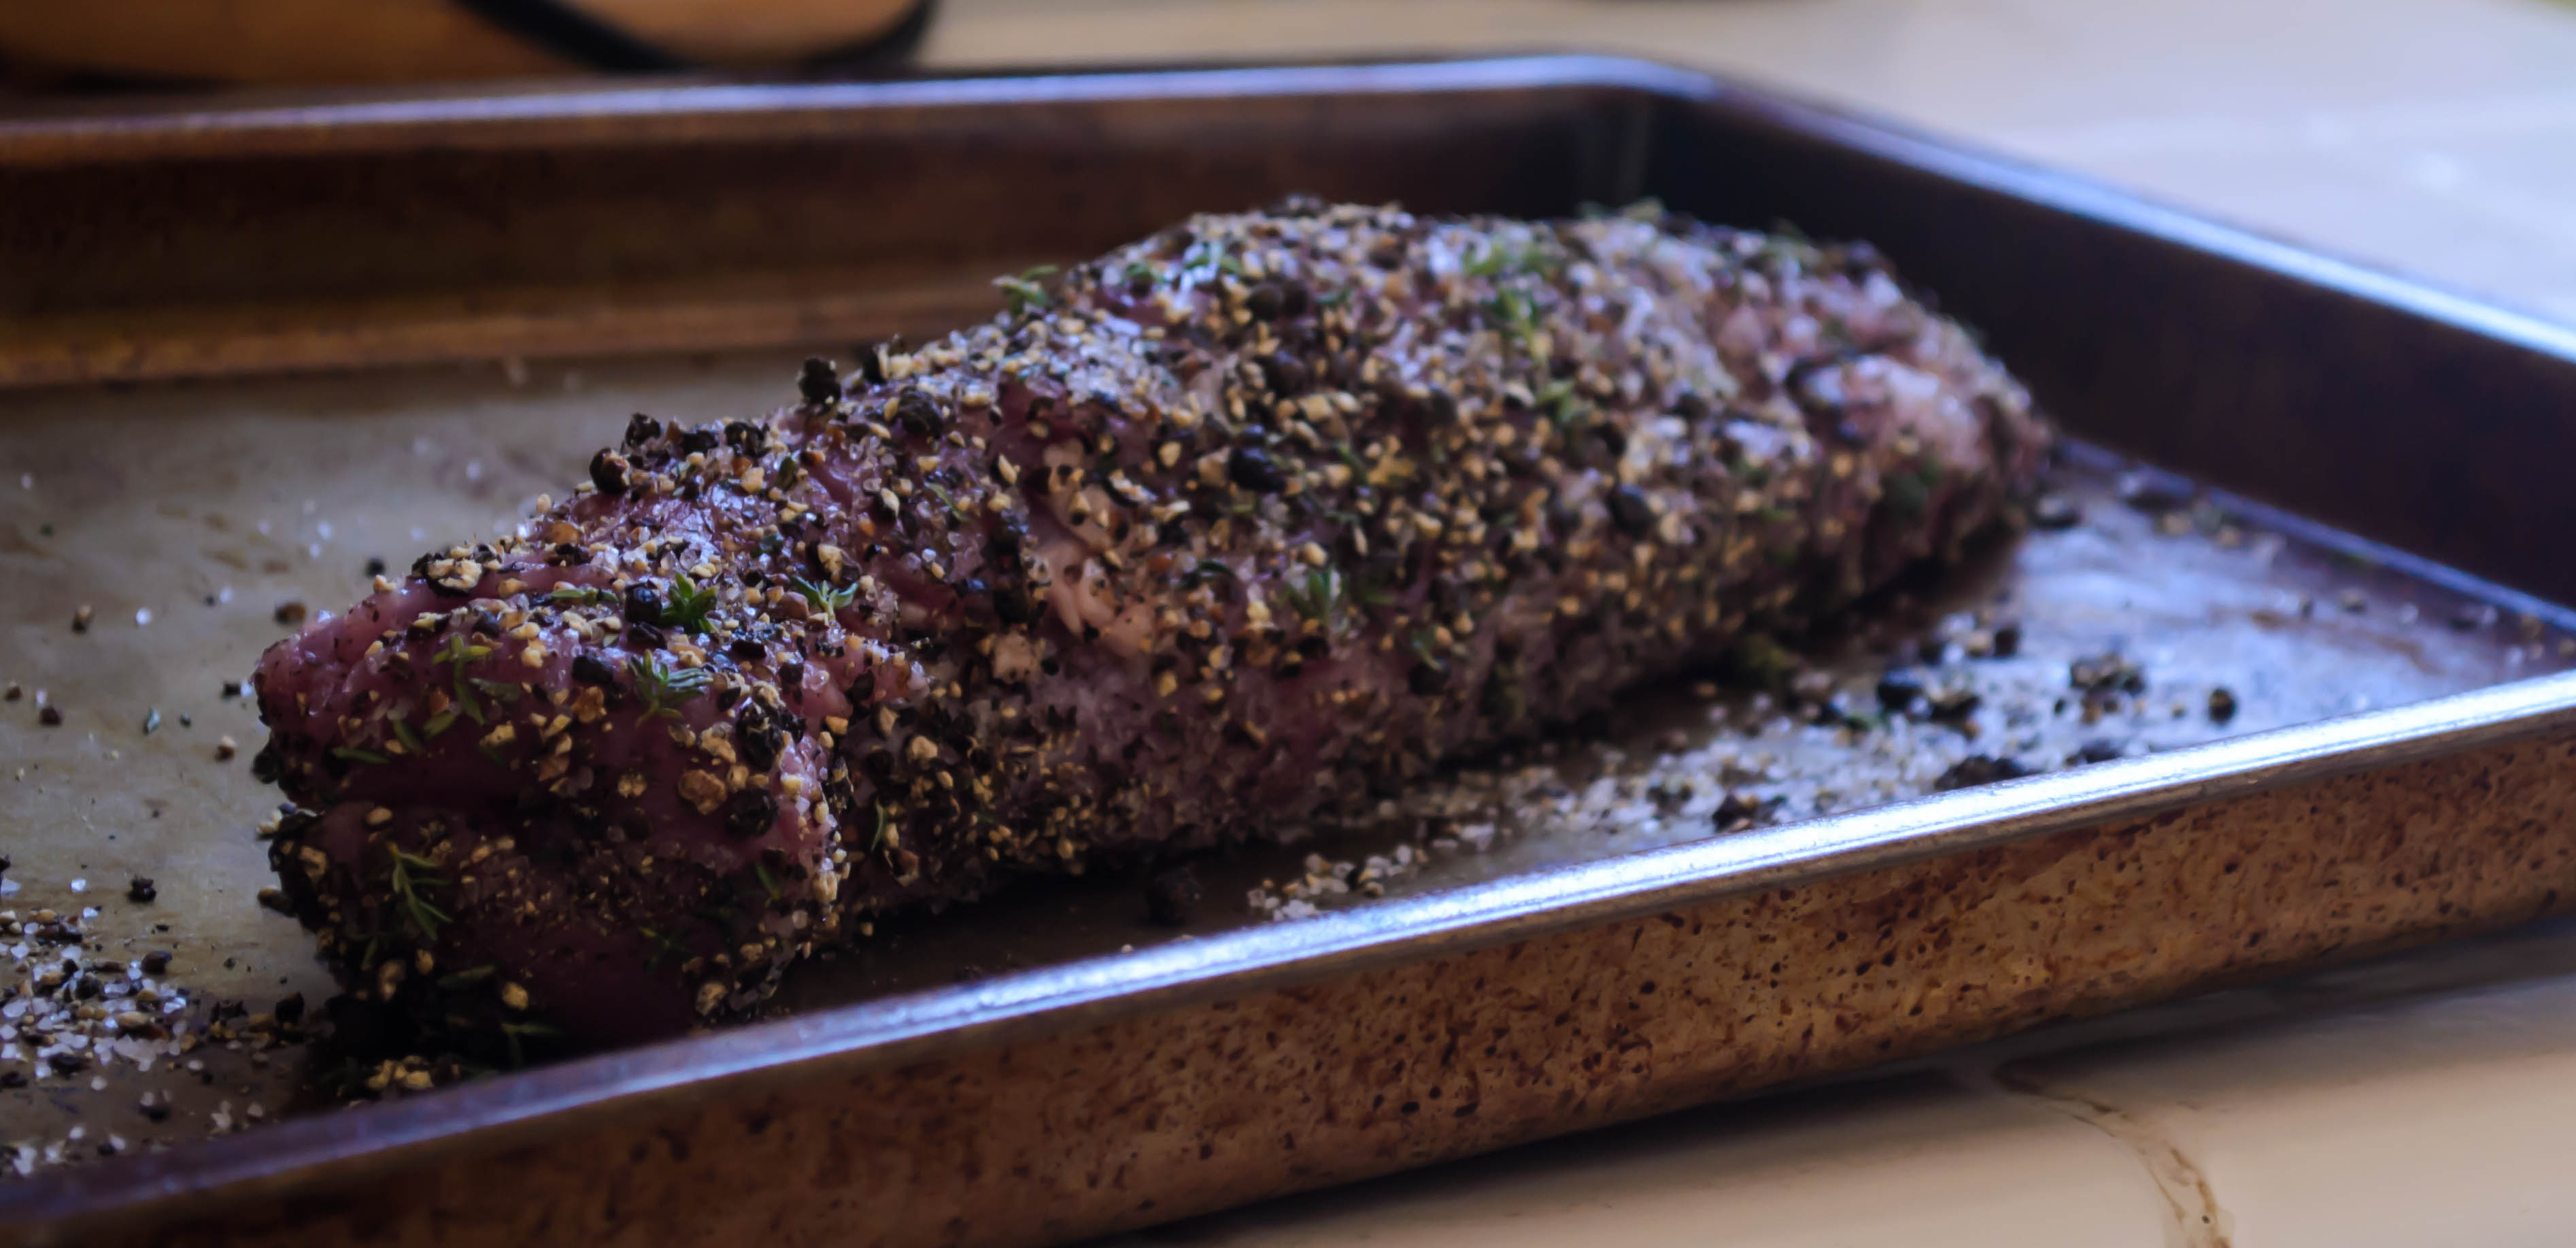
  • Preheat the oven to 350F. While it warms, combine crushed peppercorns, thyme, and salt on a large plate or a sheet tray, and roll the pork through it, coating it on all sides.
  • Heat the olive oil over medium-high in a large skillet. When it is rippling but not quite smoking, add the pork and sear it until golden-brown on all sides. This should take 2-3 minutes per side. As each side sears, leave it alone. You won’t get a lovely golden crust if you shake the pan and move the pork around too much.
  • When the outside of the pork is a uniform golden-brown (though of course quite raw on the inside still), relocate it to a rack on a roasting pan (I just placed a rack over the sheet tray I’d used earlier) and roast in your 350F oven for 35-45 minutes, or until the interior tests 150F. Then remove it from the oven, wrap tightly with aluminum foil and leave it for 10 minutes. During this time the temperature will rise to 160F, which is perfect.
  • Slice and serve with warm plum gastrique. A few slices, nicely sauced, over a bed of goat cheese polenta is quite nice.


  • While the pork is roasting, make the plum gastrique. Pit and quarter three of the plums. Pit the fourth plum, cut it into a small dice, and set aside.
  • Add the three quartered plums, the vinegar, and the sugar to a saucepan and cook over medium heat until simmering.
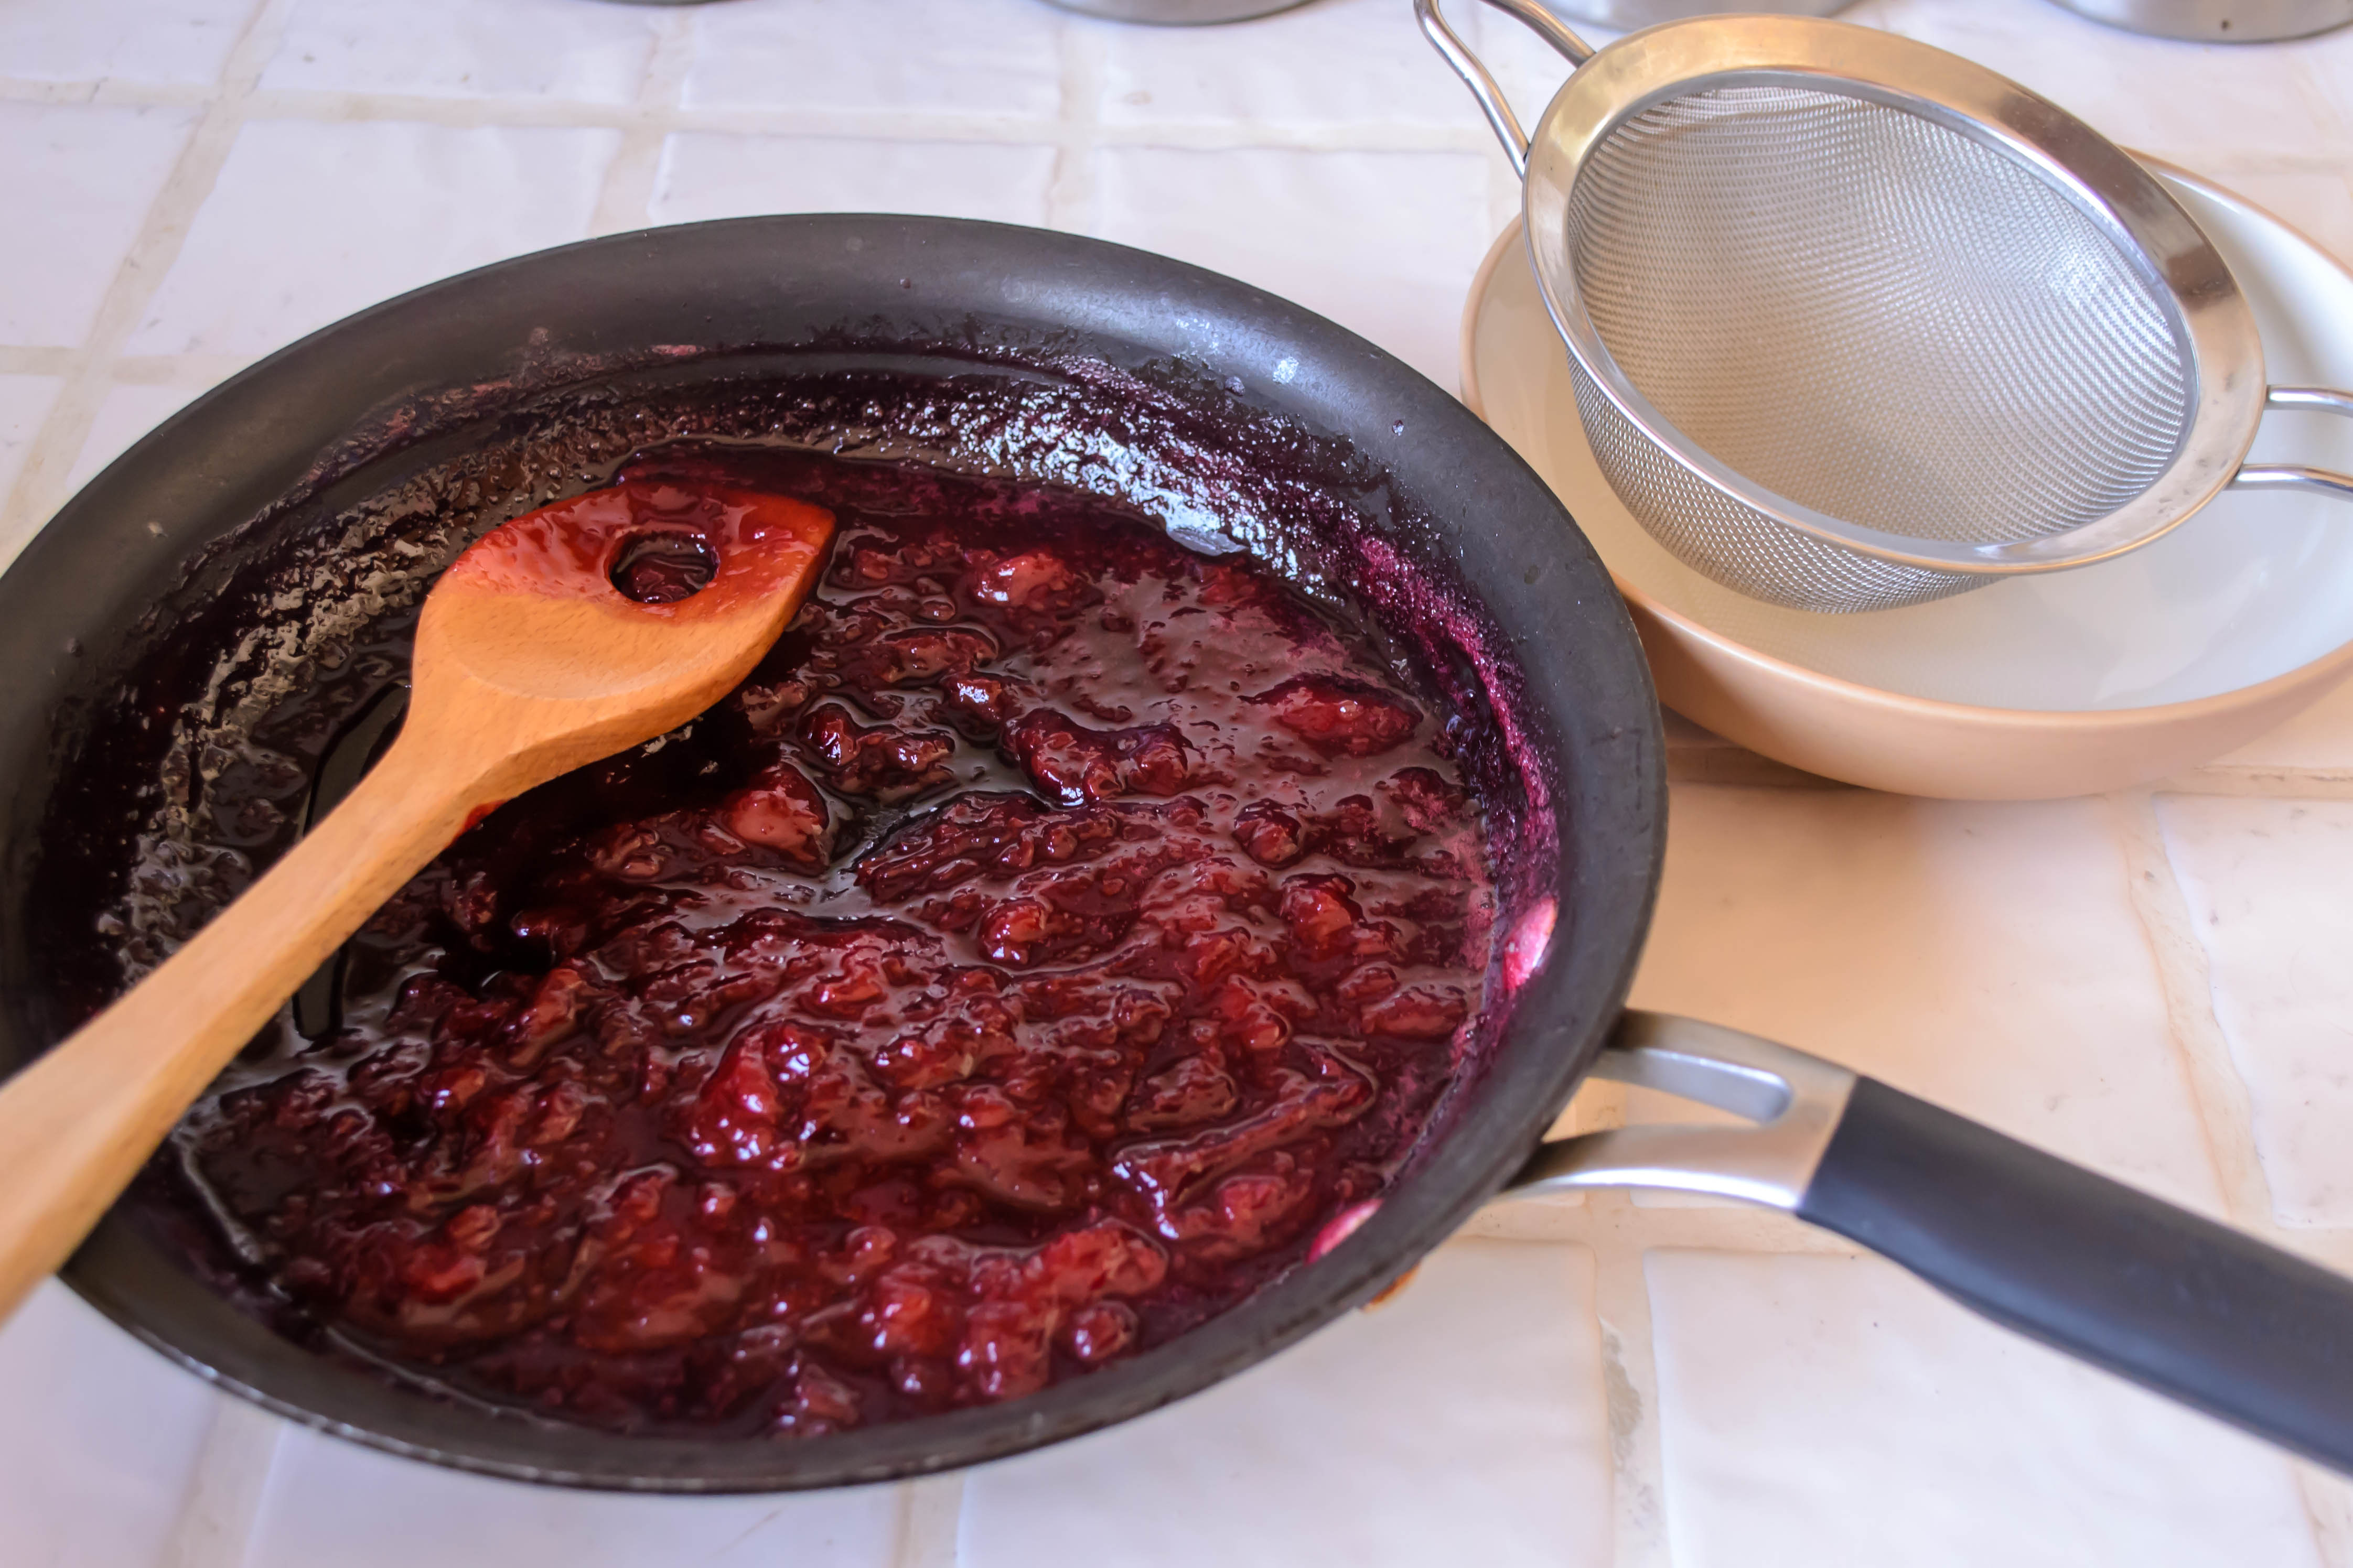
  • Turn the heat down, maintaining the simmer, and cook for 5 minutes. Then, using a potato masher (or, if they are really ripe, just the back of a spoon), mash up the plums, skins and all, into a pulpy mess.
  • Cook, stirring often, until the mixture gets syrupy – about 15 minutes.
  • Pour and/or smash the mixture through a strainer to separate the pulp and skins. You can do this into a bowl, or right back into the saucepan. Either way, once the mixture is strained, pour the sauce portion back into the pan, add the diced plumps and a pinch of salt, and cook over low heat for 5 minutes just to heat everything through.
  • Serve warm.

Pesto Parmesan Pull-Apart Bread #TwelveLoaves

Food Blog August 2014-0476I’ve put off writing this post. I wasn’t sure how to begin. Every time I sit down to think about it, I end up surfing the net, scrolling through Facebook, seeing more and more headlines, reading more and more articles about the terrible things our world has been going through recently. As one of my friends and former colleagues put it recently, “the entire internet needs a trigger warning.”

Food Blog August 2014-0450I don’t often offer political or moral commentary on this site. That’s not its job. And I don’t often try to convince you that seeing things my way is the way you should see. My truths are mine, and yours are yours. But when terrible things happen, and when death and tragedy are instigated and framed through questionable motives – sometimes on both sides of the event – I question my own job here.

Food Blog August 2014-0451Food Blog August 2014-0454I’m not going to espouse to you what I think. Not today, and probably not ever, unless it’s something frivolous and food-related. I’m just going to say, with caution, that unless you have cut off access to emotions, to moral codes, or to the internet itself (I know, gasp!), over the past week or two – certainly over the past month – the world has been pretty depressing.

Food Blog August 2014-0457So that makes a food blogger wonder where she stands. When people are suffering, when people are angry and dying and struggling, for me, there is uncertainty: is it disrespectful or willfully unaware to coo over the cuteness of a cupcake or speckle my posts with just the right adjectives to describe the lusciousness of a sauce? I’ve considered this before, written about it before, and I always come back to the same conclusion: no. Food is important. Food means things, not just about nurturing our bellies but nurturing our hearts and our minds and, depending on what you believe, our souls. I talked to N. about this the other day, thinking again of how to write this post, and he said “we have to have some things to be happy about.” Food seems like one of those things.

Food Blog August 2014-0458Finally, what helped me figure out what to write so as to be aware of, respectful of, but not overwhelmed by these events I’ve found troubling, was the introduction to Yotam Ottolenghi and Sami Tamimi’s cookbook Jerusalem. Looking back through this lovely book, I was struck by a short section they have titled “A comment about ownership.” In a place – whether that is a city, or a nation, or the world itself – where we feel a need for the power that ownership and control bring us, it is hard to share. We pull ourselves apart from one another in an effort to feel safe, or right, or justified. Ottolenghi and Tamimi argue that searching out the true “owner” of a dish through its national or personal origin is not only difficult, but futile. Either it has been made before, or there exists another, or three, or a dozen, similar dishes claiming different origins: a “variation on a theme” (16).

Food Blog August 2014-0459Though Ottolenghi and Tamimi are commenting on dish origination – which makes sense, as they like to provide a little background about the meals they offer – what struck me was not just where a dish comes from, but where it goes. For a long, long time, sitting down at a table, or a fire, or a bowl, has meant something more than filling your stomach. It means trust, or love, or a forging of bonds. You eat together and you end up sharing more than a meal. I’m not sure that’s still true, but I think it should be.

Food Blog August 2014-0461So weirdly, when it came time to sample this month’s loaf for the Twelve Loaves project, I had chosen something divisive in its very name: pull-apart bread. When you tear into it, this loaf peels into separate bits, as I see happening so often in our world. Yet its richness, its docile tendency to give up layers and hunks and edges, suggests it is meant to be shared. We pull it into soft fragrant pieces, but we’re doing that together, and the act of sharing brings us comfort and happiness.

Food Blog August 2014-0464I’ve wanted to try a pull-apart bread for a long time, particularly after seeing Deb’s nod to Welsh Rarebit on Smitten Kitchen. To answer the call of summer herbs for Twelve Loaves, I settled on pesto, blending the sharp-sweet, fresh licorice scent of basil with the usual garlic, pine nuts, and lemon juice. I amped up the parmesan quotient and included it not in the spread itself, but as a separate layer to melt and cling.

Food Blog August 2014-0468There seem to be two schools on pull-apart bread. One involves rolling little spheres of dough and jamming them into a pan together, so when they cook they swell into one another and form tenuous ties. This is also commonly called Monkey Bread, especially when it is sweet. The other, which I haven’t seen as frequently but which I chose to work with after seeing Deb’s offering, results in something more like a Pillsbury Grands biscuit or puff pastry stood on end. It involves rolling the dough thin, slicing it in long strips, layering those strips and slicing them into squares, then levering those stacked squares – like servings of lasagna or birthday cake – sideways into a loaf pan like a deck of cards to rise into one another and smash together during baking. As you peel the warm layers apart, you get the bite of pesto and the salty richness of parmesan.

Food Blog August 2014-0473I want you to make this. It’s a bit of a project, but it’s so, so delicious. And when you make it, I want you to share it. Pull it apart, by all means. But let that action by extension pull you together.

Food Blog August 2014-0480

Pesto Parmesan Pull-Apart Bread
Makes a single 9×5 inch loaf
Adapted heavily from Smitten Kitchen
For dough:
2 teaspoons yeast
2 teaspoons sugar
½ cup milk, warm but not hot
2 ½ – 3 cups bread flour, divided
1 teaspoon salt
4 tablespoons soft butter
2 eggs
For filling:
3 garlic cloves, skins removed
¼ cup pine nuts
2 tablespoons lemon juice, or to your taste
4-5 cups packed basil leaves
½ cup (approximately) olive oil
salt and pepper to taste
2 cups parmesan cheese (I know, but it’s so fluffy!  2 cups is practically nothing… besides, you’re sharing…)


  • In a glass measuring cup, warm the milk. I like to pop it into the microwave for 20-30 seconds. When it is just warmer than body temperature (poke your fingertip in – it should feel just warm to the touch), add the sugar and the yeast and stir it up. Let this sit for 5 minutes or so while the yeast wakes up and begins to bubble.
  • Meanwhile, combine the salt and 2 cups of the flour in the bowl of a stand mixer and stir to combine. When the yeast and milk mixture is bubbly and smells like bread, add it to the flour and salt and mix on low speed using the paddle attachment until damply crumbly. Add the butter and the eggs and mix on low speed again.
  • Add an additional ½ cup flour and mix to combine. As soon as the dough starts to come together and there are no longer dry swaths of flour, switch from the paddle attachment to the dough hook.
  • Knead for 3-4 minutes until a soft dough the consistency of play-dough forms. If it looks really sticky or is not coming together or pulling away from the sides of the bowl at all, begin adding the additional flour 2 tablespoons at a time, kneading for a bit in between each addition. You may not need all of the additional flour – I only used 2 ½ cups total.
  • Lightly grease the inside of the bowl (or switch to a clean, lightly oiled one), flip the dough over a few times to ensure it is lightly greased as well, then cover the bowl with plastic wrap and set it aside for 50-60 minutes to rise. We are looking for the ball of dough to double in size.
  • While the dough rises, make the filling. Drop the garlic and the pine nuts into the belly of your food processor and let it run for a few seconds, until the garlic and pine nuts become a fragrant crumble. There is still some blending to go, so they don’t have to be a smooth paste yet.
  • Add the lemon juice and as many of the basil leaves as will comfortably fit, and turn on the processor. Most of the basil will almost instantly be shredded into tiny bits. If it isn’t, or if nothing seems to be happening, take out the lid from the food chute and begin pouring in the olive oil through this chute in a slow, steady stream.
  • Once there is room in the food processor bowl again, add the remaining basil leaves, if there are any. Repeat the olive oil streaming process until you have a thick paste. I usually end up adding my basil in two or three batches. You may use more or less olive oil – this is somewhat according to preference, but you do want a fairly thick pesto that you can spread, not pour.
  • Taste for seasoning; add salt and pepper and pulse to combine. Set aside until dough is finished rising.
  • When the dough has doubled in size, punch it down by gently depressing your fist into the center. Let it rest for a minute or two, then turn it out onto a well-floured board and, using a floured rolling pin, roll it out to a rectangle of about 12×20 inches.
  • Spread pesto over the entire rectangle of dough, right up to the edges. We don’t need a bare margin for this loaf.
  • Cut the rectangle crosswise into 5 strips of 12×4 inches (so the short edge of the initial big rectangle becomes the long edge of each of the 5 strips). Sprinkle one with about ½ cup parmesan cheese – this will be the bottom of the stack.
  • Carefully, using a spatula with a long blade or a dough scraper to help you, top your parmesan covered base with another strip of dough. Sprinkle another ½ cup parmesan atop this new layer.
  • Repeat until you have a stack of five layers, though the final layer will not have cheese on top, which is fine.
  • Gently, exceedingly gently, use a serrated knife to cut the dough layers into 6 segments of about 2 inches each. Turn each segment layer-side up (showing off its stratigraphy) and snug it into a greased 9×5 inch loaf pan. You can turn the pan up on its short end to make this a bit easier – take a peek at Deb’s images (link above) for a visual. Follow this with another segment, and so on, to create a stack of layers. When you finish and set the loaf pan back on its base, Deb says this looks a bit like a full card catalog drawer, and I think this is a good assessment.
  • Cover your strange, layered loaf with plastic wrap and set it aside to rise again for 30-45 minutes. Preheat the oven to 350F so it is ready when you are.
  • Once the dough has risen again, which will squash the layers together a bit, remove the plastic wrap and stow your loaf it in the 350F oven for 25-35 minutes until it is puffy and nicely bronzed on top.
  • Cool a minimum of 10 minutes in the pan (though 15 or even 20 is probably safer; mine collapsed upon removal), then carefully flip it out and serve warm for best flavor and “pull-apart” effect.

Project Sauce: Sole Meunière

We are now, with one exception that you’ll see in a week or two, deep into the butter portion of this sauce project. It makes sense. Most of the big deal “mother” sauces are French, and the French do have a soft spot for butter. And that makes sense too. I mean, all you have to do is melt a few tablespoons of butter and you’ve already got a sauce. Think of the way it softens with the maple syrup on your pancakes, becoming something so much richer and more complex than either would have been by themselves! So let’s talk about some buttery details for a minute, and then I’ll take you to our sauce this week: meunière, a classic butter and lemon sauce specifically intended to be served with a sautéed filet of sole.

Food Blog August 2014-0418As I continue to learn about sauces, I’m seeing emulsion after emulsion. A fat bound to a liquid, often with some thickening agent that gives body to the sauce and helps the normally separate ingredients get along. Think vinaigrette: the fat is the olive oil, the liquid is the vinegar. Dropped into a glass together, they form distinct layers. But beat them vigorously, often with a dollop of mustard to help them blend, and they become a thick, rich dressing. Kitchen magic.

Food Blog August 2014-0402What I’m finding quite interesting about butter is that whole butter, the sort we buy in paper-wrapped sticks, is in fact an emulsion in itself. The butterfat, which is what solidifies when milk is churned, is the fat portion. But there is also some water in butter, and there are milk proteins too, which stabilize the emulsion. So in that one stick you have a liquid component and a fat component, hanging together in stasis.

Food Blog August 2014-0409When you brown butter, that darling of savory and sweet concoctions alike, several things happen. First, as the butter melts and bubbles furiously, you are seeing the water content boil off. If you stop at this point, skimming off any solids on the surface and reserving just the molten gold of the butterfat, you have clarified butter. But if instead you keep cooking it, the milk proteins that once acted as emulsifiers start to toast, and become deeply bronzed, and you have brown butter. You can even see those proteins roasting and browning in the photo above.

Meunière sauce capitalizes on brown butter. And with the water content of the butter boiled off, it needs a liquid to play with again, so we add the tart brightness of lemon juice. And then, for an herbal note, a scattering of parsley. That’s it. It’s so simple it feels almost like cheating. And yet it’s a classic, likely because how could a splash of butter and lemon be anything but delicious?

Food Blog August 2014-0410Unlike most other sauces, aside perhaps from hollandaise, meunière is pretty dish specific. It doesn’t really stand alone; it’s a sauce but also indicates preparation: sole meunière, or sometimes trout meunière. And though I obeyed and ladled mine over two delicate white filets, I could just as easily see this sauce, essentially a hot vinaigrette, serving as a bright gravy for mashed potatoes or roasted chicken. I would ladle it over a great tray of steamed green beans, or even stir some pasta into it and add shaved parmesan to the top (sidenote: as a kid who didn’t like marinara sauce on pasta, I would have welcomed this alternative with wide-open taste buds).

Food Blog August 2014-0405But as I said, I went traditional here. Not as traditional as sautéing or deboning the fish tableside, as some classic preparations demand, but I resisted my usual urge to add twists or additional ingredients. I wanted to see what this was about.

Okay, so I added some lemon zest to the salt and pepper I used to season the fish before dredging it in flour. But really, such a tiny alteration hardly counts, right? And when you serve the filet tenderly over some rice pilaf and drag your green beans through the last remnants of the sauce, well, words fail (no, seriously. I’ve sat here for fifteen minutes trying to think of how to tell you it was good!). Bring on the butter. She is clearly justified as the diva of the sauce world.

Food Blog August 2014-0412


Sole Meunière
Adapted from Ina Garten and Anne Burrell
Serves 2
4 tablespoons butter, divided
2 filets of sole, 3-4 ounces each
Salt and pepper for sprinkling
Zest of 1 lemon
1 cup all-purpose flour
1 tablespoon lemon juice
1-2 tablespoons minced parsley


  • Preheat your oven to warm (200F or so) and place a sheet tray with a rack balanced over it inside. This will allow you to keep the fish warm and crisp while the sauce finishes.
  • Heat 2 tablespoons of the butter in a large skillet over medium-high heat.
  • While the butter melts, unwrap your fish and season both sides with a sprinkle of salt, pepper, and lemon zest.
  • Dredge the filets lightly in flour and then lay them flat straight into the pan, being sure they are not touching. If they sit around in their floury state, they will not get crisp.
  • Sauté for 2 minutes over medium-high, until the fish begins to look opaque. It will be about ⅔ cooked at this point. Flip each filet carefully, again, being sure they are not touching, and cook another 1-2 minutes until the bottom is golden and comes away easily from the pan. Remove each filet to the rack in the preheated oven.
  • Wipe out the pan and heat the remaining 2 tablespoons of butter, again over medium-high heat. When it is melted and bubbling furiously, add the lemon juice and stir to combine.
  • As the butter starts to brown, which should only take about a minute, season the sauce with salt, add the parsley, and remove from heat.
  • Transfer the fish to a plate or serving platter and spoon or carefully pour the sauce over the fish to serve.