 Brie biscuits, using Ruhlman’s multi-fold biscuit method
Photo Friday
Reply

Brie biscuits, using Ruhlman’s multi-fold biscuit method
When I was a kid, my parents made me cassette tapes from several Disney albums to listen to in the car. I mean real albums: records. 45s and 78s, that spun, some wobbly and warping, on a turntable at a speed that, when I was much smaller, seemed unreal. But the cassette tapes were for long car trips, and we all learned every word in every song (this wasn’t so bad, according to my parents, with the Disney songs. One of the other tapes – a John Denver greatest hits album – wasn’t so lucky. I requested it so many times that the tenuous black strip of tape got tangled in the player, and even after attempts to repair it by winding it manually back into the plastic casing, one day it mysteriously disappeared. I’m still convinced that my dad, sick to death of hearing the plaintive desire for country roads to take us home, chucked it out the window).
Interestingly, one of my favorite songs from that collection was from a movie I’ve never seen: Disney’s The Happiest Millionaire. The song, “Fortuosity,” was a happy ditty about luck and opportunity, and “fortuitious little happy happenstances,” and I loved it. It’s an idea that I like, and the song itself comes back to me every once in a while at random moments, most often when I think about the word “fortuitous,” with which the song obviously plays, and when I remember road trips with my family.
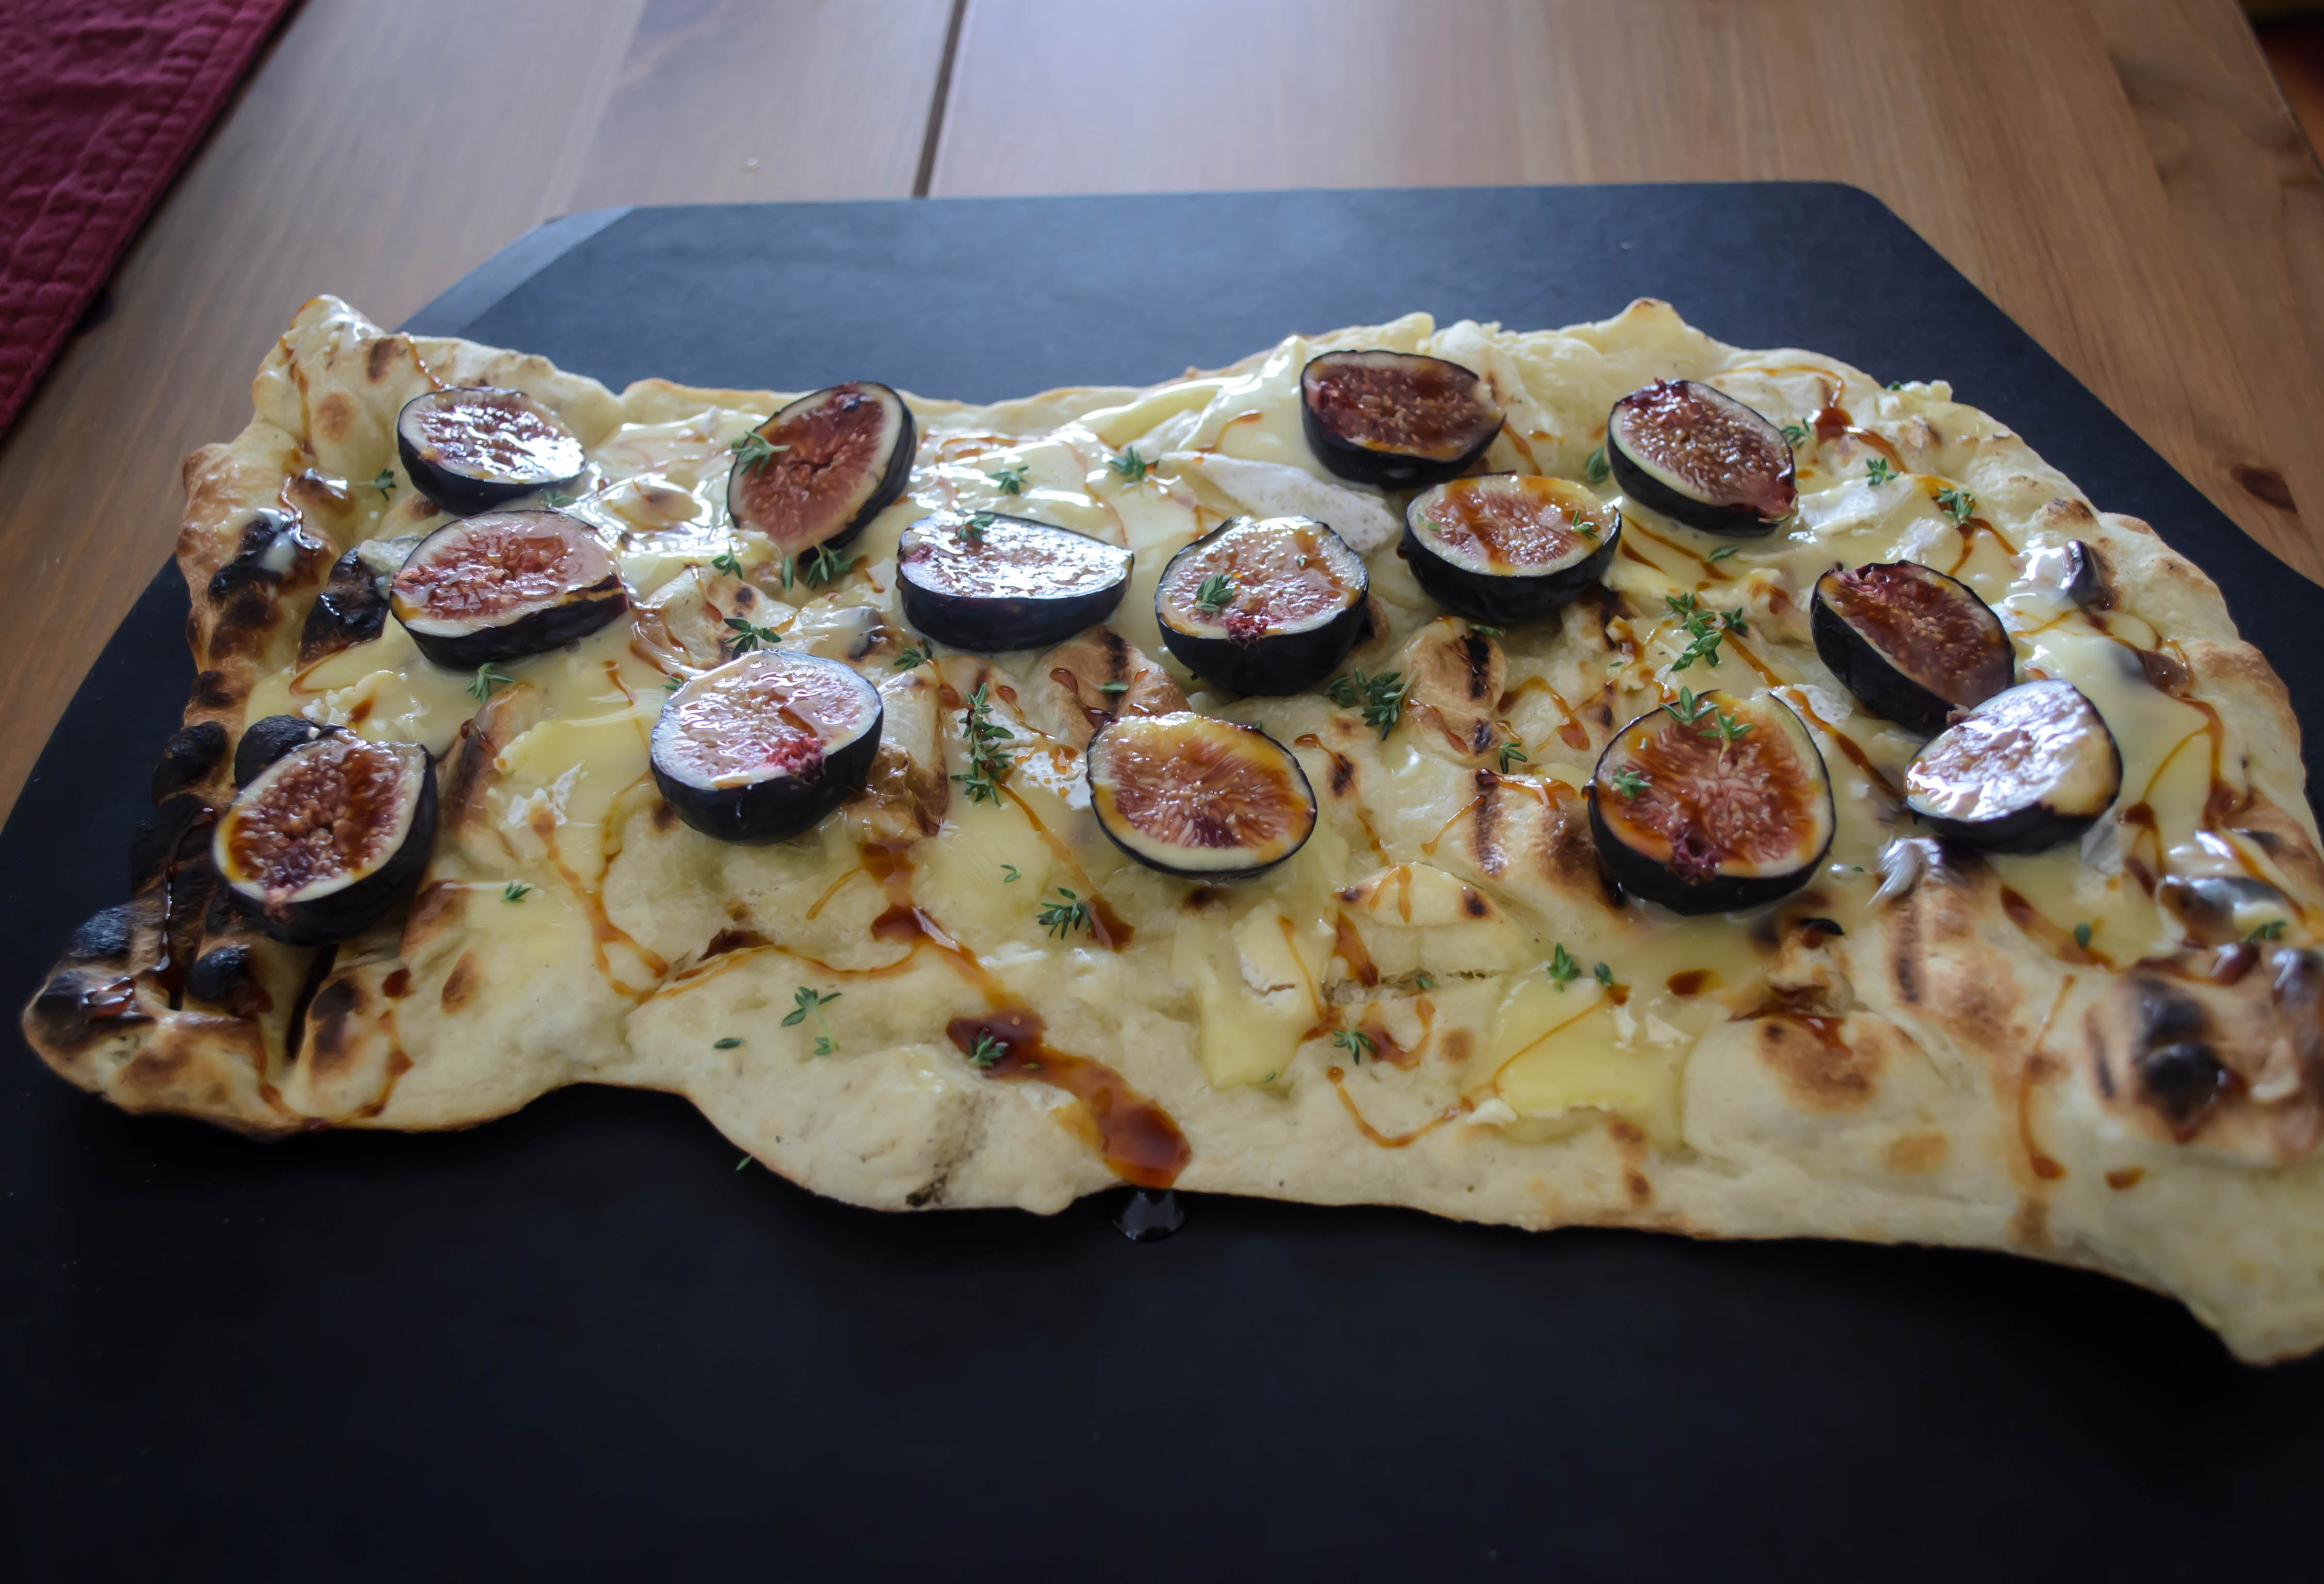 This is a long-winded way of introducing the idea that this week’s post, and this month’s Twelve Loaves challenge, aligned entirely by fortuitous coincidence. Last week I asked N. to grill up some leftover pizza dough, which I smeared with double cream brie, nestled in some halved figs straight from the farmers’ market, and drizzled with barley malt syrup and sprigs of fresh thyme. Then I checked the Twelve Loaves challenge only to see that September’s theme is Farmers’ Market food. Fortuosity indeed.
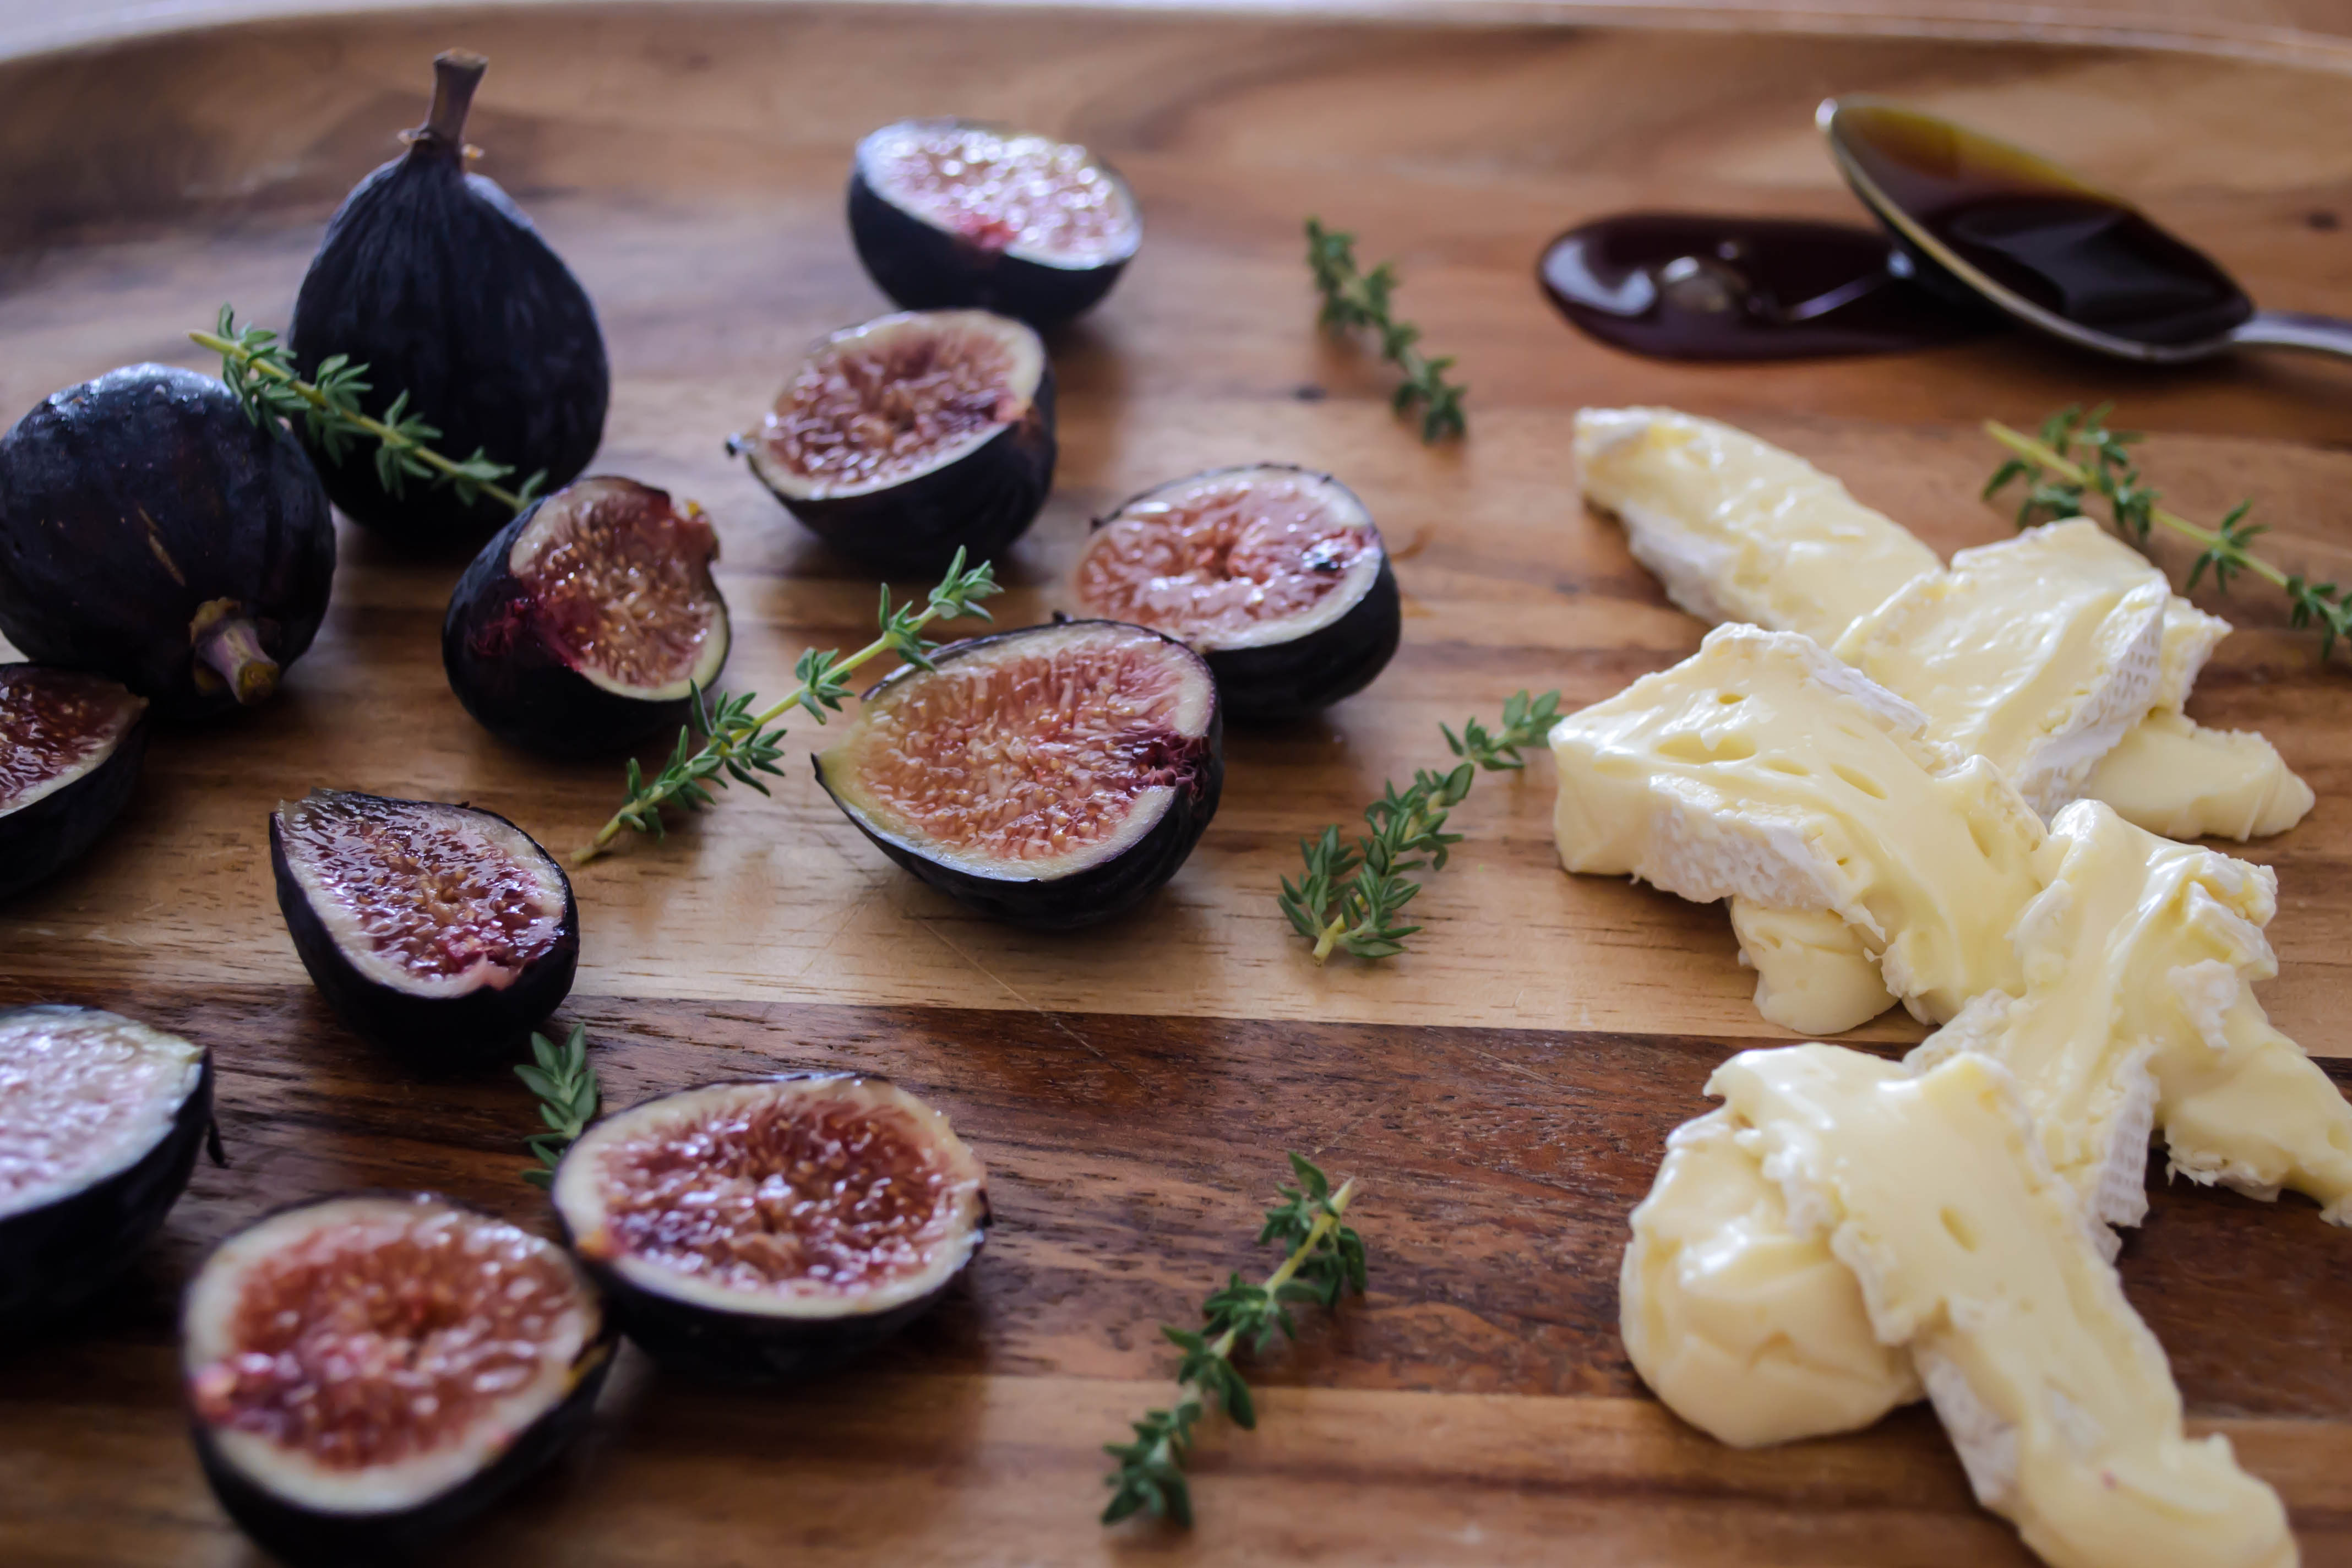 The idea for this combination – creamy cheese, soft, sweet figs, and a hit of herby freshness, came from a party N. and I attended recently. Our hostess, who works with N. (we should have them over soon, N., if you’re reading this…), had quartered some black mission figs, settled them in around a wedge of brie, and dosed both liberally with honey and thyme. My spin was based on the desire to use more of the barley malt syrup I bought for last month’s bagel experiment, and the obsessive love we have for homemade pizza, which means there is frequently a ball of dough either in the fridge or in the freezer, hoping to be put to tasty use.

Visitor to our thyme bush. I named him Algernon, because he looked like he might be impersonating someone.
We loved this combination. The barley malt syrup is a roastier contestant than, say, maple syrup, and was therefore a welcome balance. It is sweet, but there is an almost bitter edge to its flavor – no doubt the malt part. It is, in fact, just a lower grade extract than what brewers use for beer, so the darker component makes good sense. Drizzled judiciously across the blistered surface of our cheese and fruit studded flatbread, it enhanced both main players. Though Los Angeles played some mind games with me last week, cooling off just as I published a post asserting that autumn hadn’t arrived yet, it has warmed up again. Since this flatbread cooks on the grill, it’s perfect for a warm evening when you can’t bear the idea of firing up the oven. But if you don’t have a grill, and you’re willing to risk the house-heating power of indoor cooking, I’ve also included directions for the oven. 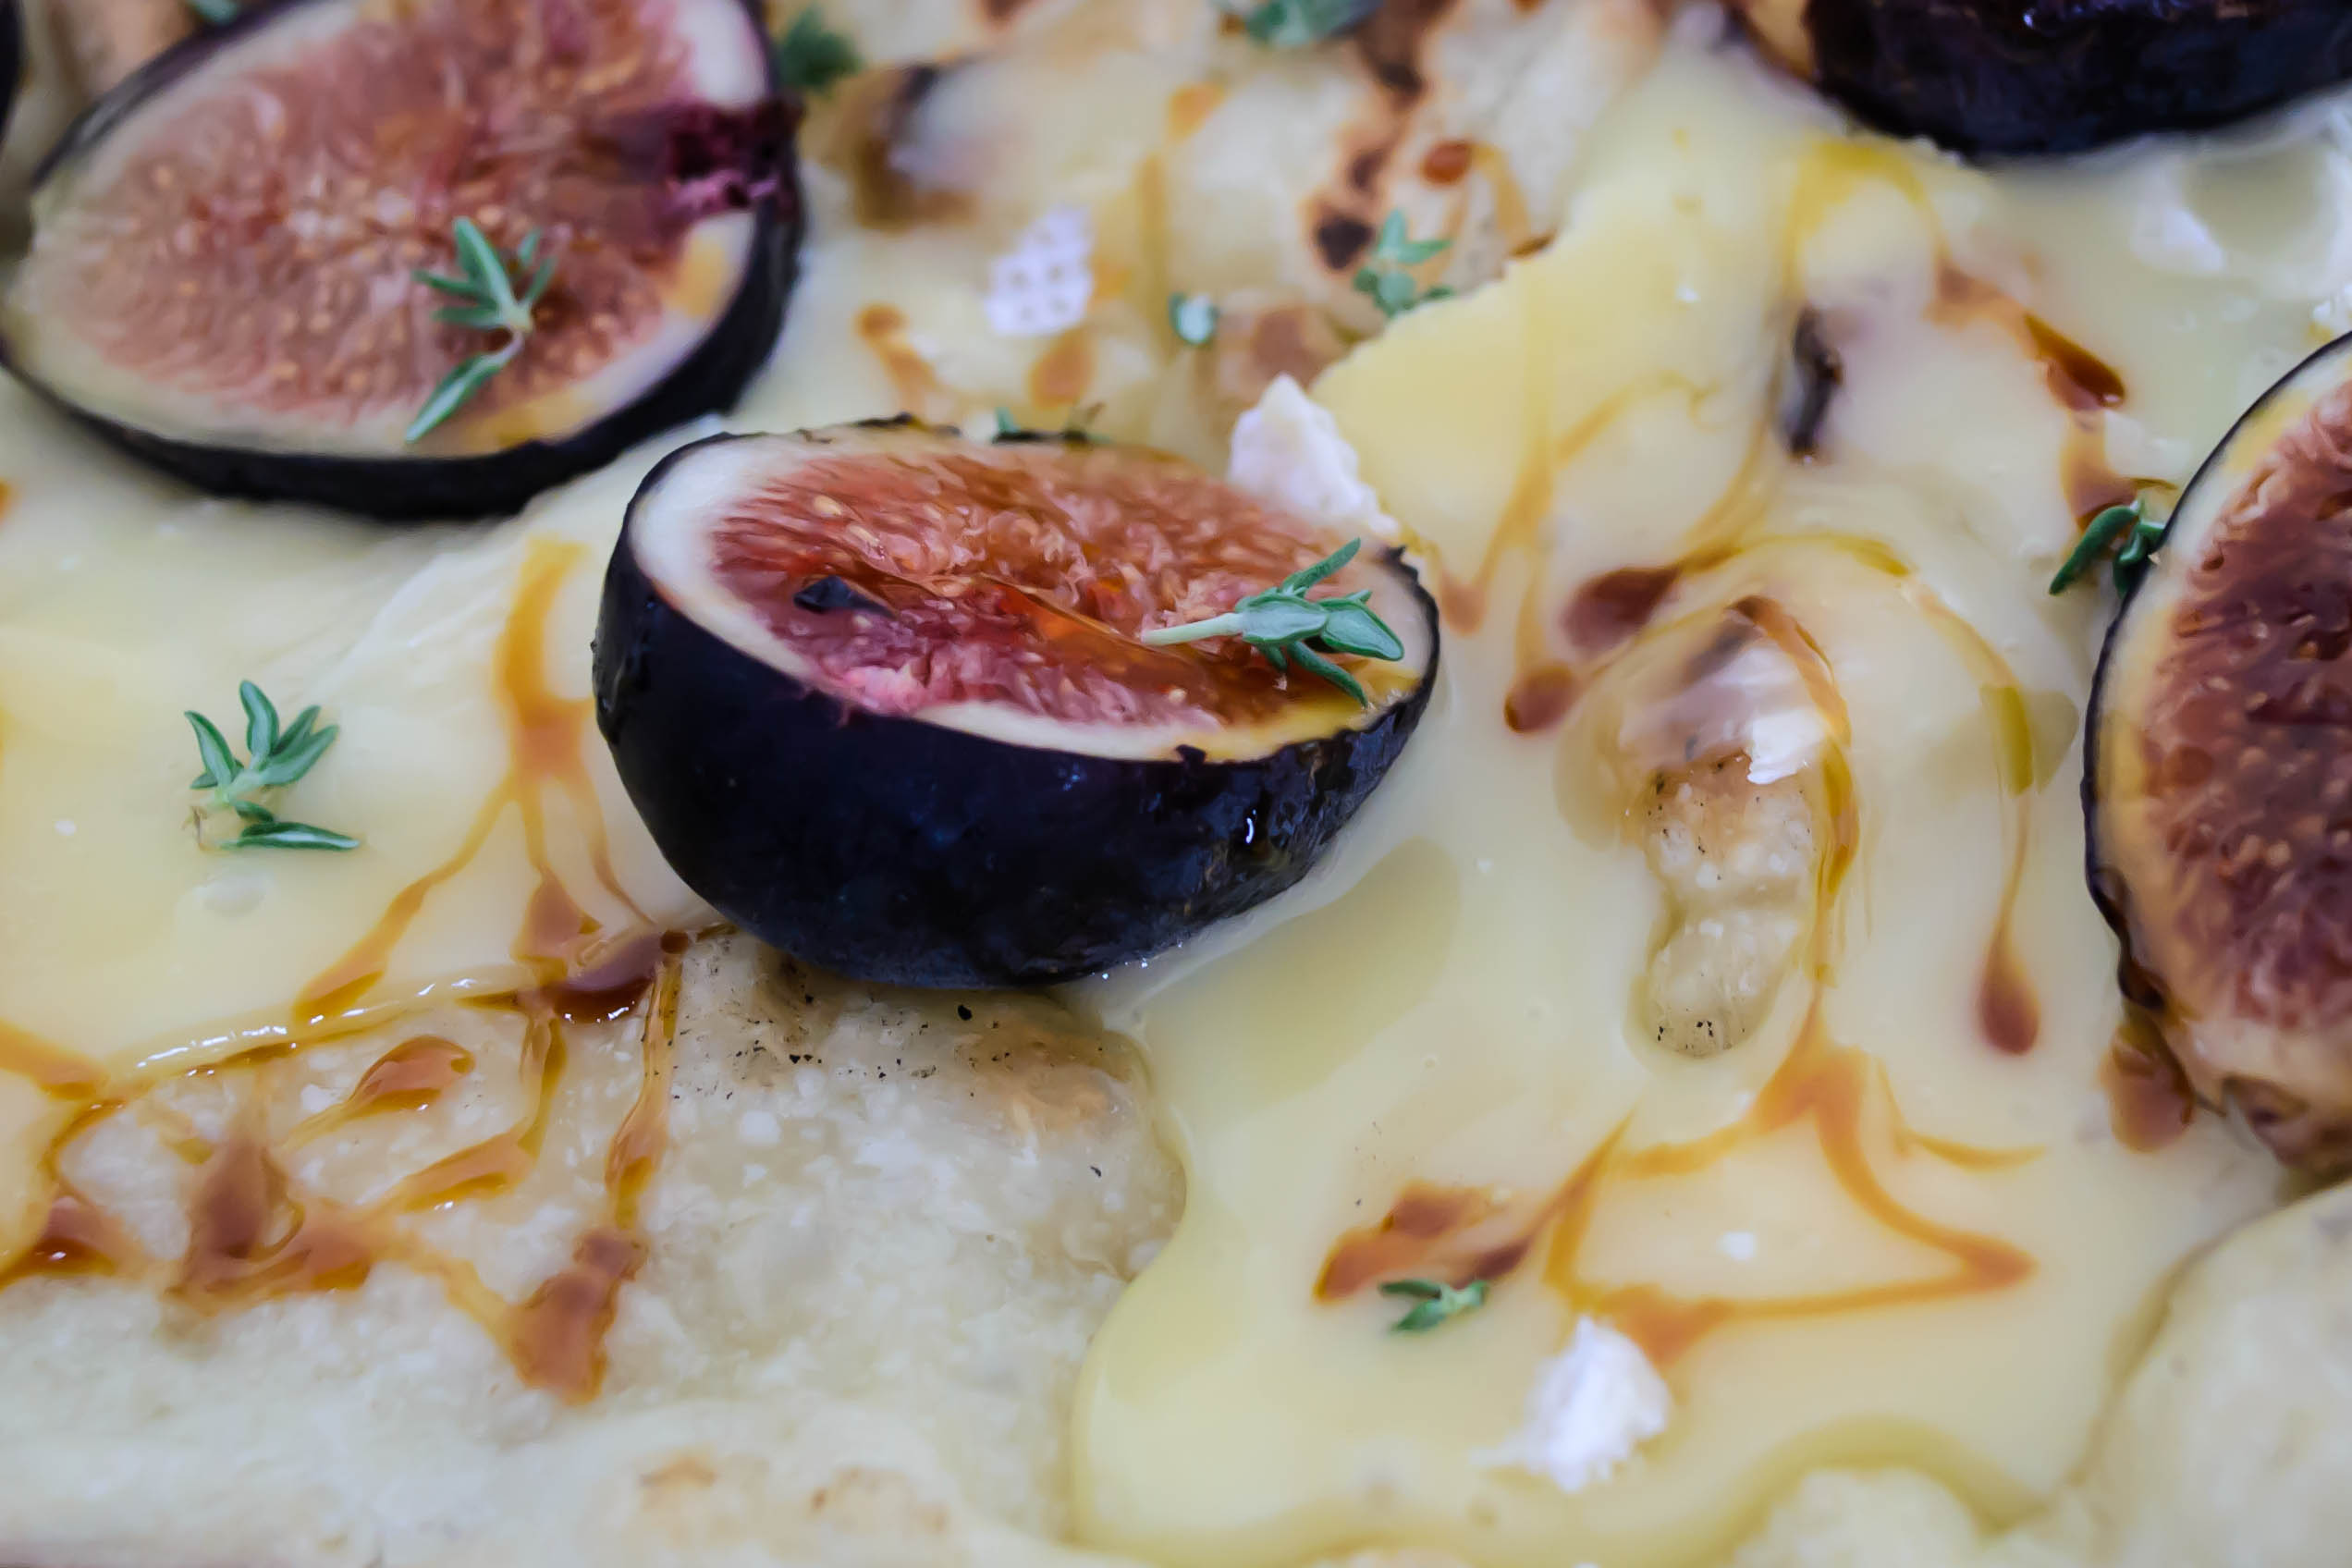

* You could, I suppose, top the dough either before cooking, if you are using the oven method, or immediately after flipping, if you are using the grill, and cook the toppings. I didn’t do this, because I wanted the freshness of the figs, and knew the heat of the bread itself would be enough to melt the cheese. If you choose to cook the toppings and you are using a grill, add the toppings after flipping, but turn off the burners on one side of the grill to create indirect heat, and cook your topped flatbread over the unlit burners for 7-10 minutes. This will allow the toppings to cook and the cheese to melt without burning the dough.
I am a list writer. I love lists. I live my life by them. I am addicted to my day-planner, where I write in even the most menial of tasks (eat lunch! unload the dishwasher!) just so I can have the satisfaction of crossing them off. I have a three page document on my laptop of “blog post ideas” – names and concepts of dishes I’ve never even tried that I’d like to develop and perfect to share with you.
 Thus it should come as no surprise that I can’t go grocery shopping without a list. Every week I make one, and every weekend before the big trip, I hand the list over to N. so he can add his requests. He writes funny little notes on random lines all out of order (doesn’t he know the list is arranged by where in the store the product is found?!) and tries whenever possible to convey his desires in puns or wordplay or goofy spelling. A few weeks ago, he wrote “chip-snack” near the bottom of the list. I knew this meant we’d be trying something new – a change-up from the standard yellow corn tortilla chips we usually have lurking about in our pantry.
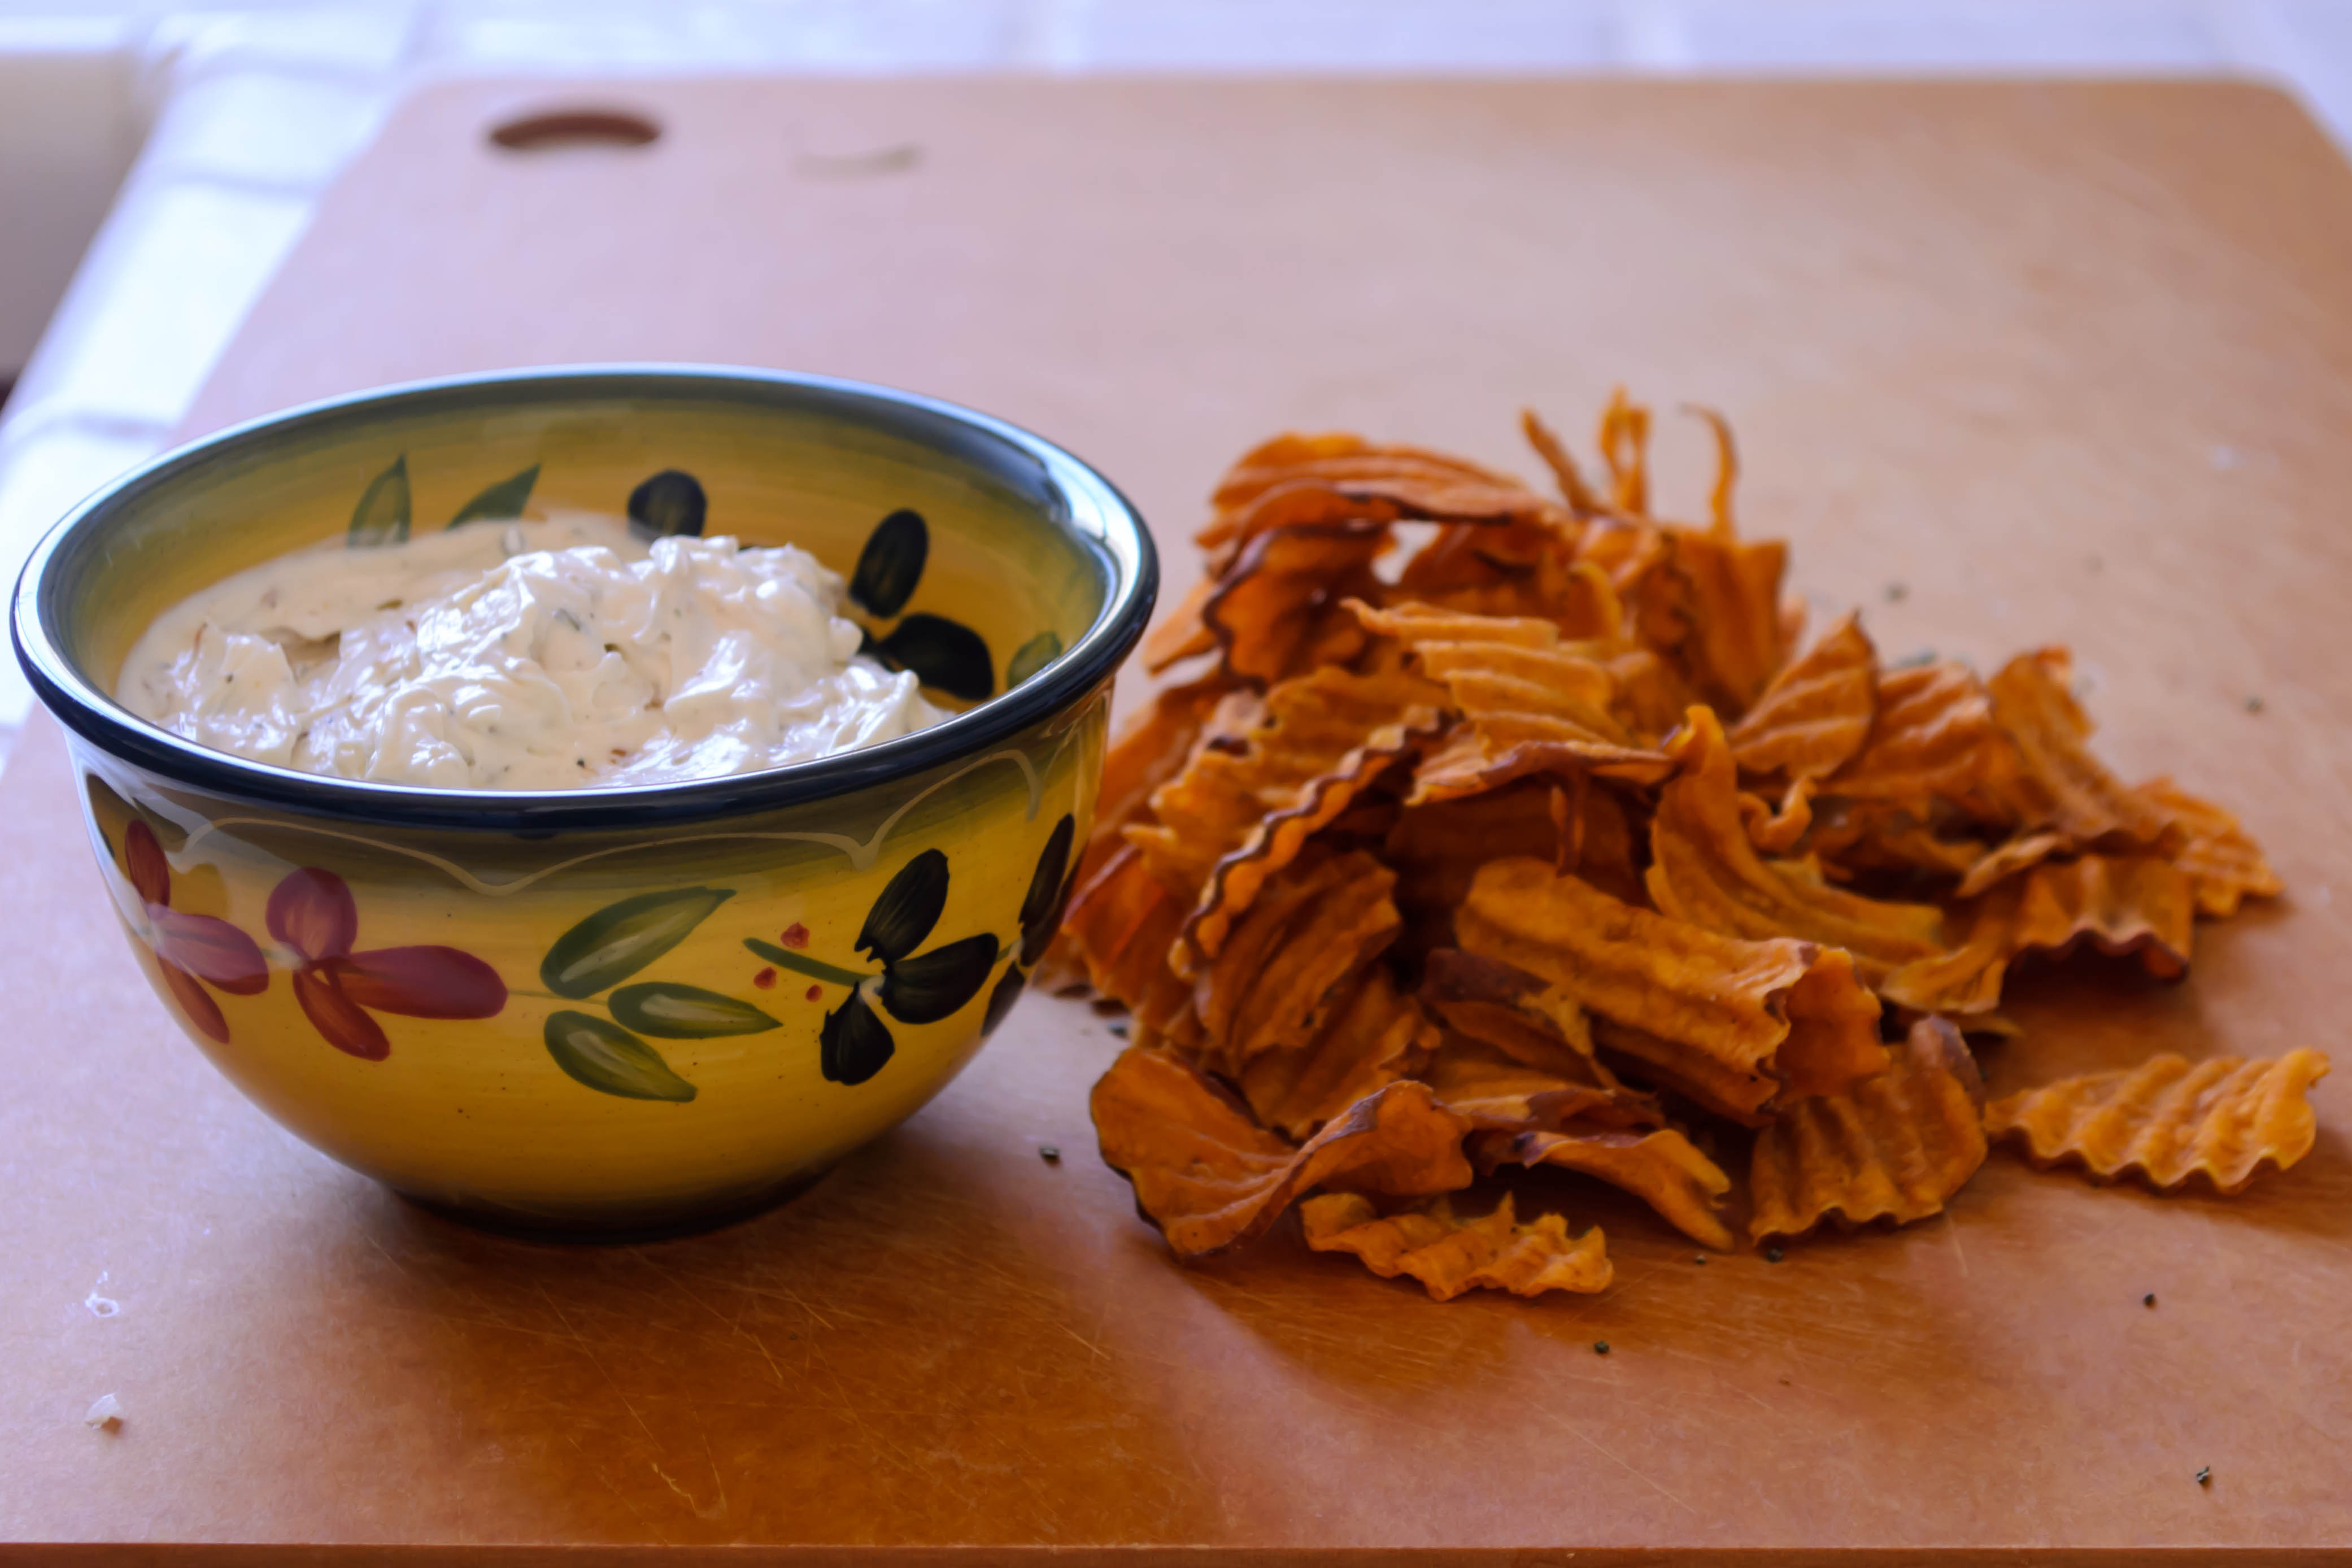
 We came home with thick ridge-cut sweet potato chips. And they were… okay. N. noted astutely that they were tasty, but after a few you felt like you’d eaten, well, a sweet potato. And I guess that’s a sign that they are what they advertise, but maybe they aren’t our ideal snack.
 As I was munching my way through a second helping one afternoon, trying to pinpoint what it was about these chips that I wasn’t crazy about (I know, I know, why would I eat more of them if I didn’t really love them?), I realized they just needed a little help. Without as much sodium as a standard potato or tortilla chip, I was missing some of the savory oomph that you really want from a chip. This meant they were going to need a friend to play with: a salty, creamy swirl of dip to plunge into.
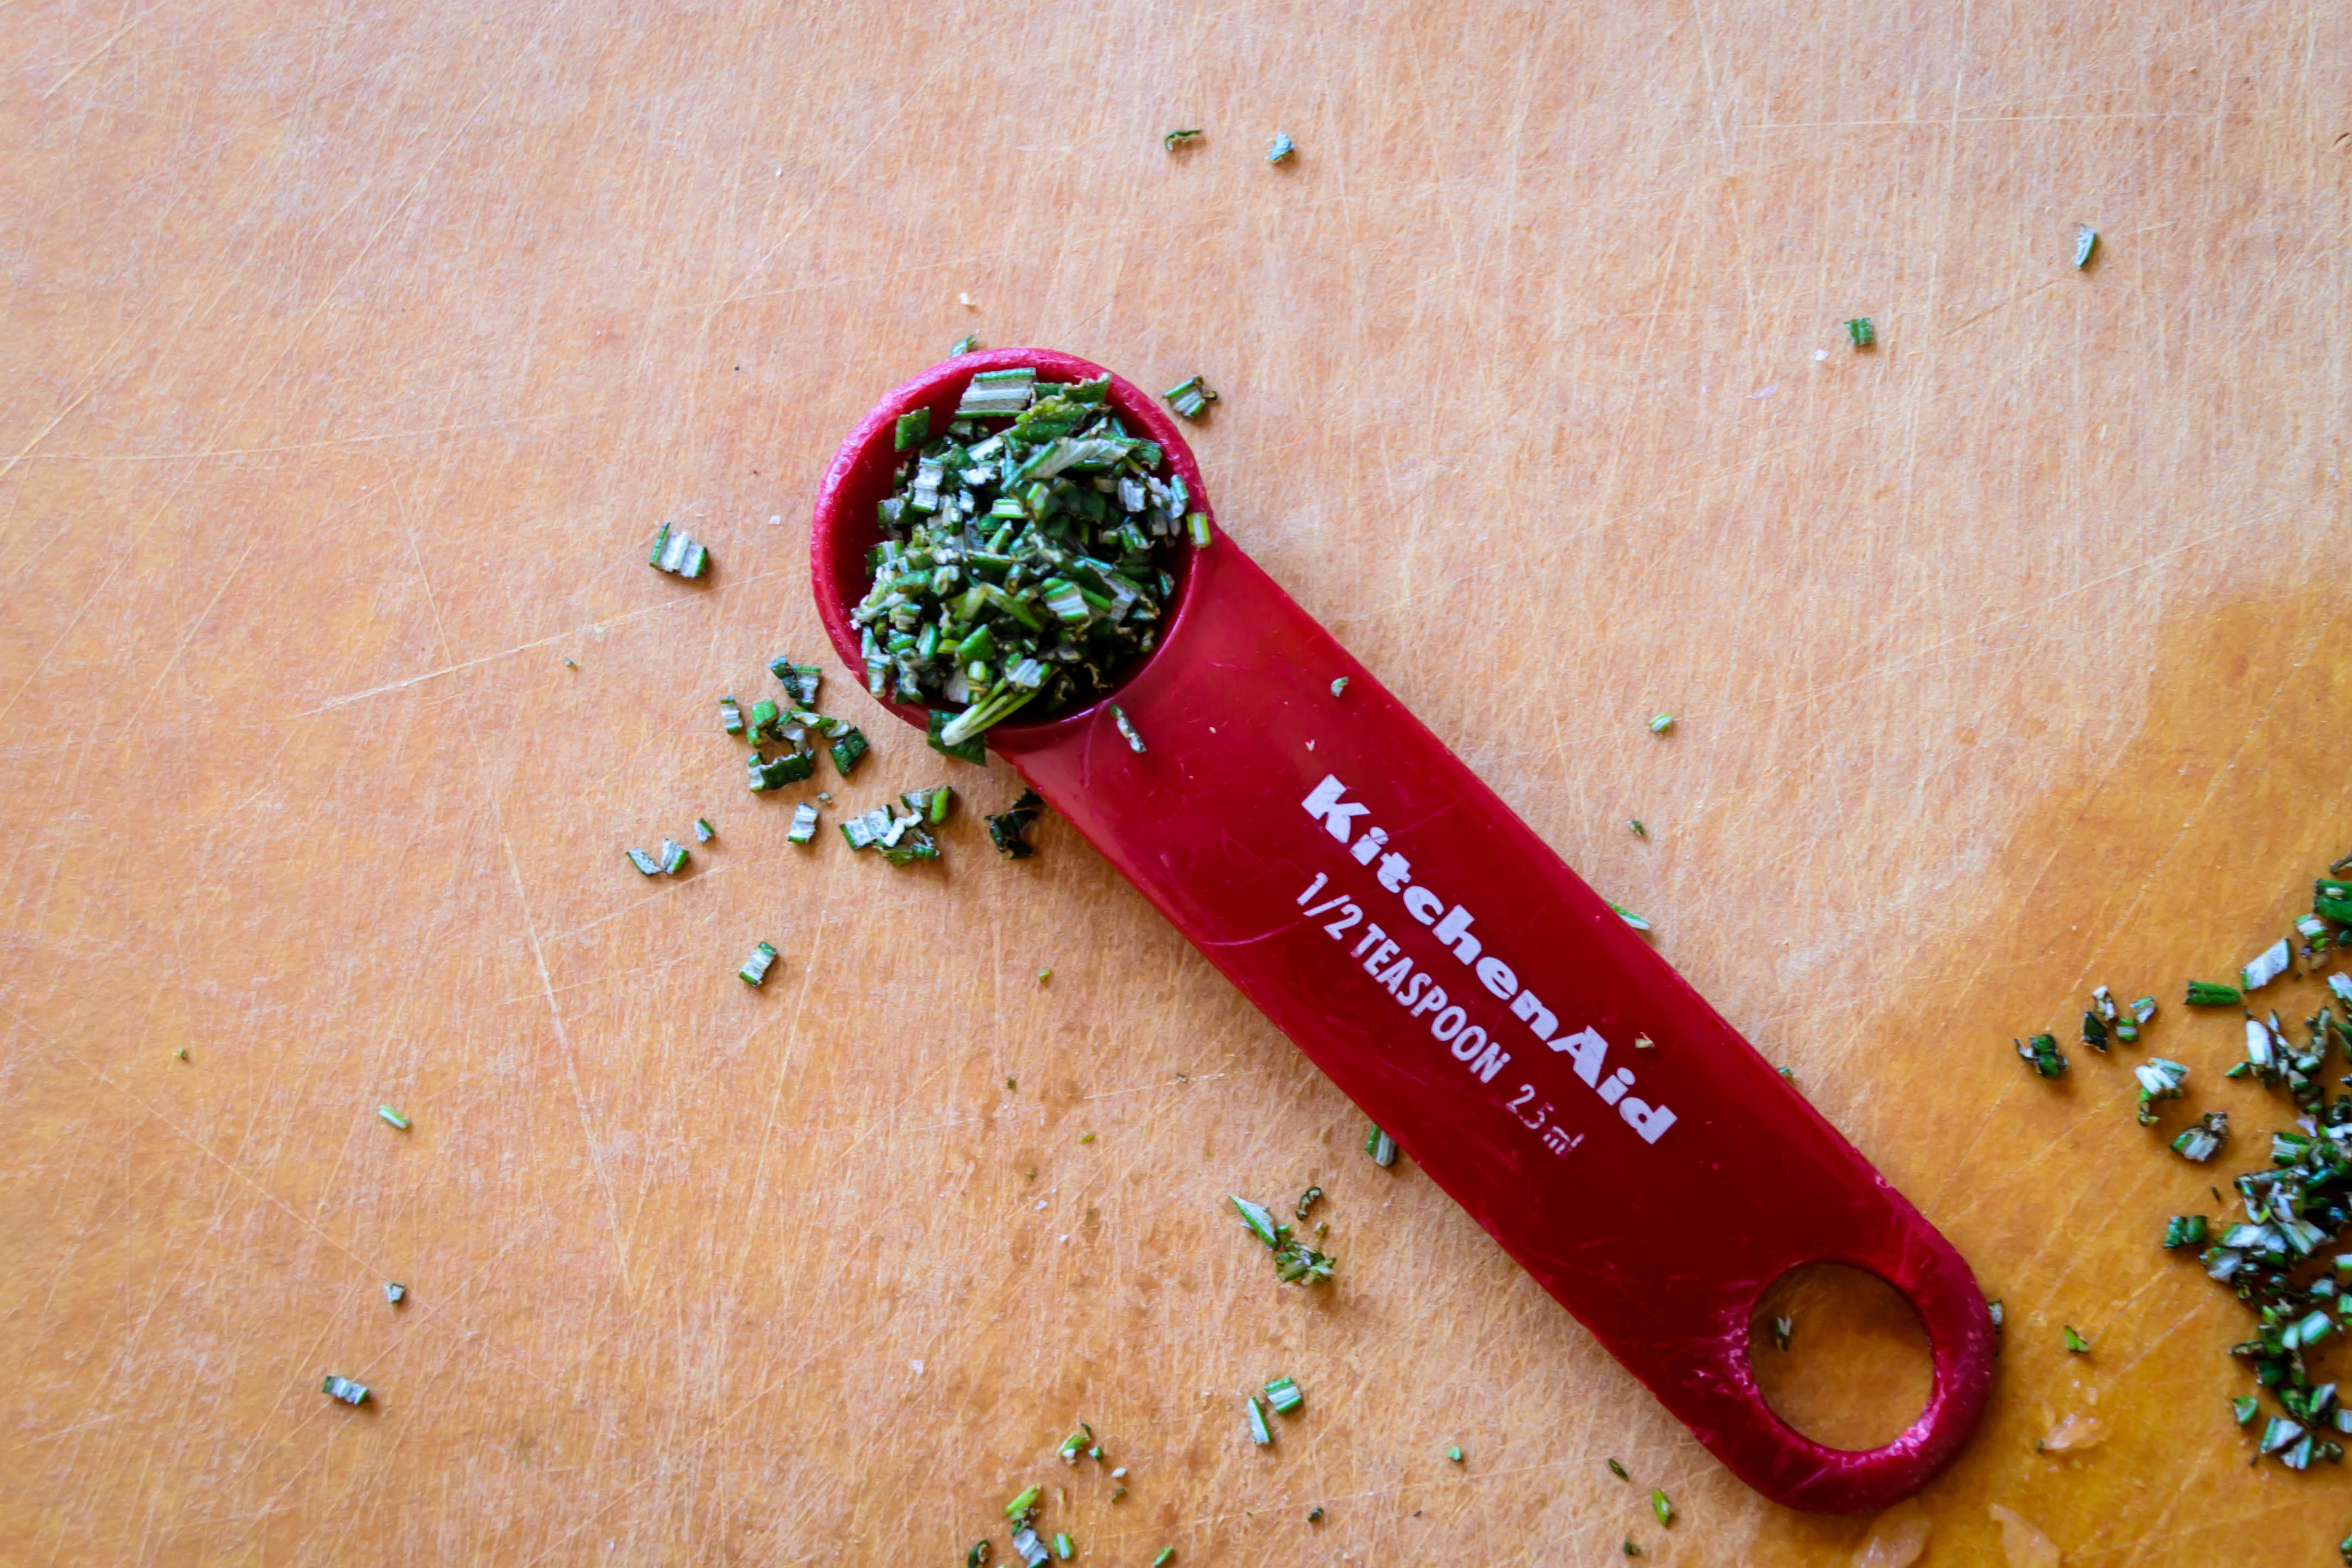
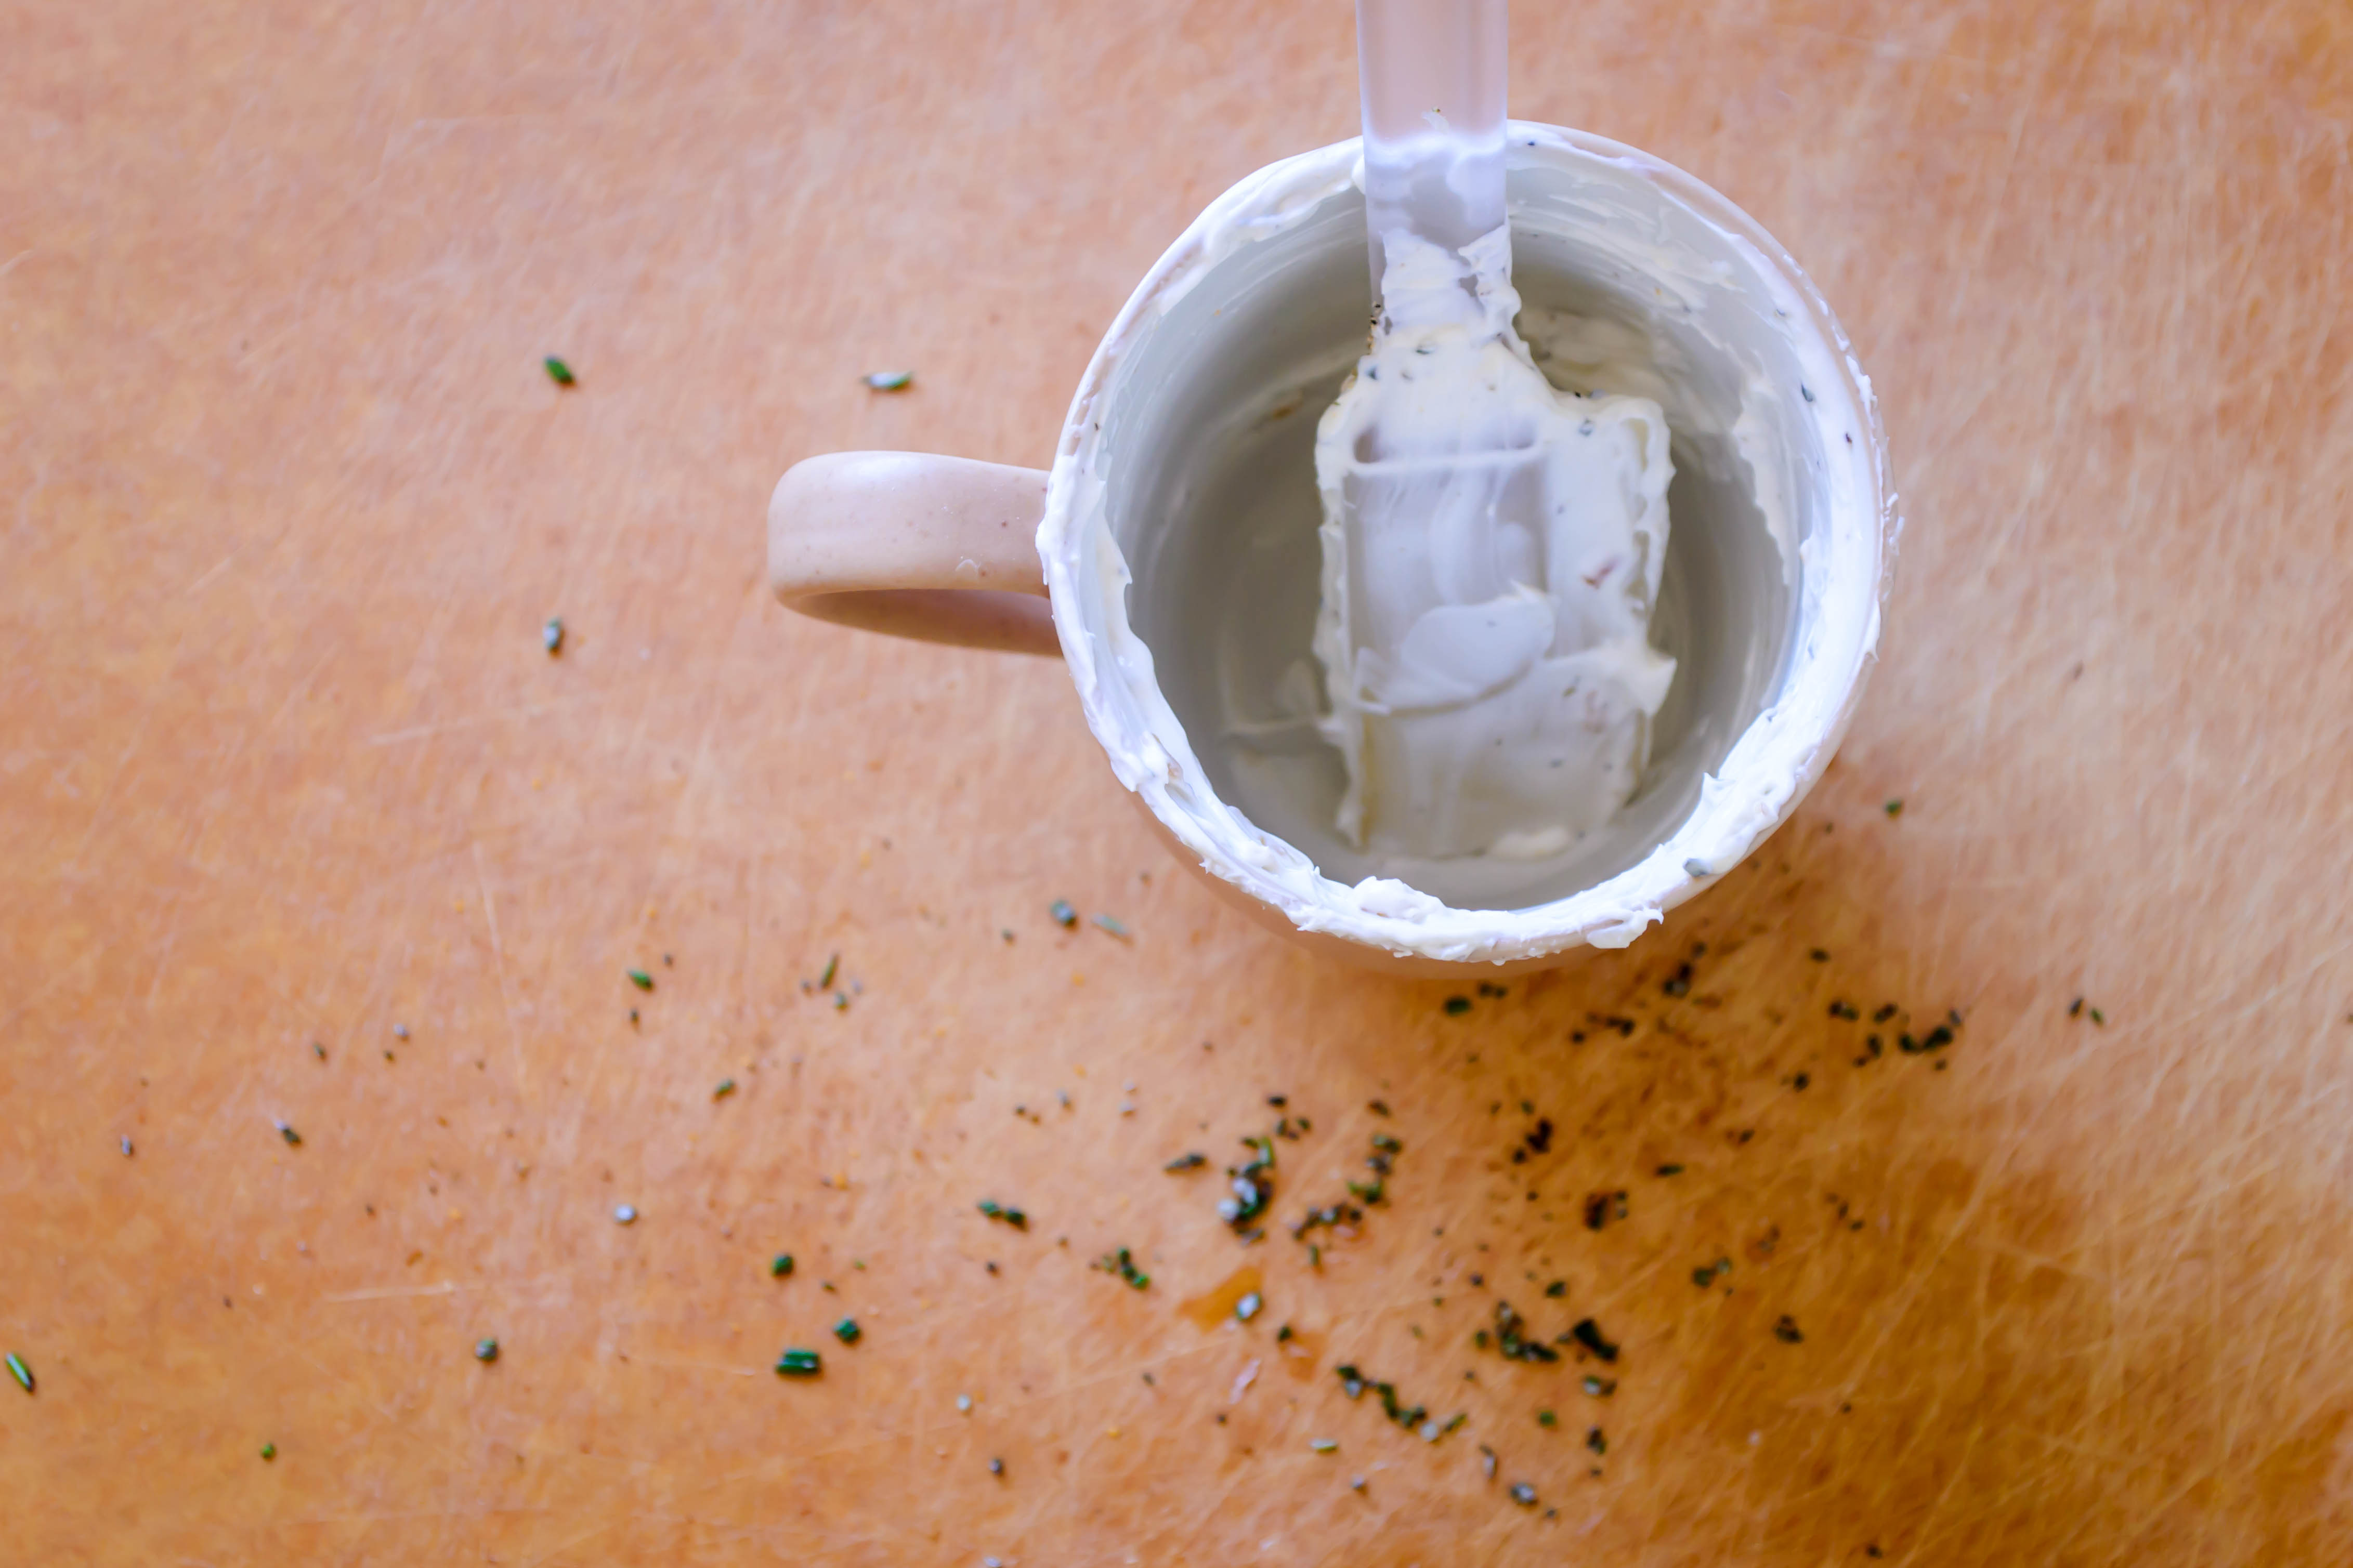 What came together, as I played, was the best possible version of a sour cream and onion dip. Whipped cream cheese with a dollop of sour cream for consistency and tang. A pile of well-caramelized onions, sweet and soft and deeply bronze, produced through considerable patience. Salt and pepper, of course, and I didn’t want to complicate things, but it needed something else to break up the richness. That something else turned out to be the earthy herby punch of finely chopped rosemary.
You want this for your next chip and dip party (do people have those? We should). You also want, I quickly determined, at least four people at the table when you serve this, because it will disappear, and you want to prevent any guilt that would result from eating the whole cupful, along with the whole bag of chips, all by yourself.
Other suggestions: double or triple this recipe, spread it evenly into a casserole dish, and bake at 400F for 20 minutes or so, until the whole thing is luscious and bubbly and mouth-searingly hot, then serve with crostini or pita chips. And call me. Because I want in on that action. Or you could roast thick slices of sweet potato with some olive oil, salt, and pepper, and pipe this on top with a piping bag in pretty little swirls. Arranged on a big square platter, that would make gorgeous passed appetizers.
Or you can just jam crackers or bits of toast into the dregs of the mixing bowl to get every last creamy bit. It is, after all, your party.

Why, I thought, as a rivulet of sweat coursed from neck to waist, do I insist on frying in the summer? The instant read thermometer I was using to check the temperature of the oil sat next to the stove, registering 91F. Normal people wait for summer and then anxiously stuff themselves on grilled meats, fresh salads, wedges of cool melon. Foods that don’t make your back bead up. But here I am, on my first real day of summer vacation, celebrating by standing over a pot of shimmering heat, making pakoras for lunch.
 Maybe it’s a cultural thing. I don’t mean the pakoras. I mean frying. Fried foods are a treat frequently enjoyed during the summer months; Americans + carnivals or county fairs = frying anything we can think of. Depending on where you are in the country, corn dogs, funnel cake, hush puppies, twinkies, tortillas, even oreos, all get dunked into vats of hot oil and floated cautiously around until they transform into variously shaped clumps of deep, crispy gold.
So to bring summer traditions like sweating and eating fatty foods and looking at award-winning livestock and riding in twirling cars where the metal shrieks and you smell the grease with every turn into my own kitchen, I’m making pakoras for a weekday lunch?
Partly. But not all.
I’ve talked before about my friend Ph., who even has a whole category on this little site dedicated to her (Phoebe-Phriendly, if you’re interested). Ph. is gluten-intolerant, can’t eat dairy or tree nuts, and is no longer able to process corn or rice. This makes cooking for her a challenge. However, she is one of the reasons I started stretching my food boundaries and knowledge; we became close friends in graduate school, and I wanted to be able to make food that she could eat! We got into a conversation in the comments of her blog the other day, and I brought up pakoras because she was playing with garbanzo bean flour. She had never made them, so we decided I should come up with a recipe she could use. That’s where you, my friends, luck out.
 Pakoras are an Indian street food: assorted vegetables (or paneer, or bread, or apparently sometimes even chicken) dredged in a well-spiced batter of besan or gram flour (which is made with garbanzo beans) and water. I added some baking powder to my mix as well, for fluff and lightness. Most often the vegetables are cut into manageable pieces and dipped into the batter individually before they are fried, resulting in something I’ve been thinking about as essentially an Indian spiced tempura.* Sometimes, though, they are cut into smaller pieces, tossed together in the batter, then levered carefully into the oil in chunky mixed fritters. I chose the first of these methods for our lunch, so we could have the fun of mixing and matching which vegetables we crunched our way through. We chose cauliflower, potatoes, and onions. My favorite ended up being the cauliflower, while N. couldn’t get enough of the puffy potato slices.
 Though they are eaten year round (depending on where you are), I discovered during my research about this delightful little snack that they are particularly popular during monsoon season, dipped into or sauced with a variety of chutneys, and served alongside a cup of chai. This makes sense – a warm treat to enjoy when it is wet and booming with storms outside – and though the weather in my California kitchen is far (far, far, far) from identical, it is currently monsoon season in India, so it turns out this was, after all, a timely choice.
We had ours with a cilantro mint chutney – lightly spicy, fresh, grassy from the herbs, and bright from the addition of lime juice. I’ve included that recipe here as well.
 Pakoras are best served as hot as your mouth can handle them. They are crispiest that way. As they sit, the batter loses its magnificent crunch. They are acceptable reheated in a 400F oven the next day, but, as with all fried foods (with perhaps the magical exception of a really good fried chicken), they are best eaten immediately.


* I realize tempura is quite different: rice flour is typical, for one, and the liquid used is often carbonated water to make the batter even lighter. But the essentials – vegetables coated in batter and fried – are the same.
Pakoras are best consumed as soon as they are cool enough for your mouth to handle. As they sit, the batter gets soggy. It’s still tasty, but not as triumphantly crunchy.

I’m not going to say that my mom was a hippie or a health nut. She didn’t stock her pantry with wheat germ or homemade granola, and she didn’t feed us sprouted grains or tempeh (in fact, she probably didn’t know what tempeh was). But she did make a definite effort to keep food choices healthy when my sister and I were kids. Her rule for me when picking out breakfast cereal was that sugar had to be third or lower on the list of ingredients tapped out in tiny letters on the side of the box. I think the first time I tasted Lucky Charms was when I was in high school, where I was quietly surprised that anyone could think of eating this candy for breakfast rather than dessert. The first time I saw someone put sugar into a bowl of Corn Flakes, I was stunned. The only kind of cereal I’d ever put sweetener onto, besides oatmeal, was Shredded Wheat.
Despite the commercials I drooled over for Sunny Delight (back when it wasn’t just a D) and Capri Sun, nothing but 100% juice (and the occasional lemonade concentrate) entered our fridge for a very long time. Brand name Fruit Roll-ups didn’t fly, but the occasional real pressed fruit leather was okay. My sister, seven years my junior, somehow managed to get Mom to buy Squeeze-its, but not until they had a “real juice” component. She also ended up with Lunchables to take to school (I didn’t find out about this until a visit home from college. I was shocked and felt a weird kind of betrayed jealousy – I didn’t want to eat Lunchables now; they looked disgusting! But I wanted to have been allowed to have them when I might have thought they tasted good. Is there even a word for that feeling?).
Given all this, as you might imagine, white bread was not something that appeared in our (paper, please) grocery bags. But my sister and I were not sold on the breads my parents wanted us to eat. Whole wheat was pushing it a little, especially if it had cracked wheat spattered across the top crust. Oatnut and any kind of seven or nine or even five grain compilations were out. And then Mom found Country Potato bread. Do you remember it? It’s golden and mild, slightly sweet but still savory enough to taste good with ham and cheese. The top was often lightly dusted with some residual flour, which was somehow not offensive in the way the cracked wheat pieces were on the bread we refused. We ate potato bread for years. It was soft enough that, once you ate the crust off, you could roll the rest of it up into a mushy little ball, or tear the slice in pieces and make a whole pile of little dough-balls, and then eat those. They squished against our teeth.
In the years since sourdough replaced potato as my bread flavor of choice, I’ve thought again about that bread my sister and I ate. How did they (whoever “they” were) get potato into bread? In what form? Was it mashed? Was it baked? Was it a flurry of potato flakes? Was it potato flour? At the farmers’ market in Eugene, OR my husband and I discovered potato donuts: dark brown, dense, sugar-crusted rings that were mercifully only available once a week, and I wondered about these too. Two beloved starches, baked together, could only be greater than the sum of their parts.
This is all an extremely long way to introduce the idea of putting potatoes in a biscuit. If they can produce bread and donuts, and of course pasta – gnocchi is not, when it comes right down to it, really so tremendously different from a row of fluffy little miniature biscuits that you boil instead of baking – why not a tall, leavened biscuit?
 A little internet research showed me numerous methods of incorporating potato flavor into my biscuits. I decided early on that I wanted to use a fresh potato, rather than the instant potato flakes some recipes recommend, which meant I had to be careful about moisture. The potato needed to be cooked and mashed or pureed before adding it to the flour, so that it mixed in easily. However, boiling potato chunks to mash them does add water, and I wanted to keep my potatoes dry so that the moisture could come from something with additional flavor – I was thinking buttermilk. Here, gnocchi was the answer. To avoid adding too much water, here or in those pillowy little nuggets, the potato is baked and then grated into crumbly, starchy strands, which are then easily smashed into smoothness.
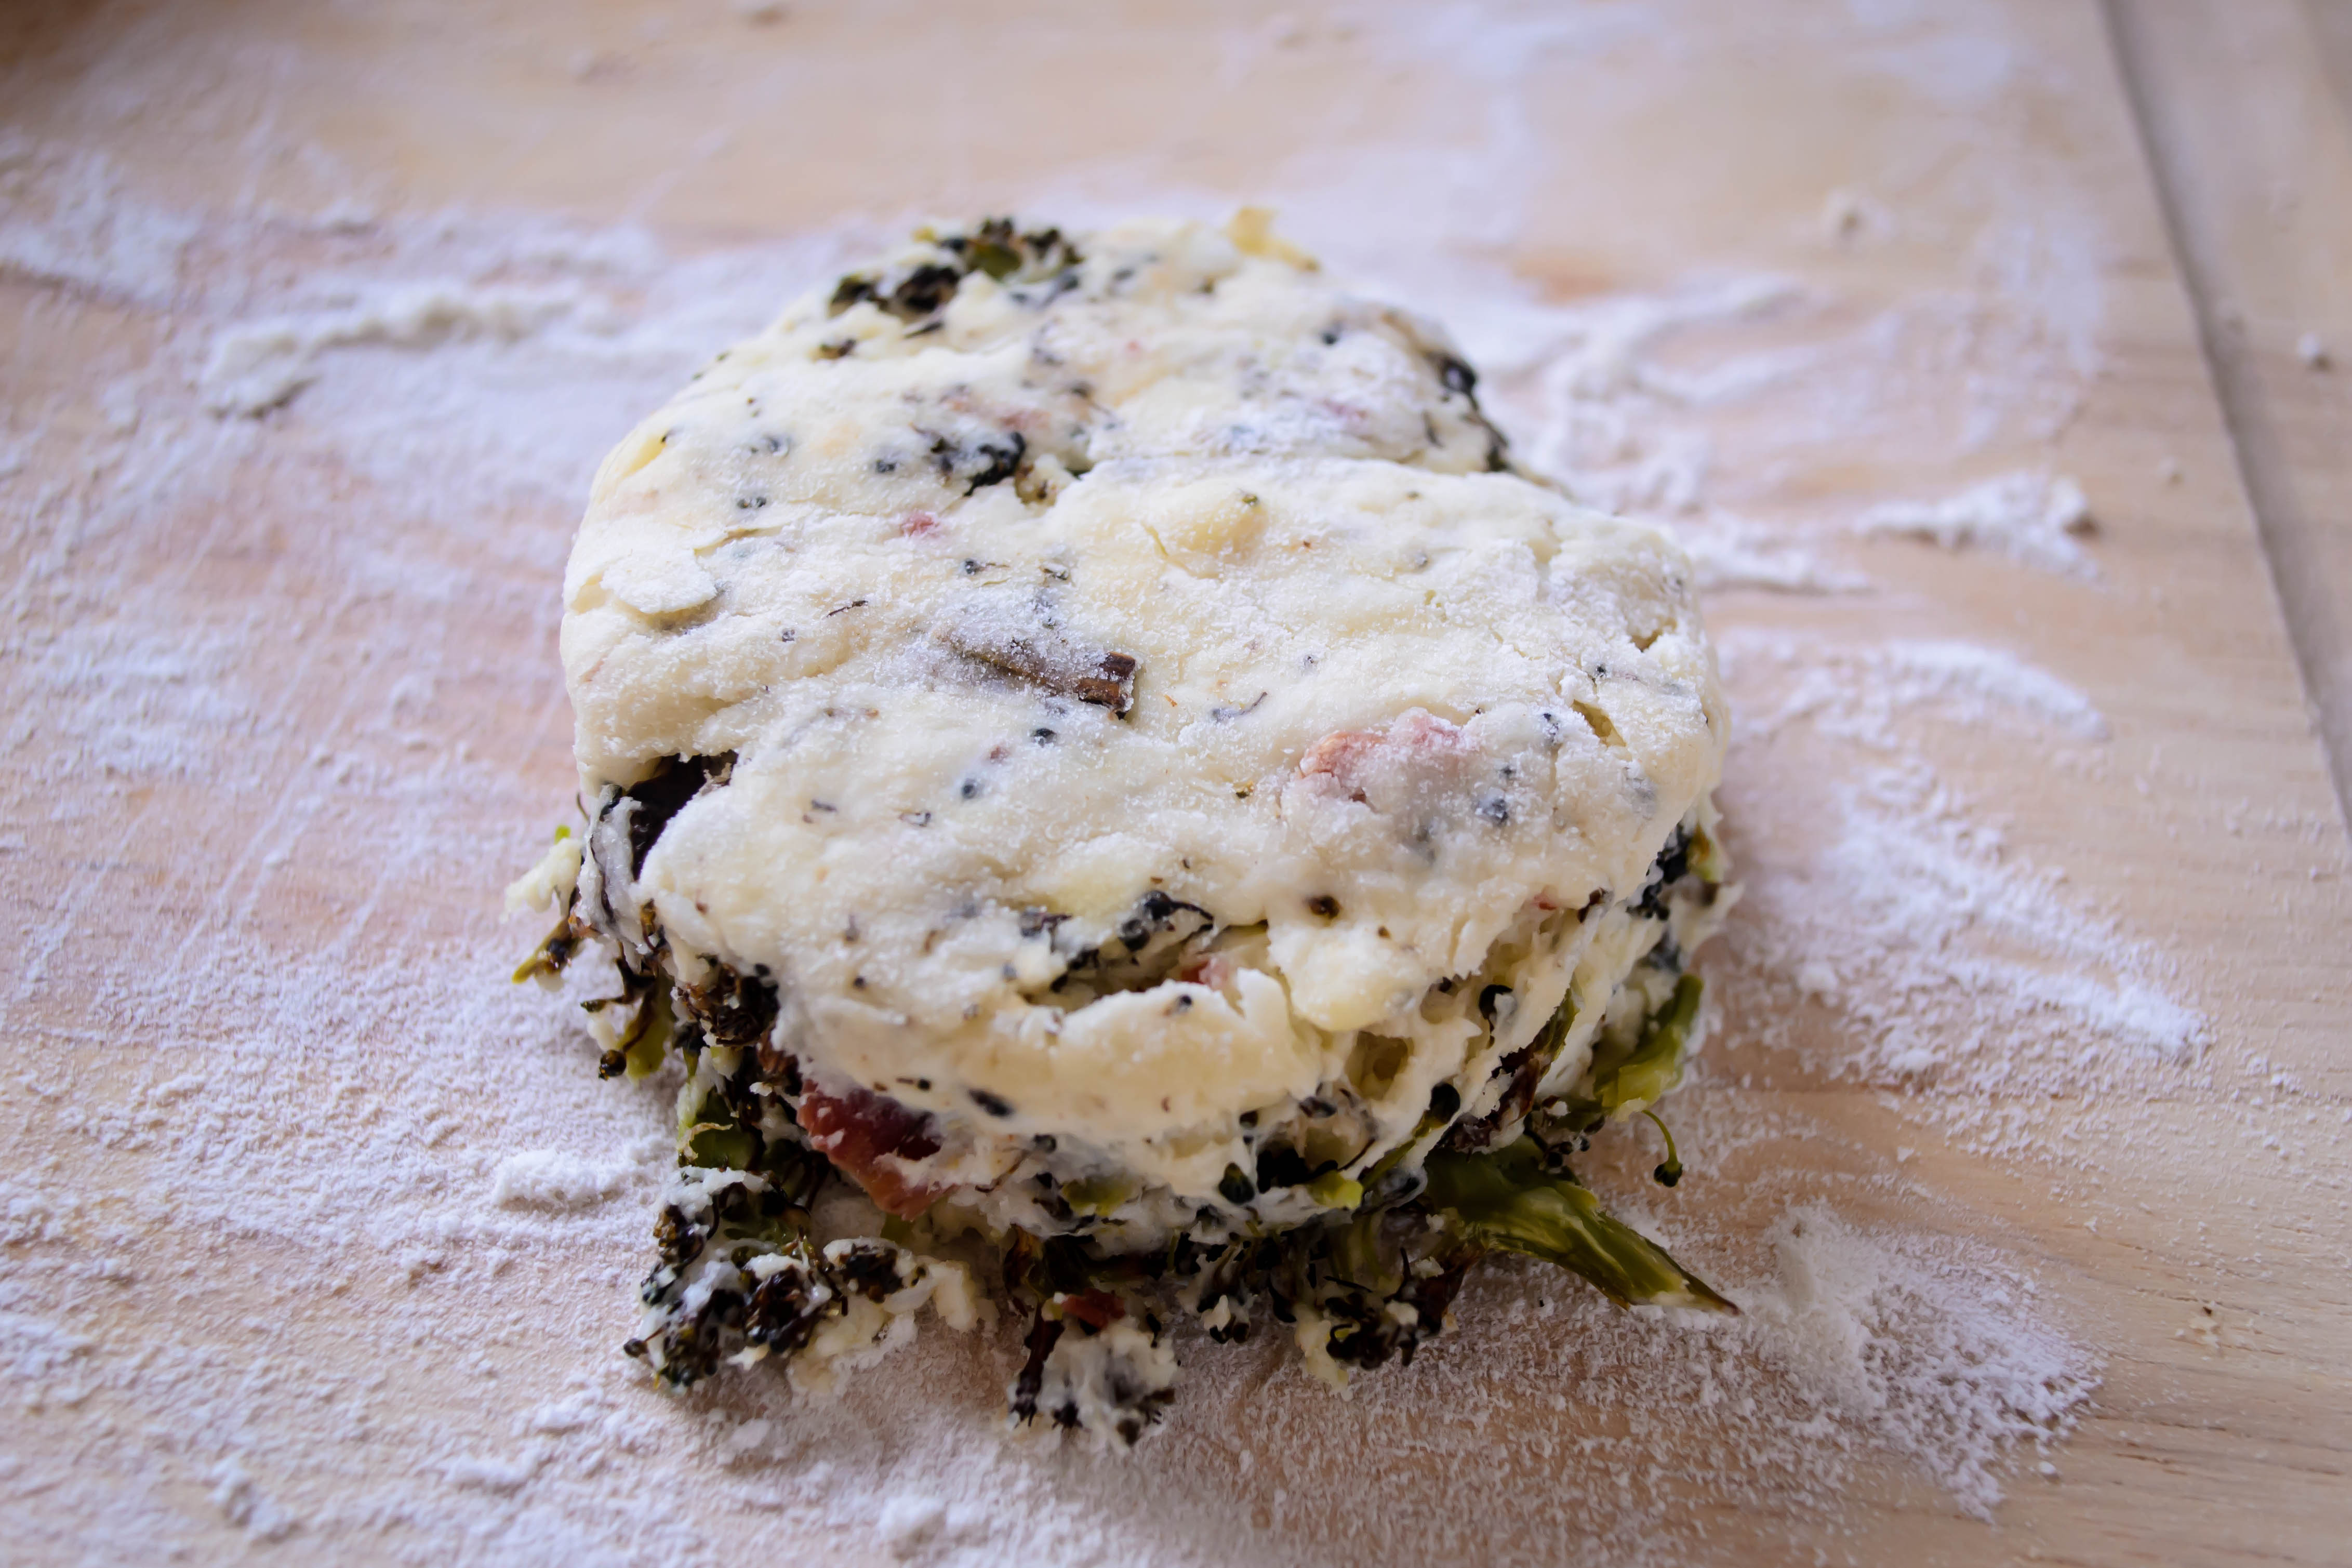
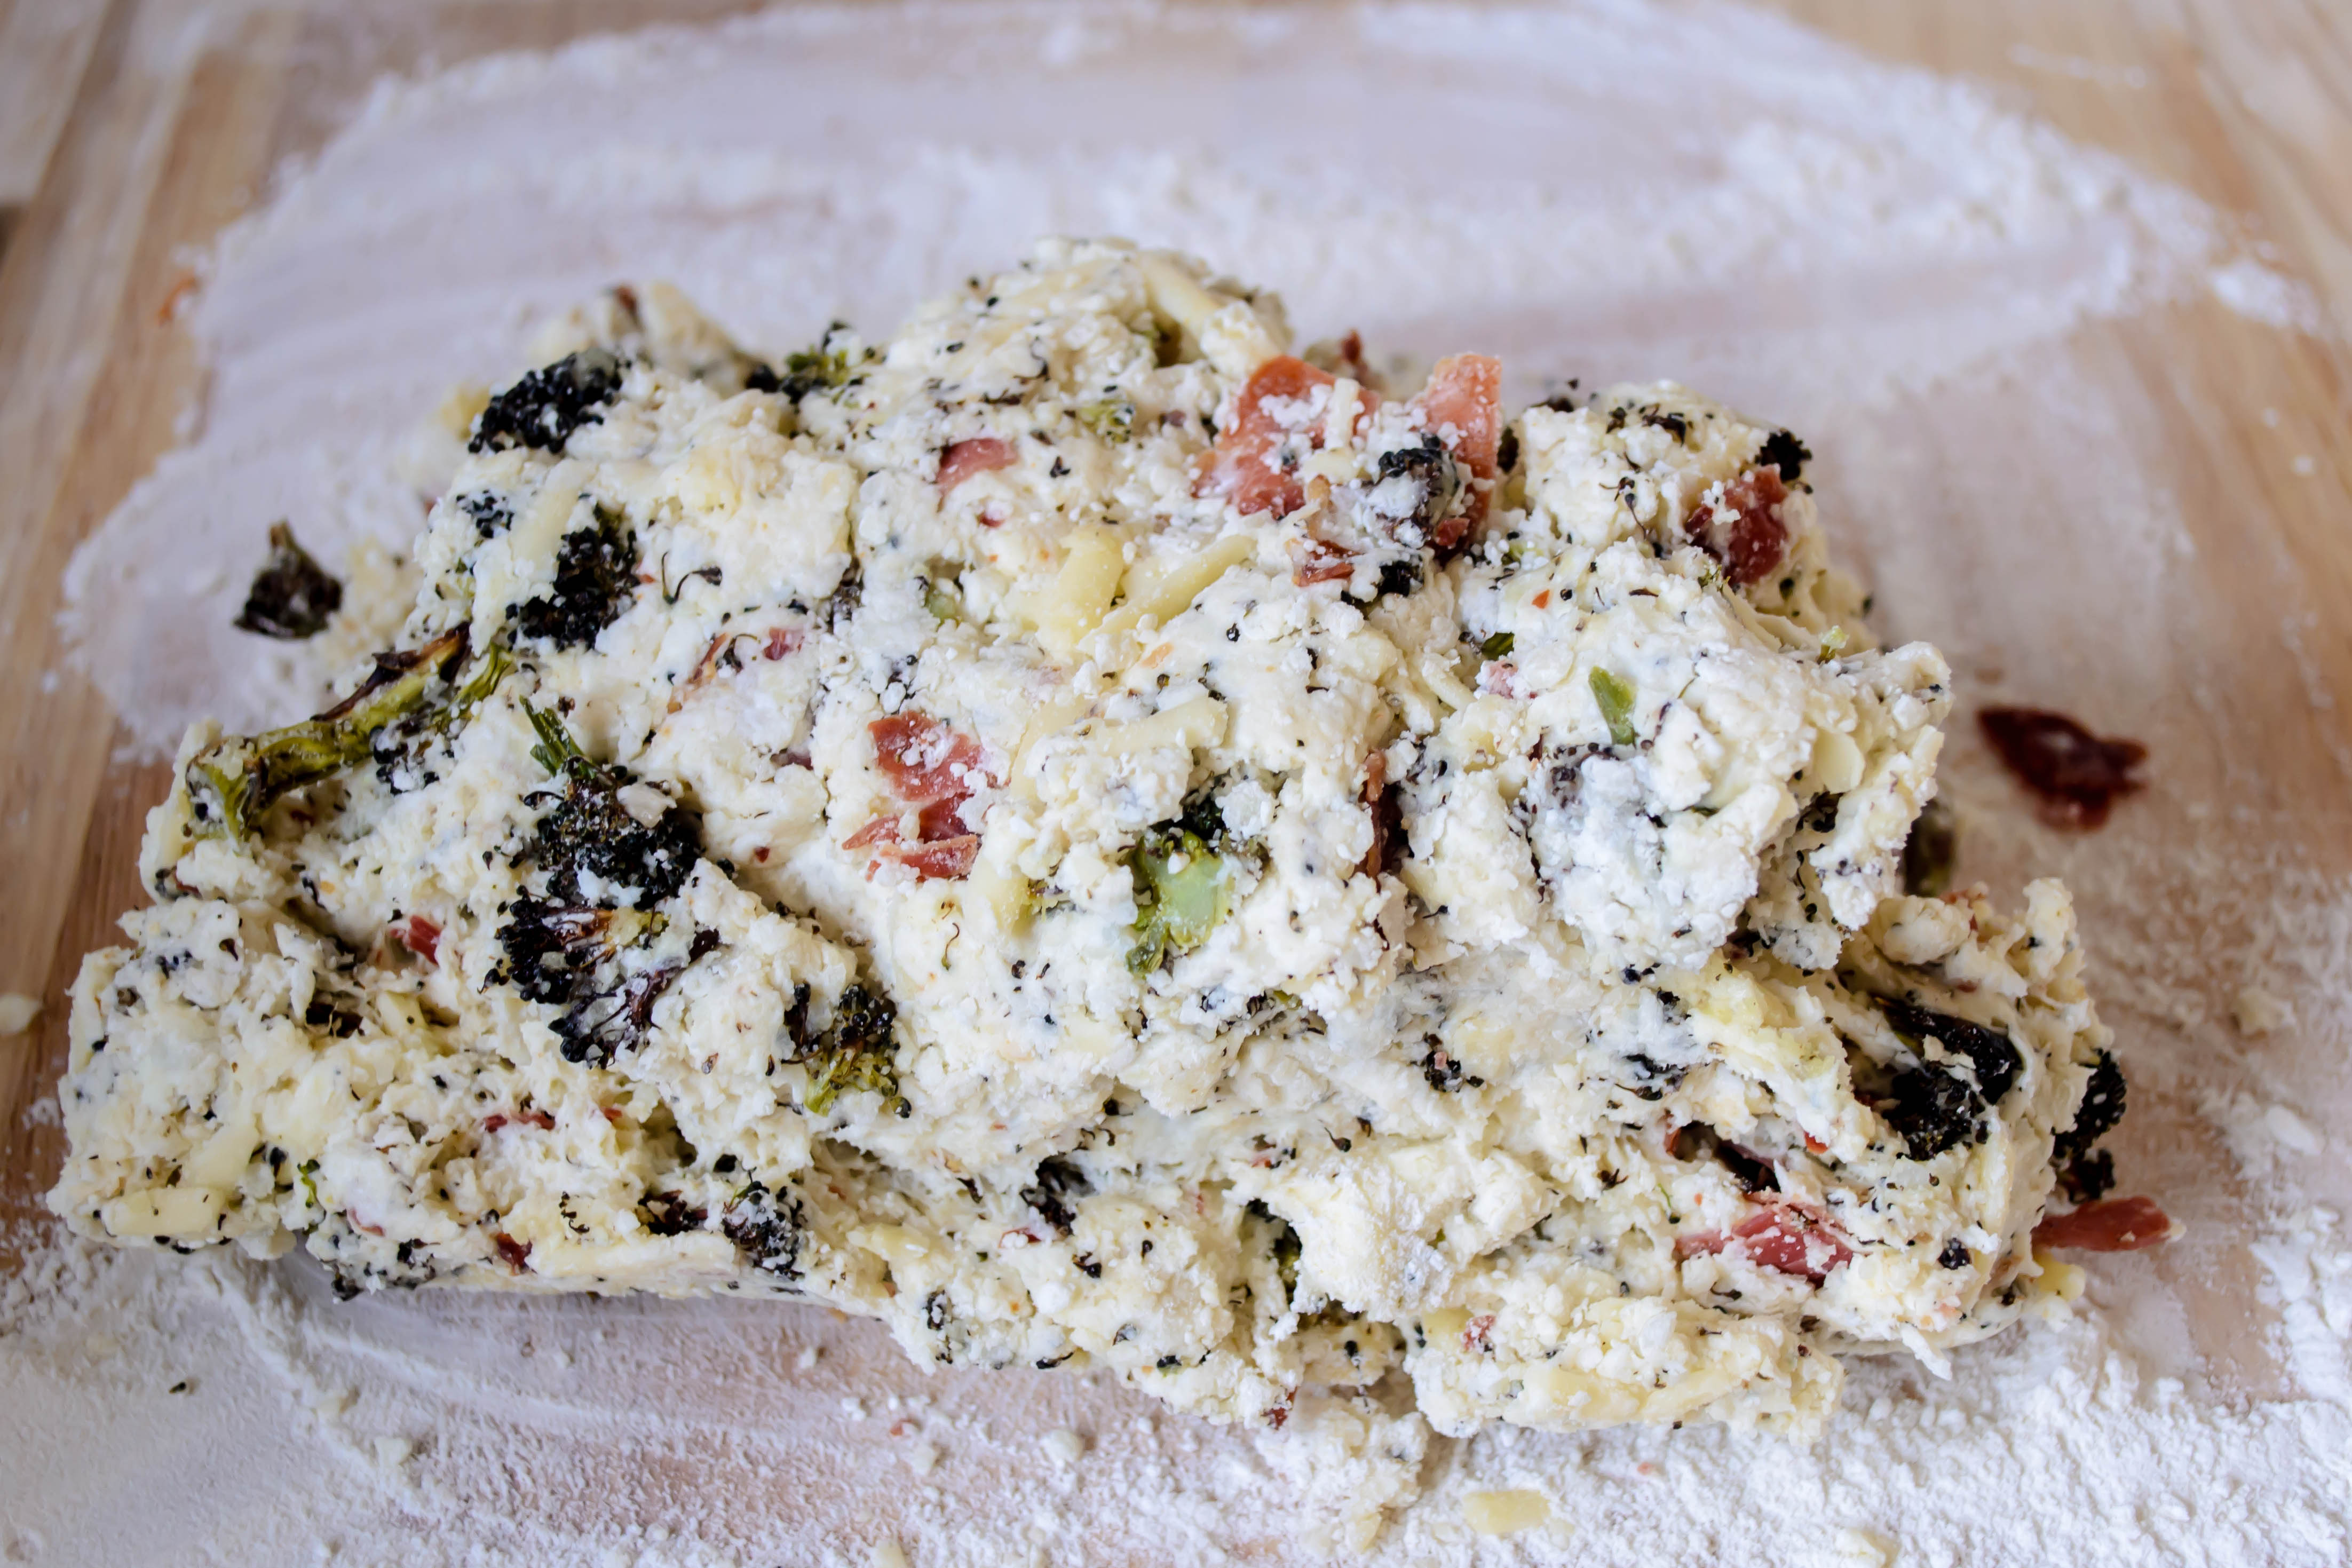 I’m rarely contented with a plain old buttermilk biscuit, so I decided some add-ins were in order. Since I was already playing with the potato idea, I started thinking about loaded baked potatoes: cheese, broccoli, bacon bits, sour cream, green onions… I had a roommate once who liked to top hers with salsa and cubes of fried tofu. In the end, though, I decided to keep the excess to a (relative) minimum: crisp shards of prosciutto, sharp cheddar, and a pile of roughly chopped roasted broccoli florets.

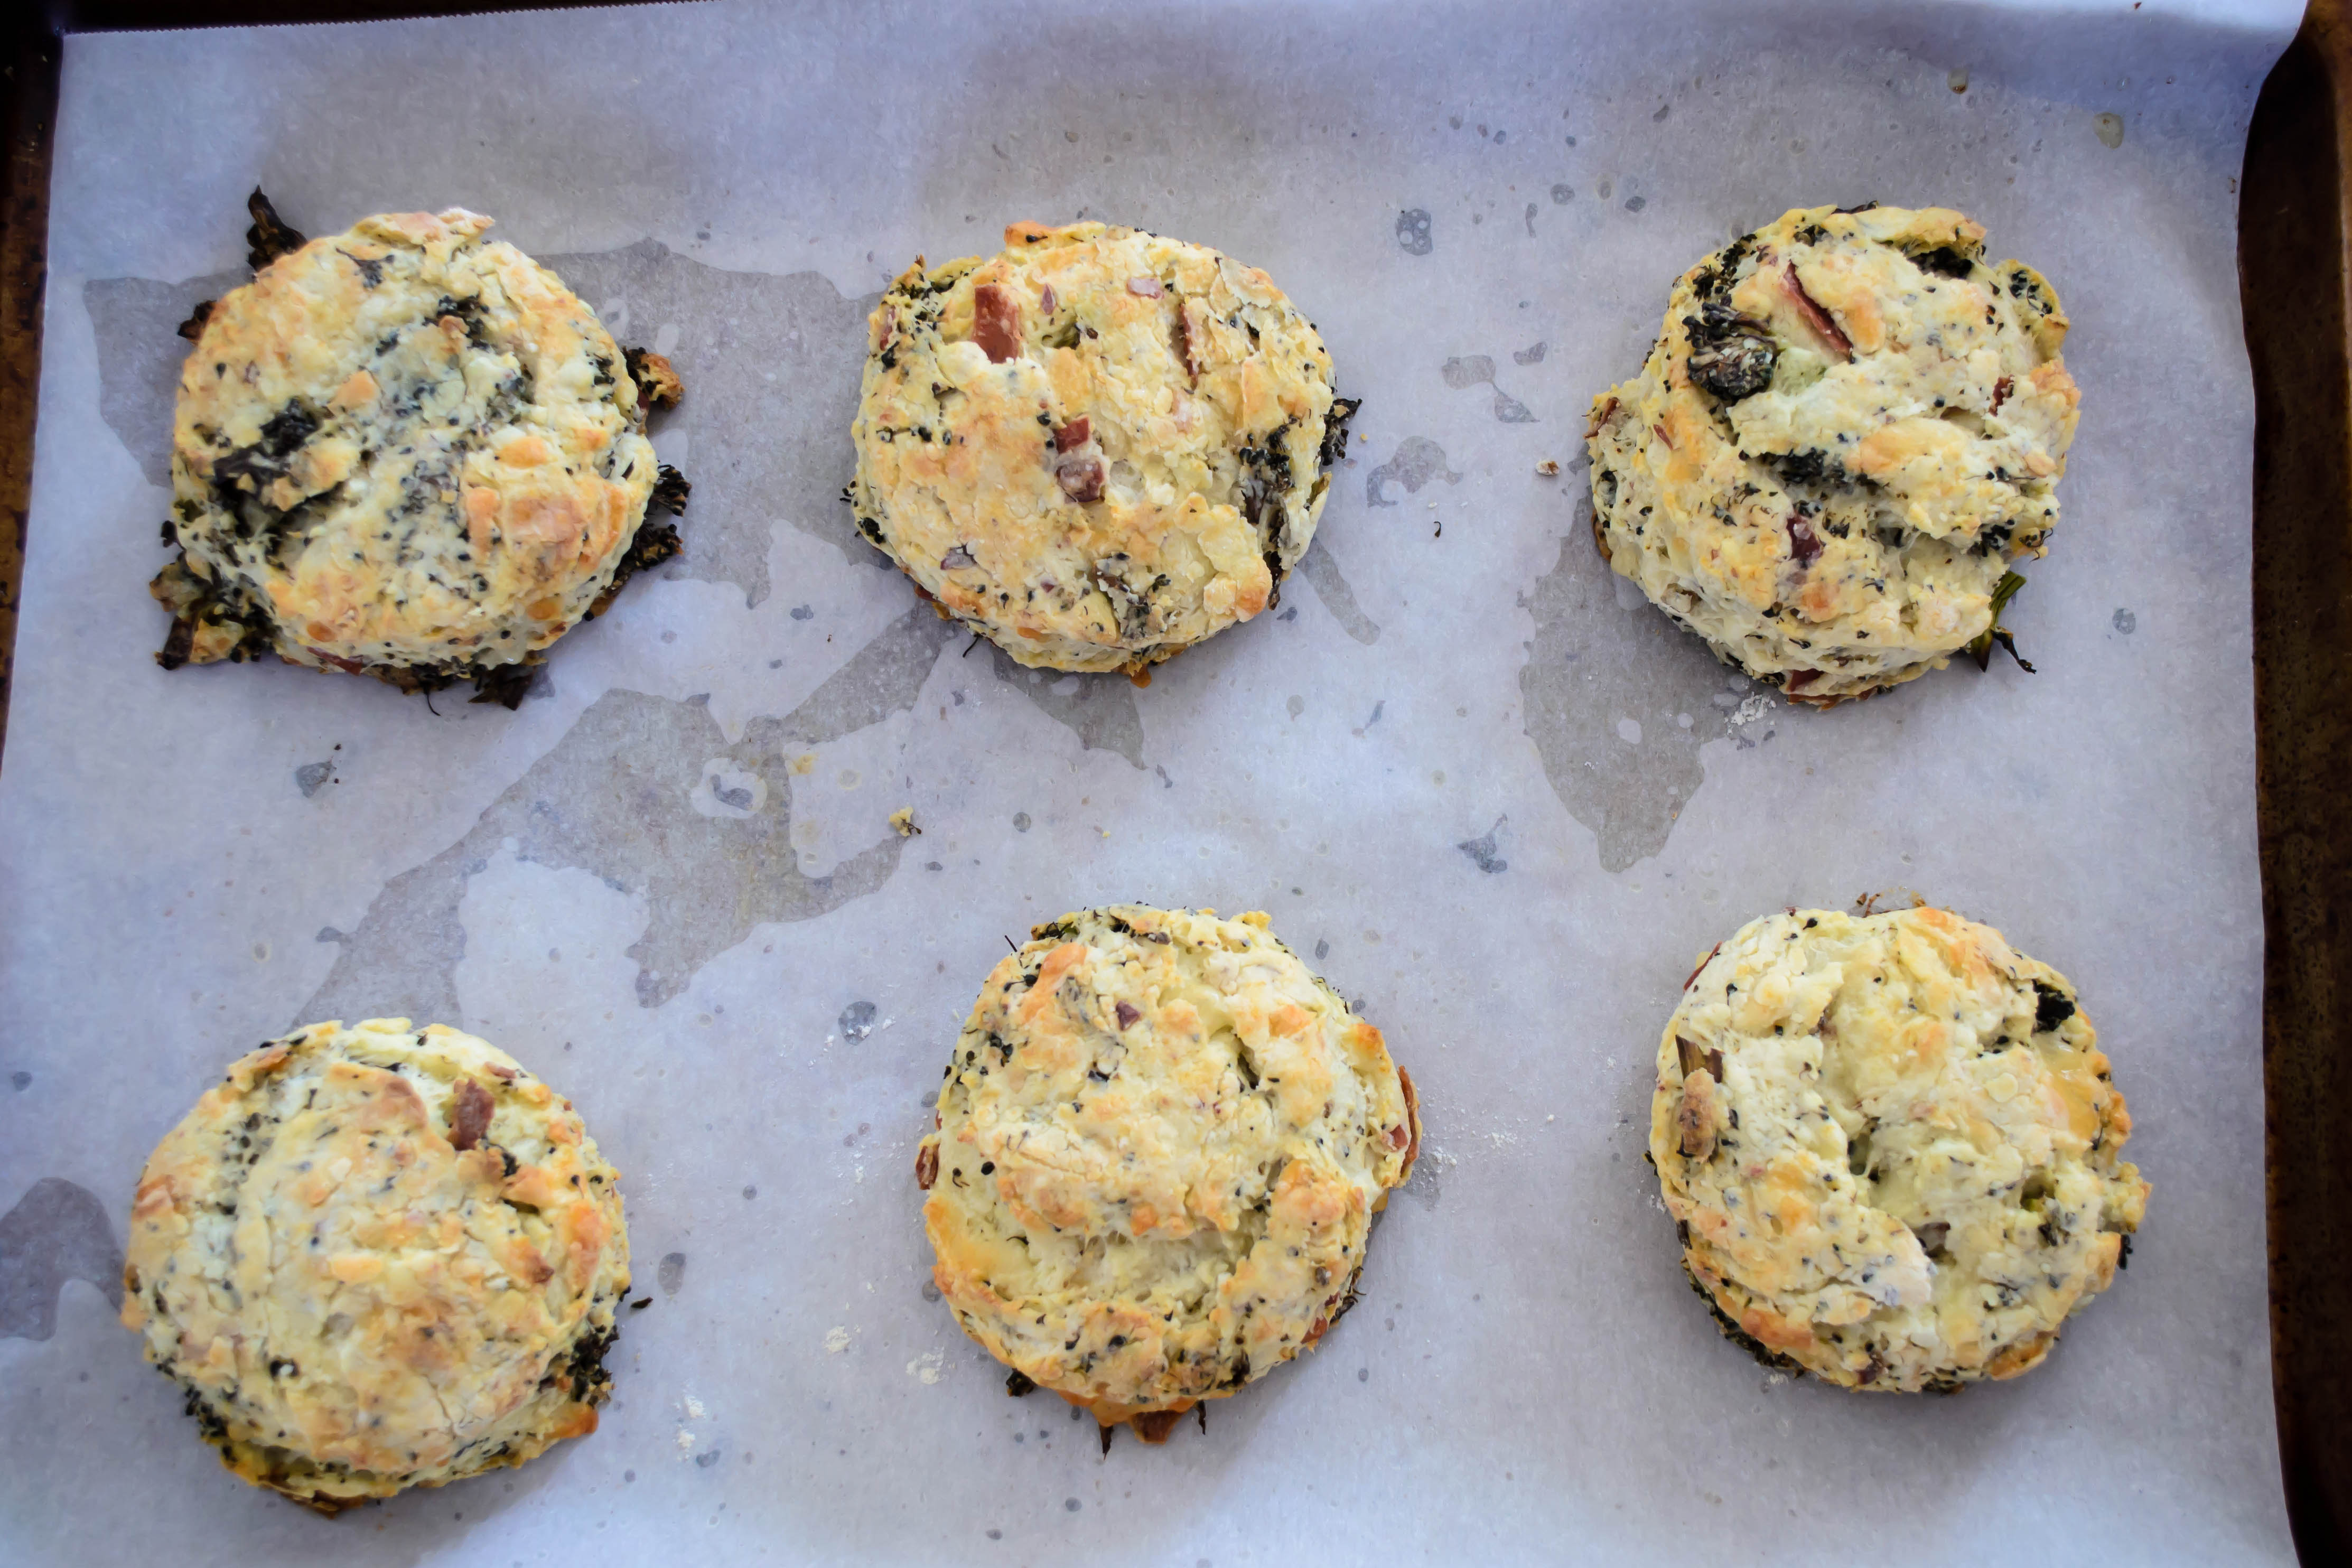
This produced a dough that clung together reluctantly, given how jammed with additions it was. But I was patient, after I’d finished throwing flour everywhere, and gentle, and managed to punch out 12 biscuit rounds jammed with bits of green and pink poking out every which way.
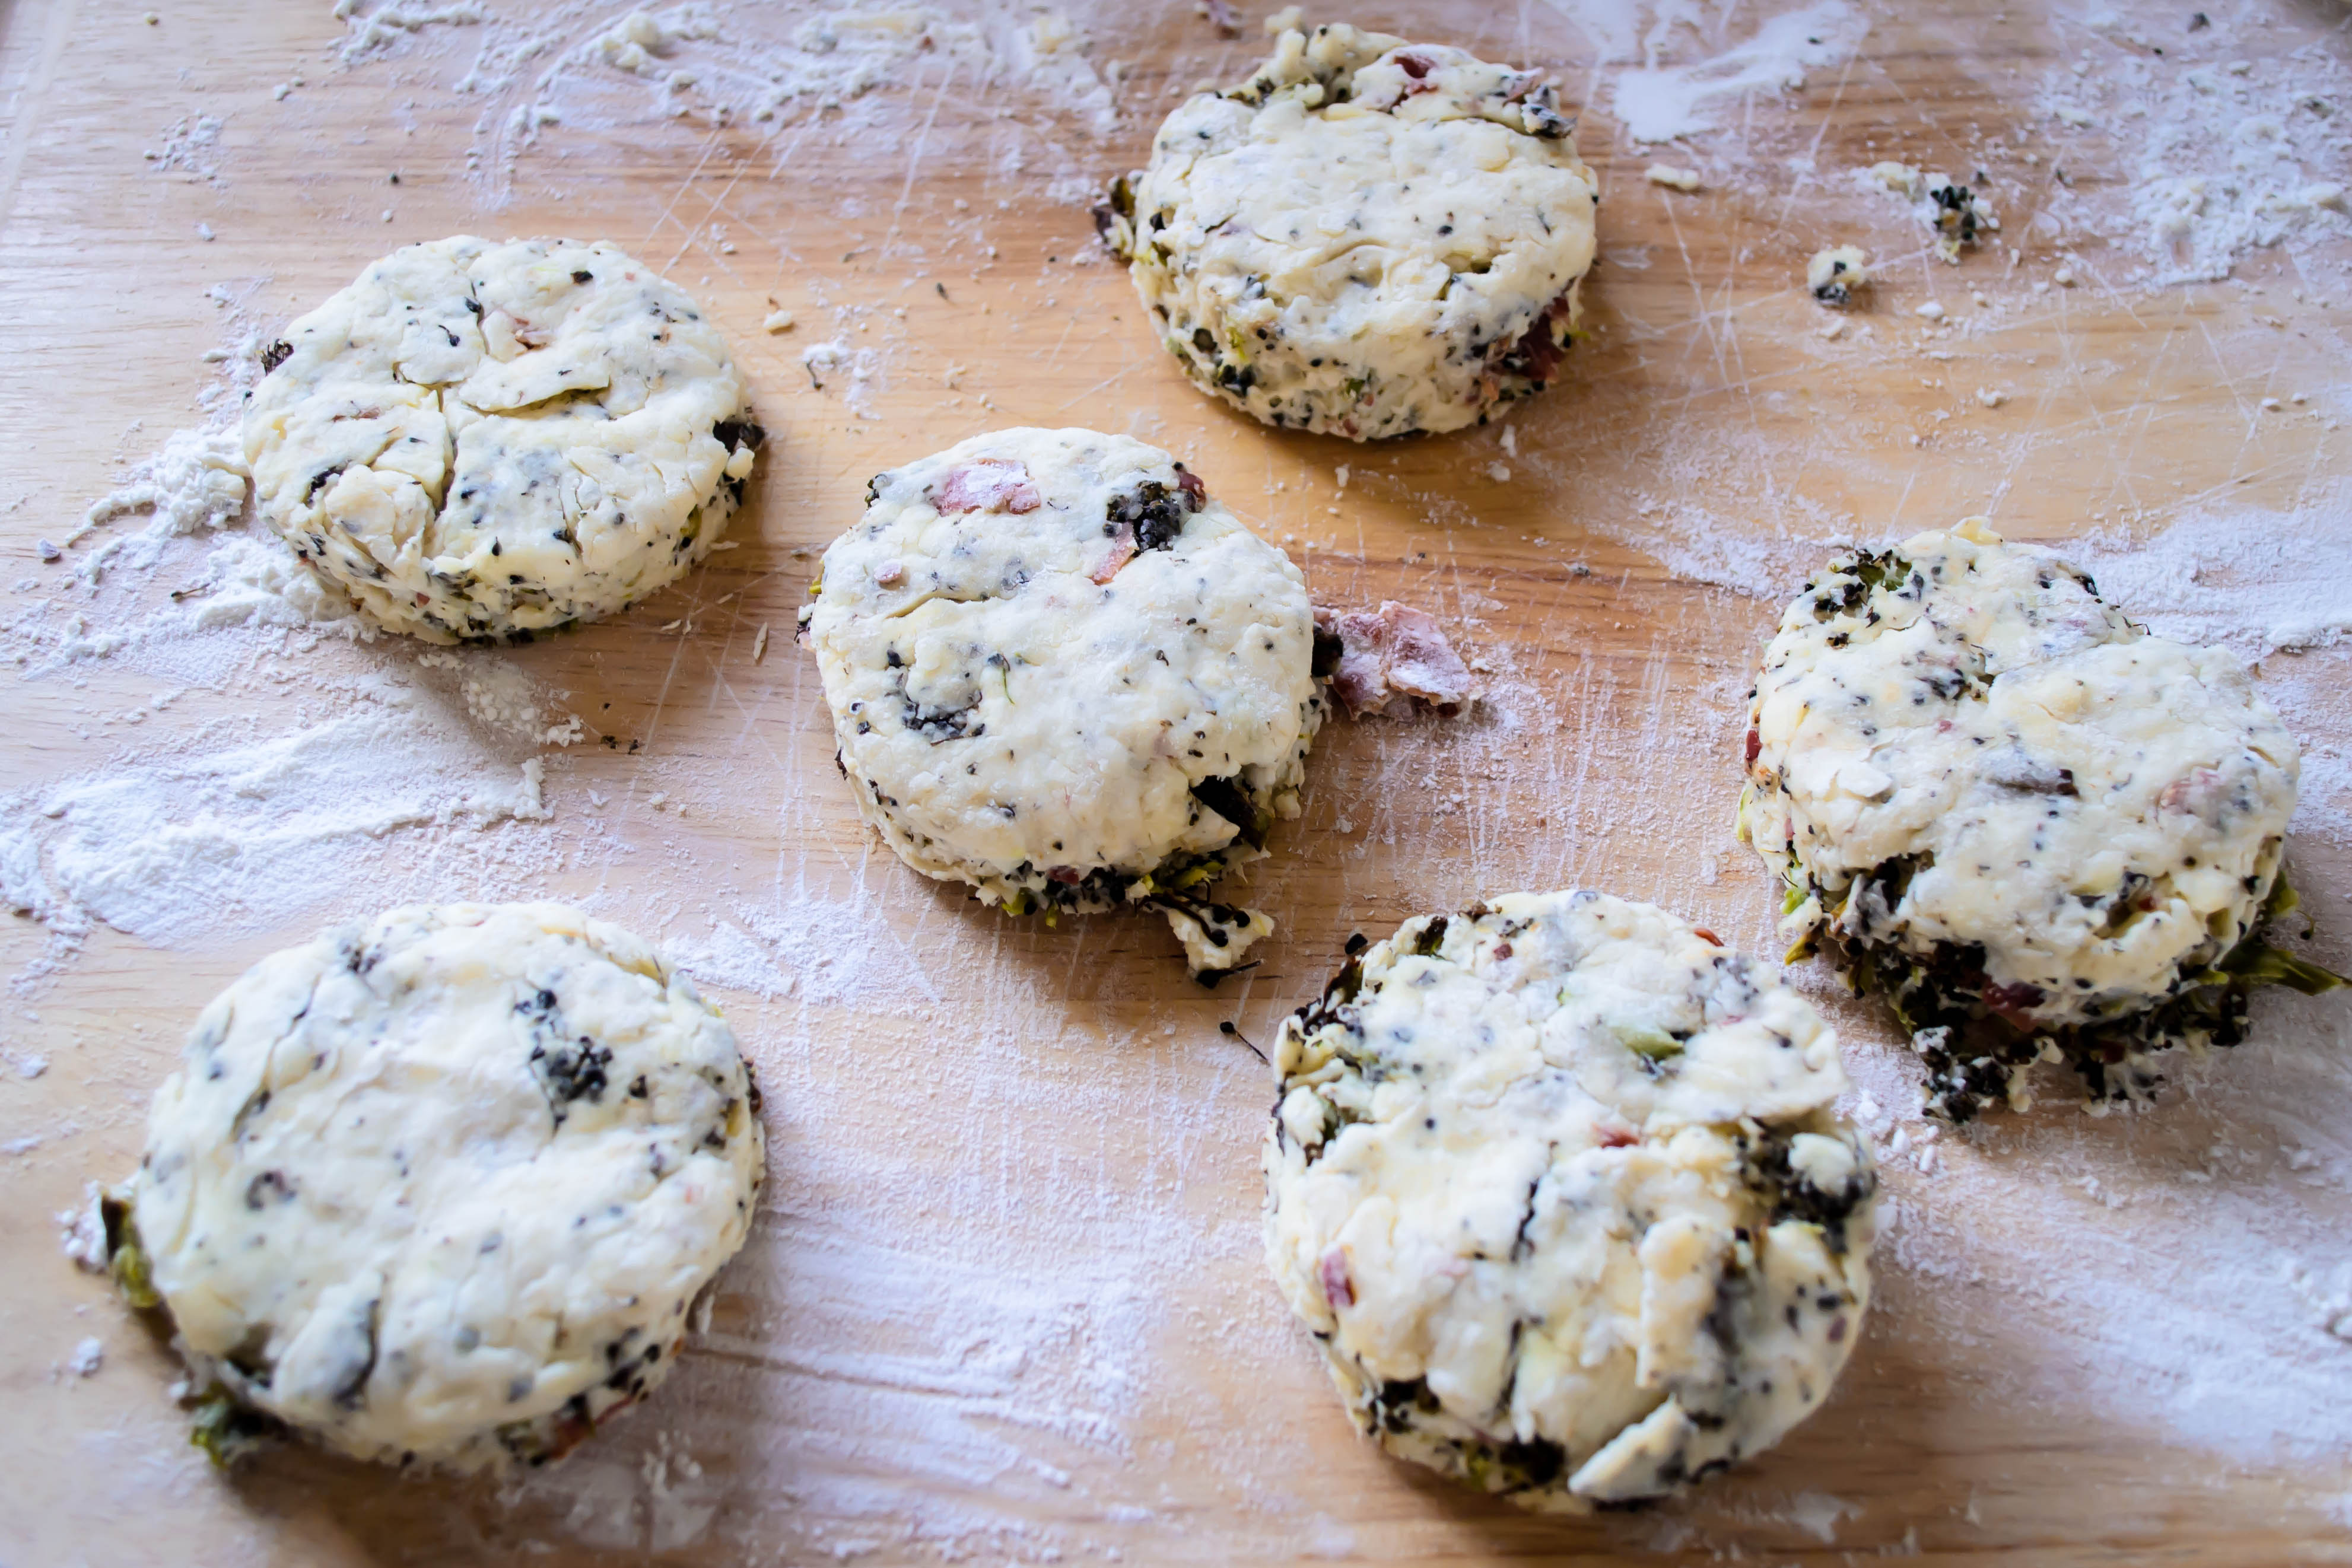
This is a dense biscuit, so it doesn’t rise a tremendous amount when it is baked, but it will still puff a bit as the chunks of butter struggle to support the spudsy weight. It emerges speckled with bits of broccoli and browned cheese, and it’s totally worth it in every way. Guys, you have to try these. It’s rare that I run out of food words to describe something, but this is one of those times. If I jammed all the superlatives I was thinking of using into this post, you probably wouldn’t believe me. I’ll keep it at this: the cheese and the broccoli and the prosciutto all lend a crazy-good saltiness (the prosciutto could easily be taken out to make this vegetarian). The flavors are perfect together, and though the potato doesn’t have a lot of flavor on its own, it does make this biscuit fairly substantial. Paired with a salad (as we had), or a nice bowl of soup, it’s basically a complete meal.
As with all biscuits I’ve ever tasted, these are best on the first day, as hot out of the oven as you can stand to touch them. They are perfect on their own, though if you wanted to split one open and add a pat of butter, I’d completely understand. They are, after all, related to baked potatoes. And if you wanted to top them with a roasted garlic or a white pepper gravy, well, I don’t think I’d be in any position to stop you.

 I have a thing about garlic bread. Achingly soft butter, a scattering of herbs, pungent, sharp garlic paste, spread thickly on sourdough baguette and broiled until the butter bubbles and browns and the garlic takes on a toasty depth; what’s not to love? I make it in the oven, I make it on the grill, I’ve even tried turning it into a sandwich. But all too often, the process of toasting leaves the edges of the bread blackened and the crust just too crunchy for my taste. I want crisp toastiness, but I don’t want mouth-scraping shards of bread shrapnel.
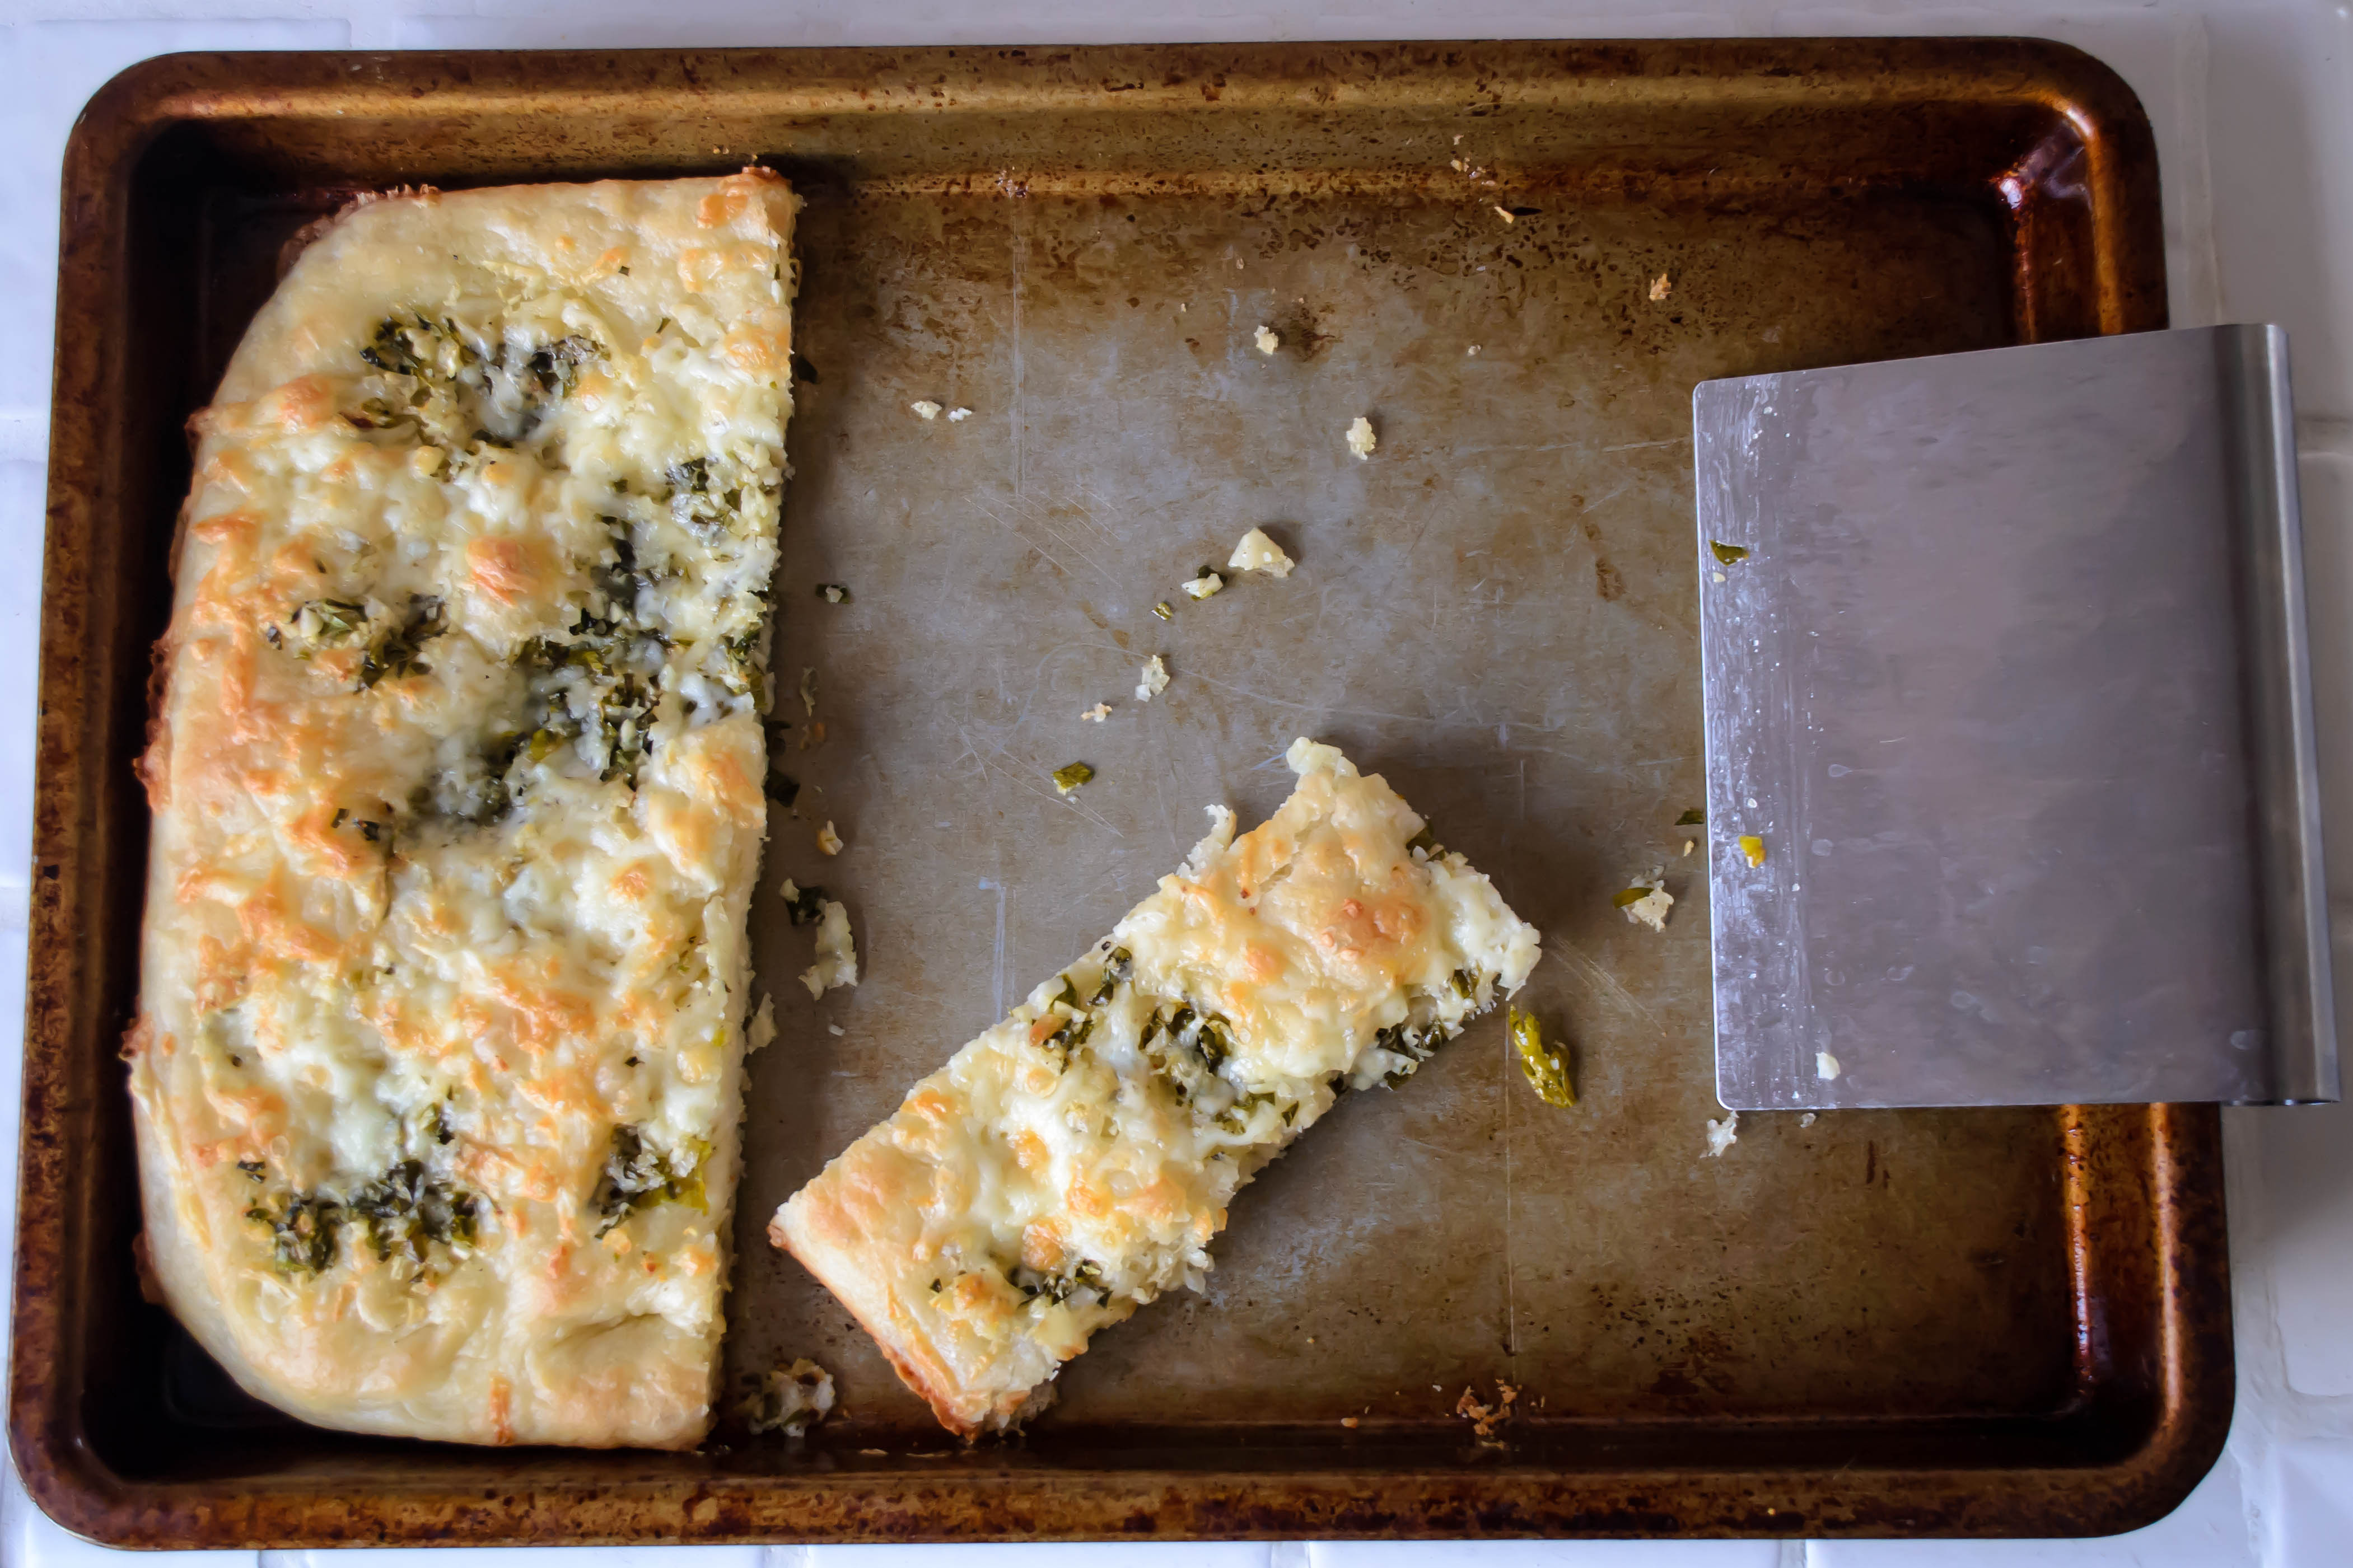
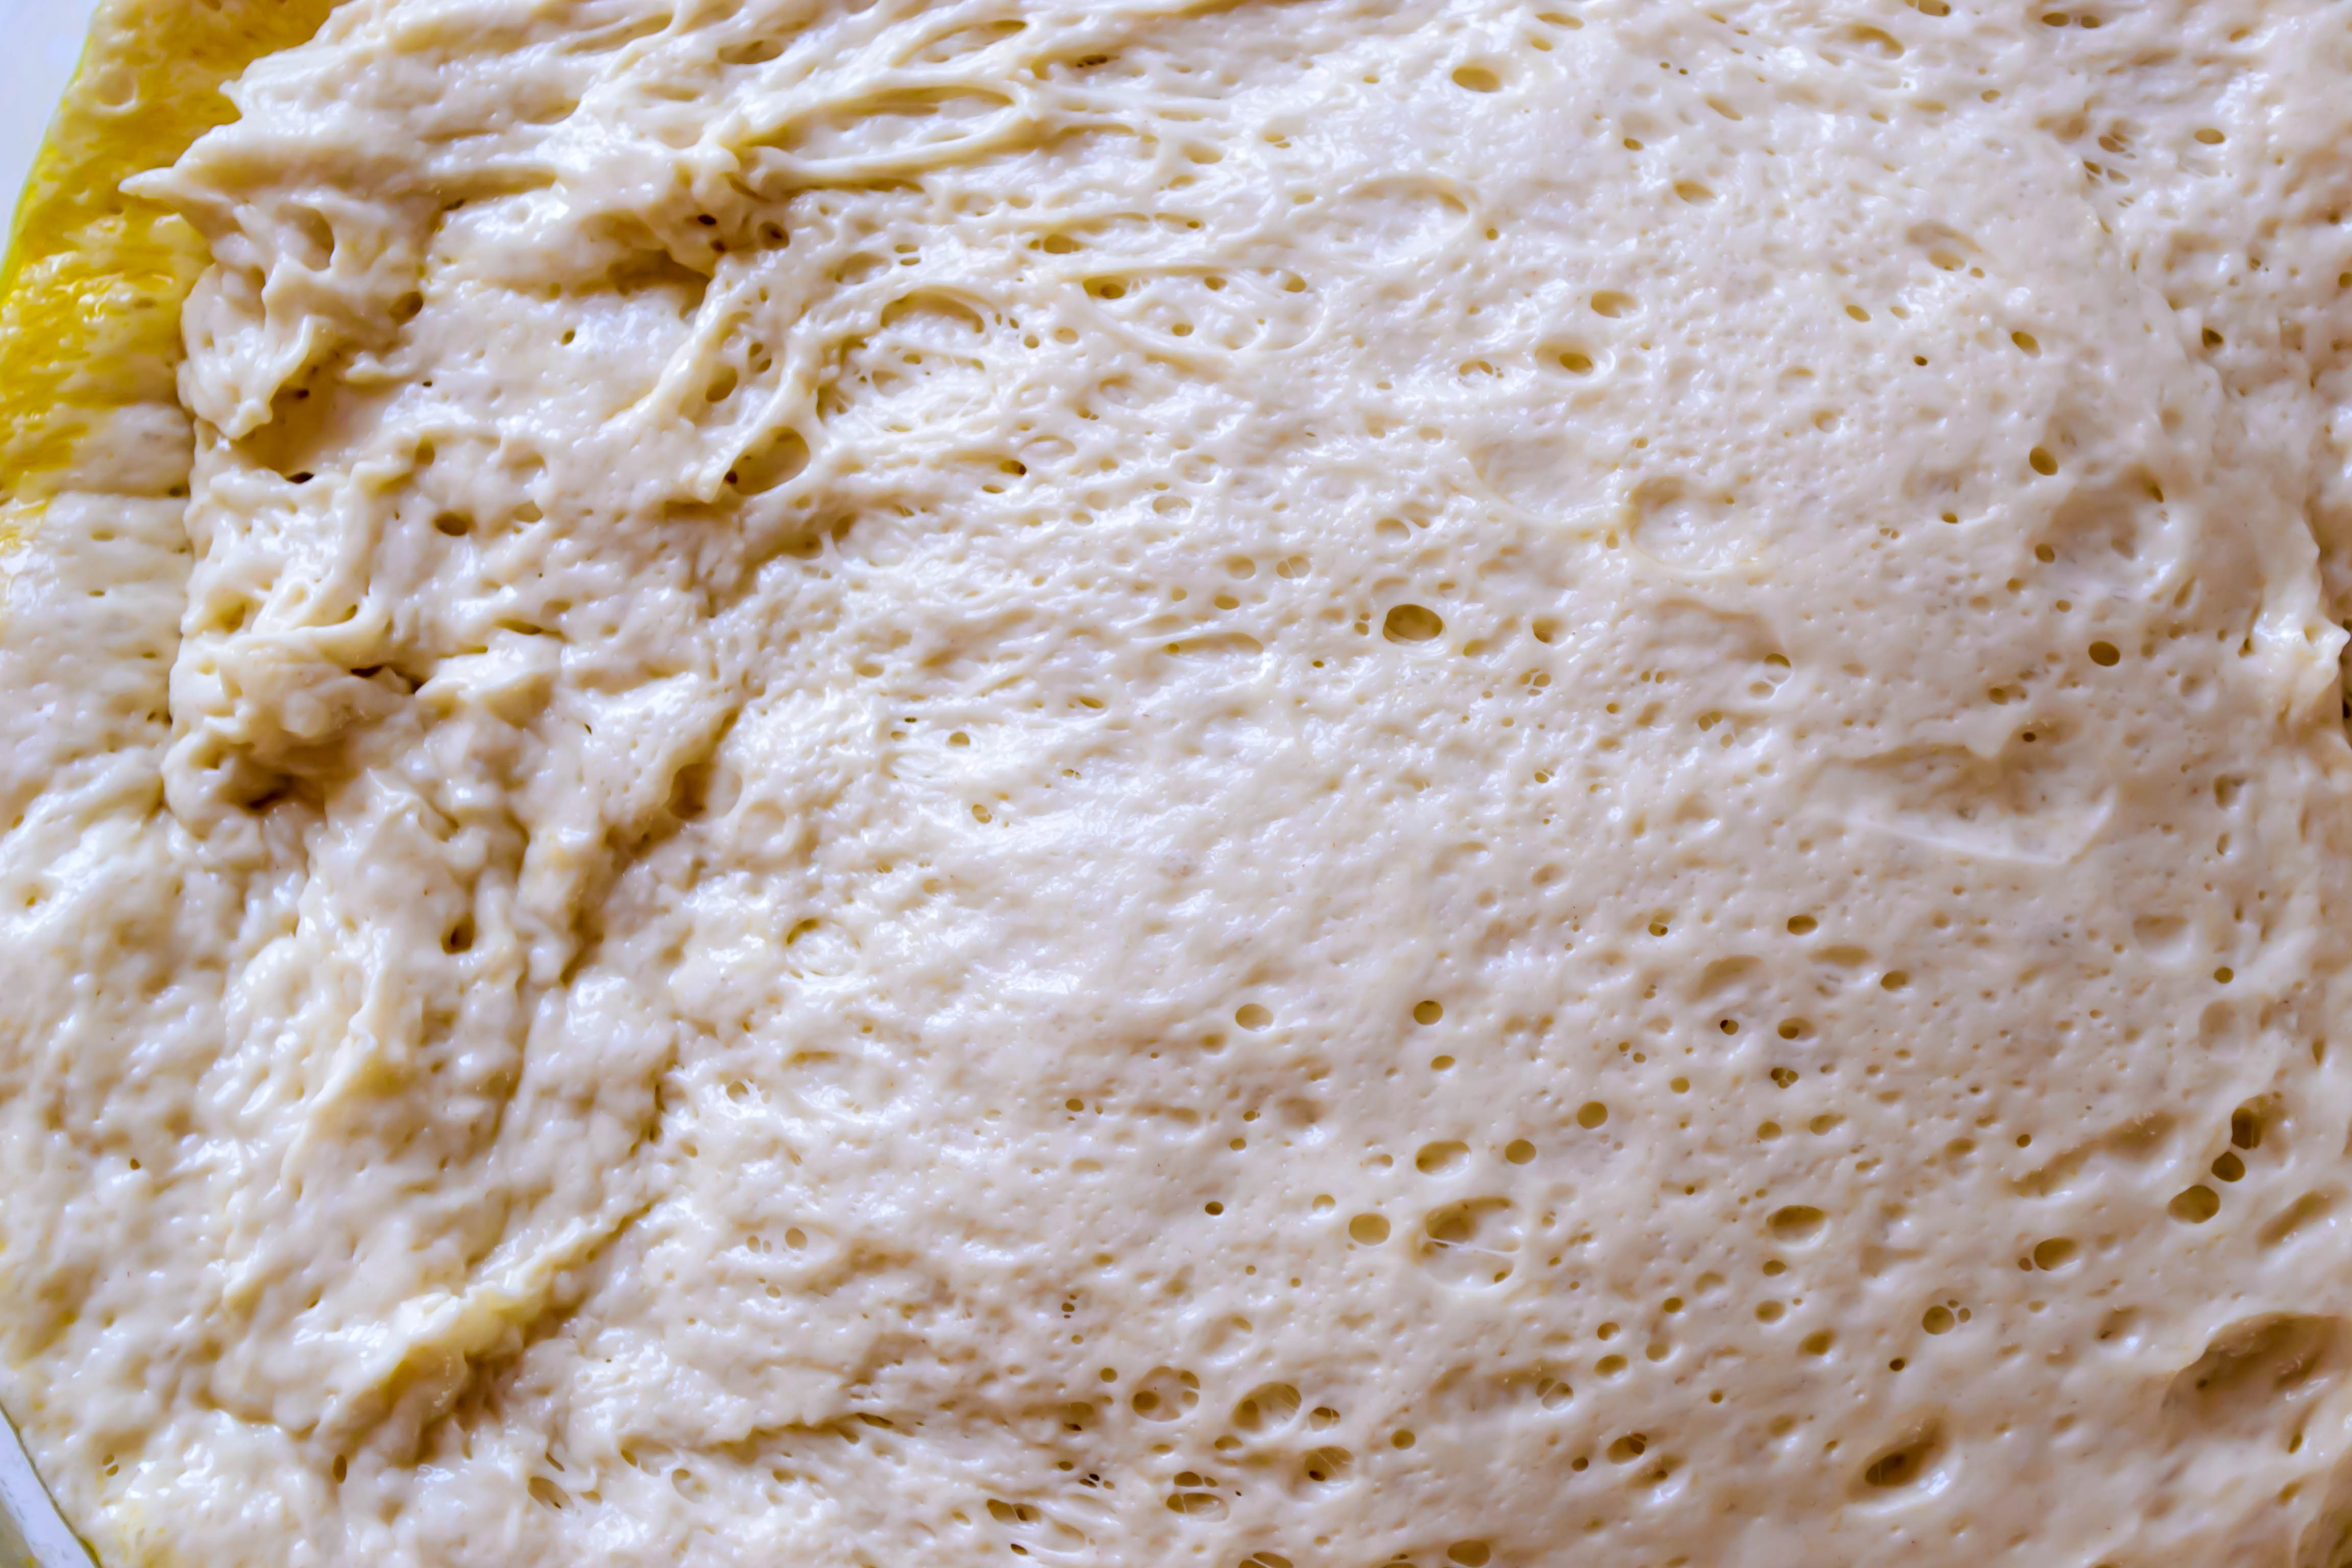
 Enter flatbread. I don’t mean the dry, cracker-like stuff carelessly sprinkled with toppings and served up as an appetizer. I mean something a little puffier, a little richer, a little cheesier. A few months ago, I dabbled with a Food Network recipe for Spinach and Cheese Flatbread, and was delighted by the elastic dough that bubbled up into a soft-but-crisp rectangle. It is chewy and golden, but not quite as sturdy as a pizza dough. The bottom, slapped against a well-oiled sheet pan, gets just crisp enough to support all but the most ridiculously sized slices (don’t ask me how I know this. Thank you), so you aren’t left with a square that wilts as you hold it.
 As soon as I ate the FN version, I realized this was the answer to my garlic bread dreams. The dough would be smeared with a loving, excessive layer of garlic-butter-herb-are-you-drooling-yet?-paste, sprinkled with fontina, which melts beautifully and has a mild funk I really enjoy, and baked until crispy toasty nirvana resulted.
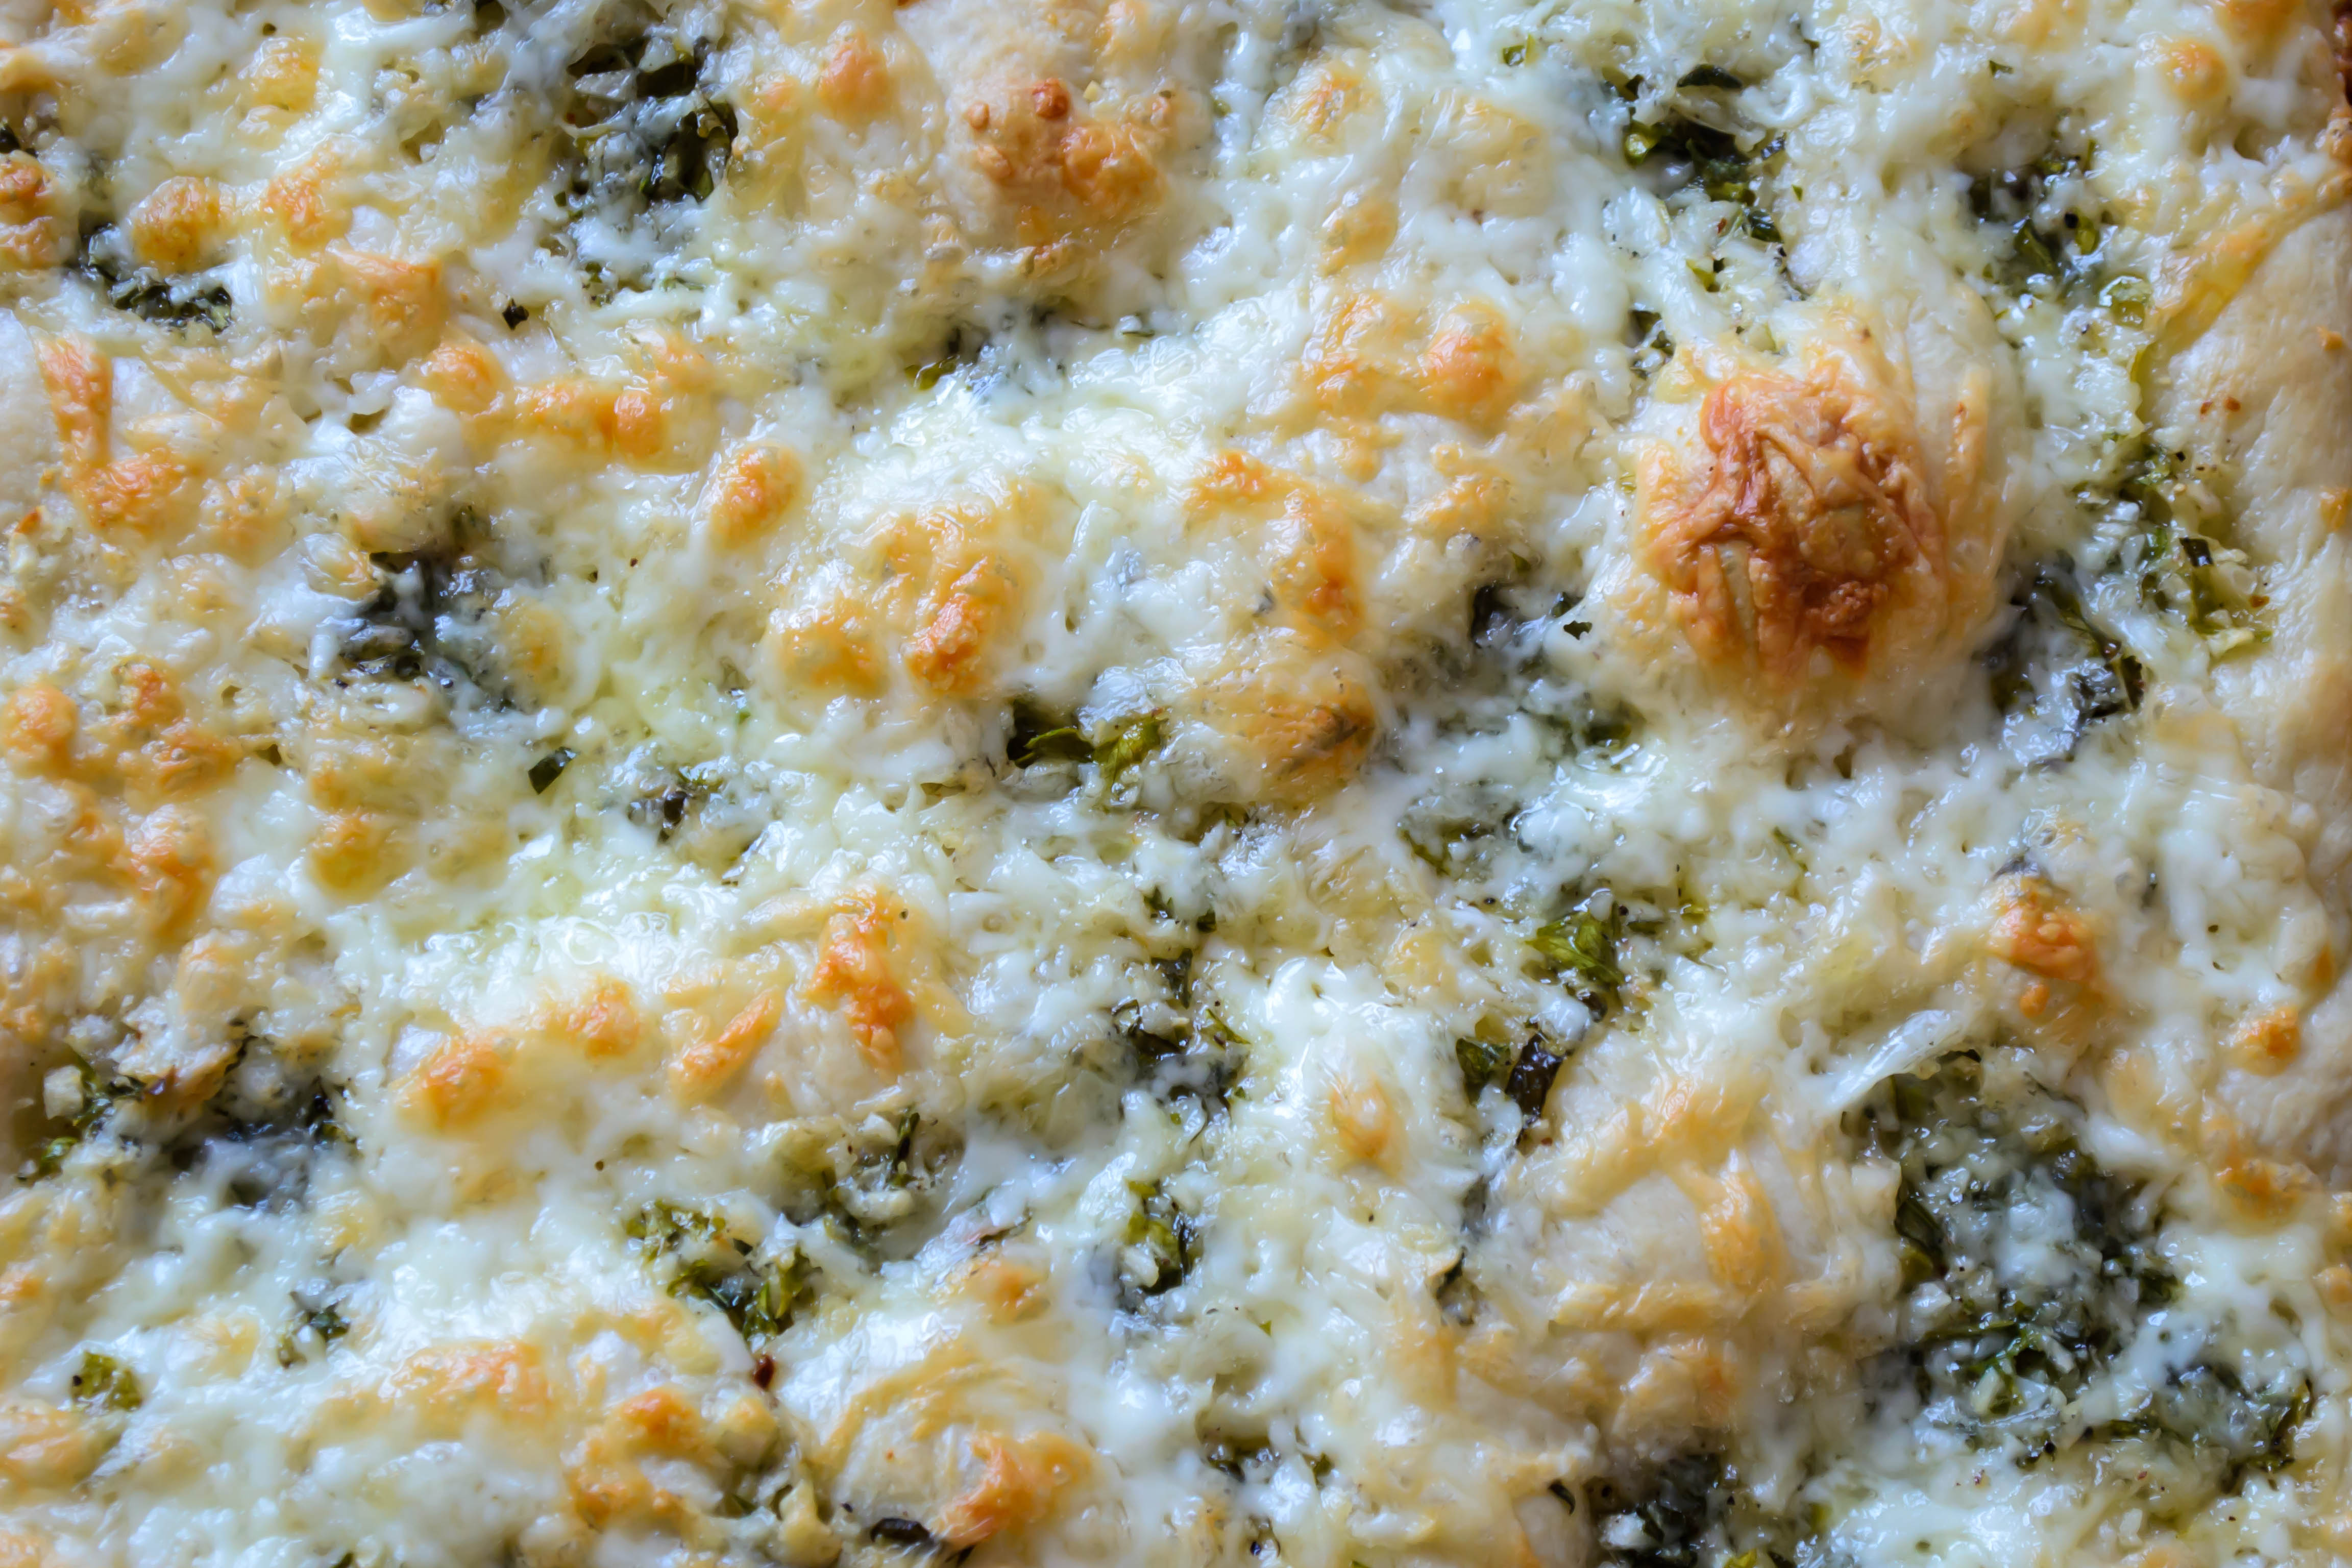
 My results approached sublimity, and the shortcomings were entirely human error, which seems fitting. The paste didn’t spread very evenly because this is a soft dough: it threatened to tear when I applied a spatula, so I ended up smearing and dolloping my mixture with my fingers. You could easily solve this by melting your butter instead of just softening it, and then pouring the mixture evenly over the dough. Then, because I was afraid the butter and garlic would burn at pizza-cooking temperatures, I was pretty liberal with my cheese application, which meant that the toasty roasty golden color I was expecting didn’t quite happen. Another minute or two in the oven might have helped, but we were hungry. A little less cheese might have helped too, but seriously, less cheese? Totally unreasonable.

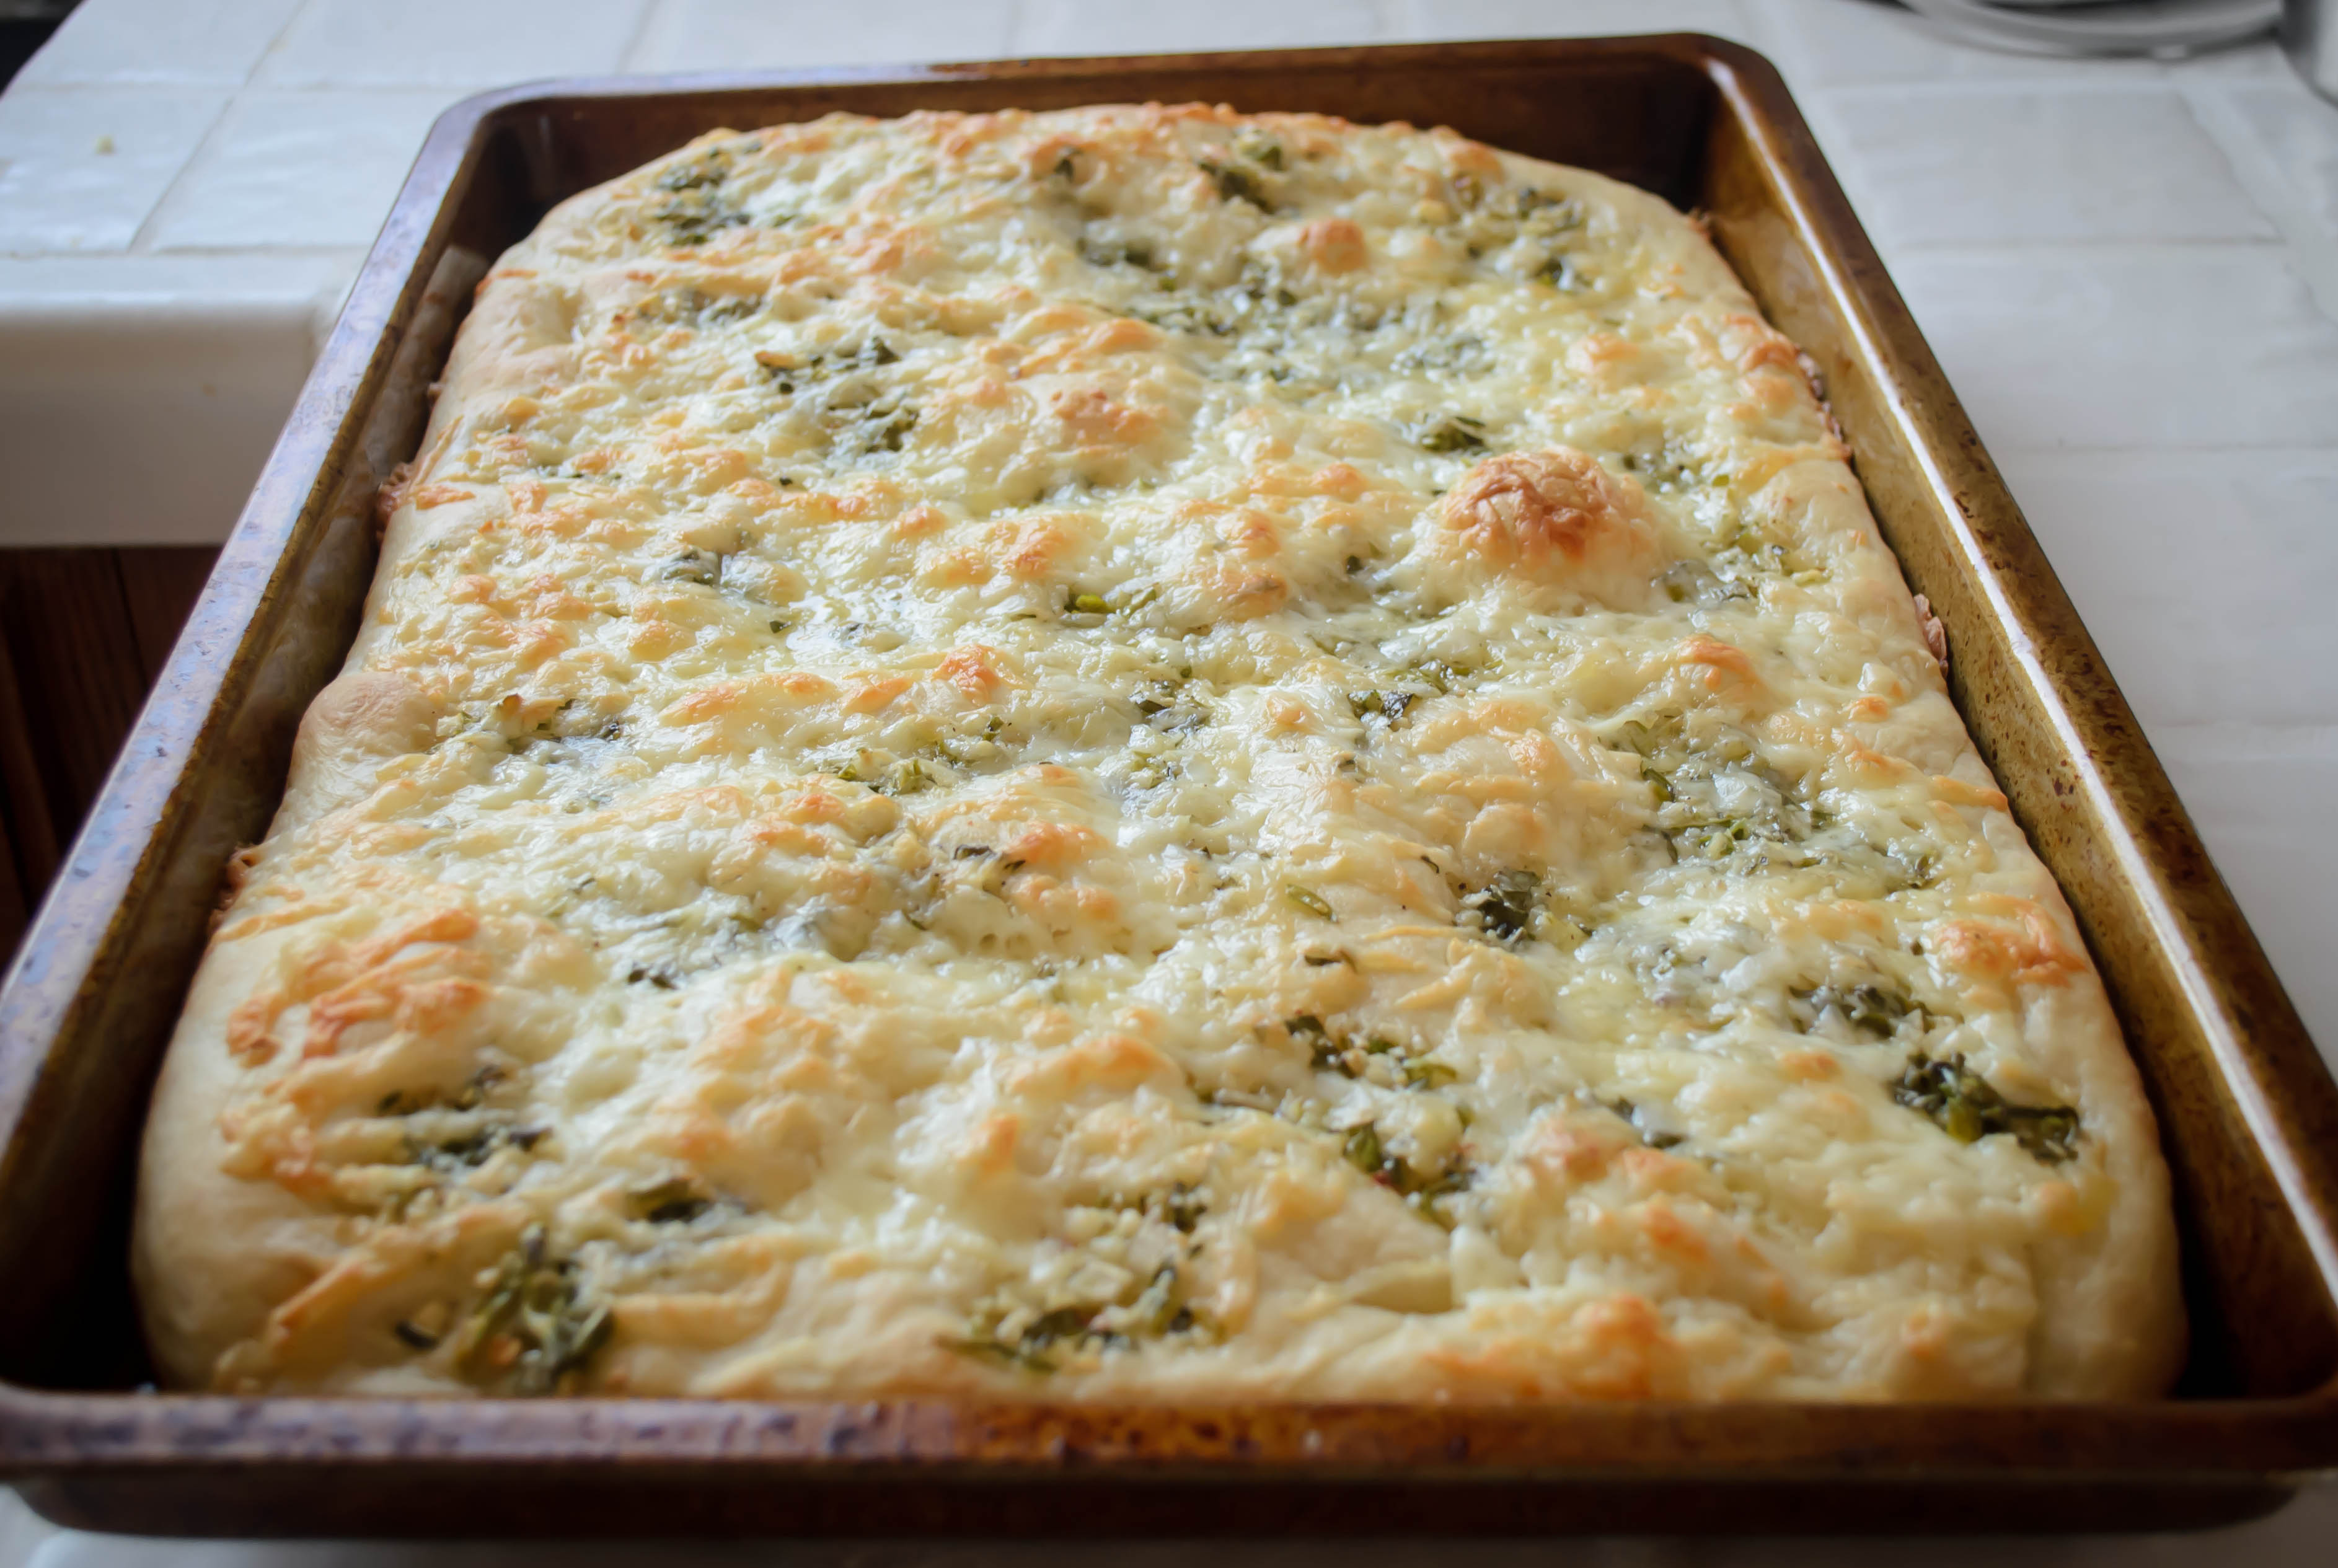
 In any case, the bread itself was puffy and buttery and decadent. The garlic loses some of its pungency during baking, but retains that addictive sharpness and bright tingly aroma that makes it so good. The dollops of butter became dimples of puddly richness that, upon reflection, reminded me a little bit of the center of a really good bialy. The bottom of the crust is like an old-style pan pizza: golden with burst air bubbles and just oiled enough to leave your fingertips in need of a napkin.
 This is a great happy hour snack. Since it heats up the house, it gives you a great excuse to sit out on your patio, or deck, or picnic blanket, or camp chair. It pairs well with a crisp, summery wine, and equally well with a frosty pint of beer (or maybe, since, you know, Cinco de Mayo, a classic Corona with lime, or a salt-and-cayenne-rimmed margarita). You can use any combination of herbs you like. I chose what was happening right outside my back door:
Oregano – I love the fuzzy leaves on this little guy. 
Basil – back in late fall, I relocated a few stalks of basil from the supermarket clamshell container to a vase of water, and instead of wilting, they grew roots! I shook my head, still in Oregon mindset, while planting them – they would never make it through the winter – but this is Southern California, so of course they did, and are now flourishing. I’ve read that plucking the blossoms off encourages them to keep producing leaves, so every day or so I faithfully scatter the delicate white blooms. 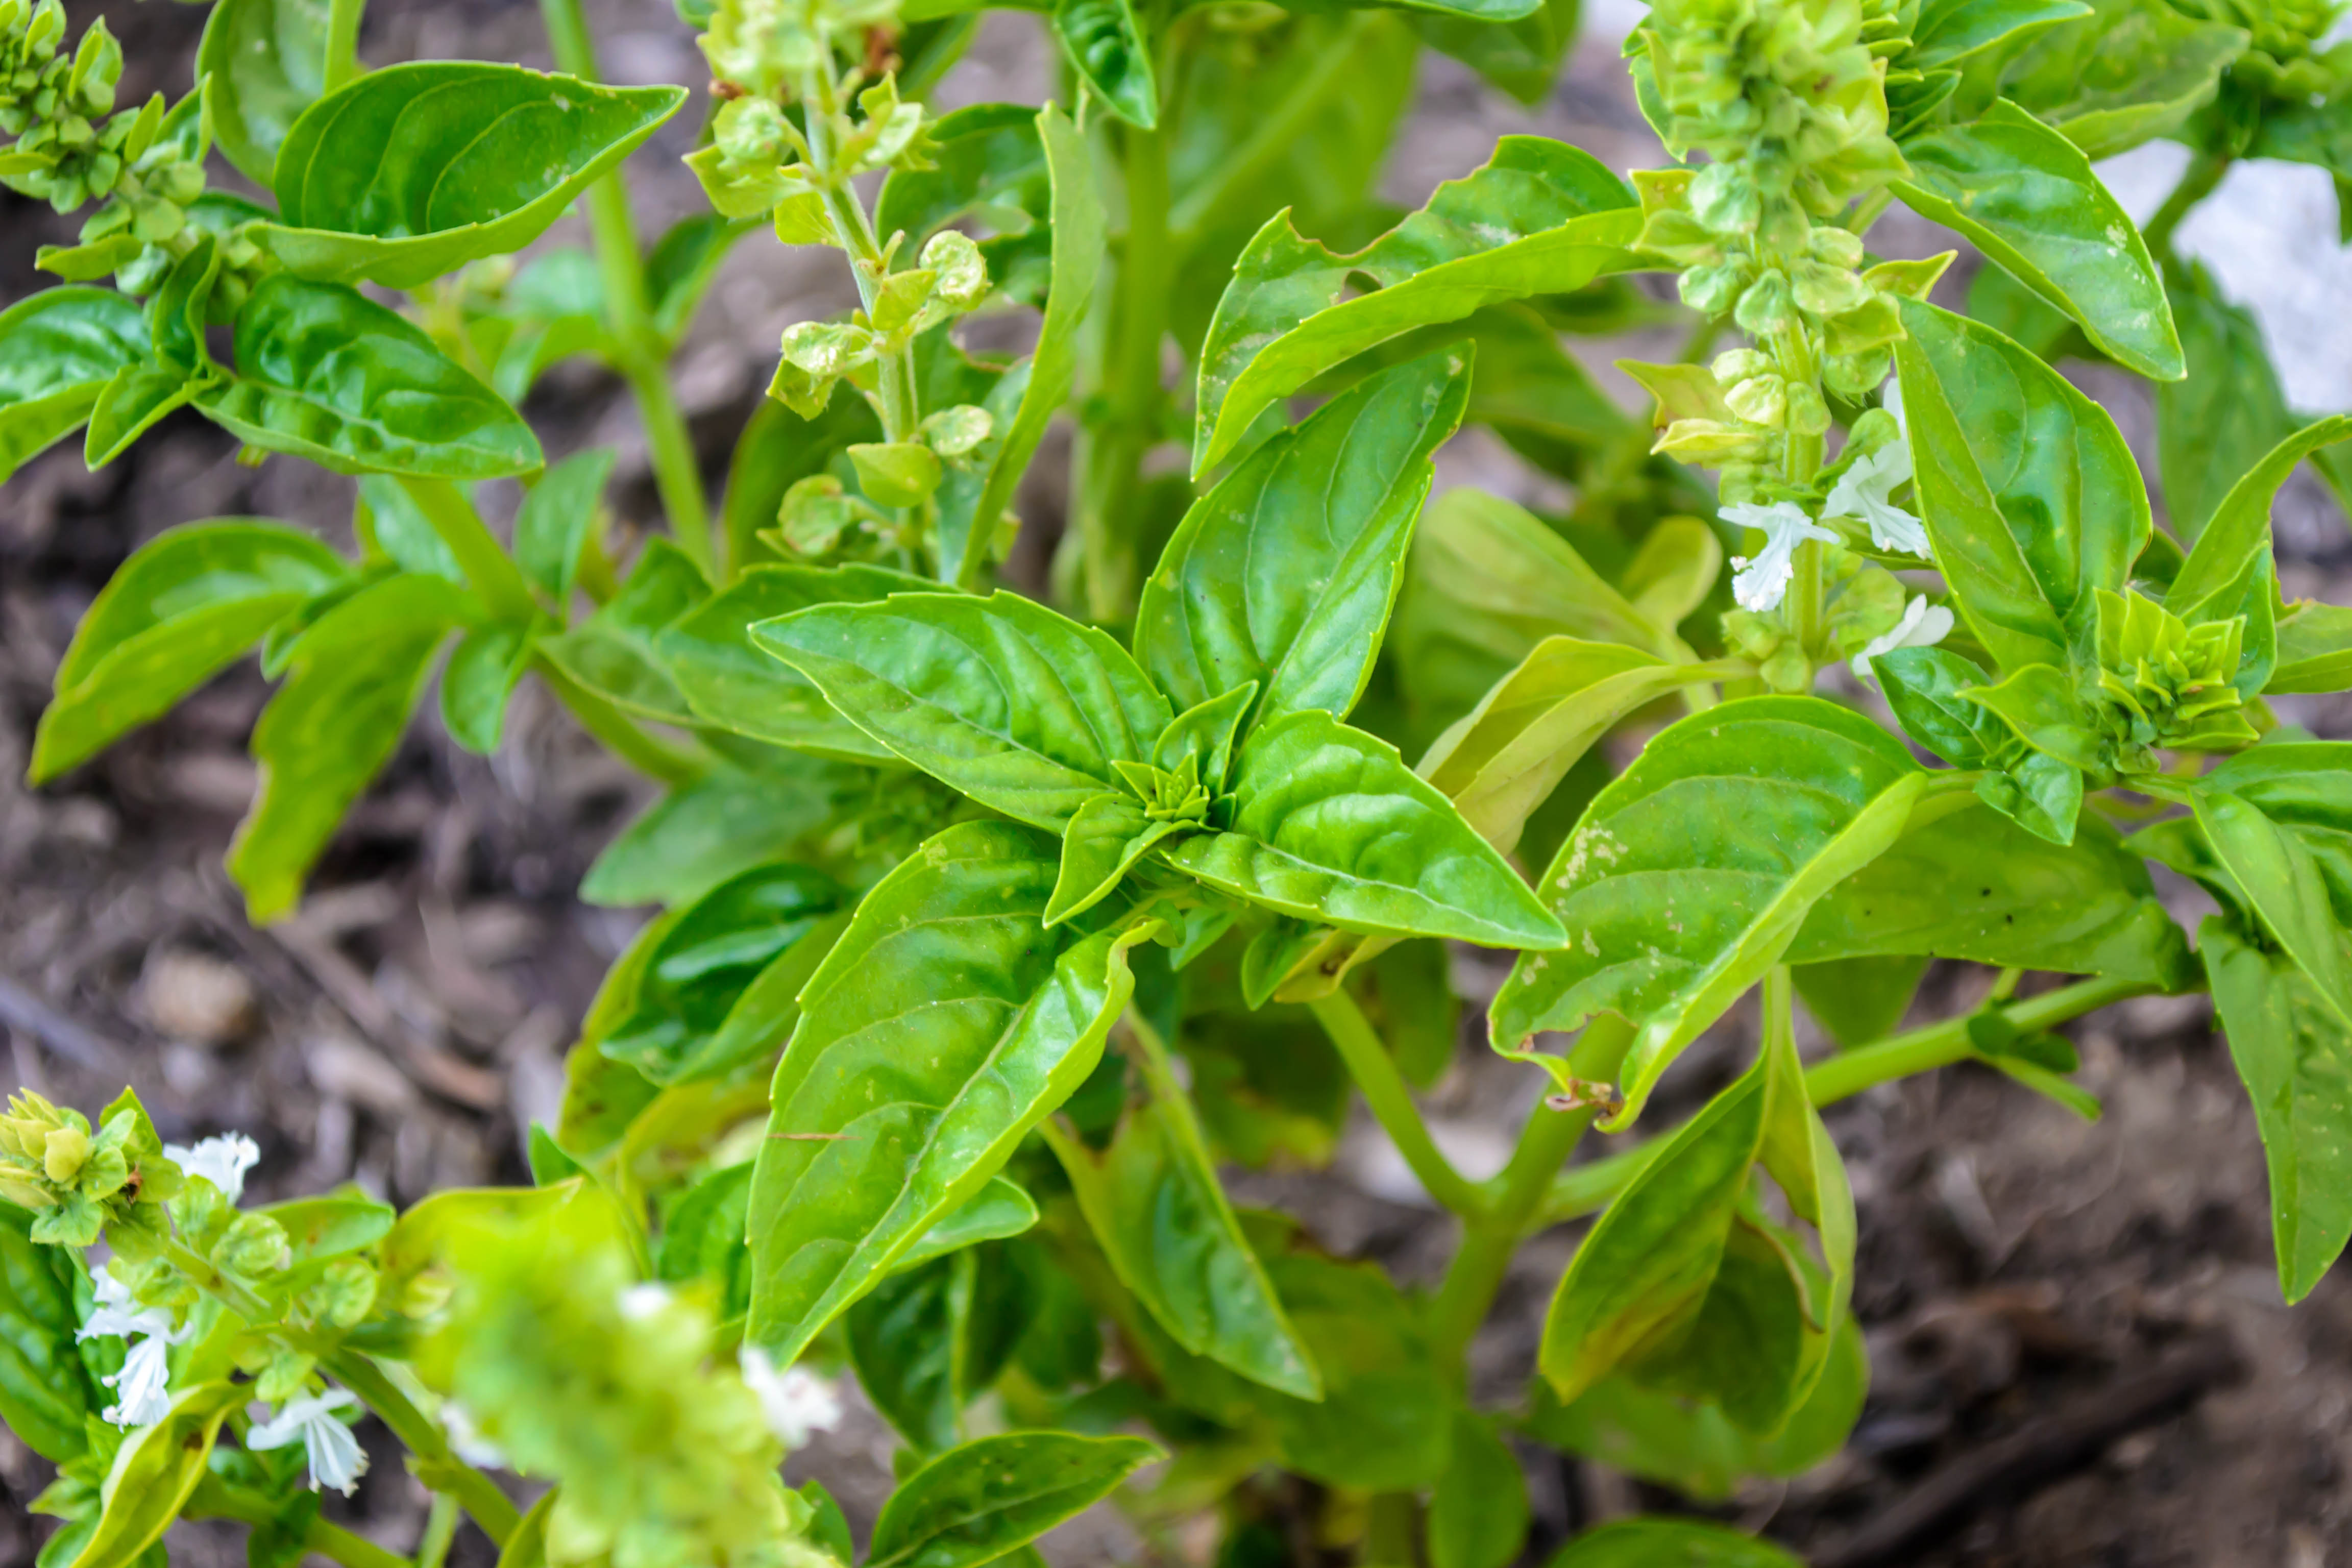
Parsley – my parsley plant is looking a bit wild these days; it has bolted thanks to the heat. 
But if you peer down inside, amidst the sunburned jungle, you can see there are still some stems worth serving! 
As for additional toppings, you could add sundried tomatoes or thin rings of bell pepper or even jalapeno to the butter paste if you want to get fancy about it, and it would certainly fare well dipped into a bubbly saucer of marinara, if that’s your thing. Either way, I think you should make this.
Maybe today!
Are you making it yet?
 Garlic Fontina Flatbread
adapted from Food Network’s Spinach and Cheese Flatbread
A fabled land of farmers, farm shares, fancy (and not so fancy) restaurants, family meals, food projects and more.
cooking my way through my dissertation, one egg at a time
Fearless cooking from a tiny NYC kitchen.
food, in so many words.
Recreating the famous dishes of famous writers. Part recipe blog, part historical discussion, entirely unabashed love of books.
Epicurean Adventures from Eugene, Oregon
Celebrating the Harvest
Modern Iranian aka Persian Food & Culture Blog - Cuisine, Recipes, Stories , Photos, Pictures, DIY tutorials
Exploring Culinary Traditions of Africa, African America and the African Diaspora
food, in so many words.
food, in so many words.
food, in so many words.
Food-Stories-Recipes-Love
WordPress.com is the best place for your personal blog or business site.
