Photo Friday: Gluten-Free Girl potluck!

Last week, I met Shauna and Danny from Gluten-Free Girl and the Chef at a potluck party they hosted in the Silverlake neighborhood of Los Angeles. This was the California segment of their American Road Trip, a voyage that has encompassed numerous regions of the country, which they are using as fodder for their newest cookbook project. They’ll be presenting gluten-free options inspired by home cooking from across the country.

I’ve been a fan of Shauna and Danny’s for some time now, participating in a few of their cookbook projects, and it was a delight to meet them and get to hang out. I brought along my warm lentil and kale salad as an offering, one of my most recent favorite gluten-free dishes.

What follows are some of the images I caught during this gathering.

Food Blog Photo Friday 2014-3297

AMAZING pumpkin chiffon pie. Chewy, crispy, perfect chocolate chip cookies in the background, all gluten-free

Food Blog Photo Friday 2014-3302

Addictive little puffs

 I’m pretty sure these little puffs, offerings from Erin at The Sensitive Epicure, are Brazilian pao de queijo, which she talks about here. No one could stop eating them.

Food Blog Photo Friday 2014-3305

Nice shirt, Danny.

Food Blog Photo Friday 2014-3306

Locals, hoping to score some gluten-free snacks

Food Blog Photo Friday 2014-3307

We even got party favors! Marvelous buckwheat and hemp cereal.

Food Blog Photo Friday 2014-3308

Sweet little father daughter moment

Food Blog Photo Friday 2014-3310

Me with Shauna, wheeee!

Cilantro Lime Rice

Once you live in an area long enough, you start to notice food trends, especially if you like to eat out (which I do).  In Los Angeles, when you’re not focusing on the grass-fed beef and the house-made buffalo mozzarella and the artisan cocktails, you start to notice side dishes.  It wouldn’t be Los Angeles, I suspect, without the ubiquitous kale salad.  These folks love their kale.  And when it’s not kale, it’s quinoa, toasted or steamed or boiled, getting cozy with vegetables or dried fruit or the lightest of vinaigrettes.  Sometimes, in a really ambitious nod to “California Cuisine,” kale and quinoa get combined in the healthiest, hipster-est, most trendy-bohemian side dish the world has ever seen.*

Food Blog September 2013-2636But the other side dish I’ve been noticing a lot lately, spurred along, no doubt, by the dozens of Chipotles lining every other street corner, is cilantro lime rice.  Whether it’s speckled with zest or dotted with the occasional herb fleck, or the bright green of a rice dish Sam I Am would be proud to serve alongside some huevos rancheros verdes, it shows up on so many menus that at some point I was bound to become either totally sick of it, or completely obsessed.

Food Blog September 2013-2631Clearly, my palate chose the latter.  I adore it.  At one of our current favorite Culver City haunts, my dinner choice is based on which dish comes with a side of cilantro lime rice.  I fall on the love side of the Great Cilantro Divide – I admit that there is a soapy quality to it, both in taste and in aroma, but it appeals to rather than repulses me – and lime is quite possibly my favorite citrus option.  These flavors paired with a fluffy, starchy, perfectly cooked scoop of rice are a side dish I would eat next to almost anything.

Food Blog September 2013-2633But the problem, as with most things I end up obsessed with, is that not all cilantro rice is particularly good.  The herbs are dull and flavorless, or the lime isn’t assertive enough, or the rice is mush, or I don’t want to pay for the accompanying $20-30 entree as often as I want the zesty side.  And so, as usual, I have to saunter into the kitchen to make my own.

Food Blog September 2013-2626I toyed around with some flavor combinations, playing with spices and vegetables and heat, and ended up with something so bright and tart and satisfying that we almost didn’t want the blistered corn quesadillas I’d made to go along with our rice.  This was fresh, and vibrant, and almost overloaded with lime and cilantro flavor – maybe my favorite rice side dish since my mom’s pilaf (which I’m convinced will never be topped).

Food Blog September 2013-2630Make this for your family.  Pair it with grilled fish or carne asada or stewed black beans or chile relleno.  And if you like it, let me know!  Maybe it can serve as my penance for the overly complicated, labor intensive loaf I pushed upon you last week.

* I’m not saying this is a bad thing.  I don’t have anything against kale or quinoa, and I agree that they are quite tasty together.  But then, I am a bit of a healthy bohemian type, though certainly not very trendy.  Which is why it’s taken me till now to fall for this dish…

Food Blog September 2013-2638

Cilantro Lime Rice
Serves 6-8 as a side dish
¼ cup olive oil
½ teaspoon whole cumin seeds
½ teaspoon coriander seeds, crushed in a spice grinder or with the side of a knife blade
4 cloves garlic, minced
¼ – ½ cup diced onion (I used a red onion, but yellow or white would be fine too)
1 ½ cups long grain white rice
½ teaspoon salt
¼ teaspoon black pepper
3 cups low sodium chicken broth, vegetable broth, or water
2 bunches cilantro
1 – 2 limes (using 2 whole limes results in a very strong lime flavor.  This was what I wanted.  If you want less or you aren’t sure, start with the juice from 1 lime and work up from there)
  • Heat the olive oil in a medium pot over medium heat.  When it is shimmering, add the cumin and coriander and turn the heat down to medium low.  Let the spices warm and release their aroma – this should take about 3-5 minutes (it will look like a lot of oil for just this little palm-full of spices.  Don’t worry.  We are using this for the vegetables and toasting the rice as well).
  • While the spices are heating up, prep your onions and garlic.  When the cumin and coriander smell toasty and begin to pop occasionally in the pot, add the onions and garlic and sweat them over medium low heat for 5-8 minutes. You want the onions to get translucent and the garlic to become aromatic, but not browned or crisp.
  • Add the rice and turn the heat up to medium high.  Let it sizzle, stirring frequently, until some grains of rice are opaque and bright white but some are still translucent and pale.  It will smell a bit reminiscent of popcorn or puffed rice, and that is a good thing.
  • When the rice is toasted, add the salt, pepper, and broth or water.  Stir well and cover to bring to a boil.  Once boiling, turn the heat down to medium or medium low and simmer for 15-18 minutes, or until liquid is absorbed and rice is tender but not mushy.
  • While the rice simmers, prepare the cilantro.  Tear or chop the leaves and tender upper stems from the tough ends and place in a blender or food processor (alternatively, if you don’t want the extra dishes or don’t mind big pieces of cilantro, you can just chop it up with a knife).  Add the lime juice and pulse in 3 second bursts until the herbs are very finely chopped and almost become a paste.
  • When the rice is done, uncover it, fluff it with a fork, and add the cilantro and lime juice mixture.  Combine thoroughly to ensure even greenness, then serve immediately.  Too much time between adding the cilantro and serving the rice will result in a less vibrant green color.

Vegetable Pakoras with Cilantro Mint Chutney

Why, I thought, as a rivulet of sweat coursed from neck to waist, do I insist on frying in the summer?  The instant read thermometer I was using to check the temperature of the oil sat next to the stove, registering 91F.  Normal people wait for summer and then anxiously stuff themselves on grilled meats, fresh salads, wedges of cool melon.  Foods that don’t make your back bead up.  But here I am, on my first real day of summer vacation, celebrating by standing over a pot of shimmering heat, making pakoras for lunch.

Food Blog June 2013-1613Maybe it’s a cultural thing.  I don’t mean the pakoras.  I mean frying.  Fried foods are a treat frequently enjoyed during the summer months; Americans + carnivals or county fairs = frying anything we can think of.  Depending on where you are in the country, corn dogs, funnel cake, hush puppies, twinkies, tortillas, even oreos, all get dunked into vats of hot oil and floated cautiously around until they transform into variously shaped clumps of deep, crispy gold.

So to bring summer traditions like sweating and eating fatty foods and looking at award-winning livestock and riding in twirling cars where the metal shrieks and you smell the grease with every turn into my own kitchen, I’m making pakoras for a weekday lunch?

Partly.  But not all.

I’ve talked before about my friend Ph., who even has a whole category on this little site dedicated to her (Phoebe-Phriendly, if you’re interested).  Ph. is gluten-intolerant, can’t eat dairy or tree nuts, and is no longer able to process corn or rice.  This makes cooking for her a challenge.  However, she is one of the reasons I started stretching my food boundaries and knowledge; we became close friends in graduate school, and I wanted to be able to make food that she could eat!  We got into a conversation in the comments of her blog the other day, and I brought up pakoras because she was playing with garbanzo bean flour.  She had never made them, so we decided I should come up with a recipe she could use.  That’s where you, my friends, luck out.

Food Blog June 2013-1603Pakoras are an Indian street food: assorted vegetables (or paneer, or bread, or apparently sometimes even chicken) dredged in a well-spiced batter of besan or gram flour (which is made with garbanzo beans) and water.  I added some baking powder to my mix as well, for fluff and lightness.  Most often the vegetables are cut into manageable pieces and dipped into the batter individually before they are fried, resulting in something I’ve been thinking about as essentially an Indian spiced tempura.*   Sometimes, though, they are cut into smaller pieces, tossed together in the batter, then levered carefully into the oil in chunky mixed fritters.  I chose the first of these methods for our lunch, so we could have the fun of mixing and matching which vegetables we crunched our way through.  We chose cauliflower, potatoes, and onions.  My favorite ended up being the cauliflower, while N. couldn’t get enough of the puffy potato slices.

Food Blog June 2013-1607Though they are eaten year round (depending on where you are), I discovered during my research about this delightful little snack that they are particularly popular during monsoon season, dipped into or sauced with a variety of chutneys, and served alongside a cup of chai.  This makes sense – a warm treat to enjoy when it is wet and booming with storms outside – and though the weather in my California kitchen is far (far, far, far) from identical, it is currently monsoon season in India, so it turns out this was, after all, a timely choice.

We had ours with a cilantro mint chutney – lightly spicy, fresh, grassy from the herbs, and bright from the addition of lime juice.  I’ve included that recipe here as well.

Food Blog June 2013-1610Pakoras are best served as hot as your mouth can handle them.  They are crispiest that way.  As they sit, the batter loses its magnificent crunch.  They are acceptable reheated in a 400F oven the next day, but, as with all fried foods (with perhaps the magical exception of a really good fried chicken), they are best eaten immediately.

Food Blog June 2013-1614Food Blog June 2013-1615Food Blog June 2013-1616

* I realize tempura is quite different: rice flour is typical, for one, and the liquid used is often carbonated water to make the batter even lighter.  But the essentials – vegetables coated in batter and fried – are the same.


Vegetable Pakoras and Cilantro Mint Chutney
serves 6-8 as an appetizer or snack, or 4 as an embarrassingly indulgent lunch
Pakora batter:
2 cups garbanzo bean flour (I used Bob’s Red Mill Gluten-Free mix, which is mostly bean flours)
2 cloves garlic, grated
1 small knuckle of ginger, grated (about a ½ inch piece)
1 tsp ground turmeric
1 tsp ground cumin
1 tsp ground coriander
¼ tsp cayenne pepper, or more to taste
1 tsp salt
2 tsp baking powder
1 cup cold water
  • Whisk together the flour, grated garlic and ginger, and all the spices until evenly combined.
  • Whisk in the water until a thick but smooth batter forms.
  • Set it aside for 30 minutes.  This is conveniently enough time to prep the vegetables, heat the oil, and make the chutney.
Pakora vegetables:
1 small head cauliflower, cut into bite-sized pieces
2 medium Yukon gold potatoes, sliced thin (1/8 inch slices seemed ideal)
½ large red onion, cut into chunks or thick rings
  • To prepare for frying, heat 1-2 quarts of oil (I used vegetable oil) in a large, heavy, steep-sided pot over medium heat, until it reaches about 350F.  Put on some closed-toed shoes to keep yourself safe, just in case you have drips or your oil bubbles over.
  • Working in small batches (5-6 pieces at a time), dip the vegetables into the batter, retrieve one at a time with long handled tongs and let the excess batter drip back into the bowl for a few moments before carefully lowering each into the hot oil.  They should sizzle as they are immersed, but not spit or foam up wildly.
  • Cook each batch of vegetables for 4-5 minutes, carefully turning each one halfway through the cooking time, until they are golden and crispy.
  • As each batch finishes, fish the pieces out one at a time and set them on a wire rack over a cookie sheet.  This will allow excess oil to drip off.  Salt them lightly as soon as they come out of the oil.
  • Take the temperature of the oil before adding a new batch of vegetables, to ensure that it returns to right around 350F, the optimal temperature for frying.
  • Continue until all vegetables are golden, crispy, and cooked!

Pakoras are best consumed as soon as they are cool enough for your mouth to handle.  As they sit, the batter gets soggy.  It’s still tasty, but not as triumphantly crunchy.

Cilantro mint chutney:
2 bunches cilantro, bottom 3 inches or so of stems removed
1 bunch mint, stemmed (you will be using leaves only)
Zest and juice of 1 lime
1 jalapeño, stem removed and sliced in half longitudinally (if you are concerned about the chutney being too spicy, remove some or all of the seeds and inner white membrane, where most of the heat is concentrated)
¼ cup water
2 TB olive oil
1 tsp garam masala
Salt to taste
  • Add all ingredients to a food processor and pulse in 3-5 second intervals until everything comes together as a loose, chunky sauce.  The resulting mixture should be thinner in consistency than a pesto, and will not remain emulsified for very long.
  • Scrape into a serving dish and eat with the pakoras.

Kidney bean, brown rice, and shiitake “vurgers”

I talk a lot on this blog about myself.  Today, I want to talk a little bit about my husband.  Before I met him, N. did a study abroad program in London.  He was there for six months, and by “there” I mean taking classes in London, but also zipping around England and then parts of Europe with a speed that his British hosts looked upon with alarm (“what do you mean you’re going to York just for the weekend? That’s a 3-4 hour trip!  It’s a whole holiday!”  To which N., who grew up in a road-tripping family, would shrug and go anyway.  Example: his family, when they lived in a suburb of Sacramento, California, thought nothing of jumping in the car to drive to Reno for the day.  Once when his parents visited us in Oregon, we drove to Tillamook from Eugene via the coast to get ice cream and cow cookies at the Tillamook Cheese Factory, and then headed home in time for dinner).

Skyscraper gazing

N. is a little camera-shy.

Interestingly, and perhaps unfortunately, N.’s study abroad program took place shortly after some of the worst scares of mad cow disease in England.  He was there in late 2002, and eating beef was a no-no.  This meant, when I met him, that N. had some food issues.  He wasn’t a picky eater – that’s not quite the right word.  He was, let’s say, a particular eater.  Beef, especially beef that wasn’t well-done, was out.  The frightening potential consequences had been too drilled into his head.  Lamb was too gamey.  Pork was not his favorite.  When I was trying to impress him with my rudimentary cooking skills when we first met (rudimentary is kind – the first time I tried to make him French toast for breakfast, the bread collapsed into over-soaked crumbles in my custard mixture.  But we fried it up and ate it anyway – sweet scrambled eggs with bread bits – and he was either kind enough or smitten enough to pretend he liked it), we ate a lot of chicken breast.

N.’s willingness and preference when it comes to food has expanded and matured significantly since we’ve been together.  Still, though, he is wary.  When we lived in Oregon, we were lucky enough to find ourselves in Eugene, which is a bit of a hippie mecca.  This meant we had a wide variety of vegetarian choices.  Neither of us is vegetarian, but N. developed the habit of ordering veggie burgers when we went out to eat, since it was a safe bet.  You didn’t have to worry about doneness, and many of the restaurants we frequented made their own patties instead of relying on something frozen from a box.

Even though we’ve been living in Los Angeles for almost a year now (can that be true?!), and we’ve done our share of restaurant investigating, we don’t have the favorites yet that we had in Eugene.  Though we’ve found some delicious options, N. doesn’t have a go-to veggie burger yet.  This week, therefore, I decided to make him one.

It always interests me, when a veggie burger is advertised as a homemade patty, to find out what its base is.  A lot of meatless patties – especially the premade kind you find in the freezer section – are wheat based, which seems like a strange thing to put on a sandwich: a patty of pressed wheat between two pieces of bread made from wheat.  Gluten-fest!  But sometimes they are made from tempeh, and sometimes from beans, and we had a really tasty one once that I’m sure had shiitake mushrooms mixed into it, which contributed a fantastic texture I haven’t found again.   Food Blog May 2013-1444

Food Blog May 2013-1446Taking this textural component as my must-have, I considered my pantry and spice cabinet, and cobbled together what turned out to be a delicious, filling patty made of brown rice, kidney beans, and reconstituted dried shiitake mushrooms.  I used a mixture of red wine and hot water to reconstitute my mushrooms, which contributed to their deep, earthy flavor.  You could use chicken or vegetable broth if you prefer, or just hot water.

Food Blog May 2013-1447To bump up the flavor and add a little moisture, I added onions and garlic I’d sweated down with some warm, southwestern spices, and pulsed the whole thing in a food processor with a generous pinch of salt until it was willing to be molded, but not completely homogenized.  The beans should be smashed but not totally pureed, and you should be able to discern the occasional grain of rice in your shaped patty.  This adds texture and interest when you are chewing, and makes the finished product less like you’re chowing down on a fried patty of bean dip.  Not that fried bean dip patties necessarily sound like a bad thing…

Food Blog May 2013-1448N.’s one complaint about veggie burgers is that they are often smothered in cheese.  It’s as though restaurants are trying to hide the flavor-that-isn’t-meat.  That might be exactly what some people want, but for us, these non-cow flavors are just as interesting and tasty.  To make this a burger (or vurger, as one of our Eugene favorites called it) worthy of N.’s preferences, I decided to skip the cheese on the actual patty, and incorporate it into the bun instead.  Thus we settled our patties on homemade jalapeño cheese “kaiser” rolls, which I’m going to have to boast about… maybe next week…

For now, though, the patty itself: these are a bit dense and fairly filling, but the mushrooms really do add a delightful chewiness that I wouldn’t want to skip.  Adding in some tempeh crumbles to replace or enhance these components would likely be delicious, though I haven’t tried this yet myself.  The final addition of the barest squeeze of lime juice makes a surprising difference: it takes them from slightly heavy to a flavor I can only describe as somehow more awake.

Food Blog May 2013-1452A few days ago Deb at Smitten Kitchen asked what her readers’ go-to dinners were.  I thought about this for a while and decided ours were pizza, roasted vegetable tacos, and a lovely little one-bowl meal I learned from a friend called “Scatter Sushi.”  I can tell you, though, based on the reaction these “vurgers” got at our house, they just joined that list.

Food Blog May 2013-1456

Note: these patties are vegan (until you put them on a cheese roll), which means they lack the dependable binding power an egg typically brings to such a party.  Therefore, I recommend shaping them and then letting them sit for half an hour or more before cooking, which will let the rice and beans soak up some of the moisture from the vegetables, and thereby hold together better.  If they threaten to crumble on you or you’re frustrated or frightened by their potential fragility and not determined to keep them vegan, go ahead and add an egg to the mix.

Brown rice, kidney bean, and shiitake “vurgers”
Makes 4 patties
1 cup cooked, cooled brown rice
1 15 oz. can kidney beans, drained and rinsed
1 oz. dried shiitake mushrooms (about 12)
3 cups wine, water, or broth for reconstituting mushrooms
¼ cup diced onion
3 cloves garlic, minced
3 TB olive oil, divided
1 tsp cumin
1 tsp paprika
½ tsp oregano
½ tsp black pepper
½ tsp salt (if you are using dried beans rather than canned, you might want to increase this quantity)
1 tsp lime juice or red wine vinegar
  • First, reconstitute the mushrooms.  Heat water or broth to near boiling, then pour into a heatproof bowl with dried mushroom caps and wine (if using).  I typically like to use 1 cup of wine and 2 cups of hot water – it’s enough heat to revive the mushrooms, and enough flavor to intensify them.  Cover, making sure the mushrooms are fully immersed, and let sit for about 20 minutes.  I like to place a small plate atop my soaking bowl to keep the mushrooms underwater.
Food Blog May 2013-1445

Mushroom soaking contraption

  • When the mushrooms are soft and pliable, drain them and set aside until cool enough to handle.  Heat 1 TB of the olive oil in a skillet and gently sweat the onions and garlic until the onions are translucent and the garlic is aromatic and sweet.  This should take 5-8 minutes over medium-low heat.
  • As the onions soften, add the cumin, paprika, oregano, and pepper, turn the heat down to low, and stir to combine.  Let the spices cook with the vegetables for another 2 minutes, to let their flavors meld and warm.  Turn off the heat and set aside.
  • Once your mushrooms are cool enough to handle, squeeze them gently to release some of the water they have collected in their bath.  You don’t want them to be drippy, but you don’t want to squeeze them completely dry either.  Some of the liquid they’ve soaked up, especially if you’ve used wine or broth, will add lovely flavor to your veggie patties.  It will also help hold the patties together.  Remove the stems (they are tough and unpleasant to eat) and then chop the shiitake caps roughly.
  • Place rice, beans, chopped mushrooms, onion, garlic and spice mixture, and ½ tsp salt in the bowl of a food processor.  Pulse 4-5 times at 3 second intervals, just until the beans are broken up and the rice is in smaller pieces.  You want some of the mixture to be smooth, but some to retain texture and shape.  Taste for seasoning, and add more salt if needed.  Squeeze in the lime juice and pulse one more time just to integrate it.
  • Remove your mixture from the processor, being careful of the blade, and dump it into a large bowl.  Press it together with your hands a bit to ensure workability.  If it is really crumbly or you are nervous about the patties holding together, you might add a lightly beaten egg or some olive oil here.  However, don’t be too worried – they are going to firm up a little when you let them sit after shaping.
  • Divide the mixture in four even quantities.  One at a time, press and shape each quarter into a round, flat patty no more than 1 inch thick.  Everything is cooked already, so you don’t have to worry about rawness, but you do want everything to heat evenly.  Any thicker than this and your burgers might still be a bit cool in the middle.  Mine were just under 1 inch thick, and had a diameter of about 3 inches.
  • Once all 4 patties are formed, set them aside on a plate or a board for at least half an hour.  If you are going to wait much longer than that or if you are making them ahead, stick them in the refrigerator, but be sure to let them come back up to room temperature before cooking, so they heat evenly.
  • When you are ready to cook, heat the remaining 2 TB olive oil in a skillet (I just used the same one I’d cooked my onions and garlic in) over medium to medium-high heat until it glistens and ripples.  Add the burgers carefully to the skillet and let them sizzle for 4-5 minutes on each side, until they develop a deep, bronzed crust.
  • Serve with your favorite condiments on the bun of your choice.  We kept it simple: mayonnaise, red leaf lettuce from the garden, on the jalapeño cheese rolls I’ll share with you here next week.

Note: if the burgers look like they are falling apart, or if they threaten to break when you try to flip them, turn the heat up a little.  This, bizarrely, helps keep them together because it sets the outside faster, so the surface of the patty is firmer.

Snakes and Ladders

It’s a classic children’s game.  Climb a ladder: advance!  Land on a snake: tumble backwards.  And so it goes with most ventures.  Last week newness delighted me.  This week I’m plodding a bit, experiencing not setbacks, exactly, but settling for lackluster(ness?)(ocity?).  I’m discovering things I don’t love about my syllabus.  I’m wading through class prep.  Students are still (still!  The third week is about to start!  Papers will be due soon!) adding my classes, which means I am overenrolled and there are new faces every day.  And though I’m mostly inspired in my kitchen, not every dish is a triumph.  Some slip a little.  Some slither into lackluster.  But it’s our job, as cooks, as experimenters, as eaters, as humans – and pardon me while I get a bit metaphorical – it’s our job to take this as a challenge.  Make it work, as Tim Gunn continually reminds us.  So we squirm ourselves around and push back toward the ladders.  And sometimes, even after a devastating slide, we climb a few steps.

70. Blanch, shock in cold water, then julienne green beans, daikon and carrots, chill. Whisk soy sauce with honey and lemon to taste; pour over vegetables.”

The most important thing to note about this particular Bittman combo is to leave yourself enough time, particularly if your knife skills are not perfect.  It is not possible to concoct this dish in anything but a zone of utter frustration and simmering disappointment if you only have twenty minutes until dinnertime.  Here’s what I did:

3 carrots, peeled and cut into thick sticks

1 6-inch chunk daikon, peeled and cut into thick sticks

½ lb. green beans, rinsed and stemmed

3 TB soy sauce

2 TB lemon juice

1-2 TB honey

I dropped the carrot and daikon sticks into a big pot of boiling, salted water and let them cook for 2-3 minutes, until they had give between my teeth but still put up a bit of resistance.  I plunged them into ice water and put the tailed green beans into the boil.  This was the point at which I ran into trouble.  Performing a nice julienne on a pile of veg takes some time and some patience, and on this particular day I lacked both.

Nevertheless, cut each thick stick of carrot and daikon into thin slices (Food Network calls them panels), then turn those slices to cut long, thin vertical strips.  You want uniformity but also thinness, since these are only partially cooked, and you want even quantities of carrot slivers and daikon slivers.

At this point the green beans were overboiled and the sausages – the other component of our meal – were almost done on the grill, so I shifted into I-don’t-care-how-it-comes-out-just-get-it-done overdrive.  It happens.  You should julienne the green beans.  I just sliced them into strange vertical halves.  You should chill the whole salad until nice and crisp – probably at least half an hour – after lovingly tossing the thin sticks of orange, white and green together.  I shoved the bowl in the freezer for five minutes while I made the dressing.

I whisked the soy, honey, and lemon together and was satisfied with the flavor.  Were I making this again, I would definitely increase the quantity of lemon juice and maybe even add some zest, but I say it’s up to you.  Play with the combination until you like the ratios.

Dressed, the vegetables had a pleasant texture and tasted well seasoned, but the salad as a dish was missing something.  N. and I agreed that the dressing was a little one-note, and that note was soy sauce.  Flavorwise, things were also a bit on the dull side.  Red pepper flakes or raw garlic, we decided, or more or different acid, would have helped things along.  Maybe some chives or lemongrass or ginger or cilantro, and certainly pairing this Asian-flavored dressing with something other than Italian sausages, would have been the right move.

And so, in my attempts to slither back into success, I considered the leftovers.  They weren’t stars, but they could perhaps be supporting players.  In fact, though they were not the traditional combination, they seemed not so different from the vegetables that go into a bahn mi sandwich.  Setting off to work a morning or two later, therefore, I slathered a crisp roll with mayonnaise, piled up a good portion of drained veggie slivers and, lacking lunchmeat, topped the whole thing with slices of pepperjack cheese.  I know.  Cheese is not part of bahn mi either.  But jalapeño slices usually are, and the vegetables were crying for spice anyway.  It wasn’t the best sandwich I’ve ever had.  But it wasn’t a disaster either.  It was a few steps forward.  Keep moving forward.  On to the next ladder!

Relishing

I can’t remember the last time Labor Day was a holiday for me.  I mean, I haven’t worked on Labor Day in a long time – perhaps ever.  But I spent the past eleven years or so attending universities organized around the quarter system: school starts in late September and ends in mid June.  That means when this magical Monday hit and working stiffs got to switch off their alarms, I was still on summer vacation.

Boo hoo, you say, poor thing!  You had to suffer through a non-holiday because you were on holiday!  But I’d remind you that for a graduate student, even allotted holidays don’t read as such.  A Monday is another toil-on-the-dissertation day.

And yet, today, with one week of class behind me at my new job, I did not have to make the pilgrimage to Burbank.  I did not have to spend the weekend lesson planning.  Ahead of me spans a week with one (one!) day of class.  It’s enough to make a girl sob with joy!

And then there are onions.  Which are enough to make a girl sob as well, though the accompanying emotion differs a little.

These are two Bittman “recipes.”  I realized recently that, as usual, my Bittman project has fallen by the wayside.  A brief count reveals that, of the list of 82 with which I began (the whole collection has 101 items, but I knew there were some N. and I would just never eat), 34 still remain unmade.  Most are soups.  That sounds like decent progress, until I remind you that I began this project 2 years ago.  But this year, beginning for me – as for every eternal academic – at the end of summer, is a year of renewed possibility.  It’s a year of everything refreshed: new home, new jobs, new opportunities.  It’s a year to relish.

3. Red Onion with Red Wine and Rosemary: Thinly slice red onions and cook them in olive oil until very soft.  Add chopped rosemary and red wine, and cook until the jam thickens.

I used:

1 big red onion, halved, peeled, and cut into thin half-moons

1 TB olive oil

Salt and pepper to taste

2 TB rosemary, finely chopped

1-2 cups red wine

1 TB brown sugar

Onions take a long time to cook down the way I suspected they needed to for this recipe.  High heat makes for crumpled, browned, crispy-edged rings.  Delicious in their own right, but not for jam.  I baby-sat the onions over medium-low heat for at least half an hour.  Their pearly-white interiors turned fragile gold as if stained by the olive oil, and their textures changed, gaining an unctuous flexibility.

I added the salt and pepper, the rosemary, the red wine and the brown sugar and stirred together carefully to dissolve the sugar.  This simmered for another half hour until the wine, sugar, and onions came together into a sticky heady mahogany swamp in the pan.  As the wine reduced, I lowered the temperature to prevent any burning.

The finished jam slumped wonderfully over baked squares of polenta, providing contrast in all the best ways: the colors were sharp, the textures played together, the flavors were rich and lovely.  The onion jam was sweet with the tang of wine and the pine-forest warmth of rosemary.  The polenta was comforting and even flavored, and it needed the sharp sweetness the jam provided.  Steamed asparagus finished out the meal.

It sounds crazy, but the next morning I had the urge to drape some of this sticky, savory jam over a piece of whole-grain toast smeared with cream cheese.  It would also, I suspect, serve well spread over a turkey burger.

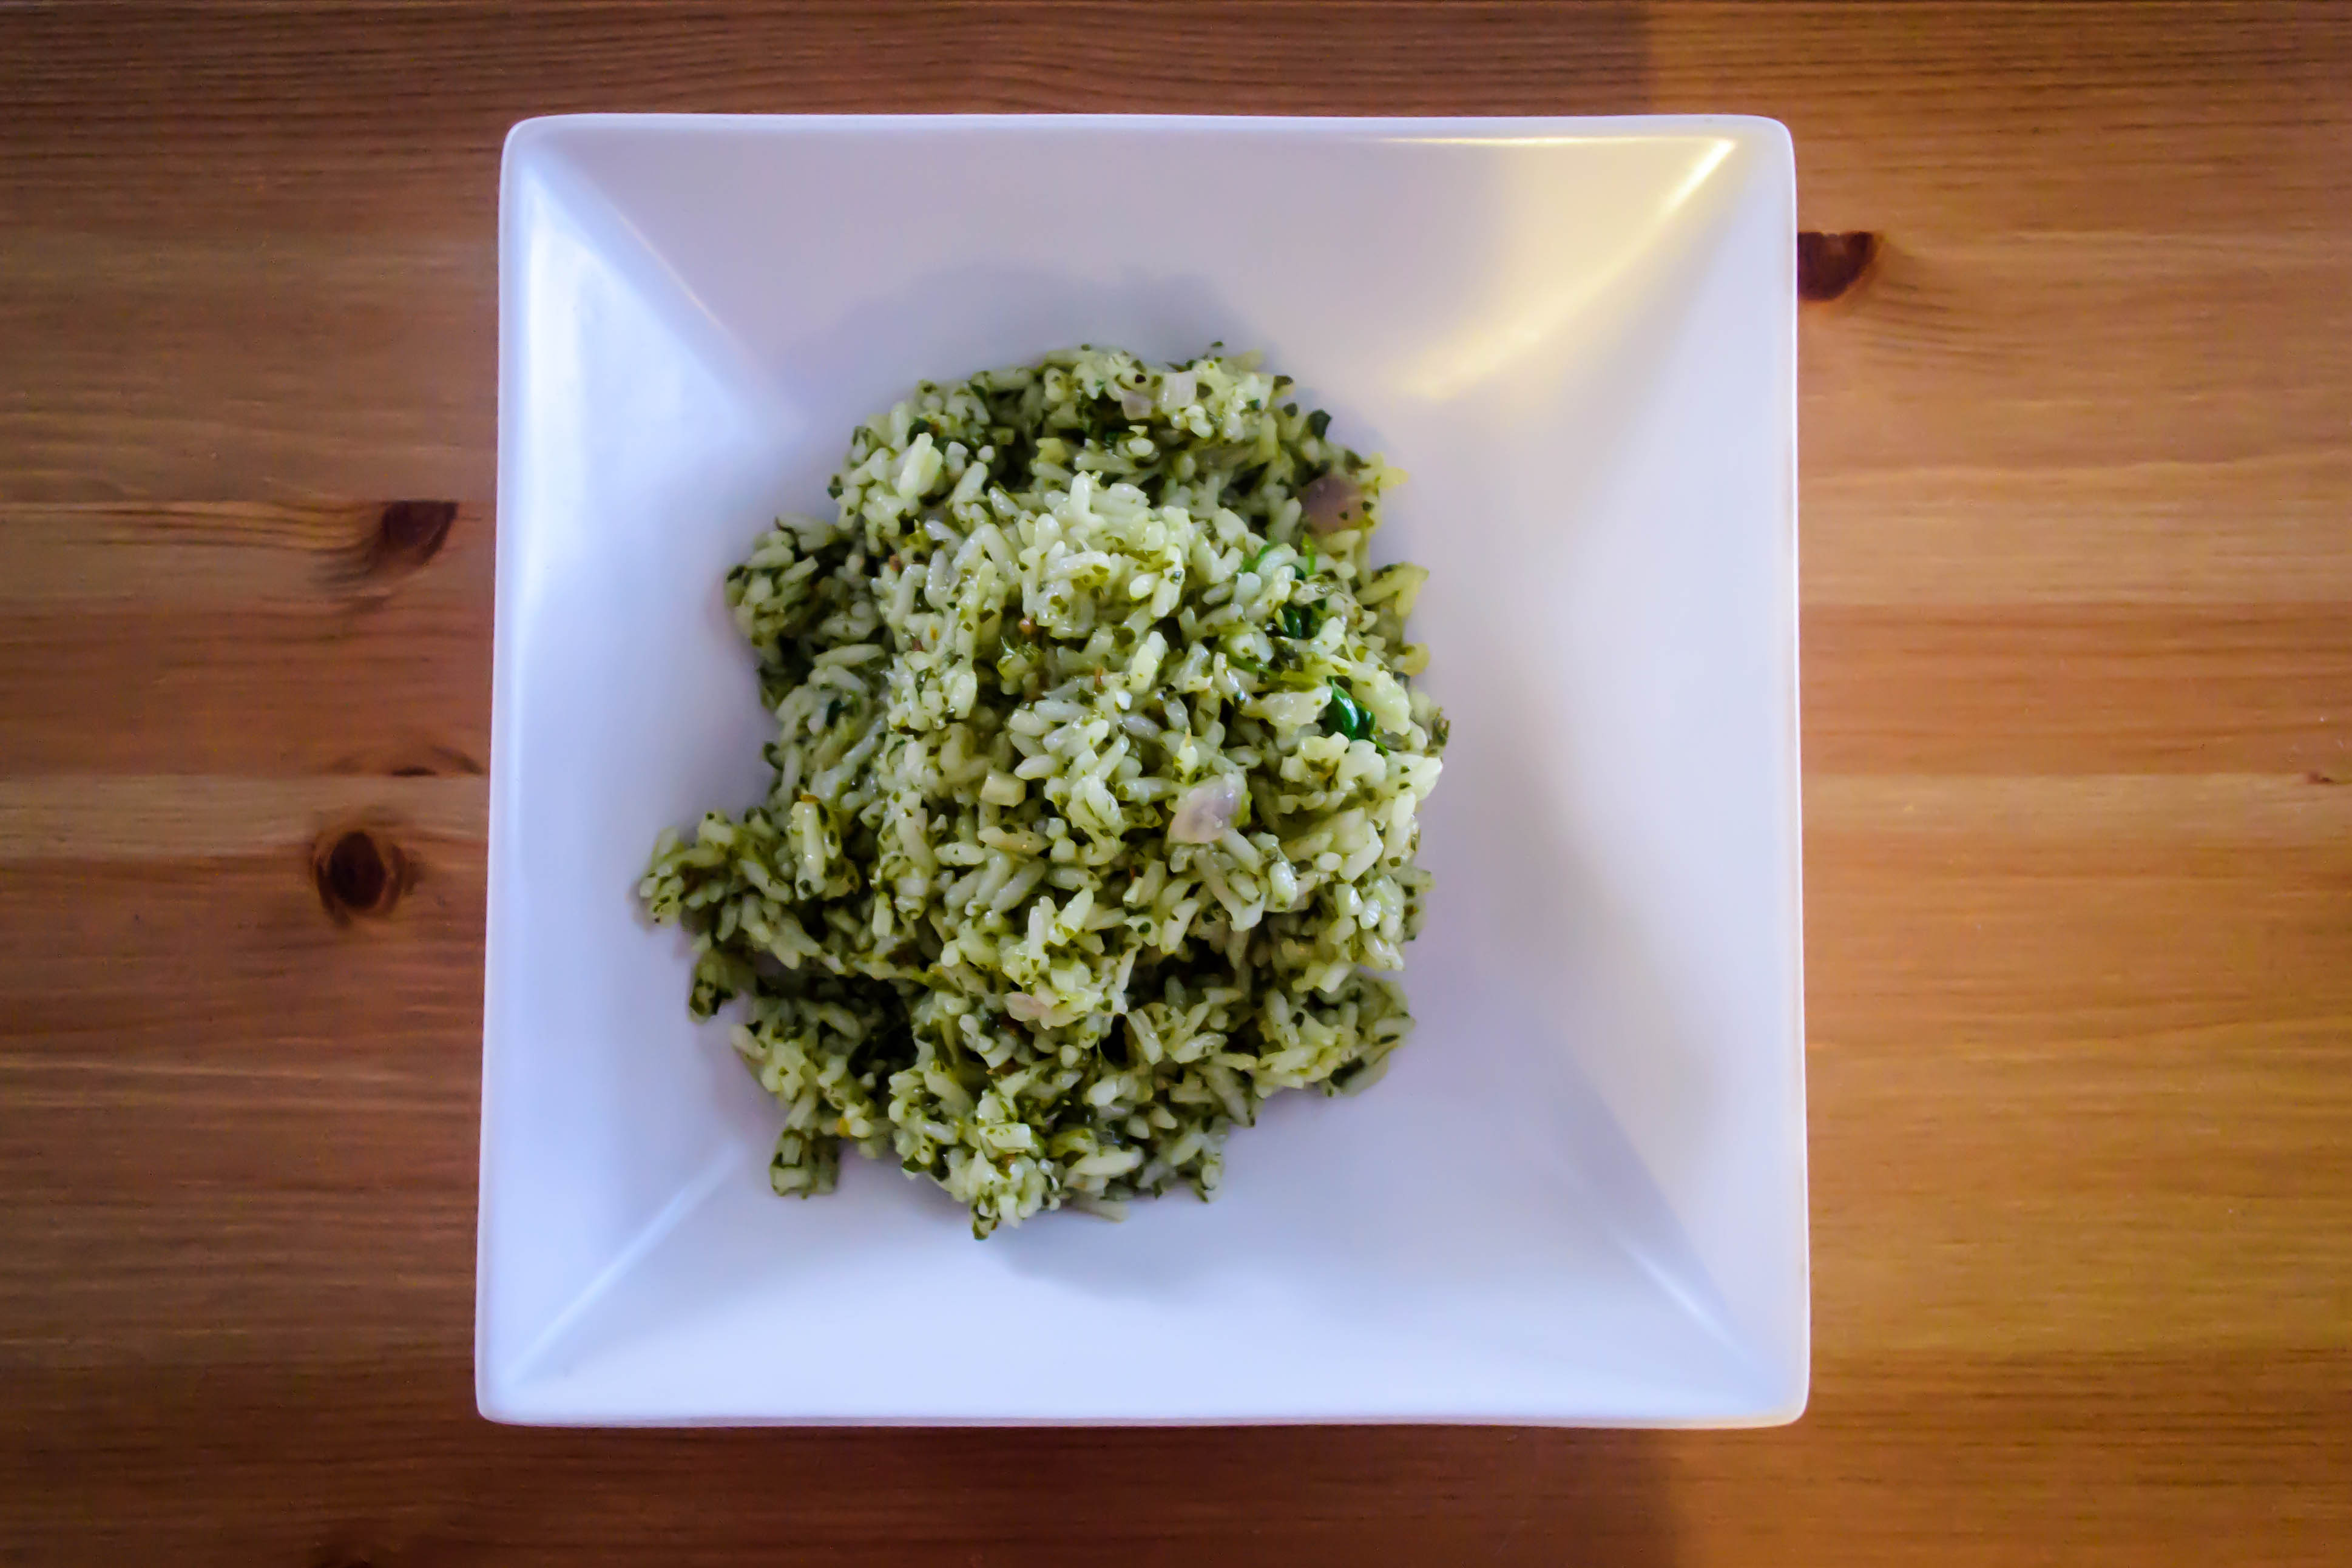
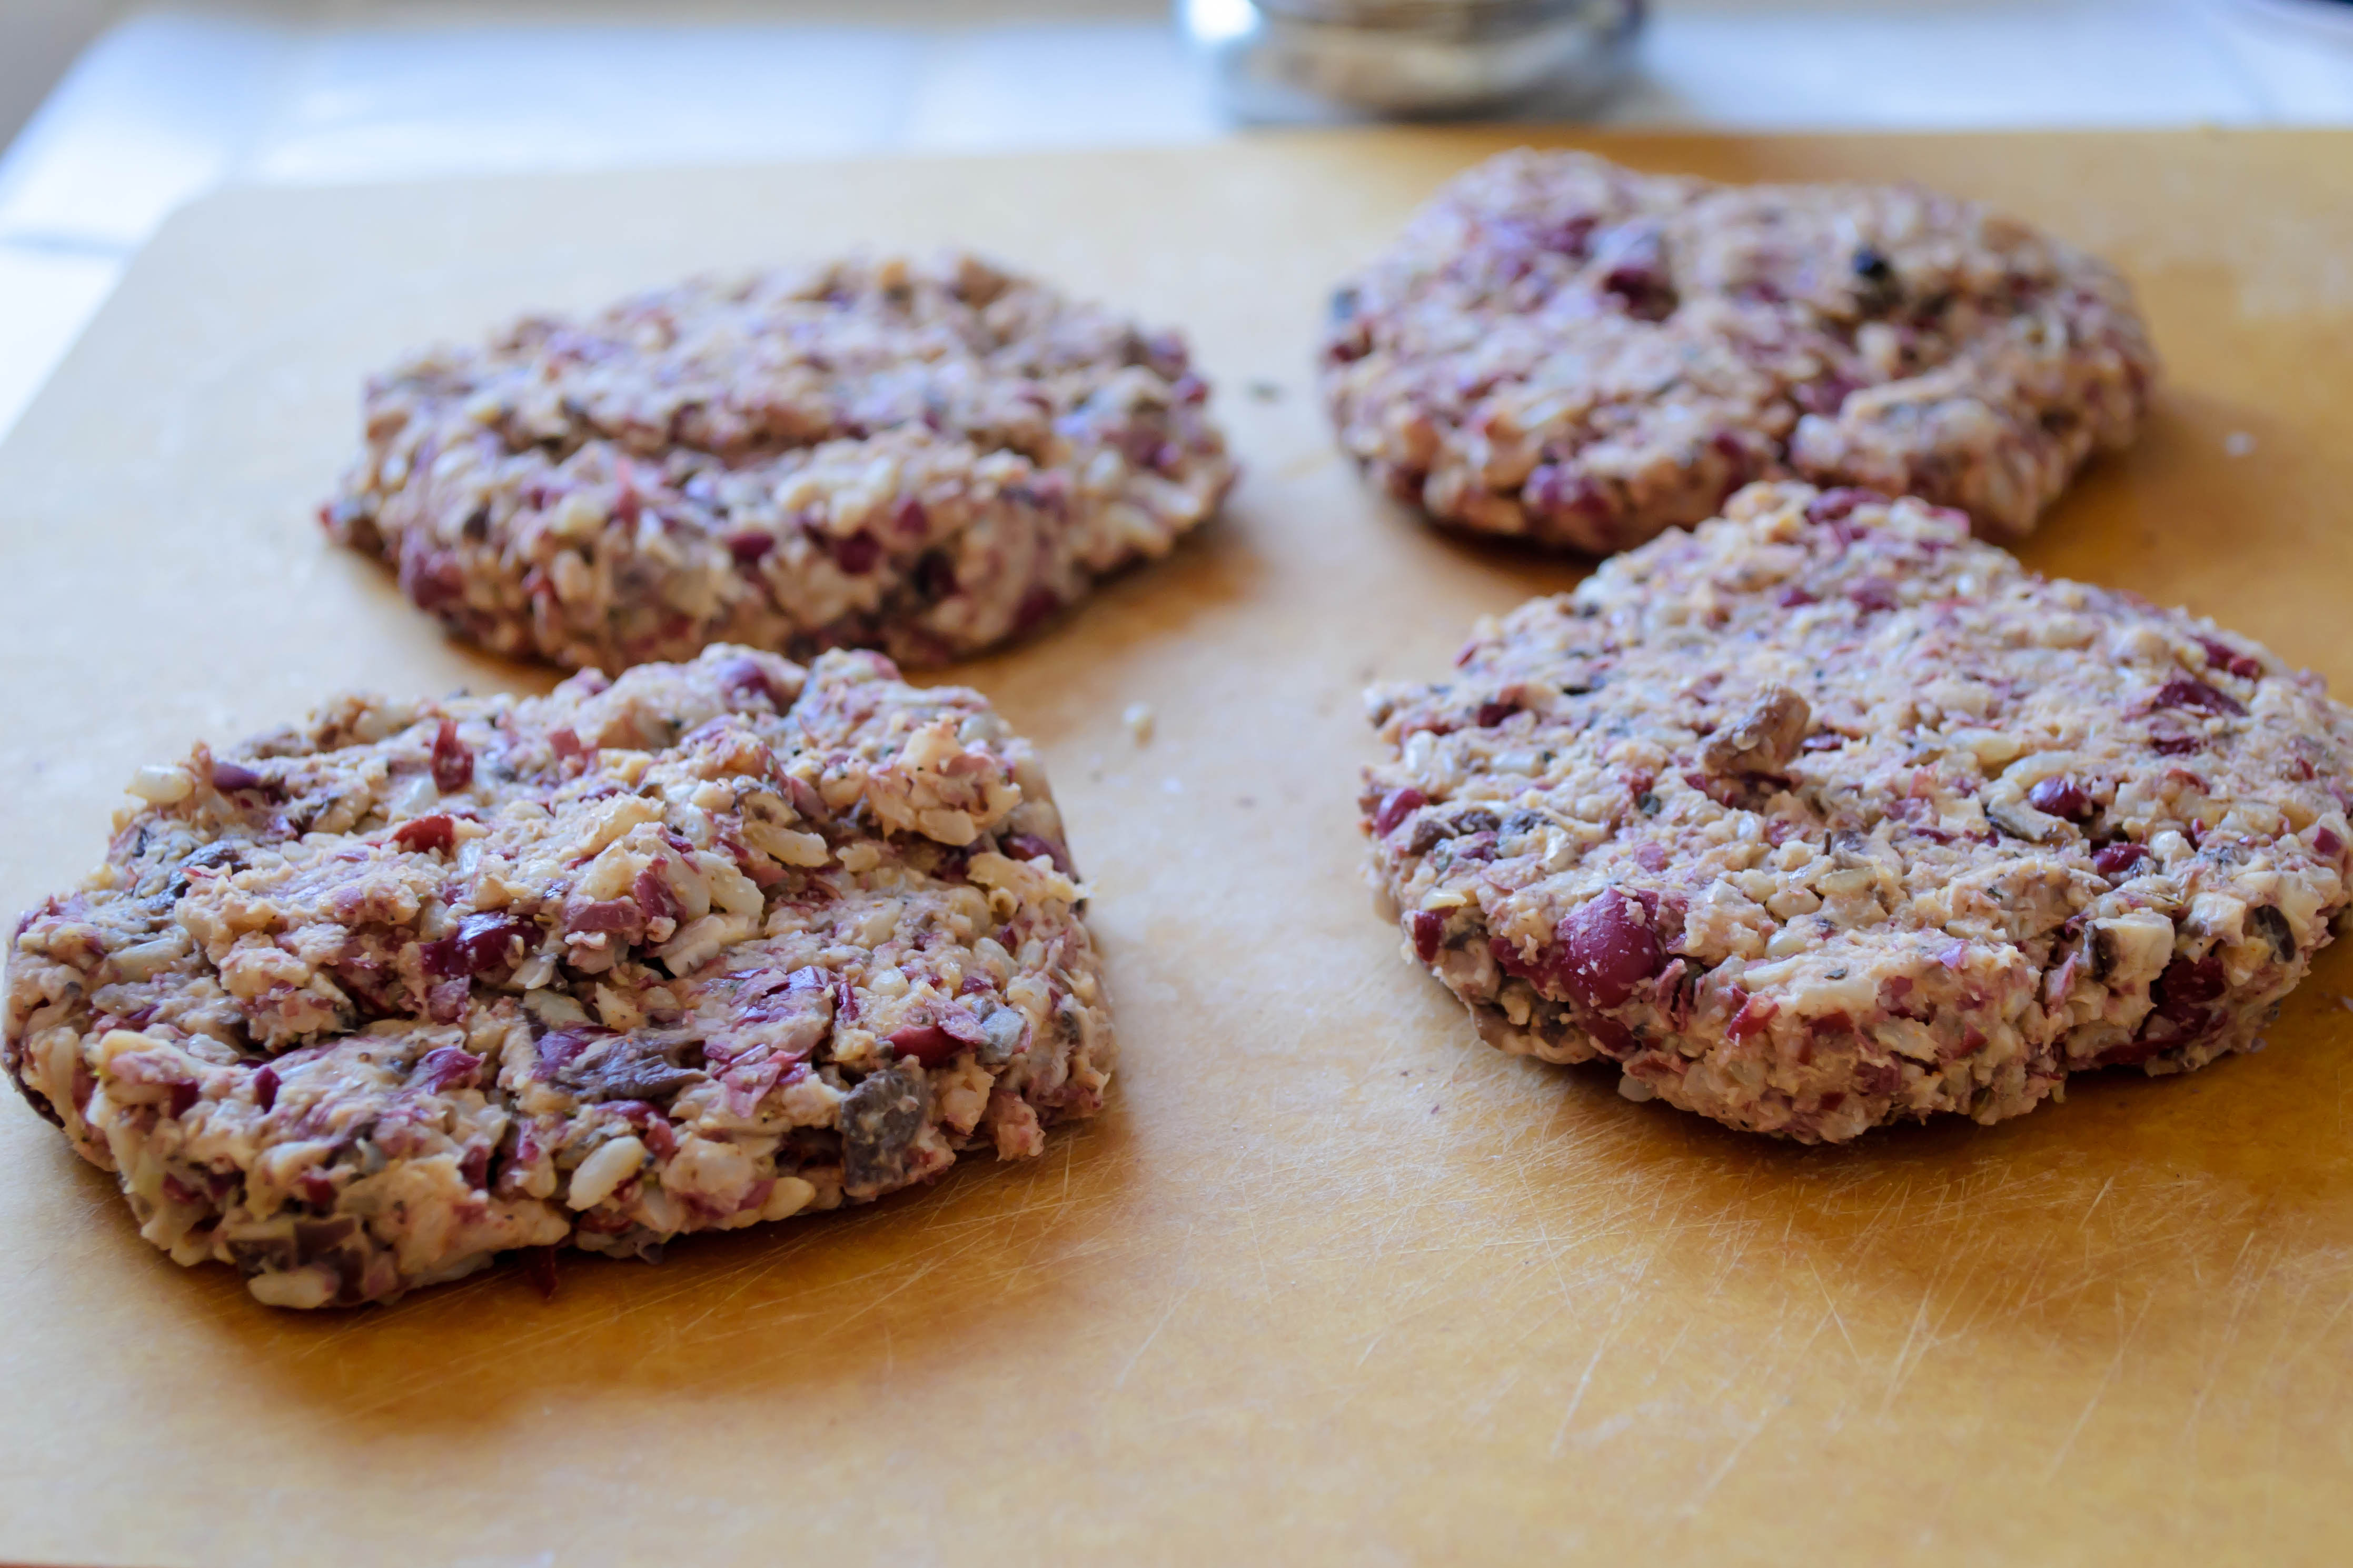
1. Onion-Pumpkinseed Relish: Roast thick slices of red onion with olive oil until softened and nicely browned.  Chop, then toss with minced chives, toasted pumpkinseeds and a little more olive oil.

A number of circumstances divide these two onion concoctions.  One was made in Oregon, one was made in California.  One was made in the cold drear of an oppressively long winter, one was made on a day of endless sun as August closed.  One was slowly reduced over an electric stove, one was browned in a gas oven, and though both were shot with digital cameras, you’re seeing one through the lens of an everything-automatic Canon PowerShot, and the other through a Nikon DSLR.  Changes to relish.

½ a huge red onion

3 TB olive oil

3-4 TB pumpkinseeds, toasted in a dry pan until they are flushed with brown and starting to pop

2 TB fresh chives

In a 400F oven, I roasted the olive oil coated onion slices until they collapsed, taking on a lovely burnished crispness.  This took probably 10-20 minutes.  Check often after 10 minutes, depending upon how hot your oven runs.  Liberate the toasty onion slices and let them cool.

When onions are cool, chop them finely and toss them with the other ingredients.  I had plenty of olive oil in my baking pan to coat all the ingredients so the relish glistened, but if you need it, feel free to add another glug or two.

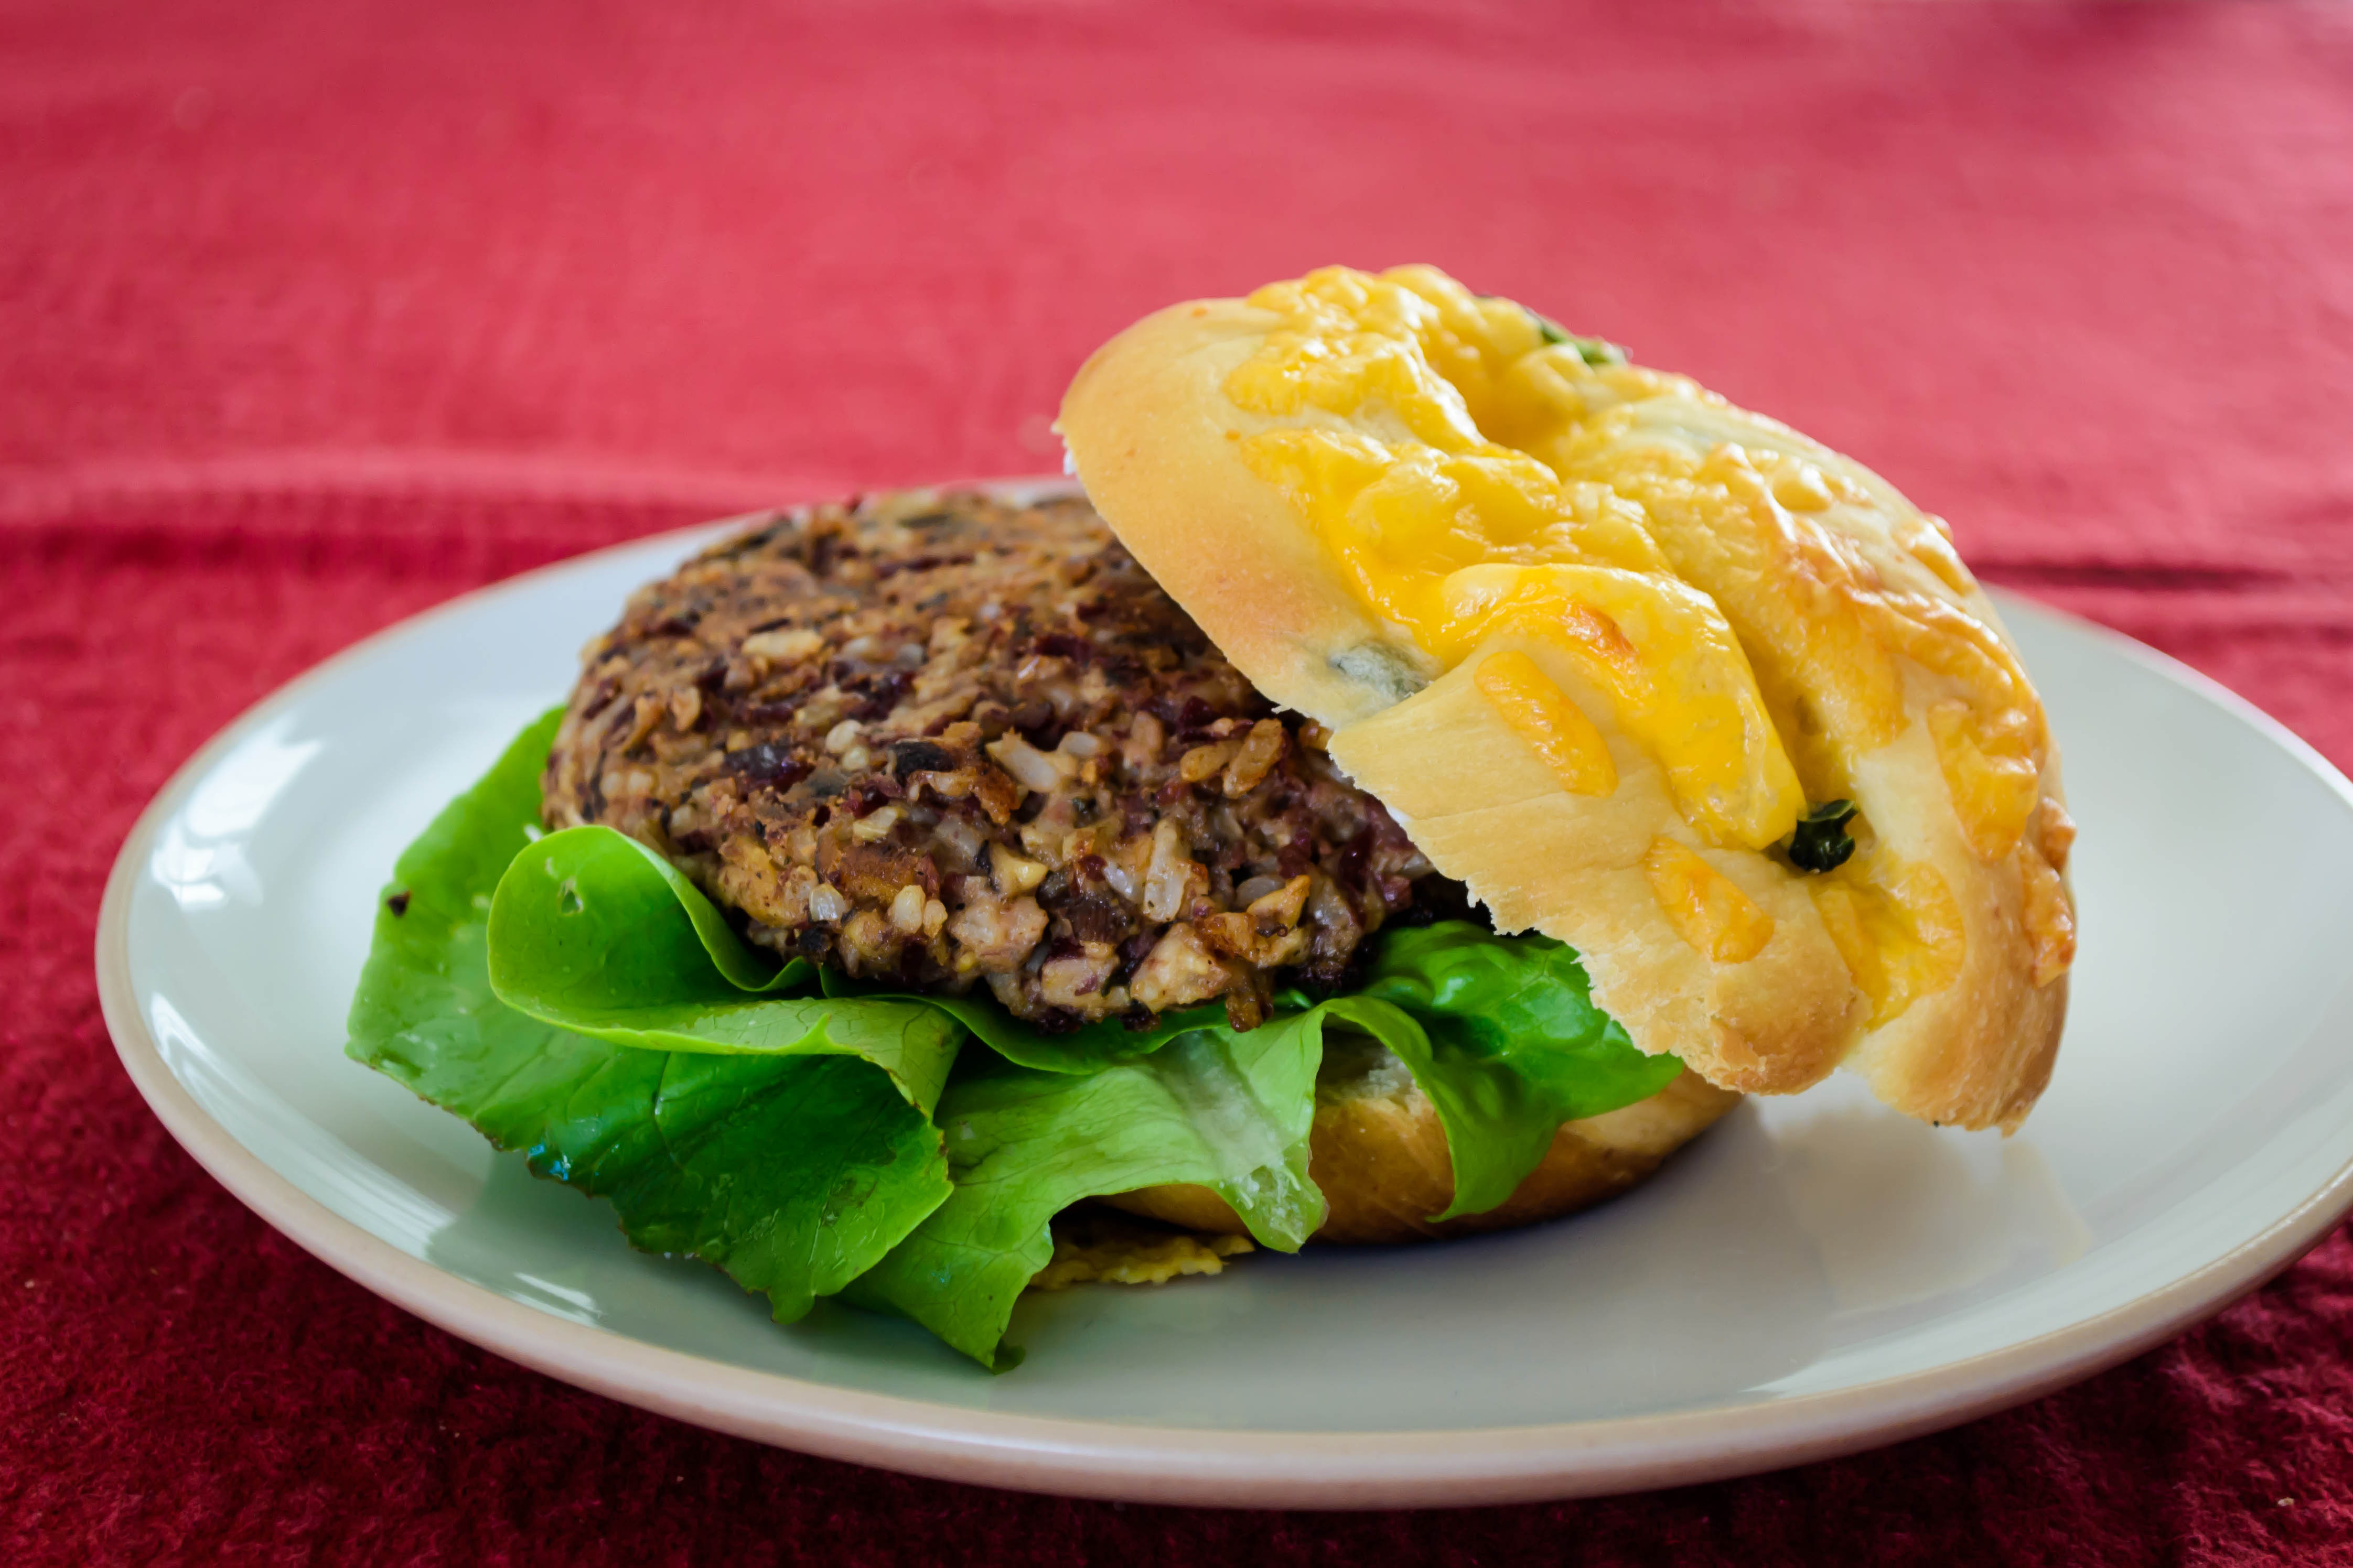
I served lovely little spoons of this mixture over black bean cakes.  We traded tastes, taking in the relish in one bite and an avocado tomato salad in the next.  It was a nice pairing: the relish was moist and crunchy and savory, with the right kind of nutty richness to complement the dense potential blandness of the beans.

But I don’t think this relish ends as a condiment for beans.  It would be a spectacular topping for lamb.  Spiced with a little chili powder, it would fit perfectly atop pumpkin enchiladas.  It might even be a good garnish for butternut squash soup: a small heap of confetti in a velvet orange sea, interrupting the endless smoothness with a well-oiled crunch.

Will I finish this Bittman project by the end of the calendar year?  I don’t know.  But I’m enjoying it again, whereas during the last few months of dissertating I was finding it burdensome.  The thrill of guessing quantities, rather than being annoyed by lack of specificity, is returning.  The intuition about temperature and time is audible again.  And now, on this holiday that has never felt like a holiday before, I’m relishing it all.