Reuben Meatballs

When I wax on about some deeply held, sentimental food memory, it’s usually in reference to one of the women in my family. My mom and my aunts are great cooks, my Nana was a powerhouse in the kitchen, and my sister is always my sounding board for dish ideas and inspiration.

2015 Blog August-0349But this one really originates from my dad. Dad doesn’t cook much. He is a master of coconut French toast, and he mans the grill for our family, but he isn’t often stirring a pot over the stove or pushing something into the oven. One of his specialties, though, is the reuben. He builds the sandwich, packs four of them tightly into my parents’ ancient, stained electric skillet, and somehow manages to flip each one perfectly.

2015 Blog August-0320When I was little, I though Dad had invented this sandwich. I mean, if you stop and think about it, it’s a strange collection of ingredients: corned beef and swiss cheese are reasonably normal, yes, but then you add a layer of sauerkraut and douse it with Russian or Thousand Island dressing straight out of the bottle? And dark rye is such a dad-bread, isn’t it? Only a dad would make you a school sandwich on rye bread. These reuben things must have been one of my dad’s concoctions – his own weird, elevated version of a grilled cheese sandwich.

2015 Blog August-03302015 Blog August-0336Imagine my astonishment, then, when I started seeing reubens on restaurant menus. This was a real thing! This wasn’t just a weird Dad-dish! I already liked reubens, as odd as I thought they were, but as an adult it’s hard for me to pass one up when it appears on a sandwich menu. One of our favorite haunts in Eugene had a tempeh version I’m working on recreating. I love a grilled sandwich, and the savory, meaty, melty business, along with the sagging pickle of the sauerkraut and the tangy sweetness of the dressing makes this worth the 5-6 napkins it usually requires.

2015 Blog August-0338
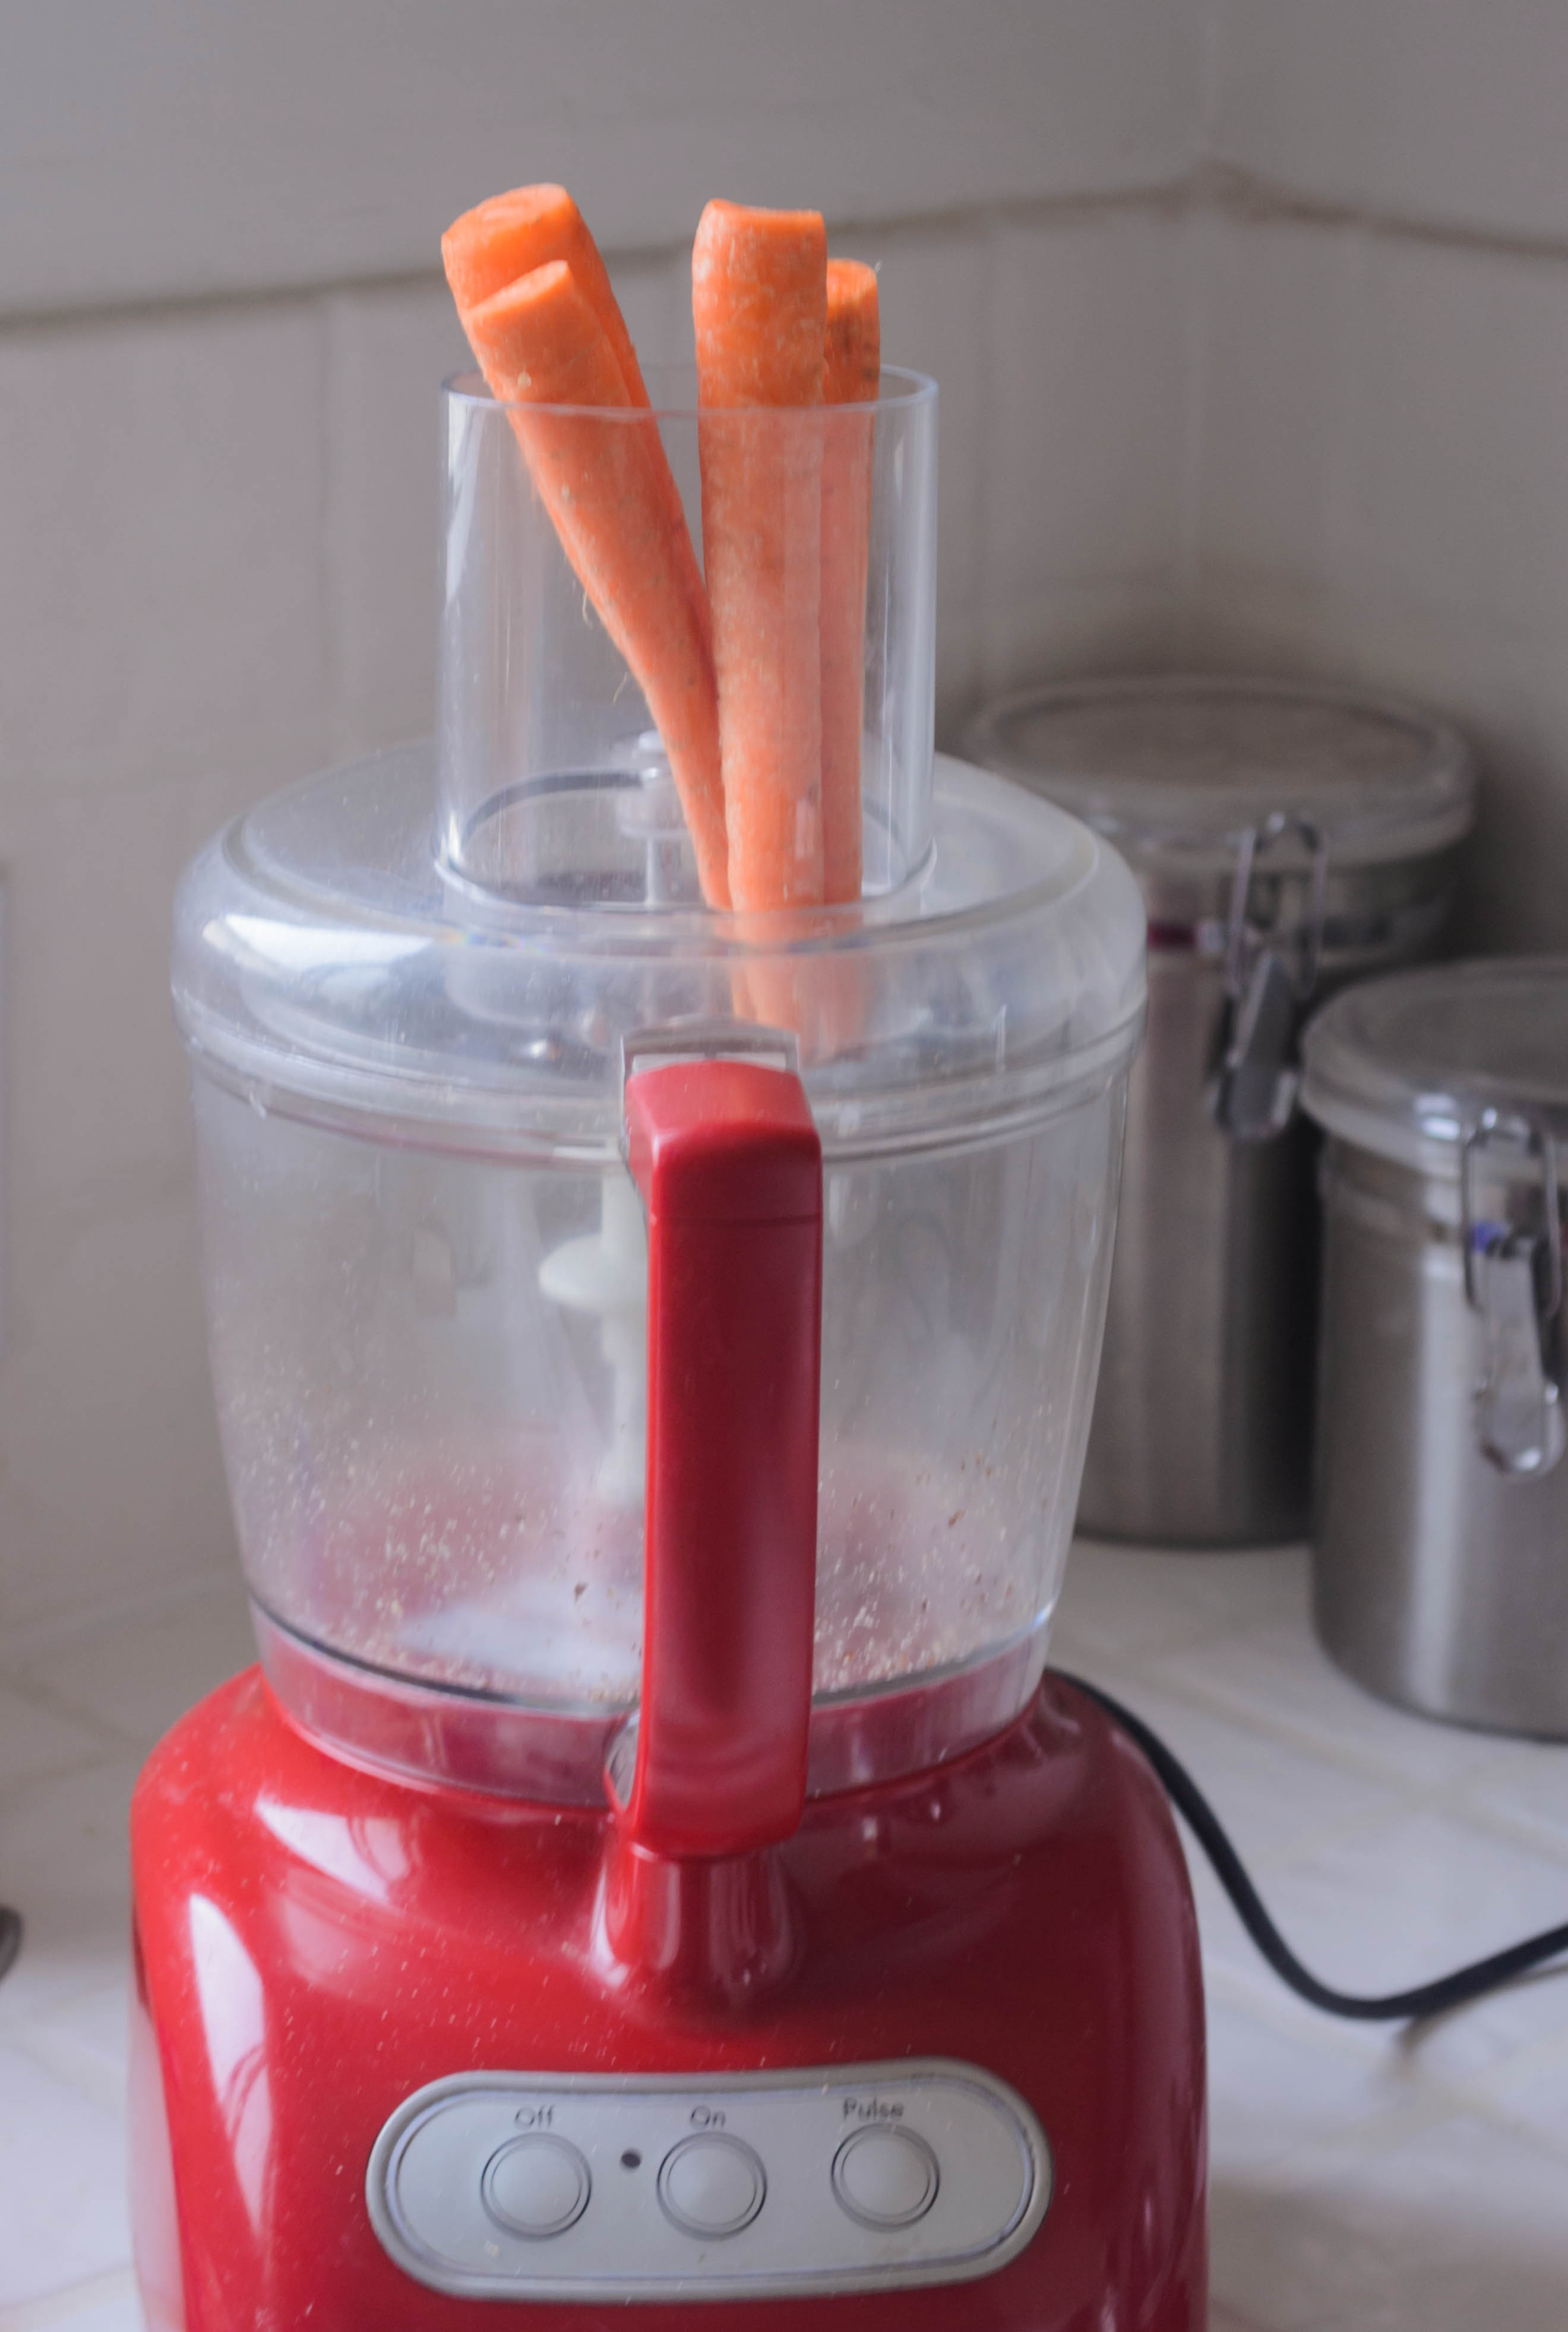
It’s no great surprise, then, that reubens became an inspiration for a meatball. Here, I’ve borrowed and shifted a bit, but tried to capture the essential elements of the classic sandwich in these compact packages. Ground beef is lightly mixed with finely diced pastrami, a bit of ketchup and mayonnaise to echo the dressing, some roughly chopped capers or diced pickle, chopped dill, and, if you like (I don’t), a minimal sprinkle of caraway seeds as a nod to the traditional rye bread of the original sandwich.

2015 Blog August-03392015 Blog August-0343
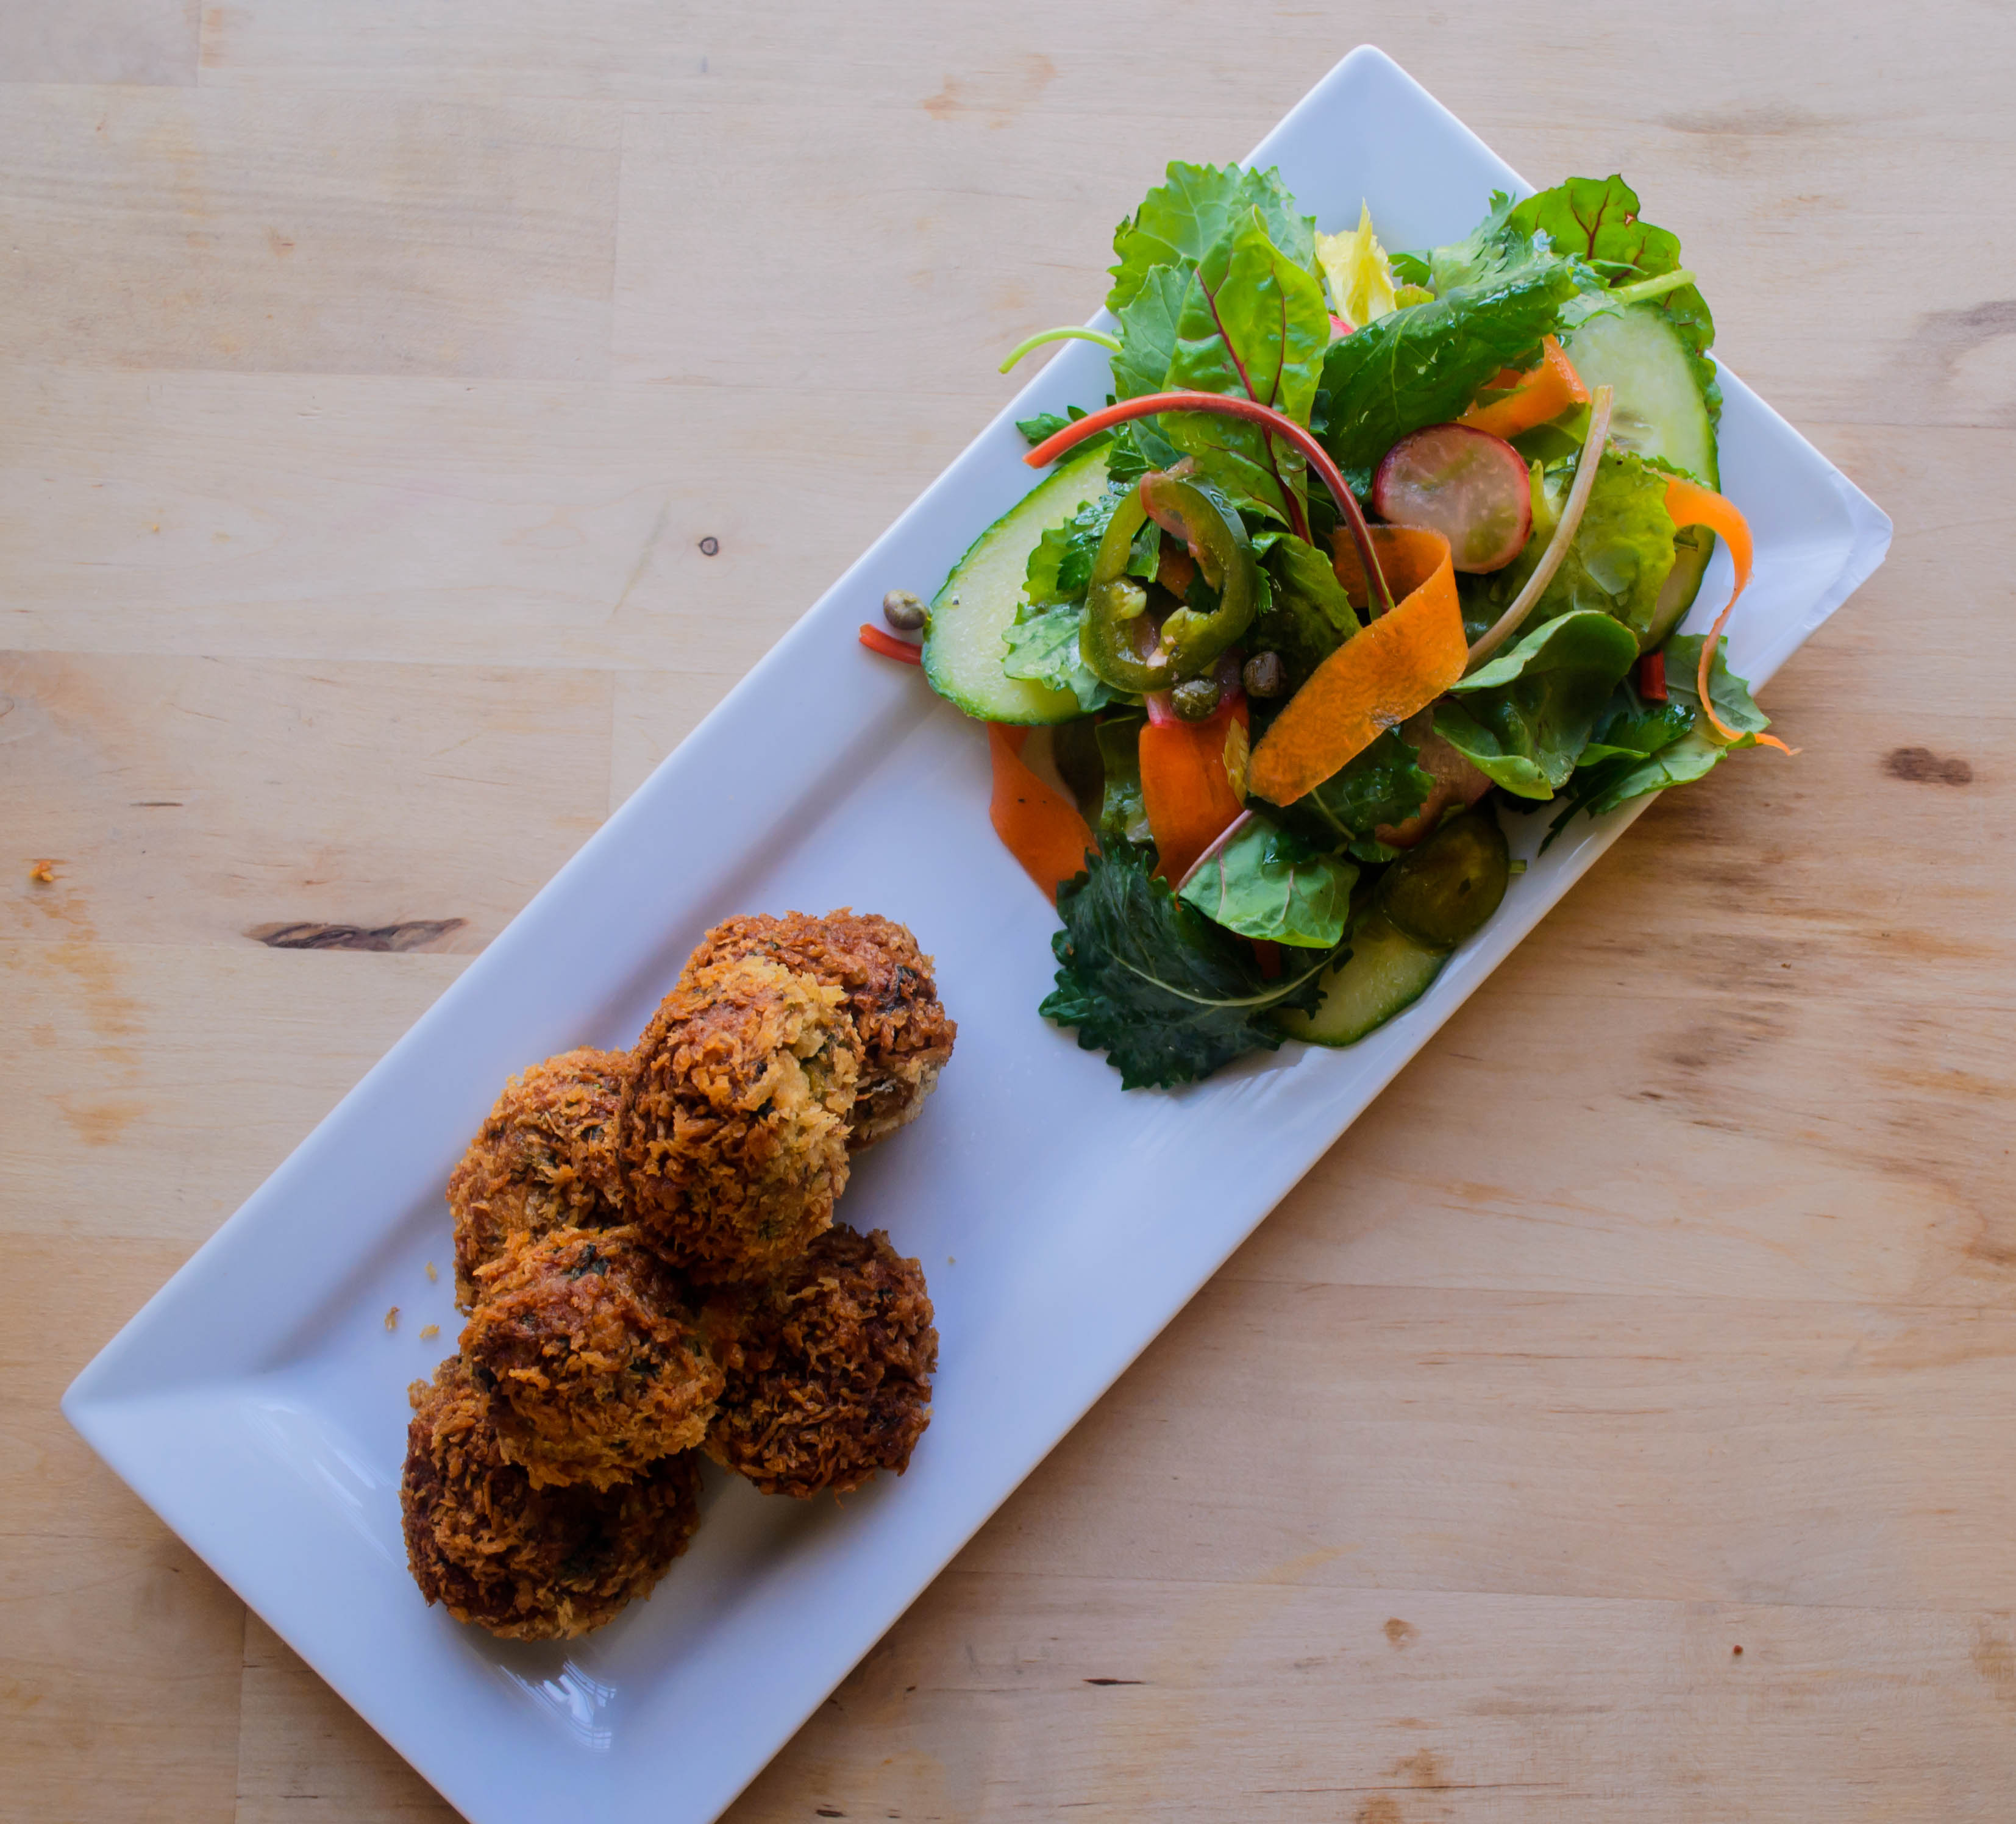
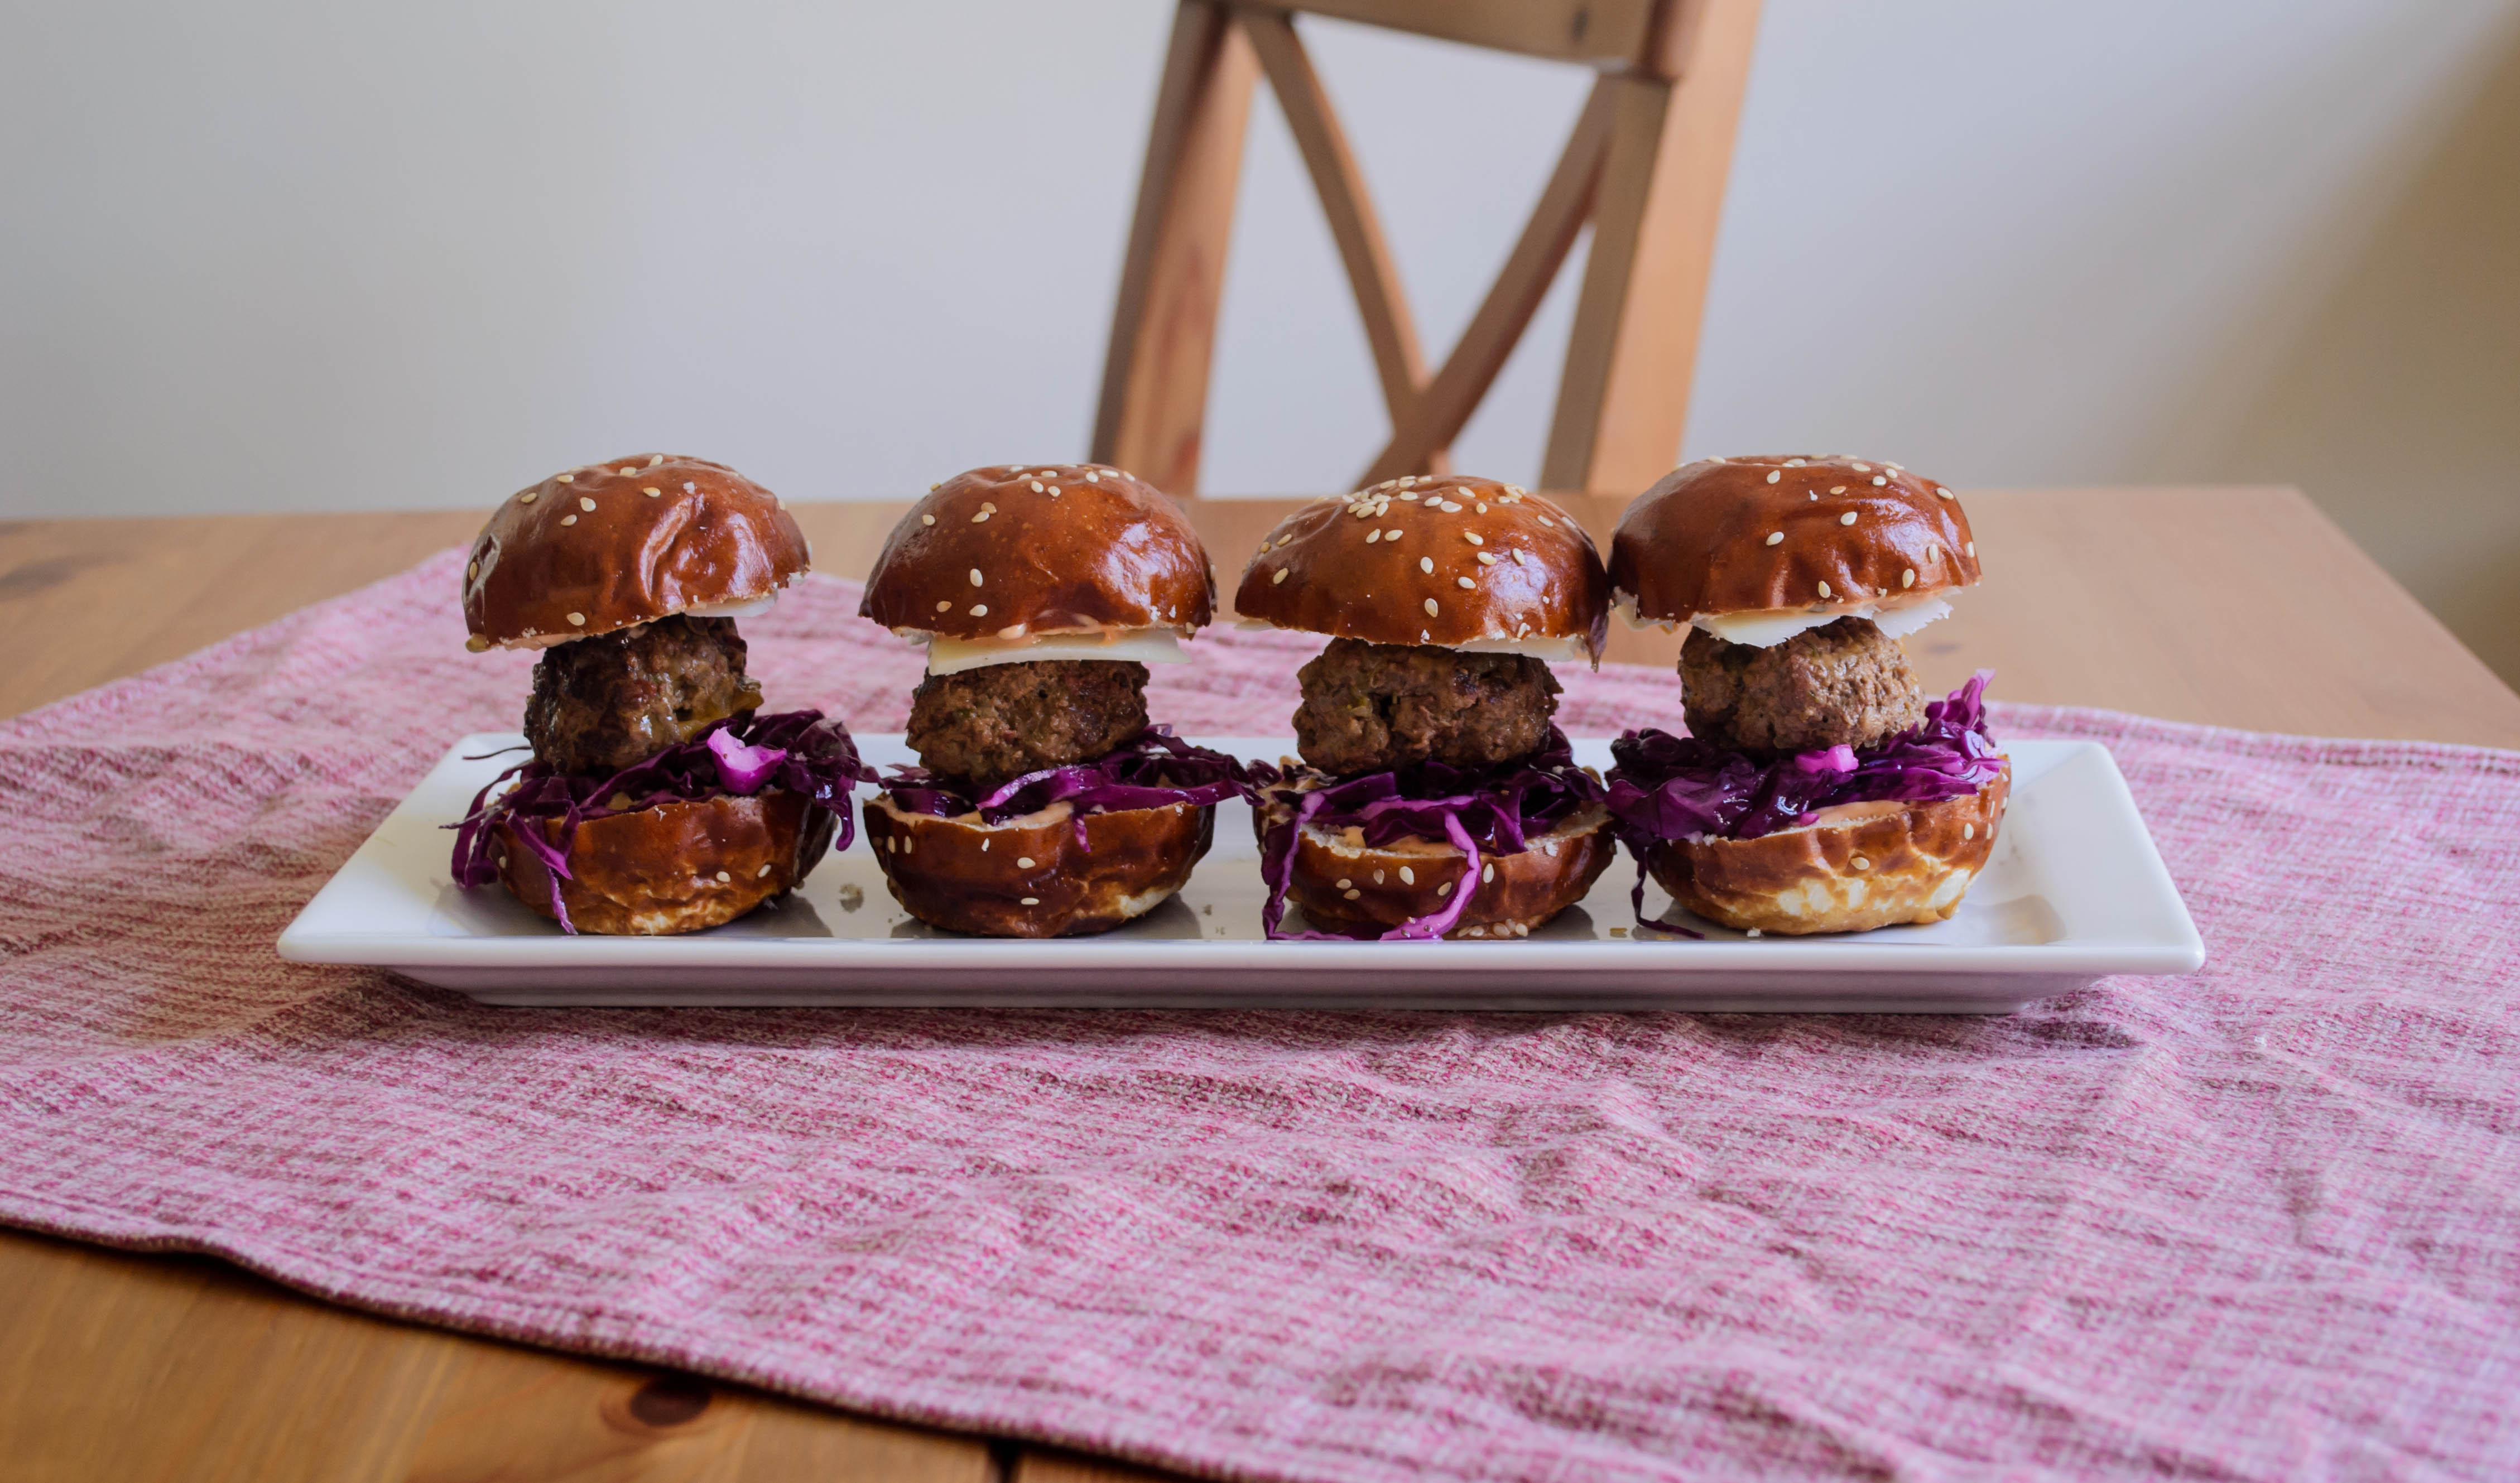
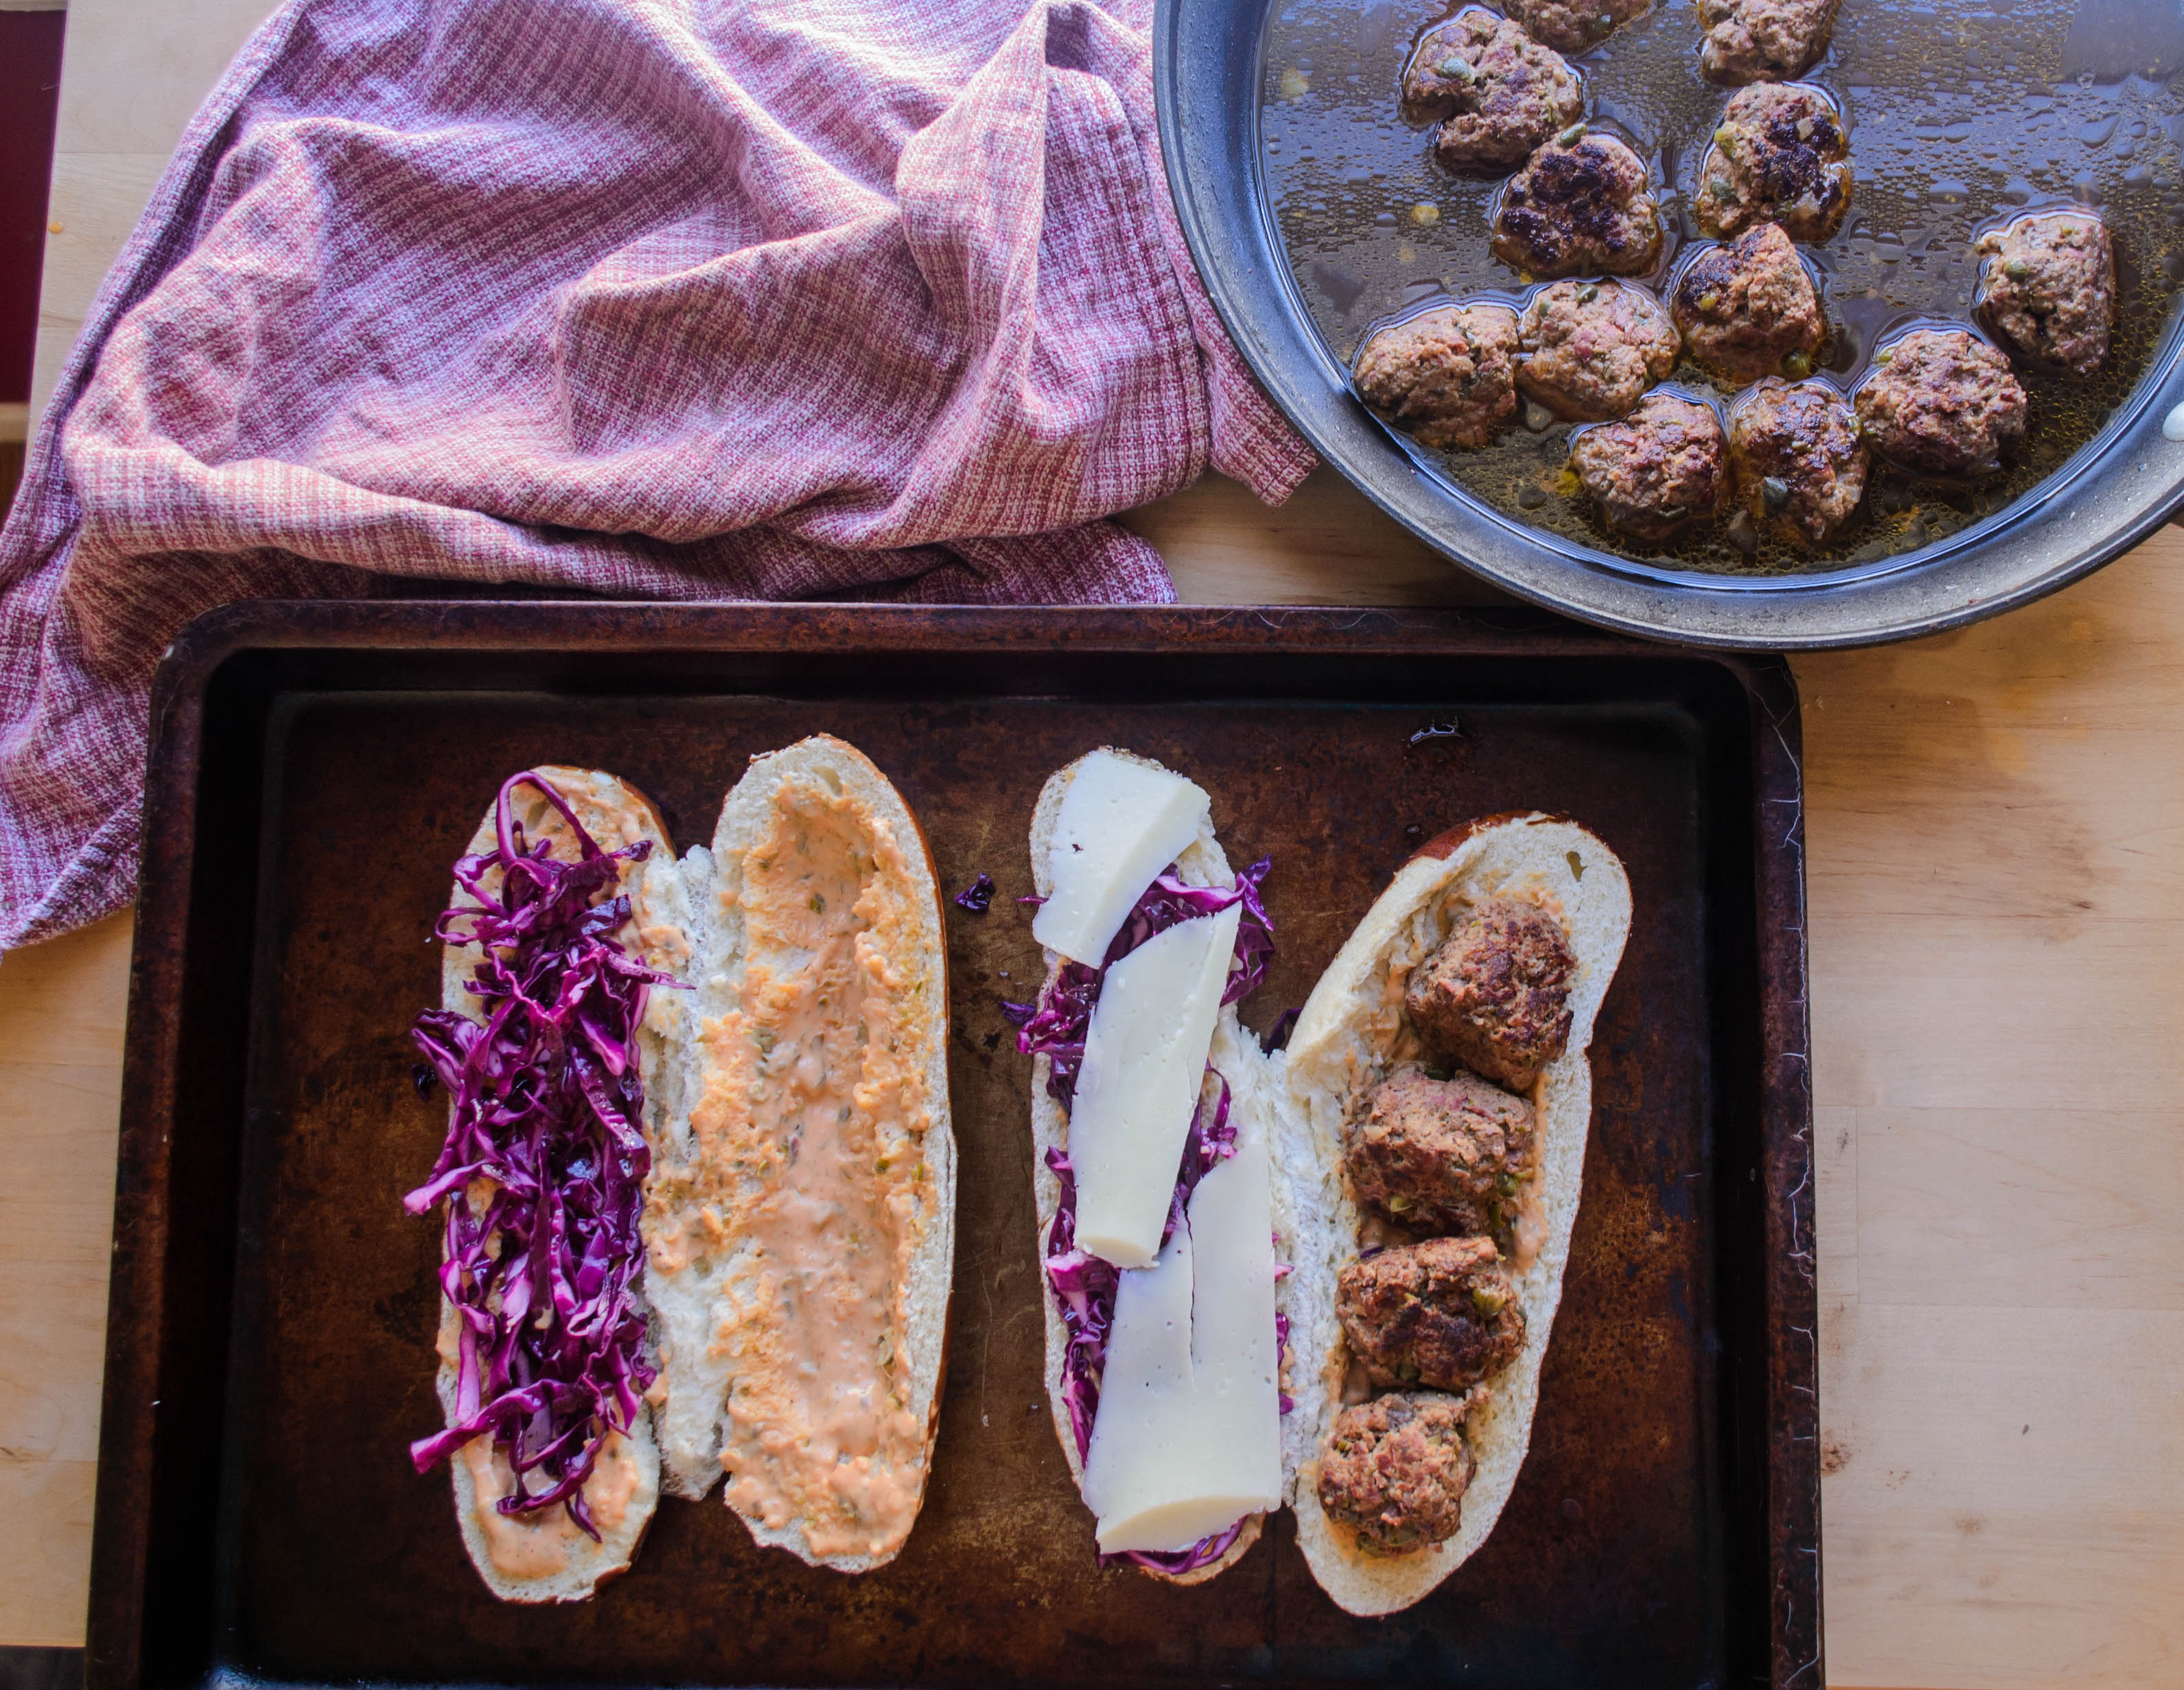
Though I originally thought of just jamming all the essentials into the meatball itself, I couldn’t imagine presenting this meatball in any other format than a sandwich. Thus, the cabbage, here lightly pickled rather than deeply brined (which, if you’re keeping track, needs to sit for a few hours before you make the sandwich), and the cheese, remain outside the meatball itself. As for the dressing, I spice up the original by adding sriracha and grated garlic to the standard ketchup and mayonnaise blend, and throw in some minced capers instead of the dill pickles. And I know, this is an affront to authenticity, but I couldn’t picture a quartet of meatballs sitting easily between two slices of rye bread, so I exchanged, keeping the depth of color but not the precise flavor, and went with a pretzel roll.

And if a regular pretzel roll isn’t enough for you, I found these at my Whole Foods:

2015 Blog August-0326That’s right, mini pretzel rolls. Pretzel roll meatball sliders. I know. But I couldn’t help myself.

2015 Blog August-0358Our assessment? These are some goooood meatballs. The bits of pastrami mixed in with the beef makes them incredibly flavorful, and you can definitely taste the dill and the mild pickled essence of the capers in the final product. I love the crispness of the cabbage – it’s not as strongly briny as sauerkraut, but it is bright with flavor and retains some texture, which is a nice addition. As we finished our sandwiches, N. turned to me and declared that these were his favorite meatball thus far. I asked him why, and he said “they’re just so… so savory!” So there you are. A most savory meatball, for my own twist on the ultimate dad-sandwich.

2015 Blog August-0355

Reuben Meatball Sandwiches
Makes 4 sandwiches or 16 sliders
For cabbage:
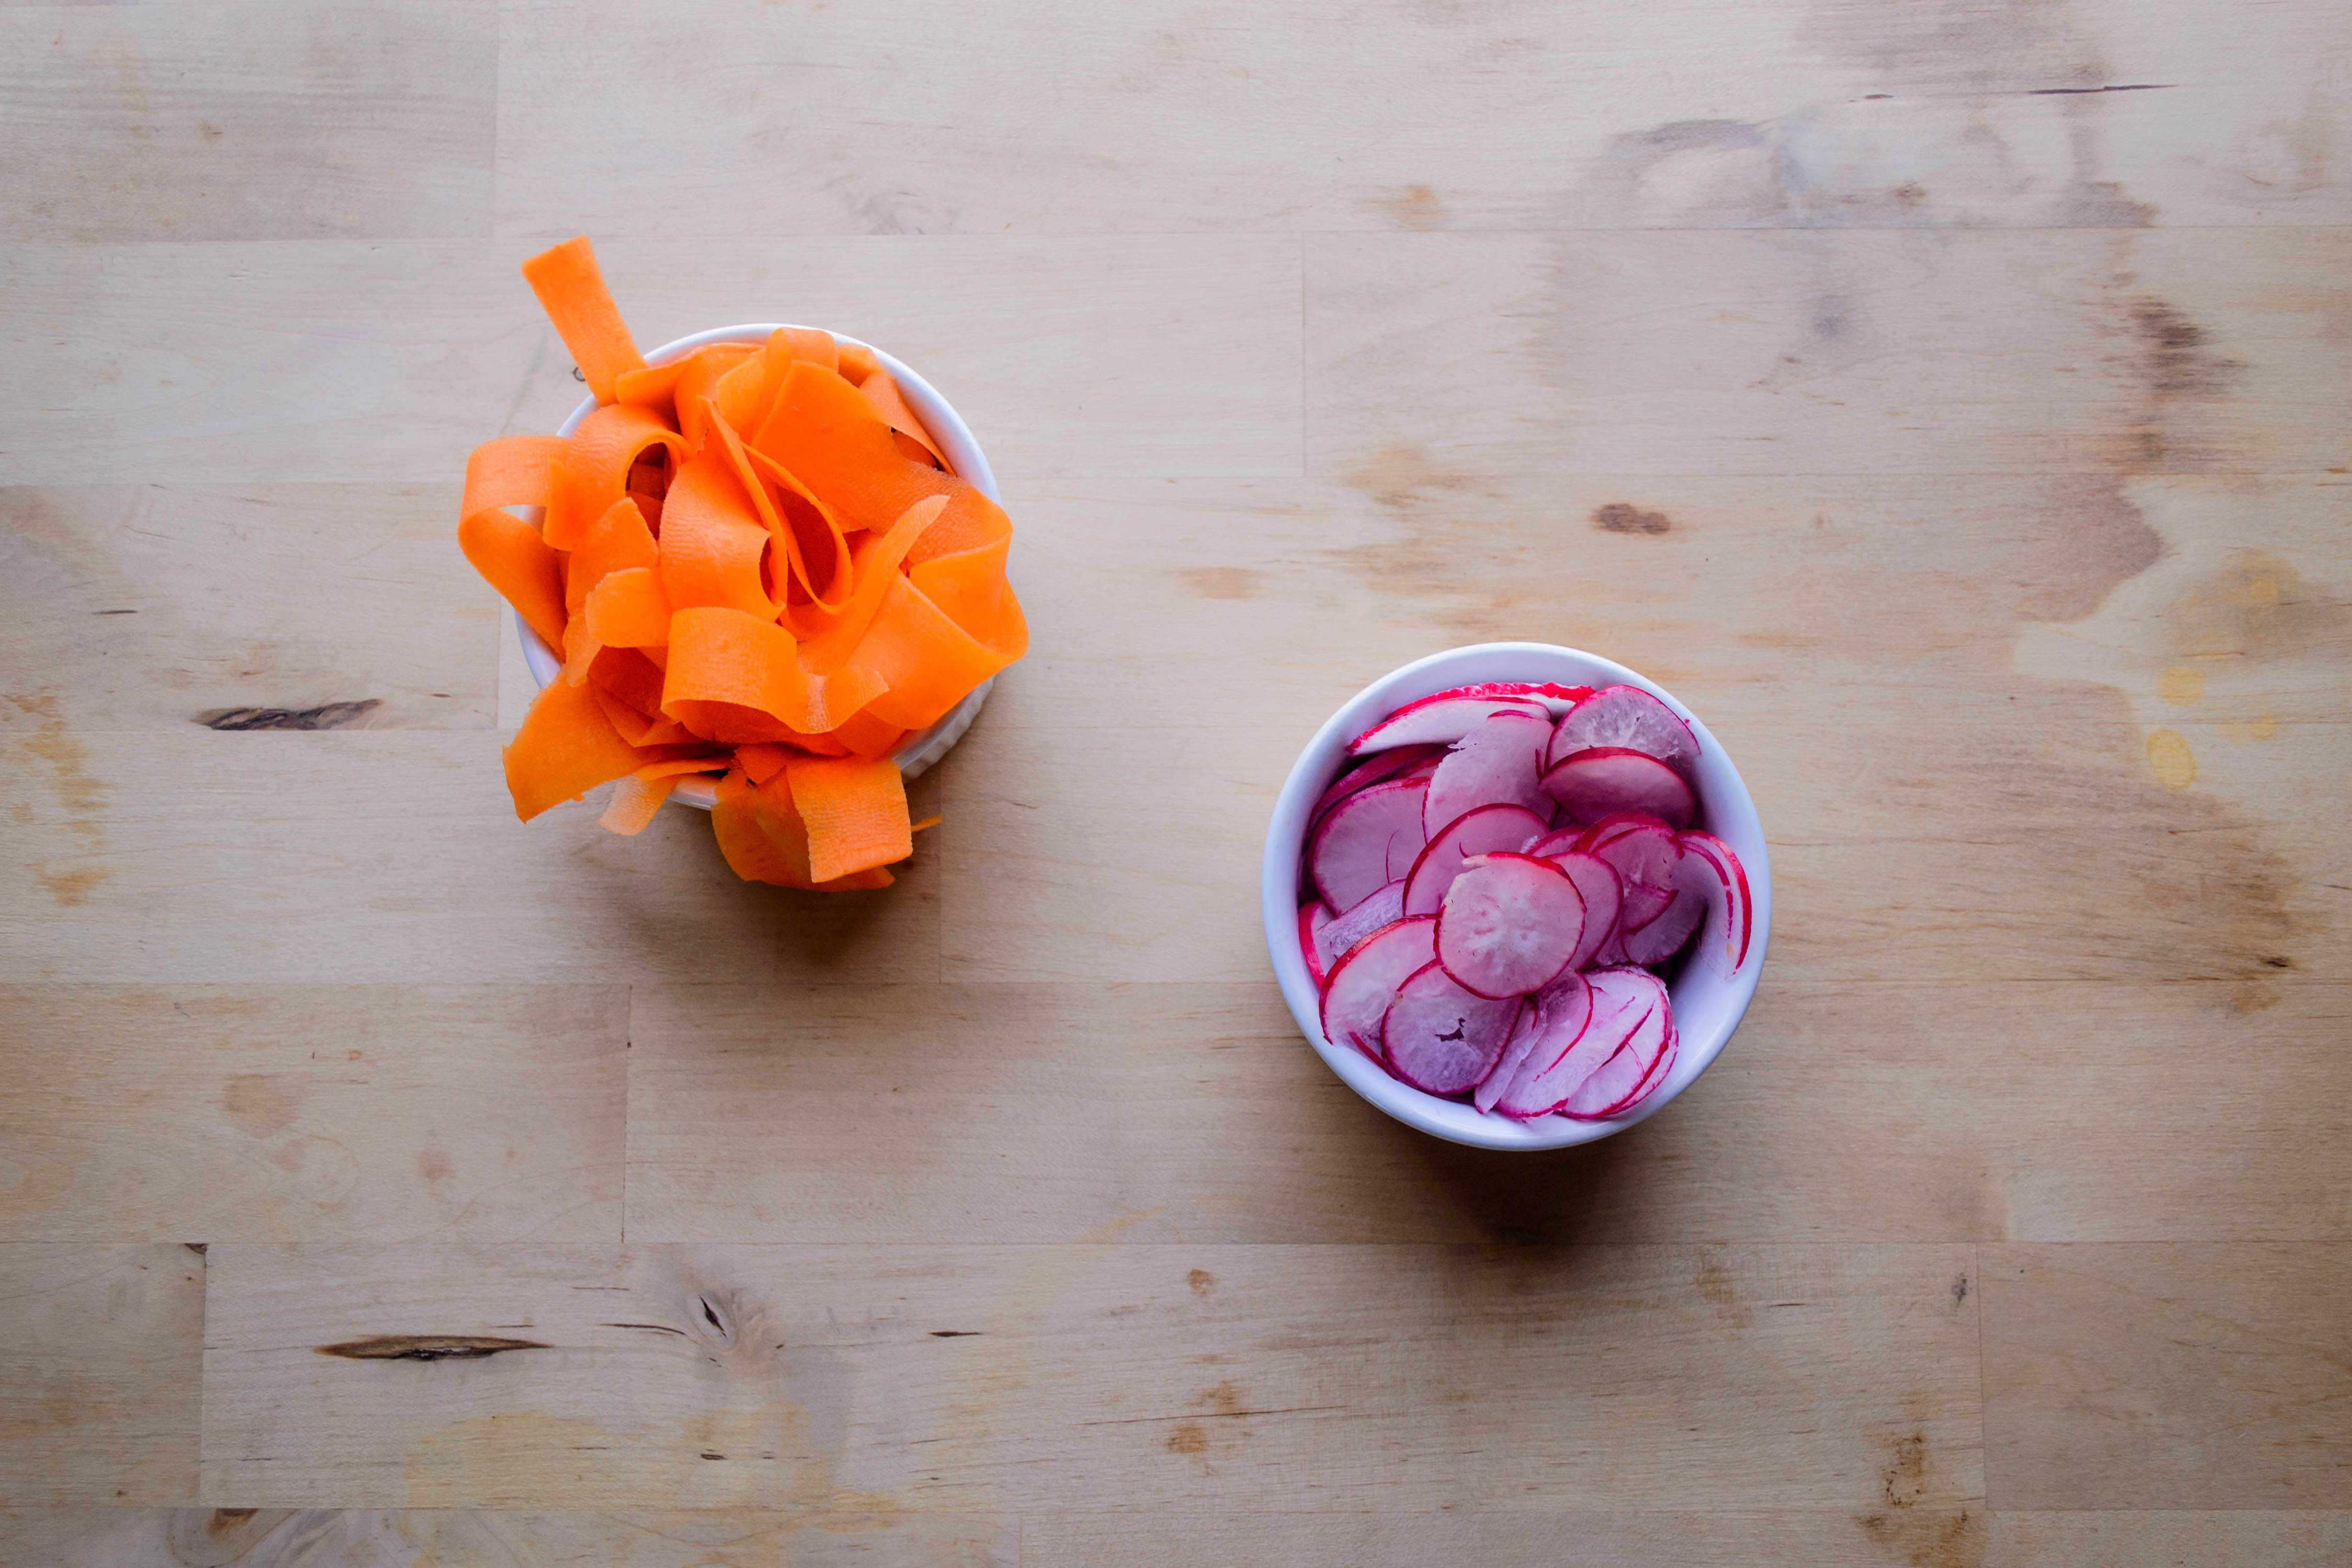
2 cups finely sliced or shredded red or green cabbage
1 teaspoon kosher salt
1 teaspoon sugar
½ teaspoon celery seeds (optional)
1 teaspoon apple cider vinegar
2 teaspoons olive oil
For meatballs:
¼ cup minced red onion
1 pound ground beef (I recommend at least 85% lean, 15% fat. Less fat could result in a dry meatball)
¼ pound pastrami or corned beef, finely diced
2 tablespoons capers or dill pickles, coarsely chopped
1 tablespoon finely chopped fresh dill
2 tablespoons mayonnaise
2 tablespoons ketchup
1 teaspoon caraway seeds, optional
¼ teaspoon salt
¼ teaspoon pepper
3-4 tablespoons olive oil
2-3 cups beef or chicken broth
For sandwich:
4 pretzel rolls or rye rolls of about 8 inches in length, or 16 slider buns
¼ cup mayonnaise
¼ cup ketchup
1 tablespoon sriracha, or to taste
2 cloves garlic, finely minced and then crushed into paste with the flat of a knife
2-3 tablespoons minced capers
black pepper to taste
sliced or grated swiss cheese (as much as desired for each sandwich)


  • In a medium bowl, toss the cabbage with the other slaw ingredients: the salt, the sugar, the celery seeds, the vinegar, and then the olive oil. Let sit at room temperature for at least two hours, tossing occasionally, or refrigerate overnight.
  • For the meatballs, heat 1 tablespoon of olive oil in a large skillet and add the onions. Cook over medium-low heat until the onions are quite tender and just starting to take on some color – about 15 minutes. Set aside to cool.
  • Combine remaining meatball ingredients in a large bowl and mix lightly with your fingertips to combine evenly. The pastrami will want to stick together, so be sure to mix attentively so it integrates well. Add the onions last, once they’ve had time to cool.
  • Heat up 1-2 teaspoons of the olive oil in a large skillet over medium-high heat. When it shimmers and spreads easily, drop in a teaspoon of the meatball mixture, flatten it out, and fry about a minute on each side, or until cooked through. Taste for seasoning, and adjust salt and pepper accordingly for the rest of the mix.
  • Wet your hands for less sticking, and roll the meat mixture into 16 meatballs of equal size – they will be somewhere between a walnut and a golf ball in diameter.
  • In the same large skillet in which you fried the tester, heat the remaining olive oil over medium-high heat. When it is shimmering and spreads easily in the pan, add the meatballs in a single layer, not touching one another (you will likely need to fry in two batches). Brown on all sides (about 2 minutes on each surface), then remove to a clean plate and repeat with the remaining meatballs.
  • You will likely have a lot of residual fat in your skillet. Wipe it out (no need to wash – a paper towel will do) and then return it to the heat. Add the broth and bring it to a simmer, then carefully relocate the meatballs back into the skillet. You want enough broth to come about halfway up the meatballs. Clamp on the lid, turn the heat down to medium or medium-low, and simmer for 15 minutes, turning each meatball once about halfway through.
  • While the meatballs simmer, start your sandwich construction. Split the rolls you’ll be using and scrape out some of the fluffy interior – we need to make room for the meatballs to nestle. Set the open rolls on a baking sheet and preheat your broiler.
  • In a small bowl, combine the ¼ cup mayonnaise, ¼ cup ketchup, the sriracha if desired, the pasted garlic and the finely minced capers. Add black pepper to taste. Spread about a tablespoon on each side of your sandwich rolls (or about a teaspoon, if you are using slider buns).
  • Pour off any liquid your lightly pickled cabbage may have exuded, then add a few tablespoons of the cabbage to one side of your sandwich roll, right on top of the sauce. Top the cabbage layer with a thin layer of swiss cheese.
  • When the meatballs are done, wedge four per sandwich (or 1 per slider) into the space you made by scraping out some of the roll’s interior. Top them with a thin layer of cheese as well, then carefully insert the baking tray of sandwiches into the broiler and cook, watching carefully, just until the cheese is nicely melted.
  • Squash the sandwich closed and serve immediately, ideally with a good, dark beer.

Arugula and Feta Pasta with Lemon Garlic Crumbs

2015 Blog August-0259I know what you must be thinking. I rhapsodize about meatballs, toss around semi-exotic ingredients you might have to go to multiple stores to obtain, advocate that you turn zucchini into noodles, and then disappear for almost three weeks with only a few photos to tide you over.

2015 Blog August-0227During those weeks, I must admit I didn’t cook much. We were traveling, making our annual pilgrimage to Oregon where we attended a wedding, stayed with good friends, single-handedly prevented the Cascadia quake by staying in a hotel that overlooked the ocean, N. bought a banjo, and I pulled a muscle in my back. (We also discovered the glory that is a chocolate stout float, but more on that in a few weeks.)

2015 Blog August-0237Not much makes you look forward to an eight-hour car ride less than having a pulled muscle in your lower back. Apart from trying to get comfortable and working to stay awake through the muscle relaxers I was taking (man do those things knock you out!), I sorted through what had become unexpectedly difficult to accomplish without the muscle just left of your spine: spitting out toothpaste without dribbling it down your front. Shimmying into a pair of shorts – your feet and ankles are suddenly so far away! Rolling over in bed. Hobbling across the street at a snail’s pace while the kindly drivers on either side regret waving you forward. Filling and then draining off a pot of pasta water.

2015 Blog August-0240Cooking, thus, when we got home, had to be simple at first, and required some of N.’s help for the parts that had become surprisingly heavy. Fortunately, I’d been hoping to repeat this simple little pasta dish: capellini, also known as angel hair, tangled together with lightly wilted arugula and salty crumbles of feta, topped with an aromatic, heavy dose of crunchy breadcrumbs flavored with garlic and lemon zest. The whole thing only uses two pans, it requires only a handful of ingredients, none particularly exotic, and it takes a mere twenty minutes or so to throw together, since most of the prep and cooking of the breadcrumbs can be done while you’re waiting for the pasta water to boil.

2015 Blog August-02422015 Blog August-0243

2015 Blog August-0246If you aren’t accustomed to having arugula in your fridge, you should be – it’s a wonderful go-to green for salads and a refreshingly different take on pesto. Delicate but peppery, it’s also called rocket and is one of my favorite salad bases. As for the topping, I’m using panko – those delightfully brittle shards that are Japan’s answer to the breadcrumb, and unquestionably my favorite type. You wouldn’t want them for your meatballs, where the goal is light, springy absorbency, but once toasted, they make an addictively perfect crisp topping for basically anything. Since they don’t taste like much, I’ve bumped up the flavor with lemon zest, a healthy bit of grated garlic, and some red pepper flakes for N., who likes that hit of warmth on the back of the throat.

2015 Blog August-0249Coming home at the beginning of August is a bittersweet proposition, because at once it means a glory of summer fruits and more vegetables at the Farmers’ Market than my market bag or my wallet can handle, but it also means the first day of classes looms ever closer on the horizon. And as nice as it is to be home, the fact that it will be at least another year before we see all the friends we just hugged goodbye is a pang quite different from my slowly healing back muscle. This week, then, we’ve covered a bit of the bitter, with the peppery greens and the briny sharpness of the cheese. Next week, inspired by a bourbon-loving friend I didn’t get to see on this trip, I want to make up for it with something sweet.

2015 Blog August-0252

Arugula and feta pasta with lemon garlic crumbs
Serves 4 very hungry diners, or 6 less hungry diners
6 tablespoons olive oil, divided
1 cup panko breadcrumbs
¼ teaspoon salt
¼ teaspoon red pepper flakes
1 tablespoon grated garlic (from about 4 cloves)
1 tablespoon lemon zest (from 1 large or 2 small lemons)
8 ounces capellini or angel hair pasta
¼ cup fresh lemon juice (from 1 large or 2 small lemons)
5-6 ounces baby arugula
4 ounces feta, crumbled


  • Heat a large, lidded pot of well-salted water over high heat. When it comes to a boil, add the capellini and cook according to package directions. While you wait for the water to boil, however, make the breadcrumbs and prep the other ingredients, as detailed below.
  • Heat 2 tablespoons of the olive oil in a 10-inch skillet over medium heat. When it is shimmering, add the panko breadcrumbs, the salt, and the red pepper flakes. Toast over medium heat, stirring almost constantly to brown evenly and prevent burning.
  • When the crumbs are golden, which for me was about 2-3 minutes, add the grated garlic and lemon zest and stir well to evenly distribute. The zest and garlic will want to clump up, so stir assertively. Cook, stirring, for another 1-2 minutes until the mixture is fragrant and nicely browned. Remove from heat and set aside.
  • By now, your water should be close to or already boiling. Add the pasta and stir to submerge it. Cook with the lid off to al dente, following the package directions. As soon as the pasta is done, drain immediately into a colander or strainer.
  • Add the remaining 4 tablespoons of olive oil to the now-empty pasta pot and swirl it over medium-low heat to evenly coat the bottom of the pot. Add the lemon juice, then the pasta, and toss with tongs to coat evenly with oil and lemon juice.
  • Dump in the arugula and use the tongs to gently integrate it with the pasta. When the arugula is gently wilted, turn off the heat and sprinkle in the crumbled feta cheese. Use tongs again to toss so the cheese is evenly distributed.
  • Serve hot in large, shallow bowls, and top each serving with about 2 tablespoons of the crumbs.

Los Feliz Biscuits and Gravy: poblano and white cheddar biscuits with chorizo gravy

Food blog July 2015-1117According to adage, breakfast is “the most important meal of the day,” and while the heavy, sweet or savory, sometimes grease-laden offerings that make up a truly excellent breakfast are some of my favorite meal options out there, if I eat them first thing in the morning I’m going to feel ill. Give me a bowl of bran flakes or a slice or two of toast in the morning, then move to the eggs, the bacon, the biscuits, the sausage, the waffles, as the day eases on. That’s why I get so excited, and wax eloquent so often here, about breakfast-for-dinner.

Food blog July 2015-1100But for a 30-something living in an urban area like Los Angeles, breakfast food of this ilk means something else: brunch. Food that is fatty and greasy in the best possible way washed down with a mimosa or three to compensate for the previous night’s revelry – this is the true calling of a large plate of breakfast meats, scrambles, and toasted, syrup-bearing stacks. And here, at least, walking into a restaurant for brunch entails working your way through a crowd of plaid and maxi skirts, tilted fedoras, gladiator sandals, and the occasional waxed mustache. So, you know, hipsters.

Food blog July 2015-1104A few months ago, N. and I wandered through a little enclave called Los Feliz just south of Griffith Park after a failed attempt to visit Griffith Observatory (on a temperate weekend, with clear skies, there’s zero chance of finding parking there more than half an hour after it opens. What fools, we). On our way to a local bookshop, we ran into one of his coworkers and her wife having brunch, and it suddenly seemed like exactly the right thing to do. We unofficially added “eat brunch at every restaurant in Los Feliz” to our LA-to-do list.

Food blog July 2015-1109Brunch in Los Feliz – like many places east of Hollywood as highway 101 cuts south toward downtown – means hipster paradise with a heavy dose of East LA flavor: huevos rancheros, chilaquiles, chorizo folded into a thick, fluffy omelet. The Mexican and Latin influence on that side of the city makes for a glorious contribution to any brunch (or, as my sister put it, a meal that is perfect for “a Sunday at 11AM or any night at 8PM or later”).

Food blog July 2015-1106Our first entrée (haha) into the Los Feliz brunch scene was late on a Sunday morning, seated outside, as you always should be, so you can watch the show walk past: rompers and sundresses, stilettos surely too high and too spiky for church, bowties and converse all-stars worn un-ironically on the same person. Some passersby are accompanied by their pit bulls and chihuahuas, who often sport their own wardrobes, and pause to jangle their collars against the metal water bowls left outside for them by many of the businesses along the main drag. But once our food came, I don’t think we noticed another single pedestrian. N. had huevos rancheros, and we agreed they were a good representation – the black beans were meaty and savory and well-seasoned, and the fresh salsa was good – but my dish was the real star: poblano and white cheddar biscuits with scrambled eggs and a chorizo gravy. Flaky, cheesy mounds draped in a bright orange, lightly spicy sauce that, even though we’d promised to share, made me reluctant to relinquish my plate. Think classic biscuits and sausage gravy, but with neighborhood flavor.

Food blog July 2015-1107A dish like that only means one thing: restaurant recreation. Even as we asked for the check, I was already considering how I would make this at home. I wanted cheesier biscuits, more roasted poblano, and a stronger chorizo presence in the gravy. This resulted, in my version, in a gravy stronger in flavor but a bit less rich, and biscuits to rejoice over – flaky, crisp and golden on top, aggressively cheese-laden with obvious hits of smoky poblano inside. Plus, once punched out the biscuits freeze perfectly, so it makes sense to bake just what you need and save the rest for another lazy morning. It’s a brunch (or lunch, or dinner) option that will remain permanently on our rotation.

Food blog July 2015-1112Brunch in Los Feliz was, then, a successful voyage in many ways, and clearly our real challenge will not be exploring the area for its brunch options, but convincing ourselves to order something different every time, because once you’ve found an option as fulfilling as this, trying something new is a gamble I’m sometimes unwilling to take.

Food blog July 2015-1113Serving suggestions: because the restaurant’s offering was pretty perfect as it was, I copied their addition of scrambled eggs between the biscuit and the gravy, but the eggs are really just an extra luxury. You could also easily pair this with a pile of crispy hash browns or homefried potatoes, which would be an excellent match for the gravy. Though I don’t have much experience with soy-based sausages, a good soyrizo or chipotle field roast sausage would likely make an excellent vegetarian sub for the chorizo, if you want to go meatless. You might have to add a little extra fat to the pan, though, when you cook them.

Food blog July 2015-1114This dish is best, of course, the first day. The biscuits are never as crunchy and warm after that, and the gravy does tend to do that thing gravy does where it gets thicker but also separates overnight in the fridge. But I think, with four diners round the table and ten biscuits to share between you, the last drippings of gravy won’t be long for this world.

Food blog July 2015-1124

Los Feliz biscuits and gravy
Serves 4
For biscuits:
1 poblano pepper (¼ – ⅓ cup, when chopped)
2 cups all-purpose flour
2 teaspoons sugar
1 teaspoon salt
2 tablespoons baking powder
6 tablespoons cold butter, cut into chunks
6 ounces buttermilk (about ¾ cup)
1 cup extra sharp white cheddar cheese, grated or in small cubes
For chorizo gravy:
9 ounces chorizo
2 tablespoons flour
2 cups whole milk, warm or at room temperature
salt and pepper to taste (depends on your chorizo – mine didn’t need any)
To serve:
softly scrambled eggs: 2 per person
2 tablespoons sour cream
1-2 teaspoons milk or cream
1-2 tablespoons thinly sliced chives or green onions, dark green part only


  • Roast poblano pepper over a grill or gas flame – about 10 minutes, turning when needed – until the skin is almost entirely blistered and black. Place in a glass bowl, cover tightly with plastic wrap, and let it steam for 20 minutes to loosen the skin and soften the flesh. After 20 minutes, remove the pepper from the bowl and use a paper towel, knife blade, or your hands to scrape off the skin (some illustrative photos here, if you need them). Remove stem and seeds as well, then dice finely for ¼ – ⅓ cup of roasted pepper bits. The pepper pieces should be room temperature when added to biscuit dough – plan accordingly.
  • Preheat the oven to 400F and line a baking sheet with parchment paper. To make the biscuits, whisk together the flour, salt, sugar, and baking powder in a medium bowl. Blend in the cubes of cold butter using a pastry cutter or your fingertips. Butter bits should be the size of small peas. Add the cooled diced poblano and the cheese and use a fork to integrate, then pour in the buttermilk and, using a fork or your fingers, bring together into a ball of soft dough.
  • Turn the dough out onto a well-floured board and use a floured rolling pin or the palms of your hands to roll or press the dough into a rectangle about ½ an inch thick. Fold the dough into thirds, then roll out again. Repeat, again folding the dough into thirds and then rolling it out; this creates more flaky layers. If the dough sticks to your board, use the flat blade of a butter knife or a pastry scraper to help you lift it free.
  • After you’ve rolled and folded, rolled and folded, and rolled once more (so you’ll have done a total of six folds), use a round cutter (or the lip of a glass) to punch out biscuits. Push the cutter straight down through the dough; don’t twist until you are all the way through the dough, or you’ll crush the flaky layers! Repeat, placing the biscuit rounds on your parchment lined baking sheet, until you can’t punch out any more rounds. Re-roll the dough scraps and repeat – with ½ inch thick dough, using a 3-inch cutter, you should be able to make about 10 biscuits.
  • Bake biscuits at 400F for 20 minutes, until their tops are golden and some cheese has oozed out to make lacey crisps around their edges.
  • While the biscuits bake, make the chorizo gravy: in a medium skillet, cook the chorizo over medium heat, stirring occasionally, until it is cooked through and nicely browned. This is difficult to see on some chorizos, because they are quite wet and reddish orange in color; look for a textural difference to determine that it is cooked.
  • When the chorizo is cooked through with brown bits and lightly crusty, chewy bits, sprinkle the flour over it and stir through to combine. Cook the flour with the chorizo for 1-2 minutes, then slowly begin adding the milk, whisking constantly as you do so. I like to pour in about ¼ cup at a time, whisk until the mixture is homogenous again, then add the next installment of milk.
  • With all the milk added, continue to whisk slowly until the mixture comes to a simmer. You will notice it thicken as it warms, but it won’t reach its final viscosity until it comes to a boil. At that point, lower the heat to a simmer, taste for seasoning, and add additional salt and pepper if your taste buds require it.
  • To serve, combine 2 tablespoons sour cream and 1-2 teaspoons milk or cream in a small dish or in a squeeze bottle. Place two biscuits on each plate, top with scrambled eggs, ladle on some gravy, and squirt or drizzle the sour cream sauce on top. Sprinkle with chopped chives or green onion, and serve immediately.

Carrot Cake Breakfast Bars

Food blog June 2015-1023The cake world is populated by two camps, it seems to me: those which are definitively dessert, and those which are trying to be breakfast (I’m looking at you, coffeecake). Some of the “trying to be breakfast” denizens bridge the gap by taking the appellation “bread” rather than cake – banana and zucchini bread are the chief players in this particular masquerade. But they are, at heart, essentially still cake: sweet, plenty of fat from oil or butter, and sometimes interspersed with shards of chocolate for good measure. Carrot cake, the other popular vegetal option, doesn’t even pretend. It just comes right out there and, whether it’s for alliterative reasons or not, boldly declares itself a cake and leaves it at that.

Food blog June 2015-1002The idea of putting these long orange taproots into a sweet application came originally from the Middle Ages, when sugar was barely on the horizon and other sweeteners were hard to come by. Carrots as a cake ingredient have since had two spikes in popularity: once during the second world war, when sugar and honey were, again, in short supply, and once starting in the 1970s or so when it was touted not as a sugar-rationing option, but as a “healthy cake.” Really though, if we’re honest today’s carrot cake is far from healthy. It may have a discernible threading of carrots, and it’s frequently studded with nuts, raisins, sometimes even coconut or pineapple, but it is also loaded with oil for moisture and draped with that miracle that is cream cheese frosting.

Food blog June 2015-1000During a text conversation with my sister about golden raisins (probably 70% of our texts are about food), I developed a craving for carrot cake. This is an irritating paradox that happens quite often to me during the summer: now that I have plenty of time on my hands, I frequently get the urge to embark on elaborate baking projects. However, because it’s summer and school is not in session, I don’t have a whole department of people to foist my creations off on. I only have N. and me, and we would both like to retain our svelte (haha) figures. My sister suggested turning carrot cake into a muffin so it could be consumed for breakfast, and I thought even easier might be a tray of breakfast bars – moist and flat and portable and loaded with carrots and golden raisins. Thus I’ve taken carrot cake – the cake that isn’t even pretending to be anything but a dessert – into the breakfast cakes camp.

Food blog June 2015-1003What resulted is not your traditional super moist, super tender carrot cake drowning in sweetened cream cheese (not that there’s anything wrong with that, mind you). After deciding on a breakfast version, I wanted something that was not, in fact, cake. Even if we didn’t want it for breakfast, we should be able to turn to it as a mid morning snack without suffering an instant sugar high. It might be a good option for N. to slice into after running. It should be more filling – more substantial – than your typical carrot cake, and very lightly sweet. It should definitely include both nuts and raisins, the nuts should always be toasted, and the spices should be more assertive than in your typical cake. I added oats in place of some of the flour, taking a hint from one of my favorite granola/energy bar recipes and toasting them first. I cut down on the quantities of oil and sugar that most recipes call for, and ended up with something very lightly sweet – the carrots and raisins contribute most of the bursts of sweetness, not the mere ½ cup of brown sugar. If you’re looking for something sweeter, bump up the sugar by ¼ cup, as I note in the recipe below.

Food blog June 2015-1005The worst thing about making a carrot cake is grating the carrots. Working from the always brilliant suggestions in The New Best Recipe, I eliminated the frustration of grated knuckles and bright orange fingernails and used the food processor. This ends up being a considerable time-and-dishes-saver, because you can also use it to chop the nuts, pulse the oats, and, as the recipe testers in TNBR devise, emulsify the oil with the eggs and sugar to make a frothy, perfectly combined syrup of wet ingredients that integrate smoothly and quickly. Toasting the nuts and the oats in the same 9×13 inch pan you’ll later bake the bars in means you’re only using, aside from various measuring and mixing utensils, a food processor, a single mixing bowl, and one baking dish.

Food blog June 2015-1019At first I considered making a simple cream cheese icing – just a breath of powdered sugar, and maybe some lemon juice to brighten it up – but found I didn’t want it after all. They were perfect, just as they were, and even better with a glass of iced chai. If you find you miss the frosting component, I’d suggest whisking a little honey or maple syrup into some room temperature cream cheese, maybe with a little lemon or lime zest if you’re feeling fancy, and adding a dab to the top of your bar.

Food blog June 2015-1020As well-spiced, fruit-laden desserts often do, these improve after a night of resting in the refrigerator, and are still just as good on the third or fourth day. This is perfect, really, because it means you can bake them the night before and have something all ready for an early breakfast before heading off on some summer adventure.

Food blog June 2015-1024Carrot Cake Breakfast Bars
Makes one 9x13x2 inch pan; 15-18 squares or bars, depending on how enthusiastically you slice them
1 cup old fashioned rolled oats
1 ½ cups pecans, walnuts, or a mixture
1 ½ cups all-purpose flour
1 teaspoon salt
2 teaspoons baking soda
2 teaspoons cinnamon
¾ teaspoon nutmeg
½ teaspoon cardamom
½ teaspoon ginger
¾ cup golden raisins
½ pound carrots, stem ends removed (approximately – for 2 cups finely shredded)
½ cup brown sugar for barely sweet, ¾ cup brown sugar for slightly sweeter
2 large eggs
1 teaspoon vanilla
1 cup vegetable oil


  • Preheat the oven to 350F. In a 9x13x2 inch pan, scatter the oats in as close to a single layer as possible. Toast in the oven at 350F for 15 minutes, until lightly golden and smelling strongly of oatmeal. Remove and pour into the belly of a food processor fitted with the metal blade.
  • In the same pan, scatter the pecans and/or walnuts and toast in the oven at 350F. Depending on the size of the nuts, pecans will take 5-7 minutes and walnuts will take 5-10 minutes. They are ready just as you begin to smell them, even if they don’t look it – they will darken as they cool, and burned nuts are unsalvageable. When ready, remove from oven and set aside to cool slightly.
  • While oats and nuts cool, whisk together remaining dry ingredients in a large mixing bowl: the flour, the salt, the baking soda, and the four spices.
  • Using the metal blade attachment, pulse the oats in the food processor 3 or 4 times, until some are fine and powdery but some are almost fully intact. Add to dry ingredient mixture and whisk to combine.
  • Add the toasted, cooled nuts to the food processor. Pulse 4 or 5 times until roughly chopped, then add to the dry ingredient mixture and again, whisk to combine.
  • Now replace the metal blade attachment in the food processor with the shredding disc. Feed the carrots through as close to vertical as possible for fine, thin shreds. You can peel the carrots before doing this if you want; I just scrubbed them off a bit. Transfer the finely shredded carrots to the bowl of dry ingredients. Add the golden raisins and fold them in with a rubber spatula.
  • Switch the food processor back to the metal blade attachment. Process the brown sugar with the eggs and vanilla until the mixture is frothy – about 20 seconds. With the machine still running, add the vegetable oil in a steady stream and continue processing until it is emulsified – another 20 seconds or so. The mixture will be surprisingly thick, almost like a butterscotch sauce in texture and in color.
  • Pour and scrape the emulsified oil mixture into the bowl of dry ingredients and carrots, and use a rubber spatula to fold them together until no hidden dry pockets remain. The resulting mixture will be thick, more like cookie dough than a standard cake batter.
  • Lower the oven temperature to 325F and spray the same 9x13x2 inch pan you used for toasting with a non-stick spray. Scrape the batter into the pan and use your rubber spatula to flatten it into an even layer. Bake at 325F until a toothpick inserted in the center comes out with just a few moist crumbs; 25-30 minutes.
  • Let cool in the pan for at least 15 minutes before slicing into bars or squares.

Spicy Carrot and Radish Herb Salad

Food blog June 2015-1064It’s dangerously easy to throw some greens into a bowl and crunch through them, but I think this is the kind of preparation that makes people think about salads as boring to make and to eat. With summer in gear and a series of weddings and reunions to attend within the next month or two, I find myself brainstorming salads creative and intriguing enough to hold my interest, so I can more easily convince myself to make choices that keep me responsible healthy fitting into my summer wardrobe. The easiest way of making a salad more exciting, it seems to me (besides just loading it up with cheese and some crisped pork product), is to take ingredients not usually used in a salad and jamming them in there anyway, lettuce be damned. For me, this generally takes the form of whatever dish I’ve been craving, transformed into something you can add an acidic vinaigrette and maybe a few crumbles of cheese to, toasting up a hunk of bread, and calling it dinner.

Food blog June 2015-1028This particular salad has two geneses. Lately I’ve been craving banh mi, with all its freshness and brightness, but I haven’t wanted to go through the whole production of making all the ingredients myself (which I’d insist upon, because I’m such a responsible foodie stubborn). Rather, I convinced myself, I wanted a salad inspired by a banh mi sandwich. What this meant was a collection of fresh and pickled vegetables, with some brightness from soft green herbs and some heat from jalapeño slices. I dithered over the pickled part, reluctant to devote multiple days to preparing for a simple salad, until I remembered a grain salad my friend S. exalted about a few years ago featuring lightly pickled carrot slices, along with some jalapeño and mint. Wheels turned.

Food blog June 2015-1033What we have here, then, is a salad that announces its summery freshness through bright, grassy herbs and crunchy cucumber, but still clings to the mild crispness of spring with ribbons of carrots and impossibly thin discs of radish. I find herb salads can get almost medicinal on the tongue, so a handful or two of baby greens tempers the sharpness of the herbs and the pucker of the vegetables after a 2 hour lemon juice bath, and brings this closer to what we usually think of as a salad. You could use any combination of greenery, but lately I’ve been obsessing over the “power to the greens” package from Trader Joe’s – baby chard, kale, and spinach, all tender enough that no stem removal is necessary. Add jalapeños, which I’ve put through the pickling process but you can certainly leave fresh, and you have a salad that pairs happily with almost anything.

Food blog June 2015-1048Serving suggestions: I can see this making a perfect base for grilled steak or salmon, with or without the addition of some tangy crumbles of goat cheese. I risked all to have it as a side for last week’s crab and shrimp balls, and though there’s a certain digestive peril to the fried + spicy pairing, hey, that’s what alka-seltzer is for. You could even force this back to its banh mi inspiration roots and stuff it inside a baguette or maybe a pita, with or without a protein accompaniment. In all cases, I’d recommend something sparkling to drink alongside – maybe a crisp prosecco or a hefeweizen with a thick wedge of citrus, or, if you prefer to go alcohol-free, a frosted glass of ginger beer with lime, for an intriguing contrasting spice.

Food blog June 2015-1062

Spicy Carrot and Radish Herb Salad
Serves 2-3 as a side salad
1 cup carrot ribbons (from 3-4 small carrots)
1 cup thinly sliced radish discs (from 5-6 radishes)
8-10 thin slices of jalapeño cut on the bias
3-6 tablespoons lemon juice (see options below)
2-4 tablespoons olive oil (see options below)
salt and pepper to taste
1 tablespoon capers
⅓ – ½ cup thin slices of seedless cucumber, cut on the bias
¼ cup cilantro leaves plucked from their stems
¼ cup mint leaves, torn if large, plucked from their stems
¼ cup parsley leaves plucked from their stems
2 tablespoons tender, pale green celery leaves, plucked from their stems, optional
1 cup mixed baby greens


  • Prepare carrots, radishes, and jalapeño. To make the carrot ribbons, peel carrots, then continue shaving off long pieces with your peeler from one side only. When the carrot gets concave and it’s difficult to make complete ribbons, flip it over and begin the shaving process again. Slice the radishes and jalapeños as thinly as you can or, if you are fancy, use a mandolin slicer (watch your fingers!).
  • For a quite spicy salad: In a large bowl, whisk together 3 tablespoons of lemon juice with 2 tablespoons of olive oil. Add salt and pepper to taste. Add the carrots, radishes, and jalapeños, toss gently to distribute, and allow them to marinate for about 2 hours. They will soften, pickle slightly, and the vegetables and dressing will take on the spice of the jalapeños.
  • After 2 hours and just before serving, add the capers, cucumbers, herb leaves, celery leaves (if using), and mixed baby greens to the bowl and toss lightly to combine. Lift out with clean fingers or tongs, let excess dressing drip off a bit, and position on serving plates.
  • For a moderately spicy salad: In a large bowl, whisk together 3 tablespoons of lemon juice with 2 tablespoons of olive oil. Add salt and pepper to taste. Add the carrots, radishes, and jalapeños and allow them to marinate for about 2 hours. They will soften, pickle slightly, and the vegetables and dressing will take on the spice of the jalapeños.
  • After 2 hours and just before serving, lift the lightly pickled carrots, radishes, and jalapeños out of the bowl and set them aside for a moment on a paper towel. Discard the remaining liquid in the bowl and wipe clean.
  • In the clean bowl, whisk together the remaining 3 tablespoons lemon juice and 2 tablespoons olive oil. Season to taste with salt and pepper. Add the vegetables back in, then gently toss with the capers, cucumbers, herb leaves, celery leaves (if using), and mixed baby greens. Lift out with clean fingers or tongs, let excess dressing drip off a bit, and position on serving plates.
  • For a mildly spicy salad: In a large bowl, whisk together 3 tablespoons of lemon juice with 2 tablespoon of olive oil. Add salt and pepper to taste. Add the carrots and radishes and toss gently to distribute. In another, smaller bowl, combine the jalapeño slices with 1 tablespoon lemon juice and a bit of salt and pepper. Allow all vegetables to marinate for about 2 hours. They will soften and pickle slightly, but the spice will not infiltrate the carrots and radishes as in the above preparations.
  • After 2 hours and just before serving, add the capers, cucumbers, herb leaves, celery leaves (if using), and mixed baby greens to the bowl with the carrots and radishes and toss lightly to combine. Drain the lightly pickled jalapeños from their lemon juice bath and add them to the salad as well, tossing gently again to combine. Lift out with clean fingers or tongs, let excess dressing drip off a bit, and position on serving plates.
  • Serve immediately – salad left in its dressing wilts quickly and loses its crisp appeal.


Peach Caprese Toasts

Food blog June 2015-0973If I were a TV chef, this would be one of those dishes I would cook outside. I’d greet you from my back patio kitchen (because of course I’d have one of those, complete with a great beehive shaped brick pizza oven), offer you a virtual cocktail, and commence a cheery narrative about summers in France when I was a kid, or how this particular combination of ingredients speaks to some cherished family memory. The peaches would have come from my backyard tree, I’d delight you by plucking the basil myself from a tiered herb garden right next to the outdoor bar, and obviously the mozzarella would have come from some local artisan selling fresh knobs of it at the local farmers’ market.

Food blog June 2015-0947But seeing as I don’t have an outdoor kitchen, and since I’d be a terrible TV chef (uncoordinated, messy, with a penchant for cooking in ripped jeans), I’ll admit that this lovely little snack emerged because I’m basically obsessed with caprese right now. After the triumphant caprese inspired meatballs of two weeks ago, my brain catapulted into summer, and all I want is fresh produce and grilled everything. Nothing says summer to me like a wide tray of gushing tomato wedges, mozzarella almost too soft to slice, and torn basil. If you add a drizzle of thick, syrupy balsamic, you’d better pour me a glass of wine, too, because I’m staying for a while.

Food blog June 2015-0954Despite the whole Southern California thing, though, I’m not ready to buy tomatoes just yet. Not even at our local farmers’ market (where I shamefully wasn’t locavore enough to look for mozzarella cheese). It’s just not time yet. There is, though, a vendor whose stall is always packed that had a nice selection of stone fruits this week. It seems a bit early for these as well, but when I could smell the peaches from a few feet away, I decided to risk it.

Food blog June 2015-0960Food blog June 2015-0962Though this rarely happens, these turned out exactly how I’d imagined them. Usually I can’t help myself from changing something as I go along, or skipping over or adding a step or ingredient, and it’s hard to stop the universe from offering up its own brand of “help” to produce unexpected results.

Food blog June 2015-0967Not this time. The peaches were juicy, the mozzarella was creamy and perfect, the basil was fresh and crisp, and I didn’t even burn the toast (believe me, that’s an accomplishment). I reduced my balsamic vinegar with a tablespoon of brown sugar, and I may never do it any other way; the sugar thickened it up faster, and it played well with the peaches, eliminating just the edge of the puckering tartness balsamic can have. Obviously, the whole thing went perfectly with a glass of cold, cold, slightly effervescent pink wine.

Food blog June 2015-0968Suggestions: as we were eating these, I was already talking about alternatives. You could, for example, add the cheese 30 seconds or so before removing the toast from the broiler, to start it melting into the bread for a softer end product. You could grill the peach slices, with or without a brush of butter or brown sugar, for a caramelized fruit flavor. You could even eschew the toast altogether and just offer a platter of layered peach and cheese slices with basil tucked in, as you would with a traditional caprese, and serve it up alongside whatever you’d grilled in your outdoor kitchen. Maybe even add in some cucumber slices for extra crunch. And not that it’s likely you’d have leftovers, but if you, say, casually stacked the peach slices and remaining balsamic syrup over a scoop or two of vanilla ice cream, and then you called me, I’d be happy to come and share it with you.

Food blog June 2015-0980

Peach Caprese Toasts
Serves 2-3 (easily doubled or tripled… go crazy!)
Most quantities here are according to your tastes (translation: approximate). Take the basics and do them up the way you like them best. No fuss. It’s summer.
½ cup balsamic vinegar
1 tablespoon brown sugar
12 slices of baguette, about ¾ inch thick (French or sourdough)
olive oil for drizzling
salt and pepper for sprinkling
2 small peaches
ball of fresh mozzarella (burrata would also be lovely, though a touch messy)
12 leaves fresh basil


  • Preheat your broiler. While it warms, make the balsamic syrup. Pour the balsamic vinegar and the brown sugar into a small pot and cook over medium heat until it comes to a boil. Lower the heat and simmer until the mixture reduces by half, then turn off the heat and let it sit. It won’t seem very thick during the boil, but just wait! It thickens as it cools into a tart, glossy syrup.
  • Spread baguette slices out on a cookie sheet and drizzle them with olive oil, salt, and pepper. You want a fairly even coating of oil for even browning. Broil, watching carefully to prevent burning, until the toasts are golden and crisp on top to your liking. For me this took about 3 minutes. Remove and let cool slightly, OR top each toast with mozzarella slices and broil just another 30-60 seconds until the cheese begins to melt.
  • To assemble, place a slice of mozzarella cheese on each toast (unless, of course, you already did with the melted option). Top that with a basil leaf, then a peach slice. Place on a platter or serving dish.
  • Use a spoon to drizzle on some of the balsamic syrup – I like a thin striped pattern back and forth across the whole thing.
  • If desired, you can also drizzle the top of the toasts with olive oil, and sprinkle with sea salt for a little extra lushness.
  • Serve immediately as an appetizer, preferably with something sparkling to drink.