Grapefruit Bars

Food Blog February 2015-0311It’s citrus season. The trees are heavy. An amble through my neighborhood right now would send you past oranges, mandarins, tangerines, lemons, and who knows what other hybrids and splices, all sagging on their branches, almost unable to bear their own weight. When we first moved here in the summer of 2012, I couldn’t believe how much fruit was wasted. Who in their right mind could let it just fall to the ground and rot? And yet as I type, my own lemon tree – sequestered away in its little corner of our backyard – is groaning with a load I can’t reach, its thick, sharp tangle of twigs protecting it from an invading ladder.

Food Blog February 2015-0237So when I cast about for a subject to post about this week, you’d think I would have wandered out and reached up, pulling what fruits I could reach down from my own harvest. But lemons aren’t my favorite. Oh I love a fresh, pulpy lemonade. I could eat lemon curd straight out of the jar. And a tiny, hangnail-puckering squeeze into a chicken or a bean dish is almost essential. But if I’m going to celebrate citrus season and its glories, I’m going to go with my favorite: grapefruit.

Food Blog February 2015-0303Sometimes maligned for its stubborn, bitter pith and its curious ability to render certain drugs either useless or too effective, it is my favorite because it is so complex. Sweet, tangy, sour, infernally juicy, it, and not orange juice, is my choice of beverage when I’m sick. I love the smell of the peel under my fingernails. I could eat grapefruit (and have) until my tongue stung and my lips swelled with the tartness.

Food Blog February 2015-0304But if grapefruit is a bit testy as a raw product, it’s equally challenging in a dish. There are (at least compared to other citrus fruits) a paucity of grapefruit dessert recipes out there, which has always seemed like a shame to me. The lovely play of sweet and sour with that beautiful color (I prefer a red grapefruit myself) seems perfect to match with sugar.

Food Blog February 2015-0306Tired of the standard, tried-and-true lemon bar, then, I set out to conquer a grapefruit version. My first time through yielded highly positive results – grapefruit zest and lemon zest in the shortbread crust, just for some extra bright punch, a silky smooth custard layer of pale salmon pink, and a careful dusting of powdered sugar across the top. A few adjustments, a bit less flour, and it would be perfect.

Food Blog February 2015-0307
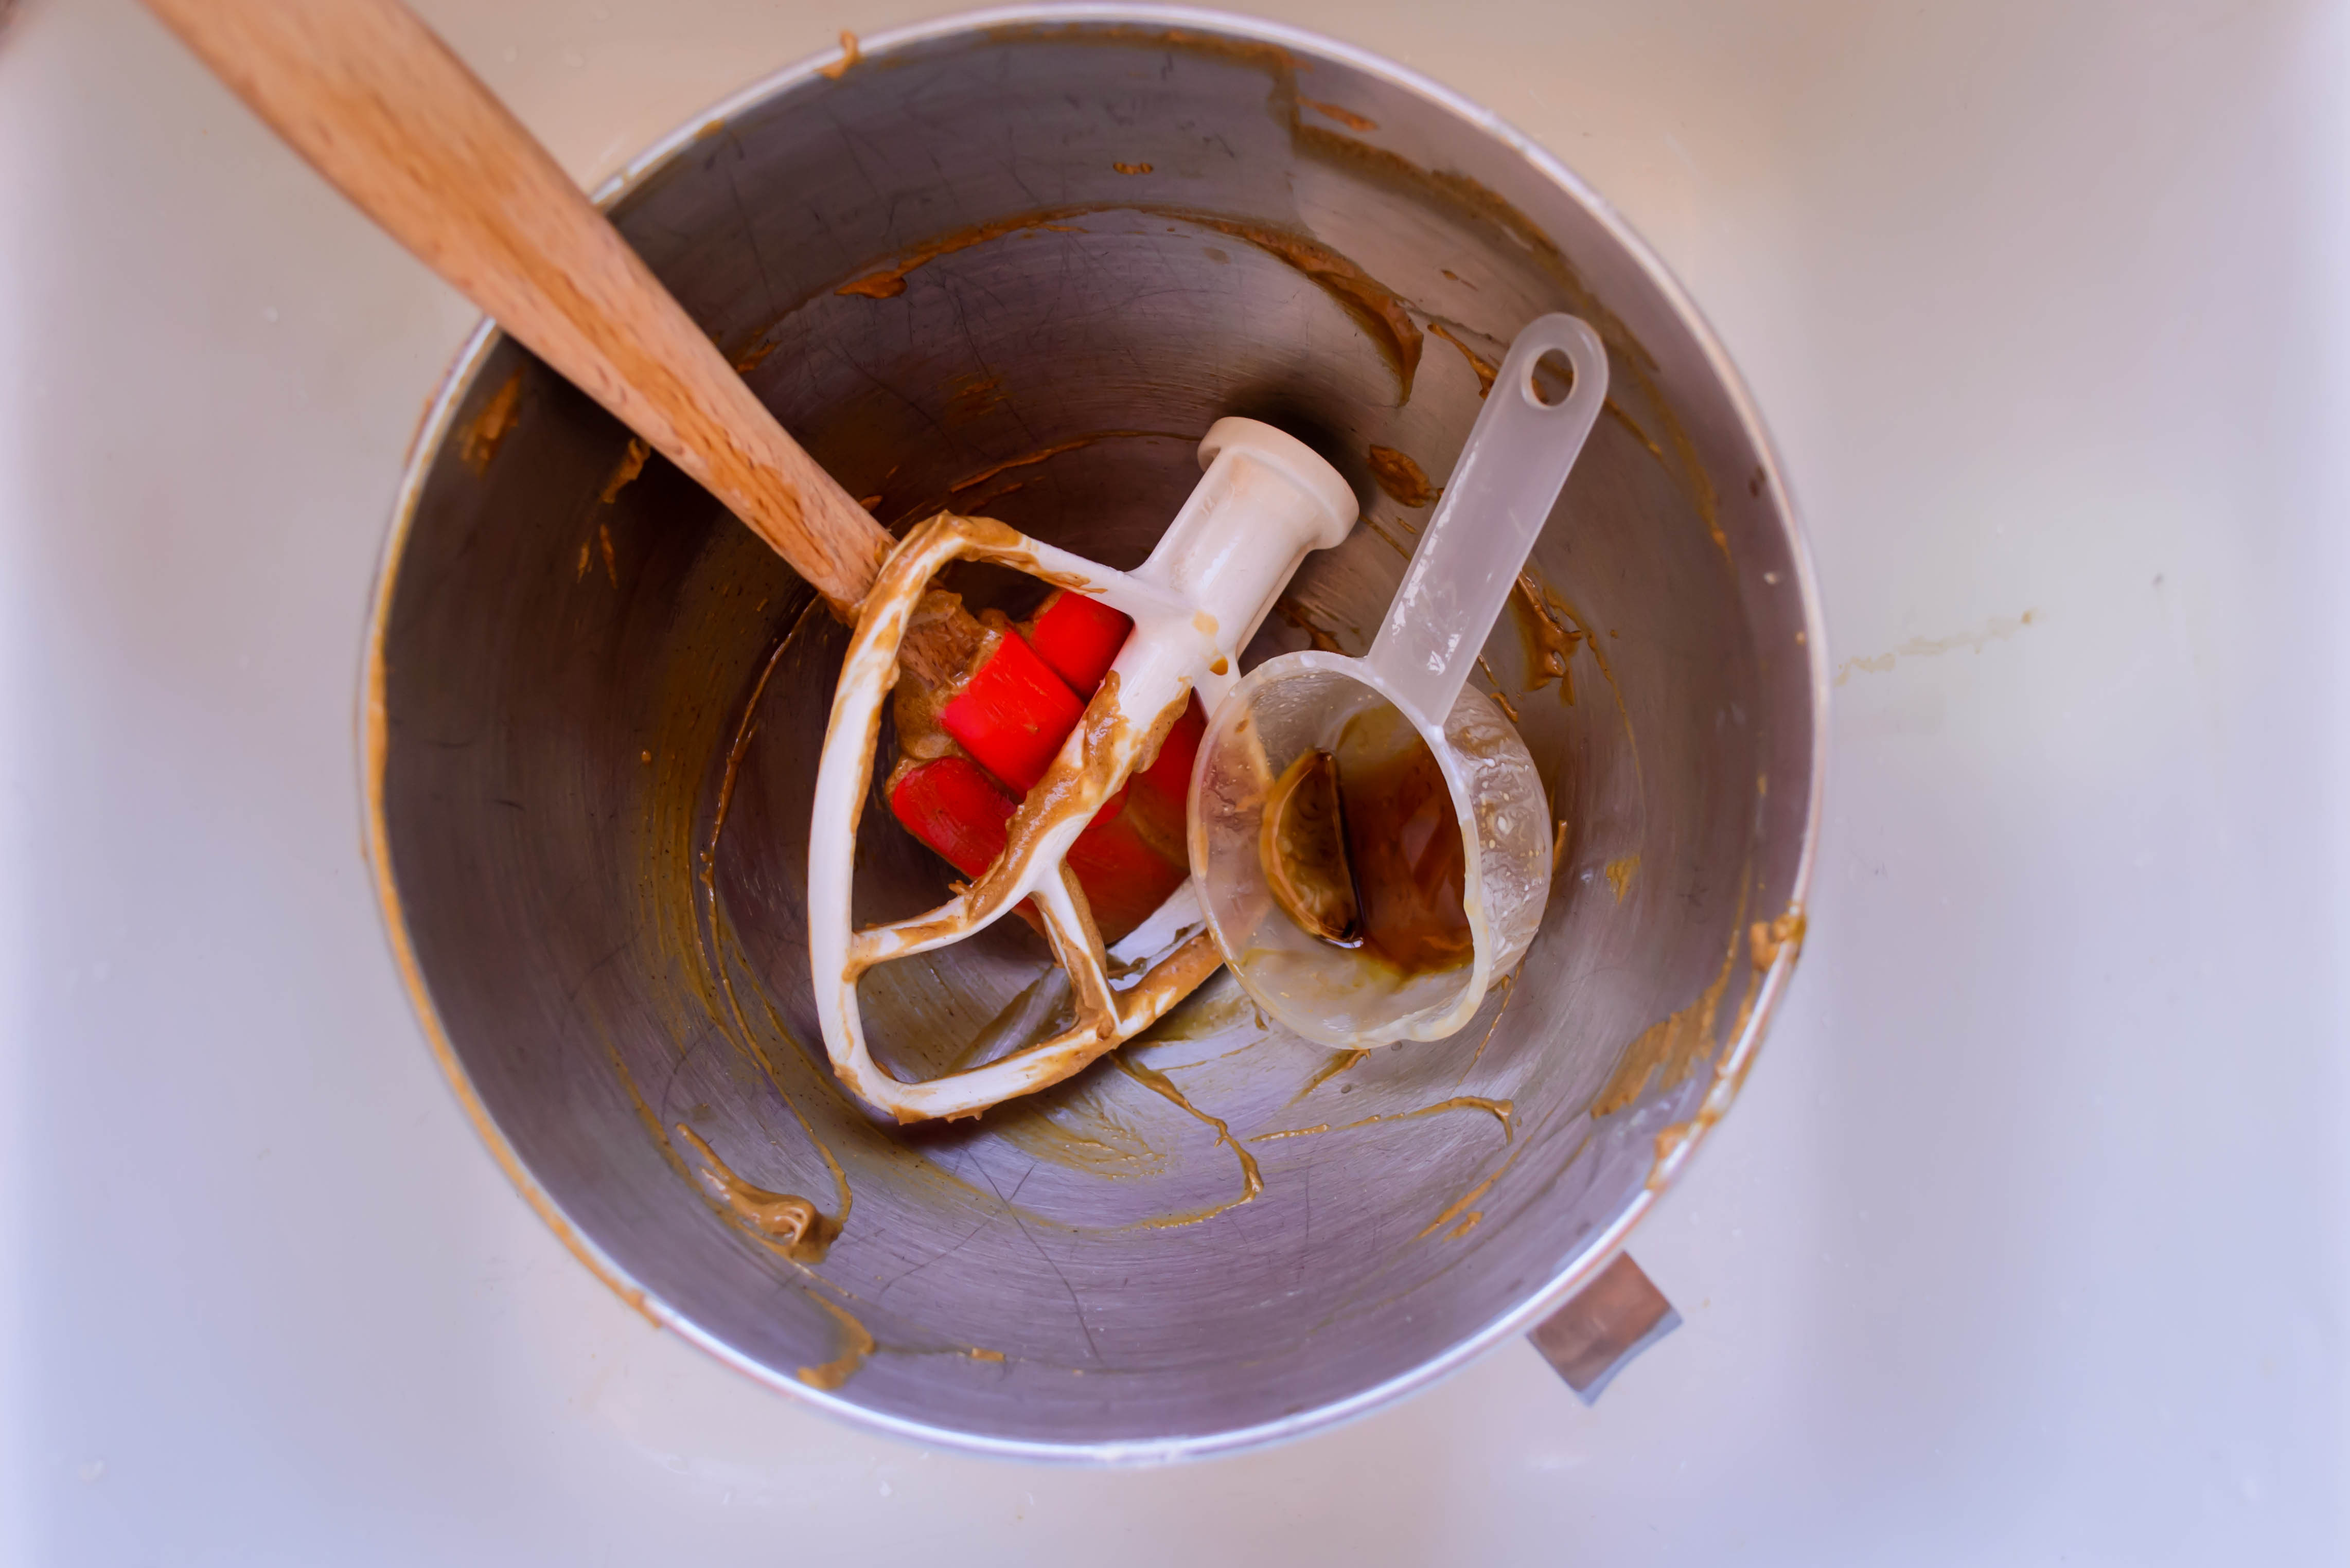
Of course, I didn’t take any photographs of this perfect little bar, because I was only experimenting. Yesterday, when I made the batch to share with you, I learned what can go wrong. You see, the basic recipe for a fruit bar like this is to make a shortbread crust – flour, butter, sugar, a breath of salt and maybe a little flavoring agent or two – and bake it just until it starts to turn a bit golden. Then you let it cool a bit until the butter, now molten, solidifies to make a firm layer. You pour on a mixture of fruit juice, eggs, more sugar, and possibly some kind of thickening agent (cornstarch, in this case), and then carefully lever the quavering thing back into the oven to cook through.

Food Blog February 2015-0308The middle step – letting the crust cool – is important. Yesterday I forgot about that step. Here’s what happens when you don’t: the beautiful, pale pink liquid filling plunges straight down, bursts through the crust, and breaks it up into floating islands of mush. You despair. You yell. You say some words that make you glad the windows weren’t open. Then you put it in the oven anyway, and even though what comes out isn’t exactly what you were intending, it still looks passable and it tastes perfect.

Food Blog February 2015-0312
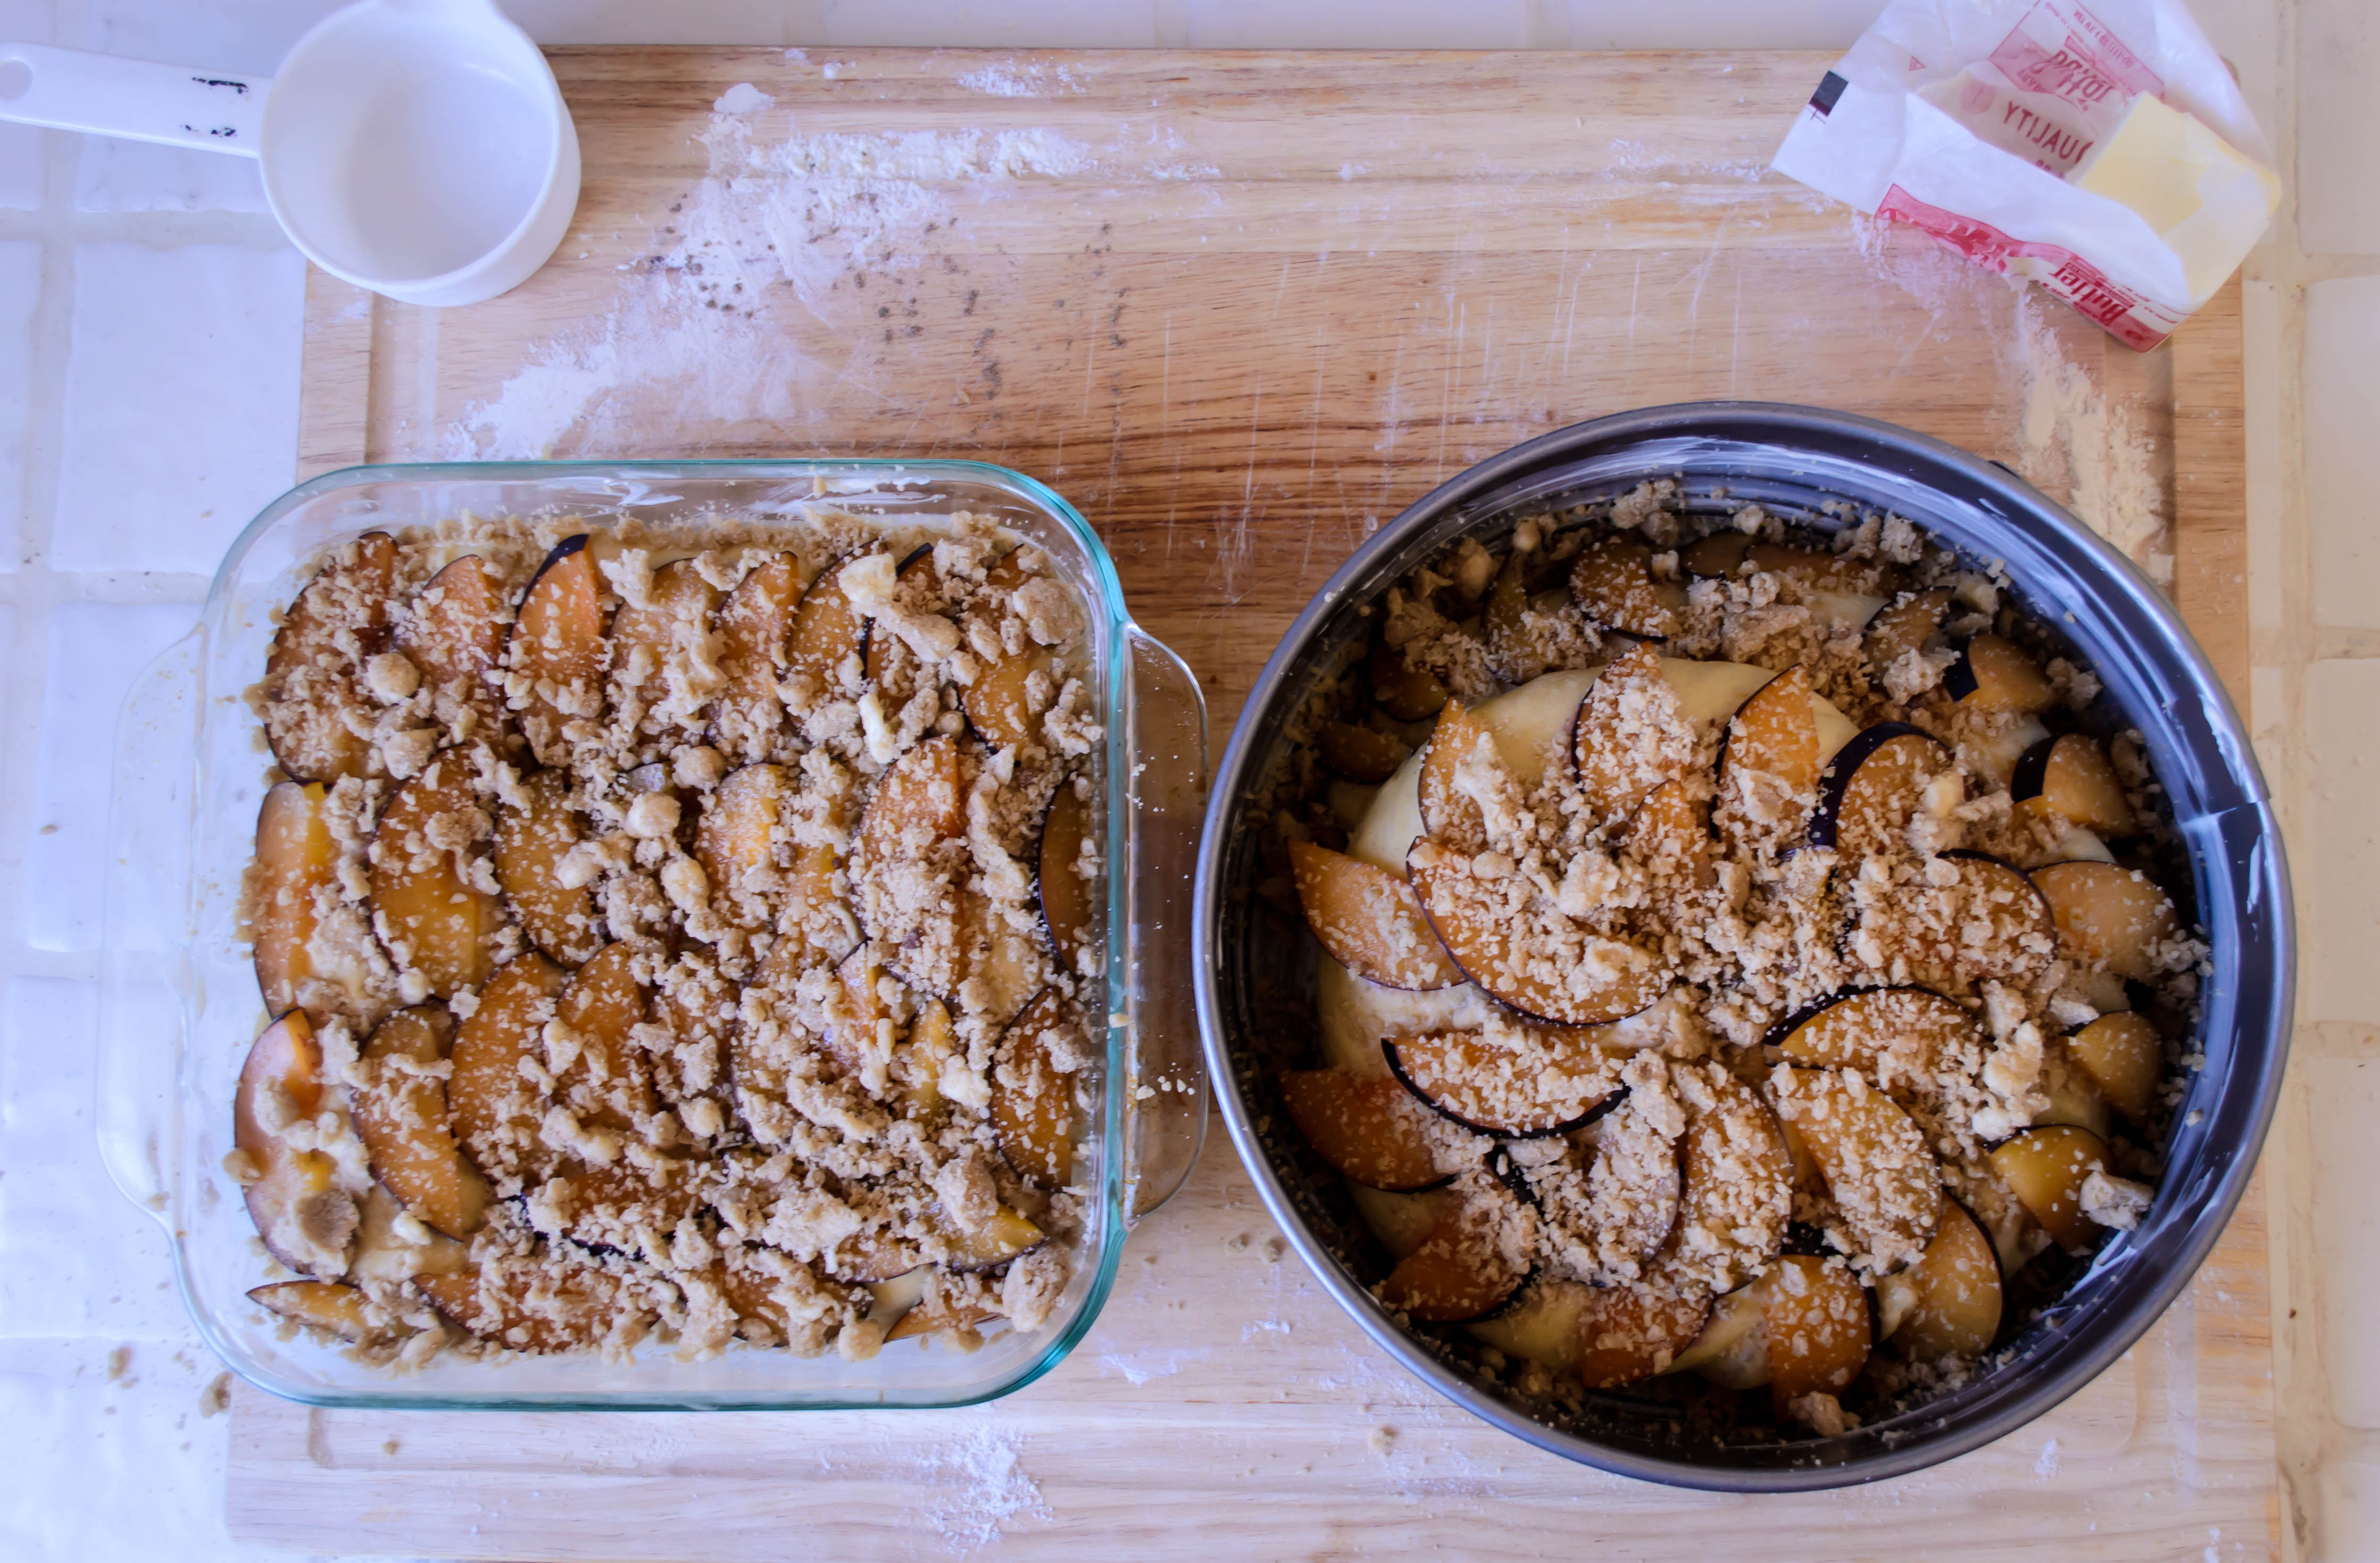
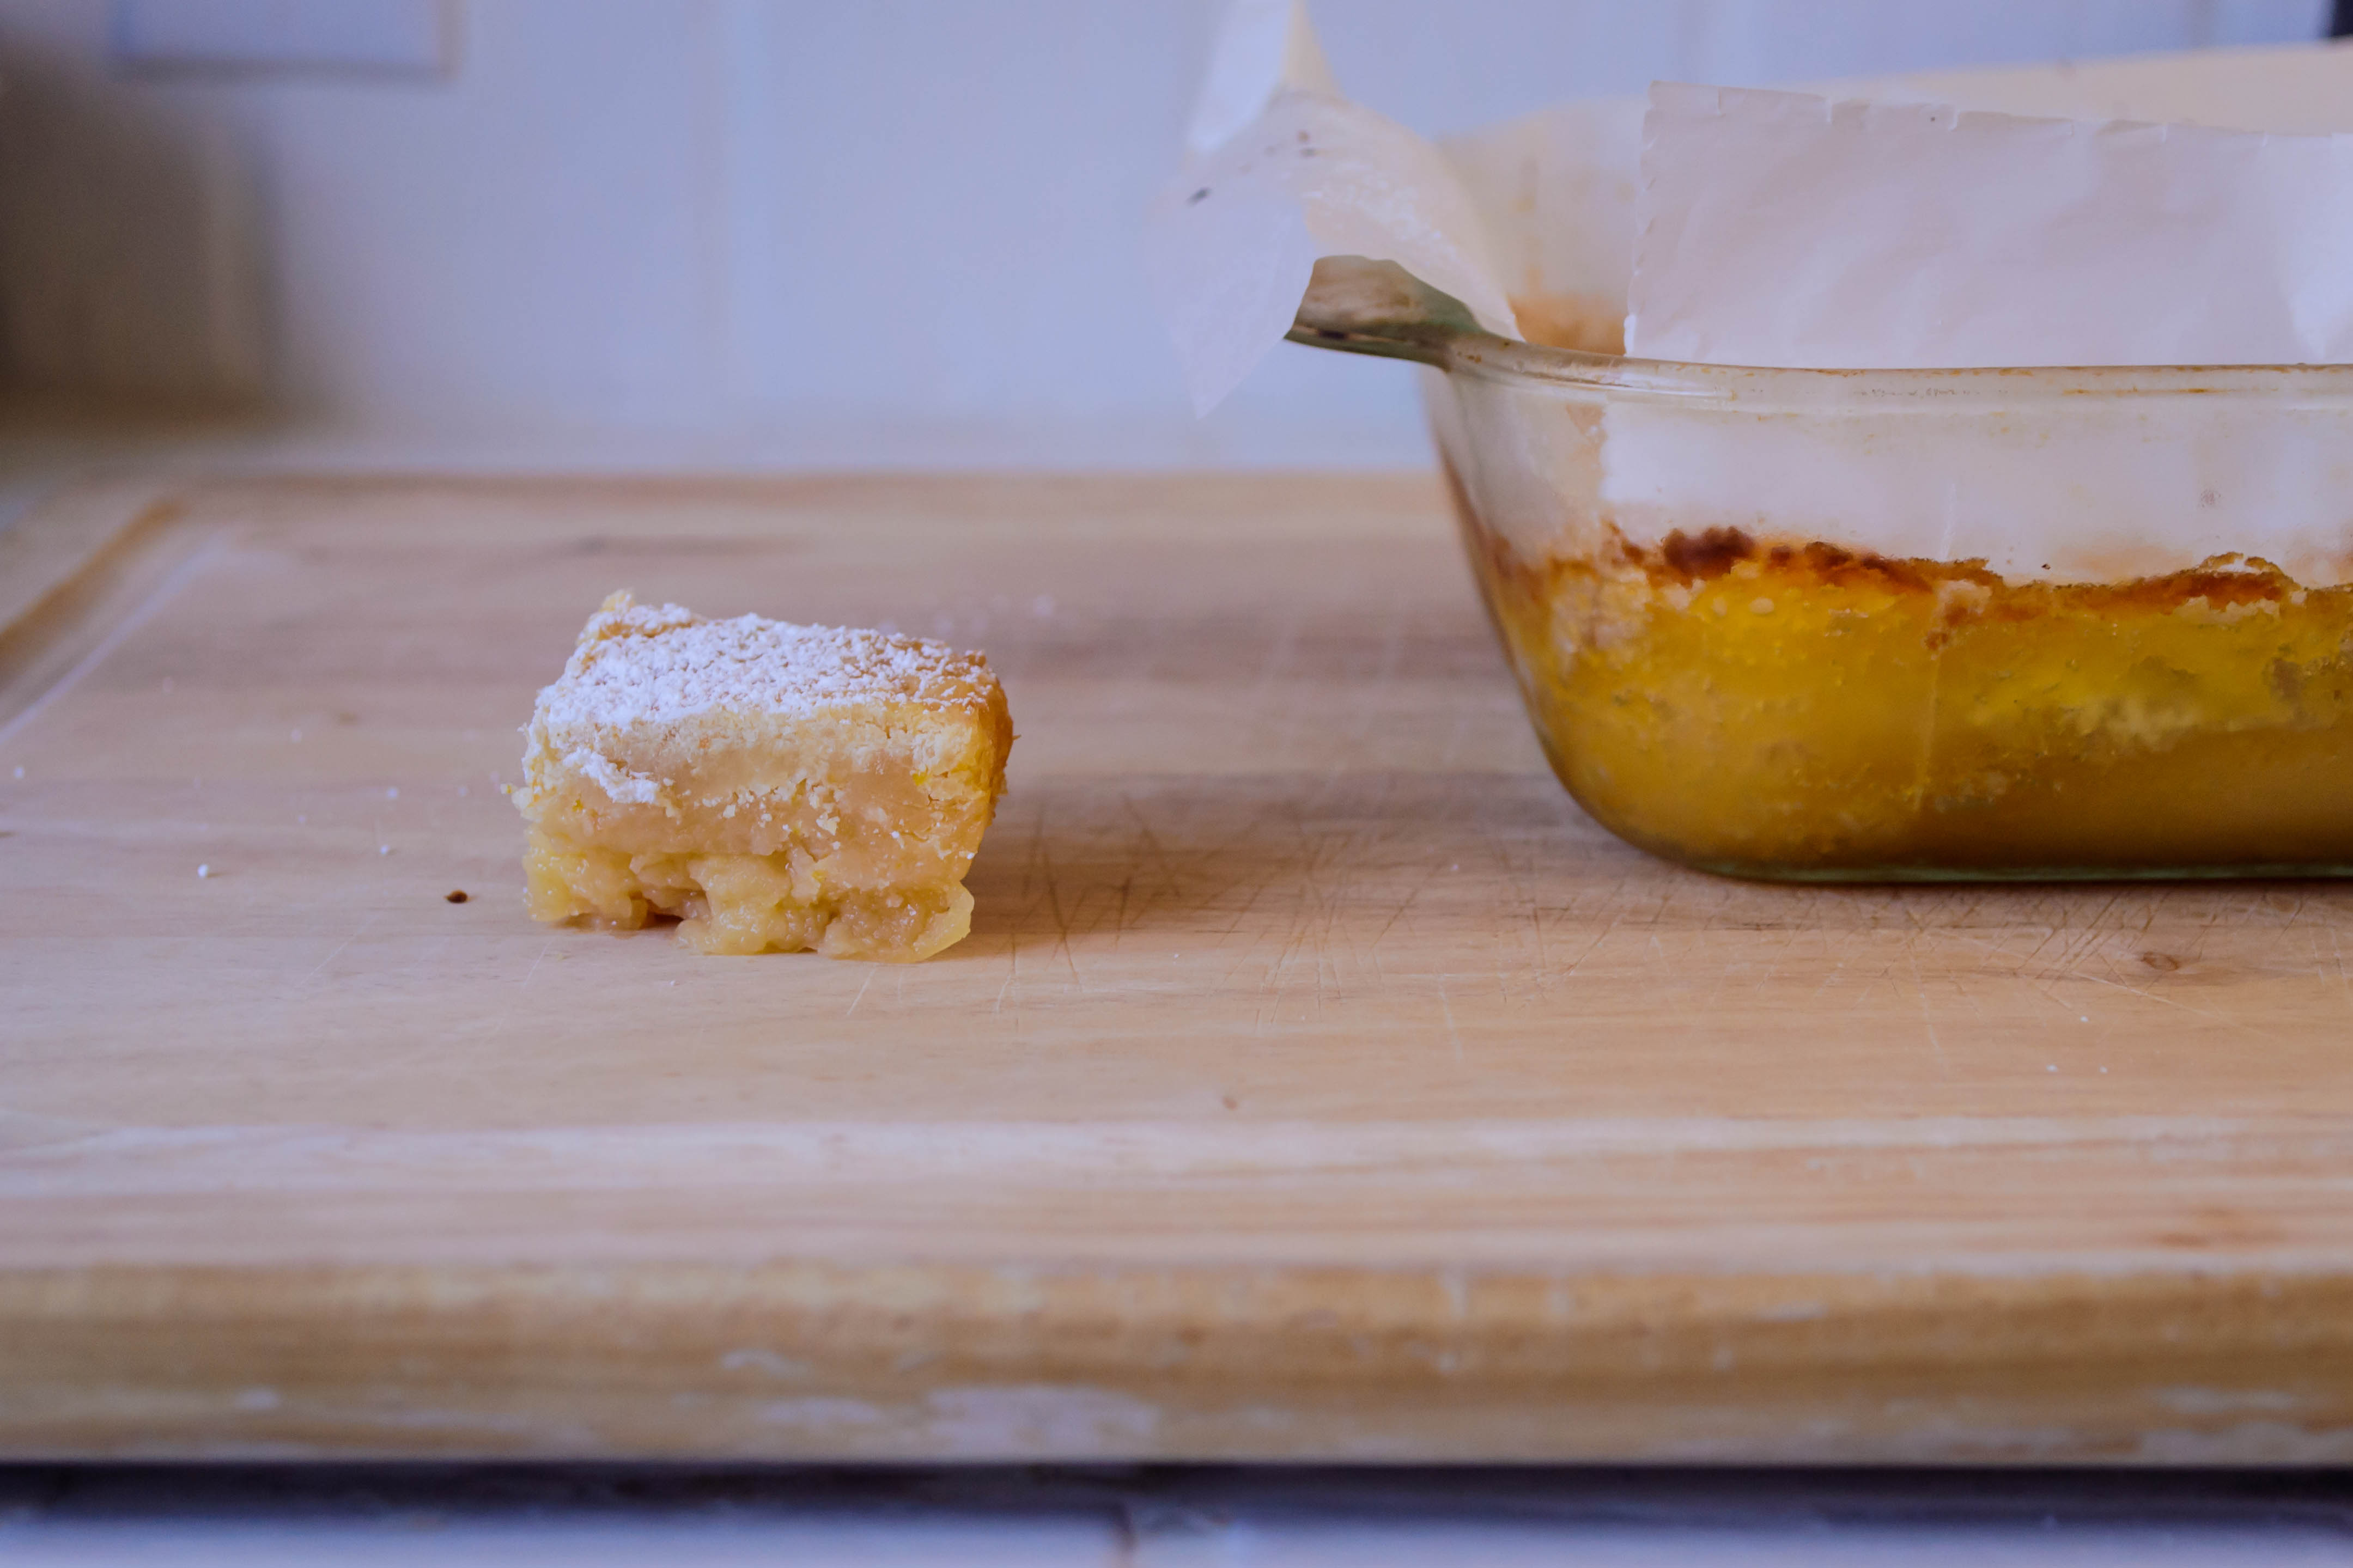
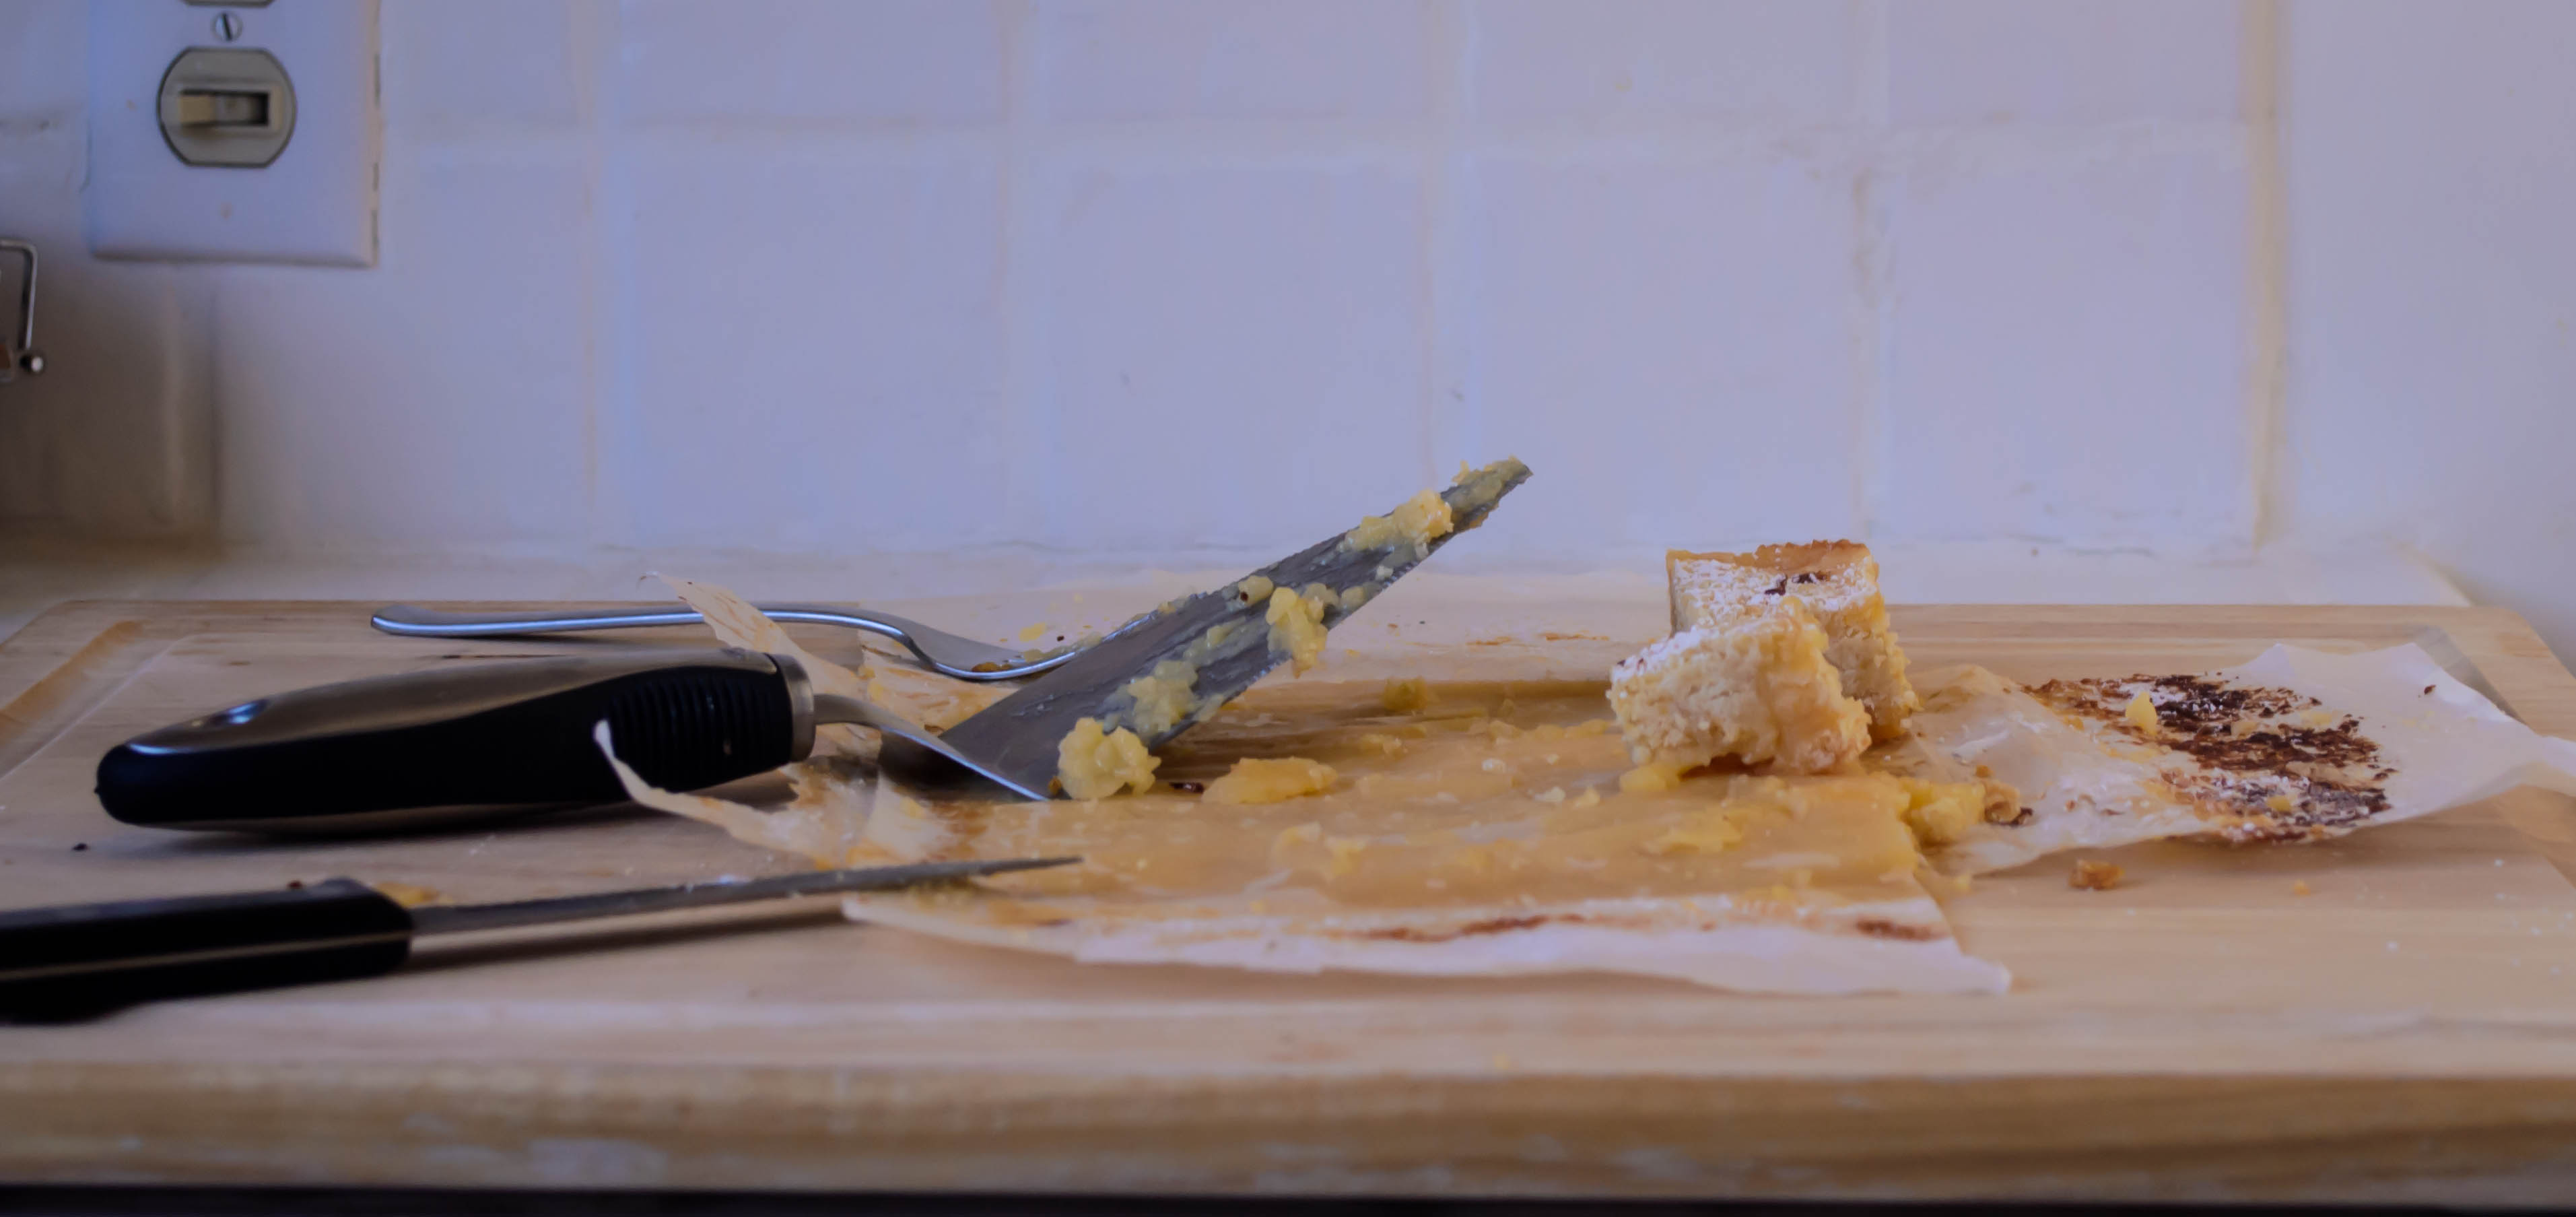
Curiously, as my grapefruit bars baked, the disrupted crust layer floated up above the (apparently) heavier “filling” layer. What came out of the oven looked more like a cake than the bars format I was expecting, but aside from making it a bit harder to cut (the grapefruit filling smooshes out as you press the blade down), they were fairly acceptable. Tangy, sweet, a play of light crunch and velvet curd, and a huff-inducing layer of powdered sugar over the top to keep you from inhaling too fast.

Food Blog February 2015-0314So the directions I’m providing you are what you should do. They will give you the expected format: a layer of shortbread-like crust on the bottom, topped by a thick layer of soft, slightly jiggly essence of grapefruit. Just don’t forget to let the crust cool. Unless you’d prefer, to echo the persnickety challenge of grapefruit itself, my upside down version. Food Blog February 2015-0320

Grapefruit bars
Makes 9×9 inch pan
Crust:
8 tablespoons butter (½ a cup or 1 stick), at room temperature, cut into cubes
½ cup sugar
1 cup all-purpose flour
¼ teaspoon salt
zest of 1 grapefruit (for extra punch in the crust, add the zest of 1 lemon as well)
Filling:
3 eggs
1 cup sugar
zest of 1 grapefruit
1 cup freshly squeezed grapefruit juice (2-3 large grapefruits)
4 tablespoons butter, at room temperature, cut into cubes
2 tablespoons cornstarch
powdered sugar, for dusting


  • Preheat the oven to 350F and prepare your baking pan: cut two 15-inch sheets of parchment paper and arrange them in a cross shape, then insert this cross shape into a 9×9 inch baking dish with the edges hanging out. This forms a kind of sling that will help you remove the bars from the baking dish without breaking them apart. Spray the inside of the dish (including the parchment paper) with non-stick spray, for extra insurance.
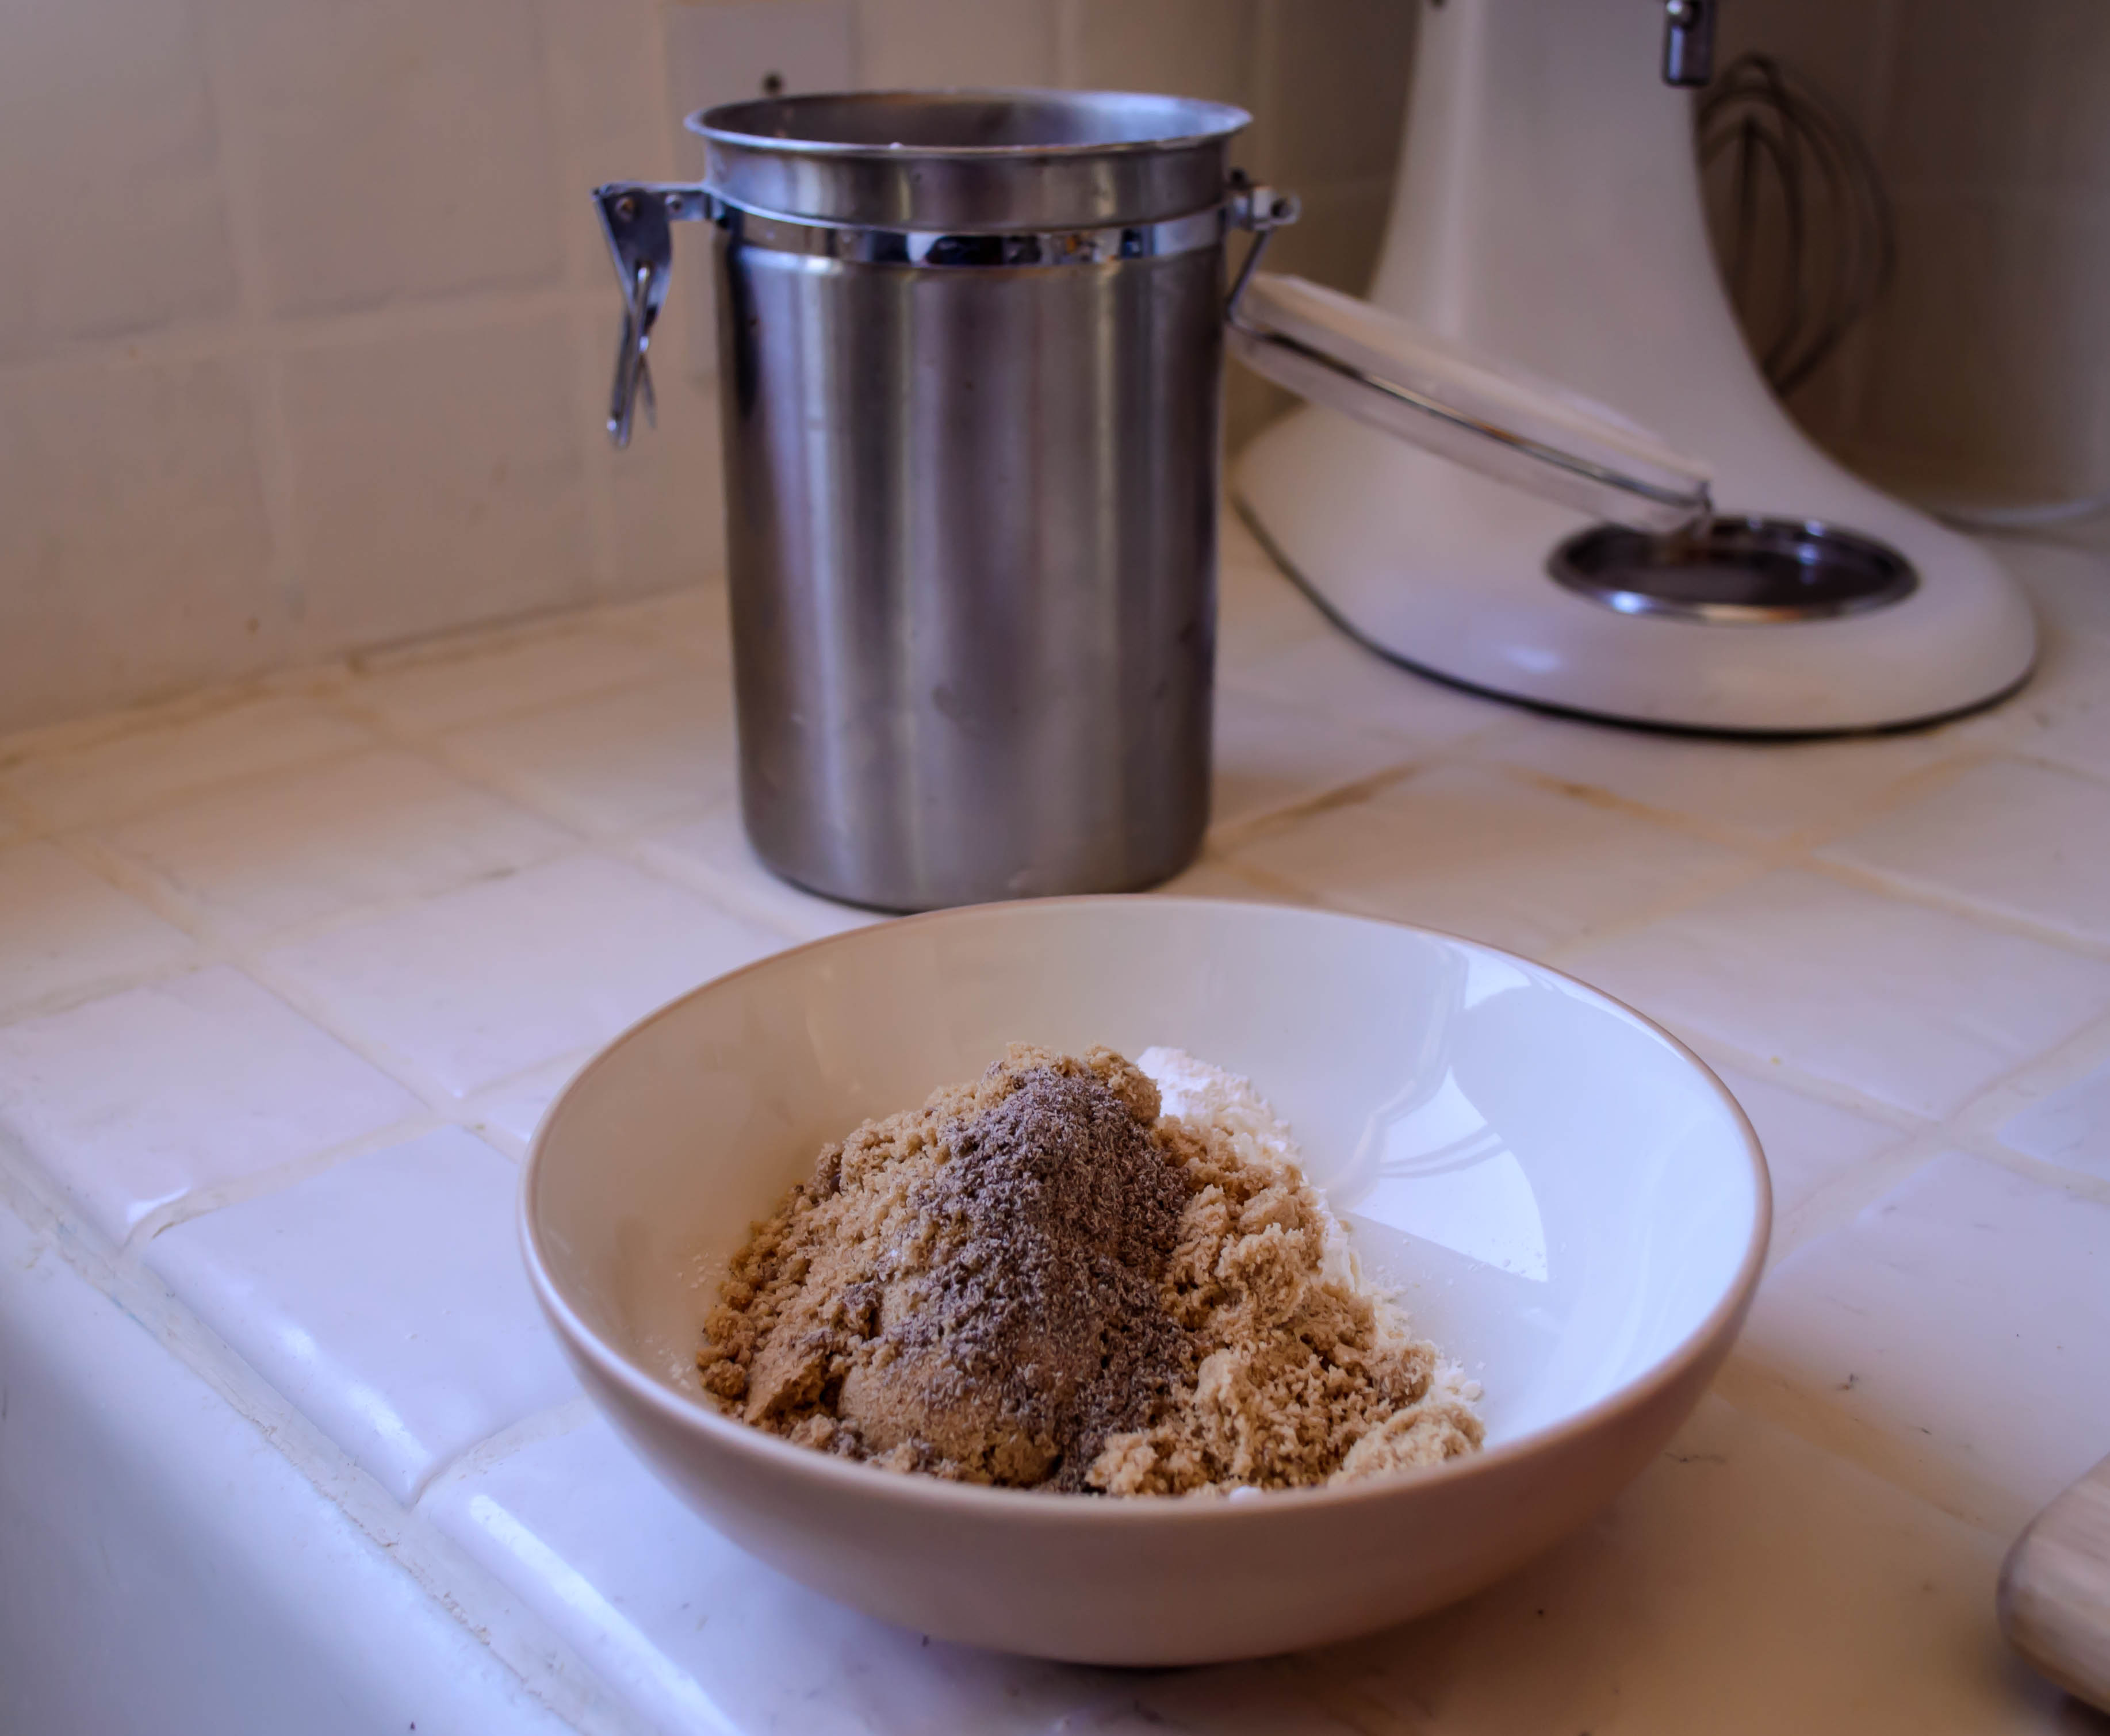
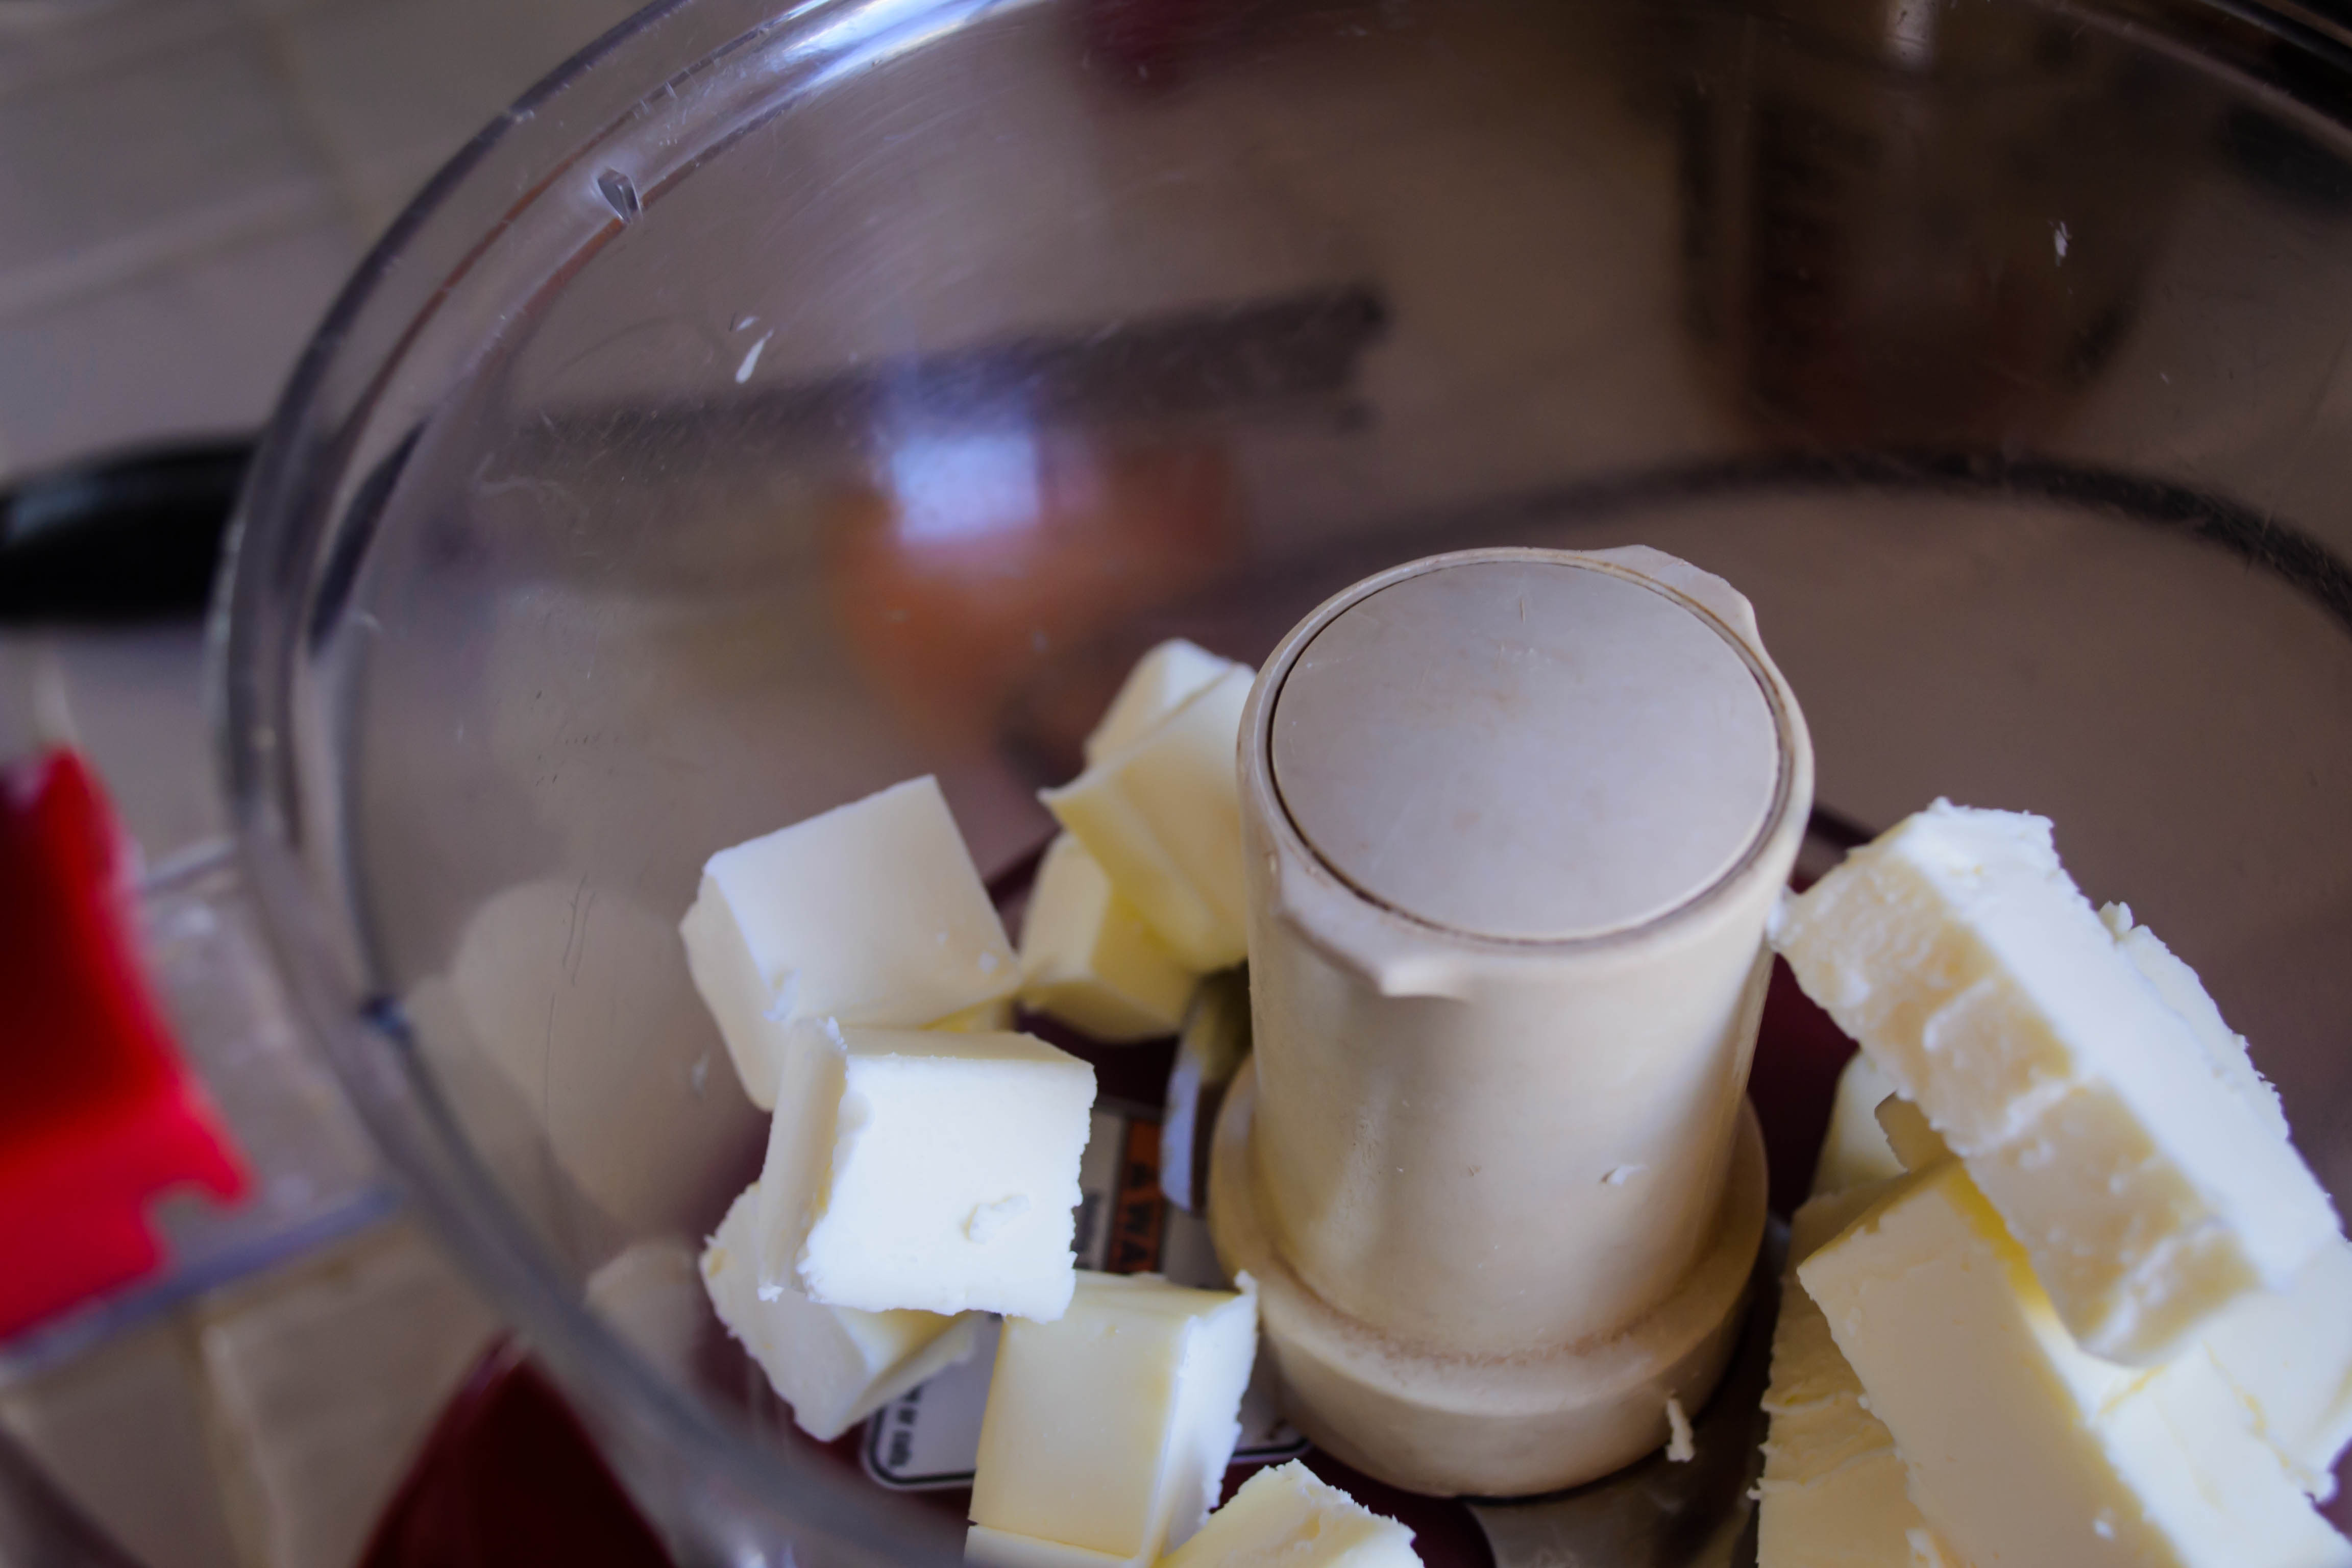
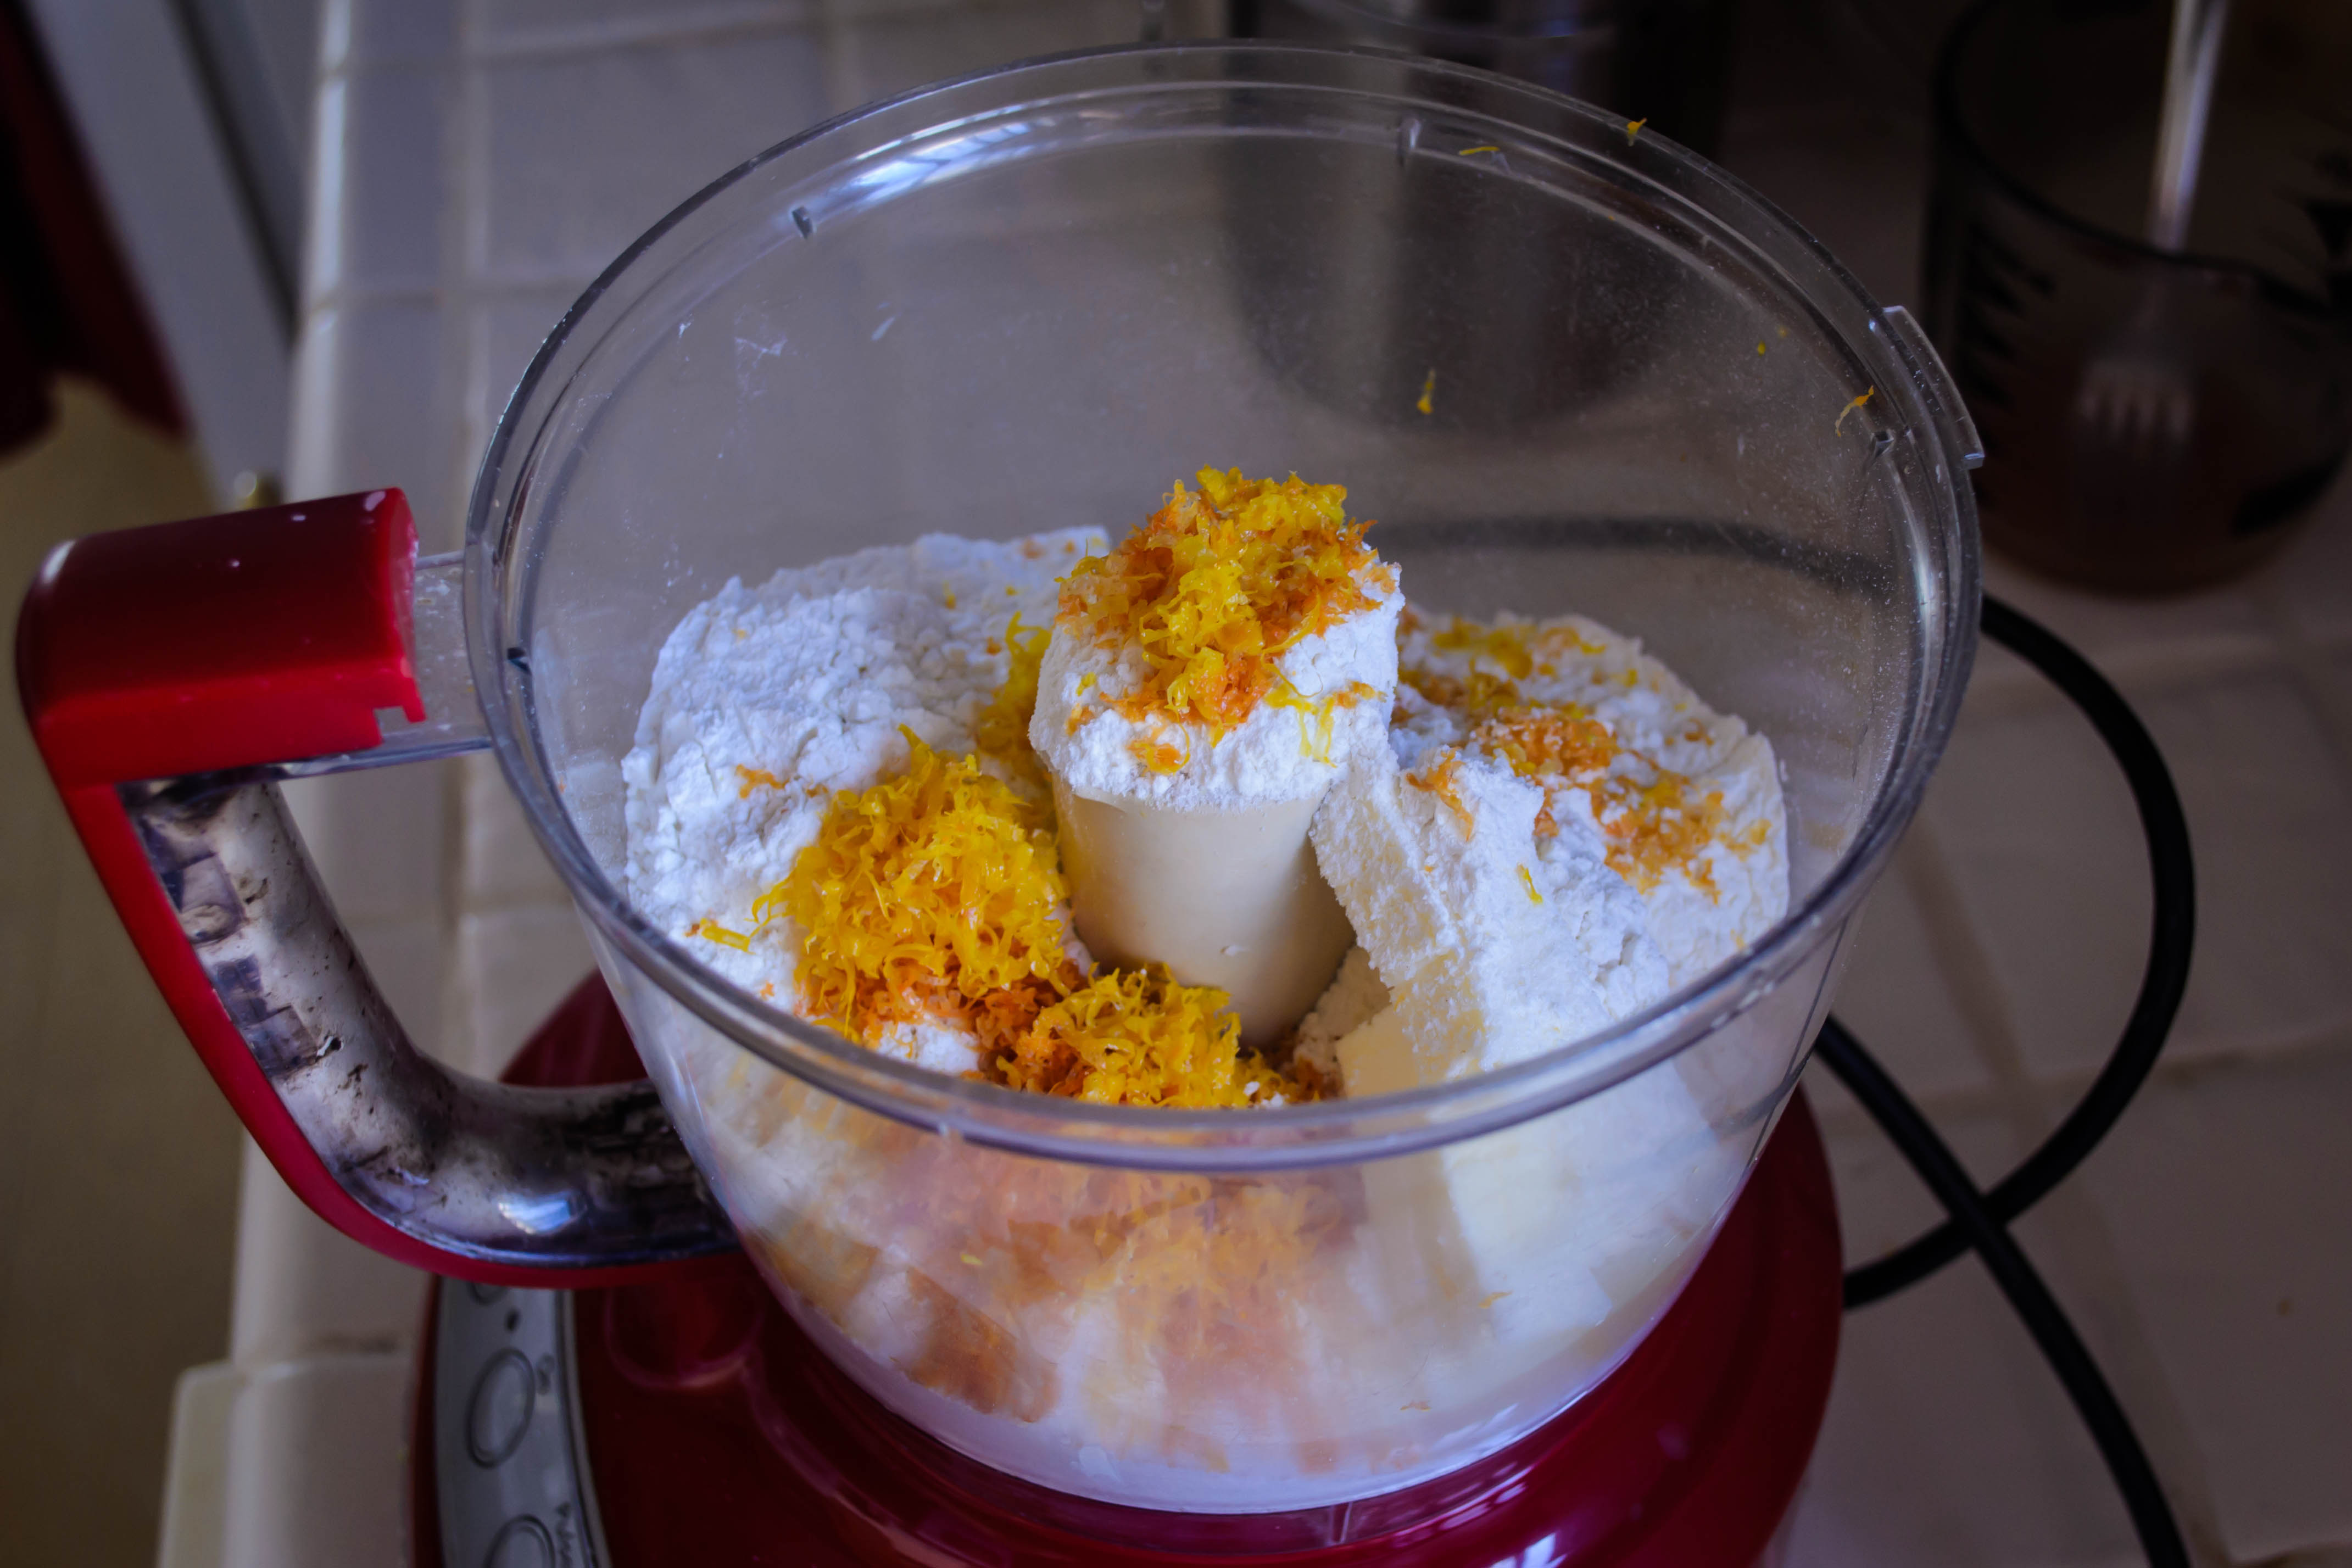
  • To make the crust, place the butter, sugar, flour, salt, and zest into a food processor and let run until the ingredients are combined and begin to clump together a bit.
  • Dump and scrape the clumpy crust bits straight into the prepared baking dish, and use your fingers or the smooth bottom of a measuring cup or a glass to gently but firmly tamp the crust down into an even layer.
  • Bake at 350F for 15-20 minutes, until it is pale golden brown and has a tender crust. If it puffs up while baking, stab it a few times with a fork to deflate it. Remove from oven and let cool for at least 10 minutes.
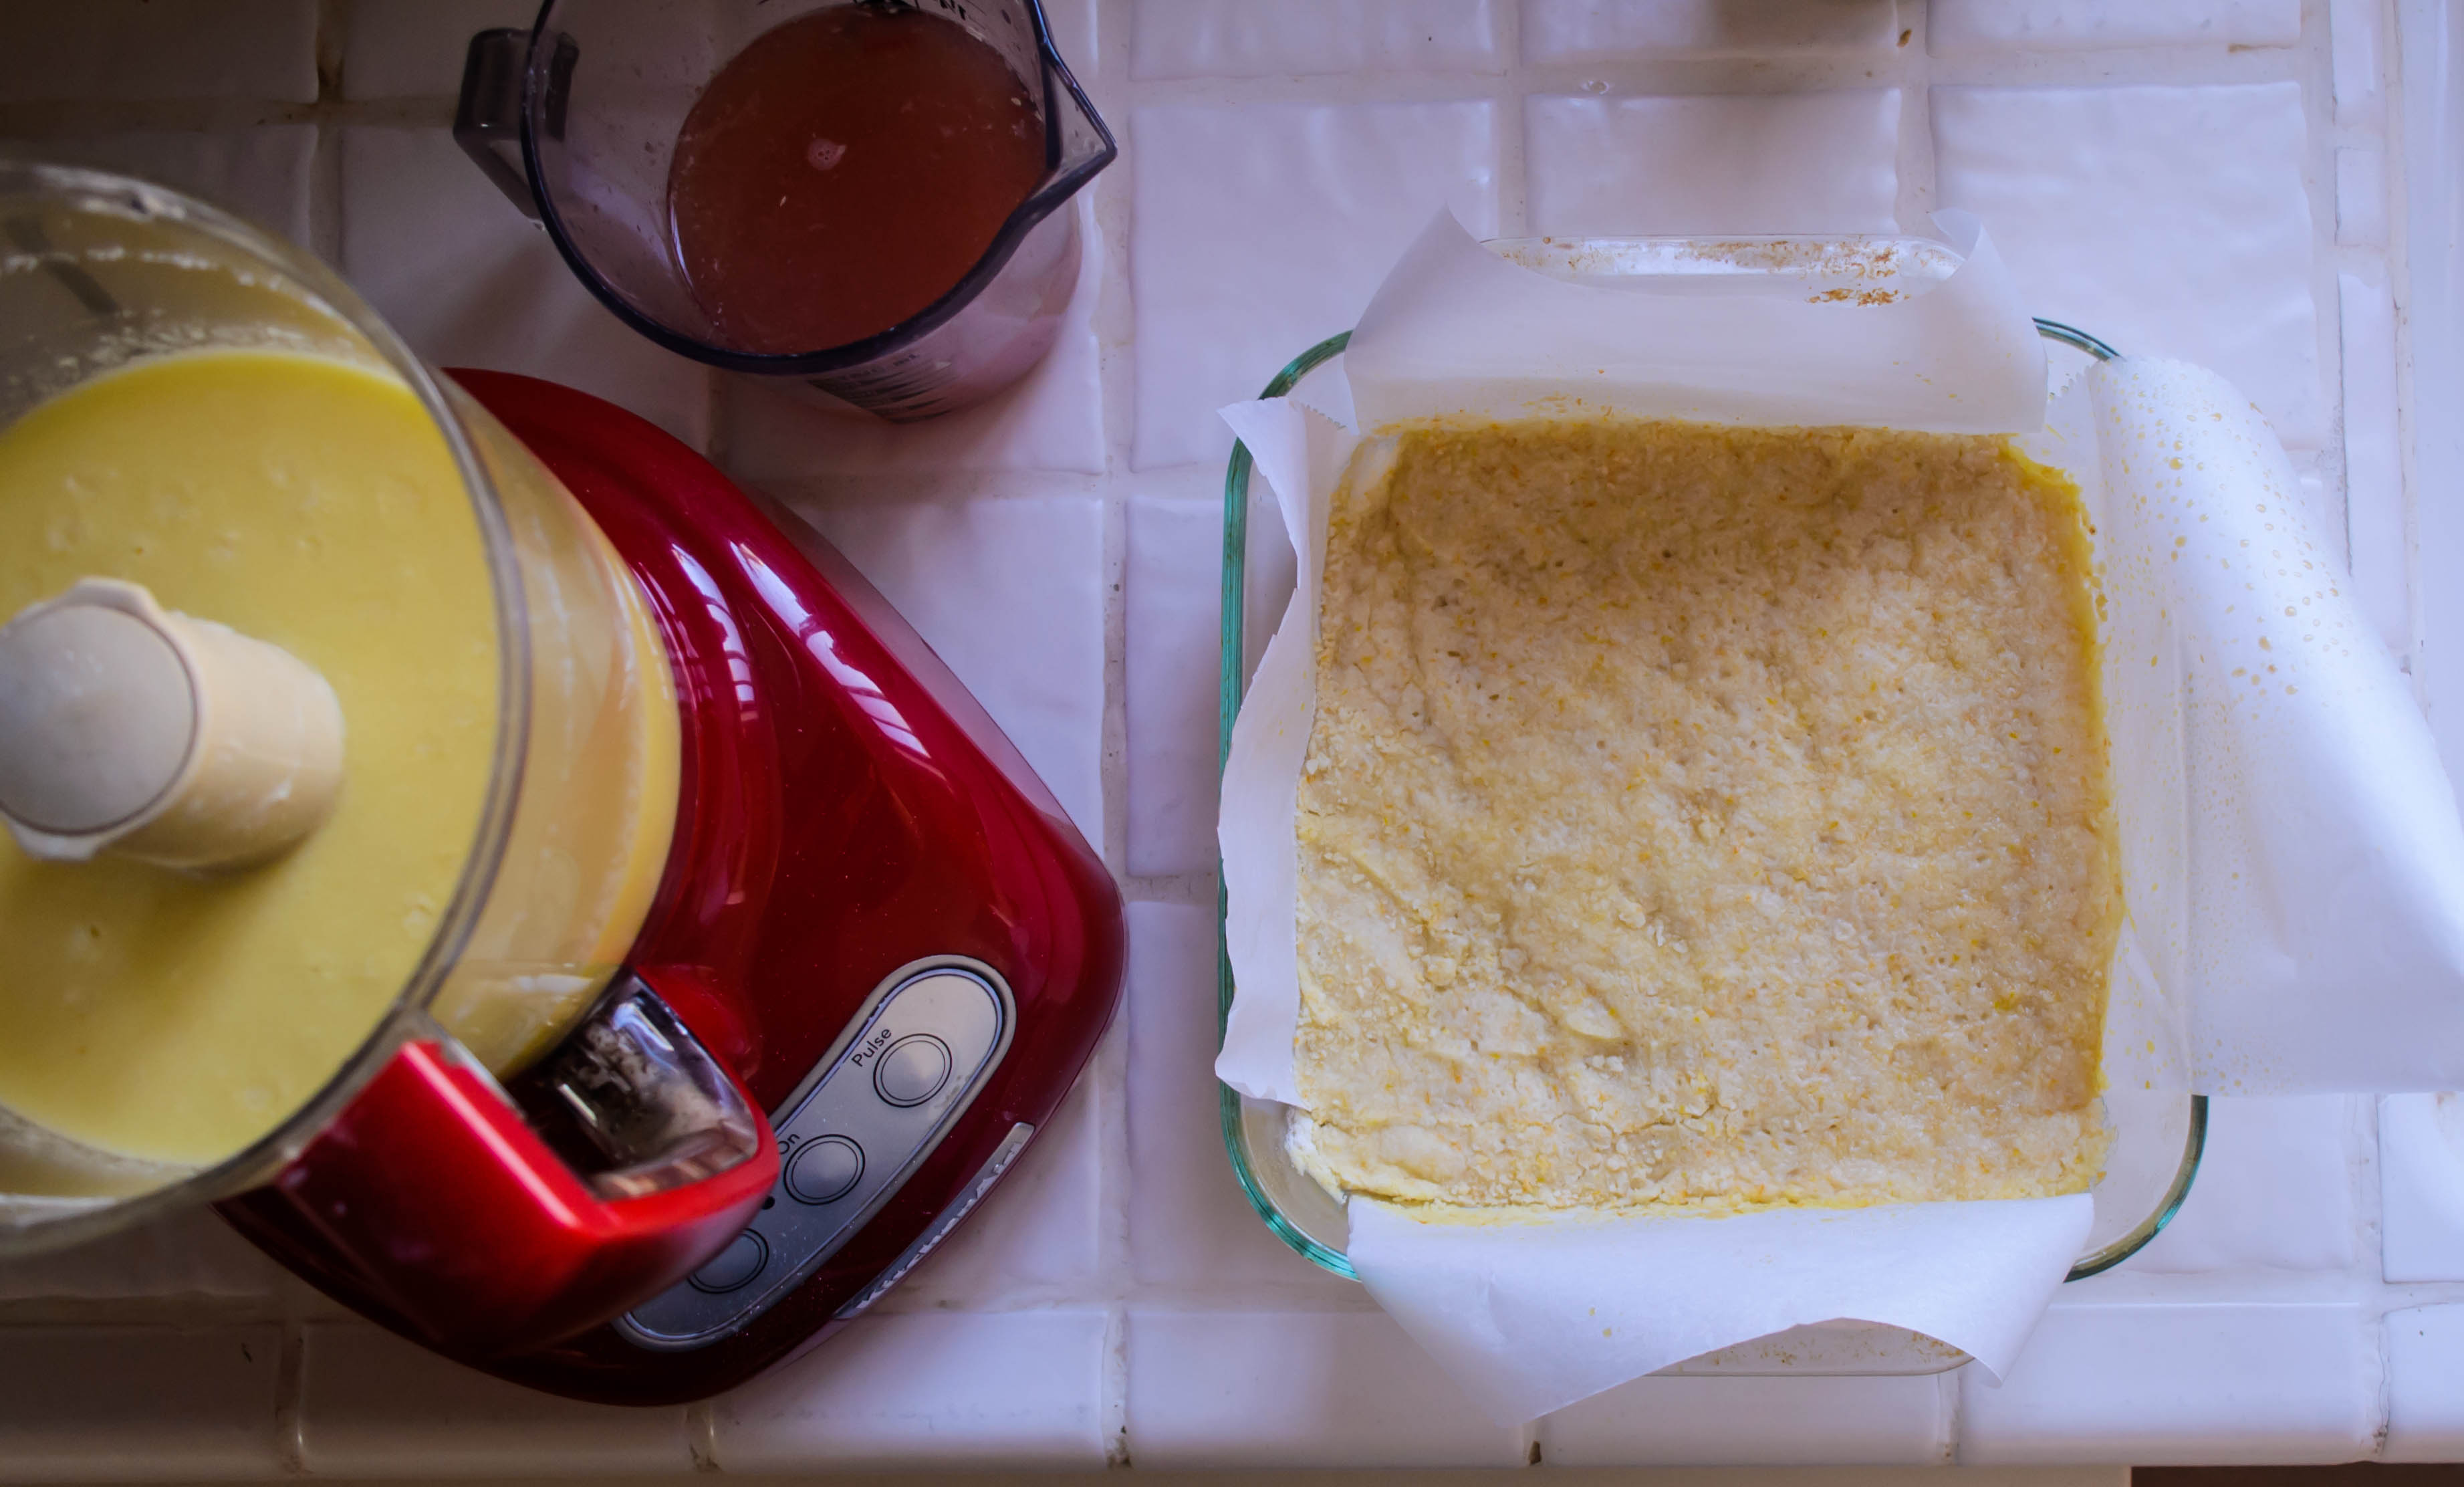
  • While the crust cools, make the filling. In the same food processor bowl (you don’t even have to wash it; so many of the ingredients are the same), place the eggs, sugar, butter, cornstarch, and grapefruit zest. Whiz to combine.
  • Add the grapefruit juice and whiz to combine again. The mixture will be quite liquid and will look curdled, but it will bake up just fine.
  • Note: there isn’t quite enough fat in this mixture to emulsify fully, which means if you leave it sitting for a while it will separate. Whir it up once more just before pouring onto the crust, or make and pour on immediately, and it should be fine.
  • Carefully pour the filling over the crust, then just as carefully, return it to the oven (the filling will slosh around a bit if you are too hasty about this) and bake for 40 minutes, or until the filling is just set. It may leave the barest sticky bit of grapefruit-y curd on your finger when you test it.
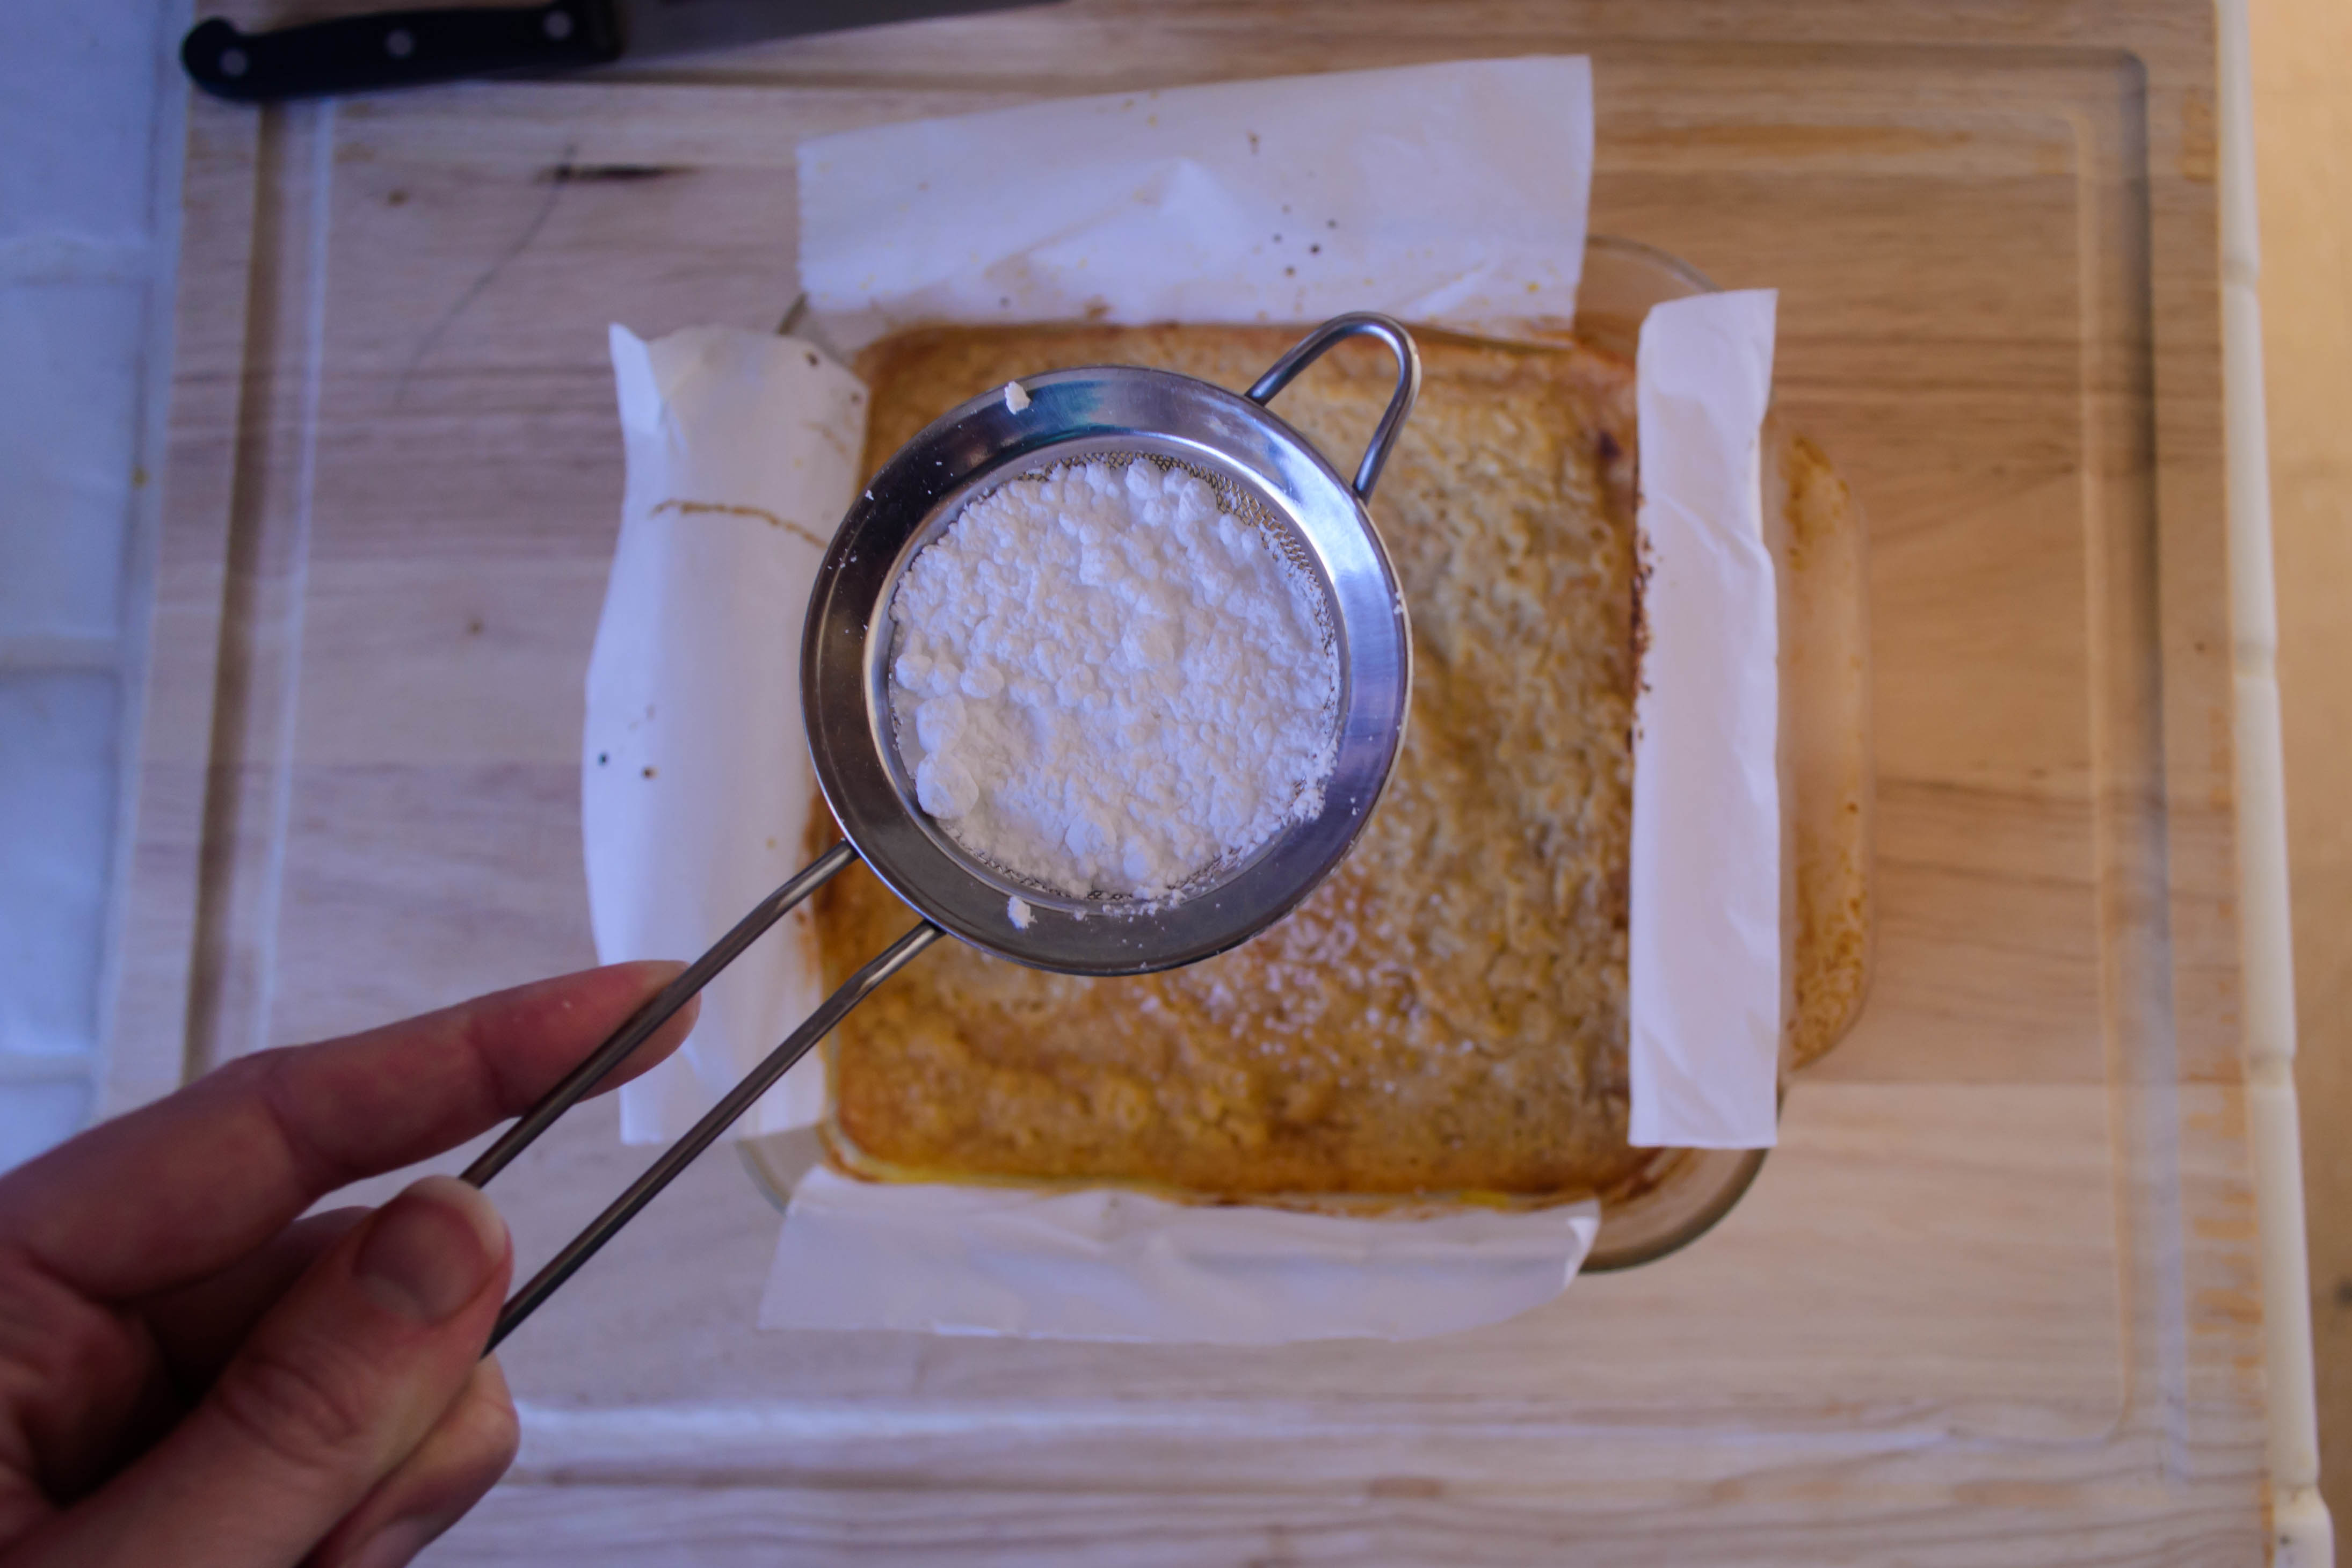
  • Let cool completely (seriously), then dust with a healthy layer of powdered sugar, if desired. If you dust it while hot, the bars will immediately absorb all the powdered sugar.
  • To slice for serving, use the parchment paper sling to hoist the whole square out of the baking dish onto a cutting board. Trim off the edges if you wish, then use a very sharp knife or a pizza cutter to slice into squares or rectangles of desired sizes. If the knife or pizza cutter gets gummed up along the way, dip it into a dish of hot water in between slices.

Apricot Ginger Thumbprint Cookies

Food Blog December 2014-0956Up until I was in college, almost every year my family received a heavy box a week or two before Christmas. As soon as we tore through the tape we could smell them: Nana’s cookies. Ladylocks or cream horns, nut-rolls, pizzelles, thumbprints, sometimes chocolate dipped apricots or seven layer bars; everything nestled in its own individual wrapping and ready to be devoured. And she didn’t just send them to us, but to the families of her other two children as well, and who knows who else. I’m sure she saved a few for herself and Pap – who was quite the cookie fiend – to eat as the holidays approached.

Food Blog December 2014-0943I never thought about it when I was a kid, but this must have taken her weeks to do. I can only imagine the organization that went into it – I’m sure dough was made ahead of time and frozen until she was ready to bake, and what a baking day(s) it must have been! How many cookie sheets would that be, all rotating in and out of the oven? How many measuring spoons and bags of flour and sugar and butter?

Food Blog December 2014-0941I had big plans this season. I was going to give you with a week of cookies, presenting my favorite holiday offerings with which you could grace your own dessert bar (and if you have one of those, I politely demand to be invited over). Just one cookie recipe a day, and you and I would both be set for the whole season.

Food Blog December 2014-0944Alas, as usual, that whole having a day job thing took over. Amidst the stacks of papers, however, one cookie managed to sweet talk its way through: a modest tray of thumbprints that, offered up in my department’s mailroom, disappeared in less than two hours. My people are cookie people.

Food Blog December 2014-0946Thumbprints were always included in Nana’s Christmas cookie box. Somewhere between a sugar cookie and shortbread, but with brown sugar rather than white, the soft dough gets rolled into a ball, dunked in egg whites and then coated in chopped nuts. A gentle squash in the middle of the ball gives the cookie its name, and provides a little receptacle for more sweetness – after baking, Nana always filled the little cavity of the cookie with pink or blue royal icing.

Food Blog December 2014-0948I hadn’t thought about thumbprint cookies in years, but at some point this summer, something reminded me of these pretty little sweets and I knew I wanted to make my own version. None of my relatives – good bakers all – had a copy of Nana’s recipe, but one of my aunts told me to start with Betty Crocker, and gave me a few hints about how Nana might have adapted her version. In mine, I’ve replaced the margarine I’m almost sure Nana used with butter, and gone with a fruit-based jammy chutney for the center rather than the sweet icing she favored. Apricot and crystallized ginger, chopped fine or pulverized in the food processor, cooked down with some water, some sugar, and some lemon zest create a beautiful glossy compote reminiscent of those tubs of candied fruit that show up in grocery store produce sections this time of year, but with fresher, cleaner flavor.

Food Blog December 2014-0949It has been a long time since I tasted one of Nana’s thumbprints, but my first bite of these, still warm from the oven, told me I was close. The cookie itself is buttery and crumbly, both features enhanced by its walnut coating, and not overly sweet. The apricot and ginger filling give it a spicy-sweet character that went as well with the walnuts as I’d hoped, and they are actually tastier the day after baking. My recipe wound up making a mere 2 ½ dozen cookies, which doesn’t sound like a pittance, but when I brought home an empty tray after making my offering at work, N. and I wished we’d saved more than the four cookies I’d laid aside for us.

Food Blog December 2014-0952As a friend shocked me by revealing last night, it’s only ten days till Christmas, and Hanukkah starts tomorrow already. I hope your plans are going well, and if you do have the urge to bake something sweet for someone you love, this little gem of a cookie should be hard to resist.

Food Blog December 2014-0955

Apricot Ginger Thumbprints
Adapted from Betty Crocker
Makes about 2 ½ dozen cookies
For the filling:
1 cup dried apricots
¼ cup crystallized ginger
Zest of one lemon
¾ cup water
1 tablespoon brown sugar
Pinch salt
For the dough:
½ cup brown sugar
1 cup butter, soft but not melted (2 sticks)
1 teaspoon vanilla
2 egg yolks
2 egg whites
2 cups all-purpose flour
½ teaspoon salt
1 ½ – 2 cups finely chopped walnuts


  • Make the filling first, since it will need time to cool after cooking.
  • With a sharp knife or a food processor, chop the apricots and ginger until very fine.
  • Place apricot and ginger bits in a small pot with lemon zest, water, brown sugar, and the pinch of salt. Bring to a bubble, then reduce heat to medium-low and simmer until the mixture becomes thick, 15-20 minutes. Stir occasionally.
  • When mixture is a thick, jammy consistency, remove from heat and set aside to cool completely.
  • While apricot ginger mixture cools, preheat the oven to 350F and make the cookie dough.
  • Cream the butter until light and fluffy – about 2 minutes.
  • Add the brown sugar and cream together another 2 minutes, until this, too, is light and fluffy. Add the egg yolks and vanilla, and mix well to combine.
  • Sprinkle in the flour and salt, mix well to combine into a clumpy dough approximately the consistency of wet sand.
  • If at this point the dough is too soft to work with, stow it in the fridge for 15 minutes or so to let the butter harden up a bit.
  • While the dough chills, use a fork to lightly beat the egg whites, reserving them in a small bowl.
  • Chop or process the walnuts into small crumbs.
  • When you are ready to form the cookies, use a spoon or your fingers to portion out and roll 1-inch balls of dough. Dunk each ball in the egg whites, then roll in the walnuts until well coated.
  • Place each ball on a greased or parchment-lined cookie sheet, spacing them about 2 inches apart.
  • When your cookie sheet is full, use your thumb or finger to push down into the center of each cookie ball, making a depression. That’s the thumbprint!
  • Bake at 350F for 15 minutes, until cookies are lightly golden and have swelled up.
  • Upon removing the cookies from the oven, use the back of a spoon to lightly press down on the depressed area again, as it may have puffed up during baking.
  • Let cool on cookie sheet for 1 minute, then remove to a wire rack. While still warm, fill the center with apricot ginger mixture – each cookie should fit about ½ a teaspoon of the fruit filling.
  • Cookies are best cooled completely, and only get better the second day, though I suspect they won’t last much longer than that.


Apple-ginger-bread with nutmeg “hard” sauce for #Twelve Loaves October

Food Blog October 2014-0722As soon as I saw that the October assignment for Twelve Loaves was apples, I thought of cinnamon. But then my contrary side took over. Apples and cinnamon is such a natural pairing, it’s practically expected. Why not give someone else a chance? Why not ginger? The searing spiciness of ginger against the cool sweetness of apples sounded like a worthy combination, and I was off and running with not just an answer to the Twelve Loaves assignment, but for my long postponed sauce project as well.

Food Blog October 2014-0735My mom has, on and off since I was little, made a holiday dessert of gingerbread and a warm, well-spiced, rum-spiked sauce. The gingerbread is a homely 9×9 layer, cut into unremarkable uniform squares. The sauce, almost still bubbling, gets spooned over the top, and a swirl of whipped cream inevitably slides right off the square of cake onto the plate beside it, already losing its fluff from the heat of the sauce. I love it.

Food Blog October 2014-0702But like so many desserts, Mom’s gingerbread with nutmeg sauce belongs to the winter. We only ever have it around Christmas and New Year’s. There’s something about its flavors that requires chill in the air. Contrary once again, I decided to see what could be done about that.

Food Blog October 2014-0705Food Blog October 2014-0706We call it a bread, but gingerbread is truly a dark, moist cake. It’s redolent with spices and sticky-sweet from large doses of molasses. Its crumbs cling wetly together and, though not particularly dense, it feels rich and heavy.

Food Blog October 2014-0700I poked around and shifted things a bit, landing on a slight adaptation of Laurie Colwin’s gingerbread recipe in her lovely little book Home Cooking. First of all, if I was going to pass this off as a bread, it needed to be in a loaf pan. This is suitable for dessert, of course, but it should also be acceptable as an afternoon snack. For freshness (and to meet the terms of the challenge, of course), I added the diced chunks of two apples. Two eggs and some buttermilk lighten things up. And finally, because I can’t leave well enough alone, to the already tremendous tablespoon of ground ginger I was prepared to include, I insisted on a palmful of finely chopped crystallized ginger as well.

Food Blog October 2014-0712Food Blog October 2014-0714Food Blog October 2014-0715Now, this bread on its own is a marvelous thing. The apples and the ginger are good playmates, and the spiciness of the bread elicits a harvest feel. With a cup of tea or a mug of apple cider, this bread is perfect.

Food Blog October 2014-0732But sometimes you want more than perfect. Enter Nutmeg Sauce: a silky, buttery, creamy spill dotted with grains of freshly grated nutmeg and discolored in the most wonderful way by a generous dose of dark rum. When I first nabbed this recipe from my mom, I thought this was another classic. Due to its inclusion of alcohol, I’d always thought it was a “hard sauce.” This name, however, comes not from the inebriating potential of the concoction, but the texture: a hard sauce is, well, hard. It’s a solid, buttery spread intended to be served in a cold, spoonable dollop. Nutmeg sauce, on the other hand, is served hot (it’s good cold as well, though it does get a bit clumpy). It is thickened to a pourable velvet with cornstarch, and it is the ideal addition to an already-perfect slice of gingerbread.

Food Blog October 2014-0734Food Blog October 2014-0740Here, though I was determined to serve them together, I must admit: the bread was good. The sauce was good. Together, they were friendly but not in love (still, I wouldn’t say no to yet another generously garnished slice). But I think I know how they could become so. Despite my most contrary, resistant feelings, I think replacing the nutmeg in the sauce with cinnamon, for the sake of the apples, would be the perfect pairing. Sometimes you just shouldn’t fight the classics.

Food Blog October 2014-0736

Apple-ginger-bread
Adapted from Laurie Colwin
Makes one 9×5 inch loaf
1 ½ cups flour
½ teaspoon salt
½ teaspoon baking soda
1 tablespoon ground ginger
1 teaspoon ground cinnamon
¼ teaspoon ground nutmeg
¼ teaspoon ground cloves
½ cup (8 tablespoons or 1 stick) unsalted butter, at room temperature
½ cup brown sugar
2 eggs
2 teaspoons vanilla
scant ½ cup molasses
½ cup buttermilk
2 sweet (rather than tart) apples, peeled, quartered, cored, and diced
2 tablespoons finely minced crystallized or candied ginger


  • Preheat the oven to 325F and lightly grease a 9×5 inch loaf pan.
  • In a medium bowl, whisk together the flour, the salt, and the ground spices.
  • In a large bowl (I used the bowl of my stand mixer), cream together the butter and sugar on medium speed until a light, fluffy mixture forms. Add the eggs, one at a time, mixing to combine after each. Add the vanilla and the molasses and mix well, scraping down the sides and bottom of the bowl to ensure complete integration.
  • Add about ⅓ of the flour mixture and beat to combine, then add half the buttermilk. Repeat with another ⅓ of the flour mixture, then the other half of the buttermilk, and finally the last ⅓ of the flour mixture, mixing until the batter is homogenous each time.
  • Finally, add the apples and the minced crystallized ginger and mix on low speed until just incorporated. Scrape and pour the mixture into the prepared loaf pan, and bake at 325 until a toothpick or cake tester inserted through the center emerges with only one or two damp crumbs; 70-80 minutes.
  • For the sake of structural integrity, let cool in the loaf pan for at least 30 minutes, then transfer to a wire rack and cool completely. Serve with or without nutmeg sauce.


Nutmeg “hard” sauce
Makes about 1 cup
½ cup sugar
1 tablespoon cornstarch
½ teaspoon freshly grated nutmeg (or try it with cinnamon to marry with the apples, and tell me all about it)
¼ cup butter
2 tablespoons dark rum (or 2 teaspoons vanilla)
1 cup whole milk


  • Pour the sugar, cornstarch, and nutmeg into a small pan. Set the pan over medium heat, and with a whisk, stir in the milk and the butter.
  • Cook over medium, whisking slowly but consistently, until a sluggish boil is reached. Continue whisking for another 3-4 minutes, or until the sauce thickens slightly to a texture like barely melted ice cream.
  • Remove from heat and add rum (or vanilla); serve hot.

Apple Cheddar Monte Cristo Sandwiches

Food Blog September 2014-0599When you tell people you live in Los Angeles, one of the first things they often say is something in the realm of “well you can’t beat the weather!” Well, okay, but you can get sick of it. As I drove home from work the day we had these sandwiches for dinner, one of the local radio DJs said something akin to “is it still summer? I won’t let it be fall yet.” Cue snarling and angry words from me. How could she?! I mean, I like the sun. I love summer. But here’s the thing: I miss my jeans. When I get home from work and evict myself from my teacher clothes, I miss sliding into the worn embrace of my soft, familiar denim. Not to mention spending a day without the hair plastered to the back of my neck. Appetizing, I know.

Food Blog September 2014-0584Food Blog September 2014-0586Food Blog September 2014-0590So maybe out of resentment at the season (or lack thereof, since it just slid from mid- to late September and we spent the last two weeks ping-ponging between mid-80s and near 100 degree temperatures), I came up with a dish that screams fall at the top of its lovely, melty little lungs. Apples. Cheddar cheese, as sharp as possible. Dense, moist sourdough. Sage, that most autumnal of herbs. Maple syrup. It’s a bit of a breakfast sandwich, but since when have I ever been opposed to that sort of thing as an evening meal?

Food Blog September 2014-0591Food Blog September 2014-0594In its preparation, this sandwich takes the Monte Cristo as its font of inspiration. Though I’m using cheddar instead of swiss, and replacing ham with apples that have been gently sautéed in brown butter with a liberal dosing of maple syrup (are you hungry yet?), the whole assembled sandwich gets dunked in an egg batter and then fried until delicately crisp on the outside and limp with melted goo on the inside.

Food Blog September 2014-0597Food Blog September 2014-0598In an effort to be responsible diners, we ate this with a wilted kale salad-ish concoction, but it honestly didn’t need any accompaniment. In fact, the second time I made it in as many weeks, I didn’t prepare any side dish at all, and that and the relatively petite slices of bread I used made me feel completely justified in demolishing two sandwiches all by my lonesome. Well, minus the apple slice or two that I shared with Miss Lucy. It’s tough to refuse those velvet brown eyes.

Food Blog September 2014-0587Food Blog September 2014-0588Your fingertips will get greasy as you eat this. But despite the richness of the cheese and the eggy coating and the caramelized, syrupy apples, the sage keeps the whole thing from being overwhelming. Its sharp, herbaceous note cuts through the cheese, and it somehow miraculously maintains a bit of crunch even buried between the layers of filling. For me, it’s sandwich nirvana.

Food Blog September 2014-0600

Apple Cheddar Monte Cristo sandwiches
Quantities for 2 sandwiches
1 tart apple, quartered, cored, and cut into thin slices – I like granny smith
6 tablespoons butter, divided
3-4 tablespoons maple syrup
¼ teaspoon salt
8 whole sage leaves
4 slices sourdough sandwich bread
⅔ cups extra sharp cheddar cheese
1 egg, lightly beaten
½ cup milk
2 tablespoons flour


  • Heat 4 tablespoons of the butter, the maple syrup, and the salt over medium heat in a 10-12 inch skillet. When the butter has melted and is bubbling with the syrup, add the apple slices in a single layer, and scatter the sage leaves on top.
  • Cook on medium heat until the underside of the apples is brown, about 5 minutes. Flip the slices over, and cook again to brown the other side, about 2-3 minutes more. Try to keep the sage leaves on top of the apples so they get crisp from the heat but don’t burn. The apples will show that they are almost ready by puffing up and looking swollen just before they begin to get golden, and the butter and maple syrup mixture will get deep, deep toffee colored and become a thick caramel.
  • Remove the pan from the heat and cool while you ready the other ingredients.
  • Shred the cheddar cheese and set it aside.
  • In a shallow bowl, combine the egg, milk, and flour, mixing well to eradicate flour lumps. The addition of the flour will help the exterior of the sandwiches stay crisp – I use the same trick with French toast.
  • To assemble the sandwiches, layer cheese, then half the apples and half the sage, then a bit more cheese onto one slice of bread. You should aim to use ⅓ cup of cheese per sandwich, but we want to have some on both sides of the apple slices to hold the whole thing together better. Top with the second slice of bread, and repeat for the second sandwich.
  • In a skillet, heat the remaining 2 tablespoons butter over medium-low heat. While it melts, set the first sandwich into the egg and milk mixture and leave it for 30 seconds or so to allow some of the batter to penetrate the bread. Then flip it over and let it sit another 30 seconds or so. Repeat with the second sandwich.
  • To cook, raise the heat on the skillet to medium and carefully add the sandwich (or sandwiches, if your skillet is large enough to accommodate both). Cook over medium heat, flipping halfway through, until both sides are golden and crisp and the cheese is melted. This should take about 5 minutes per side.
  • Slice as desired, and consume hot.

(Not Damson) Plum Coffeecake

Food Blog September 2014-0531A few weeks ago, my dad sent an email to me, my mom, and his sisters: a reading recommendation replete with a link to a story from All Things Considered. This is, in itself, not unusual. Dad often sends along news items he thinks are important or interesting. What made this one unusual and, frankly, quite special, was that it was about the acute and wonderful memories food makes for us. It was a story about a baker and a request for a very special cake – an old German cake made with damson plums. The request for this cake threw her back years to her childhood and a cake – the same cake – her opera singer mother used to make. As she watches and smells it baking, she feels like her mother Helga is there too, in the oven with that cake, singing through time and death and all those plums, and she cries tears of grief and nostalgia and joy.

Food Blog September 2014-0498Food Blog September 2014-0501Dad sent it because he thought it was a good story, but also because his mother – my Nana – used to make a coffeecake with damson plums, which made this all sound so familiar. He asked if anyone had her sweet dough recipe, and suddenly the emails were flying. He was not the only one who felt the connection here. My aunts were likewise plunged into memories. Though the cake in the NPR story was a shortbread dough topped with plums, Nana’s cake, like the one her mother made before her, used a yeast dough. It was made in a square pan and she always made two at a time so she could share one with Pap, and have one for the three kids. It had to be damson plums or it just wasn’t right. It called back memories of eating, but also of being in the kitchen with their mother. Nana was with them in that cake.

Food Blog September 2014-0492I knew I had to make it. It had called up too many happy memories for my family to remain simple nostalgia. Besides, I have Nana’s sweet dough recipe, and with the details I collected from my aunts’ emails, I felt like I had enough data to piece it together.

Food Blog September 2014-0491But you know me. I fiddle. I adjust and tweak. I ruminate, and things change. So despite my pure intentions, this is not my Nana’s cake. First of all, I couldn’t find damson plums. Even at the stand at my Farmers’ Market that carries at least six different strains of plums and pluots, there was nothing labeled “damson,” and no one knew what I was talking about. A bit of internet research suggested I might try an Italian plum as a close substitute, but without ready access to those either, I settled on a deep, black-purple skinned variety with yellow flesh. The point seemed to be a plum that was not terrifically sweet, since the cake itself is snack or breakfast fare, not a sugared up dessert. From there, with the main ingredient already an adaptation, I felt freer to play a bit as I constructed the recipe.

Food Blog September 2014-0502From Nana’s original dough, I replaced water with milk, exchanged white sugar for brown, and added a healthy dose of cardamom. I suspect Nana never used cardamom in any of her baked goods, and likely never had any in her spice collection, but its pleasant citrusy aroma and warm spicy flavor go so beautifully with plums that I decided it was a necessary update. Since I was already playing quite a bit with what I imagine was Nana’s original procedure, I decided to go whole hog and add a simple streusel to the top just before baking. This was the right thing to do. A little extra spice, a little extra sweetness, turned crumbly in some places and melted into the plums in others, adding caramel loveliness to the whole thing.

Food Blog September 2014-0504Like Nana used to, I made enough dough for two cakes. Obeying the mandates of memory, I did one in a square pan. I wasn’t sure how it was going to turn out – just a hunk of dough flopped and poked into a pan – so for the other I tried for a twisted coil, laying the flat snail-shell of dough in a springform pan to rise. Interestingly enough, while adding streusel to the top was a successful adaptation, the pan and shape change was not so ideal. The square shape turned out better because it made for a more even distribution of plums. The coil, while it baked into a beautiful puffy spiral, was smaller to start with, which meant I couldn’t load on as many plum slices. When it expanded, both on the counter and in the oven, the plum distribution ended up a bit sparse (though the outcome was still delicious). The square shaped cake, which had nowhere to expand but straight up, retained its fruit coverage for a final product that can only be termed plummier. That, then, was the one I brought to work with me to share. By the time I left campus in mid-afternoon, only a tiny, plum-less corner remained.

Food Blog September 2014-0503Food Blog September 2014-0506Nana, this is a good cake. I’m glad you made it, and I’m glad it was remembered. I don’t know whether you would have liked my version, and I know you wouldn’t have liked the mess I made in the kitchen while I worked on it. I do think, though, that you’d have liked the fact that I was happy while baking and that I made enough to share. And I think you would have liked that it made us all think about you so fondly. Food Blog September 2014-0534Food Blog September 2014-0533

(Not damson) Plum Coffeecake
Makes two 9-inch cakes – one for you, and one to share
For the dough:
4 teaspoons active dry yeast
1 cup lukewarm milk
½ cup + a pinch of brown sugar
1 teaspoon vanilla
4 eggs
½ cup unsalted butter, soft but not melted
1 teaspoon salt
2 teaspoons ground cardamom
4-5 cups flour
4-5 yellow-fleshed plums, thinly sliced (firm, or even slightly underripe, will be easiest to work with)
For the streusel:
4 tablespoons cold butter
4 tablespoons flour
3 tablespoons brown sugar
1 teaspoon cardamom or cinnamon
pinch salt


  • Add the yeast and a pinch of brown sugar to the lukewarm milk and stir to combine, then set aside for 5-10 minutes for the yeast to burble and get foamy.
  • Meanwhile, combine 3 cups of the flour, the salt and the cardamom in the bowl of a stand mixer. Add the yeast mixture, the eggs, and the vanilla and mix on low speed with the paddle attachment to combine.
  • When the eggs are mostly integrated, add the butter and mix on low speed until it is mostly absorbed into what will look like a wet batter. Add an additional 1 cup flour and mix until combined.
  • Switch to the dough hook and knead for 5 minutes until a soft, elastic dough forms. If the dough looks very loose or sticky and is not coming together, add the final cup of flour ¼ cup at a time, kneading well between each addition. You may not need the full 5 cups of flour – mine took a total of 4 ¾ cups.
  • When the dough is soft and stretchy – a bit like an elastic playdough – lightly oil the bowl, roll the dough around in it a bit, and then cover tightly with plastic wrap and set in a warm place to rise for 1 ½ – 2 hours, until doubled.
  • While the dough rises, slice the plums.
  • After the dough has doubled in size, punch it down by gently depressing your fist into the dough to release trapped air, then let it rest for 5 minutes to get its breath back.
  • Divide the dough into two equal hunks, fold, push, or twist into desired shapes, and settle each loaf into one of two greased or buttered 9-inch square or springform pans. Nana did a simple square, but you could also roll the dough out into a long, wormlike log and then twist it like a rope over and over itself, then wind it up in a coil like a flat snail-shell.
  • Top the shaped dough with plums, slightly overlapping the slices to accommodate for the additional rising time. Adding the plums now allows them to macerate a little and release some juice and flavor into the dough.
  • Cover the cakes lightly with plastic wrap or a clean kitchen towel and let them rise again for 30-45 minutes. They will almost double.
  • While the cakes rise again, preheat the oven to 350F and make the streusel.
  • In a small bowl, stir together the flour, brown sugar, cardamom or cinnamon, and pinch of salt for the streusel. Using your fingers, blend in the 4 tablespoons butter until the mixture is reminiscent of damp sand, and little clumps flatten but cling together when you press them between your thumb and forefinger.
  • Just before the cakes are ready to go in the oven, remove the plastic wrap or kitchen towel and sprinkle on the streusel, using half for one cake and half for the other. It should be enough to cover the surface completely, but don’t skimp! Use it all, as the cakes will rise again in the oven and thus the coverage will decrease a bit.
  • Bake 30-35 minutes until the streusel is golden, the tops of the cakes are nicely bronzed, and they are cooked through. Let cool at least 20 minutes before removing from pans or slicing.
  • This bread, despite how rich it is, bakes up quite light and is best the first day. It will keep three or four days in the refrigerator, well-wrapped, but it does get a little dry. Nothing a quick trip in the microwave and maybe a slick of cream cheese can’t fix, though.

Project Sauce: Peppercorn Crusted Pork Tenderloin with Plum Gastrique

Today’s entry rounds out my eighth month of this sauce project. I’ve learned a number of things thus far, but the one that remains the most challenging is this: sauce is a component, not a complete product. That means you must not only execute the sauce itself, but you also have to decide what to drizzle, spoon, scoop, pour, or dab it over!

Food Blog August 2014-0442Sometimes this is quite simple. Hollandaise, for example, is such a classic that eggs benedict spring immediately to mind. A few weeks ago, my meunière sauce had a similar effect, demanding as it does a particular fish to moisten and flavor. And in fact, once I figured out what the next entry in my little project would be, I had no trouble dreaming up how I would serve it. It would be a gastrique – a French sauce that melts sugar and vinegar together into a thick, sweet-sour glaze. Mine, since it’s the height of summer and every week I can’t help but fill a bag with stone fruit at our local Farmers’ Market, would be dressed up a touch with the addition of plums. As soon as I knew this, I knew I wanted to serve it over moist lovely slices of pork tenderloin. Easy. Done.

Food Blog August 2014-0440Except.

Let’s straighten out an unfortunate item of business here, friends. N. doesn’t like pork. Oh he loves bacon. Sausage, especially breakfast sausage, is a treat. He’ll eat various smoked and cured pig-based items: prosciutto and pancetta are consumed with gusto and exotics like guanciale or chorizo are just fine. He’ll even tolerate ham, though it wouldn’t be his first choice. But pork itself, not treated with smoke or salt or brine, elicits a sneer. He would never order pork tenderloin in a restaurant. Ribs are more trouble than they’re worth. Even pulled pork had better be swimming in a pretty flavorful sauce to keep him interested. I have to get my pork chop fix when I visit my parents without him. It doesn’t seem to matter if it’s breaded and fried, grilled up, or seared and roasted. He’ll have the chicken, thanks.

Food Blog August 2014-0426This, as you can imagine, was a considerable wrench aimed at my little plan. But the idea of silky, tangy, liquid plum dribbling over a thick slice of tenderloin sounded too good. I decided he would just have to deal. So I rolled the tenderloin in a blend of crushed peppercorns, coarse salt, and thyme leaves. I seared it, I roasted it, I let it rest. I cut it in thick, moist slices and served him a few with a coating of ruby sauce.

Food Blog August 2014-0428He went back for seconds. Later, I caught him in the refrigerator tasting just one more slice. He considered piling the leftovers onto some sourdough for a lunch sandwich the next day. Um, pork.

Food Blog August 2014-0432I can only figure one of two answers here. One, it could be that the heat from the crushed peppercorns was so powerful that it disguised the porcine flavor he’s so tepid about. Two, and this is the option I choose to believe: the pairing was so perfect, and the gastrique so sublimely flavored, that he couldn’t help himself but to fall hard for the combination.

Food Blog August 2014-0434Whichever it was, and however you feel about pork, this sauce is definitely worth trying. No butter this time; this sauce contains no dairy, no eggs, and no flour. It’s completely different from every other sauce I’ve approached thus far, with one exception: it must be simmered to thicken. Here, though, rather than emulsifying butter or letting flour granules soak up liquid or gently cooking egg yolks to coax out their protein strands, we’re contending with melting sugar and evaporating water content. In my version, the sugar and vinegar required to make this a gastrique are joined by gloriously ripe red plums, cooked down into a jammy pulp (helped out with the determined application of a potato masher), strained, and then returned to the pan just to help a few bits of diced raw plum heat through, for some texture. And all of this happens while the pork is cooking, so everything is ready to go at roughly the same time.

Food Blog August 2014-0437Food Blog August 2014-0438If you’re not a pork tenderloin fan, I think this would also work really well with salmon, or with various varieties of poultry. It would also provide the perfect wilt as the dressing in a warm salad of dark leafy greens; I’d opt for spinach. And save the skins and pulp after you’ve strained out the glorious velvet sauce. Warm or cool, perhaps with an additional sprinkle of sugar, they make a fantastic tart spread for toast.

Food Blog August 2014-0441

Peppercorn crusted pork tenderloin with plum gastrique
Gastrique recipe adapted from The Tomato Tart
Serves 4
 
For the pork:
1 lb. boneless pork tenderloin
1-2 tablespoons whole black peppercorns, crushed (we used 2 tablespoons, which was aggressively peppery. If you are concerned about spice, try 1 tablespoon)
1 tablespoon fresh thyme leaves
1 tablespoon coarse salt
2 tablespoons olive oil, for searing
 
For the gastrique:
4 ripe plums, divided (the riper they are, the faster they will cook down)
½ cup red wine vinegar
3 tablespoons sugar
Pinch of salt


  • Preheat the oven to 350F. While it warms, combine crushed peppercorns, thyme, and salt on a large plate or a sheet tray, and roll the pork through it, coating it on all sides.
  • Heat the olive oil over medium-high in a large skillet. When it is rippling but not quite smoking, add the pork and sear it until golden-brown on all sides. This should take 2-3 minutes per side. As each side sears, leave it alone. You won’t get a lovely golden crust if you shake the pan and move the pork around too much.
  • When the outside of the pork is a uniform golden-brown (though of course quite raw on the inside still), relocate it to a rack on a roasting pan (I just placed a rack over the sheet tray I’d used earlier) and roast in your 350F oven for 35-45 minutes, or until the interior tests 150F. Then remove it from the oven, wrap tightly with aluminum foil and leave it for 10 minutes. During this time the temperature will rise to 160F, which is perfect.
  • Slice and serve with warm plum gastrique. A few slices, nicely sauced, over a bed of goat cheese polenta is quite nice.


  • While the pork is roasting, make the plum gastrique. Pit and quarter three of the plums. Pit the fourth plum, cut it into a small dice, and set aside.
  • Add the three quartered plums, the vinegar, and the sugar to a saucepan and cook over medium heat until simmering.
  • Turn the heat down, maintaining the simmer, and cook for 5 minutes. Then, using a potato masher (or, if they are really ripe, just the back of a spoon), mash up the plums, skins and all, into a pulpy mess.
  • Cook, stirring often, until the mixture gets syrupy – about 15 minutes.
  • Pour and/or smash the mixture through a strainer to separate the pulp and skins. You can do this into a bowl, or right back into the saucepan. Either way, once the mixture is strained, pour the sauce portion back into the pan, add the diced plumps and a pinch of salt, and cook over low heat for 5 minutes just to heat everything through.
  • Serve warm.