Mom’s Challah

Friends, this is the motherlode.  Or, if you’ll forgive the terrible pun, the Mother loaf.*  In that same red binder of recipes I received as a wedding gift that contains my Nana’s sweet roll dough recipe, my mom included her “secret” recipe for challah (in my recipe collection, Mom promises that she’s only given this challah recipe to one other person.  This, as it turns out, has become a lie.  Both my Aunt Nancy and my cousin Julie have this recipe.  Who knows how many other people do too, by now!).  When she was much younger (read: before two children kept her waking hours a blur of busy), Mom baked bread a lot.  I don’t know where she got this recipe for challah, that wonderful, doughy, braided loaf of egg bread traditionally prepared for Jewish holidays and the sabbath, but even in our gentile household it became a holiday essential for us.
Food Blog March 2013-0971
For the past few years, my sister has taken up the challah mantle and has been preparing it, with Mom’s help, on Christmas Eve so we could slather it with apple butter or cinnamon sugar or honey to enjoy on Christmas morning.  It’s not an easy bread (are any of them, really?).  With an incredibly sticky dough, not one or two, but three rises, and a tendency to overbake, it has always intimidated me.  At any phase of the process, something could go wrong!  If I could master challah, I thought privately, I would really have a handle on this bread thing.
So, a number of loaves under my belt, with Easter coming up, and this month’s Twelve Loaves challenge of holiday breads, it seemed like the right time.  Friday morning, after quizzing my mom on a few details, I pushed my sleeves up, swallowed the disparaging warnings of that little gargoyle of doubt who often sits on my shoulder, and dove into Mom’s recipe.
Food Blog March 2013-0920Food Blog March 2013-0930Food Blog March 2013-0932
This is, as I mentioned above, a sticky dough.  After kneading it becomes elastic and smooth, but there is still a tackiness about it that leaves your bowl streaked with gummy strands and your hands, if not well floured, stringy with delicious remnants.  It takes a long time – with three rises averaging over an hour each, you aren’t starting this loaf in mid afternoon and expecting it to be ready for dinner.
Food Blog March 2013-0933Food Blog March 2013-0935
I’ve seen plenty of recipes suggesting overnight refrigeration time – Michael Ruhlman’s blog, in fact, has a guest post on challah by Marlene Newell that begins the night before it is baked – but Mom has never done it that way.  If you’ve scheduled a lazy day at home, or perhaps a day punctuated by laundry, tidying up, and the odd brief errand carefully placed during a rise, this could just become your best friend.  It’s soft, it’s rich and tasty, it looks impressive (even if, like me, you only do a three strand braid instead of the more traditional six strand), and it keeps fairly well, provided you wrap it well in aluminum foil.  I find plastic storage gives the crust an unpleasing texture.  Of course, it’s so tasty that I can’t imagine it needing to keep well – it will be gone within a day or two.  On that topic, I’ve never understood the comments that it makes wonderful french toast.  In our house, the full loaf has dwindled to half by lunch time, and as the afternoon wears on slice after slice seemingly evaporate, until the bread board contains only a lonely half heel and a small pile of crumbs.  This is the first time I can remember, with only N. and me indulging (Lucy asked with pleading eyes of liquid velvet, but it’s too good to share), that the loaf has made it to day three of existence.
DSC_0910
Despite my lingering doubt, I had only a few moments of anxiety as I put together this loaf.  The stickiness of the dough stressed me out a little – even after adding the full amount of flour in the recipe (as I will note again below, you only incorporate part of the flour at first, adding in additional ¼ cups at a time as needed to work the dough), thick gobbets clung to the sides of my mixing bowl, my dough hook, and my fingers.  One rise down, however, and the stickiness diminished.
Food Blog March 2013-0937Food Blog March 2013-0940Food Blog March 2013-0943
Faced with three thick strands of dough, I forgot how to braid for a moment.  Heavy, stretchy worms of raw dough are a far cry from pigtails or Barbie hair, my braid targets in a past life.  But braid made and ends tucked under, I had something that actually looked like my mom’s longed for loaf.
Food Blog March 2013-0944Food Blog March 2013-0949
A quick glaze of egg wash and a generous sprinkle of poppy seeds, and I started getting excited.  A quick, almost half hour in the oven later (the loaf goes from moist and springy to overbaked in what feels like an instant), and I was staring at a near perfect replica of Mom’s bread.
Food Blog March 2013-0958
It’s hard to wait the requisite 15-20 minutes to let the bread cool and the internal structure solidify, but you should.  It makes slicing much more successful.  And once you have waited, you should cut thick slices, and garnish them with butter or jam or just your own teeth and tongue.  Happy Sunday, whatever you might be celebrating.
Food Blog March 2013-0966
Mom’s Challah
1 tsp + 1/4 cup sugar, divided
½ cup warm water
2 tsp active dry yeast (or 1 package, which contains 2 ¼ tsp)
½ cup vegetable oil
½ cup warm water (again)
2 tsp salt
2 eggs, lightly beaten
3 ¾ – 4 cups flour (I used bread flour, but Mom has always used all-purpose)
Poppy seeds or sesame seeds for sprinkling
1 egg yolk beaten with 1 TB water


  • Dissolve the sugar in the first ½ cup warm water in a large bowl (or the bowl of your stand mixer, if you are using one).  Sprinkle yeast on top and let it stand to burble and breathe for about 10 minutes.
  • When your yeast has woken, and smells like bread and beer, use your paddle attachment (if you are using a stand mixer) to incorporate the oil, second ½ cup of warm water, sugar, salt, and beaten eggs.
Food Blog March 2013-0928
  • Add 3 cups of the flour and beat well.  The dough will be very sticky, but as Mom says, that’s okay.  Cover the sticky mass with a cloth and let it rest for 10-20 minutes.
  • If you are using a stand mixer, exchange your paddle attachment for the dough hook and begin kneading at low to medium speed.  As needed, add the additional flour by ¼ cups at a time.  Knead for 8-10 minutes or until the dough passes the windowpane test.  When I asked Mom about this, she looked at me like I was speaking a different language, then said “I always use the baby’s bottom test,” which got the same look back from me.  She was talking about smoothness and texture, but considering she often gives the dough a little smack when she’s done kneading it, I wondered about the ethics of this measuring device…
  • If you are kneading by hand, turn the sticky mass out onto a well floured board.  With equally well-floured hands, knead for 10 minutes, incorporating more flour as needed, until the dough is smooth and has a shiny surface (and feels, apparently, like a baby’s bottom).
  • In either case, now is the time to place the ball of dough into a lightly oiled bowl and stow it in a warm place to rise for 1-2 hours.  I like to use my oven, letting it heat for 5 minutes and then turning it off for 5 minutes before putting the dough inside.
  • After the dough has risen to double in size, punch it down (Mom notes “this is fun!”), cover it with a clean cloth, and let it rise again until doubled again – about 45 minutes.
  • Divide the dough into three equal parts.  Shape each third into a long rope, place on a greased or parchment lined baking sheet and braid together loosely, pinching the ends firmly and tucking them under on each side.  Cover with a cloth or kitchen towel and, once again, let it rise for 45 minutes to an hour.  See why you need all day for this loaf?
Food Blog March 2013-0947
  • When the braid has swollen again, preheat the oven to 350F.  While you wait, beat an egg yolk with about a tablespoon of water to make an egg wash.  Brush the top and sides of the braid with your egg wash, then sprinkle with poppy or sesame seeds (we prefer poppy, in our house).
Food Blog March 2013-0951
  • Bake in your preheated oven for 30 minutes, or until the internal temperature of the bread is 180-190F.  The top will be golden brown and the bottom will feel delicately hollow when thumped.  Hot ovens tend to overbake this bread, so be sure to check at 30 minutes, or even just before.
  • When the bread tests done, take it out of the oven and let it cool on its baking sheet for 15-20 minutes, to allow the delicate internal crumb structure to firm up a bit.  This will make for easier slicing.
 Food Blog March 2013-0965
Thanks, Mom!

DSC_9042

* still not as bad as N.’s pun: he keeps saying “holla for challah!” and even though he admits this is neither in good taste nor particularly funny, finds he can’t stop doing it…

Pizza Pretzels

I have these moments when I realize I’ve just said something.  I don’t mean this to sound like I’m unaware of or not in control over my own speech, but I am a classic case of speaking before I think, at least when it comes to food.
Food Blog March 2013-0882A few weeks ago, N. and I were on the verge of no longer enjoying our morning errands.  On Sundays, we frequently run errands before going to our local Farmers’ Market, and because one of us is occasionally a bit of a lazy slouch on weekend mornings (I’ll leave the guessing up to you), we often don’t hit the shops until after 10am.  This is not a huge problem, except that my body is programmed to begin its hinting that “lunch would be nice, please” at about 11:30.  By noon it’s more of a demand, and by 12:15 you’d better feed me, because I’m about to devolve into full-on hangry (which I remain convinced is one of the best portmanteaus ever invented.  It’s right up there with spork).  N. is keenly aware of this schedule, and yet for several weeks in a row we’ve found ourselves food-less during the half hour that takes me from peckish to crotchety to downright unpleasant.
Despite this, I retain a sense of snobbishness when it comes to choosing what I will eat to relieve this condition.  We play a game when it comes to choosing food, especially when the choices are undesirable; I affectionately call it the “bleh” game.  It consists of one or the other of us facetiously offering “we could eat there…” which inevitably engenders the titular response.  This game was in full effect as, plagued by my hangriness, we walked past one of those soft pretzel stands at the mall we were ambling through and N. suggested it.  I looked in at the pizza pretzels – studded with cheese that looked painted on, pepperoni grease slowly cooling and solidifying, and declared, loudly, “psssh, I could MAKE those.”
Food Blog March 2013-0904Suddenly, I was beholden to it.  N. isn’t always taken in by my crazy food schemes, but apparently the idea of a homemade pretzel masquerading as pizza was something he’d never known he always wanted.  It fell to me to create a version that wasn’t sodden with grease, wasn’t packed with questionable preservatives, and wasn’t luke-warm and pressed behind plastic with its sad, sorry brethren.  My typical response to this would be to turn to the internet.  This time, however, I had Nana’s sweet roll dough to guide me, and I wondered whether I could achieve my objective by creating a savory version of her lovely elastic dough.
Food Blog March 2013-0894
Removing the sugar and adding savory Italian herbs to the mix was a successful experiment.  The kitchen smelled like foccaccia while my dough rose, and I was thrilled with the flavor in the piece I pinched off to sample.  I divided my dough into eight little balls, rolled them into long stringy ropes, and surprised myself when careful looping and twisting resulted in a pan full of something that actually looked like pretzels.
But here’s where things started to go a bit imperfectly.  I topped my plump little pretzels with chunks of sundried tomatoes, mounded them with shredded mozzarella, and draped slices of pepperoni over the top.  They lost their definition and looked more like piles of cheese than like pretzels, but that didn’t bother me much.

Food Blog March 2013-0900

Upon baking, however, a bit of their charm dissolved.  In the time it took to bake the dough, the cheese didn’t brown or bubble they way I’d hoped.  Further baking time led to overly charred edges on the tomatoes, and the cheese that had fallen onto the parchment paper I’d laid down as extra insurance went from bubbling to black.  N. ate them with gusto anyway, devouring several for dinner that night and taking foil-wrapped leftovers to work for the next few days.  But I wasn’t satisfied.  Not only were there overcooked elements, but the result didn’t taste quite like a pretzel.  It was good, but lacking in that toasty, crunchy exterior that makes a soft pretzel great.  I’m going to give you the recipe I used, but first consider these alternatives and, if you try any, let me know how they work out.
Next time, I’m going to mix the sundried tomatoes right into the dough along with the herbs.  Their flavor will still be there, but I think they will stay chewy and moist instead of burning.  I’m also toying with the idea of stuffing the pretzels with the cheese rather than sprinkling it on top – this would result in an oozing, melty, stringy core to each pretzel, and it would allow you to boil the pretzels before baking them, which contributes to the classic texture of the exterior my version was missing.  I would flatten each individual dough ball into a rectangle, sprinkle it lightly with cheese (leaving a generous border on all sides to prevent leakage), then roll and pinch tightly before making a rope and twisting as before.
I’d then boil the pretzels (Alton Brown has a recipe that looks really promising, no surprise there), drape them with pepperoni or olives or onion, and bake as before.  This would, I suspect, eliminate charring, create a better texture, and perhaps introduce a more successful alternative to the travesty that is stuffed crust pizza.*
These would be delightful dunked in some garlic butter, or basil spiked marinara, or even seasoned and pureed roasted red peppers, if you’re into any of those sorts of things.  But either way, you’ll have a remedy for the sneaky Sunday afternoon hangries that far excels anything you’ll find at a food court.
 Food Blog March 2013-0896
Pizza Pretzels
Makes 8 sweet, slightly stubby 4-inch pretzels
2 tsp active dry yeast
¼ cup warm water (stick your fingertip in; the water should be about body temperature)
1-2 tsp honey
¼ cup scalded milk, cooled
¼ cup melted or very soft butter
1 egg
1 tsp salt
1 tsp garlic powder
1 tsp dried basil
1 tsp dried oregano
2 ¼ cups bread flour
1 3oz. package sun dried tomatoes (not packed in oil – these would be, I suspect, too wet for this recipe)
½ – 1 cup shredded mozzarella cheese
24 slices pepperoni
  • Combine yeast, honey, and warm water in the bowl of your stand mixer (or in a medium bowl) and set aside for 5 minutes, or until the yeast is bubbly and smells like bread.
  • Meanwhile, heat the milk and combine with the butter, swirl until the milk is cooled and the butter is melted.
  • Add cooled milk, melted butter, and egg to the bubbling yeast and mix on low speed with the paddle attachment until the egg is broken up a bit and things are slightly combined.
  • Add flour, spices, and salt (you could probably add any combination of spices you like, including crushed red pepper for some heat, or rosemary for a woodsy flavor.  I’d stick with dry spices, though, for easier distribution and that classic pizza flavor) and mix with the paddle attachment until a wet, sticky, uneven dough forms.  You could also add the tomatoes at this point, if you want to incorporate them directly into the dough.
  • Scrape clean the paddle attachment and switch to the dough hook.  Knead at medium-low speed for 5-8 minutes or until dough is smooth, elastic, and willing, if you pinch a bit between your thumb and finger, to stretch out about an inch without tearing.
  • Dump your ball of dough into a glass or ceramic bowl greased with olive oil and turn it over once or twice until it is coated in oil, then cover with a clean kitchen towel and stow in a warm, draft-free place for 1½ hours, or until it has puffed and doubled in size.
  • When you return to your dough, after you admire its impressive swell and the way it already smells of pizza, gently deflate by pressing your knuckles into the center of the puff.  Let it sit for a few minutes to get its breath back.

Food Blog March 2013-0885

  • Turn the dough out onto a barely oiled surface (I don’t have a marble stone or anything fancy like that, but I do have a pizza peel, which was a little small but otherwise worked just fine) and divide into eight even pieces.
  • If you want to stuff the centers of your pretzels with cheese, roll each dough ball out into a thin rectangle and sprinkle a few tablespoons of mozzarella over the surface, leaving a wide margin on all edges to prevent the shreds from escaping.  Then wind it up tightly and pinch the edges to secure.

Food Blog March 2013-0888

  • Whether you are stuffing with cheese or not, now is the time to roll the ball (or coil) of dough into a long skinny rope 18-24 inches in length.  The best way to do this, I found, is to use the palms of your hands and start in the middle.  Push the rope of dough firmly away from you, then back toward you, starting in the very middle and then, as the dough bulges toward the outer edges, follow it along moving outward until the rope is even in thickness and at least 18 inches long.
  • To form your pretzels, bring the ends of each rope toward each other into a horseshoe shape.

Food Blog March 2013-0889

  • Then, about a third of the way down each end of the horseshoe, make a twist.  Take one end of the rope and twist it fully around the other (that is, the left side of the rope should end up back on the left side once you’ve twisted it completely around the right end).
Food Blog March 2013-0891
  • Gently grab the ends above the twist and flip them over, pressing them into the bottom of the horseshoe loop to adhere.  You’ve made a pretzel!
Food Blog March 2013-0893
  • Place all eight of your formed pretzels on parchment lined baking sheets (I found I needed two), cover them with a kitchen towel, and let rise for 30 minutes.  During this time, you should preheat your oven to 375F.
Food Blog March 2013-0895
  • When the pretzels have risen again – it won’t be a dramatic change, but they will get a bit plumper – add your toppings.  If you’ve integrated the tomatoes and cheese already, just drape a few slices of pepperoni over them and you’re done.
Food Blog March 2013-0901
  • If you haven’t integrated the tomatoes or cheese, stud the tops of each pretzel with the tomato pieces, sprinkle with cheese, and then add the pepperoni on top.  Be careful not to get too much cheese on the parchment paper, as it will burn and lend an acrid taste to your pretzels.
Food Blog March 2013-0903
  • Bake your topped pretzels at 375F for 20-25 minutes, or until the cheese has melted and the dough is fully cooked.  The cheese won’t get quite as brown as it does on a pizza, but it will still be melty and delicious.
Food Blog March 2013-0910
  • Let cool for 5 minutes before eating, so the dough has a chance to firm slightly.
We had ours with a salad inspired by pizza toppings: spinach, artichoke hearts, olives, tomatoes, and some pine nuts for crunch, tossed with mustard lemon vinaigrette.
 Food Blog March 2013-0911
* I love, love the idea of stuffed crust pizza.  Forcing more cheese into an already cheese-laden dish?  Yes, please!  But the reality of it is so disappointing: a thick block of semi-melted sludge inside a soggy crust, like someone wrapped a stick of string cheese that had been lying in the sun for an hour in some sandwich bread and called it a day.  It’s a worthy notion, but the execution just hasn’t been perfected.

Honesty and Irish Soda Bread

Food Blog March 2013-0878
It seems like admission and honesty are the motifs of the moment in many of the blogs I read.  A few weeks ago Joy the Baker created a beautiful list of things to remember while blogging – things like despairing over the cuteness of other people’s pages isn’t worth it.  Things like not stressing over ratings, and remembering that the internet is always changing, which means it’s okay to not be involved in every single new trend.  She has just ended a week on that most humble and most basic of vehicles for deliciousness: toast.  Simple.  Honest.  Real.  (Also, can you tell I’m kind of crushing on Joy the Baker right now?  This is about honesty, after all…).  Shauna on Gluten-free Girl and the Chef has been writing for herself lately, not for ratings or comments or trends.  In fact, she has closed comments on her blog; she’s writing in the undisturbed beauty of what is important to her, not what is important to others making demands on her.  Just Monday, Irvin at Eat the Love published a beautiful, real, excruciatingly honest piece he’d been sitting on for over a year about jealousy and perfection and measuring up in the blogging world.  (Lately I’m crushing on Irvin too; he just seems so nice!  And sometimes he responds to my tweets!  Squee…).
Food Blog March 2013-0854These are courageous posts.  It’s hard to be real here in this virtual world.  It’s hard to admit to imperfection or doubt or dissatisfaction or envy.  These are ugly ideas.  Yet we have them, and our impulse is to hide them behind the veneer of beautifully crafted pages, or photos with the white balance adjusted, and cropped just right to edit out the dish soap we forgot to move, or fluffy, romantic sentences with words like “mouth-feel” or “buttery crumb” or “silky texture.”
Food Blog March 2013-0858
And I do it too.  Despite my assertion that you are going to see imperfect products or read about unsuccessful attempts, of course I want every item I post about here to be beautiful and balanced and insurmountably delicious.  Of course I don’t want to admit to the doubts and worries and sneaky hate spirals that sometimes result from something as simple as turning away from grading papers to bake a loaf of bread and then half an hour later I’m trembling before a monster of despair that maybe by cooking instead of researching I’m throwing away all that work I did on my PhD because my dissertation might never become a book.  That by insisting on making dinner every night and posting every week, I’m sabotaging my own search for a better job and therefore I’m never going to “make it” in the adult world.  That I’m wasting my time as a blogger because I don’t have – and will likely never have – the same kind of following as Deb or Ree.  That there are a billion food blogs out there and I’m just adding to the clamor without bringing anything original or special or any of the things I hoped to be when I started writing.

Food Blog March 2013-0861

But I don’t want to tell you all that.  Despite my doubts, I, too, want to be a “good blogger,” a “popular blogger” with a following and cooing comments over the little messes I arrange just right so they look like masterpieces on screen, so I try to do the things that will make this happen.  I want to be an authority.  I want to spring to people’s minds when they think of food sites they like.  I want to talk about food and I want to be real, but I still want to find that magical, imaginary combination of words and photos and style and design that pulls people here in droves.  Those days where my little stats bar doesn’t even tick from zero to one are too real.  I never tell you that.
Food Blog March 2013-0862But I think this desperate, ugly, gasping kind of honesty can be a good thing, even if it only emerges now and then.  It’s a sign of strength and a sign of independence.  It forces you – it forces me – to reassess, to remember that I am doing what makes me happy for the reasons it makes me happy.  And maybe that is part of what Spring is about: cleaning out your assumptions.  Stripping down the need for perfection and presenting a more naked, more truthful, more real version of yourself to your audience.  Even if that version is a little ugly.
Let’s call it mental Spring cleaning.

Food Blog March 2013-0851

This week I made Irish Soda Bread.  Simple, rustic, honest.  Lumpy.  Rough.  Uneven.  No yeast, no eggs, no herbs or dried fruit or fancy techniques or browned butter or sifting.  I didn’t even wipe down the counters first to make you think my kitchen is always spotless.  I shuffled through a few recipes and found suggested combinations like golden raisin and rosemary, or candied orange peel and bittersweet chocolate.  Those didn’t feel truthful.  They were too dressed up – too showy.  So I turned to the most basic, most honest cookbook I have: Baking Illustrated.  BI is willing not only to present you with a recipe, but to explain why they made the choices they made, and what happened when they tried things in other ways.  They talk about the cakes that came out gummy or runny.  They talk about overly eggy batters and dry loaves and dense biscuits.  They show you what a less-than-perfect product looks like.  And then they tell you how to fix it.  This was the kind of Springtime honesty I needed.

Food Blog March 2013-0866

I changed very little from the original recipe, only using brown sugar in place of white granulated sugar for a deeper flavor, and taking up the suggestion to bake the loaf in a deep covered pot to enhance the texture of the crust.  Since I’ve been doing that with success in my yeast experiments, it seemed worth trying out here too, and I have to recommend it highly.  Our loaf was surprisingly tender – almost like a giant scone – and the crust was springy and buttery – it felt like it must be loaded with eggs even though there are none in the recipe.  I like the flavor the baking soda provides, which is a different kind of tangy breadiness than yeast.  After weeks of churning out loaves that require hours and hours and multiple rise times, it was nice to have a quick-bread that rose just enough on baking time alone, and left behind concerns like proofing and kneading and windowpanes and tucking and shaping.  Honestly.
 Food Blog March 2013-0868
Irish Soda Bread
adapted from Baking Illustrated
3 cups all-purpose flour (BI recommends one with a relatively low protein content, like Gold Medal or Pillsbury) plus a scattering for your work surface
1 cup cake flour (even lower protein, which makes for a more tender end product)
2 TB brown sugar
1½ tsp baking soda
1½ tsp cream of tartar
1 tsp salt
2 TB softened butter
1½ cups buttermilk
3 additional TB butter, divided
Food Blog March 2013-0872

Here’s the final product, when I edit and trim.

Food Blog March 2013-0873

But since we’re being honest here, this is the set-up; I just push all that other stuff aside and crop it out…

Preheat your oven to 400F.  BI says to position a rack in the upper middle portion of your oven, but I left mine near the bottom and things turned out fine.
Whisk the dry ingredients together in a large bowl.
Cut in the softened butter with a fork, your fingers, or a pastry blender until it is distributed in small crumbly bits.  The mixture, BI says, should resemble coarse crumbs.
Add the buttermilk and combine with a fork just until the mixture begins to come together – the coarse crumbs should clump into slightly wet crags.
Turn out onto a floured board and knead slightly – 12 to 14 turns – just till the dough becomes “cohesive and bumpy” (43).  You don’t want to overknead this bread because it will become tough.  The intent here is not to stimulate gluten production, as it would be in a yeast dough.  We just want a homogenous mass that stays together.
Pat the dough into a 6 inch round (about 2 inches high) and score an X in the center with a sharp knife; use 2 TB of the additional butter to grease the bottom and sides of a dutch oven or similar covered pot.  Place the loaf carefully inside, cover, and bake with the lid on for 30 minutes.  Then remove the lid and continue baking for an additional 10 minutes, or until the internal temperature is 180F.
Melt the final TB of butter.  As soon as you remove the loaf from the oven, brush the top with the melted butter to keep the crust soft and tender.
Wait about half an hour before you attack it – this bread is delicate and it needs the extra structural support gained by cooling.  Earlier slicing will result in squashing and crumbling, and as honest as that is, we’d rather have nice slices or, as N. and I prefer, thick wedges for dunking.

Food Blog March 2013-0875Food Blog March 2013-0877

Go-to Dough III – Orange and Rosemary loaf

First, thank you.  Thank you to you lovely people and the lovely way you responded to last week’s post about my sweet rolls and my Nana.  Old friends, new friends, family, it warmed me to see your comments.  I so appreciate you making yourselves known and sharing your own experiences and memories – I’m motivated to delve into more old family recipes and more new experiments.  That probably sounds a little cheesy, but I mean it.


Food Blog March 2013-0755
So I suppose you could call this a thank you loaf.  It was delicious, it was easy (well, as easy as baking bread can be, I suppose), and I made it for you.
I wanted, as I’ve noted, a basic recipe, though I can’t resist adding a tweak or two to keep things interesting.  My first boule was overbrowned; my second utilized an overnight leavening procedure I didn’t think added all that much to the final product.  So the third had to be just right – the charm, you might say – and I really do think it was.  Goldilocks bread.


Food Blog March 2013-0761
I went back to Ruhlman’s directions for cooking the loaf in a pot.  This strategy for maintaining the shape and for holding in moisture by using a lid makes so much sense, and I wanted to give it another shot.
This time I decided to add some fat to the bread in the form of olive oil.  This made the crumb a bit moister and I think it kept the bread tasting fresh longer.  To make the yeast extra happy, I proofed it (them?  Is yeast grammatically plural?) with a few tablespoons of honey.  This didn’t contribute noticeable sweetness to the final product, but it did make for an extra foamy yeast party.  You could probably increase the honey if you wanted a sweeter end product.  Since I was still on a high from the orange marmalade triumph, I decided this bread would benefit from some orange zest and, just for fun, some fresh rosemary too.  I ended up with a really beautiful loaf: puffed, thin but crisp crust, moist dense crumb.  The orange and rosemary creep up on you – perfumed subtlety lingering in the background until you’re almost finished chewing.  Then they suddenly become present.  It’s not a punch, it’s a slow sloping into flavor.
This was perfect for sopping up sauce from baked beans (it would make stellar toast for beans on toast), complementing the sweetness and the fatty bacon flavor with its subtle herbaceousness.  I could see adding some dried cranberries to the dough for a wintry take on a breakfast slice.  It dances well with a slick of salted butter, plain and simple, but its shining moment this week was as an open faced sandwich spread thickly with cream cheese and fig preserves.  The orange and rosemary played beautiful back-up to the cream cheese and the fig, and I bolted it before I even considered taking a photo to share the triumph.  If you make this bread – and you should, oh you should – don’t miss this combination.


Food Blog March 2013-0738
Orange and Rosemary loaf
12 oz. warm water
2 TB honey
2 tsp yeast
2 TB olive oil
20 oz. bread flour (or 4 cups, give or take)
2 tsp salt (I’m currently obsessed with a gray French sea salt, which I found at Cost Plus World Market)
2 TB fresh rosemary leaves, minced
zest from 2 oranges


Food Blog March 2013-0740
Combine the warm water, honey, and yeast in a small bowl or a measuring cup, and stir lightly.  Set aside for 5 minutes or so to let the yeast revive from its hibernation.


Food Blog March 2013-0741
In a medium bowl (I use my stand mixer), combine the flour, salt, orange zest, and rosemary.
When the yeast is bubbly and smells of bread and beer and awesome, add the olive oil to the wet mixture and stir lightly.
Pour the wet yeast mixture carefully into the dry ingredients, then stir to combine until you have a wet, shaggy mixture (if you are using a stand mixer, try the paddle attachment.  I know it’s one extra thing to wash, but it brings the mixture together much more quickly than a dough hook).
Once the dough is shaggy but workable, knead for 8-10 minutes or until a small knob can be stretched gently between your fingers to a point of translucency.  This is called the windowpane test.  If you’re getting help from a stand mixer, use your dough hook and knead on medium speed, checking after 6-7 minutes.
Your dough should be warm, elastic, and smooth.  Turn it into an oiled bowl and flip it around until all sides are lightly oiled.  Let it rise in a warm, draft-free environment until doubled, 60-75 minutes (My preferred method is to turn my oven on for five minutes, turn it off, wait for five minutes, and then put the dough inside.  This creates an environment warm enough to help it rise, but not warm enough to start it cooking already).
After the dough has doubled in bulk, push it down gently with your fist to release the gasses trapped inside, then let it rest for 10 minutes to get its breath back.
On a floured board, shape your bread.  Since we are going for a round loaf, spin the dough in a circle, pushing it away from you with one hand, and using the other hand to tuck it under so you form a smooth, round ball.  (There are a lot of videos and complex step-by-step series for this procedure, involving pinching seams, smoothing and pulling, spreading and folding and turning the dough, and a host of others to prevent the loaf from spreading rather than maintaining its round shape.  Letting it rise and then baking it in a round pot takes care of many of these concerns.  I haven’t been particularly firm about pinching seams, and my loaves have turned out nicely rounded.)


Food Blog March 2013-0746
Transfer the loaf to a dutch oven or similar lidded pot and let it rise for another 90 minutes.  I lined my baking vessel with parchment paper this time so I wouldn’t have to use olive oil, which I suspect made my previous attempt too brown on the bottom.  This seemed to work fairly well.
When your dough has risen again, it will be puffed and pushing against the sides of the pot.  It’s now time to score it with a sharp knife, drizzle it with olive oil and sprinkle it with salt, then bake it with the lid on in a preheated 450F oven for 30 minutes.  Keeping the lid on traps some of the moisture inside, so you don’t have to bother with flicking or spraying the inside of the oven, or even with adding a pan of water.
After half an hour, remove the lid and continue baking for 15-30 additional minutes, or until the bread is done (it should register 180-200F on an instant-read thermometer and sound hollow when you tap the bottom).  Mine only took an additional 15 minutes before it tested done.


Food Blog March 2013-0751
Let the bread cool for 10-15 minutes, if you can stand it, before slicing.  This gives the center time to cool a bit and helps it stay together better.


Food Blog March 2013-0760
Or, you know, just tear off chunks and eat them blisteringly hot.  I won’t tell anyone.


Food Blog March 2013-0764

Go-To Dough 2

Because my little house sits smack between the concentrated skyscrapers of downtown Santa Monica and the constant ascent path from LAX, because I can hear the freeway from my backyard and see, from just down the block, the Hollywood sign in the distance, it sometimes slips my mind that I only live a few miles from the ocean.  Los Angeles is a funny place: loud, boisterous, urban, crowded, and yet along its edges it’s a beach town, where it’s just as loud and crowded, but people seem to move just a little slower.
Hard to remember, sometimes, but this past week we were treated to afternoons that reminded me I’m only a few minutes from the water.  Warmth gave way to brisk, fresh breezes heavy with the smell of salt.  Fog rolled over and it felt like a summer day on the Oregon coast.  These reminders of the Pacific Northwest made me want to call on ocean flavors: smoked salmon, crunchy salt crystals, and the grassy headiness of fresh dill.
Food Blog February 2013-0621There are so many different methods for making bread that it’s a wonder anyone becomes a master at it.  This week I decided to try a process slightly more complex than Ruhlman’s basic boule, working with a recipe for French Boule from the Feburary 2009 issue of Cuisine at Home.  The process for this round loaf starts the night before, with a sticky, soggy, tasteless combination of flour, yeast and water called a poolish.  C@H tells us this came from the French pronunciation of “Polish,” from whom they learned this technique (19).  The long, slow fermentation time allows for plenty of yeast development and supposedly contributes a nuttier flavor to the end product.  It is supposed to look like pancake batter, and when you pull it out the following morning and add more water, it is supposed to be very thin.  Mine was, when I put it in the fridge for its overnight chill session, more like the texture of silly putty.  When I added water the following morning, it refused to combine evenly, its sticky strands getting soggier and stickier at the same time.  I was skeptical about this, but followed procedure anyway, and once it had been kneaded aggressively into my dough it didn’t seem to matter.
With the starter crises resolved, I considered flavorings.  Thanks to the overcast coastal feeling of our afternoons and a recent episode of Top Chef, dill sprang to mind as the most logical choice.  It would pair perfectly with our dinner: gemelli pasta draped with smoked salmon and vodka cream sauce.  Black pepper sounded like a nice foil for the dill – pungent and dry where the dill was fresh and mild.  I sprinkled them onto the flattened dough, then rolled the whole thing up into a long tube and kneaded through before letting it rise.  You could certainly add other flavor combos – kalamata olives and cloves of roasted garlic sound incredible – and gently roll and then knead them through the dough.

Food Blog February 2013-0611

Food Blog February 2013-0608
The usual procedure followed: rise, shape, rise again, and prepare for baking.  Olive oil, mustard seeds, and a good sprinkle of coarse salt seemed like the right things to add.
This time, instead of using a Dutch oven, I opted for my cast iron pan.  I was nervous about the bread sticking, which is probably silly, but what can I say?  I’ve lost several chunks of flatbread to that pan because I get anxious and rush the cooking process, so I took out some insurance and settled my loaf onto a layer of parchment paper sandwiched between it and the surface of the pan.
My recipe called for a heavy misting of water over the bread and into the inside of my preheated oven.  I didn’t have a spray bottle on hand with which to mist, so I just flicked droplets in with the tips of my fingers.  The sizzle was tremendous, but seemed to work well.  The resulting loaf was not as big as my first boule attempt, but it was lighter and not overbrowned on the bottom.  The crust was thin but crisp, and we loved the flavor combination.  The mustard didn’t do much besides providing a fun crunchy-pop texture on the edges, but the dill and black pepper were the right contrast of fresh and sharp and incredibly aromatic.  We each took a slice to eat in the car on the way to a soccer game at my husband’s school – had to make sure it was suitable for dinner, after all.  We ate thick slices with our pasta, running them around our plates to pick up every drop of sauce.  We ate more the next day, spread with salted butter, and were surprised and saddened the following morning to find that the loaf was nearly gone.  Dreaming of this bread again, I could see it toasted lightly, smeared with artisan goat cheese and topped with a luscious slice of smoked salmon: the Oregon coast in one bite.
Food Blog February 2013-0615
Dill and Black Pepper Boule
(adapted from Cuisine at Home, February 2009)
For the poolish starter:
1¼ cups bread flour
¾ cup room-temperature water
¼ tsp yeast (I used active dry yeast)
Rehydrate the yeast by combining it in a small dish with 1 TB of the water you’ll be using for the starter.  Let it sit for a few minutes.
Combine the flour, water, and yeast mixture in a bowl or a large measuring cup.  Stir well; the mixture should come together into a texture somewhere between pancake batter and silly putty.
Cover your mixture with plastic wrap and let it sit at room temperature for 3-4 hours, then move to the refrigerator and leave it alone overnight.
The next day, take it out about an hour before you intend to start, so it can return to room temperature and the yeast can wake up a little.
For the bread:
2 cups all-purpose flour (I’m not sure what the advantage is of combining bread flour and AP flour here, but I followed the directions anyway…)
1½ tsp salt
½ tsp yeast
½ cup room temperature water
Poolish starter
2 TB chopped fresh dill
½ tsp (or to taste) fresh ground black pepper
1 TB mustard seeds
1 TB coarse salt
Olive oil for drizzling
Fit your stand mixer with the paddle attachment and use it to combine the flour and salt (you could likely add the dill and pepper here too).
Rehydrate the yeast with 1 TB of the ½ cup water.  Add the remaining water to the room temperature poolish starter and combine.  Mine did not become very thin, as my recipe said.  In fact, mine refused to combine particularly well (read: at all) with the poolish, but it seemed to work out just fine anyway.
Add rehydrated yeast and poolish mixture to the dry ingredients and stir with paddle attachment until the whole mess comes together a bit.  It will be quite sticky.
Scrape sticky mass of just-barely-dough onto a well-floured board and work it with a bench scraper, adding more flour in small sprinkles until some of the stickiness abates and it seems like it could be worked by hand.
At this point, let the dough rest for 10-15 minutes.  The recipe suggests turning a bowl over it (I presume to prohibit drafts), but I think draping on a clean, dry kitchen towel would work just as well.
After the dough has rested, it’s time to knead.  You can do this by hand for 10-15 minutes, or in a stand mixer with the dough hook for 8-10 minutes, until it passes the windowpane test.
Food Blog February 2013-0606
When the dough is smooth, elastic, and stretchy enough to pass the test, if you haven’t added your flavor extras already, flop it onto a floured board and push, pull, or roll out into a rectangle.  Sprinkle on the toppings, then roll up lengthwise and knead together until the dill and pepper are distributed; you’ll be able to see green and black flecks throughout.  I don’t think it matters much when you add something finely chopped like dill, but if you are using a more delicate addition like olives or even sundried tomatoes, be sure to add it this way so it doesn’t get bashed up during the kneading.

Food Blog February 2013-0612

Set the dough in an oiled bowl and let it rise for an hour in a warm, draft-free place (like a briefly heated, then switched off oven).  It should double in size.
Once the dough has risen, remove it from the bowl and shape it into a boule by spinning it away from you with one hand and tucking the dough under with the other.  Let it rise for another hour.
While the dough rises, preheat your oven to 475F and put a cast iron skillet inside (mine is a 9” skillet).  If you are worried about the loaf sticking or getting too brown, prep a piece of parchment paper by cutting or tearing it to cover the bottom and sides of the skillet (don’t be too fussy about this – mine was a square that protruded above the sides of the pan and it was just fine).

Food Blog February 2013-0614

Turn the dough out onto the parchment paper, then pull the skillet out from the oven and set the loaf – on parchment paper if you are using it – into the center.  Slash the top, drizzle with olive oil, and sprinkle liberally with mustard seeds and salt.  Using the tips of your fingers or a spray bottle, mist or dribble the top of the loaf with water.
Place the laden skillet back into the oven, spritz the inside of the oven with ten flicks or so of water, and shut the door.  Wait 30 seconds and repeat the spritzing process.
Reduce heat to 450F and bake for ten minutes.
Reduce heat to 425F and bake for ten more minutes.
Finally, reduce the heat to 375F and bake another twenty minutes.  Remove from oven and cool on a rack for 45 minutes before slicing and devouring.

Food Blog February 2013-0619

Uncommon Brown Sugar and Cheddar Biscuits

When it rains in Los Angeles, the whole atmosphere of the city changes.  The earth sighs acceptance and glee, and the ordinary dustiness of every other person’s front yard glimmers with emerald slickness: life!  Reprieve from the desert we pretend we haven’t built over!  The roads become jagged, glistering, tar and oil stained slip’n’slides on which people drive either too slowly – avoiding disaster through excess caution – or too quickly – rushing to get off the highways as soon as possible.  The sky is unused to gray billows here, or at least it seems that way.

Food Blog January 2013-0518

But for me, the end of this week felt like home.  It was a strange mix of homesickness and invigoration.  I am accustomed to working in this climate.  It feels natural.  Habitual.  My fingers and my brain and my skin – they fit into this overcast world.

Seeking the comfort of familiarity, I decided to leave yeast alone for this week and fall back on something I know: biscuits.  Butter.  Flour.  Buttermilk.  Salt.  Baking powder.  The blessed fundamentals.  But I know the fundamentals.  I wanted more.

Food Blog January 2013-0514

In Ratio, Ruhlman calls these Chicago biscuits because their ratio 3-1-2 is Chicago’s area code.  3 parts flour, 1 part fat, 2 parts liquid.  I’m calling them Uncommon because their pairing – brown sugar and extra sharp cheddar cheese – might not be anyone’s first inclination.  It made sense to me, though, if you reinsert the missing link of apple pie in the middle.  Cheese and apples are perfect.  Brown sugar and apples are perfect.  What would happen if you took the apples out of the equation and left the savory richness of cheese chewing against the molasses-deep hum of brown sugar?  They are also Uncommon because they take a little extra time (almost 3 hours from start to finish) and produce a slightly different product than your ordinary dinner biscuit.

Adapted, obviously, from Ruhlman’s Ratio 312 Biscuits.


Uncommon Brown Sugar Cheddar BiscuitsFood Blog January 2013-0491

scant 2 cups flour (9 oz)

1 tsp salt

2 tsp baking powder

2 TB brown sugar

6 TB butter (3 oz)

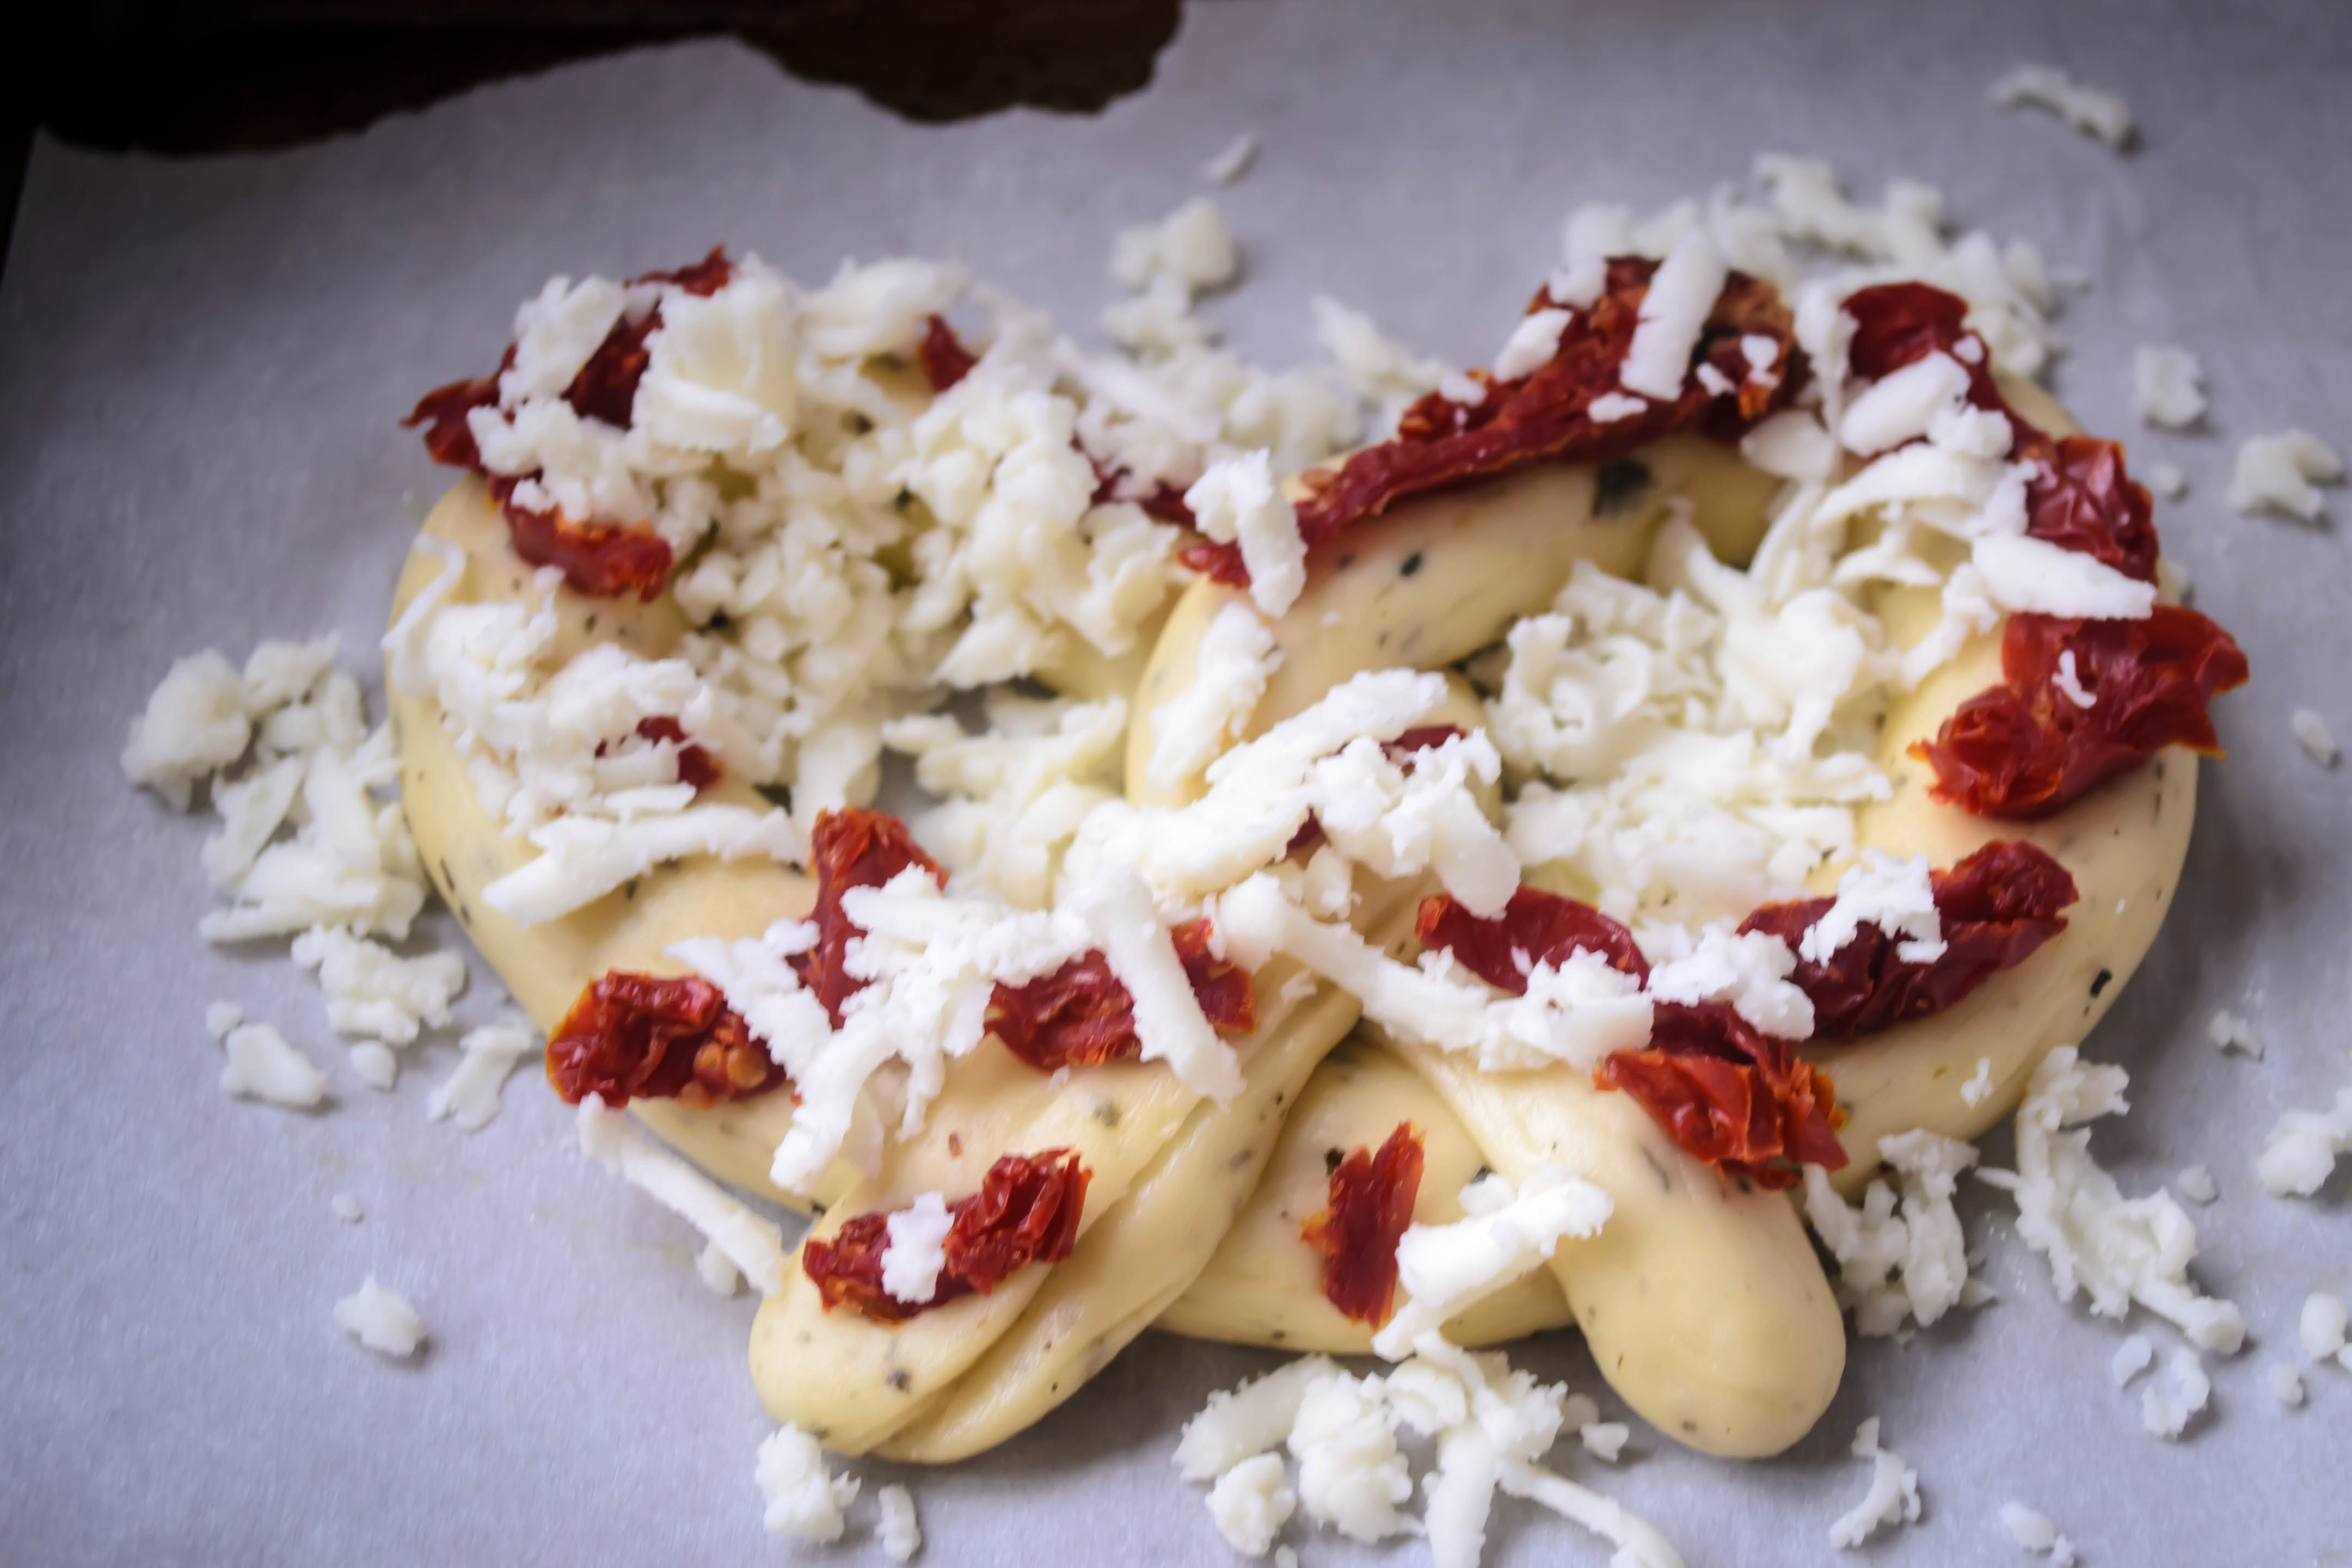
½ cup ¼-inch chunks of cheddar cheese, the sharper the better

¾ cups buttermilk (6 oz)

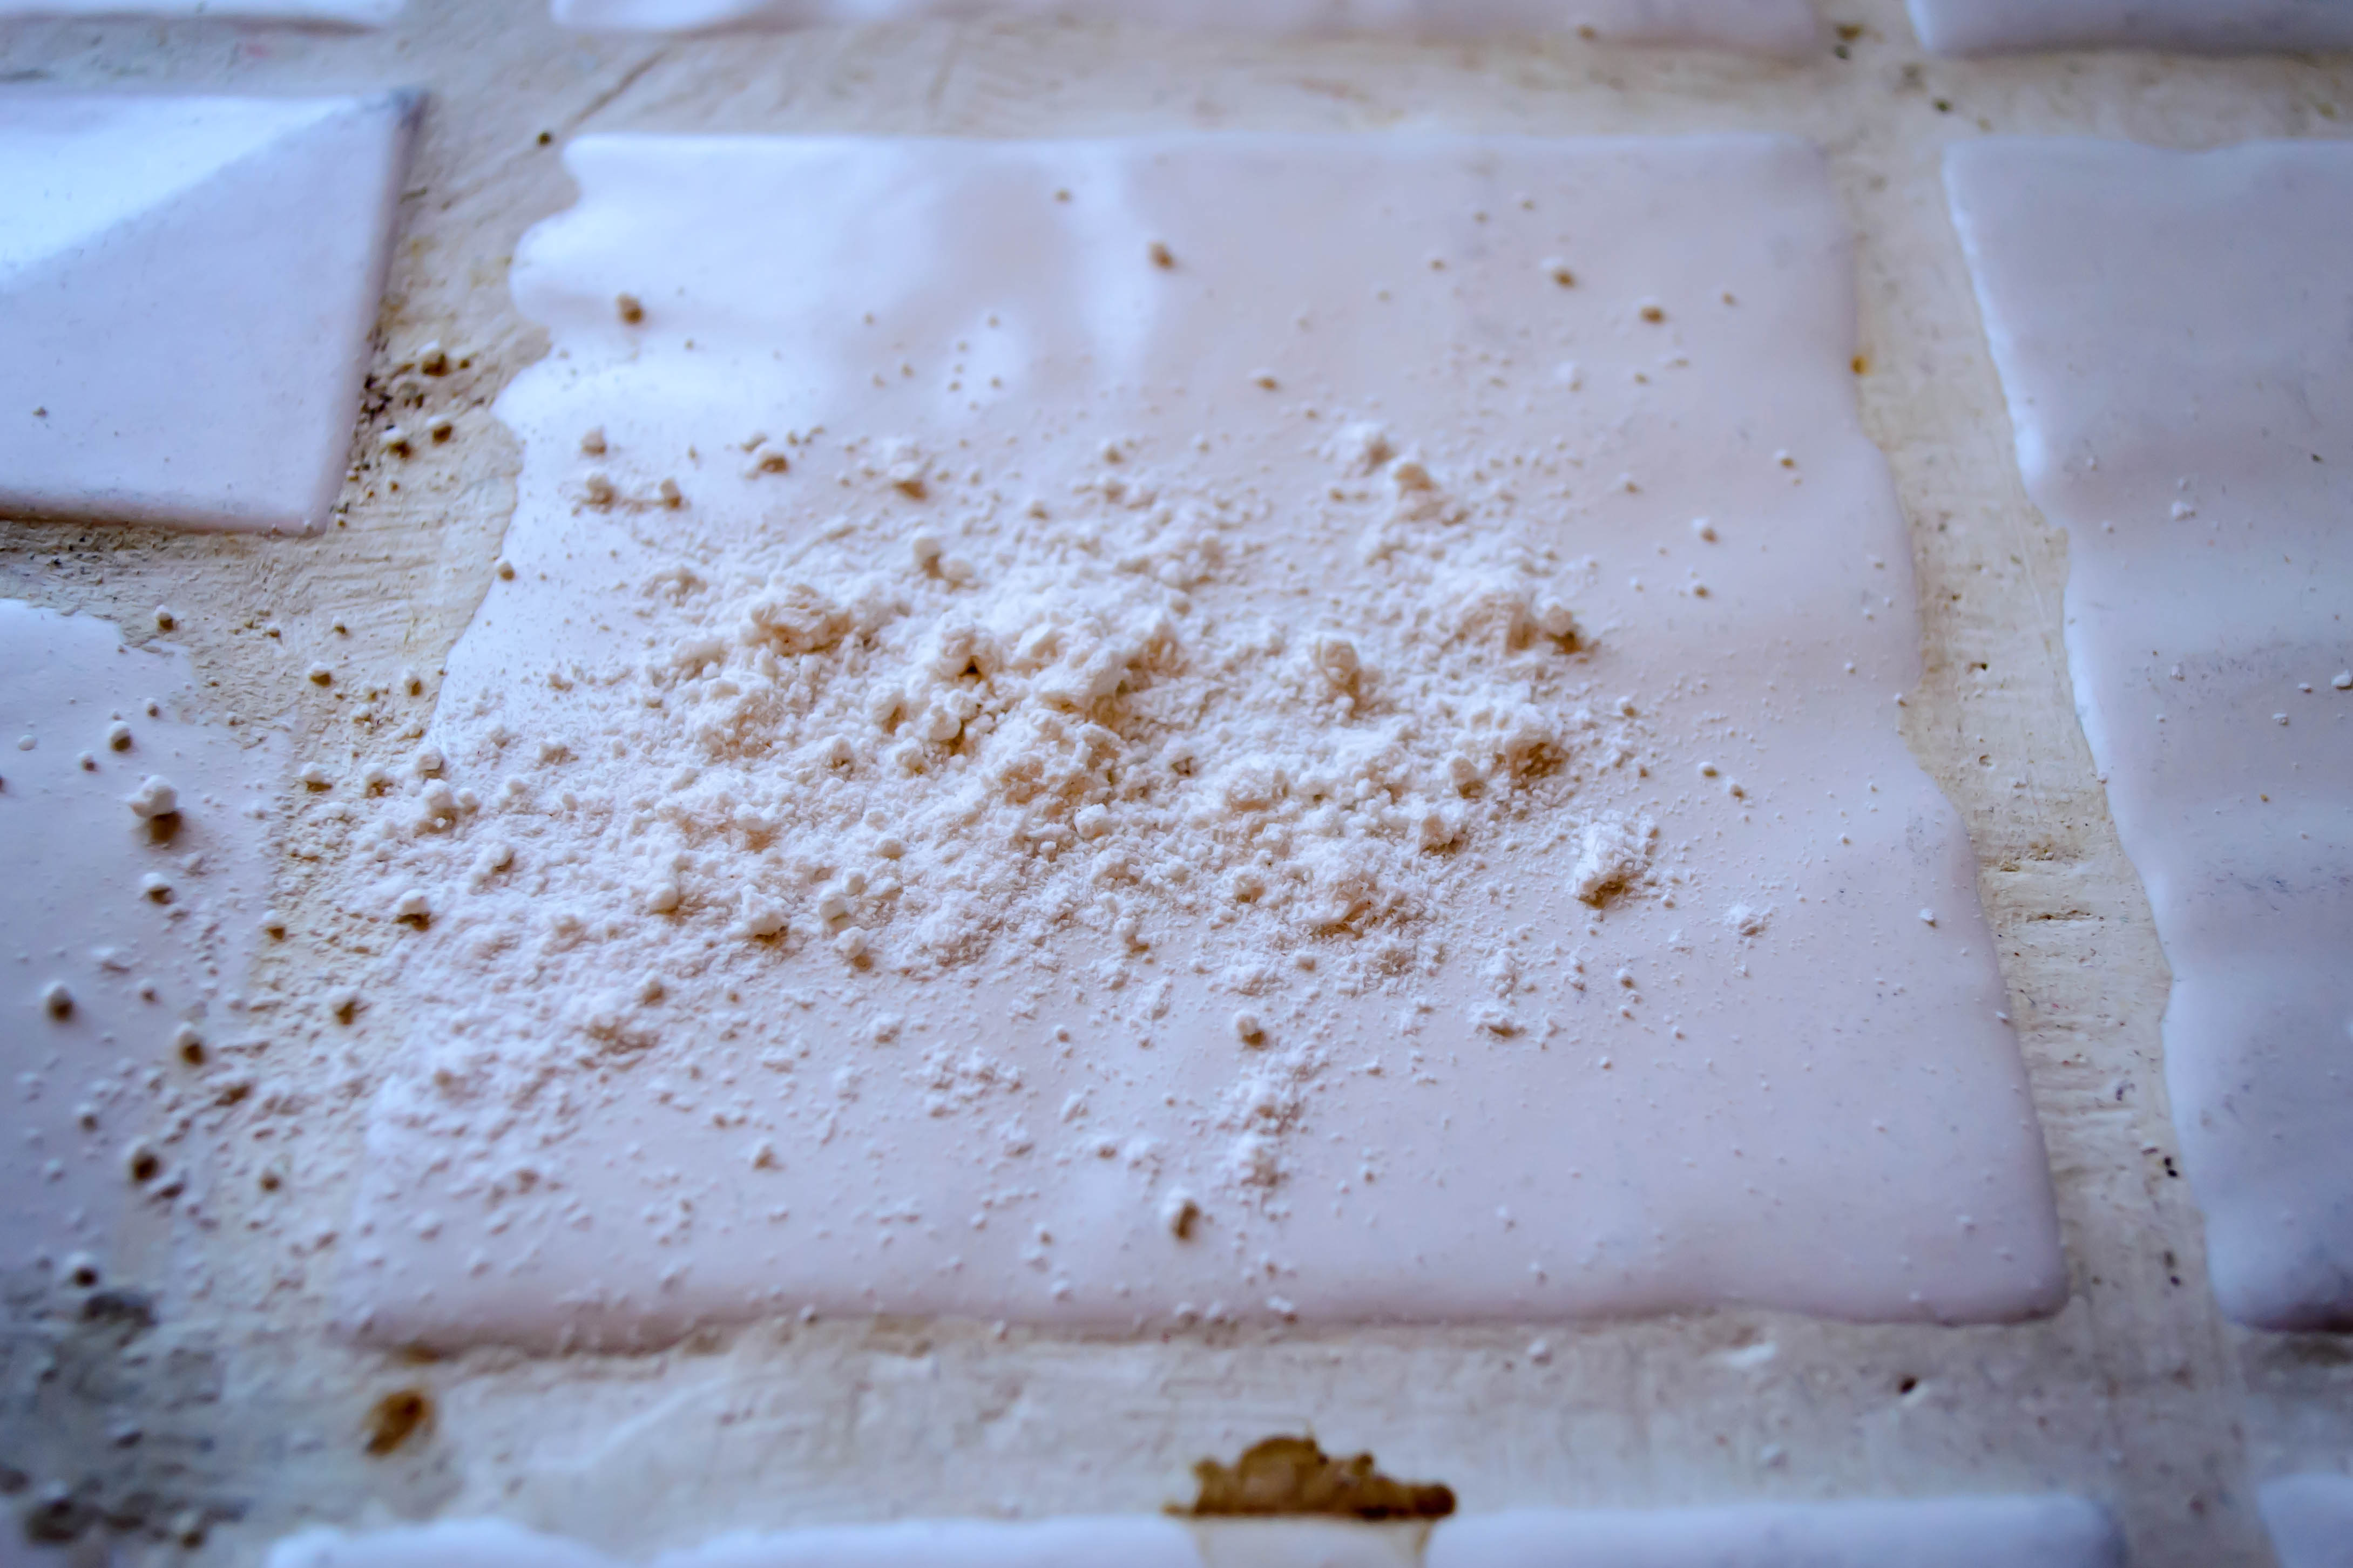
In a medium bowl, whisk together the flour, salt, baking powder, and brown sugar.

Using a pastry blender or your fingers, cut in the butter until it is incorporated throughout in chunks the size of small peas.

Add the cheddar cheese and buttermilk and mix to combine into a rough, sticky dough.  I find using a fork works well for this step.

Food Blog January 2013-0501

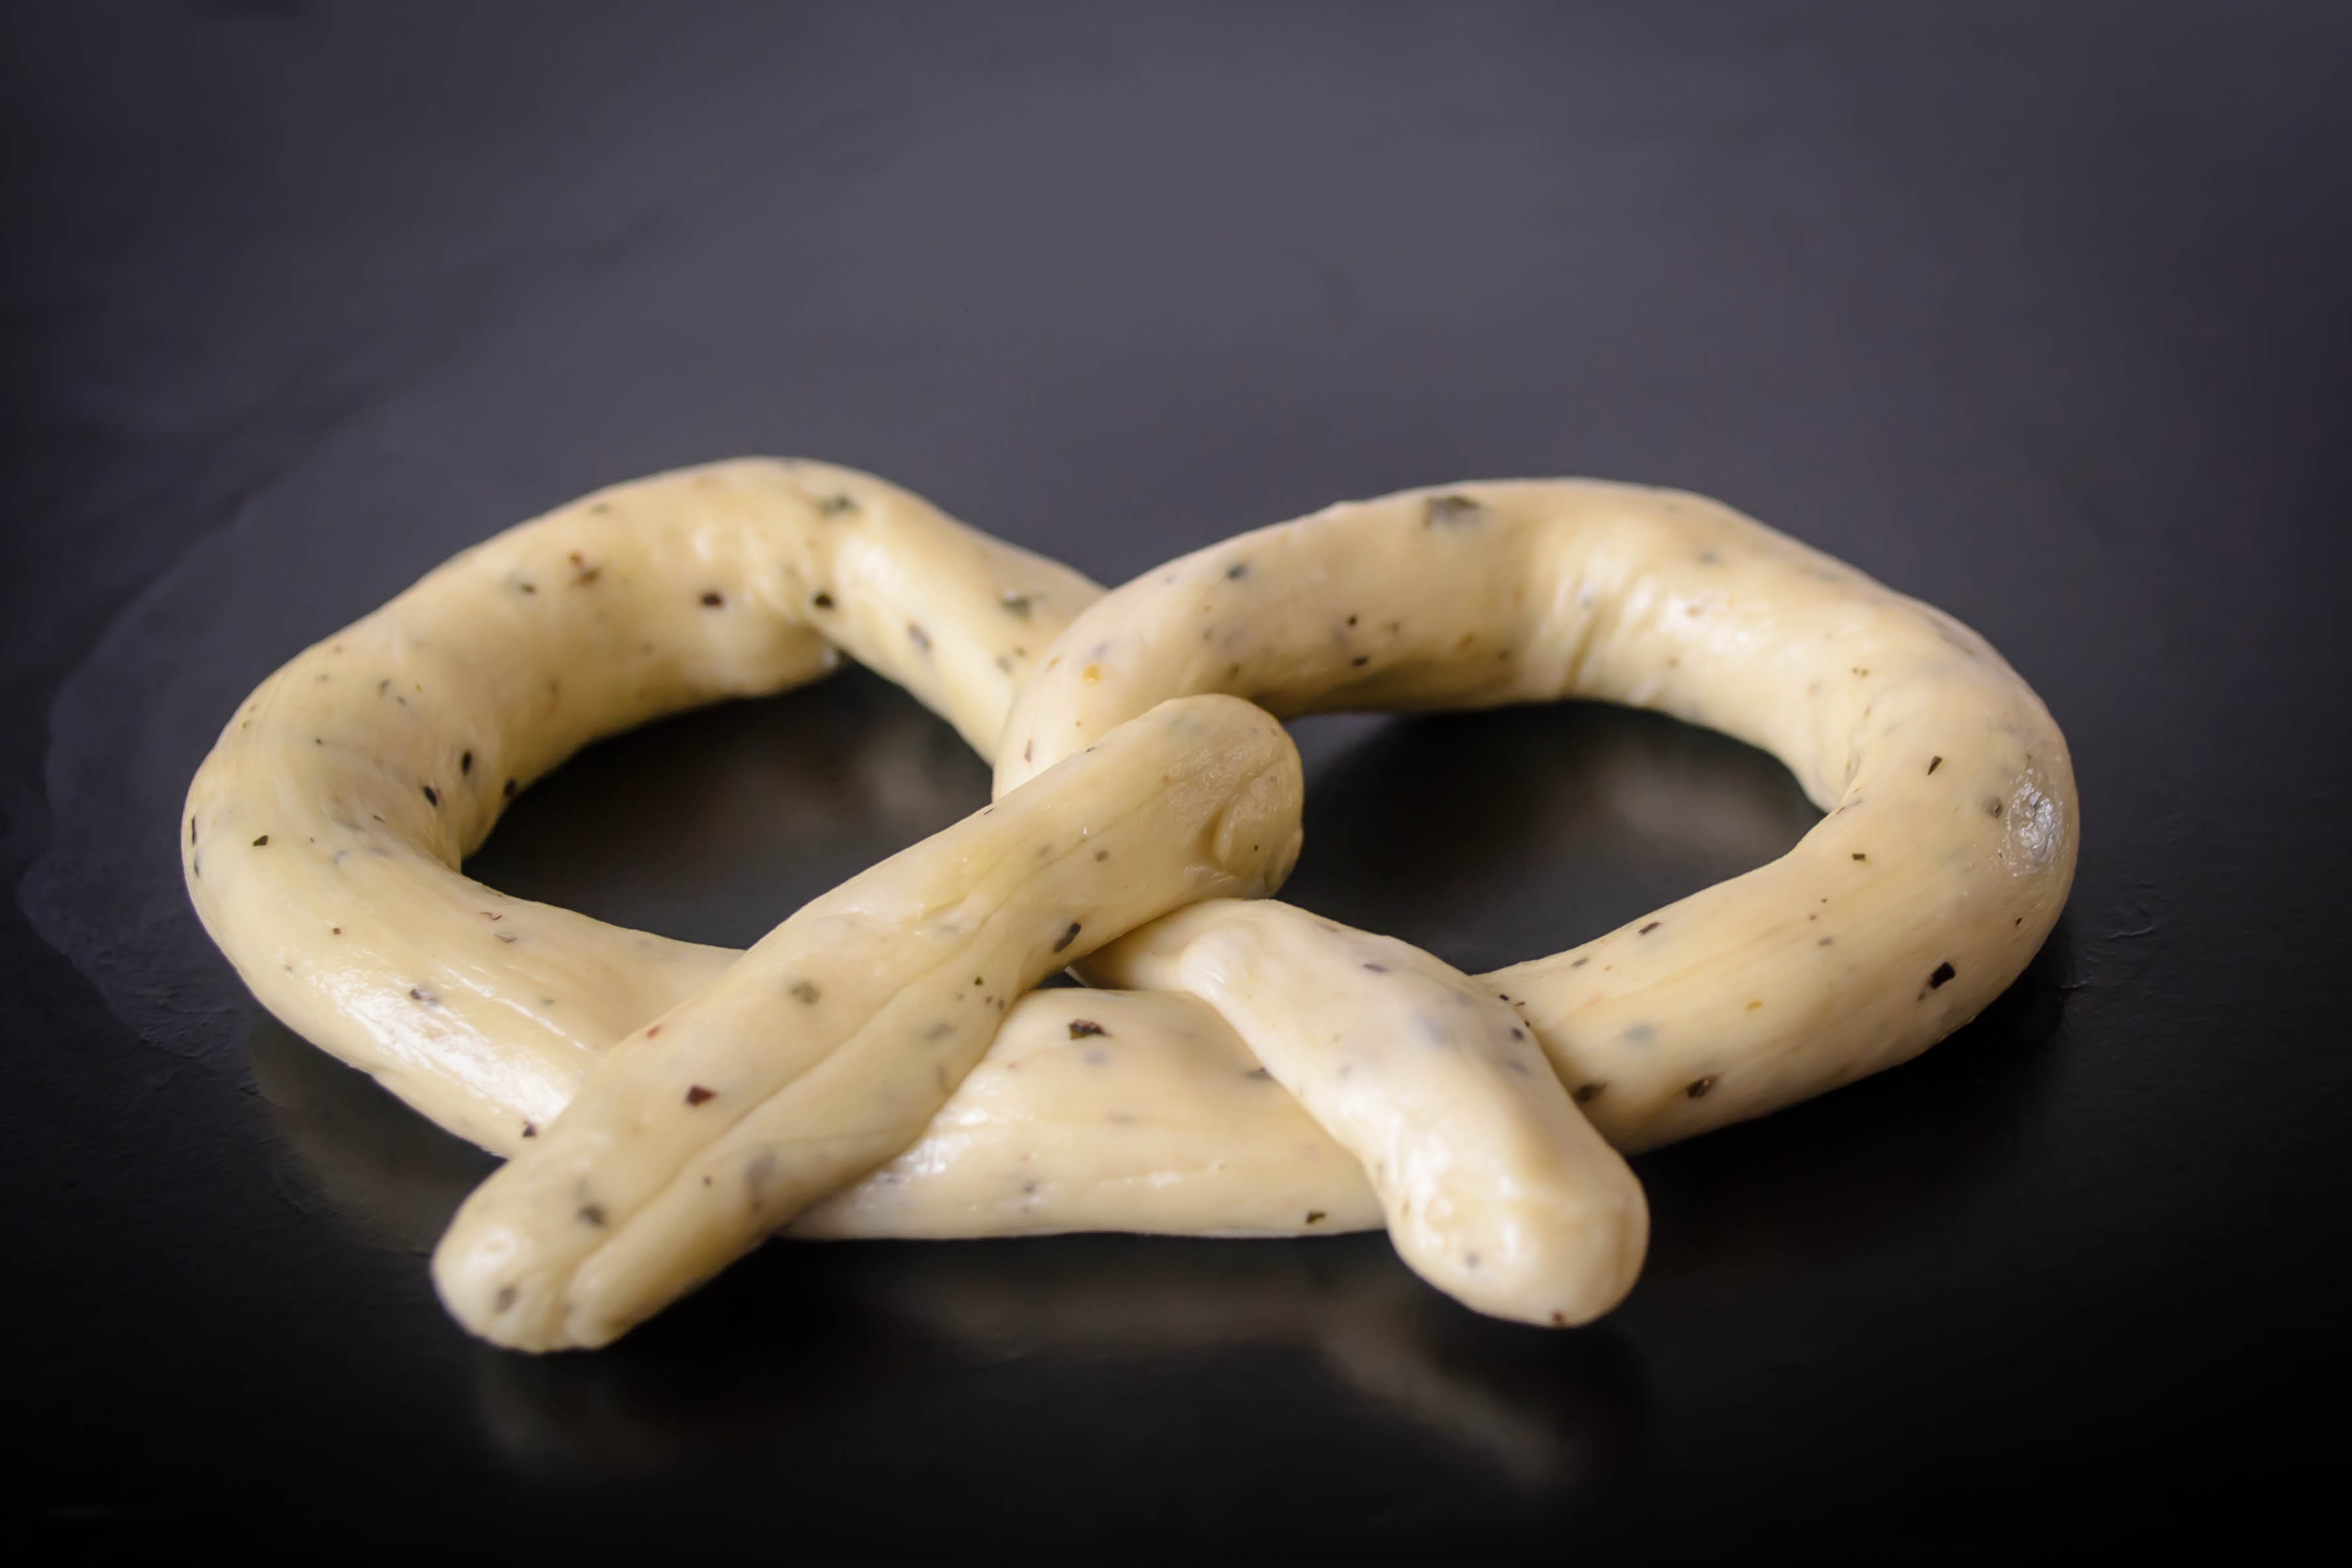
Here’s where things change up a bit.  Instead of rolling this out and cutting rounds, stretch a piece of plastic wrap across your counter and dump the dough onto it.  Using the plastic wrap, form the dough into a rectangle of approximately 4×6 inches.  Mine was bigger because I am impatient.  This didn’t seem to have dire consequences.  Once the dough is shaped, wrap it in the plastic wrap and refrigerate for at least 1 hour.

Food Blog January 2013-0502

After an hour, the butter has firmed up again and the dough has relaxed.  Pull it out and free it from the plastic, plopping it carefully onto a well floured board.  It’s a very sticky dough, so flour your rolling pin and the top of the dough itself well to avoid irritation.  Roll the dough out until it is three times its original size, maintaining the rectangular shape.  Fold it into thirds, press down well, and then roll it out again.  Fold it into thirds for a second time.  I did mine in the opposite direction of the first fold, which was probably wrong, but again, produced no discernible taste consequences.  Press down firmly, wrap up the dough in plastic wrap again, and put it back into the fridge for another hour.

Food Blog January 2013-0506

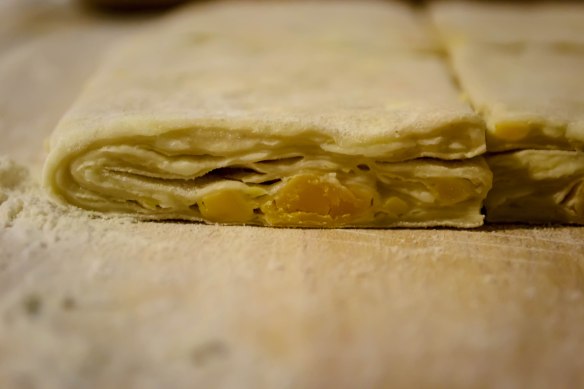
While it chills, here’s what’s happening with all this bother: you are creating something akin to one of those biscuits that comes out of the tube.  You know, the cardboard tube you anxiously peel the wrapper from to reveal a twisting seam, then judiciously smack on the edge of the counter until it pops and dough appears in great bulges?  Those biscuits are composed of dozens of flaky layers, and that’s what you are doing by folding and rolling and folding and rolling.  You are, Ruhlman notes, following a similar procedure to that used for making puff pastry, except in our case the butter is irregularly placed, which results in craggy puffs, whereas puff pastry requires a smooth, even layer of butter in between each floury fold to reach its incredible signature height.

With another hour gone, liberate the dough from fridge and plastic, return it to your well floured board, and repeat the procedure: roll out, fold in thirds, roll out, fold in thirds again.  At this point, you should also preheat the oven to 400F.

Food Blog January 2013-0509

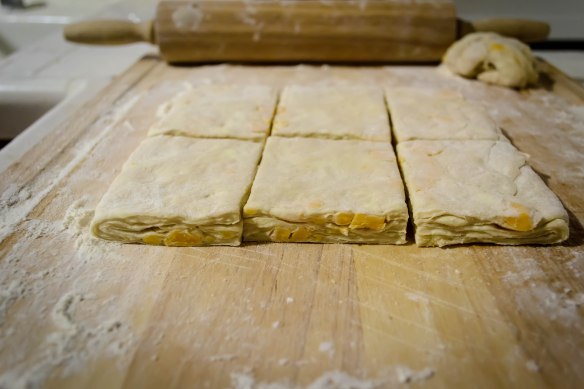
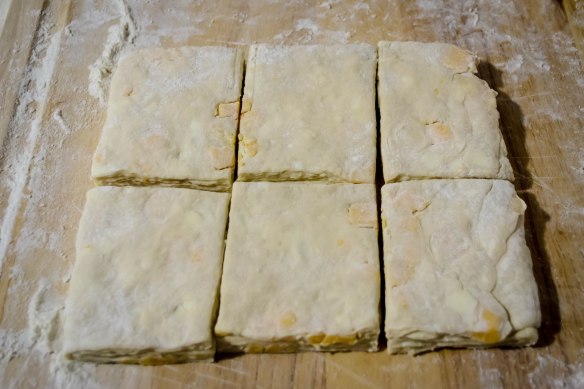
You’ve now folded your dough a total of four times, which means you’ve made twelve layers.  Now, roll it out to ½ inch thick and cut it into 6 pieces.  You could do rounds with a biscuit cutter, but it seems easier and less wasteful to just trim up the edges (which you could roll into a homely little extra biscuit to taste on the sly) and then cut into squares.

Food Blog January 2013-0511

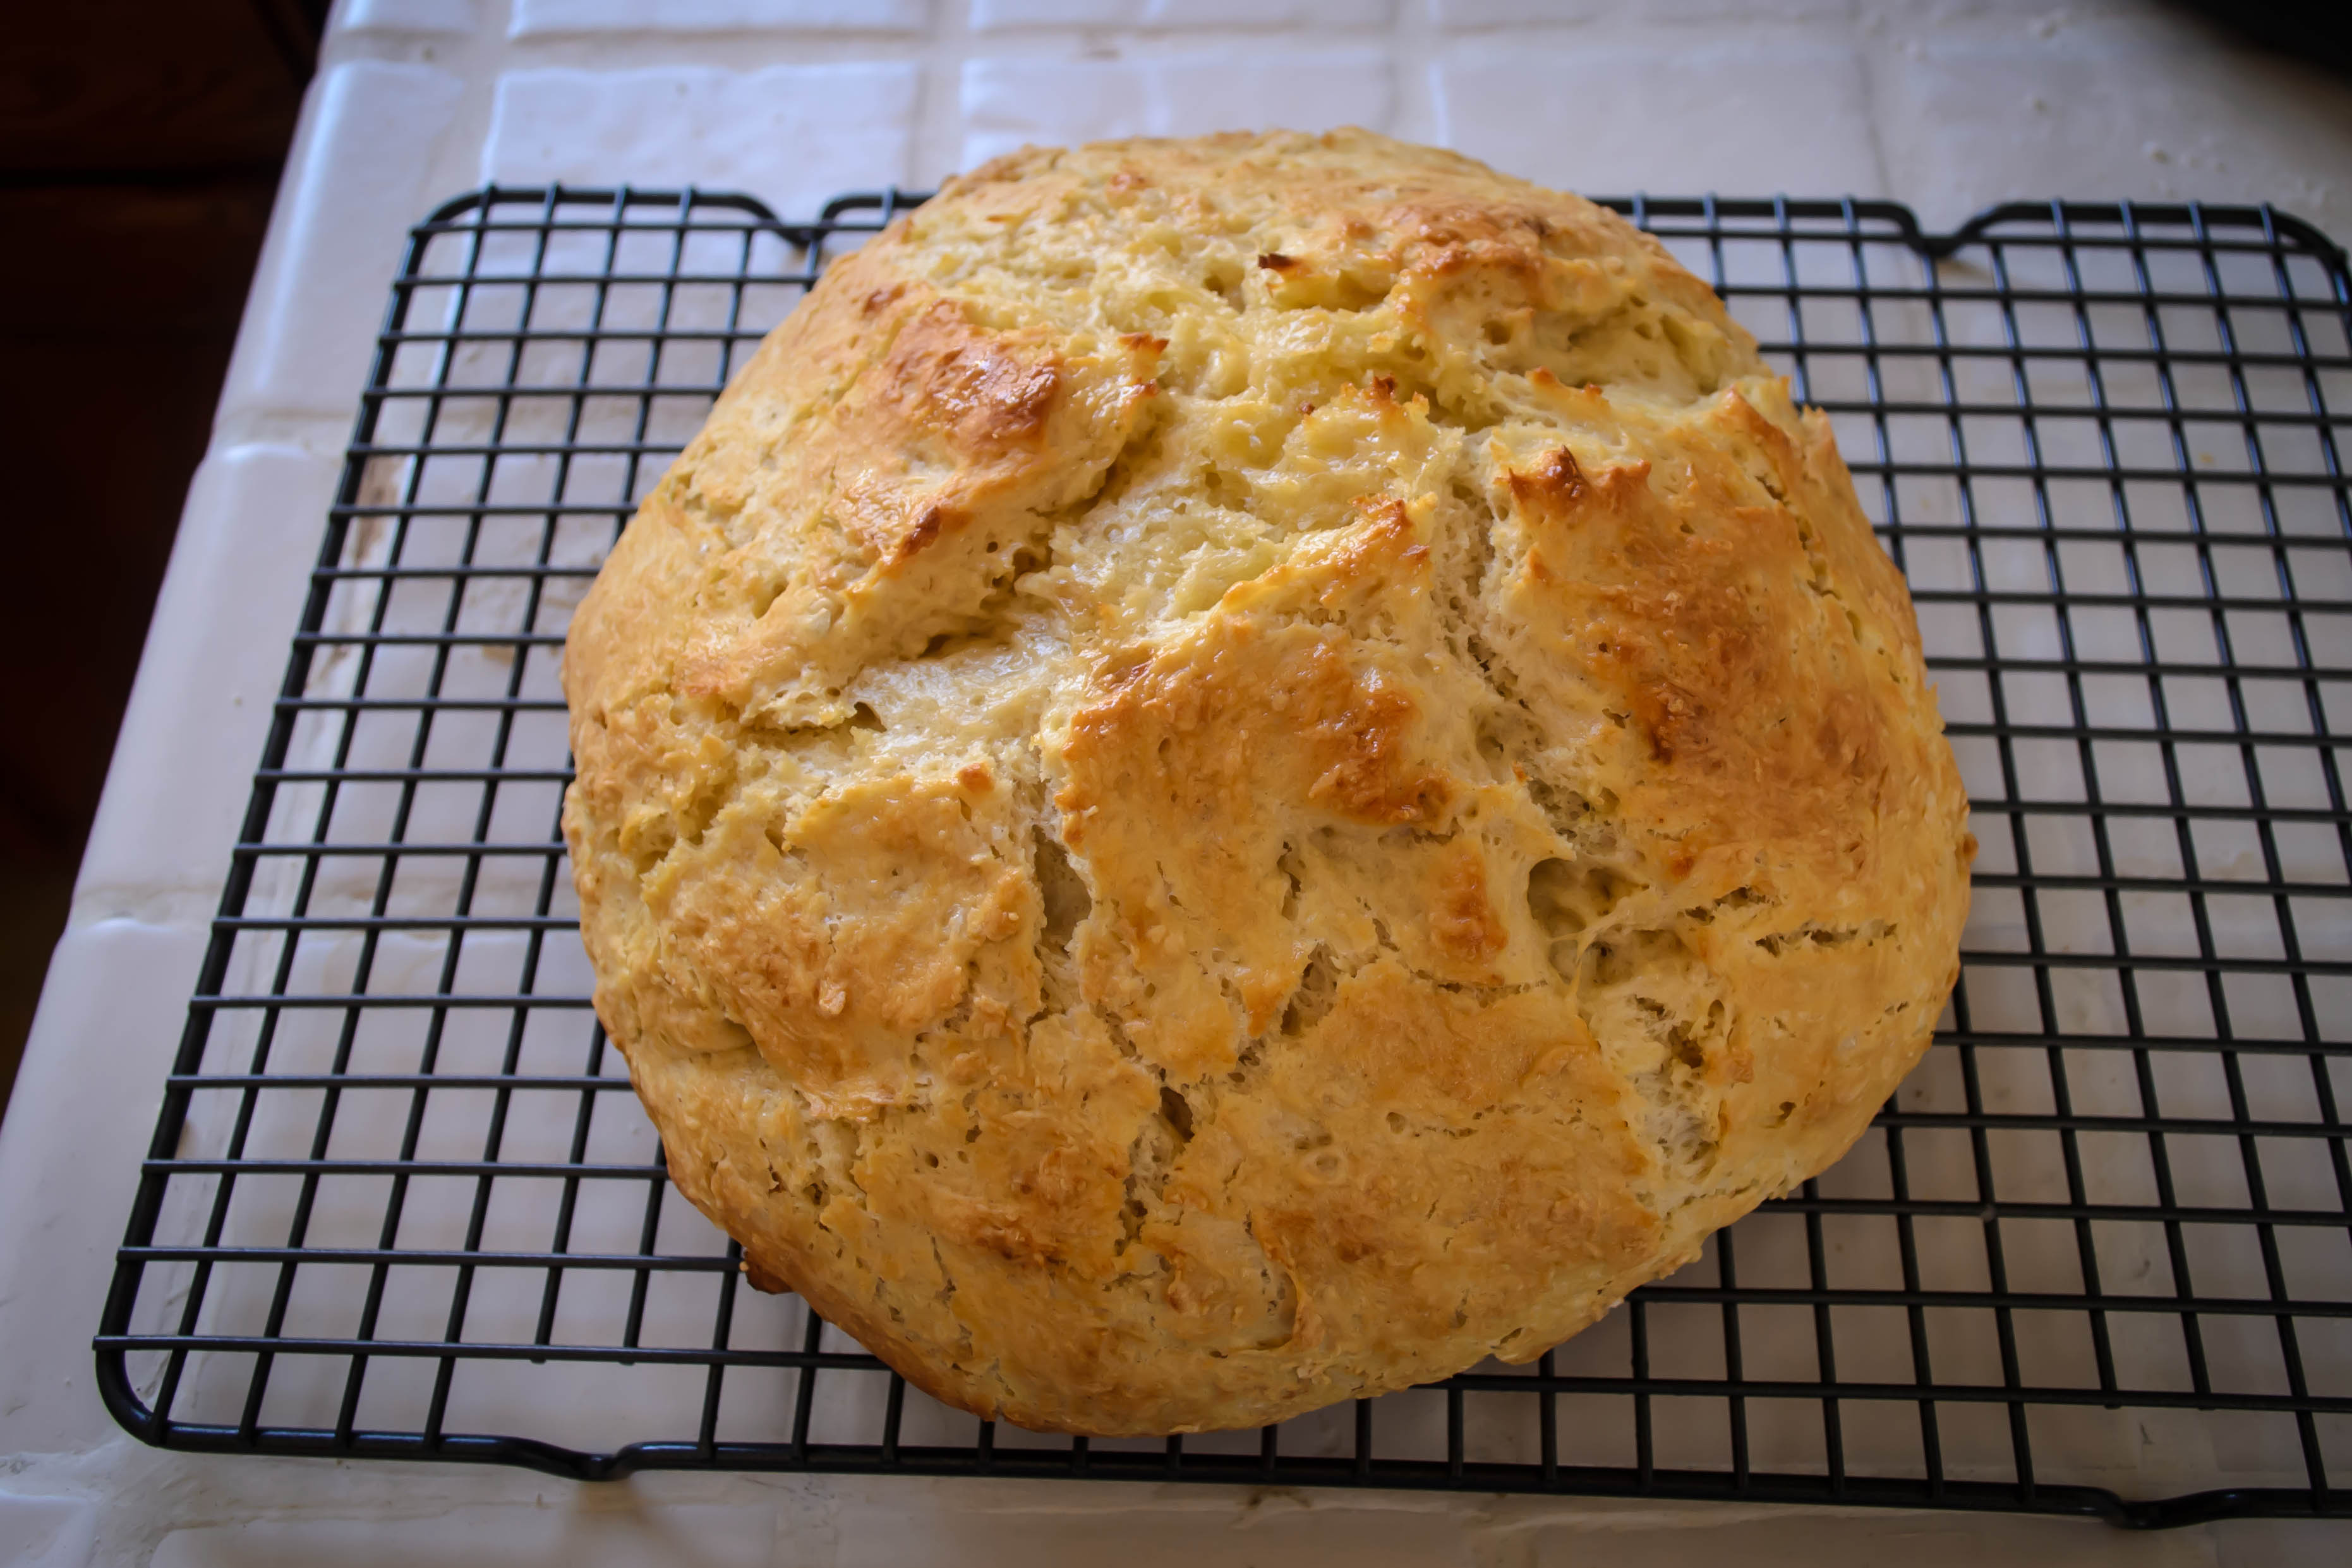
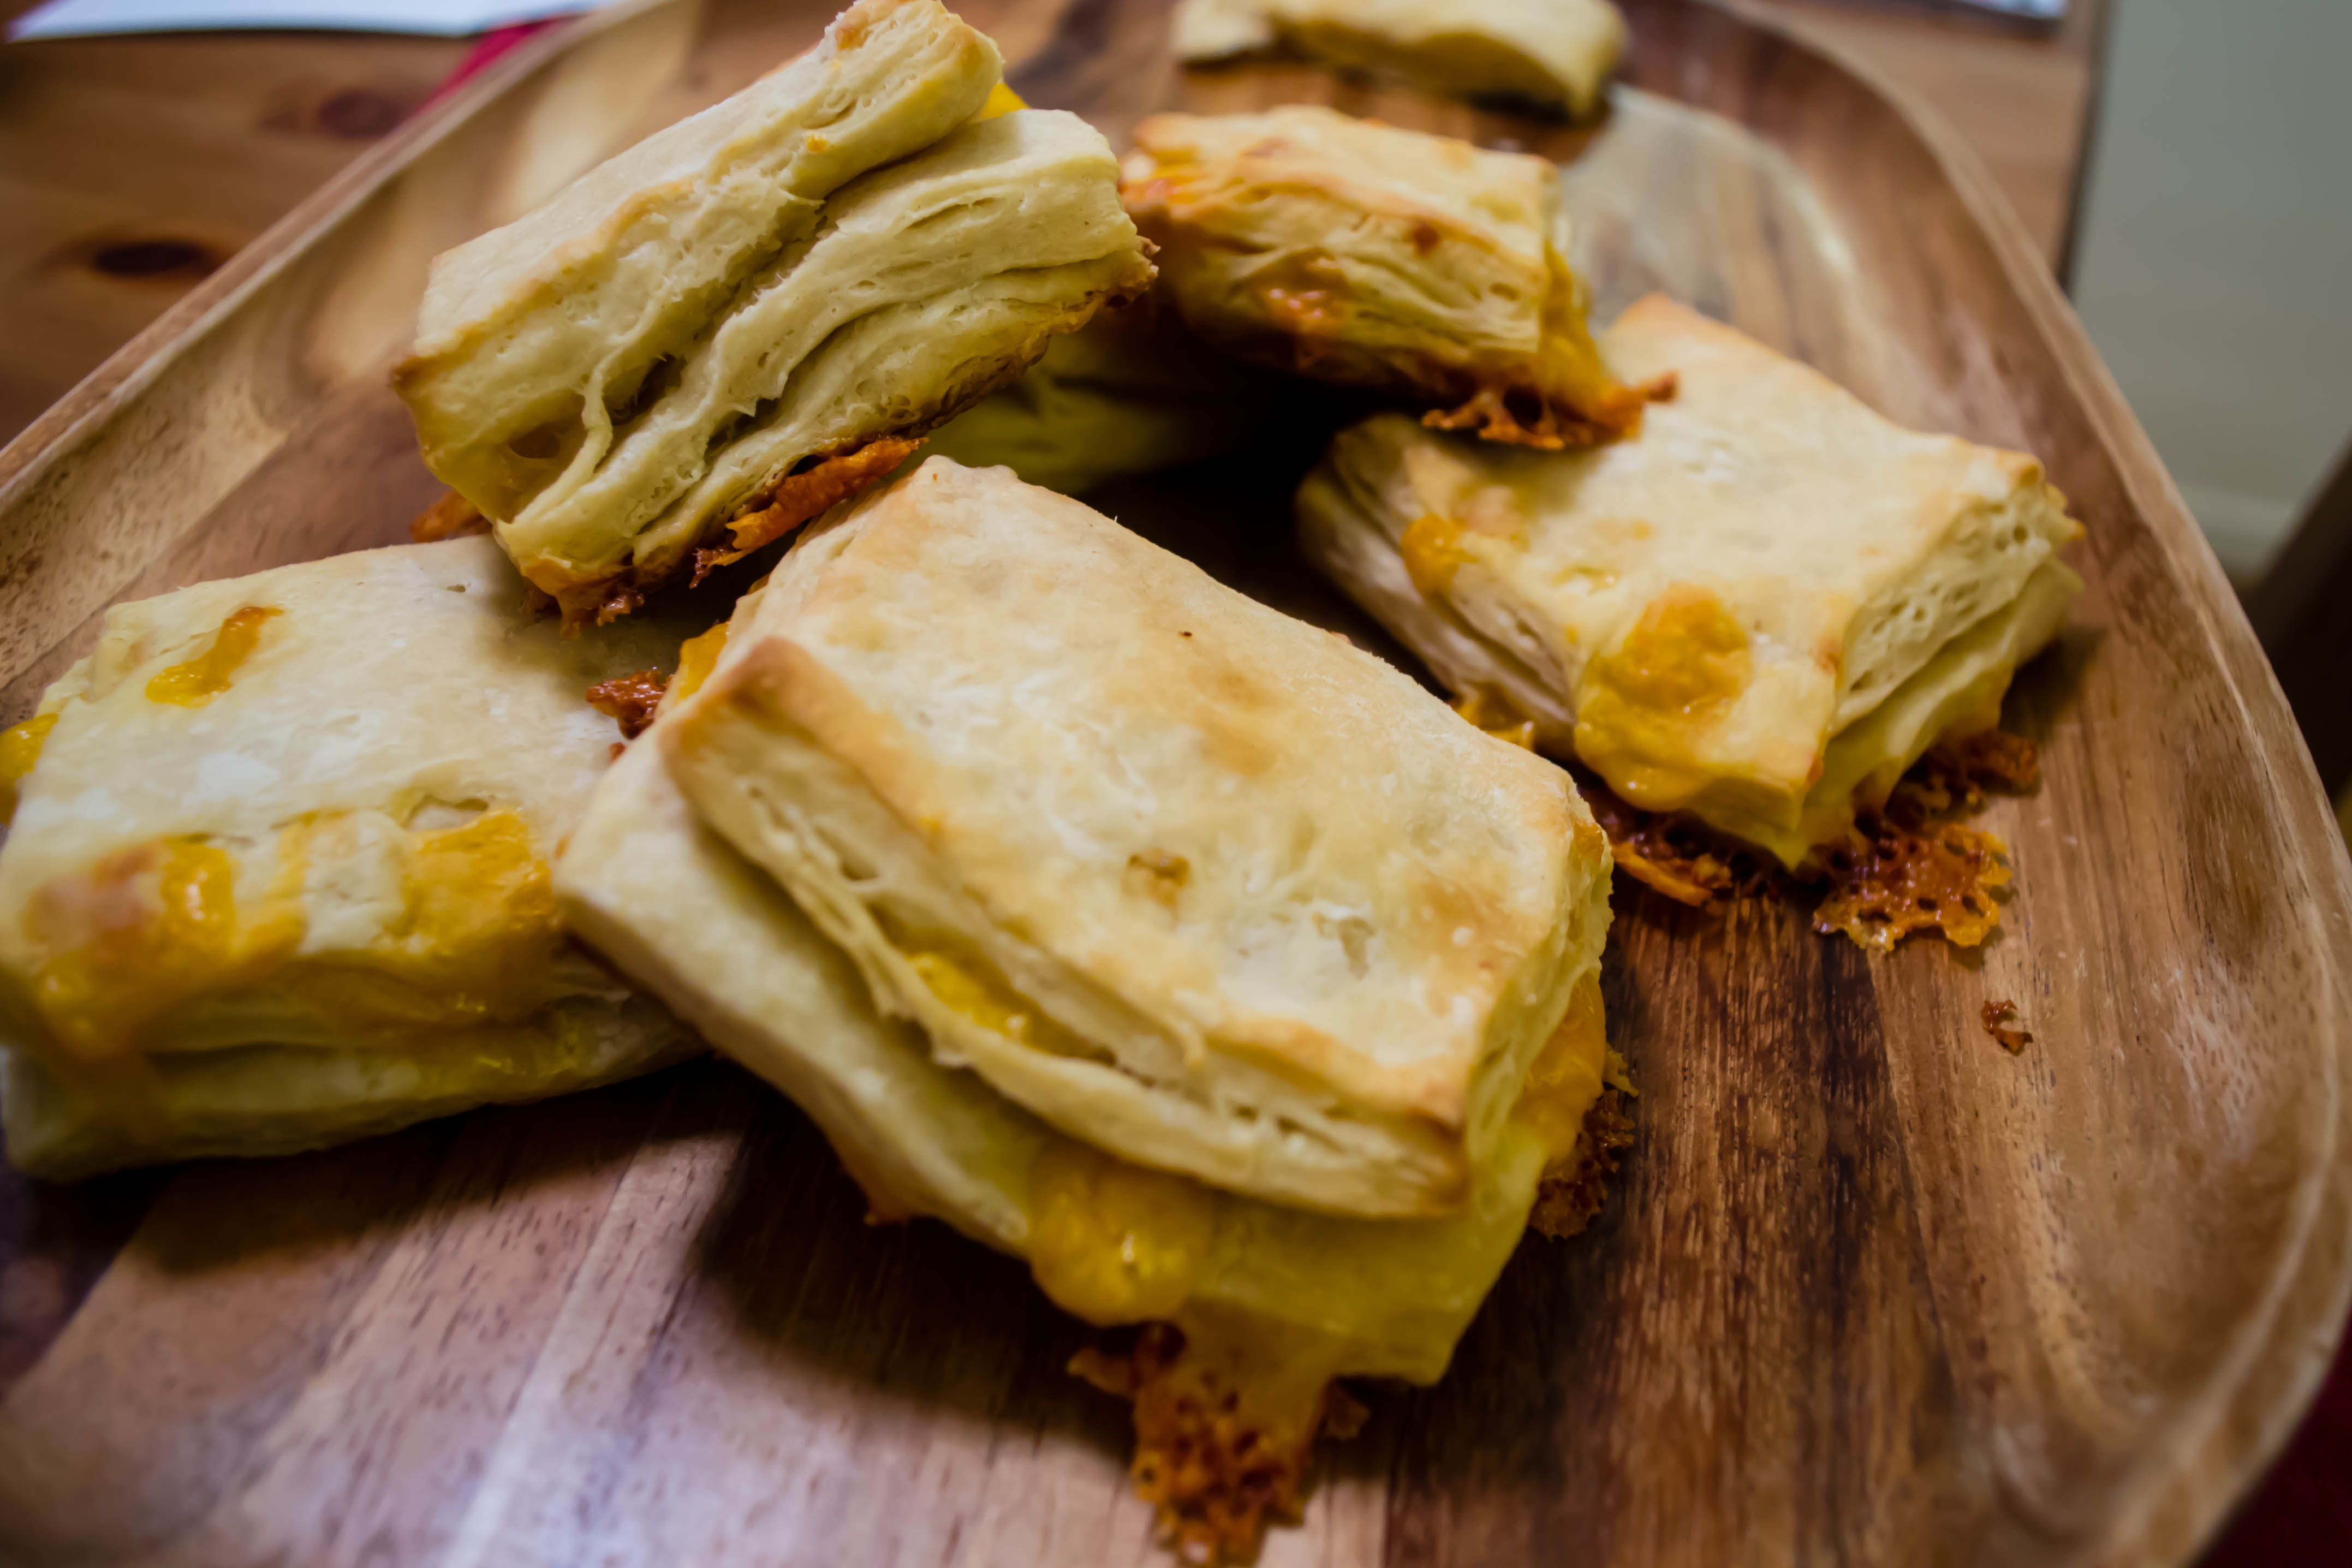
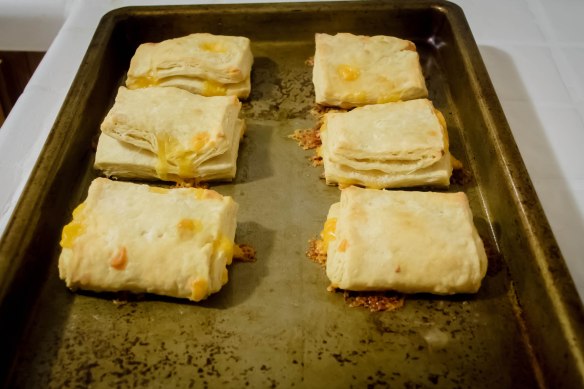
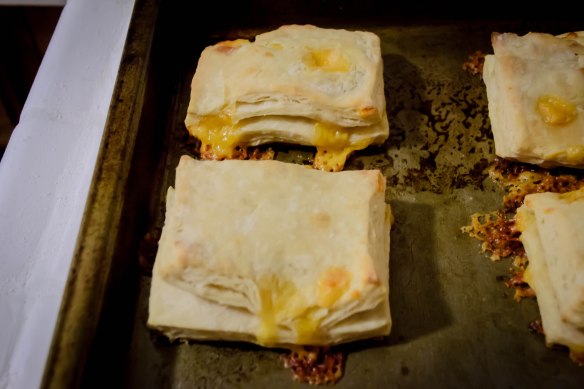
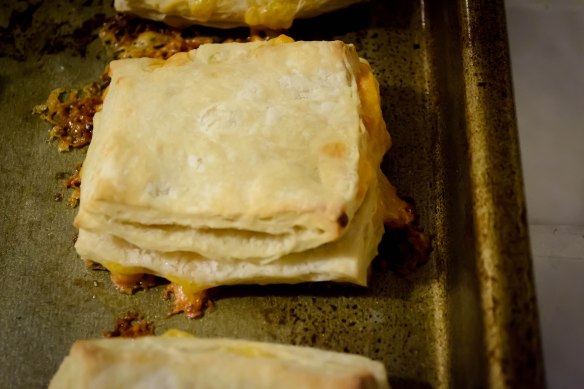
Pop these onto a greased baking sheet and into the oven for 20-25 minutes.  They will emerge lightly golden on top, with cheese oozing out from between the layers to form crispy lacy edges against the cookie sheet.

Food Blog January 2013-0517

We ate these as an accompaniment to a honey mustard roasted acorn squash and chicken apple sausages.  I know, I had to get the apple back in there somehow.  My assessment?  They were delightful.  The exterior was flaky and crisp, and I was impressed by how the layers really did make a difference in the texture of the biscuit: they were moist and chewy and distinct.  The cheese wasn’t as noticeable as I’d thought it would be, though the crispy edge bits were lovely – much like the lacy brulée that adorns the outside edges of a good cheese bagel.  At first I thought I couldn’t taste the brown sugar at all, but as I took my third and fourth bite, gasping around the steam, I realized that the complex lingering warmth at the end of each bite was probably the effect of the brown sugar.  It carried the depth and richness of a caramel without being sweet.

Food Blog January 2013-0516

So the verdict is: if you need biscuits to go with a weekday meal, these are probably not the ones for you.  It’s asking a bit much to devote three hours to six biscuits, when you could just roll, cut, and bake the same ingredients straight from the mixing bowl.  But if you are planning for something special, or if you were thinking of baking bread anyway and are willing to replace rise time with refrigeration time, try these instead.  The layers are really remarkable, they stay warm for some time, they are all kinds of tasty, and they would reheat – I suspect – very well in a toaster oven, though they are best on the day they are made.  But you probably won’t have any left over, so that’s an issue barely worth discussing.

Food Blog January 2013-0522

I hope you are warm and well, wherever you are.