Frozen Sangria

Food Blog July 2013-1673Chances are, where you are, or were, or will be soon, it’s hot.  Or it was.  Or it’s going to be.  But past, present, future, when it’s hot out, and you still want dessert, you are probably going to have certain demands: it must be easy.  Mimimal measuring.  Simple directions. No fine chopping or dicing or mincing.  It must require short cooking time, if any.  No long baking times (sorry, bread pudding), no stewing or roasting or brûléeing.  It must be refreshing and delicious and maybe even a bit surprising, to pull you out of your mid-summer funk.  Not that I’m having one of those…

Food Blog July 2013-1628

Frozen sangria.  Does that make your sweat-beaded forehead wrinkle with interest?  It makes mine feel a little curious, a little intrigued, a little go-on-I’m-listening…

Sometimes feet get in the way of your photoshoots...

(Sometimes feet get in the way of photoshoots…)

Frozen sangria requires relatively little of you.  It wants flavor – some sugar, some spice, some whatever’s-your-favorite red wine.  It wants just a little simmering to infuse the liquid with cinnamon sticks, with cloves, with orange peel.  We’re playing a little game with ourselves here: imparting winter flavors into an icy treat.  Maybe the reminders of that holiday season half a year away will help us cool down just as much as the temperature of our dessert.

Food Blog July 2013-1626Finally, frozen sangria wants time.  Because we’re dealing with alcohol, freezing is going to take longer than if we were working with juice or water or even ice cream.  It will freeze – most wines are between 9 and 13% alcohol, and this relatively low percentage will still solidify, but it will take a little longer.  For satisfactory results, you’ll want to start this little project the day before.  I know; planning ahead is not always on your mind when you are struck with the yen for a frozen treat.  But this icy, deeply flavored bomb of spice, tipsy with wine, sparkling with citrus from freshly squeezed orange juice and freckled with mashed strawberries, is worth the extra wait.

Food Blog July 2013-1632Here, because I care about you, and I want you to know your options before you have to brave the melting temperatures to find your way back to the kitchen, I’m giving you two preparations (well, three, if you count the plain ol’ sangria itself).

Food Blog July 2013-1640
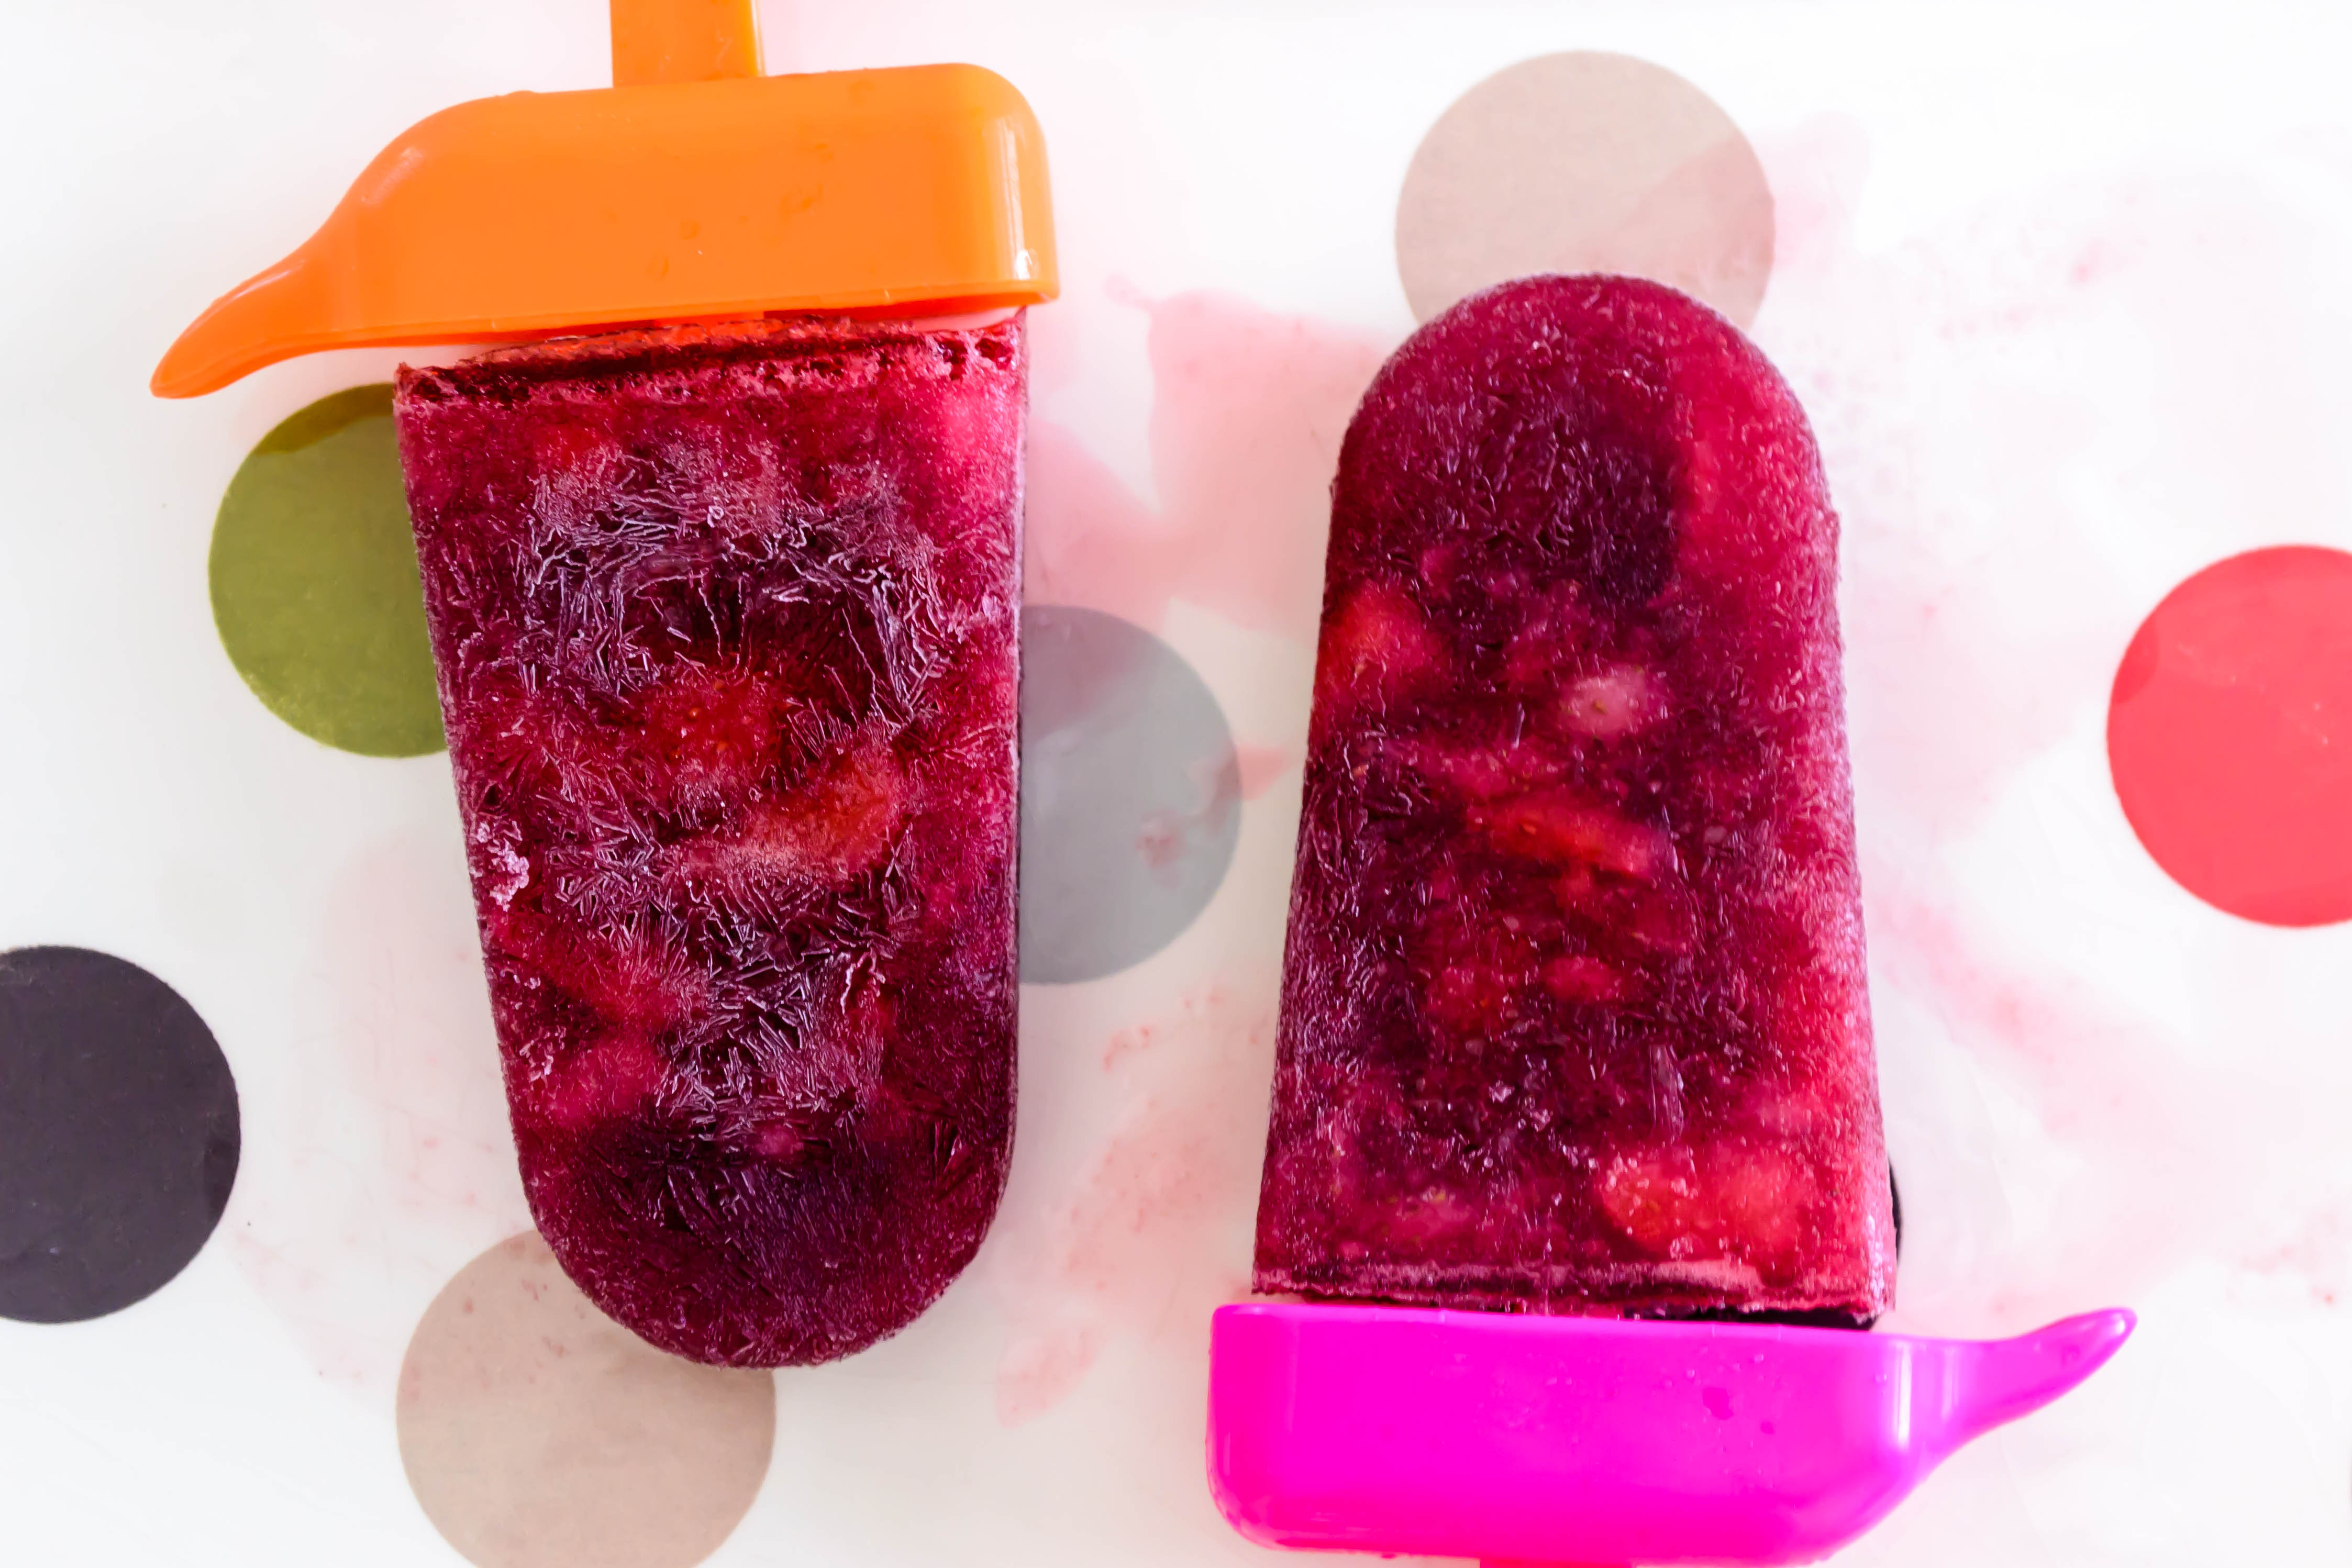
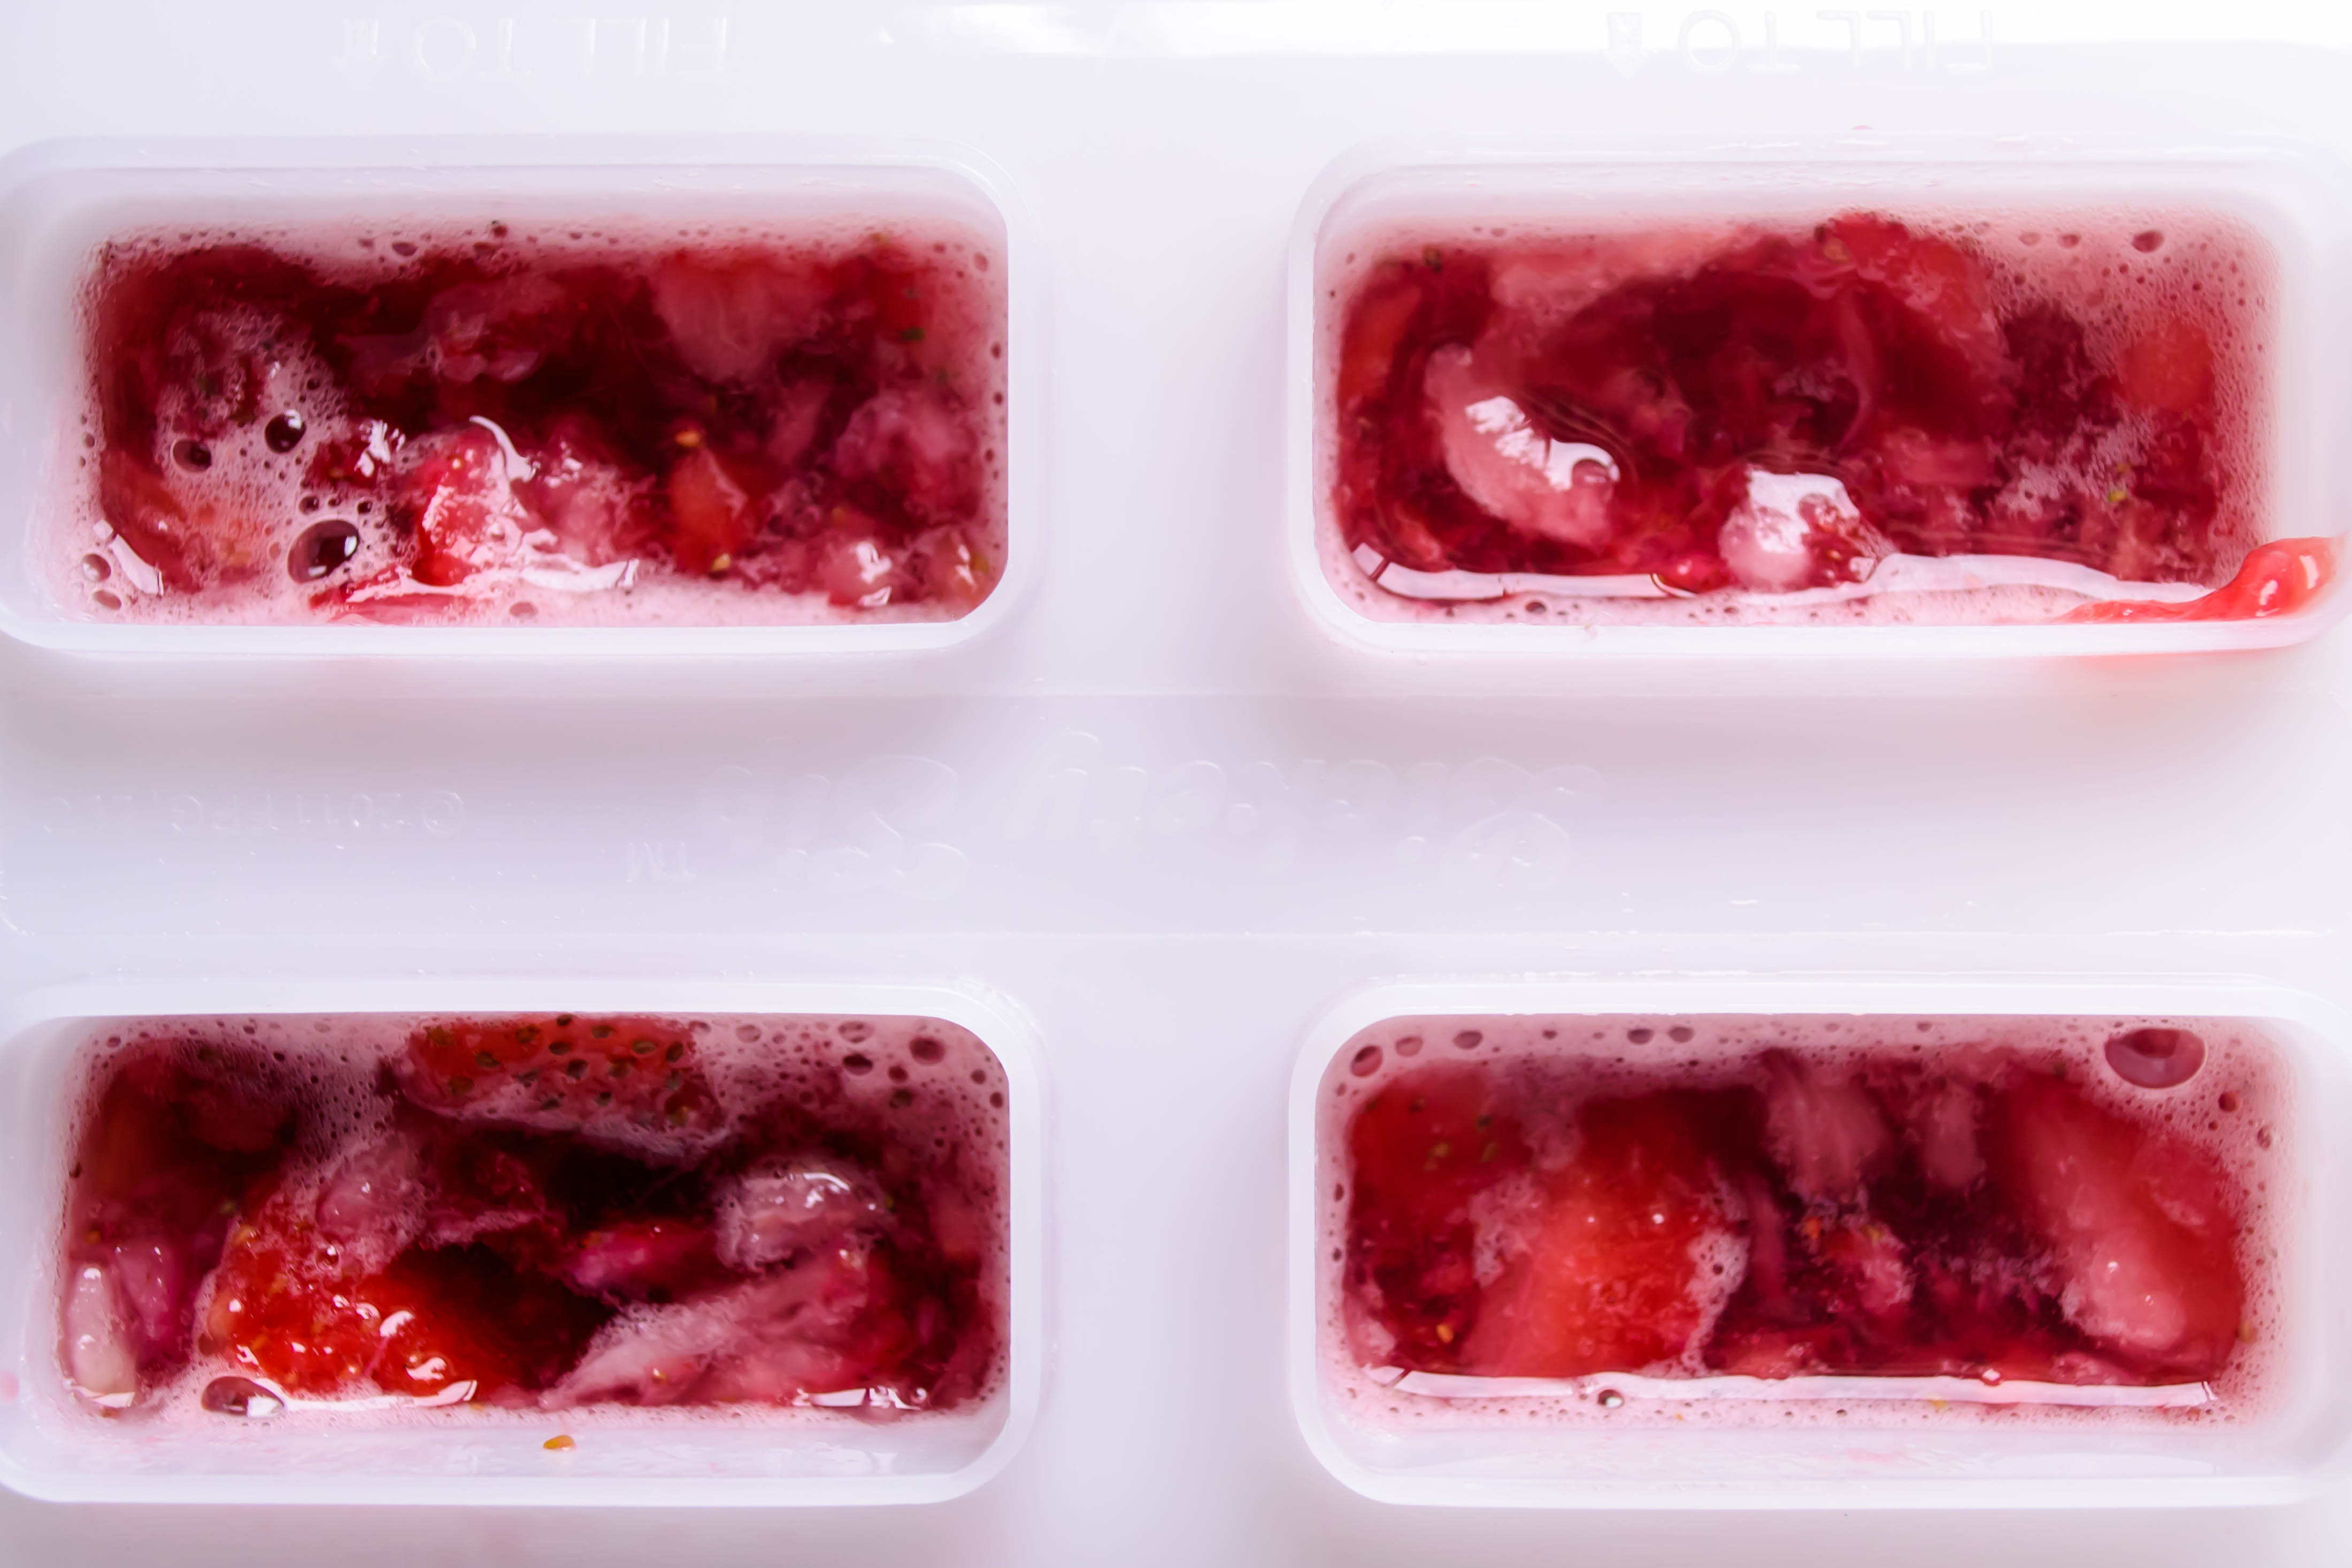
First, let’s talk casual, fun, surprising: the popsicle.  Red wine, orange juice, tiny, tooth-freezing pockets of strawberry, frozen together in a shape that will pull you back to childhood even while the ingredients remain oh so adult.  Once they are poured and put up, you have a secret cache of popsicles ready for your next girls’ night, or barbeque, or just a late afternoon so oppressing that standing barefoot on the kitchen’s tile floor just doesn’t cut it anymore.

Food Blog July 2013-1655Food Blog July 2013-1648
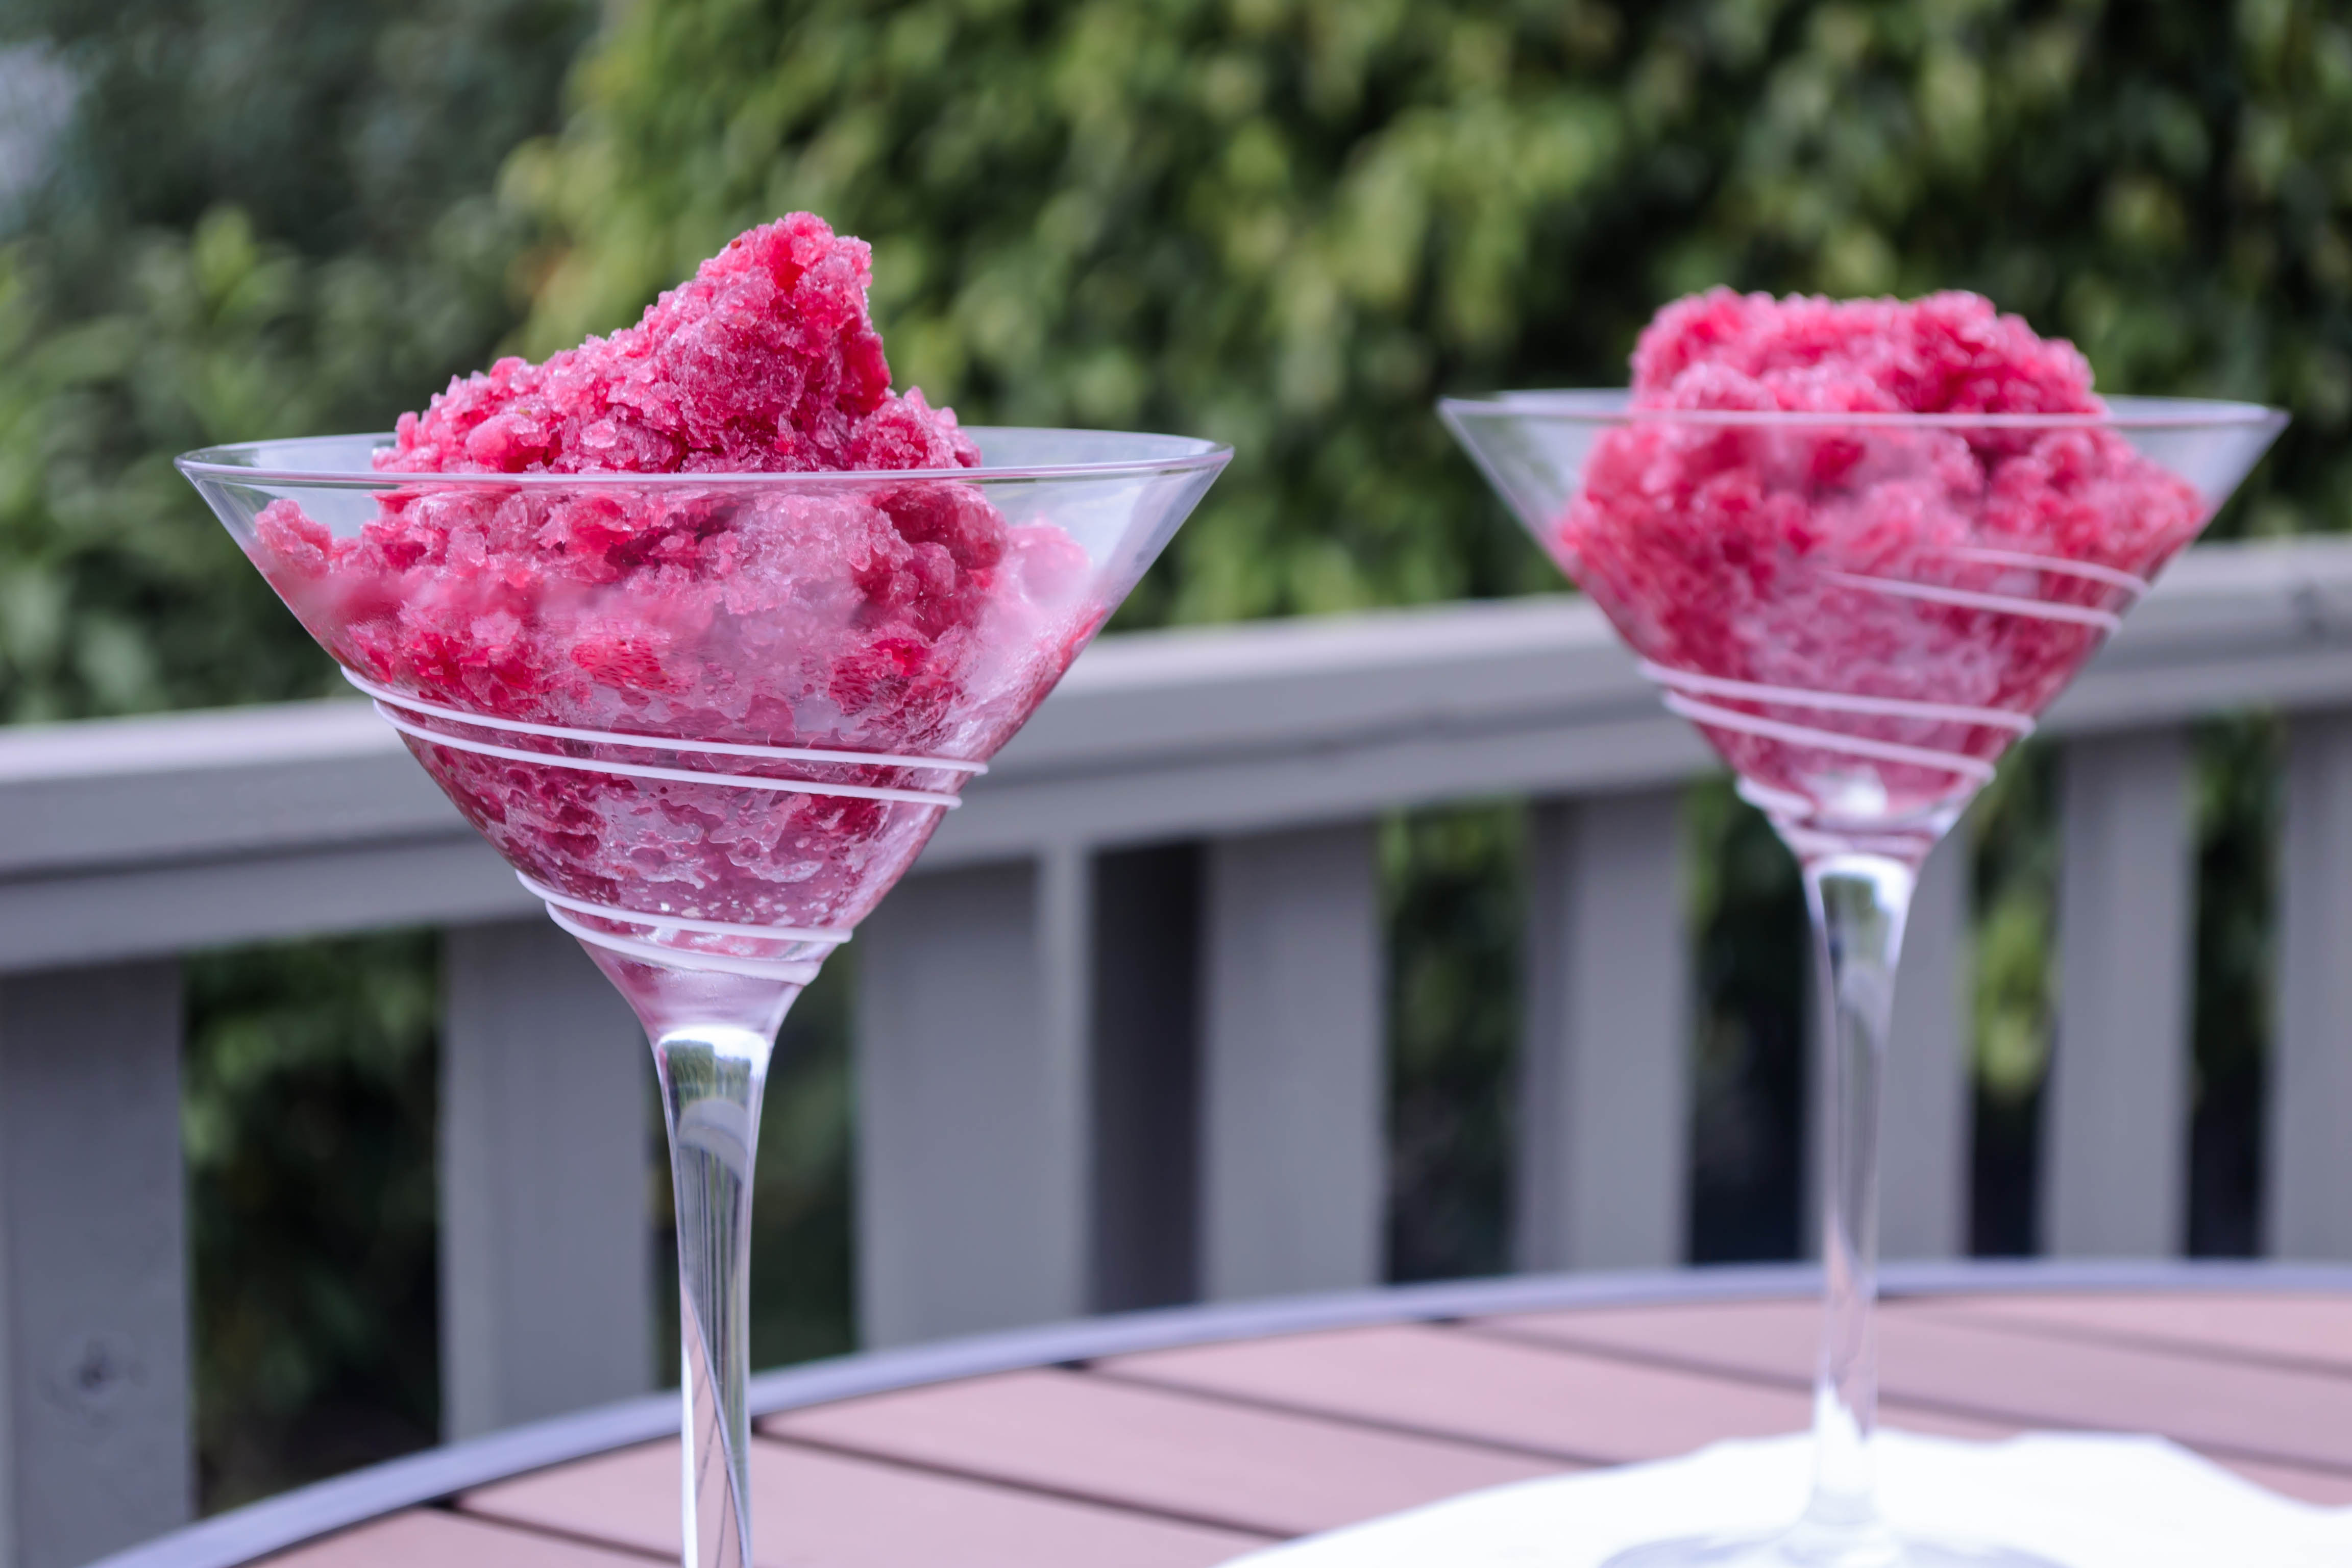
Our second preparation is a bit more elegant, a bit more dinner party, but still almost as easy: the granita.  Granitas are Italian desserts related to sorbets, except that they have a crystalline texture more like snow or shave ice.  Here, instead of spooning the sangria mixture into popsicle molds, it gets poured into a wide, shallow vessel, like a 9×13 baking dish, and again, moved to the freezer.  After a few hours, though, you pull it out and scrape through it with a fork.  This prevents the liquid from freezing into a solid mass.  After this initial freezing period, return once every few hours and scrape again, agitating the mixture into separated crystals (and strawberry chunks).  Several of these scraping sessions in, your liquid will be frozen and clustered in deep red flurries: a mound of feathery ice ready to be scooped and crunched after dinner or, if you prefer, perhaps even before.  That’s what your favorite patio table is for, right?

Note: these are great options for a stay-home dessert, but if you are traveling or feeding them to guests who will be traveling, be cautious about the serving size: unlike warm desserts, where you simmer off most of the alcohol, this is basically a frozen bottle of wine with some flavorings added in – the majority of the alcohol content is still there.

Food Blog July 2013-1673Frozen Sangria
Makes at least 12-16 servings, depending on the size of your popsicle molds or serving vessels
1 bottle (750ml) red wine of your choice
4 big strips of orange peel
3 cloves
2 sticks cinnamon
½ cup sugar
½ cup (4 oz.) freshly squeezed orange juice (for me this took 2 large oranges)
12 oz. strawberries, fresh or frozen and defrosted, chopped into small pieces or mashed with a potato masher


  • The day before you want to serve your frozen sangria, place cloves, cinnamon sticks, orange peel, sugar, and 1 cup of wine in a small saucepan and bring to a simmer over medium-low heat.  Keep at the barest of simmers until the liquid is reduced by half – you will end up with ½ cup of deeply flavored, spicy-sweet wine.  This will probably take 15-20 minutes, depending on how hot your burner is and the size of your pan.
  • Remove from heat, strain out spices, and allow the liquid to cool.
  • In a bowl, pitcher, or 9×13 inch glass baking dish (if you are making the granita), combine the rest of the bottle of wine, the reduced, spiced wine, and the orange juice.
  • Add the mashed or chopped strawberries and stir to combine.
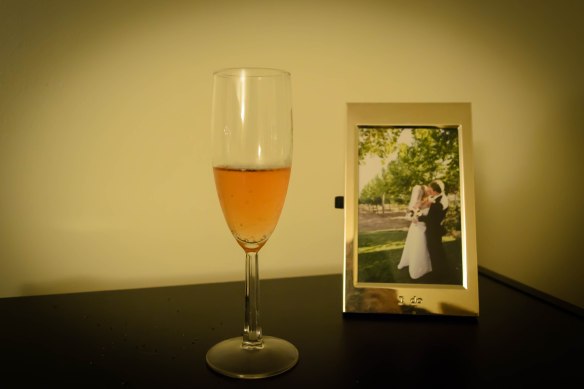
  • At this point, you have three options.  If you want to serve this as a simple, pourable sangria, simply refrigerate until it is well chilled, then top up with sparkling water and serve in fun glasses.
  • If you want to make popsicles, spoon the liquid into popsicle molds until almost full (we want to account for expansion), being sure to get plenty of strawberry bits in each one.  Add sticks or holders and freeze overnight or until solid.  To unmold, dip each compartment into warm water for a few seconds, then carefully and gently pull the popsicle out.  Don’t rush them or they may break.  Just give them a few seconds to separate from the plastic.
  • If you are making granita, pour your liquid into a 9×13 inch glass baking dish and put it into the freezer for 3-4 hours.  If you are me, this step is complicated by trying to create room in my freezer for a 9×13 inch glass baking dish.  Just pack it in.  It will work out.  Or, as with last month’s spice rub post, use this as a mandate opportunity for reorganization.
  • After 3-4 hours things should be resolutely slushy.  Remove the whole dish from the freezer and drag the tines of a fork through the mixture, breaking up the solid chunks and redistributing them.  Return it to the freezer.  Repeat this procedure once every few hours until you have a feathery, crystalline heap of frozen wine.  It should look similar in texture to shave ice or a snow cone.  At this point, it is ready to serve or keep frozen for up to a week, with occasional re-fluffing.
  • I like to serve mine in big mounds in a fancy martini glass, but wine glasses, cups, bowls, or little jam jars will work too.  And if you want to recreate the snow cone experience, rolled cones of thick paper would likely do just fine.

Vegetable Pakoras with Cilantro Mint Chutney

Why, I thought, as a rivulet of sweat coursed from neck to waist, do I insist on frying in the summer?  The instant read thermometer I was using to check the temperature of the oil sat next to the stove, registering 91F.  Normal people wait for summer and then anxiously stuff themselves on grilled meats, fresh salads, wedges of cool melon.  Foods that don’t make your back bead up.  But here I am, on my first real day of summer vacation, celebrating by standing over a pot of shimmering heat, making pakoras for lunch.

Food Blog June 2013-1613Maybe it’s a cultural thing.  I don’t mean the pakoras.  I mean frying.  Fried foods are a treat frequently enjoyed during the summer months; Americans + carnivals or county fairs = frying anything we can think of.  Depending on where you are in the country, corn dogs, funnel cake, hush puppies, twinkies, tortillas, even oreos, all get dunked into vats of hot oil and floated cautiously around until they transform into variously shaped clumps of deep, crispy gold.

So to bring summer traditions like sweating and eating fatty foods and looking at award-winning livestock and riding in twirling cars where the metal shrieks and you smell the grease with every turn into my own kitchen, I’m making pakoras for a weekday lunch?

Partly.  But not all.

I’ve talked before about my friend Ph., who even has a whole category on this little site dedicated to her (Phoebe-Phriendly, if you’re interested).  Ph. is gluten-intolerant, can’t eat dairy or tree nuts, and is no longer able to process corn or rice.  This makes cooking for her a challenge.  However, she is one of the reasons I started stretching my food boundaries and knowledge; we became close friends in graduate school, and I wanted to be able to make food that she could eat!  We got into a conversation in the comments of her blog the other day, and I brought up pakoras because she was playing with garbanzo bean flour.  She had never made them, so we decided I should come up with a recipe she could use.  That’s where you, my friends, luck out.

Food Blog June 2013-1603Pakoras are an Indian street food: assorted vegetables (or paneer, or bread, or apparently sometimes even chicken) dredged in a well-spiced batter of besan or gram flour (which is made with garbanzo beans) and water.  I added some baking powder to my mix as well, for fluff and lightness.  Most often the vegetables are cut into manageable pieces and dipped into the batter individually before they are fried, resulting in something I’ve been thinking about as essentially an Indian spiced tempura.*   Sometimes, though, they are cut into smaller pieces, tossed together in the batter, then levered carefully into the oil in chunky mixed fritters.  I chose the first of these methods for our lunch, so we could have the fun of mixing and matching which vegetables we crunched our way through.  We chose cauliflower, potatoes, and onions.  My favorite ended up being the cauliflower, while N. couldn’t get enough of the puffy potato slices.

Food Blog June 2013-1607Though they are eaten year round (depending on where you are), I discovered during my research about this delightful little snack that they are particularly popular during monsoon season, dipped into or sauced with a variety of chutneys, and served alongside a cup of chai.  This makes sense – a warm treat to enjoy when it is wet and booming with storms outside – and though the weather in my California kitchen is far (far, far, far) from identical, it is currently monsoon season in India, so it turns out this was, after all, a timely choice.

We had ours with a cilantro mint chutney – lightly spicy, fresh, grassy from the herbs, and bright from the addition of lime juice.  I’ve included that recipe here as well.

Food Blog June 2013-1610Pakoras are best served as hot as your mouth can handle them.  They are crispiest that way.  As they sit, the batter loses its magnificent crunch.  They are acceptable reheated in a 400F oven the next day, but, as with all fried foods (with perhaps the magical exception of a really good fried chicken), they are best eaten immediately.

Food Blog June 2013-1614Food Blog June 2013-1615Food Blog June 2013-1616

* I realize tempura is quite different: rice flour is typical, for one, and the liquid used is often carbonated water to make the batter even lighter.  But the essentials – vegetables coated in batter and fried – are the same.


Vegetable Pakoras and Cilantro Mint Chutney
serves 6-8 as an appetizer or snack, or 4 as an embarrassingly indulgent lunch
Pakora batter:
2 cups garbanzo bean flour (I used Bob’s Red Mill Gluten-Free mix, which is mostly bean flours)
2 cloves garlic, grated
1 small knuckle of ginger, grated (about a ½ inch piece)
1 tsp ground turmeric
1 tsp ground cumin
1 tsp ground coriander
¼ tsp cayenne pepper, or more to taste
1 tsp salt
2 tsp baking powder
1 cup cold water
  • Whisk together the flour, grated garlic and ginger, and all the spices until evenly combined.
  • Whisk in the water until a thick but smooth batter forms.
  • Set it aside for 30 minutes.  This is conveniently enough time to prep the vegetables, heat the oil, and make the chutney.
Pakora vegetables:
1 small head cauliflower, cut into bite-sized pieces
2 medium Yukon gold potatoes, sliced thin (1/8 inch slices seemed ideal)
½ large red onion, cut into chunks or thick rings
  • To prepare for frying, heat 1-2 quarts of oil (I used vegetable oil) in a large, heavy, steep-sided pot over medium heat, until it reaches about 350F.  Put on some closed-toed shoes to keep yourself safe, just in case you have drips or your oil bubbles over.
  • Working in small batches (5-6 pieces at a time), dip the vegetables into the batter, retrieve one at a time with long handled tongs and let the excess batter drip back into the bowl for a few moments before carefully lowering each into the hot oil.  They should sizzle as they are immersed, but not spit or foam up wildly.
  • Cook each batch of vegetables for 4-5 minutes, carefully turning each one halfway through the cooking time, until they are golden and crispy.
  • As each batch finishes, fish the pieces out one at a time and set them on a wire rack over a cookie sheet.  This will allow excess oil to drip off.  Salt them lightly as soon as they come out of the oil.
  • Take the temperature of the oil before adding a new batch of vegetables, to ensure that it returns to right around 350F, the optimal temperature for frying.
  • Continue until all vegetables are golden, crispy, and cooked!

Pakoras are best consumed as soon as they are cool enough for your mouth to handle.  As they sit, the batter gets soggy.  It’s still tasty, but not as triumphantly crunchy.

Cilantro mint chutney:
2 bunches cilantro, bottom 3 inches or so of stems removed
1 bunch mint, stemmed (you will be using leaves only)
Zest and juice of 1 lime
1 jalapeño, stem removed and sliced in half longitudinally (if you are concerned about the chutney being too spicy, remove some or all of the seeds and inner white membrane, where most of the heat is concentrated)
¼ cup water
2 TB olive oil
1 tsp garam masala
Salt to taste
  • Add all ingredients to a food processor and pulse in 3-5 second intervals until everything comes together as a loose, chunky sauce.  The resulting mixture should be thinner in consistency than a pesto, and will not remain emulsified for very long.
  • Scrape into a serving dish and eat with the pakoras.

Smoky Summer Spice Rub

Let’s talk about your spice cabinet.  No?  Okay, then let’s talk about mine.  I really started cooking when I moved to Oregon, and that first Christmas, coming back home to Northern California after three months of what seemed like non-stop rain, the gift I wanted more than anything else was a spice rack.  This, I was sure, would be the essential catalyst in my longed-for transition from college-graduate-experimental-cook to full-scale domestic goddess.  Mom and I went to kitchen store after kitchen store, looking for the right one.  It needed to hang, so it couldn’t be too big.  It had to have a fair number of bottles, but I wanted them empty, not filled, because I wanted to choose my own spices.  We finally found it in Cost Plus World Market, which was convenient, because it was immediately adjacent to their spice selection.  We picked out ten or twelve of the usual suspects, and then Mom said “okay, now turn around while I put it in the cart, and forget what you saw here,” which has, since the days of Santa Claus, always been our funny way of buying presents for each other in full view of the giftee.

Food Blog June 2013-1526This little spice rack worked fine, and hung proudly from a nail above my stove, until my spice requirements exceeded the twelve little bottles the shelves would hold.  Suddenly whole AND ground cumin were necessary.  Tumeric and cayenne and cream of tartar and even the dreaded pre-mixed pumpkin pie spice found their way into my kitchen and demanded homes.

So I’ve ended up with something I am going to guess looks familiar to many of you:

Food Blog June 2013-1529This is not a good system.  There, I said it.  It’s just not!  It holds the whole collection nicely, but it’s dark back there, and things fall over, and sometimes I don’t feel like digging around to see if I have any poultry seasoning, and then it’s Thanksgiving and I’m in a dark, cranky place and I think “screw this noise!” and buy a new bottle.  So then I have four.   What I really need, what I covet and dream about, is something like Aarti’s magnetic spice wall.

In the absence of space or motivation to build something that fancy, though, I stick with my system.  Every once in a while, I summon the courage and the patience to investigate the dark reaches of the cabinet, to get a sense of what’s in there, what needs replacing, and what deserves a space in my weekly menu.  The early days of summer are a good time to do this, because they offer a prime opportunity to make a smoky, spicy, aromatic rub for grilling.

Food Blog June 2013-1532Food Blog June 2013-1534I started with a recipe from Fine Cooking originally designed for beer can chicken, and then I tweaked and adjusted and adapted for what was, as you might have guessed, in my spice collection.  It’s got cumin, it’s got crushed red pepper, it’s loaded with garlic powder and mustard seeds and sea salt and just a hint of ginger for an intriguing and different kind of heat.

Food Blog June 2013-1535This is a tasty rub for grilled meat, obviously (we like it for chicken, patted on before a liberal slather of equal parts Dijon mustard and apricot jam), but I think it would also be great on slabs of pressed tofu, or buttered corn, or potato wedges (you make your steak fries on the grill in the summer, right?).  And if you were really feeling adventurous, you might even add some to a light, lemony vinaigrette to carry the flavors through your side salad.

Food Blog June 2013-1540This recipe makes enough for several applications, which means you’ll have enough to last part of the summer.  It keeps well in a sealed zip top bag.  And in between grilling, you can just store it… in… your spice cabinet.  Oh.  Well, just jam it in at the front, for easy access.  Maybe it will help you forget the mess nightmare treasure trove behind it.  Plus, it’s got so many tasty flavors in it, you surely won’t need anything else for the rest of the summer, right?  Right.

Food Blog June 2013-1542Happy grilling!


Smoky Spice Rub
Adapted from Fine Cooking Magazine
Makes about ¼ cup
2 tsp cumin seeds
1 tsp mustard seeds
1 tsp coriander seeds
1 TB coarse sea salt
2 tsp garlic powder
1 tsp crushed red pepper flakes
1 tsp freshly ground black pepper
½ tsp ground ginger


  • If you are feeling especially ambitious, toast your cumin, coriander, and mustard seeds in a small, dry pan over medium-low heat for 5 minutes, or until the cumin starts to pop a bit and look just a touch oily.  Once that has happened, turn the heat off and let cool before moving on.
  • If you are feeling lazy less ambitious, skip the toasting step and put the cumin, coriander, and mustard into a spice grinder (or your husband’s coffee grinder.  If there’s a little residual ground coffee in there, all the better!  Extra shot of flavor you didn’t have to work for!) and pulse until the seeds become a fine powder.
  • Mix together ground seeds and all remaining ingredients in a small bowl or, if you are lazy especially efficient, the zip-top bag you’ll be using to store your mix in.
  • Ta-da!  Apply liberally, patting and massaging for good coverage and adhesion, to whatever you’ll be grilling for a smoky, slightly spicy kick.

Kidney bean, brown rice, and shiitake “vurgers”

I talk a lot on this blog about myself.  Today, I want to talk a little bit about my husband.  Before I met him, N. did a study abroad program in London.  He was there for six months, and by “there” I mean taking classes in London, but also zipping around England and then parts of Europe with a speed that his British hosts looked upon with alarm (“what do you mean you’re going to York just for the weekend? That’s a 3-4 hour trip!  It’s a whole holiday!”  To which N., who grew up in a road-tripping family, would shrug and go anyway.  Example: his family, when they lived in a suburb of Sacramento, California, thought nothing of jumping in the car to drive to Reno for the day.  Once when his parents visited us in Oregon, we drove to Tillamook from Eugene via the coast to get ice cream and cow cookies at the Tillamook Cheese Factory, and then headed home in time for dinner).

Skyscraper gazing

N. is a little camera-shy.

Interestingly, and perhaps unfortunately, N.’s study abroad program took place shortly after some of the worst scares of mad cow disease in England.  He was there in late 2002, and eating beef was a no-no.  This meant, when I met him, that N. had some food issues.  He wasn’t a picky eater – that’s not quite the right word.  He was, let’s say, a particular eater.  Beef, especially beef that wasn’t well-done, was out.  The frightening potential consequences had been too drilled into his head.  Lamb was too gamey.  Pork was not his favorite.  When I was trying to impress him with my rudimentary cooking skills when we first met (rudimentary is kind – the first time I tried to make him French toast for breakfast, the bread collapsed into over-soaked crumbles in my custard mixture.  But we fried it up and ate it anyway – sweet scrambled eggs with bread bits – and he was either kind enough or smitten enough to pretend he liked it), we ate a lot of chicken breast.

N.’s willingness and preference when it comes to food has expanded and matured significantly since we’ve been together.  Still, though, he is wary.  When we lived in Oregon, we were lucky enough to find ourselves in Eugene, which is a bit of a hippie mecca.  This meant we had a wide variety of vegetarian choices.  Neither of us is vegetarian, but N. developed the habit of ordering veggie burgers when we went out to eat, since it was a safe bet.  You didn’t have to worry about doneness, and many of the restaurants we frequented made their own patties instead of relying on something frozen from a box.

Even though we’ve been living in Los Angeles for almost a year now (can that be true?!), and we’ve done our share of restaurant investigating, we don’t have the favorites yet that we had in Eugene.  Though we’ve found some delicious options, N. doesn’t have a go-to veggie burger yet.  This week, therefore, I decided to make him one.

It always interests me, when a veggie burger is advertised as a homemade patty, to find out what its base is.  A lot of meatless patties – especially the premade kind you find in the freezer section – are wheat based, which seems like a strange thing to put on a sandwich: a patty of pressed wheat between two pieces of bread made from wheat.  Gluten-fest!  But sometimes they are made from tempeh, and sometimes from beans, and we had a really tasty one once that I’m sure had shiitake mushrooms mixed into it, which contributed a fantastic texture I haven’t found again.   Food Blog May 2013-1444

Food Blog May 2013-1446Taking this textural component as my must-have, I considered my pantry and spice cabinet, and cobbled together what turned out to be a delicious, filling patty made of brown rice, kidney beans, and reconstituted dried shiitake mushrooms.  I used a mixture of red wine and hot water to reconstitute my mushrooms, which contributed to their deep, earthy flavor.  You could use chicken or vegetable broth if you prefer, or just hot water.

Food Blog May 2013-1447To bump up the flavor and add a little moisture, I added onions and garlic I’d sweated down with some warm, southwestern spices, and pulsed the whole thing in a food processor with a generous pinch of salt until it was willing to be molded, but not completely homogenized.  The beans should be smashed but not totally pureed, and you should be able to discern the occasional grain of rice in your shaped patty.  This adds texture and interest when you are chewing, and makes the finished product less like you’re chowing down on a fried patty of bean dip.  Not that fried bean dip patties necessarily sound like a bad thing…

Food Blog May 2013-1448N.’s one complaint about veggie burgers is that they are often smothered in cheese.  It’s as though restaurants are trying to hide the flavor-that-isn’t-meat.  That might be exactly what some people want, but for us, these non-cow flavors are just as interesting and tasty.  To make this a burger (or vurger, as one of our Eugene favorites called it) worthy of N.’s preferences, I decided to skip the cheese on the actual patty, and incorporate it into the bun instead.  Thus we settled our patties on homemade jalapeño cheese “kaiser” rolls, which I’m going to have to boast about… maybe next week…

For now, though, the patty itself: these are a bit dense and fairly filling, but the mushrooms really do add a delightful chewiness that I wouldn’t want to skip.  Adding in some tempeh crumbles to replace or enhance these components would likely be delicious, though I haven’t tried this yet myself.  The final addition of the barest squeeze of lime juice makes a surprising difference: it takes them from slightly heavy to a flavor I can only describe as somehow more awake.

Food Blog May 2013-1452A few days ago Deb at Smitten Kitchen asked what her readers’ go-to dinners were.  I thought about this for a while and decided ours were pizza, roasted vegetable tacos, and a lovely little one-bowl meal I learned from a friend called “Scatter Sushi.”  I can tell you, though, based on the reaction these “vurgers” got at our house, they just joined that list.

Food Blog May 2013-1456

Note: these patties are vegan (until you put them on a cheese roll), which means they lack the dependable binding power an egg typically brings to such a party.  Therefore, I recommend shaping them and then letting them sit for half an hour or more before cooking, which will let the rice and beans soak up some of the moisture from the vegetables, and thereby hold together better.  If they threaten to crumble on you or you’re frustrated or frightened by their potential fragility and not determined to keep them vegan, go ahead and add an egg to the mix.

Brown rice, kidney bean, and shiitake “vurgers”
Makes 4 patties
1 cup cooked, cooled brown rice
1 15 oz. can kidney beans, drained and rinsed
1 oz. dried shiitake mushrooms (about 12)
3 cups wine, water, or broth for reconstituting mushrooms
¼ cup diced onion
3 cloves garlic, minced
3 TB olive oil, divided
1 tsp cumin
1 tsp paprika
½ tsp oregano
½ tsp black pepper
½ tsp salt (if you are using dried beans rather than canned, you might want to increase this quantity)
1 tsp lime juice or red wine vinegar
  • First, reconstitute the mushrooms.  Heat water or broth to near boiling, then pour into a heatproof bowl with dried mushroom caps and wine (if using).  I typically like to use 1 cup of wine and 2 cups of hot water – it’s enough heat to revive the mushrooms, and enough flavor to intensify them.  Cover, making sure the mushrooms are fully immersed, and let sit for about 20 minutes.  I like to place a small plate atop my soaking bowl to keep the mushrooms underwater.
Food Blog May 2013-1445

Mushroom soaking contraption

  • When the mushrooms are soft and pliable, drain them and set aside until cool enough to handle.  Heat 1 TB of the olive oil in a skillet and gently sweat the onions and garlic until the onions are translucent and the garlic is aromatic and sweet.  This should take 5-8 minutes over medium-low heat.
  • As the onions soften, add the cumin, paprika, oregano, and pepper, turn the heat down to low, and stir to combine.  Let the spices cook with the vegetables for another 2 minutes, to let their flavors meld and warm.  Turn off the heat and set aside.
  • Once your mushrooms are cool enough to handle, squeeze them gently to release some of the water they have collected in their bath.  You don’t want them to be drippy, but you don’t want to squeeze them completely dry either.  Some of the liquid they’ve soaked up, especially if you’ve used wine or broth, will add lovely flavor to your veggie patties.  It will also help hold the patties together.  Remove the stems (they are tough and unpleasant to eat) and then chop the shiitake caps roughly.
  • Place rice, beans, chopped mushrooms, onion, garlic and spice mixture, and ½ tsp salt in the bowl of a food processor.  Pulse 4-5 times at 3 second intervals, just until the beans are broken up and the rice is in smaller pieces.  You want some of the mixture to be smooth, but some to retain texture and shape.  Taste for seasoning, and add more salt if needed.  Squeeze in the lime juice and pulse one more time just to integrate it.
  • Remove your mixture from the processor, being careful of the blade, and dump it into a large bowl.  Press it together with your hands a bit to ensure workability.  If it is really crumbly or you are nervous about the patties holding together, you might add a lightly beaten egg or some olive oil here.  However, don’t be too worried – they are going to firm up a little when you let them sit after shaping.
  • Divide the mixture in four even quantities.  One at a time, press and shape each quarter into a round, flat patty no more than 1 inch thick.  Everything is cooked already, so you don’t have to worry about rawness, but you do want everything to heat evenly.  Any thicker than this and your burgers might still be a bit cool in the middle.  Mine were just under 1 inch thick, and had a diameter of about 3 inches.
  • Once all 4 patties are formed, set them aside on a plate or a board for at least half an hour.  If you are going to wait much longer than that or if you are making them ahead, stick them in the refrigerator, but be sure to let them come back up to room temperature before cooking, so they heat evenly.
  • When you are ready to cook, heat the remaining 2 TB olive oil in a skillet (I just used the same one I’d cooked my onions and garlic in) over medium to medium-high heat until it glistens and ripples.  Add the burgers carefully to the skillet and let them sizzle for 4-5 minutes on each side, until they develop a deep, bronzed crust.
  • Serve with your favorite condiments on the bun of your choice.  We kept it simple: mayonnaise, red leaf lettuce from the garden, on the jalapeño cheese rolls I’ll share with you here next week.

Note: if the burgers look like they are falling apart, or if they threaten to break when you try to flip them, turn the heat up a little.  This, bizarrely, helps keep them together because it sets the outside faster, so the surface of the patty is firmer.

Honey Mustard Roasted Carrots

If you’re frequenting your Farmers’ Market this spring, you have probably seen the amazing bundles of carrots cropping up everywhere.  Some are knobbly and stubby and round, like little turnips, some are almost wispy-thin and well-whiskered.  The ones that drew me, and made last week’s side dish for our biscuits, were the rainbow bunches: orange and yellow, but also the vibrant, veiny purple that was probably the original color of these funny, beloved roots (orange carrots were reputedly a Dutch development: in the 17th century the color was cultivated to celebrate William of… wait for it… Orange. Harold McGee agrees on the date and location, but he doesn’t mention political motivations).
Food Blog April 2013-0986
The treatment I subjected these little bolts of spring to was so good that rather than dawdling through a lengthy bread recipe, I wanted to share these instead.  I can’t stop thinking about them (we’re probably having them with dinner again tonight), and since it is the perfect season for it, I can’t really fault us for that.
Carrots sometimes seem too straightforward: sweet and crisp, made only marginally complex by a mild grassiness.
Food Blog April 2013-0987
Liberally slicked with a mixture of honey, mustard, and olive oil, then roasted until their skins almost blackened under the heat, ours became intensely savory and yet also caramelized, homely to the eye but stunners on our tongues.  Their taut skins, lacquered with crackly coating, retained a barest crunch while the interiors just slid down our teeth like cold butter.
Food Blog April 2013-0997
(Admission: I did make bread this week: my first attempt at baguettes.  They were okay, but nothing amazing – the interior had a nice spongy crumb but the crust was a bit thicker than I like, with none of the shattering crispness that makes a really good French loaf.  They were bumpy in shape and the deep scores I made across their surface didn’t puff the way they do in bakery cases.  They were far from shameful, and tasty sliced, toasted and spread with salted butter, but still. So pedestrian. You deserved something more exciting.)
 Food Blog April 2013-1015
Honey Mustard Roasted Carrots
Serves 1-2 as a side dish


This is almost too simple to be a real recipe, but a few of those are nice to have in your repertoire.  Note: cooking time and ingredient quantities may differ depending on the number and thickness of the carrots you are using.  Start with these amounts, then adjust as suits your palate and pantry.


2 bunches (12-15 individual) rainbow carrots (though I suspect any carrots would be great). If you are using a Farmers’ Market variety, you won’t even need to peel them.  The skin will caramelize beautifully, and any wispy roots clinging on will gain an addictive roasty crunch.
2 TB dijon mustard
2 TB honey
2 TB olive oil
pinch freshly ground black pepper
scant sprinkle of sea salt
  • Preheat the oven to 400F and line a baking sheet with aluminum foil.
  • To prepare your carrots, remove the greens, scrub them well (if they are dirty), and roll them around on a clean kitchen towel to dry.
  • In a shallow dish, use the tines of a fork to combine the honey, mustard, and olive oil.  If the honey refuses to play nicely, send the mixture through 10-15 seconds in the microwave.  Add salt and pepper to taste, though I recommend under-salting just a tad.  The flavors intensify so much after roasting that you’ll only need a tiny hit of salt.
  • Toss the cleaned, dry carrots in the honey mustard mixture, then tumble them onto your baking sheet and spread them out so none are touching.  If you have too many carrots for that, at least be sure they are in a single layer.  We want as much surface area to be heat blasted as possible.
  • Place the loaded baking sheet in the oven and roast for 30-45 minutes, or until carrots are well-caramelized and tender.  This is a wide range of time, I know, but everything depends upon the size and thickness of your carrots.  Plunge the tines of a fork into your thickest specimen.  If you meet with considerable resistance, leave it in the oven for another 10-15 minutes before checking again.  If the tines slide in easily, or you get only a bit of push back from the flesh of the carrot, it’s probably ready.  Your own preferences also play a role here: roast them until they have the texture you like best.
They will be amazingly hot when they first emerge from the oven, so if they sit for a minute or two before serving, all the better.  But once you start tasting, don’t expect them to last long.

Happy New Year!

Food Blog 2011-2013-0362

Oh friends, it happened.  I made it.  Yesterday I made the last two Bittmans on my list and completed, albeit a year later than I’d originally intended, my project.  I have reflections to share, certainly, and I have changes and excitement and promises for the new year, but first, I think, let’s work with the program.  Two Bittmans.  Two reports:

“14. Steam or poach 2 cups of pumpkin cubes until tender. Meanwhile, sauté 1 cup sliced shiitake mushroom caps in vegetable oil with a few drops of sesame oil. Boil 4 cups water and whisk some of it with ⅓ to ½ cup of miso. Stir miso mixture, pumpkin and mushrooms into water and heat everything through, then serve, drizzled with more sesame oil.”

Because we were planning to reach midnight by eating as many snacks as possible eating our way to midnight snacking, I wanted a light dinner to precede the countdown.  This seemed to fit the bill.  And it had to, after all, since it was the only soup left and the calendar was screaming December 31st.

2 cups peeled, cubed butternut squash (I had some in the fridge, and suspected pumpkin would be hard to find)

1 1 oz. package dried shiitake mushrooms

1 TB vegetable oil

¼ tsp (or to taste) toasted sesame oil, plus some for drizzling

3 packets instant tofu miso soup mix (all I could find at my grocery store)

water

white wine

To reconstitute my shiitake mushrooms, I soaked them in a mixture of white wine and almost boiling water for 15-20 minutes, until they were plump and soft.

While the mushrooms soaked, I cubed up my butternut squash and submerged the pieces in a pan of salted water.  I brought this to a bare simmer and cooked it just until the squash pieces were tender – 10-15 minutes – then drained the pieces in a colander.  Don’t overcook them, because they will start to fall apart.  Set the squash pieces aside.

When the mushrooms were tender, I scooped them out of their bath and decided the remnants shouldn’t go to waste.  I poured the soaking broth into a little pot to bring to a boil, so I could use this already flavored liquid as the base for my soup.  While it heated, I stemmed and sliced the mushrooms.

Since the shiitakes were now basically cooked, I probably could have skipped Bittman’s sautéing step.  But honestly, I’m not one to pass up the opportunity to ingest sesame oil, so I dutifully dribbled vegetable oil with a few (or a few more than a few) drops of sesame oil in the (drained and dried) pan I’d used to simmer my squash and sautéed the mushroom slices over medium heat until they dried out a bit and started to take on some color.

While this colorization happened, slowly and so aromatically, I made the broth.  I poured all three miso soup seasoning packets – tofu and seaweed and all – into a small dish, then mixed in about ½ cup of my heated mushroom soaking liquid and whisked gently to dissolve the powdery soup mix.  This created a slightly thickened slurry, which I poured with the rest of the liquid and the butternut squash cubes into the mushroom pan.

Food Blog 2011-2013-0341

After a few moments of reheating, we dipped up bowlfuls and ate.

Food Blog 2011-2013-0343

N. wasn’t sure (he sometimes takes issue with the texture of reconstituted mushrooms), but I inhaled it with devotion.  I love the flavor of miso soup, and the mild sweetness of butternut squash against the salty umami and fleshy squish of the mushrooms was lovely.

Food Blog 2011-2013-0347

It was light but still satisfying, and the tofu and vegetables from the soup mix were so welcome that I’d advise you, if you are using straight miso rather than a pre-mixed, additive laden packet, to consider adding some tofu or seaweed or green onion just to contribute a little substance and contrast to the soup.

Food Blog 2011-2013-0348

Dinner done, we moved on to the second stage of the evening.

“89. Vegetable crackers: Slice beets, sweet potatoes, plantains or parsnips or all of the above into 1/8-inch disks (a mandoline is helpful) and toss lightly in olive oil. Spread the slices on baking sheets, sprinkle with salt, pepper and, if you like, other seasonings and bake at 400 degrees for 10 to 12 minutes. When browned, flip the chips over and bake for another 10 minutes or so.”

This sounded tasty, and I’d always intended to make it for a party.  With a dear friend coming over to ring in the new year with us, and since hunks of cheese alone might be deemed a slightly imbalanced offering (though so, so delicious…), this seemed like a perfect opportunity.  Beets were out of the question (N.’s nemeses since childhood), and I couldn’t find plantains in my grocery store’s produce section, so we were left with the nutty herbiness of parsnips and the always dependable earthy sweetness of sweet potato.

3 medium parsnips, peeled

½ large sweet potato, peeled

generous dose of olive oil (maybe ¼ cup?), plus more to grease the cookie sheets

1 tsp each (or to taste) salt, pepper, and garam masala

To prepare for roasting, preheat the oven to 400F and line two cookie sheets with aluminum foil.  Drizzle with olive oil and spread to cover the surface of the foil evenly.

While the oven preheats, tackle the vegetables.  I don’t have a mandoline, but I do have a ruler, and I must confess I did bring it to the kitchen to give myself a better idea of what 1/8 inch looks like.  My slices were not quite even, but they did verge on passable.  I tossed them – big coins of harvest orange and speckled white – in a glass bowl with the olive oil and the spices until they were evenly coated.

Food Blog 2011-2013-0339

Spread the vegetable coins across the cookie sheets in a single layer, not overlapping, not in piles.  If they cook in a stack, they will soften but not brown or crisp.  Stow them in the oven for 12-15 minutes, or until they are just beginning to brown.

This next step is a true exercise in patience.  Unless you are far more talented with a spatula than I, you will have to flip each piece over individually.  You have to, because otherwise one side will burn and the other side will flutter limply into cooked-but-not-crisp status.  Trust me on this one.  When you have laboriously flipped each coin, shove the tray back into the oven for another 10-12 minutes.

Food Blog 2011-2013-0342

At this point, you’ll have to use your judgment.  My offerings were, after this additional time, cooked through but not remotely cracker-like in texture.  Another five minutes in the oven might have done the trick.  Putting them back in, failing to set a timer, and heading to the couch to eat dinner (I was trying to multitask) is not advisable.  I didn’t remember them until I smelled the slightly spicy aroma of parsnips, and by then it was too late – many of the little coins had gone from crackers to briquets.

I decided to pick out the worst offenders – Lucy reports that she didn’t mind a bit of charred flavor – and eat the salvageable ones anyway.

Food Blog 2011-2013-0356

To make them a bit more exciting (and disguise any lingering burned taste) I made a little dipping sauce.  You’ll need:

juice from 1 lime

2 TB honey

1 tsp garam masala

½ – 1 cup Greek yogurt

Whisk the first three ingredients together with a fork until they are smooth.  In increments, add Greek yogurt until your sauce reaches the desired thickness.  Mine was about the consistency of ranch dressing, but much more interesting in flavor.

Food Blog 2011-2013-0349

These crackers (with and without the sauce) were – if you were able to overlook the overcooking – a nice alternative to crudites or store-bought crackers.  They weren’t quite as crispy (except the ones that were too crispy), but they had a lovely deep flavor and none of the powdery, processed taste some crackers can have.  They are also a gluten-free offering and, minus the yogurt and honey sauce, vegan as well.

Food Blog 2011-2013-0350

I served them alongside a cheese platter,

Food Blog 2011-2013-0353

Food Blog 2011-2013-0354

Joy the Baker’s chili spiced sharp cheddar cheese crackers,

Food Blog 2011-2013-0352

assorted sweets,

Food Blog 2011-2013-0355

and my appetizer version of Bittman’s “Marshmallow Topping for Adults” dish: thick discs of sweet potato roasted until tender, topped with a dollop of cream cheese and sprinkled with a pecan brown sugar blend before being broiled until the sugar bubbles and the cheese slackens toward melting.

Food Blog 2011-2013-0357

Food Blog 2011-2013-0359

And champagne, of course.

Food Blog 2011-2013-0361

Happy New Year.  I hope you celebrate your achievements, meet your goals, and find happiness in your own self.  I’ll be checking in again later this week with some reflections and announcements.  Welcome to 2013.