Vegetable Pakoras with Cilantro Mint Chutney

Why, I thought, as a rivulet of sweat coursed from neck to waist, do I insist on frying in the summer?  The instant read thermometer I was using to check the temperature of the oil sat next to the stove, registering 91F.  Normal people wait for summer and then anxiously stuff themselves on grilled meats, fresh salads, wedges of cool melon.  Foods that don’t make your back bead up.  But here I am, on my first real day of summer vacation, celebrating by standing over a pot of shimmering heat, making pakoras for lunch.

Food Blog June 2013-1613Maybe it’s a cultural thing.  I don’t mean the pakoras.  I mean frying.  Fried foods are a treat frequently enjoyed during the summer months; Americans + carnivals or county fairs = frying anything we can think of.  Depending on where you are in the country, corn dogs, funnel cake, hush puppies, twinkies, tortillas, even oreos, all get dunked into vats of hot oil and floated cautiously around until they transform into variously shaped clumps of deep, crispy gold.

So to bring summer traditions like sweating and eating fatty foods and looking at award-winning livestock and riding in twirling cars where the metal shrieks and you smell the grease with every turn into my own kitchen, I’m making pakoras for a weekday lunch?

Partly.  But not all.

I’ve talked before about my friend Ph., who even has a whole category on this little site dedicated to her (Phoebe-Phriendly, if you’re interested).  Ph. is gluten-intolerant, can’t eat dairy or tree nuts, and is no longer able to process corn or rice.  This makes cooking for her a challenge.  However, she is one of the reasons I started stretching my food boundaries and knowledge; we became close friends in graduate school, and I wanted to be able to make food that she could eat!  We got into a conversation in the comments of her blog the other day, and I brought up pakoras because she was playing with garbanzo bean flour.  She had never made them, so we decided I should come up with a recipe she could use.  That’s where you, my friends, luck out.

Food Blog June 2013-1603Pakoras are an Indian street food: assorted vegetables (or paneer, or bread, or apparently sometimes even chicken) dredged in a well-spiced batter of besan or gram flour (which is made with garbanzo beans) and water.  I added some baking powder to my mix as well, for fluff and lightness.  Most often the vegetables are cut into manageable pieces and dipped into the batter individually before they are fried, resulting in something I’ve been thinking about as essentially an Indian spiced tempura.*   Sometimes, though, they are cut into smaller pieces, tossed together in the batter, then levered carefully into the oil in chunky mixed fritters.  I chose the first of these methods for our lunch, so we could have the fun of mixing and matching which vegetables we crunched our way through.  We chose cauliflower, potatoes, and onions.  My favorite ended up being the cauliflower, while N. couldn’t get enough of the puffy potato slices.

Food Blog June 2013-1607Though they are eaten year round (depending on where you are), I discovered during my research about this delightful little snack that they are particularly popular during monsoon season, dipped into or sauced with a variety of chutneys, and served alongside a cup of chai.  This makes sense – a warm treat to enjoy when it is wet and booming with storms outside – and though the weather in my California kitchen is far (far, far, far) from identical, it is currently monsoon season in India, so it turns out this was, after all, a timely choice.

We had ours with a cilantro mint chutney – lightly spicy, fresh, grassy from the herbs, and bright from the addition of lime juice.  I’ve included that recipe here as well.

Food Blog June 2013-1610Pakoras are best served as hot as your mouth can handle them.  They are crispiest that way.  As they sit, the batter loses its magnificent crunch.  They are acceptable reheated in a 400F oven the next day, but, as with all fried foods (with perhaps the magical exception of a really good fried chicken), they are best eaten immediately.

Food Blog June 2013-1614Food Blog June 2013-1615Food Blog June 2013-1616

* I realize tempura is quite different: rice flour is typical, for one, and the liquid used is often carbonated water to make the batter even lighter.  But the essentials – vegetables coated in batter and fried – are the same.


Vegetable Pakoras and Cilantro Mint Chutney
serves 6-8 as an appetizer or snack, or 4 as an embarrassingly indulgent lunch
Pakora batter:
2 cups garbanzo bean flour (I used Bob’s Red Mill Gluten-Free mix, which is mostly bean flours)
2 cloves garlic, grated
1 small knuckle of ginger, grated (about a ½ inch piece)
1 tsp ground turmeric
1 tsp ground cumin
1 tsp ground coriander
¼ tsp cayenne pepper, or more to taste
1 tsp salt
2 tsp baking powder
1 cup cold water
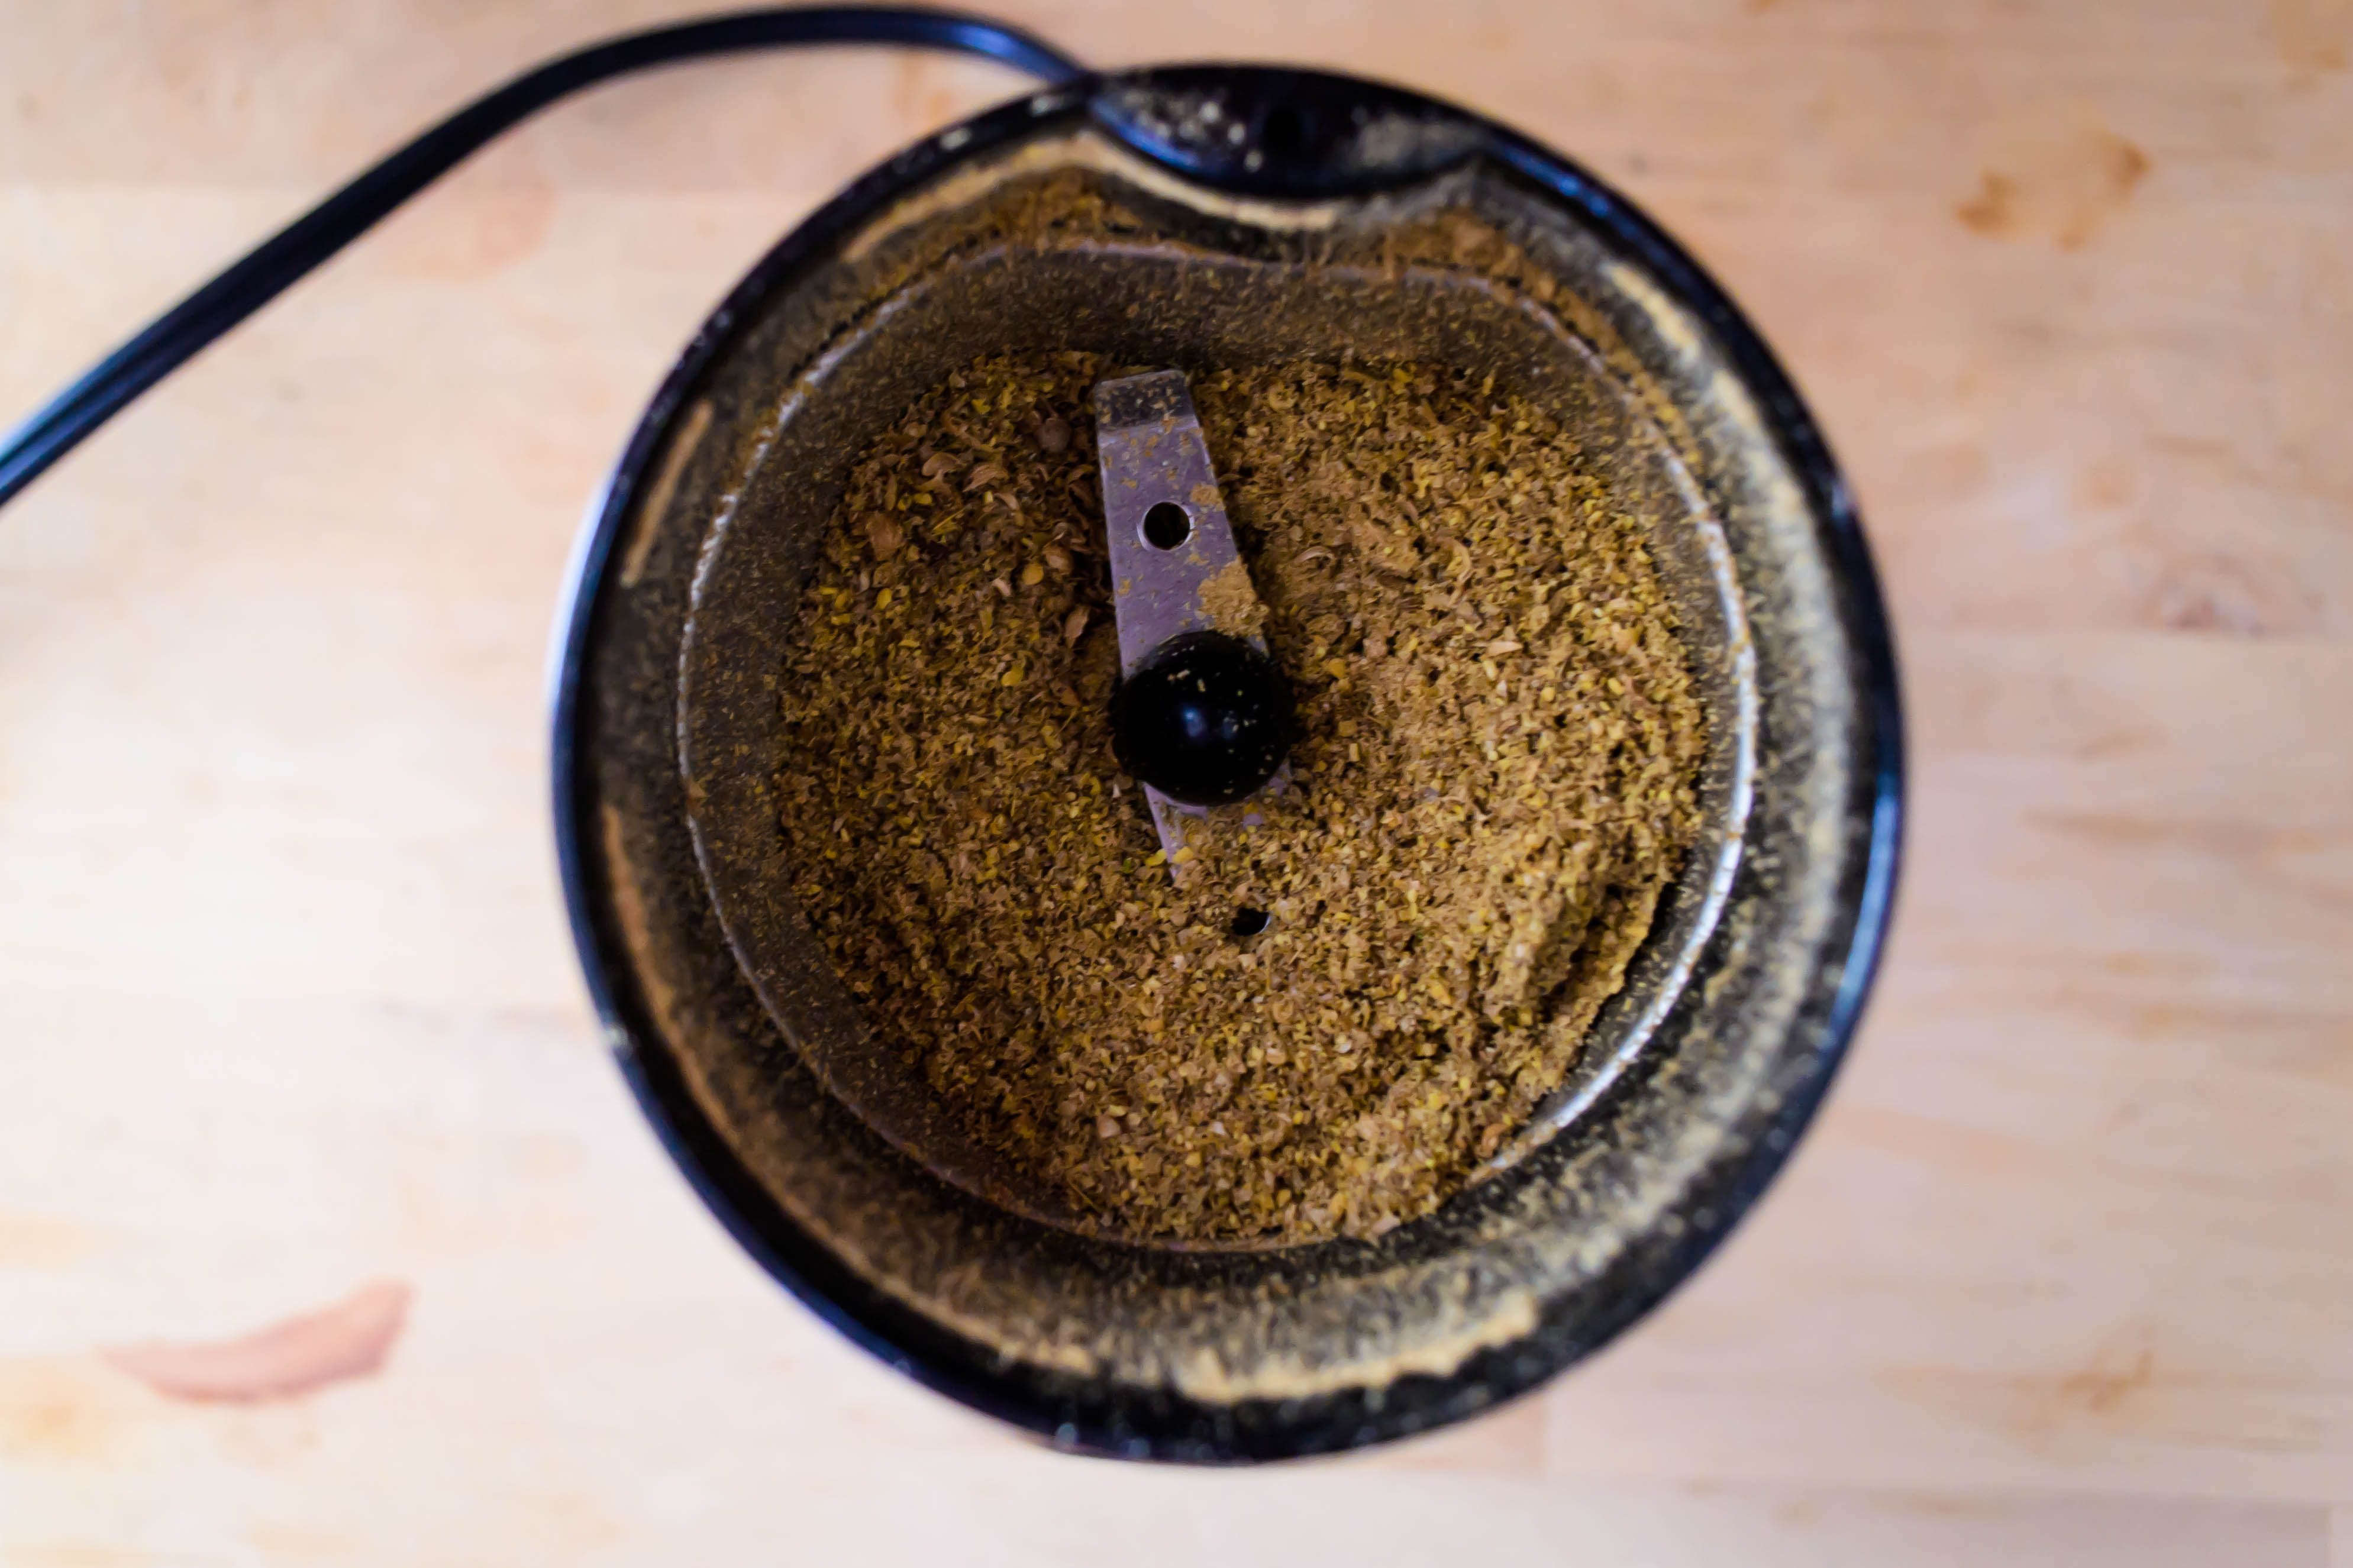
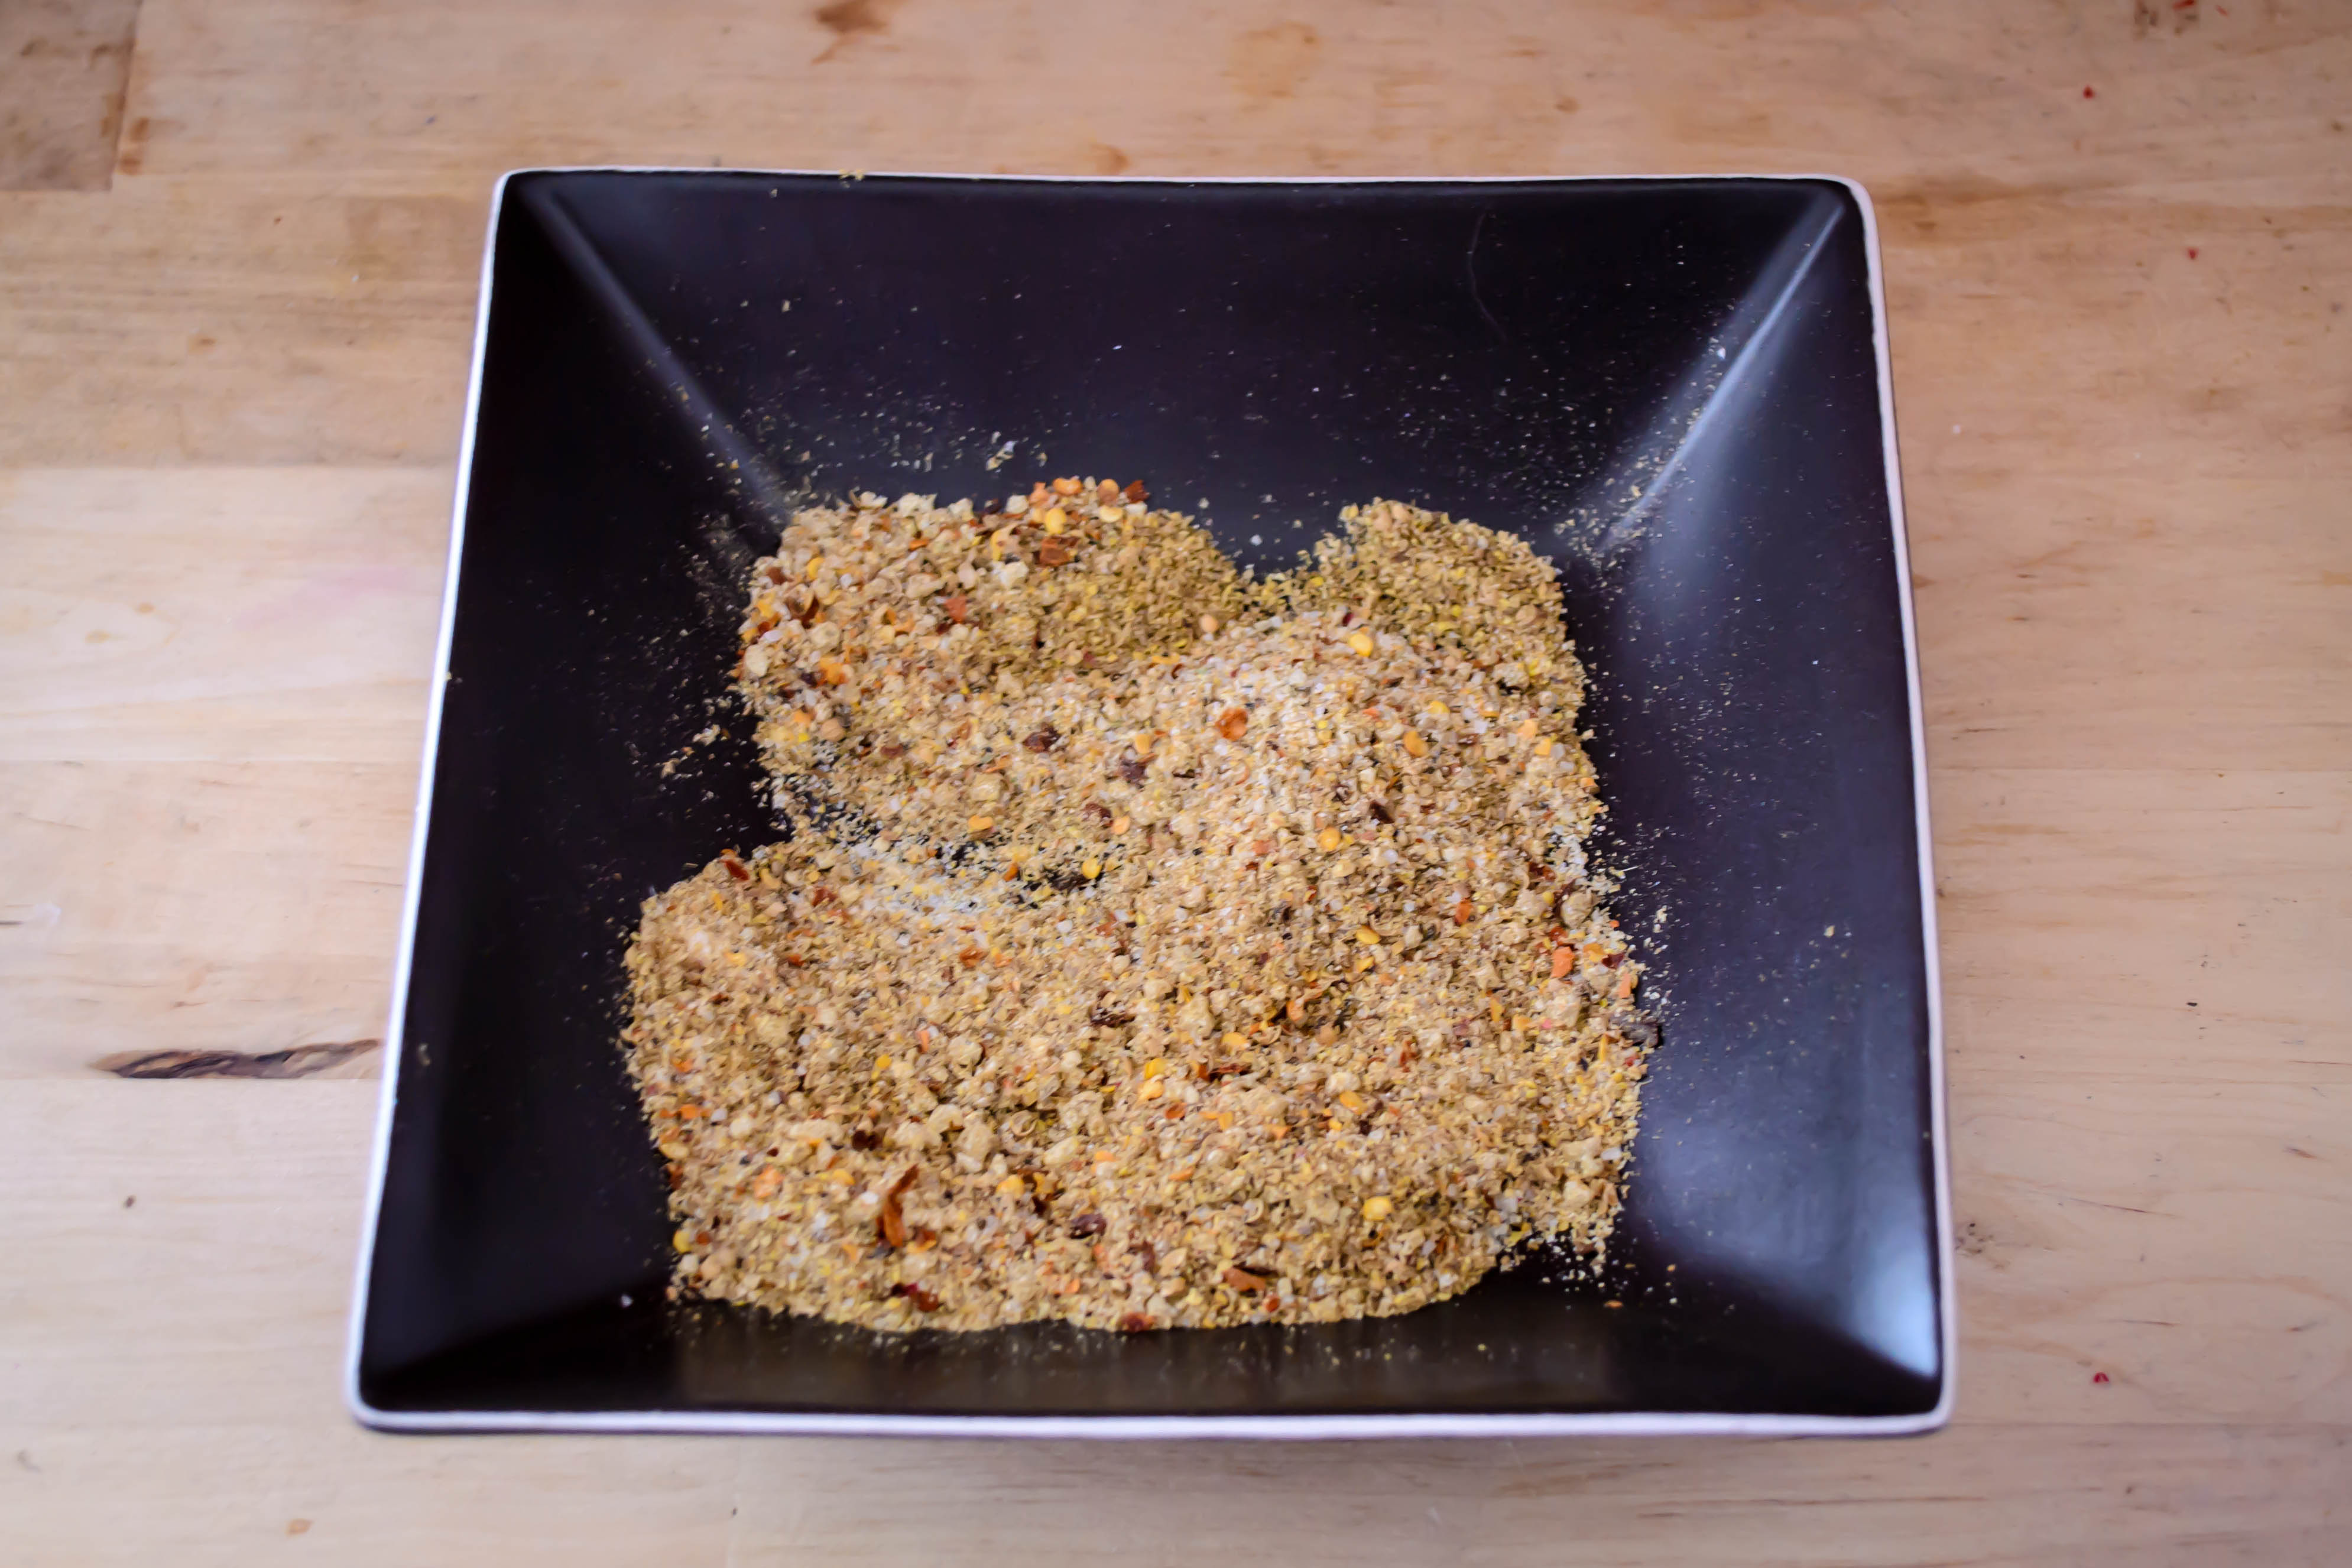
  • Whisk together the flour, grated garlic and ginger, and all the spices until evenly combined.
  • Whisk in the water until a thick but smooth batter forms.
  • Set it aside for 30 minutes.  This is conveniently enough time to prep the vegetables, heat the oil, and make the chutney.
Pakora vegetables:
1 small head cauliflower, cut into bite-sized pieces
2 medium Yukon gold potatoes, sliced thin (1/8 inch slices seemed ideal)
½ large red onion, cut into chunks or thick rings
  • To prepare for frying, heat 1-2 quarts of oil (I used vegetable oil) in a large, heavy, steep-sided pot over medium heat, until it reaches about 350F.  Put on some closed-toed shoes to keep yourself safe, just in case you have drips or your oil bubbles over.
  • Working in small batches (5-6 pieces at a time), dip the vegetables into the batter, retrieve one at a time with long handled tongs and let the excess batter drip back into the bowl for a few moments before carefully lowering each into the hot oil.  They should sizzle as they are immersed, but not spit or foam up wildly.
  • Cook each batch of vegetables for 4-5 minutes, carefully turning each one halfway through the cooking time, until they are golden and crispy.
  • As each batch finishes, fish the pieces out one at a time and set them on a wire rack over a cookie sheet.  This will allow excess oil to drip off.  Salt them lightly as soon as they come out of the oil.
  • Take the temperature of the oil before adding a new batch of vegetables, to ensure that it returns to right around 350F, the optimal temperature for frying.
  • Continue until all vegetables are golden, crispy, and cooked!

Pakoras are best consumed as soon as they are cool enough for your mouth to handle.  As they sit, the batter gets soggy.  It’s still tasty, but not as triumphantly crunchy.

Cilantro mint chutney:
2 bunches cilantro, bottom 3 inches or so of stems removed
1 bunch mint, stemmed (you will be using leaves only)
Zest and juice of 1 lime
1 jalapeño, stem removed and sliced in half longitudinally (if you are concerned about the chutney being too spicy, remove some or all of the seeds and inner white membrane, where most of the heat is concentrated)
¼ cup water
2 TB olive oil
1 tsp garam masala
Salt to taste
  • Add all ingredients to a food processor and pulse in 3-5 second intervals until everything comes together as a loose, chunky sauce.  The resulting mixture should be thinner in consistency than a pesto, and will not remain emulsified for very long.
  • Scrape into a serving dish and eat with the pakoras.

Smoky Summer Spice Rub

Let’s talk about your spice cabinet.  No?  Okay, then let’s talk about mine.  I really started cooking when I moved to Oregon, and that first Christmas, coming back home to Northern California after three months of what seemed like non-stop rain, the gift I wanted more than anything else was a spice rack.  This, I was sure, would be the essential catalyst in my longed-for transition from college-graduate-experimental-cook to full-scale domestic goddess.  Mom and I went to kitchen store after kitchen store, looking for the right one.  It needed to hang, so it couldn’t be too big.  It had to have a fair number of bottles, but I wanted them empty, not filled, because I wanted to choose my own spices.  We finally found it in Cost Plus World Market, which was convenient, because it was immediately adjacent to their spice selection.  We picked out ten or twelve of the usual suspects, and then Mom said “okay, now turn around while I put it in the cart, and forget what you saw here,” which has, since the days of Santa Claus, always been our funny way of buying presents for each other in full view of the giftee.

Food Blog June 2013-1526This little spice rack worked fine, and hung proudly from a nail above my stove, until my spice requirements exceeded the twelve little bottles the shelves would hold.  Suddenly whole AND ground cumin were necessary.  Tumeric and cayenne and cream of tartar and even the dreaded pre-mixed pumpkin pie spice found their way into my kitchen and demanded homes.

So I’ve ended up with something I am going to guess looks familiar to many of you:

Food Blog June 2013-1529This is not a good system.  There, I said it.  It’s just not!  It holds the whole collection nicely, but it’s dark back there, and things fall over, and sometimes I don’t feel like digging around to see if I have any poultry seasoning, and then it’s Thanksgiving and I’m in a dark, cranky place and I think “screw this noise!” and buy a new bottle.  So then I have four.   What I really need, what I covet and dream about, is something like Aarti’s magnetic spice wall.

In the absence of space or motivation to build something that fancy, though, I stick with my system.  Every once in a while, I summon the courage and the patience to investigate the dark reaches of the cabinet, to get a sense of what’s in there, what needs replacing, and what deserves a space in my weekly menu.  The early days of summer are a good time to do this, because they offer a prime opportunity to make a smoky, spicy, aromatic rub for grilling.

Food Blog June 2013-1532Food Blog June 2013-1534I started with a recipe from Fine Cooking originally designed for beer can chicken, and then I tweaked and adjusted and adapted for what was, as you might have guessed, in my spice collection.  It’s got cumin, it’s got crushed red pepper, it’s loaded with garlic powder and mustard seeds and sea salt and just a hint of ginger for an intriguing and different kind of heat.

Food Blog June 2013-1535This is a tasty rub for grilled meat, obviously (we like it for chicken, patted on before a liberal slather of equal parts Dijon mustard and apricot jam), but I think it would also be great on slabs of pressed tofu, or buttered corn, or potato wedges (you make your steak fries on the grill in the summer, right?).  And if you were really feeling adventurous, you might even add some to a light, lemony vinaigrette to carry the flavors through your side salad.

Food Blog June 2013-1540This recipe makes enough for several applications, which means you’ll have enough to last part of the summer.  It keeps well in a sealed zip top bag.  And in between grilling, you can just store it… in… your spice cabinet.  Oh.  Well, just jam it in at the front, for easy access.  Maybe it will help you forget the mess nightmare treasure trove behind it.  Plus, it’s got so many tasty flavors in it, you surely won’t need anything else for the rest of the summer, right?  Right.

Food Blog June 2013-1542Happy grilling!


Smoky Spice Rub
Adapted from Fine Cooking Magazine
Makes about ¼ cup
2 tsp cumin seeds
1 tsp mustard seeds
1 tsp coriander seeds
1 TB coarse sea salt
2 tsp garlic powder
1 tsp crushed red pepper flakes
1 tsp freshly ground black pepper
½ tsp ground ginger


  • If you are feeling especially ambitious, toast your cumin, coriander, and mustard seeds in a small, dry pan over medium-low heat for 5 minutes, or until the cumin starts to pop a bit and look just a touch oily.  Once that has happened, turn the heat off and let cool before moving on.
  • If you are feeling lazy less ambitious, skip the toasting step and put the cumin, coriander, and mustard into a spice grinder (or your husband’s coffee grinder.  If there’s a little residual ground coffee in there, all the better!  Extra shot of flavor you didn’t have to work for!) and pulse until the seeds become a fine powder.
  • Mix together ground seeds and all remaining ingredients in a small bowl or, if you are lazy especially efficient, the zip-top bag you’ll be using to store your mix in.
  • Ta-da!  Apply liberally, patting and massaging for good coverage and adhesion, to whatever you’ll be grilling for a smoky, slightly spicy kick.

Elsie’s Rhubarb Cornmeal Cake

Blogs have birthdays.  Who would have imagined, a mere decade ago, that the little space we write in daily, or weekly, or monthly, or whenever we can, would become so important in our lives that we would want to celebrate its anniversary?

Food Blog June 2013-1512As I look back, it turns out that I started writing in my own little space almost five years ago.  But I haven’t celebrated its bloggy birthday, nor will I when I do roll over the half-decade mark, because my schedule of blogging was, at least near the beginning, so sporadic.  It doesn’t seem like I’ve really been writing here for five years when for three of those five, you were lucky to get a post a month.  The nice thing about WordPress, though (which I’ve been using quite happily for all of those almost-five-years), is that it tells you how many posts you’ve actually made.  And this, friends, against all belief, is number 200.  Two hundred!  That, to me, calls for a bit of celebration.  Let’s have cake!

Food Blog June 2013-1506Food Blog June 2013-1509This cake needs to be about the edging warmth of late spring, and freshness.  It needs to be something I could never have imagined making 200, or 150, or even 100 posts ago.  It needs to be original and tart-sweet and humble but delicious.  It’s not a show-off cake, but it stands up for itself.  It’s simple and tasty and equally good as afternoon snack, as dessert, and as a bit of a naughty breakfast.  It also, as it turns out, needs to be dairy-free.  Let me explain.

A few months ago, my aunt asked me to make something sweet.  But her granddaughter, Miss Elsie, can’t have dairy products.  No milk, no cheese, no butter.  No whipped cream.  No gelato!  I’ve met Elsie once.  We went on a glorious, sunshiney, beachy, too-much-food-and-certainly-too-much-wine family reunion trip.  The twelve of us – sisters, cousins, uncles, husbands, nieces – shouted and guffawed and flip-flopped our way up and down the three stories of a pool-bearing beach house in North Carolina for the better part of a week, and in the middle of this trip, Elsie tasted her first ice cream.  It was dark chocolate, made entirely with coconut milk, and her first taste, once the chill evaporated, was the purest expression of joy I’ve ever seen.  The kid was hooked.  The shirt she was wearing – white and pink with docile little flowers – was never the same.

Would I come up with something sweet, my aunt asked, that she could make for Elsie?  You got it.  This is an easy little cake, with just a bit of cornmeal for texture.  Butter and milk are replaced by applesauce for moisture and olive oil for deep, rich flavor.

But it couldn’t be just a cake.  If it was already going to be about family, I decided, I needed to go whole hog.  Our reunion trip was, in part, a joyous memorial for my grandparents, who used to vacation in North Carolina many, many years ago.  Transported by this connection, I was pulled back into their old backyard, and I could see Nana’s rhubarb bush at the back corner of the house.

Food Blog June 2013-1458Food Blog June 2013-1461I don’t know whether Elsie likes rhubarb, but from that moment on, rhubarb was it.  I chopped and simmered down a heap of the strange, red stalks, with some quartered strawberries for a different kind of sweetness, and a shower of sugar until it collapsed into a thick, stringy jam.  Think rhubarb floss, but in the most delicious possible way.

Food Blog June 2013-1462Food Blog June 2013-1474Once cooled slightly, a respectable layer of the strawberry rhubarb compote gets smoothed over the top of the bright golden cake, and then baked.

Food Blog June 2013-1483Food Blog June 2013-1489In the oven, the cake puffs and firms, but the rhubarb layer keeps it moist.  The fruit itself, exposed fully to the heat, gets sticky and slightly caramelized, and the edges turn almost molasses-dark.  This is a great, easy cake for a simple dinner party, in part because it is gorgeous – the dark pink top layer looks glossy and impressive – but just as importantly because this cake actually tastes better on the second day.  The compote cools and mellows, and the hit of vanilla in the cake is so right against the rhubarb.

Food Blog June 2013-1494I know rhubarb season is ending, but if you find some in your grocery store and can’t decide what to do with it, make this cake.  It’s easy and pretty and delicious, and it looks as at home, I think, on a simple plate as it does on a cake platter.  And if you miss the rhubarb, try straight simmered strawberries, or slices of plum, or maybe even peach jam, and take this cake directly from spring to summer.

Here’s to 200 more.  I hope you come along for the ride.

Food Blog June 2013-1501Elsie’s Rhubarb Cornmeal Cake

Makes one 9” cake

Strawberry rhubarb compote
5 cups rhubarb chunks from 1-2 lbs rhubarb
1 pint strawberries, washed, hulled, and quartered
½ cup sugar
  • Tumble the fruit into a medium pot, shower on the sugar, and cook over medium heat, stirring occasionally, until the fruit collapses into a stringy, jammy puddle.  This should take 20-30 minutes, depending on the size and depth of your pot.
  • Set the compote aside to cool while you mix up the cake batter.
Cornmeal Cake
1 ½ cups flour
½ cup cornmeal
2 tsp baking powder
½ tsp salt
2 eggs
½ cup sugar
½ cup smooth applesauce
½ cup olive oil
1 tsp vanilla extract
  • Preheat your oven to 350F and grease the bottom and sides of a springform pan with olive oil or nonstick spray.
  • Whisk together the flour, cornmeal, baking powder, and salt in a medium bowl.
  • In a large bowl (I used the bowl of my stand mixer), beat the eggs and sugar until the eggs become pale yellow and increase in volume; about 2 minutes.  This extra volume – air you’ve beaten into the eggs – contributes to the structure of the cake.
  • Add the olive oil, applesauce, and vanilla, and mix to combine.
  • Add the dry ingredients to the wet mixture in thirds, beating just to combine after each addition.  This helps hydrate the batter more evenly, and it gives you a fighting chance of emerging from this baking session without getting flour all over yourself, your countertop, your floor… Not that this sort of thing ever happens to me…
  • Scrape-pour the thick, gloppy batter into your prepared springform pan and use a spatula to smooth it into an even layer.
  • Strew about 1 ½ cups of your now-cooled compote over the top of the cake, creating a thin but complete layer across the batter.  You will have plenty of leftover compote, which is a wonderful thing because it is delicious on top of toast, or bagels, or ice cream, or straight off of a spoon.
  • Carefully place your now-loaded springform pan in the oven and bake for 35-45 minutes, or until a toothpick inserted in the middle of the cake comes out with just a few gummy crumbs clinging to it.  Transfer to a wire rack and pop the spring to let the cake release from the sides of the pan.
  • Cool completely, then refrigerate – this cake is best the day after baking.  Bring it to room temperature before serving.

*Word of warning: it is easy to overbake this cake, because the semi-liquid layer of rhubarb means the top of the cake will not brown.  Thus, it will seem like it’s still underdone.  Remember, though, this cake is better after it has spent the night in the fridge.  As it sits on your counter, cooling off for its sleepover, it will continue cooking for a while.  So even if your toothpick seems to be telling you that all is awry, chances are things are going to be okay.  Try a cautious prod closer to the edges if you need some reassurance.

Jalapeño Cheese Rolls #TwelveLoaves June

Food Blog May 2013-1439Last week I presented you with something both vegan and gluten-free.  Dietary allergen-buster, that’s me!  This week, to prove that I’m a fickle  equal opportunist  flexible sort of cook, I’m giving you something that is neither.  But really, this is the kind of food person I am, and I’ve been thinking about this lately, especially given this post from Shauna at Gluten-Free Girl.  I’ve thought, over this past year as I finished my Bittman Project and moved on to my exploration of dough, what kind of food blog this is, anyway.  I don’t follow a specific dietary regimen.  I don’t cook – or eat – specifically one type of food.  So what am I?  As I wrote to Shauna, what drove me to her blog, and what drove me to one of my own, was the expression of joy through food.  I want food that tastes good and brings joy.  And then, because it has given joy to the tongues and teeth and bellies of the people I made it for, I want to pass that on to people who weren’t in our little house with us.  That’s you, people.  So I guess what it comes down to is: this is a blog about food that brings you joy.  At least, that’s what I hope you feel when you read, and when you eat, if you end up using the recipes here (and if you do, will you tell me?  I’d love to know what you guys think).

These little rolls brought us considerable joy.  They are cheddar infused, jalapeño studded puffs somewhere in between a rich, buttery brioche and a stern, crusty, segmented Kaiser roll.  They are also, given this month’s Twelve Loaves assignment of buns, the perfect choice to slice equatorially, layer with mayonnaise or hot sauce or pickles or onion rings or dripping fresh tomato slices and then cram with a burger of your favorite juicy variety.

Food Blog May 2013-1410I started with my Nana’s sweet roll dough, replacing the sugar with a smaller amount of honey, opting for the tang of buttermilk rather than the roundness of whole milk, and injecting wafer-thin slices of jalapeno and cheddar cheese so sharp it made me – let’s not lie – basically drool when I sampled some.

Food Blog May 2013-1414Food Blog May 2013-1415Though you could just divide your dough into equal sections and let these rise into sweet, uncomplicated burger buns, I decided to take on the familiar lobed shape of a Kaiser roll.  This is, as you might expect, not the most straightforward approach, mostly because there are numerous methods for achieving that instantly recognizable shape.  You can score the dough as it rises, you can use a special press that creates the petal shape, can follow a complex procedure of folds, or, as I learned and executed to my delight, you can roll the dough into ropes, tie them in a simple overhand knot, and then tuck up the ends.  I’ve attempted instructions and accompanying pictures below, but if you are lost, try this recipe, which explains the knotting and tucking process pretty clearly.

Food Blog May 2013-1425Food Blog May 2013-1429Sprinkled with more sharp cheddar and topped with a few more, probably gratuitous slices of pepper (you have to know what you’re in for, I think), these bake into all but perfect imitations of the jalapeño cheese rolls N. and I used to buy from Market of Choice as the occasional treat after a perfect sunny afternoon trip to the dog park in Eugene.  We never put burgers on those, because they never made it through the whole ride home.  But these little Kaiser-roll-buns of mine, burnished with cheddar and lip-tingling with heat, will carry anything you load them with.

Food Blog May 2013-1435Food Blog May 2013-1433Summer’s coming.  That should bring you joy.  If you can stand more, make these for your next barbeque.  This recipe can easily be doubled, and once baked, these will keep in the fridge for a few days or, securely wrapped in airtight packaging, in the freezer for much longer.

Food Blog May 2013-1441Jalapeño Cheese Rolls
makes 8 petite rolls, or 6 larger ones
 2 tsp active dry yeast
1 TB warm water
½ cup warm buttermilk
2 TB honey
¼ cup room temperature butter
1 egg
1 tsp salt
2 cups flour (I like bread flour best for these, because it has a high protein content that stimulates gluten production.  But I think all-purpose would create similarly fantastic rolls)
1 cup shredded extra sharp cheddar cheese, divided
1 medium jalapeño pepper, thinly sliced


  • Stir the yeast gently into the warm water, set aside for five minutes to let the yeast wake up.
  • Add butter and honey to the warm buttermilk, stirring them together until incorporated.  This will make the honey and butter easier to integrate into the dough, and cool the buttermilk so it won’t kill the yeast or scramble the egg.
  • Pour the puffy, bready yeast, the buttermilk mixture, and the egg  into a large bowl (I use the bowl of my electric stand mixer), and whisk or stir together with a wooden spoon or the paddle attachment of your stand mixer.
  • Add the flour and salt to the mixture, and stir just until roughly combined.
  • Add ¾ cup of the cheddar cheese and half of the jalapeño slices to the rough dough and stir again, just until the cheese and peppers are well distributed.
  • If you are using a stand mixer, replace the paddle attachment with the dough hook and knead on medium speed for 8-10 minutes. If you are not using a stand mixer, turn the dough out onto a floured board and knead by hand for about 10 minutes.  Though I think kneading by hand will work fine here (I haven’t tried it, so I’m not positive), there are two things to take into consideration.  First, this dough has cheese it in, so that may make it messier to work with than your average burger bun dough.  Second, it contains jalapeño peppers, which can leach capsaicin onto your hands and sting delicate skin (read: don’t forget and wipe your nose!), so be absolutely certain you wash your hands really well after handling this dough.
  • In either case, the dough starts out sticky, but becomes smooth and stretchy as you continue to work it. Once it is elastic and supple and lovely, place it in a lightly oiled bowl, cover with plastic wrap, and set aside in a warm room (if you have one handy) for an hour and a half, or until it has doubled in volume.
  • Remove the plastic wrap and punch down your doubled dough by gently but firmly pressing your fist into the center.  It will almost gasp as the built-up gasses are released.
  • Divide the dough in 8 equal pieces (for petite buns), or 6 equal pieces (for big, beefy buns).
  • Now would be a good time to do some prep, while the dough-balls get some breath back.  Preheat your oven to 350F.  Line two baking sheets with parchment paper.  If you haven’t already, dust a bread board with flour.
  • Working one at a time, roll each dough ball into a 6-8 inch rope (Picture 1).
Food Blog May 2013-1419

Picture 1: dough rope

Food Blog May 2013-1420

Picture 2: overhand knot

Picture 3: tuck right side into top middle of knot

Picture 3: tuck right side into top middle of knot

Food Blog May 2013-1426

Picture 4: tuck left side under and into bottom middle of knot

  • Tie the rope into a simple overhand knot (the same way you would begin tying a shoelace).  I tie mine left side through right side, probably because I am left-handed.  If you are right-handed and you tie your knot the opposite way, reverse the L and R in the directions below.  You will have a knot in the middle and some lanky excess on either side (picture 2).
  • Now, to form the segmented shape of a Kaiser roll, lift the length on the right side of your knot (which started out as the left end of your original rope) and pull it up over the knot, shoving the end of it down into the middle of the knot itself and pressing lightly to secure (picture 3).
  • Next, lift the left side and tuck it under the knot, pushing it up through the middle from the bottom.  Sometimes it will poke through and make a little button in the top of the roll; sometimes it won’t.  Either is okay (picture 4).
  • With all of your rolls knotted and tucked, set them on your prepared baking trays, spaced evenly.  I did four per sheet tray.
  • Sprinkle each roll with cheddar cheese from the remaining ¼ cup.  Top each with 1-2 slices of reserved jalapeño.  Cover trays with a clean kitchen towel and let rise for 30 minutes.
  • Remove kitchen towel, admire the puffy little buns you’ve created, and bake in your preheated, 350F oven for 20 minutes.  The cheese will melt, the dough will rise, the color will deepen to a lovely golden brown, and the thinnest of your jalapeño slices will barely begin to caramelize.
  • If you eat these immediately, you will burn your mouth.  And it won’t just be the good burn from the jalapeño.  So do what you can to let them cool a little, and then load them up, or just eat them plain.  I think you’ll be happy either way.

Kidney bean, brown rice, and shiitake “vurgers”

I talk a lot on this blog about myself.  Today, I want to talk a little bit about my husband.  Before I met him, N. did a study abroad program in London.  He was there for six months, and by “there” I mean taking classes in London, but also zipping around England and then parts of Europe with a speed that his British hosts looked upon with alarm (“what do you mean you’re going to York just for the weekend? That’s a 3-4 hour trip!  It’s a whole holiday!”  To which N., who grew up in a road-tripping family, would shrug and go anyway.  Example: his family, when they lived in a suburb of Sacramento, California, thought nothing of jumping in the car to drive to Reno for the day.  Once when his parents visited us in Oregon, we drove to Tillamook from Eugene via the coast to get ice cream and cow cookies at the Tillamook Cheese Factory, and then headed home in time for dinner).

Skyscraper gazing

N. is a little camera-shy.

Interestingly, and perhaps unfortunately, N.’s study abroad program took place shortly after some of the worst scares of mad cow disease in England.  He was there in late 2002, and eating beef was a no-no.  This meant, when I met him, that N. had some food issues.  He wasn’t a picky eater – that’s not quite the right word.  He was, let’s say, a particular eater.  Beef, especially beef that wasn’t well-done, was out.  The frightening potential consequences had been too drilled into his head.  Lamb was too gamey.  Pork was not his favorite.  When I was trying to impress him with my rudimentary cooking skills when we first met (rudimentary is kind – the first time I tried to make him French toast for breakfast, the bread collapsed into over-soaked crumbles in my custard mixture.  But we fried it up and ate it anyway – sweet scrambled eggs with bread bits – and he was either kind enough or smitten enough to pretend he liked it), we ate a lot of chicken breast.

N.’s willingness and preference when it comes to food has expanded and matured significantly since we’ve been together.  Still, though, he is wary.  When we lived in Oregon, we were lucky enough to find ourselves in Eugene, which is a bit of a hippie mecca.  This meant we had a wide variety of vegetarian choices.  Neither of us is vegetarian, but N. developed the habit of ordering veggie burgers when we went out to eat, since it was a safe bet.  You didn’t have to worry about doneness, and many of the restaurants we frequented made their own patties instead of relying on something frozen from a box.

Even though we’ve been living in Los Angeles for almost a year now (can that be true?!), and we’ve done our share of restaurant investigating, we don’t have the favorites yet that we had in Eugene.  Though we’ve found some delicious options, N. doesn’t have a go-to veggie burger yet.  This week, therefore, I decided to make him one.

It always interests me, when a veggie burger is advertised as a homemade patty, to find out what its base is.  A lot of meatless patties – especially the premade kind you find in the freezer section – are wheat based, which seems like a strange thing to put on a sandwich: a patty of pressed wheat between two pieces of bread made from wheat.  Gluten-fest!  But sometimes they are made from tempeh, and sometimes from beans, and we had a really tasty one once that I’m sure had shiitake mushrooms mixed into it, which contributed a fantastic texture I haven’t found again.   Food Blog May 2013-1444

Food Blog May 2013-1446Taking this textural component as my must-have, I considered my pantry and spice cabinet, and cobbled together what turned out to be a delicious, filling patty made of brown rice, kidney beans, and reconstituted dried shiitake mushrooms.  I used a mixture of red wine and hot water to reconstitute my mushrooms, which contributed to their deep, earthy flavor.  You could use chicken or vegetable broth if you prefer, or just hot water.

Food Blog May 2013-1447To bump up the flavor and add a little moisture, I added onions and garlic I’d sweated down with some warm, southwestern spices, and pulsed the whole thing in a food processor with a generous pinch of salt until it was willing to be molded, but not completely homogenized.  The beans should be smashed but not totally pureed, and you should be able to discern the occasional grain of rice in your shaped patty.  This adds texture and interest when you are chewing, and makes the finished product less like you’re chowing down on a fried patty of bean dip.  Not that fried bean dip patties necessarily sound like a bad thing…

Food Blog May 2013-1448N.’s one complaint about veggie burgers is that they are often smothered in cheese.  It’s as though restaurants are trying to hide the flavor-that-isn’t-meat.  That might be exactly what some people want, but for us, these non-cow flavors are just as interesting and tasty.  To make this a burger (or vurger, as one of our Eugene favorites called it) worthy of N.’s preferences, I decided to skip the cheese on the actual patty, and incorporate it into the bun instead.  Thus we settled our patties on homemade jalapeño cheese “kaiser” rolls, which I’m going to have to boast about… maybe next week…

For now, though, the patty itself: these are a bit dense and fairly filling, but the mushrooms really do add a delightful chewiness that I wouldn’t want to skip.  Adding in some tempeh crumbles to replace or enhance these components would likely be delicious, though I haven’t tried this yet myself.  The final addition of the barest squeeze of lime juice makes a surprising difference: it takes them from slightly heavy to a flavor I can only describe as somehow more awake.

Food Blog May 2013-1452A few days ago Deb at Smitten Kitchen asked what her readers’ go-to dinners were.  I thought about this for a while and decided ours were pizza, roasted vegetable tacos, and a lovely little one-bowl meal I learned from a friend called “Scatter Sushi.”  I can tell you, though, based on the reaction these “vurgers” got at our house, they just joined that list.

Food Blog May 2013-1456

Note: these patties are vegan (until you put them on a cheese roll), which means they lack the dependable binding power an egg typically brings to such a party.  Therefore, I recommend shaping them and then letting them sit for half an hour or more before cooking, which will let the rice and beans soak up some of the moisture from the vegetables, and thereby hold together better.  If they threaten to crumble on you or you’re frustrated or frightened by their potential fragility and not determined to keep them vegan, go ahead and add an egg to the mix.

Brown rice, kidney bean, and shiitake “vurgers”
Makes 4 patties
1 cup cooked, cooled brown rice
1 15 oz. can kidney beans, drained and rinsed
1 oz. dried shiitake mushrooms (about 12)
3 cups wine, water, or broth for reconstituting mushrooms
¼ cup diced onion
3 cloves garlic, minced
3 TB olive oil, divided
1 tsp cumin
1 tsp paprika
½ tsp oregano
½ tsp black pepper
½ tsp salt (if you are using dried beans rather than canned, you might want to increase this quantity)
1 tsp lime juice or red wine vinegar
  • First, reconstitute the mushrooms.  Heat water or broth to near boiling, then pour into a heatproof bowl with dried mushroom caps and wine (if using).  I typically like to use 1 cup of wine and 2 cups of hot water – it’s enough heat to revive the mushrooms, and enough flavor to intensify them.  Cover, making sure the mushrooms are fully immersed, and let sit for about 20 minutes.  I like to place a small plate atop my soaking bowl to keep the mushrooms underwater.
Food Blog May 2013-1445

Mushroom soaking contraption

  • When the mushrooms are soft and pliable, drain them and set aside until cool enough to handle.  Heat 1 TB of the olive oil in a skillet and gently sweat the onions and garlic until the onions are translucent and the garlic is aromatic and sweet.  This should take 5-8 minutes over medium-low heat.
  • As the onions soften, add the cumin, paprika, oregano, and pepper, turn the heat down to low, and stir to combine.  Let the spices cook with the vegetables for another 2 minutes, to let their flavors meld and warm.  Turn off the heat and set aside.
  • Once your mushrooms are cool enough to handle, squeeze them gently to release some of the water they have collected in their bath.  You don’t want them to be drippy, but you don’t want to squeeze them completely dry either.  Some of the liquid they’ve soaked up, especially if you’ve used wine or broth, will add lovely flavor to your veggie patties.  It will also help hold the patties together.  Remove the stems (they are tough and unpleasant to eat) and then chop the shiitake caps roughly.
  • Place rice, beans, chopped mushrooms, onion, garlic and spice mixture, and ½ tsp salt in the bowl of a food processor.  Pulse 4-5 times at 3 second intervals, just until the beans are broken up and the rice is in smaller pieces.  You want some of the mixture to be smooth, but some to retain texture and shape.  Taste for seasoning, and add more salt if needed.  Squeeze in the lime juice and pulse one more time just to integrate it.
  • Remove your mixture from the processor, being careful of the blade, and dump it into a large bowl.  Press it together with your hands a bit to ensure workability.  If it is really crumbly or you are nervous about the patties holding together, you might add a lightly beaten egg or some olive oil here.  However, don’t be too worried – they are going to firm up a little when you let them sit after shaping.
  • Divide the mixture in four even quantities.  One at a time, press and shape each quarter into a round, flat patty no more than 1 inch thick.  Everything is cooked already, so you don’t have to worry about rawness, but you do want everything to heat evenly.  Any thicker than this and your burgers might still be a bit cool in the middle.  Mine were just under 1 inch thick, and had a diameter of about 3 inches.
  • Once all 4 patties are formed, set them aside on a plate or a board for at least half an hour.  If you are going to wait much longer than that or if you are making them ahead, stick them in the refrigerator, but be sure to let them come back up to room temperature before cooking, so they heat evenly.
  • When you are ready to cook, heat the remaining 2 TB olive oil in a skillet (I just used the same one I’d cooked my onions and garlic in) over medium to medium-high heat until it glistens and ripples.  Add the burgers carefully to the skillet and let them sizzle for 4-5 minutes on each side, until they develop a deep, bronzed crust.
  • Serve with your favorite condiments on the bun of your choice.  We kept it simple: mayonnaise, red leaf lettuce from the garden, on the jalapeño cheese rolls I’ll share with you here next week.

Note: if the burgers look like they are falling apart, or if they threaten to break when you try to flip them, turn the heat up a little.  This, bizarrely, helps keep them together because it sets the outside faster, so the surface of the patty is firmer.

Loaded Baked Potato Biscuits

Food Blog May 2013-1406

I’m not going to say that my mom was a hippie or a health nut.  She didn’t stock her pantry with wheat germ or homemade granola, and she didn’t feed us sprouted grains or tempeh (in fact, she probably didn’t know what tempeh was).  But she did make a definite effort to keep food choices healthy when my sister and I were kids.  Her rule for me when picking out breakfast cereal was that sugar had to be third or lower on the list of ingredients tapped out in tiny letters on the side of the box.  I think the first time I tasted Lucky Charms was when I was in high school, where I was quietly surprised that anyone could think of eating this candy for breakfast rather than dessert.  The first time I saw someone put sugar into a bowl of Corn Flakes, I was stunned.  The only kind of cereal I’d ever put sweetener onto, besides oatmeal, was Shredded Wheat.

Food Blog May 2013-1403

Despite the commercials I drooled over for Sunny Delight (back when it wasn’t just a D) and Capri Sun, nothing but 100% juice (and the occasional lemonade concentrate) entered our fridge for a very long time.  Brand name Fruit Roll-ups didn’t fly, but the occasional real pressed fruit leather was okay.  My sister, seven years my junior, somehow managed to get Mom to buy Squeeze-its, but not until they had a “real juice” component.  She also ended up with Lunchables to take to school (I didn’t find out about this until a visit home from college.  I was shocked and felt a weird kind of betrayed jealousy – I didn’t want to eat Lunchables now; they looked disgusting!  But I wanted to have been allowed to have them when I might have thought they tasted good.  Is there even a word for that feeling?).

Given all this, as you might imagine, white bread was not something that appeared in our (paper, please) grocery bags.  But my sister and I were not sold on the breads my parents wanted us to eat.  Whole wheat was pushing it a little, especially if it had cracked wheat spattered across the top crust.  Oatnut and any kind of seven or nine or even five grain compilations were out.  And then Mom found Country Potato bread.  Do you remember it?  It’s golden and mild, slightly sweet but still savory enough to taste good with ham and cheese.  The top was often lightly dusted with some residual flour, which was somehow not offensive in the way the cracked wheat pieces were on the bread we refused.  We ate potato bread for years.  It was soft enough that, once you ate the crust off, you could roll the rest of it up into a mushy little ball, or tear the slice in pieces and make a whole pile of little dough-balls, and then eat those.  They squished against our teeth.

In the years since sourdough replaced potato as my bread flavor of choice, I’ve thought again about that bread my sister and I ate.  How did they (whoever “they” were) get potato into bread?  In what form?  Was it mashed?  Was it baked?  Was it a flurry of potato flakes?  Was it potato flour?  At the farmers’ market in Eugene, OR my husband and I discovered potato donuts: dark brown, dense, sugar-crusted rings that were mercifully only available once a week, and I wondered about these too.  Two beloved starches, baked together, could only be greater than the sum of their parts.

This is all an extremely long way to introduce the idea of putting potatoes in a biscuit.  If they can produce bread and donuts, and of course pasta – gnocchi is not, when it comes right down to it, really so tremendously different from a row of fluffy little miniature biscuits that you boil instead of baking – why not a tall, leavened biscuit?

Food Blog May 2013-1393A little internet research showed me numerous methods of incorporating potato flavor into my biscuits.  I decided early on that I wanted to use a fresh potato, rather than the instant potato flakes some recipes recommend, which meant I had to be careful about moisture.  The potato needed to be cooked and mashed or pureed before adding it to the flour, so that it mixed in easily.  However, boiling potato chunks to mash them does add water, and I wanted to keep my potatoes dry so that the moisture could come from something with additional flavor – I was thinking buttermilk.  Here, gnocchi was the answer.  To avoid adding too much water, here or in those pillowy little nuggets, the potato is baked and then grated into crumbly, starchy strands, which are then easily smashed into smoothness.

Food Blog May 2013-1394I’m rarely contented with a plain old buttermilk biscuit, so I decided some add-ins were in order.  Since I was already playing with the potato idea, I started thinking about loaded baked potatoes: cheese, broccoli, bacon bits, sour cream, green onions… I had a roommate once who liked to top hers with salsa and cubes of fried tofu.  In the end, though, I decided to keep the excess to a (relative) minimum: crisp shards of prosciutto, sharp cheddar, and a pile of roughly chopped roasted broccoli florets.

Food Blog May 2013-1397

This produced a dough that clung together reluctantly, given how jammed with additions it was.  But I was patient, after I’d finished throwing flour everywhere, and gentle, and managed to punch out 12 biscuit rounds jammed with bits of green and pink poking out every which way.

Food Blog May 2013-1399

This is a dense biscuit, so it doesn’t rise a tremendous amount when it is baked, but it will still puff a bit as the chunks of butter struggle to support the spudsy weight.  It emerges speckled with bits of broccoli and browned cheese, and it’s totally worth it in every way.  Guys, you have to try these.  It’s rare that I run out of food words to describe something, but this is one of those times.  If I jammed all the superlatives I was thinking of using into this post, you probably wouldn’t believe me.  I’ll keep it at this: the cheese and the broccoli and the prosciutto all lend a crazy-good saltiness (the prosciutto could easily be taken out to make this vegetarian).  The flavors are perfect together, and though the potato doesn’t have a lot of flavor on its own, it does make this biscuit fairly substantial.  Paired with a salad (as we had), or a nice bowl of soup, it’s basically a complete meal.

Food Blog May 2013-1400

As with all biscuits I’ve ever tasted, these are best on the first day, as hot out of the oven as you can stand to touch them.  They are perfect on their own, though if you wanted to split one open and add a pat of butter, I’d completely understand.  They are, after all, related to baked potatoes.  And if you wanted to top them with a roasted garlic or a white pepper gravy, well, I don’t think I’d be in any position to stop you.

Loaded Baked Potato Biscuits
(for flour and potato quantities, I started with Deb’s sweet potato biscuits, and improvised from there.  This seems like a lot of steps, but trust me…)


For the potato:
  • Bake a medium to large russet or other fluffy, starchy potato at 400F for about an hour, or until a fork sinks easily through the middle.  When it is cooked through, let it cool completely.  Splitting it in half will hasten this process.
  • Using the largest holes on a box grater, grate the potato flesh away from the skin.  In a large bowl, smash or crush the crumbly bits of potato into a smooth mash.
For the broccoli and prosciutto:
1-2 medium heads broccoli, cut into small florets
6 slices prosciutto


  • Preheat the oven to 425F.  On a baking sheet, toss the broccoli with olive oil, salt, and pepper, and roast for 30-45 minutes, flipping the broccoli pieces over halfway through the cooking process.  When done, they should be well browned on the outside and tender in the middle.  The flowery bits will be crisp, like broccoli popcorn.
  • Remove the broccoli to a plate or cutting board to cool.  When cool enough to handle, chop into ½ inch pieces.
  • Place prosciutto strips onto the now-empty baking tray (yes, there will be some broccoli bits and residual oil there.  Don’t worry about it – they are all going into the biscuits together!).  Bake for 10-15 minutes, or until prosciutto is crisp.  Watch it carefully: it burns easily.
  • When crisp and dry, set aside on paper towels or a wire rack to cool and drain a bit.  Once cool, cut or crumble into bits.
For the biscuits:
2 cups flour
2 TB baking powder
½ tsp salt (this doesn’t seem like much, but remember, the broccoli, prosciutto, and cheese are all salty already.  If you’re a salt fiend, go ahead and use a full teaspoon, but otherwise, start small)
1 cup grated baked potato, mashed smooth
5 TB unsalted butter, cut into cubes
½ cup buttermilk
1 – 1½ cups chopped roasted broccoli florets
Crumbled prosciutto from 6 strips (you could easily substitute an equal quantity of bacon)
1 cup shredded cheddar cheese, as sharp as you can find


  • In a large bowl, whisk together the flour, mashed potato, baking powder, and salt.  You want a homogenous mixture: no big potato chunks.
  • Using a fork, two knives, or (my favorite) a pastry blender, cut in the butter until it is the size of large peas.  This will also help break up any remaining hunks of potato.
  • Add the cheese, prosciutto, and broccoli, and incorporate until they are distributed evenly.
  • Add buttermilk and stir with a fork.  You are looking for everything to combine into a rough, shaggy-looking dough.
  • Turn your dough out onto a well-floured board and knead it a few times with the heels of your hands until it is more willing to cling together.  Press it out into a rectangle or circle about 1 inch thick.
  • Using a biscuit cutter or the floured rim of a drinking glass, punch out biscuits by pressing straight down, NOT twisting.  This will help the biscuits rise better by not disrupting their layers.
  • Once you have punched as many as you can from the dough rectangle, gather the scraps, knead them together once or twice, and press the dough out again.  Continue until no more dough remains (making one or two funky-looking biscuit bits is totally acceptable: you can call those the cook’s tax and gobble them while no one is looking).
  • As you punch out biscuits, place them on a greased or parchment lined baking tray.
  • Bake in a preheated 425F oven for 15-18 minutes.
  • Eat while hot, warm, or room temperature, if you can wait that long.

Food Blog May 2013-1407