Reflecting

The Bittman project is done.  I did it!  I took a list of 101 side dishes conceived to accompany a Thanksgiving turkey, whittled it down a bit into dishes N. and I would actually eat (this left us with a total of 82) and, over the course of two years, made and ate each one.  Before moving on to my next project, I wanted to stop and consider a bit.  This project was valuable in many ways and I don’t think it should be pushed aside like a last gasping bite before launching into the next thing.  I learned a lot about cooking, I think, both from the mistakes I made and from the little triumphs and successes I achieved.


The Mistakes:

Measuring is important.  If you don’t measure, if you don’t have the correct ratios, things don’t bake up the way they are supposed to.

Follow directions.  Roasting can’t happen with waterlogged ingredients, and adding items in the wrong order produces unintended results.  Of course, this is challenging with Bittman’s suggestions because they don’t always have exact directives.  But it has taught me a lot about how a recipe fits together, and how to organize and present information in a way that works – at least for me.

Pairings matter.  Learning how to cook a dish is one thing.  But you’re probably always going to be serving it to someone (or multiple someones) as part of a meal.  Crossing flavors in strange ways – Italian sausage with soy-glazed vegetables, Southwestern spices with Middle Eastern preparations, too much sweet with too little savory – doesn’t produce a very satisfying eating experience.

I just don’t like yellow curry.  I can tolerate it, but I’d much rather have garam masala, or tumeric, or cumin, or just straight black pepper.

Give yourself time.  Charging headfirst into an unfamiliar recipe with only twenty minutes until dinnertime is almost always going to lead to frustration, mistakes, and unsatisfying results.  This sounds very preachy, but read the recipe beforehand, make sure you understand what it is asking, and budget your time accordingly.

WRITE THINGS DOWN!  This isn’t the first – or the only – time I will make this mistake.  But I’m trying.  If you don’t write it down, chances are good you won’t remember it.  And then that perfect amount of nutmeg, or salt, or the temperature you used, is lost.  And that makes it unrepeatable.


The Triumphs:

Repurposing works.  If something doesn’t come out right – or to your liking – there is no sense in throwing it away if you can imagine transforming it into something better.  If that means adding booze and wrapping it in pie dough, then so be it!

Acid saves.  If your dish is missing something but you don’t want to add more salt and you’re not sure about upping the spice quotient, try a squeeze of lemon juice or a dash of red wine vinegar.  There’s something about the brightness and verve this brings to a dish that really changes it.  (Hell, it even tones down the overbearing sweetness of buttercream. )

I can, if I take my time and don’t freak out, make a successful dough.  It’s not pretty yet, and it’s not error-free, but it comes together and rolls out and tastes pretty good too.  That’s something.  That’s more than I expected.

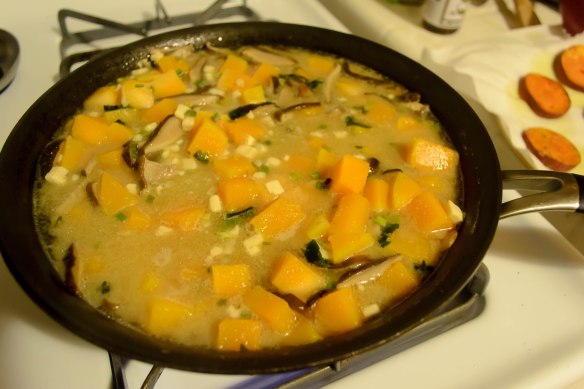
Soup is easy.  I grew up on two kinds of soup: the overprocessed, condensed kind that came in cans, and the long-simmering stew and chili kind.  This led me to believe that homemade soup was a time consuming process.  Watching cooking shows that talk about extracting flavors from bones and babysitting a stock for hours furthered this assumption.  But since I’ve started making my own chicken stock from the carcasses of roast chickens, and since I realized that Bittman’s soup recipes mostly go the same way (sweat vegetables, add flavoring, add broth and heat through), soup became a quick and simple venture.  Onions, garlic, carrots, celery, and chicken broth, and you’re 75% there already.  During the year I even invented my own, which N. and I will be having again next week with the addition of ramen noodles.


The Favorites:

As seems inevitable with a project like this, there are some ingredient combinations N. and I will never have the desire to return to.  But there are some that we will crave again and again.  Some, in fact, have already graced our table on multiple occasions.  I just want to point out a few of these.

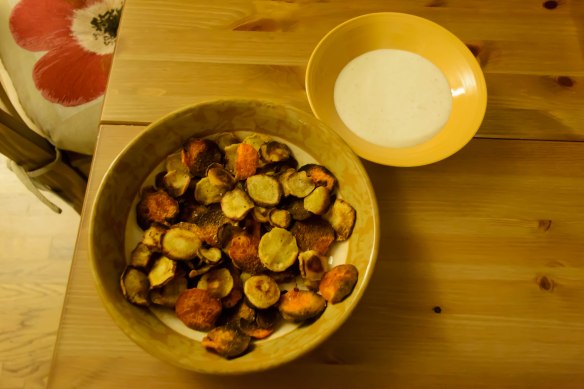
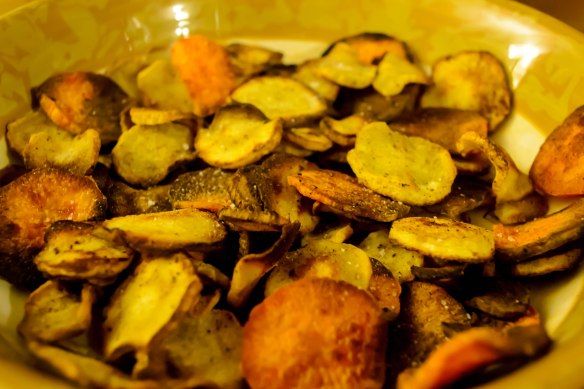
Sweet.  This combo of sweet potatoes and green onions, roasted until caramelized and perfectly salted, is an achingly beautiful side dish still in search of the perfect accompaniment.  But it dances solo just fine.  I’d have these for lunch any day.  I’d have them for dessert too.

Sausage, kale, and white beans (and cheddar cheese or Parmesan rind, too, if you really want to comfort it up) are a beautiful combination that deserve revisiting.  This soup is warm and satisfying and should be eaten at least once per winter.  Nicely spiced tempeh crumbles might make an adequate substitution for the sausage, if you aren’t into pig.

Herbed buttermilk biscuits, especially with the addition of lemon zest, are all I want in the biscuit world right now.  They are crisp and tender and have just the right crunch.  They are breakfast ready.  They would accept cream gravy.  They would mop up a savory sauce.  They would provide the perfect vehicle for jam or honey or sweetened goat cheese.  They freeze perfectly and, frozen solid and plopped onto parchment paper, require only a few extra minutes in the oven to cook.

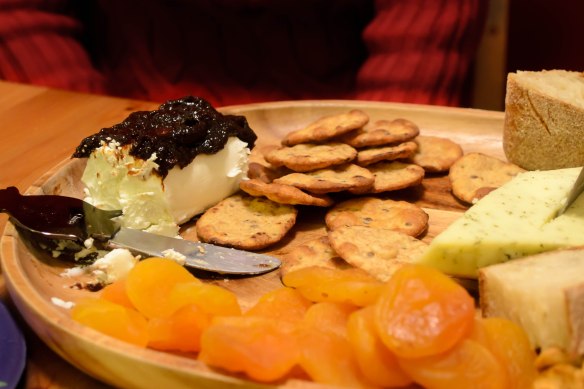
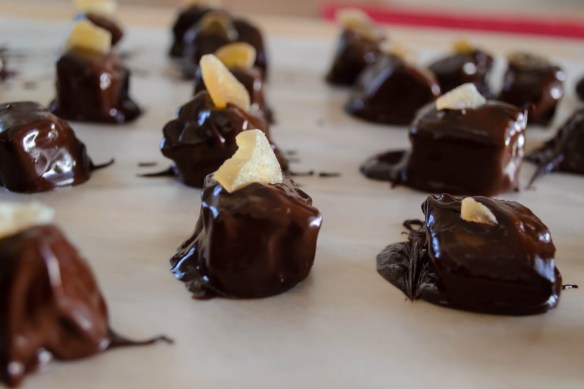
Ginger-Apricot Chutney.  This spicy-sweet condiment would be a suitable topper for the Herbed Buttermilk Biscuits I just got weak-kneed over.  But it also pairs well with grilled or roasted chicken, and would probably be delectable as a fresh take on a Christmas ham glaze.  Or, you know, on sandwiches with lunchmeat or cream cheese, or as an interesting filling for chocolate truffles.  Now I want to make this again immediately.  I wonder if I have any ginger in the freezer…

Perhaps the crowning glory of the whole project, the beer-y cornbread stuffing laced with tomatoes, green onions, and corn kernels is a genius combination I have already revisited on multiple occasions.  My sister has used this as a Thanksgiving stuffing alternative for her celery-hating boyfriend (seriously, almost every stuffing I’ve ever made has a base of onions and celery.  Hit the shelves.  Look for one without that notorious stringy green stalk).  It’s yeasty and deep and golden and glorious, and it gives you an excuse to toast and taste a few cubes of cornbread along the way.  It is, even if you don’t like beer, not to be missed.


The News:

I have a few things planned for the year on which we’ve just embarked.  First, we need a new project.  I’ve decided.  It’s going to be bad for my waistline but good for my confidence in the kitchen.  I hope you’ll like it.  I’ll get to that next week.

Second, I think we need a new place to meet each week.  I started this blog intending to write about fancy things I’d made.  I didn’t know how much I would enjoy sharing even my mistakes.  I didn’t know how much I was going to learn about cooking and photography and writing about food.  “shornrapunzel,” a moniker picked up from my last days in college when I went from three feet of hair to less than one (I’m back in the three feet range now), was the username on my first blog – a livejournal I used as a writing exercise and an attempt to stay in touch with friends pre-Facebook.  Eventually, all I was posting there were long, drippy descriptions of food I had eaten or wanted to eat, and I decided to start this little venture as a more appropriate way of addressing this obsession.  So “shornrapunzel” was an easy name to saddle a url with because it was familiar and connected with me, but it never really had any relevance to this blog or its topics.  Blackberries, given their literary suggestions of adventure and unexpectedness, still seem to fit well the kind of cooking and sharing I’m doing here.  So they get to stay.  In this next week, I’m moving this little kitchen corner to a new domain for continued blackberrying.  I hope everything transfers over okay.  I’ve never done this before.  But then, that’s nothing new.

See you on the other side!

Happy New Year!

Food Blog 2011-2013-0362

Oh friends, it happened.  I made it.  Yesterday I made the last two Bittmans on my list and completed, albeit a year later than I’d originally intended, my project.  I have reflections to share, certainly, and I have changes and excitement and promises for the new year, but first, I think, let’s work with the program.  Two Bittmans.  Two reports:

“14. Steam or poach 2 cups of pumpkin cubes until tender. Meanwhile, sauté 1 cup sliced shiitake mushroom caps in vegetable oil with a few drops of sesame oil. Boil 4 cups water and whisk some of it with ⅓ to ½ cup of miso. Stir miso mixture, pumpkin and mushrooms into water and heat everything through, then serve, drizzled with more sesame oil.”

Because we were planning to reach midnight by eating as many snacks as possible eating our way to midnight snacking, I wanted a light dinner to precede the countdown.  This seemed to fit the bill.  And it had to, after all, since it was the only soup left and the calendar was screaming December 31st.

2 cups peeled, cubed butternut squash (I had some in the fridge, and suspected pumpkin would be hard to find)

1 1 oz. package dried shiitake mushrooms

1 TB vegetable oil

¼ tsp (or to taste) toasted sesame oil, plus some for drizzling

3 packets instant tofu miso soup mix (all I could find at my grocery store)

water

white wine

To reconstitute my shiitake mushrooms, I soaked them in a mixture of white wine and almost boiling water for 15-20 minutes, until they were plump and soft.

While the mushrooms soaked, I cubed up my butternut squash and submerged the pieces in a pan of salted water.  I brought this to a bare simmer and cooked it just until the squash pieces were tender – 10-15 minutes – then drained the pieces in a colander.  Don’t overcook them, because they will start to fall apart.  Set the squash pieces aside.

When the mushrooms were tender, I scooped them out of their bath and decided the remnants shouldn’t go to waste.  I poured the soaking broth into a little pot to bring to a boil, so I could use this already flavored liquid as the base for my soup.  While it heated, I stemmed and sliced the mushrooms.

Since the shiitakes were now basically cooked, I probably could have skipped Bittman’s sautéing step.  But honestly, I’m not one to pass up the opportunity to ingest sesame oil, so I dutifully dribbled vegetable oil with a few (or a few more than a few) drops of sesame oil in the (drained and dried) pan I’d used to simmer my squash and sautéed the mushroom slices over medium heat until they dried out a bit and started to take on some color.

While this colorization happened, slowly and so aromatically, I made the broth.  I poured all three miso soup seasoning packets – tofu and seaweed and all – into a small dish, then mixed in about ½ cup of my heated mushroom soaking liquid and whisked gently to dissolve the powdery soup mix.  This created a slightly thickened slurry, which I poured with the rest of the liquid and the butternut squash cubes into the mushroom pan.

Food Blog 2011-2013-0341

After a few moments of reheating, we dipped up bowlfuls and ate.

Food Blog 2011-2013-0343

N. wasn’t sure (he sometimes takes issue with the texture of reconstituted mushrooms), but I inhaled it with devotion.  I love the flavor of miso soup, and the mild sweetness of butternut squash against the salty umami and fleshy squish of the mushrooms was lovely.

Food Blog 2011-2013-0347

It was light but still satisfying, and the tofu and vegetables from the soup mix were so welcome that I’d advise you, if you are using straight miso rather than a pre-mixed, additive laden packet, to consider adding some tofu or seaweed or green onion just to contribute a little substance and contrast to the soup.

Food Blog 2011-2013-0348

Dinner done, we moved on to the second stage of the evening.

“89. Vegetable crackers: Slice beets, sweet potatoes, plantains or parsnips or all of the above into 1/8-inch disks (a mandoline is helpful) and toss lightly in olive oil. Spread the slices on baking sheets, sprinkle with salt, pepper and, if you like, other seasonings and bake at 400 degrees for 10 to 12 minutes. When browned, flip the chips over and bake for another 10 minutes or so.”

This sounded tasty, and I’d always intended to make it for a party.  With a dear friend coming over to ring in the new year with us, and since hunks of cheese alone might be deemed a slightly imbalanced offering (though so, so delicious…), this seemed like a perfect opportunity.  Beets were out of the question (N.’s nemeses since childhood), and I couldn’t find plantains in my grocery store’s produce section, so we were left with the nutty herbiness of parsnips and the always dependable earthy sweetness of sweet potato.

3 medium parsnips, peeled

½ large sweet potato, peeled

generous dose of olive oil (maybe ¼ cup?), plus more to grease the cookie sheets

1 tsp each (or to taste) salt, pepper, and garam masala

To prepare for roasting, preheat the oven to 400F and line two cookie sheets with aluminum foil.  Drizzle with olive oil and spread to cover the surface of the foil evenly.

While the oven preheats, tackle the vegetables.  I don’t have a mandoline, but I do have a ruler, and I must confess I did bring it to the kitchen to give myself a better idea of what 1/8 inch looks like.  My slices were not quite even, but they did verge on passable.  I tossed them – big coins of harvest orange and speckled white – in a glass bowl with the olive oil and the spices until they were evenly coated.

Food Blog 2011-2013-0339

Spread the vegetable coins across the cookie sheets in a single layer, not overlapping, not in piles.  If they cook in a stack, they will soften but not brown or crisp.  Stow them in the oven for 12-15 minutes, or until they are just beginning to brown.

This next step is a true exercise in patience.  Unless you are far more talented with a spatula than I, you will have to flip each piece over individually.  You have to, because otherwise one side will burn and the other side will flutter limply into cooked-but-not-crisp status.  Trust me on this one.  When you have laboriously flipped each coin, shove the tray back into the oven for another 10-12 minutes.

Food Blog 2011-2013-0342

At this point, you’ll have to use your judgment.  My offerings were, after this additional time, cooked through but not remotely cracker-like in texture.  Another five minutes in the oven might have done the trick.  Putting them back in, failing to set a timer, and heading to the couch to eat dinner (I was trying to multitask) is not advisable.  I didn’t remember them until I smelled the slightly spicy aroma of parsnips, and by then it was too late – many of the little coins had gone from crackers to briquets.

I decided to pick out the worst offenders – Lucy reports that she didn’t mind a bit of charred flavor – and eat the salvageable ones anyway.

Food Blog 2011-2013-0356

To make them a bit more exciting (and disguise any lingering burned taste) I made a little dipping sauce.  You’ll need:

juice from 1 lime

2 TB honey

1 tsp garam masala

½ – 1 cup Greek yogurt

Whisk the first three ingredients together with a fork until they are smooth.  In increments, add Greek yogurt until your sauce reaches the desired thickness.  Mine was about the consistency of ranch dressing, but much more interesting in flavor.

Food Blog 2011-2013-0349

These crackers (with and without the sauce) were – if you were able to overlook the overcooking – a nice alternative to crudites or store-bought crackers.  They weren’t quite as crispy (except the ones that were too crispy), but they had a lovely deep flavor and none of the powdery, processed taste some crackers can have.  They are also a gluten-free offering and, minus the yogurt and honey sauce, vegan as well.

Food Blog 2011-2013-0350

I served them alongside a cheese platter,

Food Blog 2011-2013-0353

Food Blog 2011-2013-0354

Joy the Baker’s chili spiced sharp cheddar cheese crackers,

Food Blog 2011-2013-0352

assorted sweets,

Food Blog 2011-2013-0355

and my appetizer version of Bittman’s “Marshmallow Topping for Adults” dish: thick discs of sweet potato roasted until tender, topped with a dollop of cream cheese and sprinkled with a pecan brown sugar blend before being broiled until the sugar bubbles and the cheese slackens toward melting.

Food Blog 2011-2013-0357

Food Blog 2011-2013-0359

And champagne, of course.

Food Blog 2011-2013-0361

Happy New Year.  I hope you celebrate your achievements, meet your goals, and find happiness in your own self.  I’ll be checking in again later this week with some reflections and announcements.  Welcome to 2013.

Finish line

The problem with cramming for final exams – as many of my students were doing only a few weeks ago – is that you end up trying to process too much information, and just as quickly as you learn new things, the old things you thought you knew start sliding away. That’s the glory and the power of writing. Once it’s on the page, it’s solid. No matter how many holiday dinners you eat (I’m onto my third or fourth at this point), those words will still tell you exactly what you did and (sometimes) how you felt about it.

I feel like I’m cramming for my final. Last week, before the holiday, before the family time, before the outpouring of memories and laughter and swallowed tears of all kinds and barking and yelling and joy, I made three Bittmans in a desperate bid to stay on top of the project.

42. Brussels Sprout Sliders: Trim and halve large brussels sprouts, toss with olive oil and roast at 400 degrees until tender but not mushy. Using the brussels sprout halves as you would hamburger buns, sandwich them around a piece of crispy bacon or ham, maybe a little caramelized onion, and a dab of whole grain mustard. Keep everything in place with toothpicks.”

I always intended to make this one for a Halloween party. It seemed fitting: for some, brussels sprouts are a frightening, disdained vegetable. But this new perspective on them makes them fun and perhaps even appetizing to those disbelievers who see them only as a bitter waterlogged grenade of disappointment. But I never did. So they became an appetizer for two:

6 brussels sprouts, trimmed and halved

2 strips bacon, cut into eight even pieces (you’ll use six for the brussels. Eat the other two, or share with a tall, handsome somebody who shows up in the kitchen when the smell becomes too enticing to ignore)

dab (maybe 1 tsp total?) whole grain mustard

Preheat the oven to 400F.

Line a small baking dish (I used a 9” cake pan) with aluminum foil and drizzle the foil with olive oil. Brush or rub the olive oil into an even layer so every millimeter of foil is covered.

Set the sprouts, cut side down, on the oiled foil, spacing them evenly so none are touching. This will ensure even roasting rather than steaming.

Food%2520Blog%25202011-2013-0204

Roast for 15 minutes, until the cut edges are browned and just crisp. Using tongs, flip over each sprout so they teeter on their curved sides. Roast for another 15 minutes.

While sprouts are roasting, cook the bacon. Mine was already cooked – saved from another porky occasion – so during the last five minutes of sprout roasting I added the bacon pieces to the pan to heat them up a little.

When the sprouts are browned and lightly tender, set them aside until they are cool enough to handle. As soon as you can bear to touch them, add a tiny spread of mustard across one cut edge, seat the bacon atop it, and place another sprout half on top to complete the sandwich. Drive a toothpick through the whole thing and serve as an hors d’oeuvre.

Food%2520Blog%25202011-2013-0205

We gobbled these down like we hadn’t eaten in weeks. They were delightful and I highly recommend them as a party item: crisp bacon, zesty mustard, and the nutty crunchy slight bitterness of roasted brussels sprouts, all collected together in one perfect bite. Perhaps a New Year’s Eve treat to help the hours pass.

Food%2520Blog%25202011-2013-0210


Soup and bread seemed like a good meal to follow our sprouts.

82. Cornmeal Flatbread with Onion and Sage: Mix 1 cup cornmeal with 1 teaspoon salt; slowly whisk in 1½ cups water. Cover and let sit for an hour (or up to 12 hours in the refrigerator). Put ¼ cup olive oil in a 12-inch ovenproof skillet along with a thinly sliced red onion; stir. Heat the skillet in a 400-degree oven for a few minutes, then stir and pour in the batter. Bake at 375 degrees until the flatbread is crisp at the edges and releases easily from the pan, about 45 minutes.”

I followed these directions fairly exactly, with the exception that I used only half an onion. The olive oil and onion went into the oven for five minutes at 400F, at which point the onion slices were sizzling and the oil was shimmering beautifully.

Bittman neglects to note where and when to add the sage, so I stirred a tablespoon of finely chopped fresh sage into the batter just before adding it to the skillet.

Food%2520Blog%25202011-2013-0203

This concoction baked for 45 minutes, until it was set, the onions were crisp-tender, and the whole thing loosened easily from the skillet and slid almost gracefully onto a serving tray.

Food%2520Blog%25202011-2013-0212

We cut large wedges and tasted. It was unlike any other bread I’ve come across – more like baked squares of polenta than anything else, which made sense when I stopped and thought about it. Were I renaming this dish, I think I would call it Polenta Pizza. It was well oiled and spongy in texture, squishing pleasingly between our teeth and driving us back for additional tastes. N. wasn’t sure he liked it at first, but then he went back for a second slice and then a third. When I ribbed him about this, he said he was still deciding what he really thought, and needed more samples to truly make up his mind.

Food%2520Blog%25202011-2013-0214

This odd little bread course could easily be dunked in saucers of warmed marinara sauce, or sprinkled with mozzarella or parmesan for a pleasing salty bite. Though the onions and sage were good, you could probably saute almost anything in that skillet before adding the batter: sausage, peppers, mushrooms… anything you’d put on a pizza.

A decadent appetizer and a well-oiled pizza/bread need a sober, sensible kind of soup to balance them out.

19. Saute chopped onions, garlic, celery and carrots in olive oil, then add chopped tomatoes (boxed are fine) with their juice, lentils and stock or water to cover. When everything is soft, add a squeeze of lemon juice or a splash of red wine vinegar. Garnish with parsley.”

Since we were leaving town the next day, I didn’t want huge quantities. (This still made enough for four, but I froze the leftovers so nothing was lost)

½ red onion (left from the flatbread, so convenient), diced

4-6 small cloves garlic, minced

1/3 cup each celery and carrots, sliced

¾ cup lentils

13.5 oz can petite diced tomatoes

2½ cups chicken broth (or vegetable broth, or water)

1 TB lemon juice

2 TB fresh, finely chopped parsley

salt and pepper to taste

I heated 2 TB olive oil over medium heat, then tossed in the onions to sweat for a minute or two before adding the garlic and the other vegetables. When the onions were translucent and tender, I added the tomatoes, lentils, and broth and turned the heat up to medium high until the whole pot came to a boil.

Once boiling, I gave it a healthy stir and then turned the heat down so the soup would just simmer, letting the lentils soften gently and the vegetables tenderize.

Simmer for at least 35 minutes, then taste the lentils to see if they are tender enough for your taste. We like them soft but not mushy, with minimal resistance but still able to hold their shape.

Just before serving, squeeze in the lemon juice, stir gently, and dip into serving bowls. Scatter the surface with a grassy sprinkle of parsley.

Food%2520Blog%25202011-2013-0215

We liked this, though it wasn’t the best lentil soup I’ve ever had. The flavors were enticing and the lemon juice made it a bright, rather than heavy, soup. The problem with it was that I like my lentil soup more like a stew or a chili. The brightness of the lemon made the shower of shredded pepperjack cheese I was considering adding seem extraneous and out of place, and I tend to get crotchety when denied cheese. But alongside the flatbread and the richness of the brussels sprouts, it was hearty but didn’t weigh us down.

2012 is fading like the last sheen of daylight across the hills in winter. 2013 charges toward us, all mystery and sharp promise. I thought about cheating and saying I was done; these three dishes are the final three, I made it, all boxes are checked, all questions answered, funtoosh, kaput (extra points if you can name my source!), but I just can’t. I’m too close. This final exam is too important. This resolution needs to be one I keep. I have two dishes left. I have two days, one of which will be spent driving from the Sierra Nevada foothills where N.’s parents live back to Los Angeles and my little house. I hope I’m going to make it. The finish line is in sight. Now I just have to stagger across it.

Truffling

At our house, a box of See’s chocolates was standard holiday fare. They were special – the white box, the ruffled, rustling brown wraps that made it all but impossible to sneak a selection without someone overhearing – and all too quickly gone. But they were special for good and for bad reasons. As Forrest Gump so wisely told us, you never knew what you were going to get. It might be a luscious square of soft, fudgy dark chocolate studded with walnuts, or it might be the dreaded maple nougat. My cousin J. loves caramel, and when she was little she developed a surefire way to determine which mysterious See’s square to choose: bite the bottoms off, and if you don’t like the filling inside, put it back in the box. No one could see the intrusion, at least not until that piece was selected again.

For the past few years, I’ve made truffles for my officemates at the end of the term. Squares of ganache flavored with fruits, nuts, and liqueurs, robed lovingly in melted chocolate and stuffed carefully into pretty little boxes make excellent, always well-received holiday gifts. I’ve experimented with ginger, apricots, amaretto, peppermint, almond butter, dark, white, and bittersweet chocolate. To my delight, Bittman has a truffle (or at least a truffle-like) recipe among his 101. With no officemates to share with this year, I decided to make a selection of truffles for my husband to give his department at his school.

I went a little overboard.

Food%2520Blog%25202011-2013-0195

Cranberry Truffles: Heat ½ cup simple syrup and ½ cup bourbon or water; add 2 cups dried cranberries and steep until soft, 10 to 15 minutes. Drain, reserving the liquid. Pulse the fruit in a food processor, adding just enough liquid so the mixture comes together. Roll spoonfuls of the cranberry filling into balls, then roll them in cocoa, mixed with pulverized nuts if you like.”

This sounded decadent and very adult – an excellent addition to truffle flavor combinations I was planning like Chambord with dried raspberries and Grand Marnier with candied orange peel. I used:

Food%2520Blog%25202011-2013-0182½ cup bourbon (I used Knob Creek)

½ cup simple syrup (I had some ginger syrup kicking around, so why not?)

2 cups dried cranberries (use reduced sugar, if you can find them)

½ cup cocoa powder

½ cup hazelnuts (optional)

I was pleased to find reduced sugar Craisins to use here – the bourbon has its own kind of sweetness, and the ginger syrup I was using instead of a simple syrup was tooth-twingingly sweet. I heated the liquids together in a small pot over medium heat until they came to the barest simmer.

As Bittman directs, I steeped the Craisins in the bourbon and syrup for fifteen minutes or so. I wasn’t sure what temperature “steeping” actually is, so I decided on a barely bubbling simmer. The syrup seeped into the cranberries, giving them a slightly fleshy texture. The bourbon wafted headily through my kitchen, making me think 10am might have been on the early side to take on this project so clearly meant for a Friday evening.

Food%2520Blog%25202011-2013-0184

Fifteen minutes of simmering down, and I dumped my swelling craisins into a strainer over a pot to catch the liquid. Don’t lose all the liquid; you’re going to need a tablespoon or two of it later. Let the craisins drain and cool for at least ten or fifteen minutes. While they cooled, I put half a cup of hazelnuts in my food processor and let it rip until they were almost all pulverized into a powder.

When they were cool and had (emitted) plenty of bourbon infused syrup, I moved the craisins to the clean-scraped food processor and let it run. The little ruby jewels came together into a whirring relish of red, and as the bits began to clump in the bowl of my food processor, I added a tablespoon of the bourbon syrup, and then another. The cranberry bits now clung stickily together and I decided they were stable enough to scoop.

Food%2520Blog%25202011-2013-0186

I mixed my powdered hazelnuts with cocoa powder in a shallow bowl, then laid out a piece of wax paper for the finished balls. I spooned out rounds slightly smaller than ping-pong balls and rolled them gently in the nut and cocoa mixture, then set them gently on the wax paper to set or firm up or whatever it was they were going to decide to do.

Food%2520Blog%25202011-2013-0187

When I let myself taste one (I waited until after lunch, out of respect for the bourbon), I was glad to have waited. These, folks, are strong. They are utterly delicious, but extremely intense. The cranberries absorb all the flavor and warmth and musty floral overtones of the alcohol, and the cocoa adds just the right hint of matte bitterness to combat the sweetness and tartness of the cranberries. I set them gently in mini cupcake wrappers.

Food%2520Blog%25202011-2013-0191

Once completed, the bourbon balls joined the rest of the bejeweled collection, which consisted of:

Apricot and almond bits in white chocolate, spiked with amaretto and then dipped in dark chocolate.

Bittersweet ganache with orange liqueur, threaded with candied orange peel, dunked in white chocolate and garnished with a piece of sugared rind.

Dark chocolate with candied ginger and ginger syrup, dressed with semi-sweet chocolate and topped with a piece of ginger.

Food%2520Blog%25202011-2013-0194

Chocolate ganache flavored with chambord and studded with freeze dried raspberries, which contributed a really intriguing crunchy intensity.

Crunchy flaxseed and almond butter cups, topped with a sprinkle of sea salt.

Food%2520Blog%25202011-2013-0197

Happy Holidays!

Food%2520Blog%25202011-2013-0198

Fading light. And bourbon.

My home office – the room where grading, blogging, photo editing, and general work happens – has the most wonderful light in our house.  A huge sliding glass door lets sunlight pour in during the morning hours, and in the afternoon I get brightness mediated by the roof of the house.  Even when it’s overcast, there is still so much natural light that it makes for wonderful food shots.

But winter is a problem.  I’m discovering that if I make a dish for dinner, I’m not going to be able to photograph it from my office because it’s too dark by 5pm.  And wedded to this blog and this project as I am, there’s no way we’re having dinner at 4:30 in the afternoon just so I can get the best light in the house.  So I’m trying out new angles, and new placement, and new adjustments.  I’m learning more about artificial light: which arrangements I find glaring and which I find acceptable.  Bear with me, and look forward to the return of Daylight Savings Time!

“17. Sauté chopped onion in butter, then chunks of sweet potato and stock or water to cover. Simmer until the sweet potatoes can be pierced with a knife, then add chopped kale and cook until wilted.”

This was easy, and quick, and tasty.  I made a few additions to Bittman’s recommendations and think the soup really benefited from them.  I used:

4 TB butter Food blog 2011-0133

½ a medium onion (mine was yellow)

1 big sweet potato, peeled and cut into small chunks (the smaller the chunks, the faster they will cook, so make your decision based on how much time you have and what size is most pleasing to you)


Salt, pepper, ground nutmeg to taste

4 cups broth – vegetable or chicken, depending on your preference

6 oz. kale

1 tsp red wine vinegar

Heat the butter in a pot over medium heat.  When it has melted, add the onion and cook gently, stirring occasionally, until the onion is soft and translucent but not bronzed.

Add the sweet potatoes and seasoning, stir to combine for a minute or two, then add the broth.  The quantity of liquid you need will depend entirely upon the size of your sweet potato.  You may need more or less than the 4 cups listed here.

Let the soup simmer until the sweet potatoes are tender but not falling apart.  Mine took about 15 minutes.

Add the kale and stir to combine.  You will be bewildered by how quickly it collapses on itself, wilting from smoky green to a brighter, more vibrant hue as it is immersed in the liquid.  Cook just until it reaches the texture you like against your tongue – I let it simmer for about 5 minutes, because I like my kale to still put up some resistance and retain its bright color.

I tasted and thought this needed something.  Extra salt to heighten the flavor of the kale, certainly, but there was a kind of dullness about the whole concoction.  Remembering my soup lessons from Alton Brown, I sprinkled in just a hint of red wine vinegar, and the difference was amazing.  The whole thing was brighter, somehow, even though you couldn’t taste anything harsh or stringent.

We consumed this happily with freshly toasted, garlic-rubbed slices of pugliese.  It was good, but could have been stuffed with even more flavor: I’d consider adding garlic, ginger, maybe even rice or ramen noodles.

Food blog 2011-0137

“4. Onion jam with bacon and bourbon: Thinly slice red onions and cook in olive oil with chopped bacon until soft. Add a little bourbon and brown sugar to taste and cook until the jam thickens.”

Bourbon is new for me.  N. has been enjoying the occasional scotch for a few years now, but we recently acquired a bottle of Knob Creek and I’ve been appreciating the floral notes of it – so much less musty and boggy than its British cousin.

4 slices thick-cut bacon, halved lengthwise into long strips, then sliced into small rectangles

½ large red onion, thinly sliced

¼ cup bourbon

2 TB brown sugar

Freshly ground black pepper

1 small sprig rosemary

Food blog 2011-0144

I used about a tablespoon of olive oil to start the pan, but I don’t think you really need it.  Just toss in the bacon slices over medium heat and let them work for about 5 minutes.  You will get a shimmer of fat across the bottom of the pan that is more than enough to start the onions sizzling in.

Add the onions and cook over medium or medium-low for at least ten minutes, until the onions soften and the bacon is mostly cooked.  Stir with some frequency to ensure even cooking.

Off the heat (especially if you are using a gas stove) add the bourbon and the brown sugar.  Stir to combine, then return to medium heat and simmer slowly for about 20 minutes, to let the flavors mingle and the bourbon soak into the onions and bacon.

After a few minutes of cooking, I added pepper and rosemary for additional flavor components, and I think they were a good choice.  The rosemary’s woodsy flavor was a nice contrast to the fatty bacon and sweet onions.  Everything cooked down into a sticky, caramelized jam that I draped across some baked rounds of polenta.

Food blog 2011-0148

This was delicious, but misplaced.  The meaty, smoky bacon was intensified by the bourbon, and the brown sugar and onions had a nice note of molasses.  It didn’t belong on polenta.  It belonged, I think, on a freshly toasted piece of crostini, possibly smeared with a thick slice of brie.  The funkiness of the cheese could stand up nicely to the sweet smoky strength of this jam.

We paired our misguided polenta with green beans, lightly blanched and then seared in a hot pan and deglazed with a bit of red wine.  These, too, were delicious, but not the ideal pairing for the sweet saltiness of my jam.  Apples, maybe, or red grapes would make better pairings.  Regardless, we ate with joy and returned to the pan once or twice for a final sweet chunk of sticky, gooey jammy bacon to sweeten our palates, even though dessert was still to come.


“91. Pears in Red Wine: Simmer 2 cups red wine with ½ cup sugar, 2 cloves, a cinnamon stick and a few slices of ginger in a pot for a few minutes, then gently poach peeled and cored pears (use a spoon to hollow them from bottom), until soft. Cool or chill, and serve with a bit of the poaching liquid.”

This is supposed to be one of the most sophisticated desserts you can offer: not overly sweet, laden with mulled flavor, perfect for a gourmet adult party in celebration of autumn.  Pears, with their temperamental habits and signature grainy texture, are perhaps the same kind of acquired taste as wine or coffee or any of those other “adult” tastes.  As dessert for our onion-jam-crusted dinner, I decided to attempt these.

Food blog 2011-0140

I used 2 pears, but followed the rest of Bittman’s quantities exactly.

Food blog 2011-0142Well, one exception to note: I thought about getting fancy and adding things like citrus peel or rosemary (apparently I’m hooked on the stuff these days).  But in the end, I just splashed in a bit of bourbon to link the flavor profile back to our dinner: red wine from the beans, bourbon from the jam, and this dessert would fit right in.

After the first simmer, in which I stirred gently to let the sugar dissolve and the spices mull gently into the wine, I prepared the pears.

The issue with pears is that inside their tender skins they are slippery little beasts.  You can’t grasp them too firmly or they sigh into bruises.  You can’t hold them too delicately or they slide out of your hands and threaten to slip from the edge of the kitchen counter.

I dove into my attempt to core the pears only after peeling them.  This, and the attempt to do so with a spoon, may have been a mistake.  The spoon tore through the tender flesh of the pear but was too wide to remove only the core.  Further, I wasn’t sure how much core I was supposed to be removing, so I ended up with two pale, naked, slightly mutilated pears, which I slid into their (hopefully) healing bath of alcohol.

I let them simmer, turning them occasionally to dye all sides a lovely burgundy, for about 15 minutes.  Then I turned off the heat and let them sit a further 20 minutes until we were ready for dessert.

Surrounded by a moat of spiced wine, these were achingly tender and nicely flavored.  I would choose pears that were less ripe if I attempted this dessert again, because a bit of additional texture might have done them good.  As it was, though, much of the graininess disappeared in the poaching, and the soft floral flavor was really nice against the wine and assertive spices.  A scoop of vanilla ice cream on the side would have made this a richer endeavor, but I think the creaminess would have matched well with the fruit and the wine.   Or maybe I just need the extra comfort as we roll into December…

Food blog 2011-0150

Giving thanks

The house feels empty.  Wednesday through Saturday, my family visited for Thanksgiving.  This morning, with them on the road home, fog hovering sticky in the sky, the cheery burgundy tablecloth in the washing machine, and a stack of lingering dishes I’m trying to ignore proclaiming themselves from the sink, our little home was stark and cold.  I could say that the memories of the holiday will keep me warm, but that would only be true in a metaphorical sense.  What I really want is another baked apple.

90. Baked Apples: Combine chopped pecans and chopped dried fruit (raisins, dates, figs, cranberries all work) and toss with maple syrup and a sprinkle of cinnamon, allspice or nutmeg or all three. Fill the cavities of cored apples with the fruits and nuts, dot each with butter, put into a baking dish and roast about 30 minutes, until tender. Better with vanilla ice cream.”

We had a few small apples from our local Farmers’ Market waiting for attention in the fruit bowl, so I set about collecting partners for them to make a dessert for two.

2 small apples

¼ cup chopped pecans

¼ tsp pumpkin pie spice (I agree with Joy the Baker that we should probably just make our own, but if you, like me, purchased some in a moment of confused weakness, this seems a harmless way to put it to use)

1-2 TB each:

chopped dried figs (I used black Mission, my current favorite)

craisins

golden raisins

3 TB maple syrup

Preheat the oven to 350F.

Core the apples, keeping the bottoms intact if you can.  If you can’t, just wrap the bottom quarter or so in aluminum foil and set them in a baking dish.  This will keep the filling from escaping.

In a small bowl, combine the nuts, fruit, and spice(s).  Drizzle in the maple syrup and stir gently to combine – you want even stickiness throughout.

Using a small spoon, or your fingers, insert as much filling as you can into the cored apples.  You will notice that this quantity makes about twice as much as you need for 2 small apples.  That’s okay.  The leftovers are a fantastic topping for oatmeal the next morning.

Once full, stow your apples in the oven for 30 minutes, or until they are tender when pierced with a knife.  Liberate, evacuate to a dessert plate, and pair with vanilla ice cream.

These were a lovely dessert.  They felt light, because they were primarily fruit, but were still sweet enough to satisfy that after-dinner craving.  The apples still had some resistance, but were warmed through and starting to collapse into themselves.  The ice cream was a perfect accompaniment – I wouldn’t want this dessert without it.  I might ideally have chosen an apple with more tartness to contrast against the sweetness of the syrup and dried fruit, but in such a case, especially if the apple were on the large size, I would advocate a longer baking time.  If the fruit and nuts protruding from the top of the apple start to brown too much, give them a tinfoil hat to hide beneath.


“84. Sage Crackers: Pulse 1 cup flour, 1 teaspoon salt, ½ cup Parmesan and 4 tablespoons cold butter in a food processor. Add ¼ cup cream and 1 tablespoon finely chopped sage.  When just combined, roll as thinly as possible, score into squares, sprinkle with salt and bake at 400 degrees until golden.  Let cool, then break into pieces.”

I’ve always liked a nice cheese-and-crackers platter as an appetizer option, and these seemed like a good option to lead into the big Thanksgiving meal: relatively easy to make, but impressive – who wouldn’t be staggered by the effort of making homemade crackers even with a homemade feast to produce as well?

Bittman’s directions and quantities here are pretty specific, so I just followed his directions.  I omitted the salt, because Parmesan carries so much of its own tangy hit, and my parents are not big salt eaters.  It should also be noted that pulsing this mixture until just combined does not create a rollable dough, unless my idea of “just combined” is different from Bittman’s.  However, turning out the just-clinging crumbs onto a floured board and kneading for only a minute or two does produce a nice textured ball of dough that can be rolled out with minimal sticking.

I’d recommend aiming for a shape as close to a rectangle as possible.  Further, roll that rectangle to the size of your biggest cookie sheet.  That way you can carefully transport onto the greased or parchment-lined sheet tray by draping the dough loosely over the rolling pin.  Score it very gently into rectangles or squares of your chosen size (cut halfway through the dough with a knife, not all the way through), and into the oven with it!

When I checked these 20 minutes later, they were a little more golden than I wanted.  They were, in fact, heading toward a burnished bronze (is that not the kindest way ever of saying they were all-but-burned?).

After the cracker sheet had cooled for a few minutes, I broke it along the scored lines into neat (mostly) rectangles and we passed around a few samples.  The outside edges, which were thinner, had a slightly over-toasted flavor we didn’t love.  The inside rectangles, though, were crisp and flavorful, with a flaky – almost chalky – texture reminiscent at once of pie crust and shortbread.  My dad in particular, who enjoys this texture, thought they were great.

And now the confession: my final Bittman for this week is a bit of a cheat.  But I’m okay with that, because I also think it was a bit of a cheat for him, though in the best and most useful way.

“101. Buy some cheese. Unwrap it and put it on a plate with some walnuts and fruit; let come to room temperature. Serve with good bread.”

This is the final numerical entry of the list, and that means it’s in the dessert category.  While I accept that some people prefer a cheese course to dessert, I’m not sure I consider this an acceptable option for Thanksgiving.  It is, however, acceptable as an appetizer idea, as I mentioned above.  So that’s what I did.  In addition to the sage parmesan crackers above, I made my favorite craisin rosemary biscotti-style crackers with white bean and almond dip, and set them all out with some creamy Stilton, a nice rich chevre, and a wedge of Manchego obtained from a stand at the Farmers’ Market where we finally decided we’d had too many samples to feel right about not purchasing.  Surrounding these, I added dried apple rings, black Mission figs, and a fresh Granny Smith cut into slim slices.  The walnuts, which I was ready to add as well after a brief toasting, were subjected instead to accidental scorching, and had to be sacrificed.  We will speak of them no further.

What can you say about a cheese platter, besides that it was delicious?  We adored the Manchego, and soft crumbles of Stilton paired well with the fresh apples.  I tried fig and goat cheese together, and now I think chevre-stuffed-figs sounds like an amazing experiment.  We decimated the platter in little over ten minutes, but thankfully were not too stuffed to take full advantage of the turkey dinner that followed.

With Thanksgiving handled, that leaves only five weeks of 2012, and only twelve Bittman selections to go!  New Year’s Eve is on a Monday, but that still counts as this year if I need to jam in a few final selections, right?

I think I can, I think I can, I think I can…