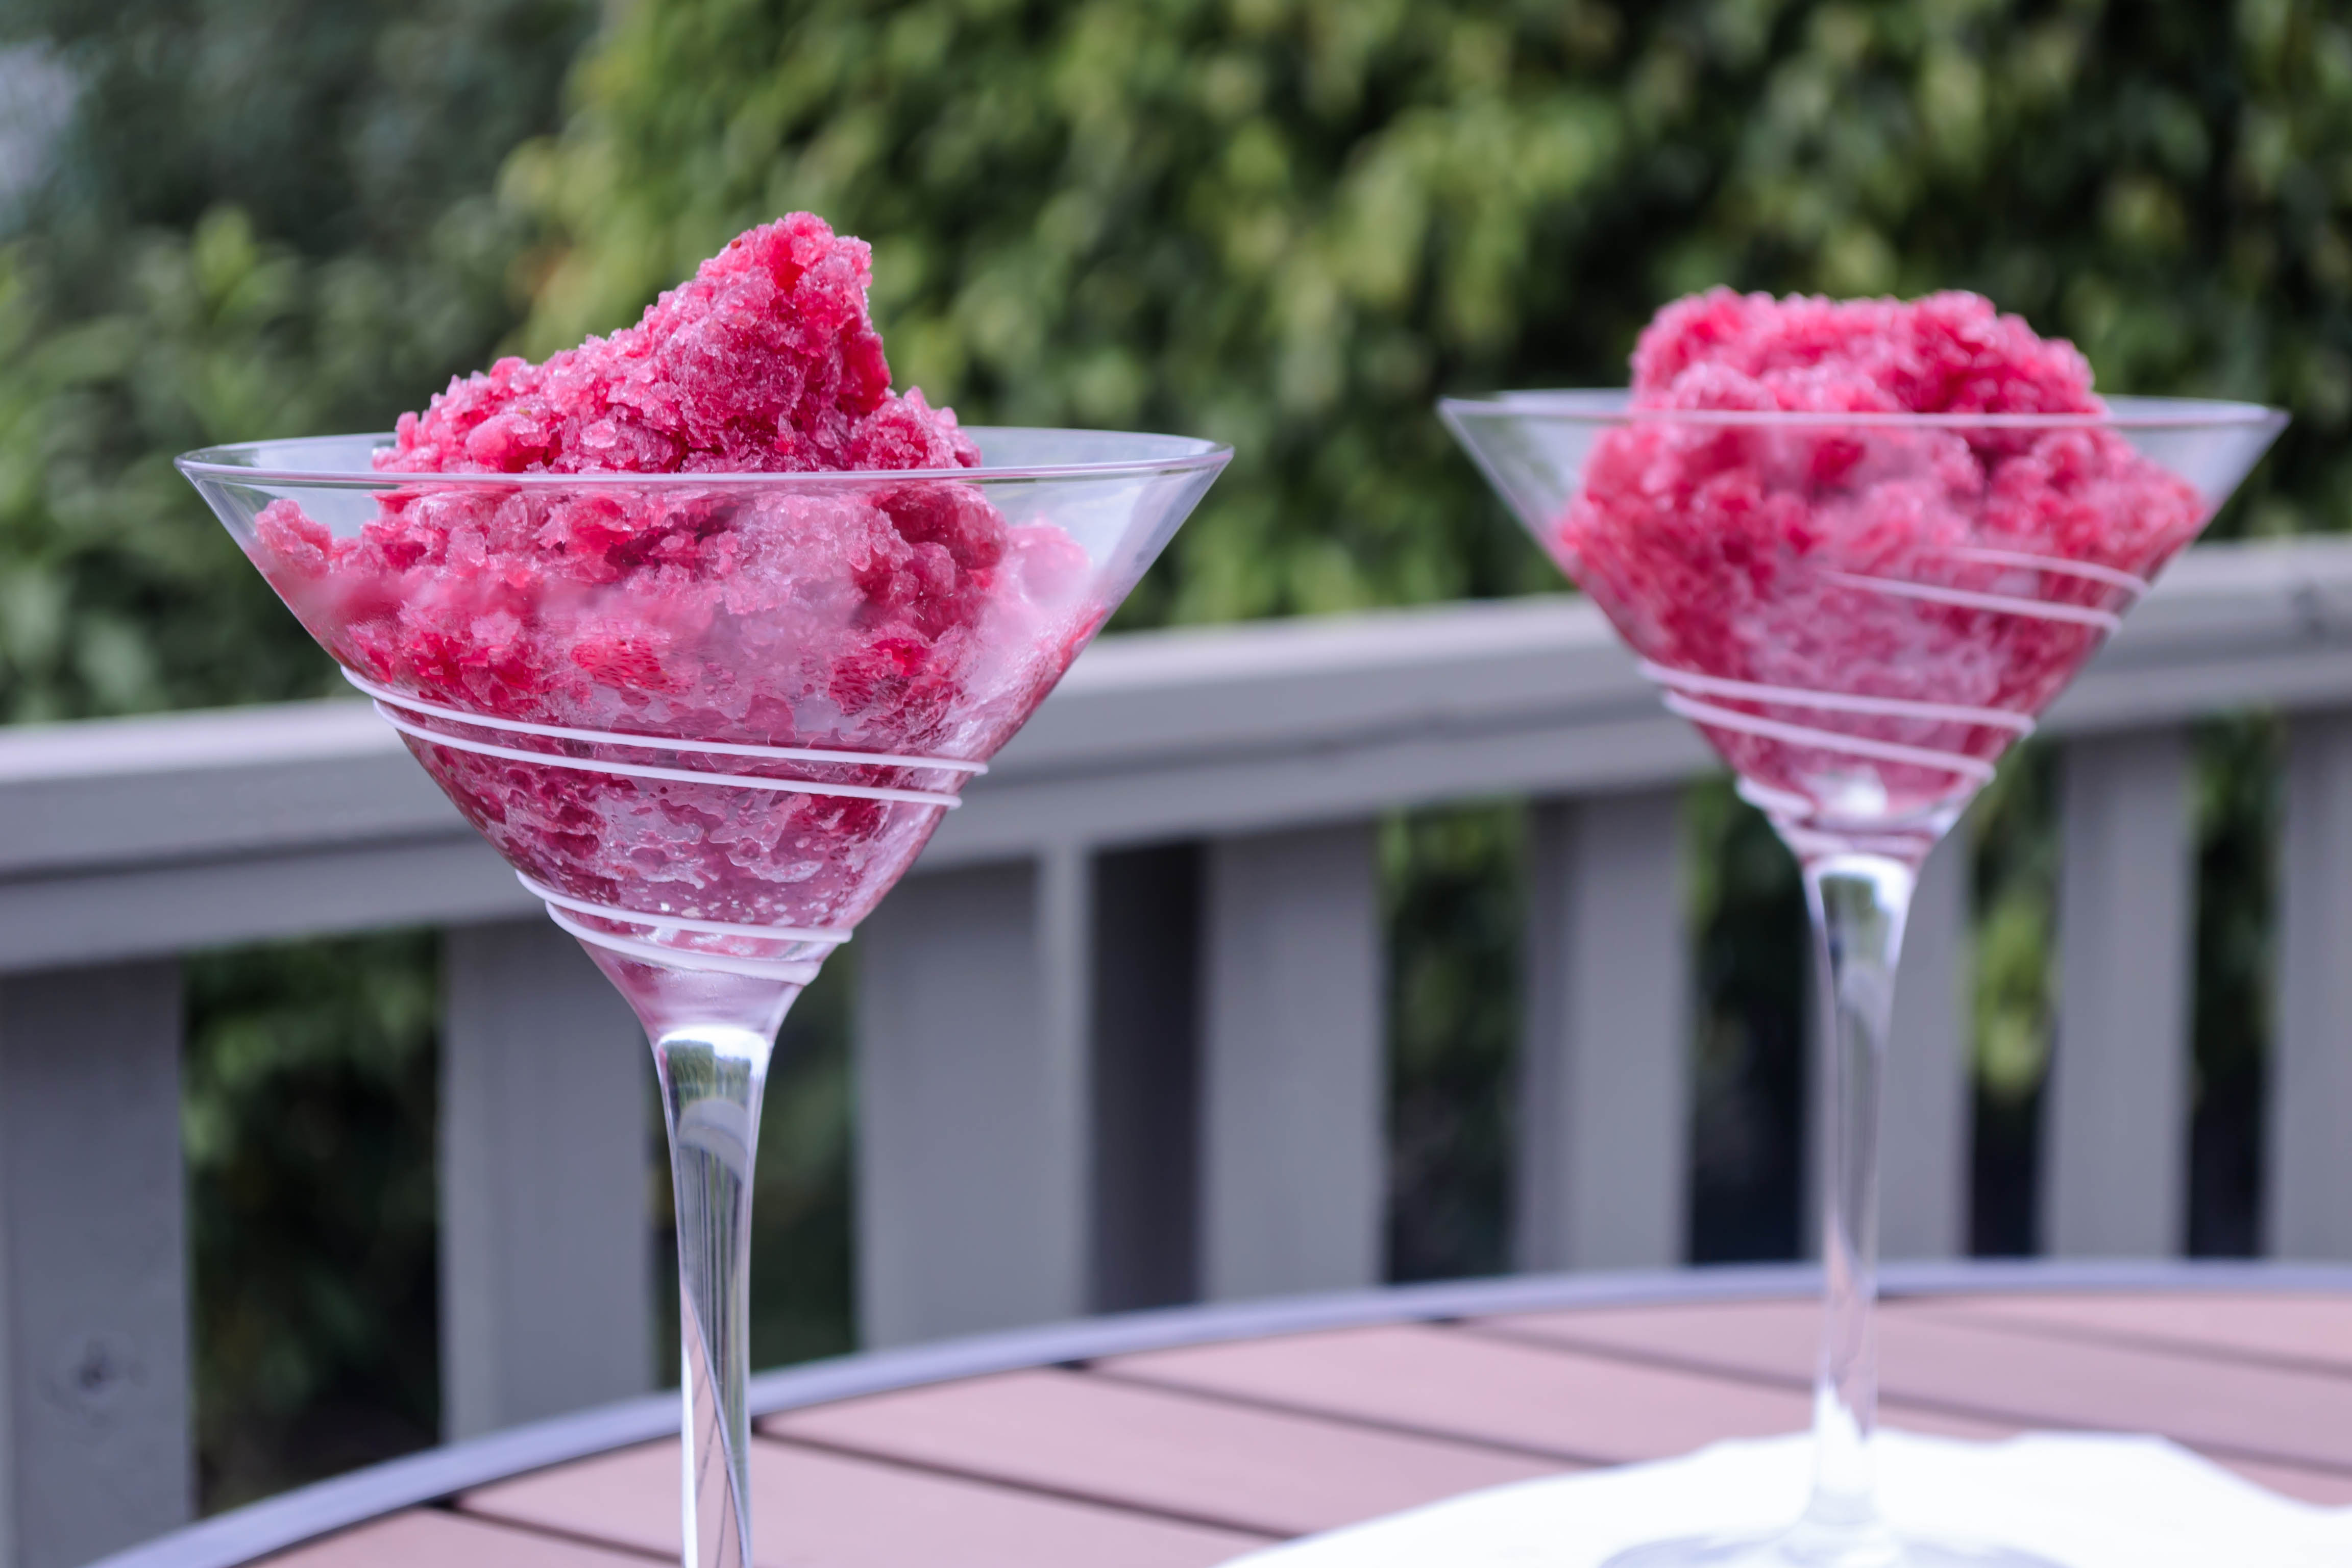
Just for fun, a few more shots of the sangria granita I posted about on Monday:
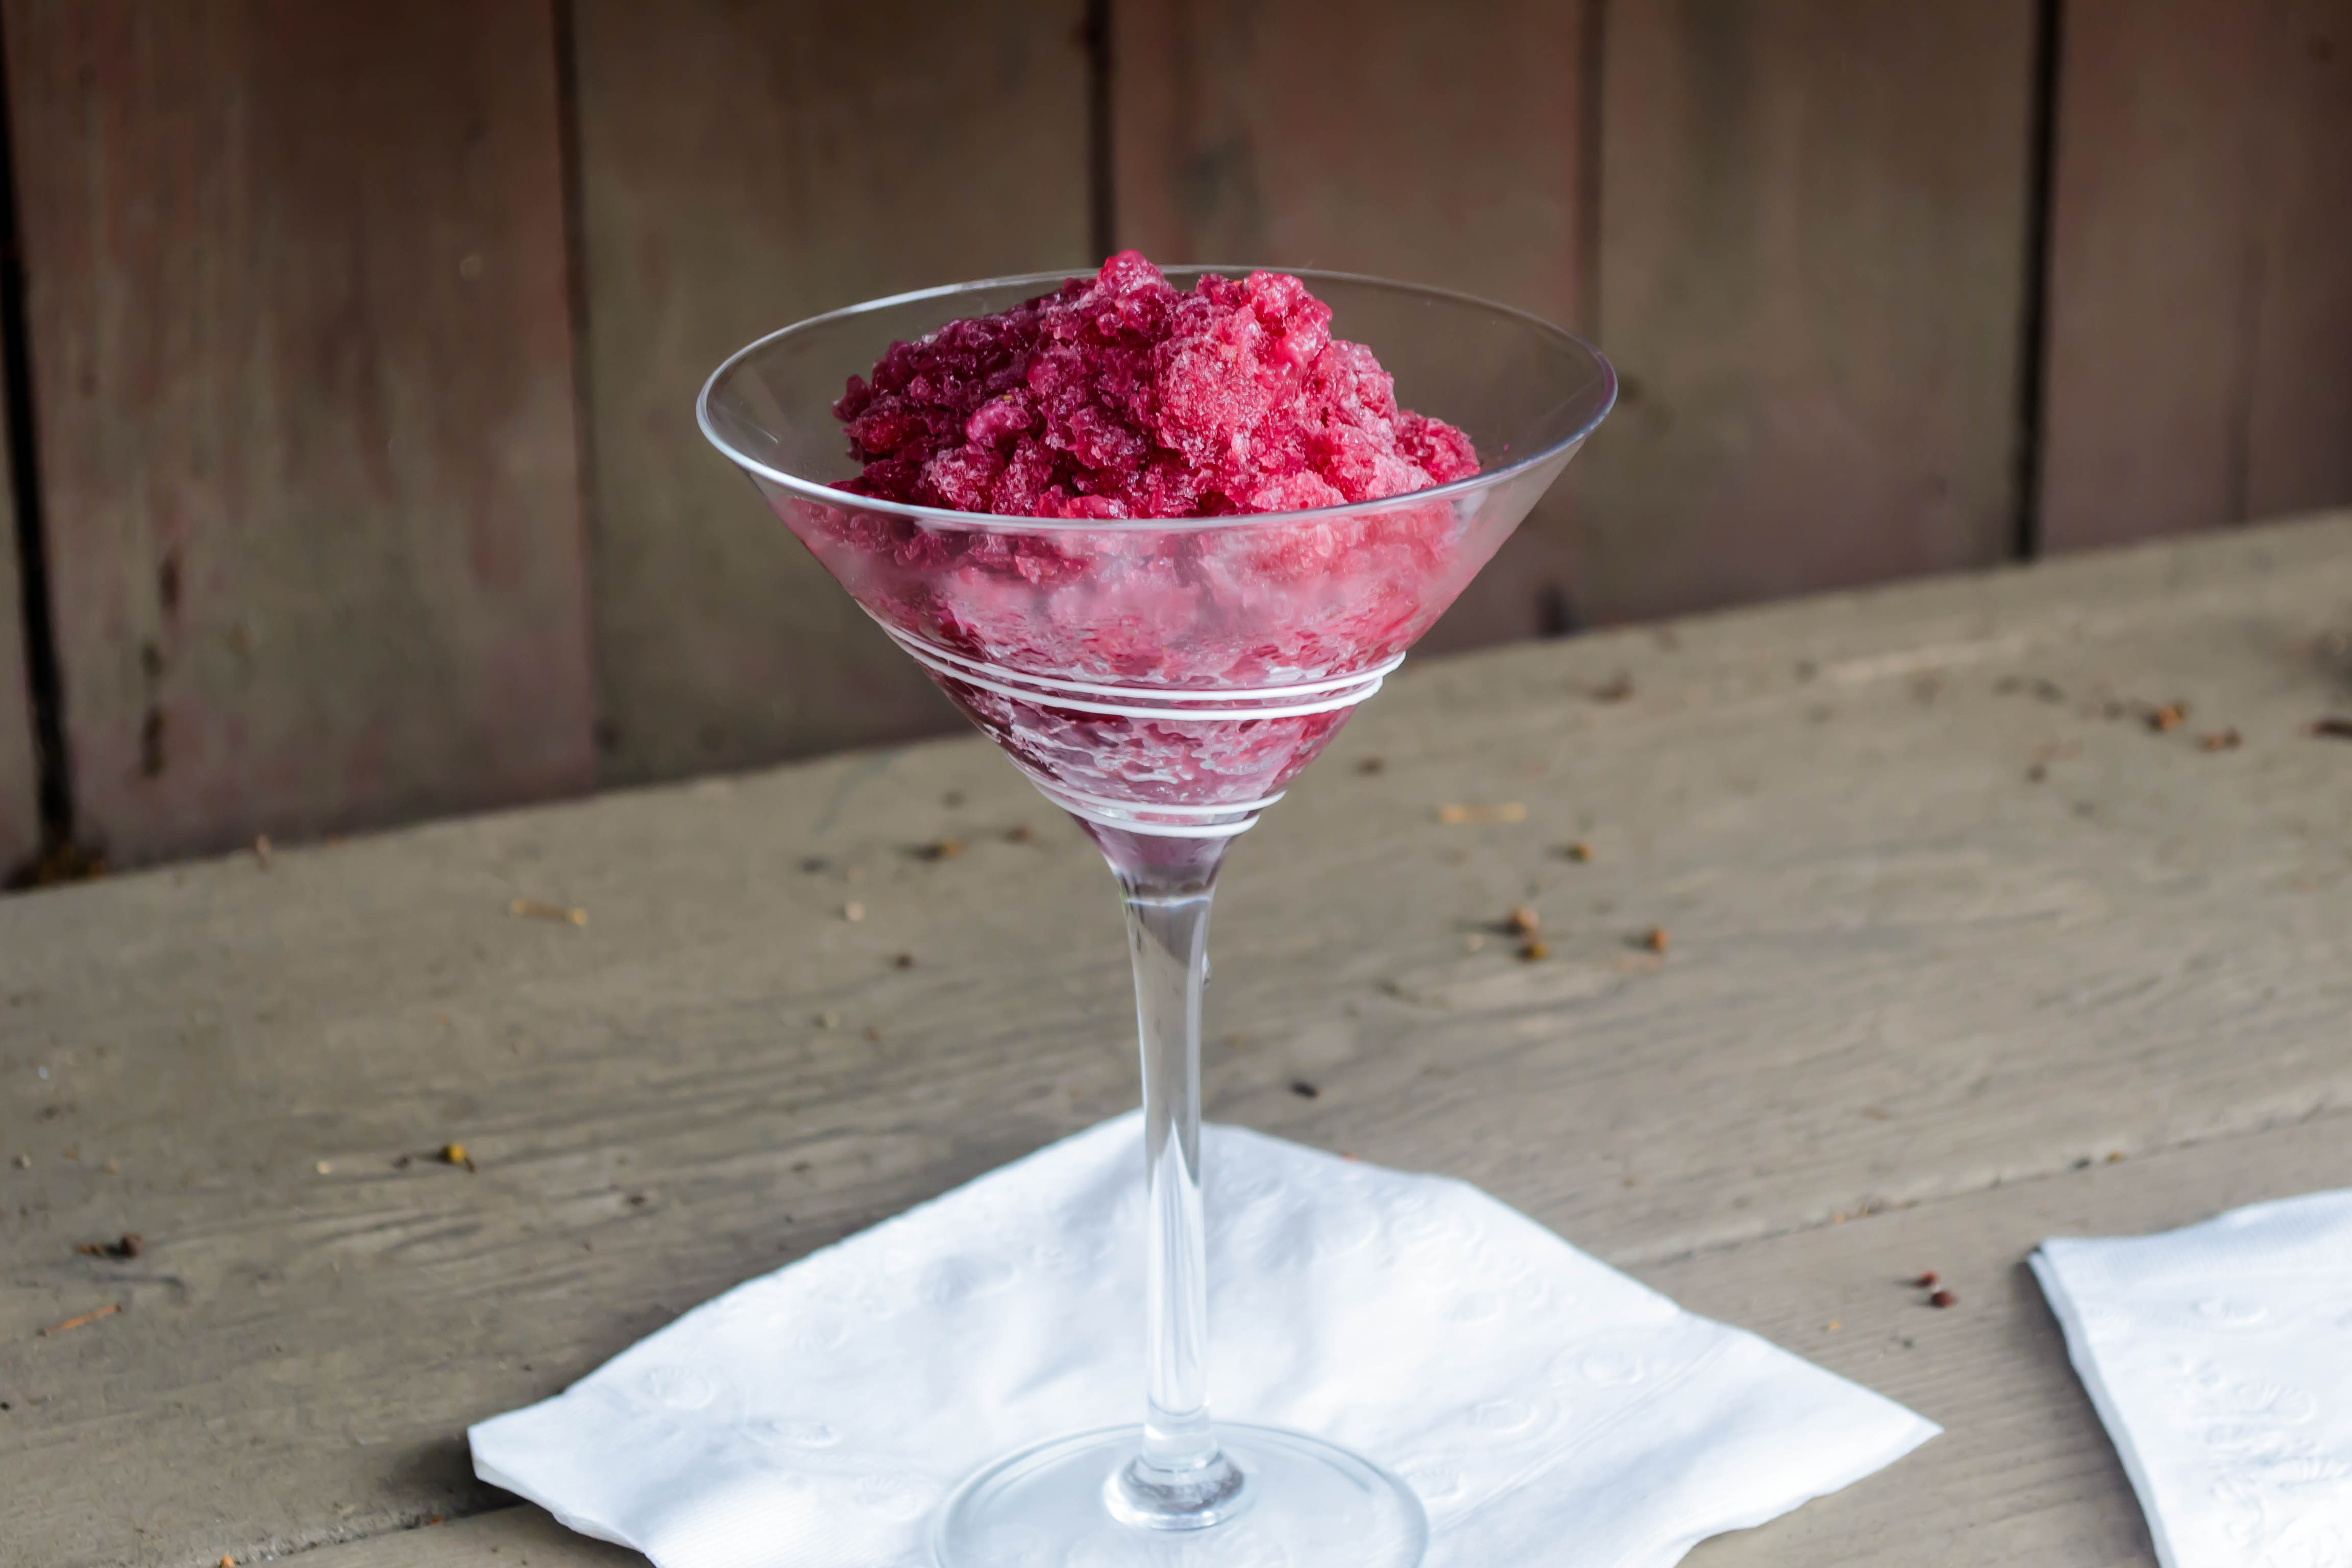
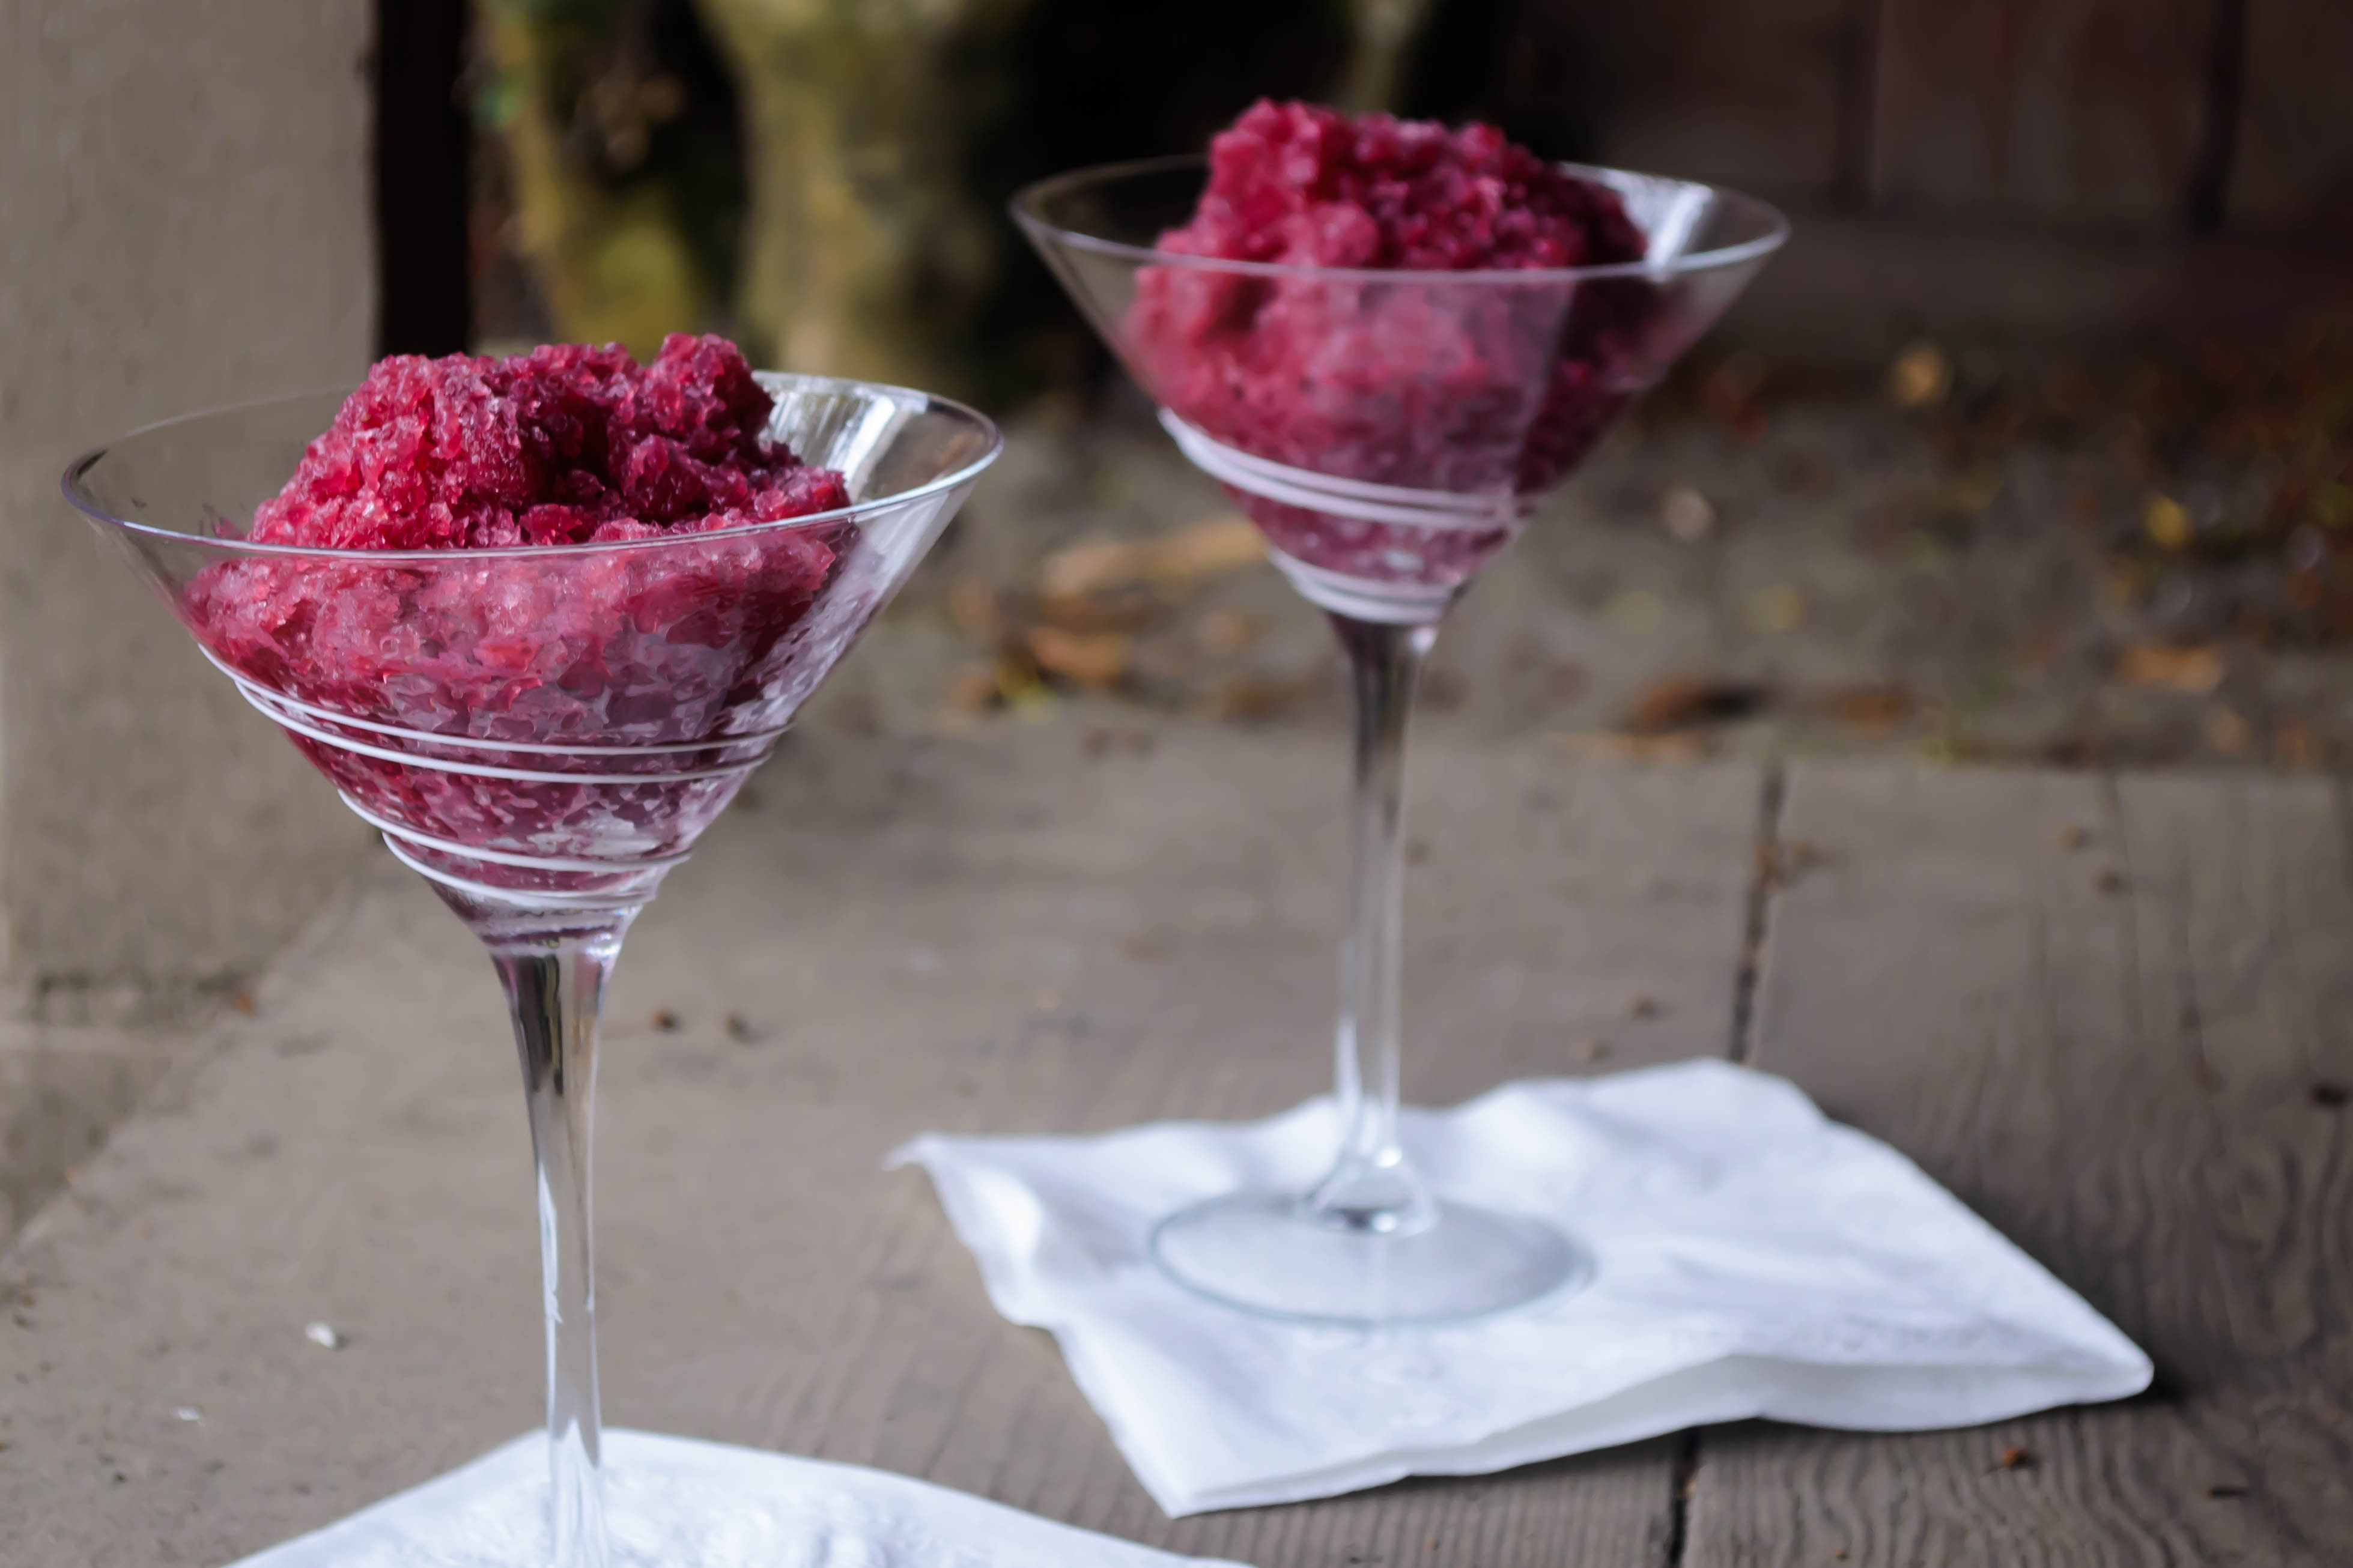


Just for fun, a few more shots of the sangria granita I posted about on Monday:
 Chances are, where you are, or were, or will be soon, it’s hot. Or it was. Or it’s going to be. But past, present, future, when it’s hot out, and you still want dessert, you are probably going to have certain demands: it must be easy. Mimimal measuring. Simple directions. No fine chopping or dicing or mincing. It must require short cooking time, if any. No long baking times (sorry, bread pudding), no stewing or roasting or brûléeing. It must be refreshing and delicious and maybe even a bit surprising, to pull you out of your mid-summer funk. Not that I’m having one of those…

Frozen sangria. Does that make your sweat-beaded forehead wrinkle with interest? It makes mine feel a little curious, a little intrigued, a little go-on-I’m-listening…

(Sometimes feet get in the way of photoshoots…)
Frozen sangria requires relatively little of you. It wants flavor – some sugar, some spice, some whatever’s-your-favorite red wine. It wants just a little simmering to infuse the liquid with cinnamon sticks, with cloves, with orange peel. We’re playing a little game with ourselves here: imparting winter flavors into an icy treat. Maybe the reminders of that holiday season half a year away will help us cool down just as much as the temperature of our dessert.
 Finally, frozen sangria wants time. Because we’re dealing with alcohol, freezing is going to take longer than if we were working with juice or water or even ice cream. It will freeze – most wines are between 9 and 13% alcohol, and this relatively low percentage will still solidify, but it will take a little longer. For satisfactory results, you’ll want to start this little project the day before. I know; planning ahead is not always on your mind when you are struck with the yen for a frozen treat. But this icy, deeply flavored bomb of spice, tipsy with wine, sparkling with citrus from freshly squeezed orange juice and freckled with mashed strawberries, is worth the extra wait.
 Here, because I care about you, and I want you to know your options before you have to brave the melting temperatures to find your way back to the kitchen, I’m giving you two preparations (well, three, if you count the plain ol’ sangria itself).
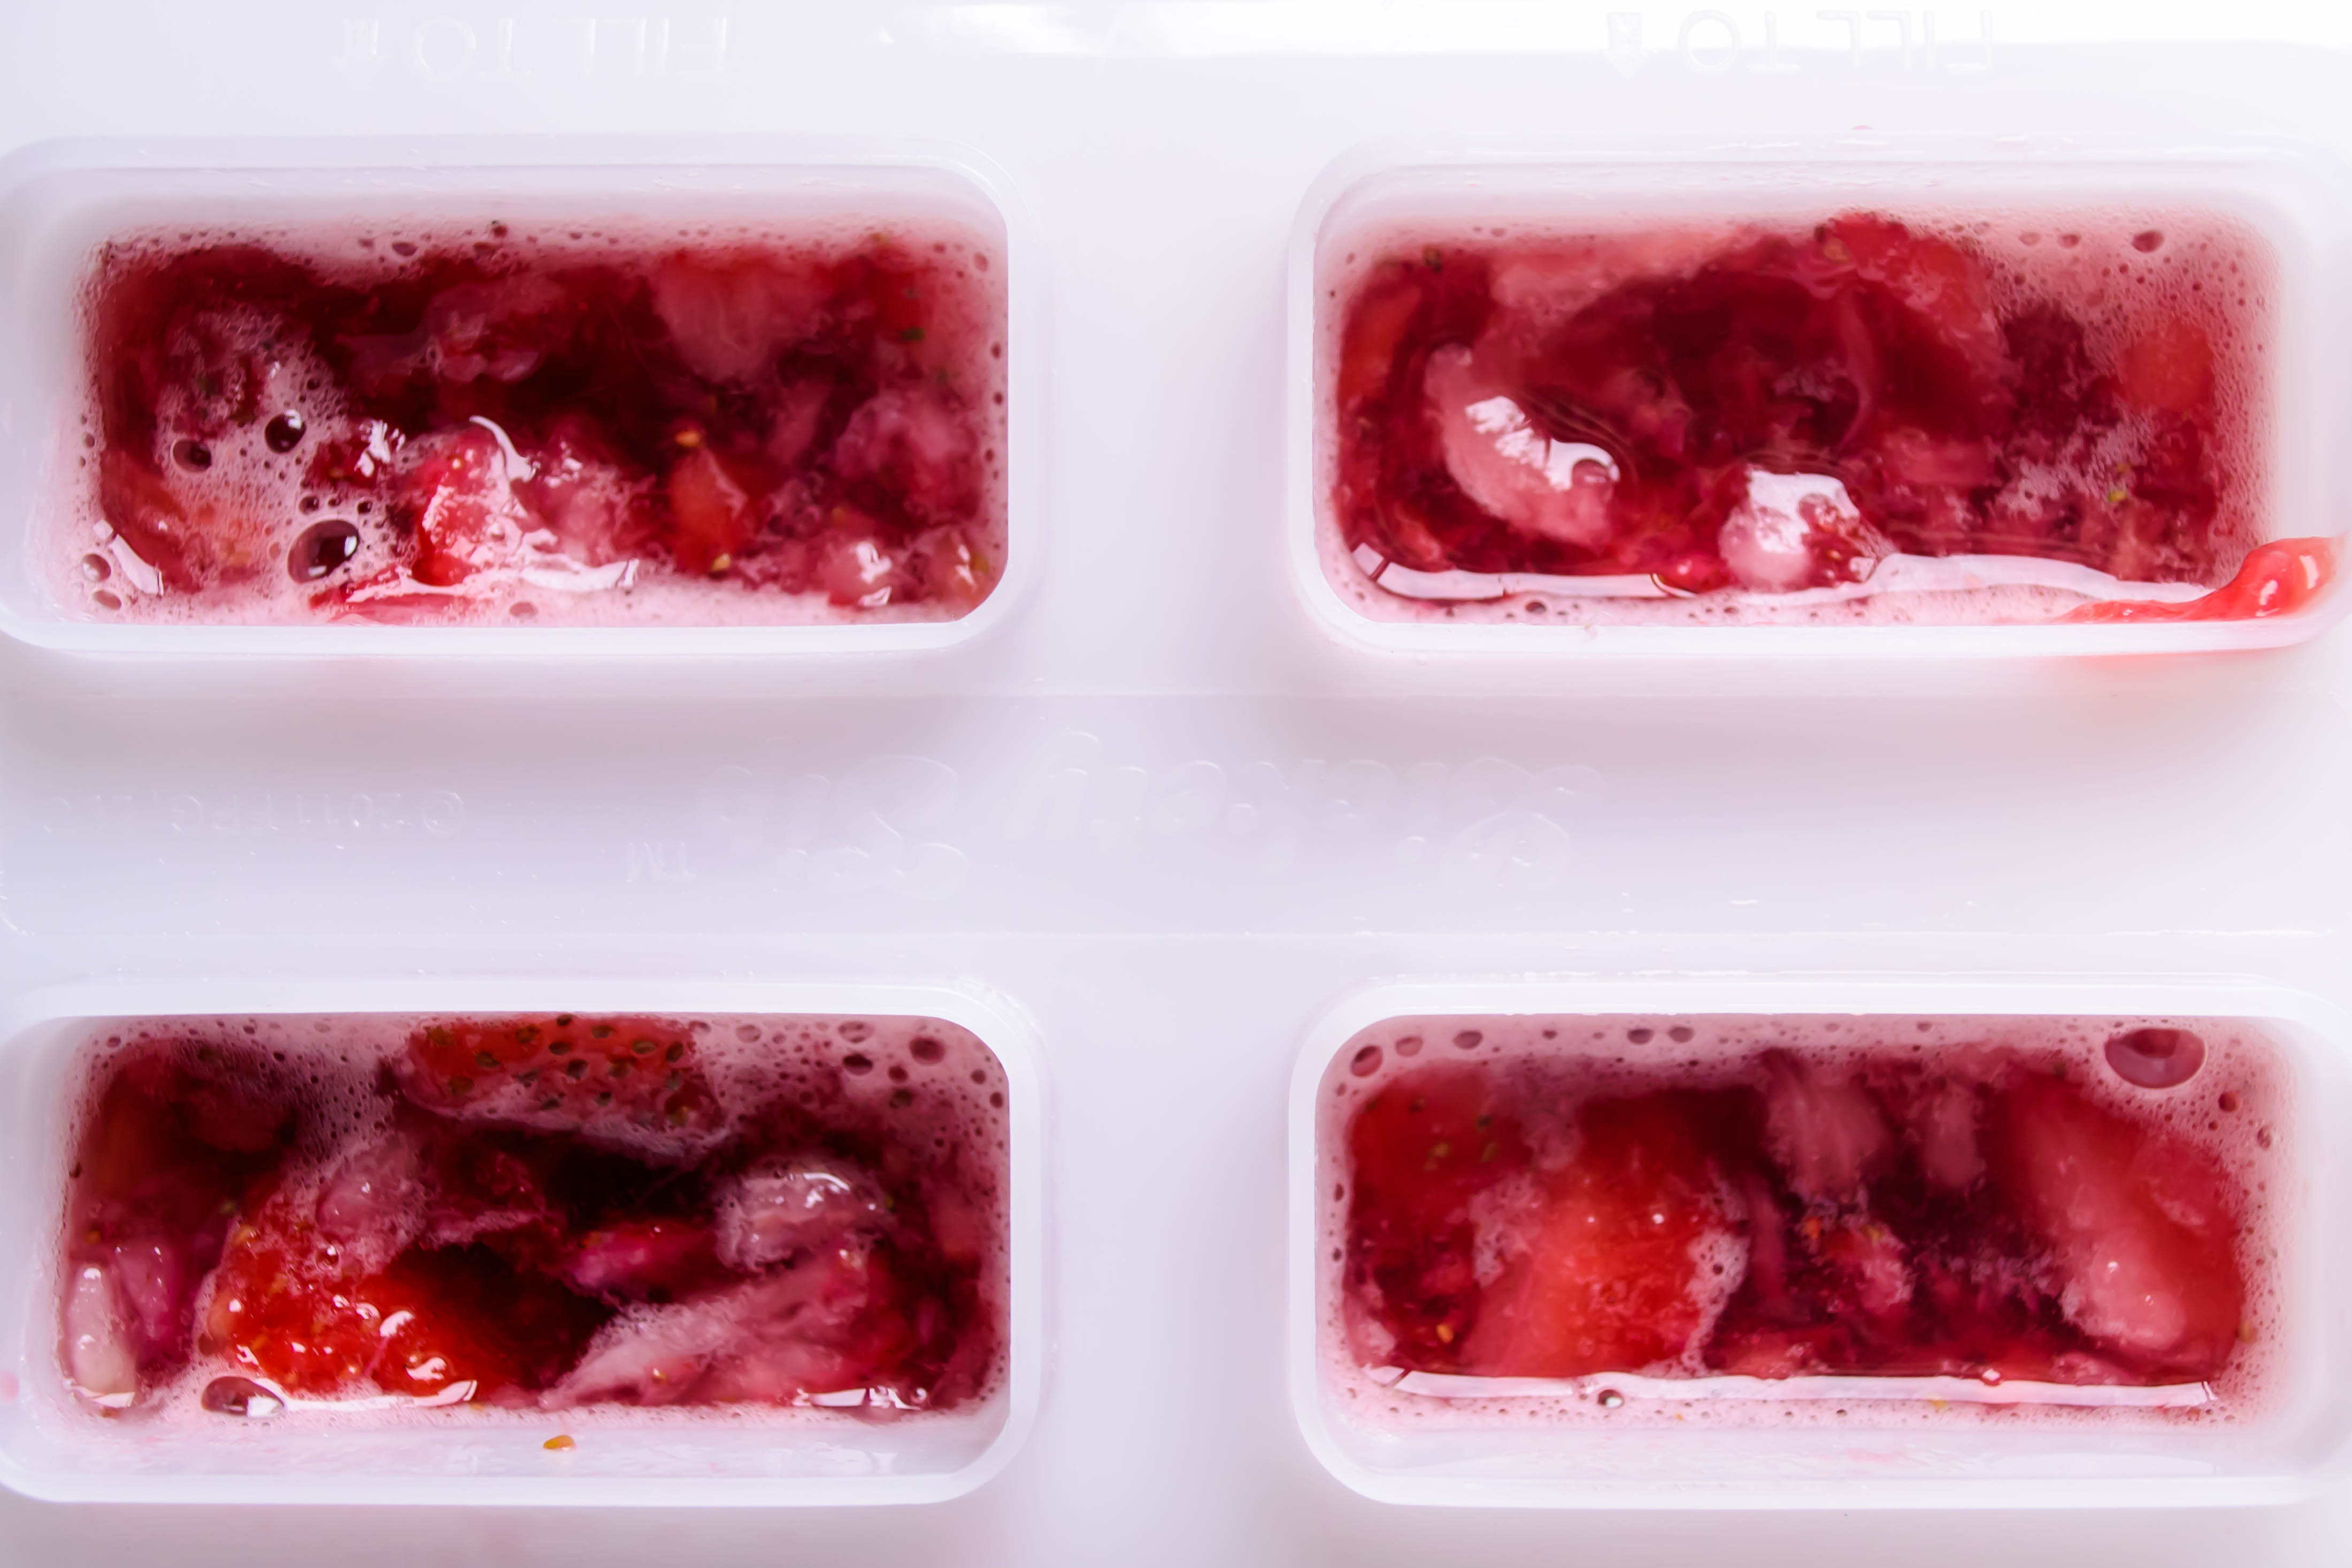 First, let’s talk casual, fun, surprising: the popsicle. Red wine, orange juice, tiny, tooth-freezing pockets of strawberry, frozen together in a shape that will pull you back to childhood even while the ingredients remain oh so adult. Once they are poured and put up, you have a secret cache of popsicles ready for your next girls’ night, or barbeque, or just a late afternoon so oppressing that standing barefoot on the kitchen’s tile floor just doesn’t cut it anymore.
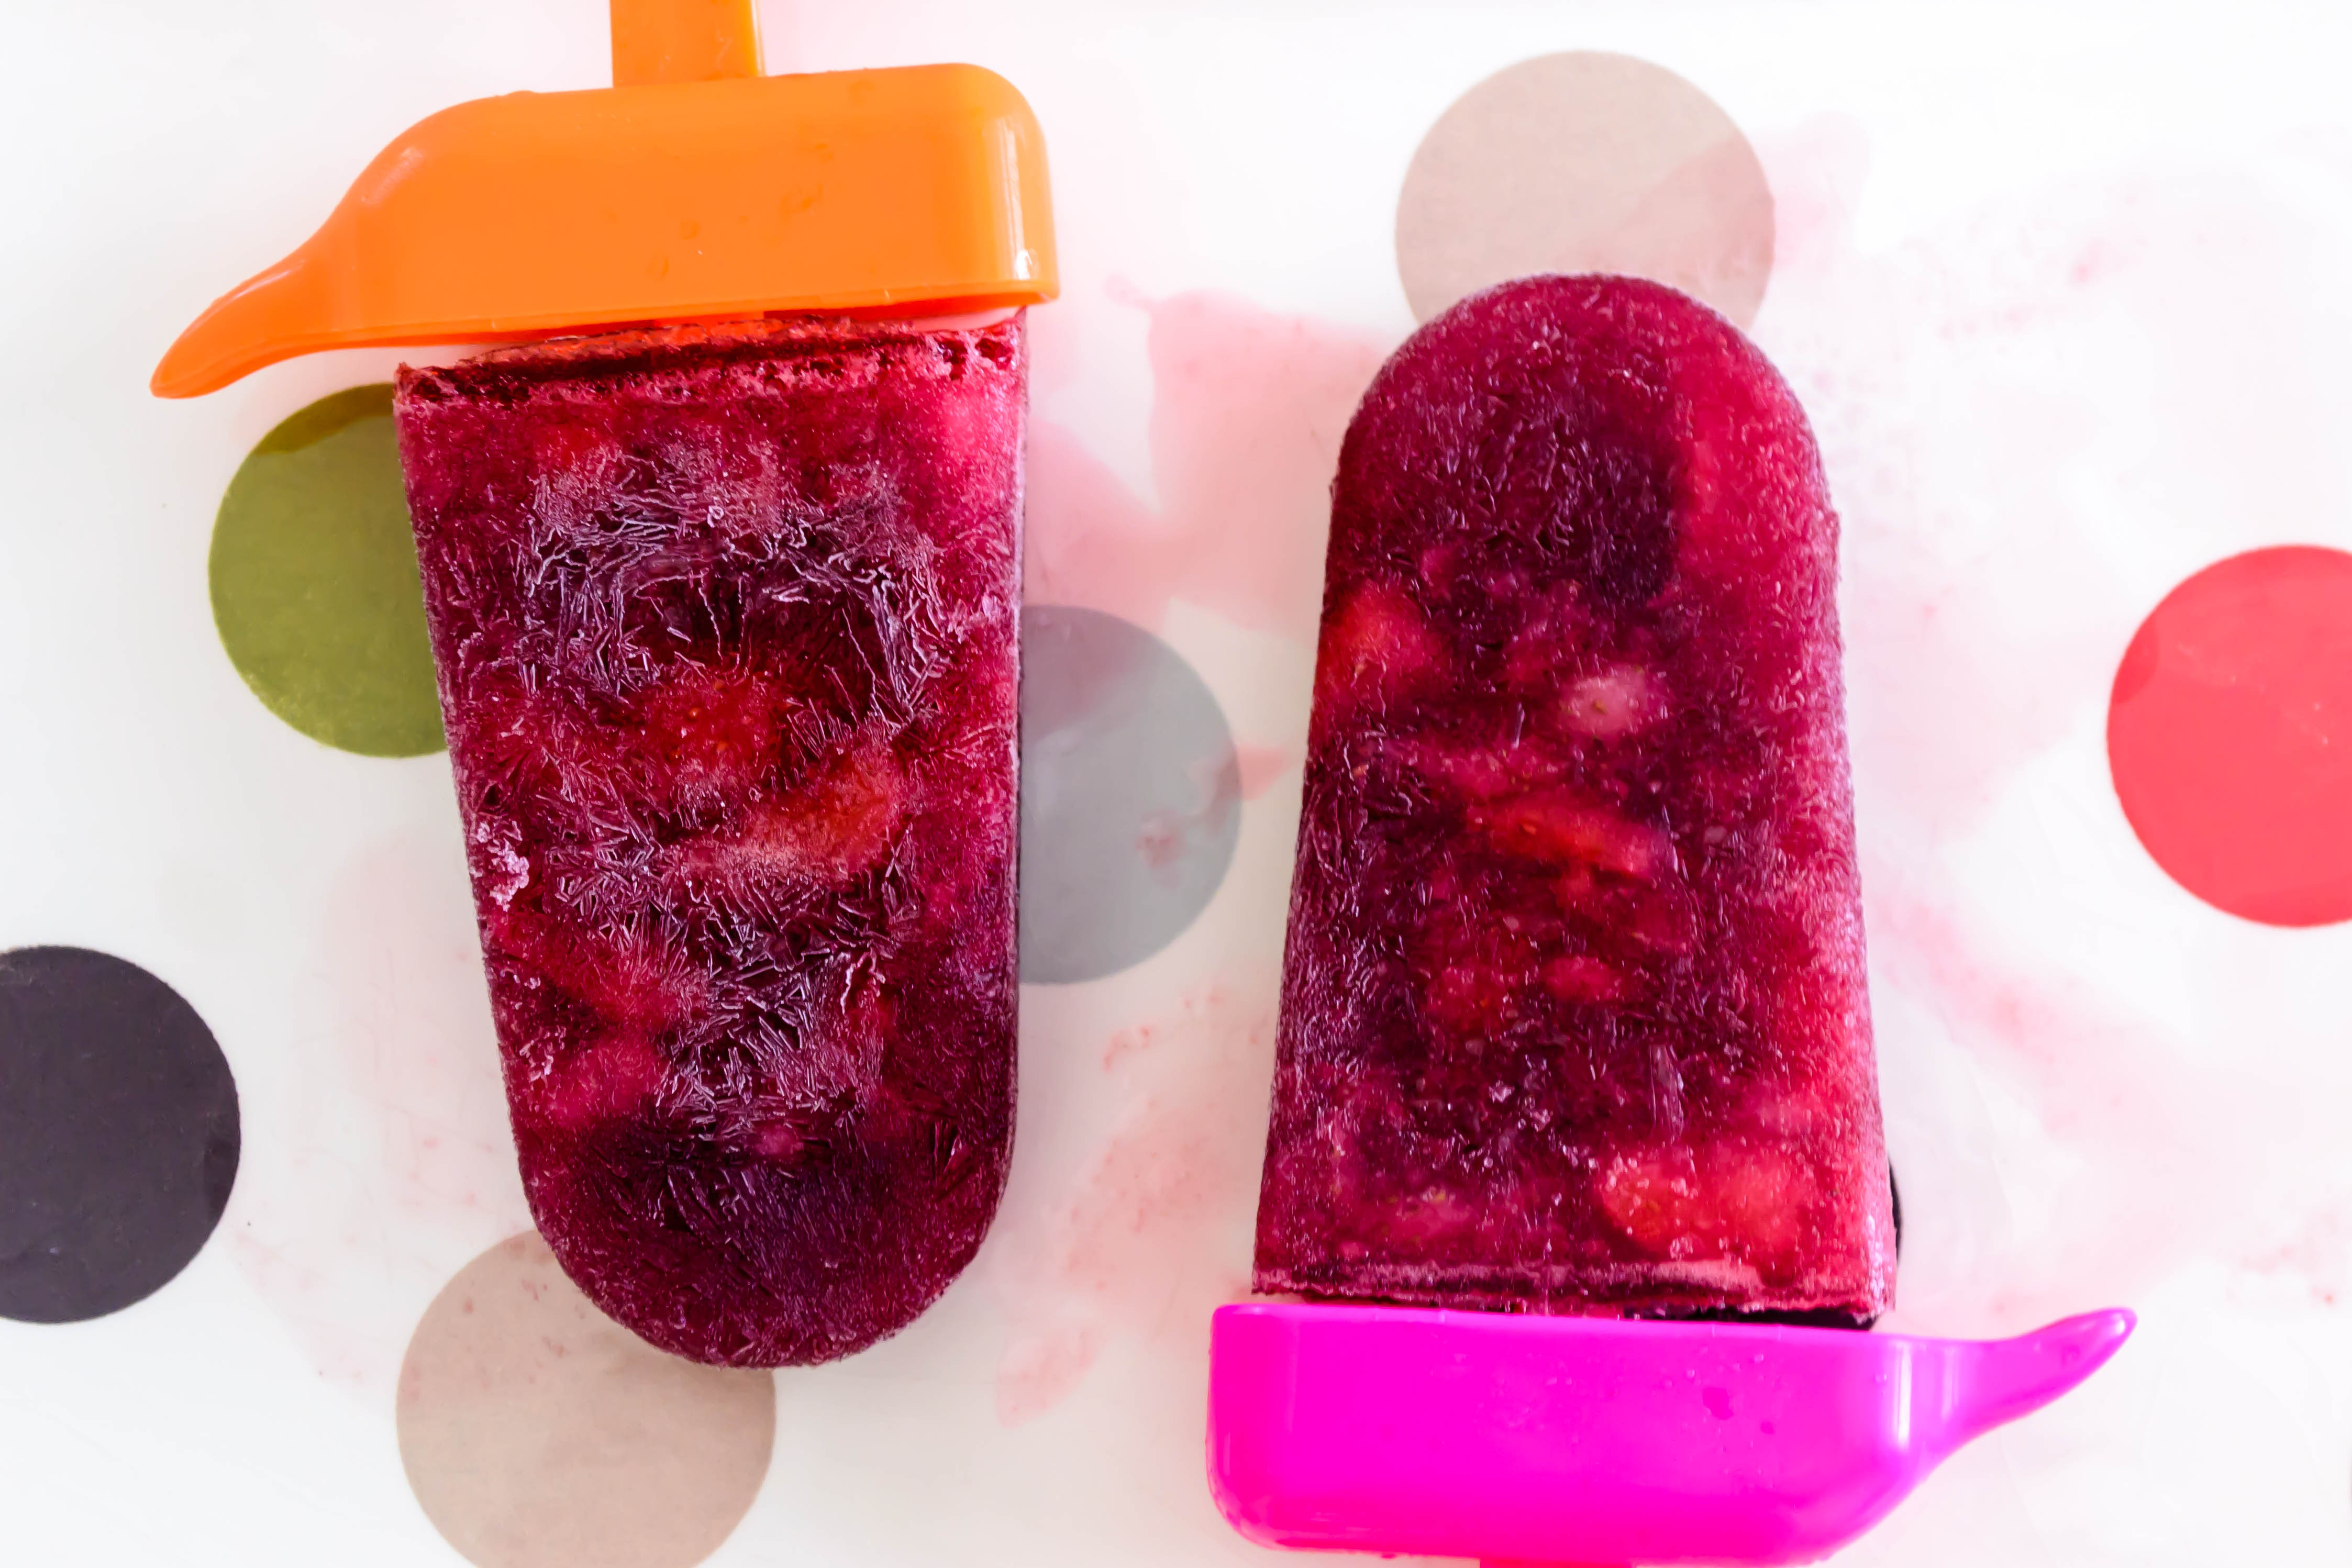
 Our second preparation is a bit more elegant, a bit more dinner party, but still almost as easy: the granita. Granitas are Italian desserts related to sorbets, except that they have a crystalline texture more like snow or shave ice. Here, instead of spooning the sangria mixture into popsicle molds, it gets poured into a wide, shallow vessel, like a 9×13 baking dish, and again, moved to the freezer. After a few hours, though, you pull it out and scrape through it with a fork. This prevents the liquid from freezing into a solid mass. After this initial freezing period, return once every few hours and scrape again, agitating the mixture into separated crystals (and strawberry chunks). Several of these scraping sessions in, your liquid will be frozen and clustered in deep red flurries: a mound of feathery ice ready to be scooped and crunched after dinner or, if you prefer, perhaps even before. That’s what your favorite patio table is for, right?
Note: these are great options for a stay-home dessert, but if you are traveling or feeding them to guests who will be traveling, be cautious about the serving size: unlike warm desserts, where you simmer off most of the alcohol, this is basically a frozen bottle of wine with some flavorings added in – the majority of the alcohol content is still there.
Frozen Sangria
Why, I thought, as a rivulet of sweat coursed from neck to waist, do I insist on frying in the summer? The instant read thermometer I was using to check the temperature of the oil sat next to the stove, registering 91F. Normal people wait for summer and then anxiously stuff themselves on grilled meats, fresh salads, wedges of cool melon. Foods that don’t make your back bead up. But here I am, on my first real day of summer vacation, celebrating by standing over a pot of shimmering heat, making pakoras for lunch.
 Maybe it’s a cultural thing. I don’t mean the pakoras. I mean frying. Fried foods are a treat frequently enjoyed during the summer months; Americans + carnivals or county fairs = frying anything we can think of. Depending on where you are in the country, corn dogs, funnel cake, hush puppies, twinkies, tortillas, even oreos, all get dunked into vats of hot oil and floated cautiously around until they transform into variously shaped clumps of deep, crispy gold.
So to bring summer traditions like sweating and eating fatty foods and looking at award-winning livestock and riding in twirling cars where the metal shrieks and you smell the grease with every turn into my own kitchen, I’m making pakoras for a weekday lunch?
Partly. But not all.
I’ve talked before about my friend Ph., who even has a whole category on this little site dedicated to her (Phoebe-Phriendly, if you’re interested). Ph. is gluten-intolerant, can’t eat dairy or tree nuts, and is no longer able to process corn or rice. This makes cooking for her a challenge. However, she is one of the reasons I started stretching my food boundaries and knowledge; we became close friends in graduate school, and I wanted to be able to make food that she could eat! We got into a conversation in the comments of her blog the other day, and I brought up pakoras because she was playing with garbanzo bean flour. She had never made them, so we decided I should come up with a recipe she could use. That’s where you, my friends, luck out.
 Pakoras are an Indian street food: assorted vegetables (or paneer, or bread, or apparently sometimes even chicken) dredged in a well-spiced batter of besan or gram flour (which is made with garbanzo beans) and water. I added some baking powder to my mix as well, for fluff and lightness. Most often the vegetables are cut into manageable pieces and dipped into the batter individually before they are fried, resulting in something I’ve been thinking about as essentially an Indian spiced tempura.* Sometimes, though, they are cut into smaller pieces, tossed together in the batter, then levered carefully into the oil in chunky mixed fritters. I chose the first of these methods for our lunch, so we could have the fun of mixing and matching which vegetables we crunched our way through. We chose cauliflower, potatoes, and onions. My favorite ended up being the cauliflower, while N. couldn’t get enough of the puffy potato slices.
 Though they are eaten year round (depending on where you are), I discovered during my research about this delightful little snack that they are particularly popular during monsoon season, dipped into or sauced with a variety of chutneys, and served alongside a cup of chai. This makes sense – a warm treat to enjoy when it is wet and booming with storms outside – and though the weather in my California kitchen is far (far, far, far) from identical, it is currently monsoon season in India, so it turns out this was, after all, a timely choice.
We had ours with a cilantro mint chutney – lightly spicy, fresh, grassy from the herbs, and bright from the addition of lime juice. I’ve included that recipe here as well.
 Pakoras are best served as hot as your mouth can handle them. They are crispiest that way. As they sit, the batter loses its magnificent crunch. They are acceptable reheated in a 400F oven the next day, but, as with all fried foods (with perhaps the magical exception of a really good fried chicken), they are best eaten immediately.


* I realize tempura is quite different: rice flour is typical, for one, and the liquid used is often carbonated water to make the batter even lighter. But the essentials – vegetables coated in batter and fried – are the same.
Pakoras are best consumed as soon as they are cool enough for your mouth to handle. As they sit, the batter gets soggy. It’s still tasty, but not as triumphantly crunchy.
Let’s talk about your spice cabinet. No? Okay, then let’s talk about mine. I really started cooking when I moved to Oregon, and that first Christmas, coming back home to Northern California after three months of what seemed like non-stop rain, the gift I wanted more than anything else was a spice rack. This, I was sure, would be the essential catalyst in my longed-for transition from college-graduate-experimental-cook to full-scale domestic goddess. Mom and I went to kitchen store after kitchen store, looking for the right one. It needed to hang, so it couldn’t be too big. It had to have a fair number of bottles, but I wanted them empty, not filled, because I wanted to choose my own spices. We finally found it in Cost Plus World Market, which was convenient, because it was immediately adjacent to their spice selection. We picked out ten or twelve of the usual suspects, and then Mom said “okay, now turn around while I put it in the cart, and forget what you saw here,” which has, since the days of Santa Claus, always been our funny way of buying presents for each other in full view of the giftee.
 This little spice rack worked fine, and hung proudly from a nail above my stove, until my spice requirements exceeded the twelve little bottles the shelves would hold. Suddenly whole AND ground cumin were necessary. Tumeric and cayenne and cream of tartar and even the dreaded pre-mixed pumpkin pie spice found their way into my kitchen and demanded homes.
So I’ve ended up with something I am going to guess looks familiar to many of you:
 This is not a good system. There, I said it. It’s just not! It holds the whole collection nicely, but it’s dark back there, and things fall over, and sometimes I don’t feel like digging around to see if I have any poultry seasoning, and then it’s Thanksgiving and I’m in a dark, cranky place and I think “screw this noise!” and buy a new bottle. So then I have four. What I really need, what I covet and dream about, is something like Aarti’s magnetic spice wall.
In the absence of space or motivation to build something that fancy, though, I stick with my system. Every once in a while, I summon the courage and the patience to investigate the dark reaches of the cabinet, to get a sense of what’s in there, what needs replacing, and what deserves a space in my weekly menu. The early days of summer are a good time to do this, because they offer a prime opportunity to make a smoky, spicy, aromatic rub for grilling.

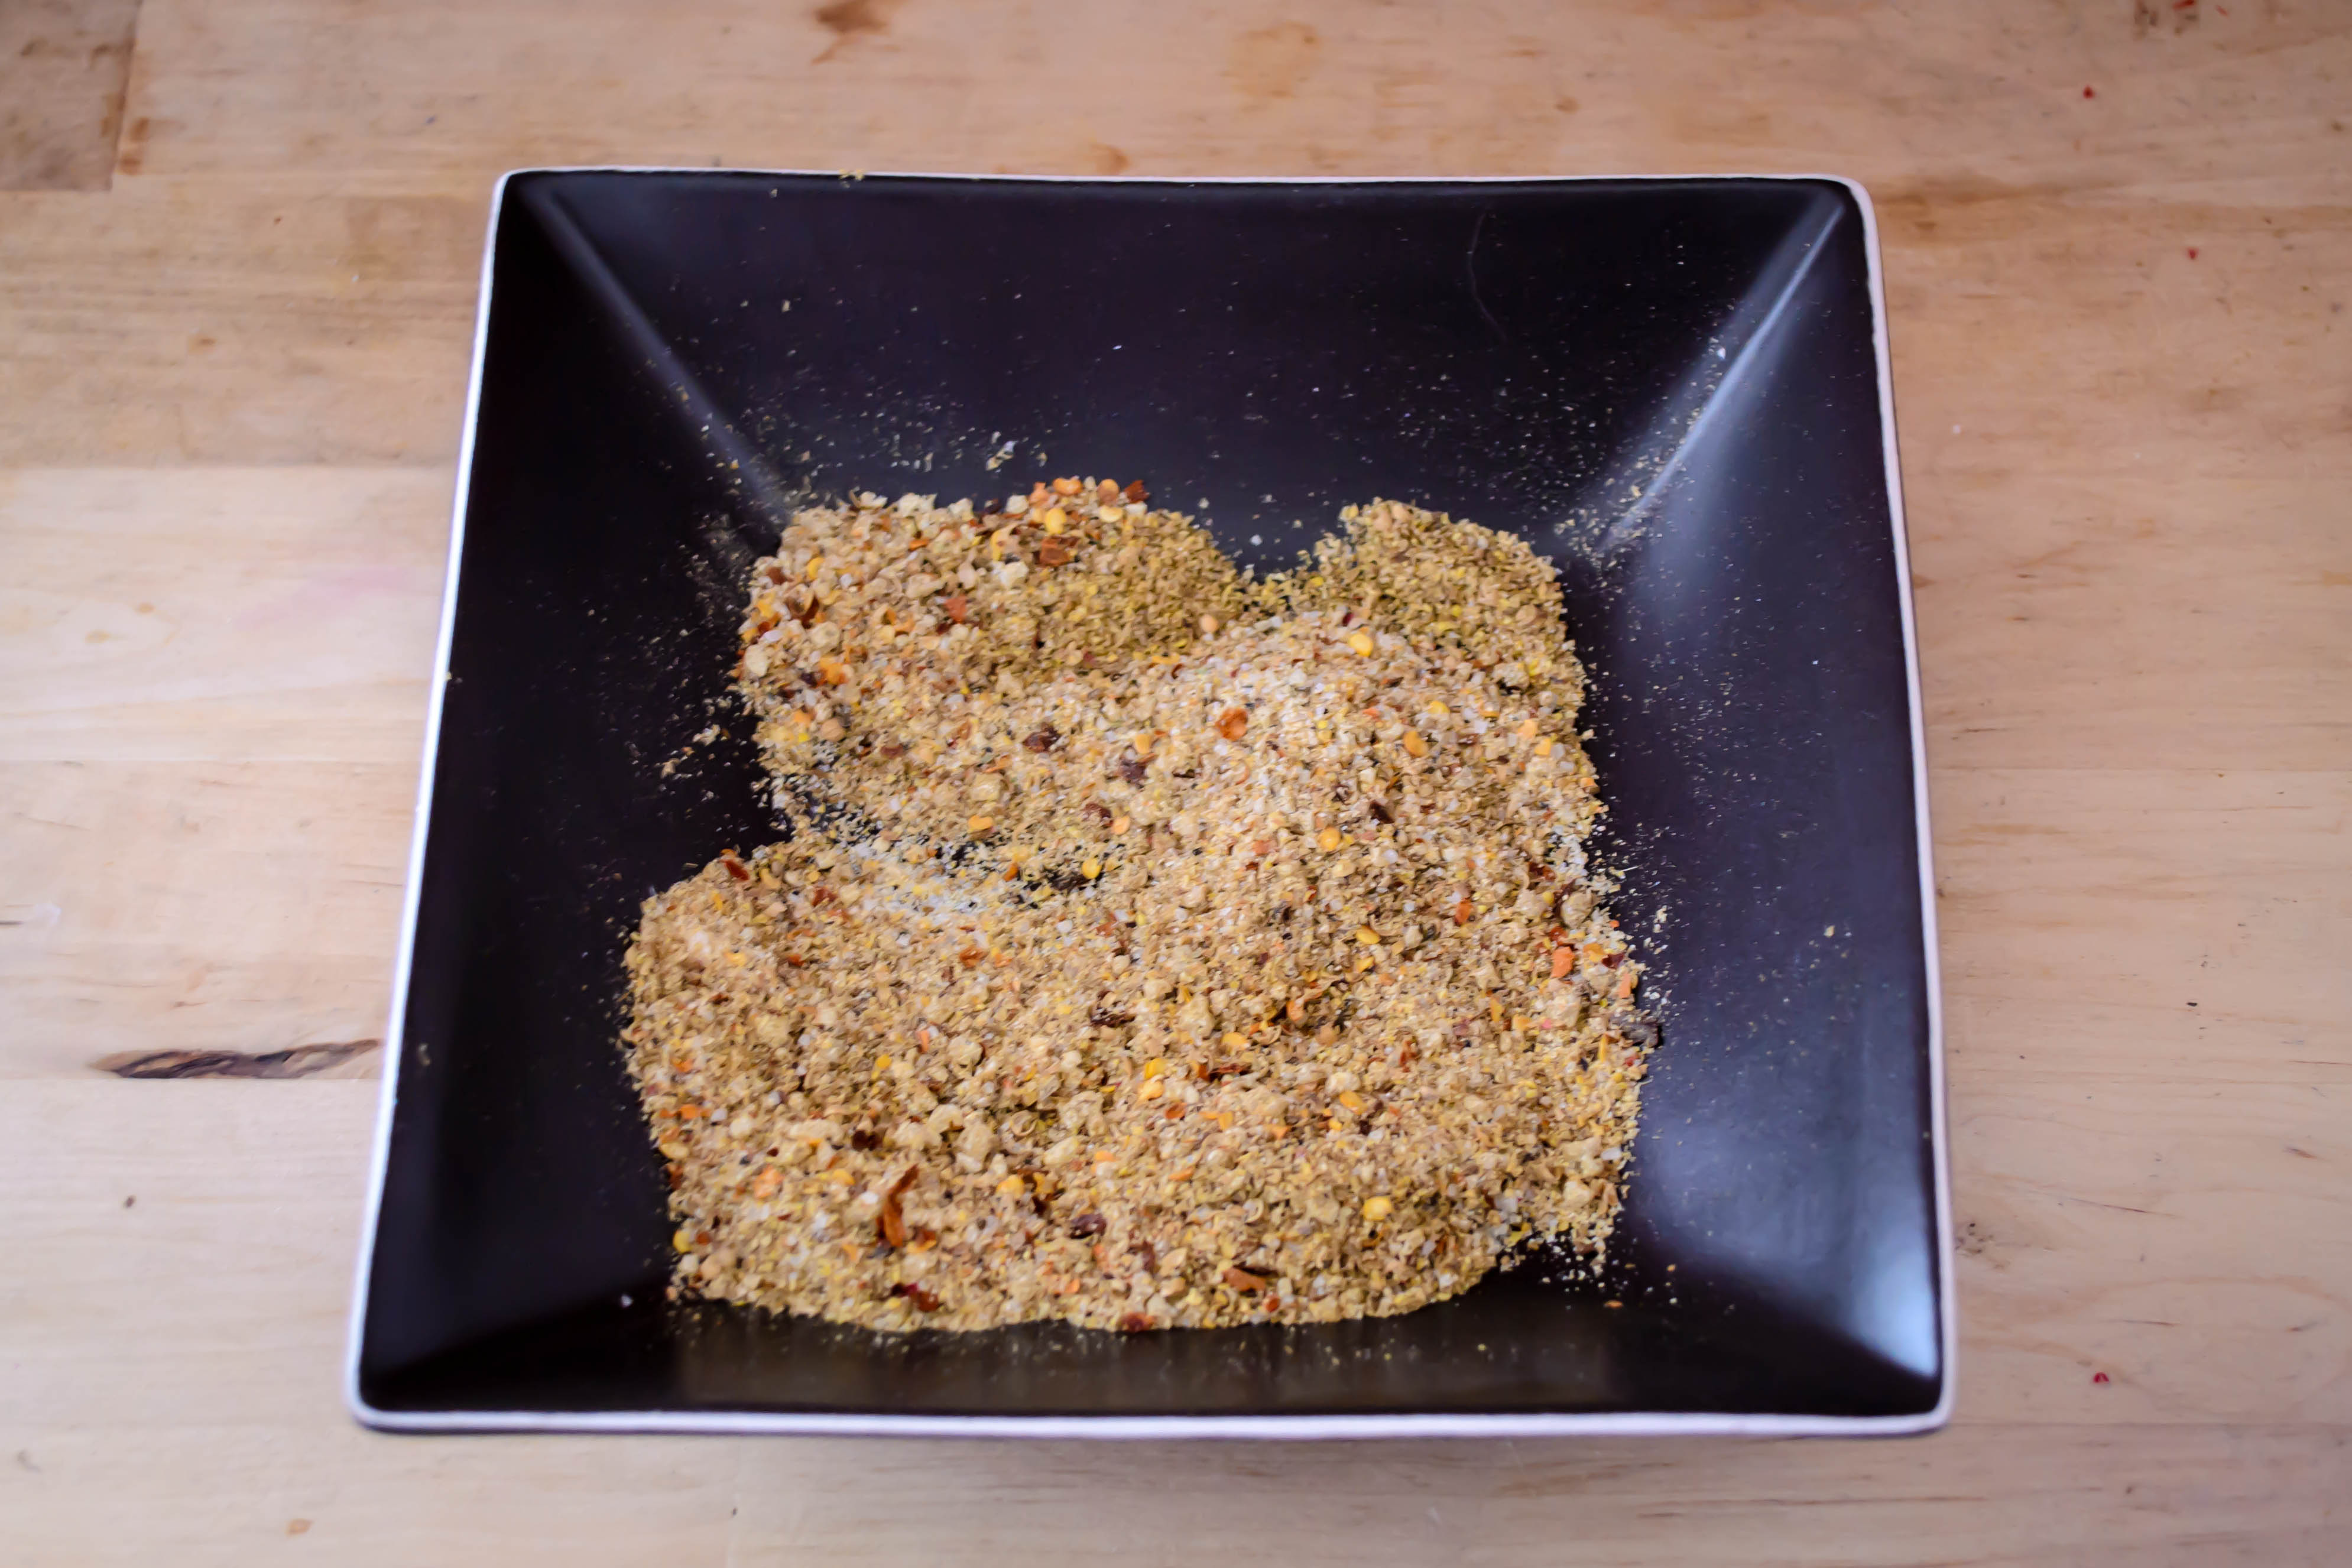
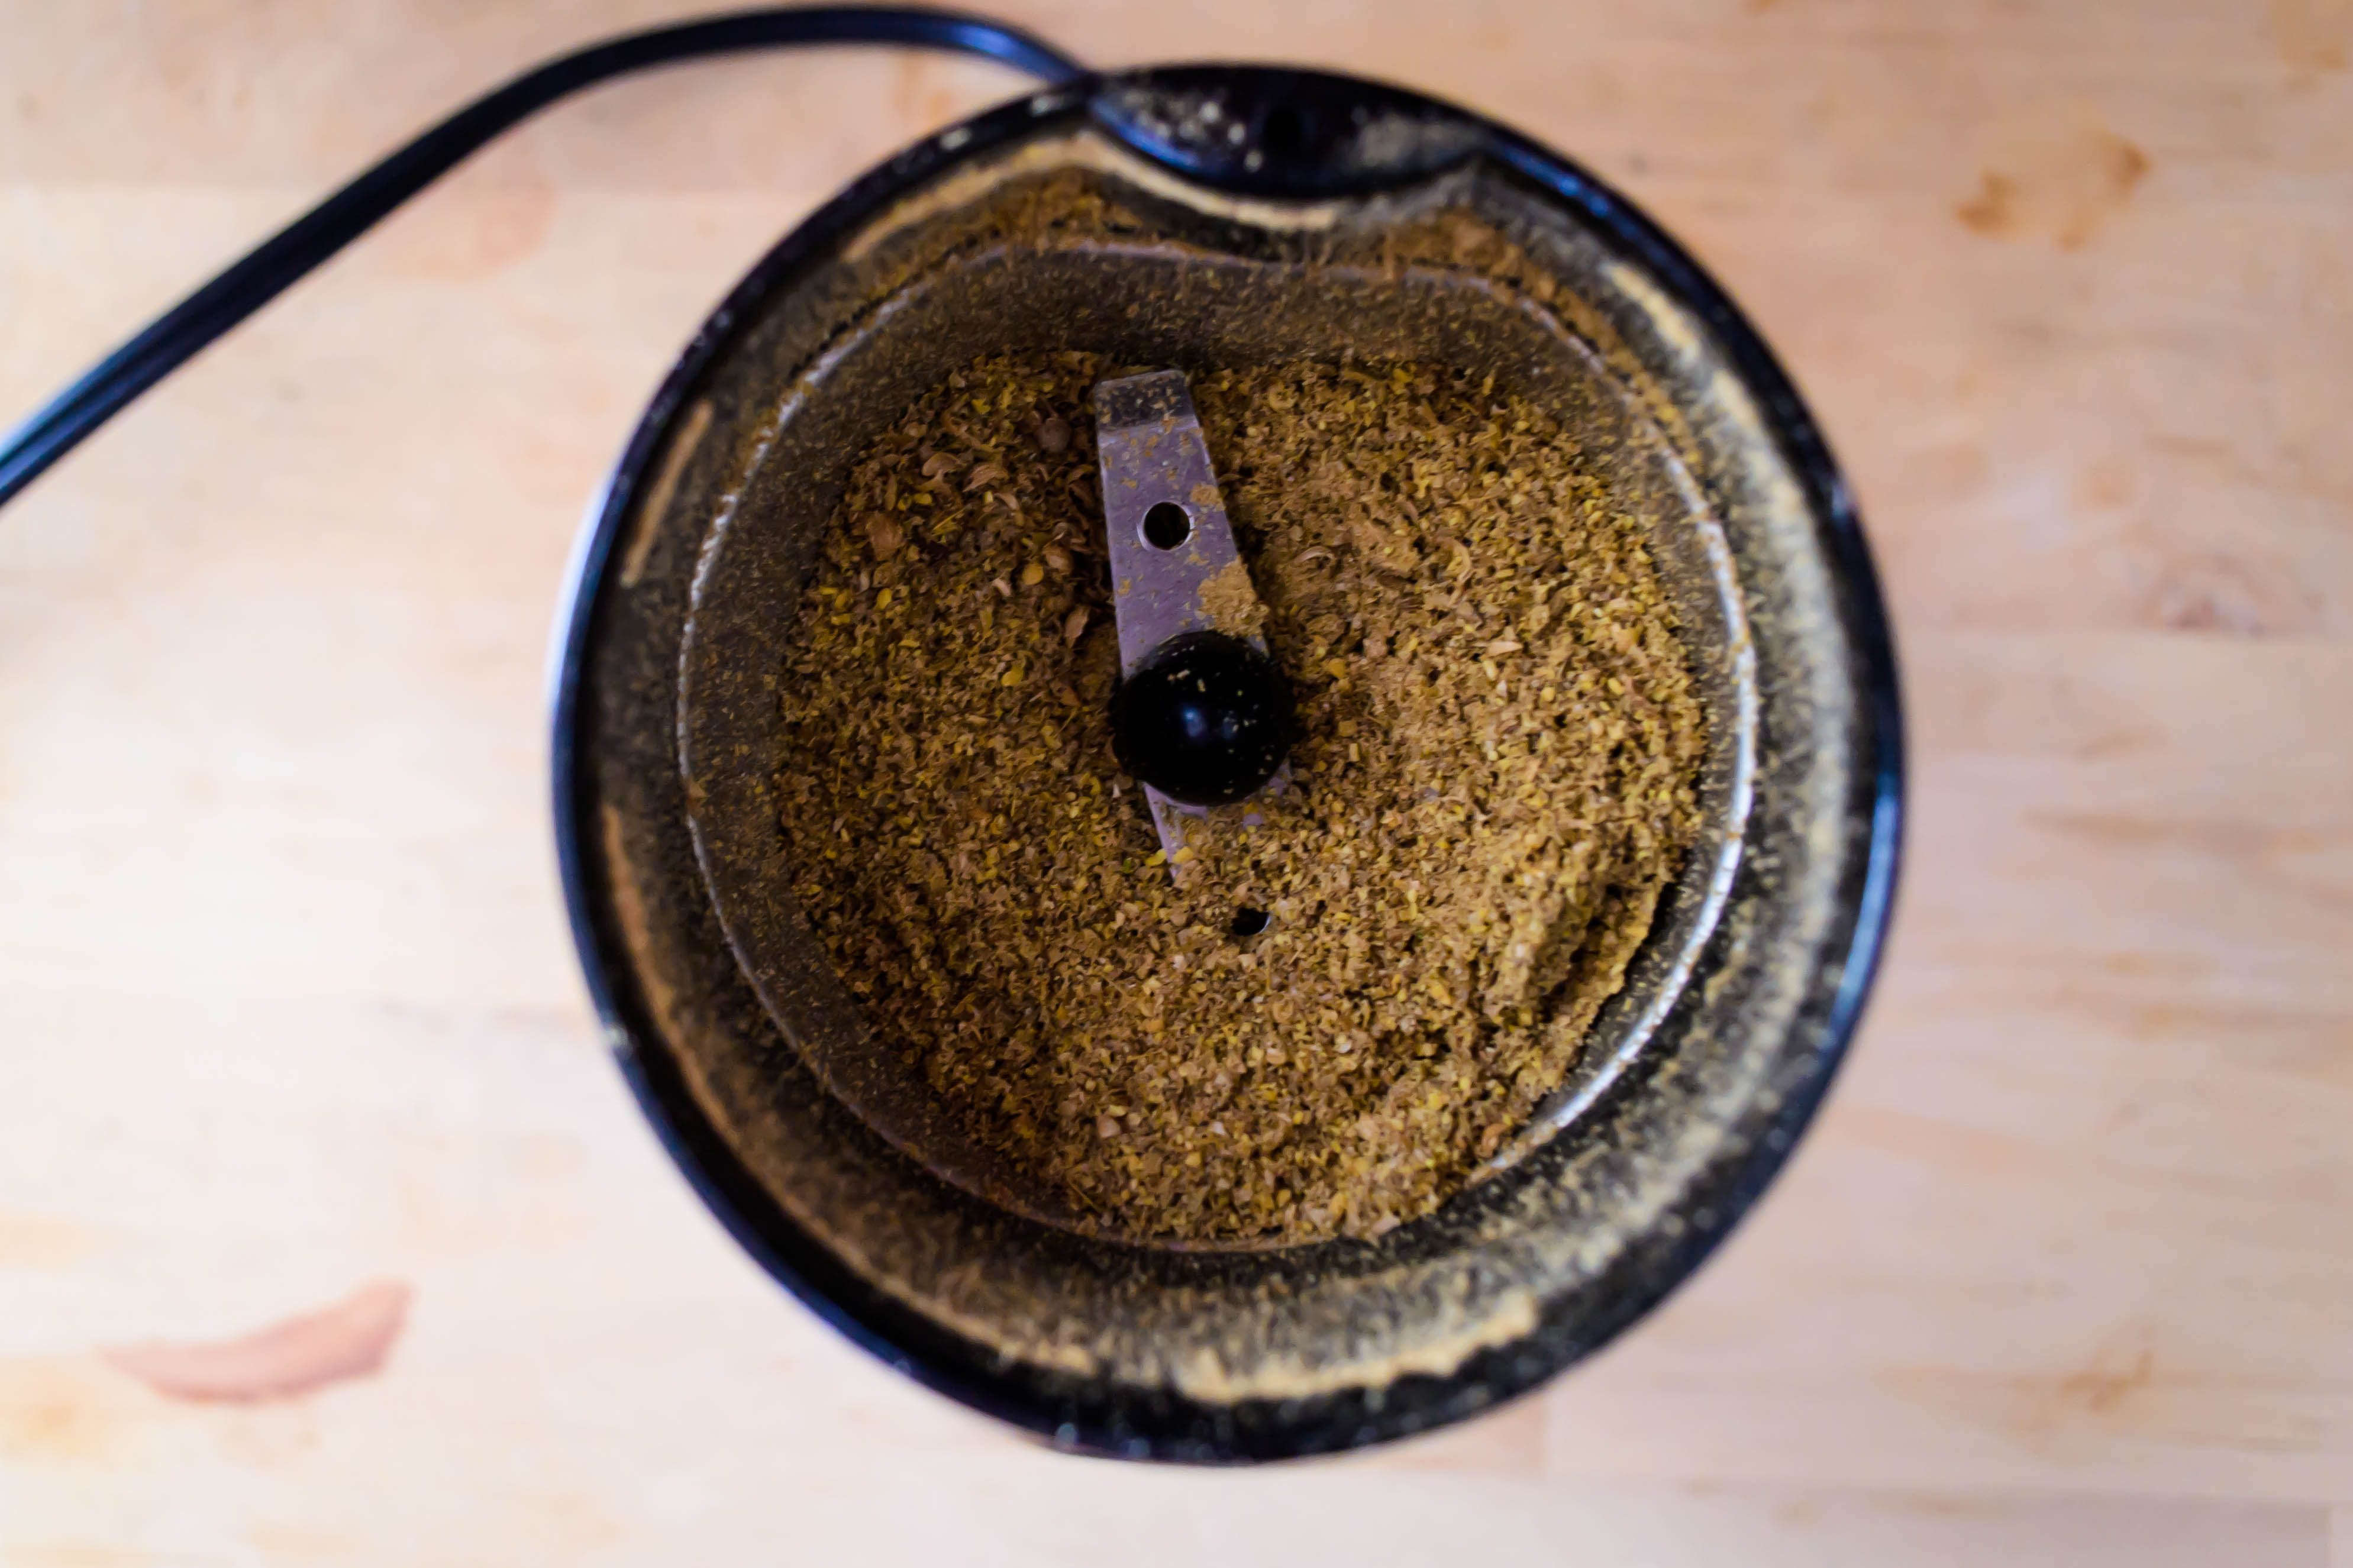 I started with a recipe from Fine Cooking originally designed for beer can chicken, and then I tweaked and adjusted and adapted for what was, as you might have guessed, in my spice collection. It’s got cumin, it’s got crushed red pepper, it’s loaded with garlic powder and mustard seeds and sea salt and just a hint of ginger for an intriguing and different kind of heat.
 This is a tasty rub for grilled meat, obviously (we like it for chicken, patted on before a liberal slather of equal parts Dijon mustard and apricot jam), but I think it would also be great on slabs of pressed tofu, or buttered corn, or potato wedges (you make your steak fries on the grill in the summer, right?). And if you were really feeling adventurous, you might even add some to a light, lemony vinaigrette to carry the flavors through your side salad.
 This recipe makes enough for several applications, which means you’ll have enough to last part of the summer. It keeps well in a sealed zip top bag. And in between grilling, you can just store it… in… your spice cabinet. Oh. Well, just jam it in at the front, for easy access. Maybe it will help you forget the
 mess nightmare treasure trove behind it. Plus, it’s got so many tasty flavors in it, you surely won’t need anything else for the rest of the summer, right? Right.
 Happy grilling!
I talk a lot on this blog about myself. Today, I want to talk a little bit about my husband. Before I met him, N. did a study abroad program in London. He was there for six months, and by “there” I mean taking classes in London, but also zipping around England and then parts of Europe with a speed that his British hosts looked upon with alarm (“what do you mean you’re going to York just for the weekend? That’s a 3-4 hour trip! It’s a whole holiday!” To which N., who grew up in a road-tripping family, would shrug and go anyway. Example: his family, when they lived in a suburb of Sacramento, California, thought nothing of jumping in the car to drive to Reno for the day. Once when his parents visited us in Oregon, we drove to Tillamook from Eugene via the coast to get ice cream and cow cookies at the Tillamook Cheese Factory, and then headed home in time for dinner).

N. is a little camera-shy.
Interestingly, and perhaps unfortunately, N.’s study abroad program took place shortly after some of the worst scares of mad cow disease in England. He was there in late 2002, and eating beef was a no-no. This meant, when I met him, that N. had some food issues. He wasn’t a picky eater – that’s not quite the right word. He was, let’s say, a particular eater. Beef, especially beef that wasn’t well-done, was out. The frightening potential consequences had been too drilled into his head. Lamb was too gamey. Pork was not his favorite. When I was trying to impress him with my rudimentary cooking skills when we first met (rudimentary is kind – the first time I tried to make him French toast for breakfast, the bread collapsed into over-soaked crumbles in my custard mixture. But we fried it up and ate it anyway – sweet scrambled eggs with bread bits – and he was either kind enough or smitten enough to pretend he liked it), we ate a lot of chicken breast.
N.’s willingness and preference when it comes to food has expanded and matured significantly since we’ve been together. Still, though, he is wary. When we lived in Oregon, we were lucky enough to find ourselves in Eugene, which is a bit of a hippie mecca. This meant we had a wide variety of vegetarian choices. Neither of us is vegetarian, but N. developed the habit of ordering veggie burgers when we went out to eat, since it was a safe bet. You didn’t have to worry about doneness, and many of the restaurants we frequented made their own patties instead of relying on something frozen from a box.
Even though we’ve been living in Los Angeles for almost a year now (can that be true?!), and we’ve done our share of restaurant investigating, we don’t have the favorites yet that we had in Eugene. Though we’ve found some delicious options, N. doesn’t have a go-to veggie burger yet. This week, therefore, I decided to make him one.
It always interests me, when a veggie burger is advertised as a homemade patty, to find out what its base is. A lot of meatless patties – especially the premade kind you find in the freezer section – are wheat based, which seems like a strange thing to put on a sandwich: a patty of pressed wheat between two pieces of bread made from wheat. Gluten-fest! But sometimes they are made from tempeh, and sometimes from beans, and we had a really tasty one once that I’m sure had shiitake mushrooms mixed into it, which contributed a fantastic texture I haven’t found again. 
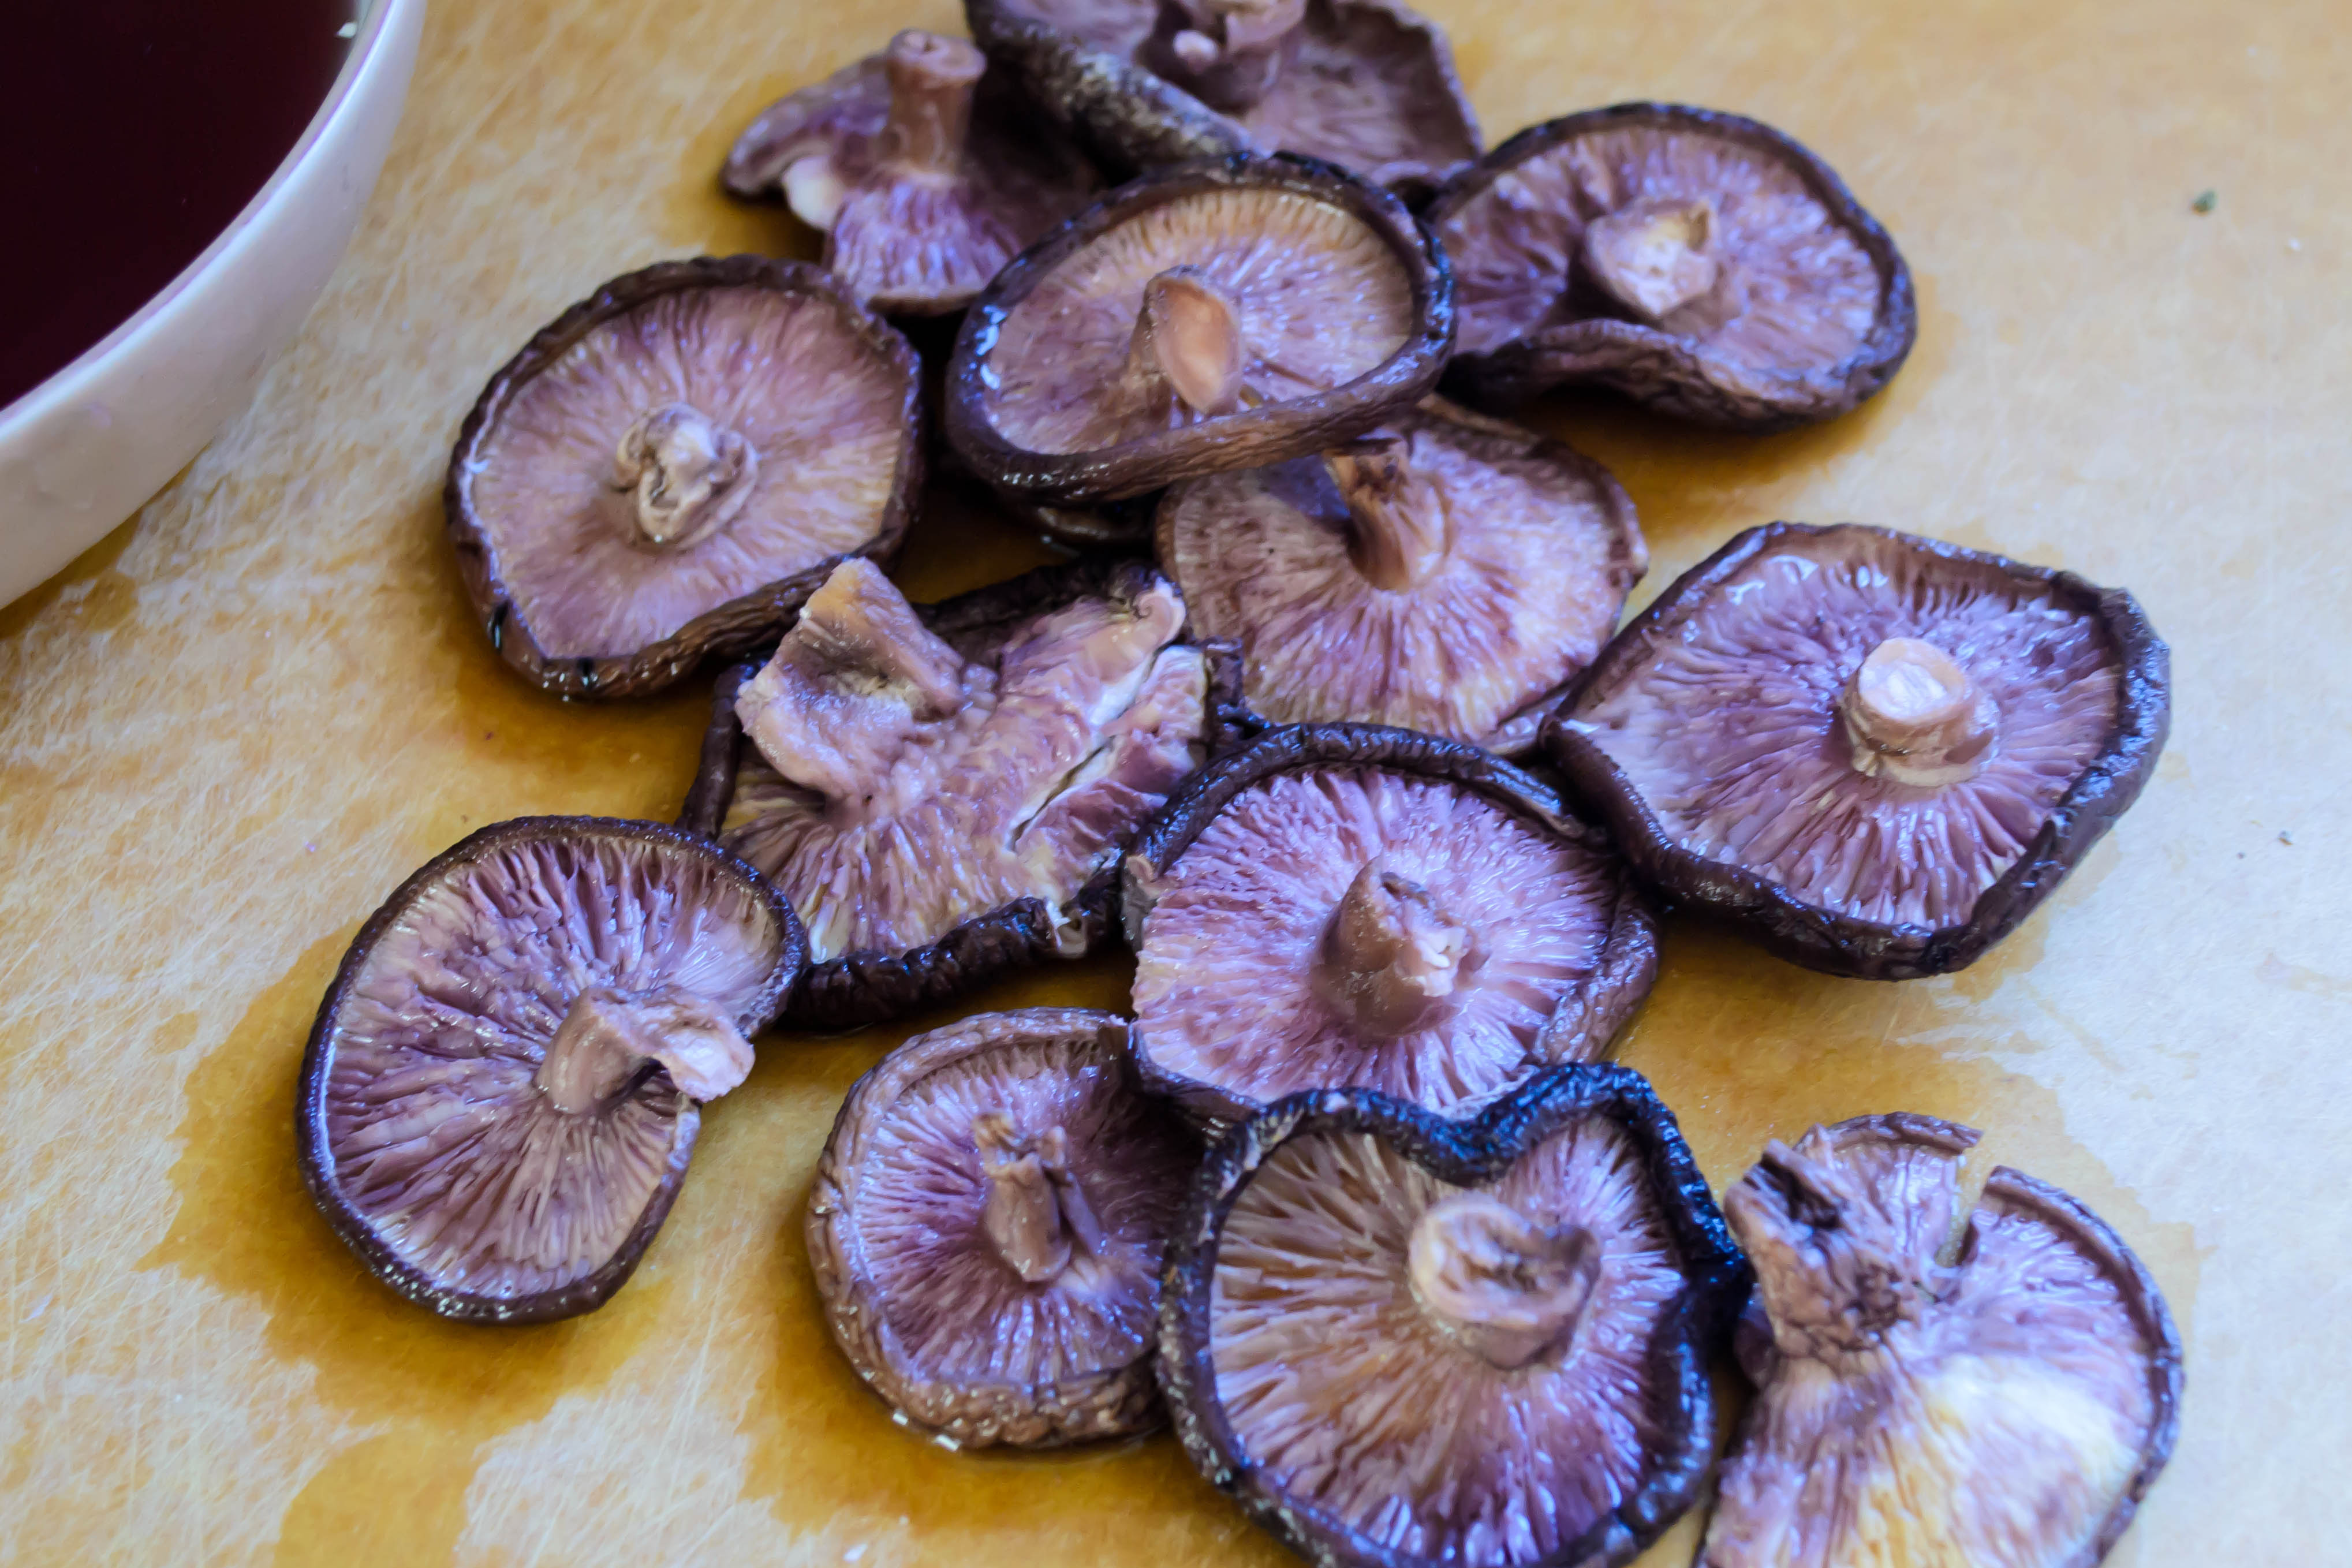 Taking this textural component as my must-have, I considered my pantry and spice cabinet, and cobbled together what turned out to be a delicious, filling patty made of brown rice, kidney beans, and reconstituted dried shiitake mushrooms. I used a mixture of red wine and hot water to reconstitute my mushrooms, which contributed to their deep, earthy flavor. You could use chicken or vegetable broth if you prefer, or just hot water.
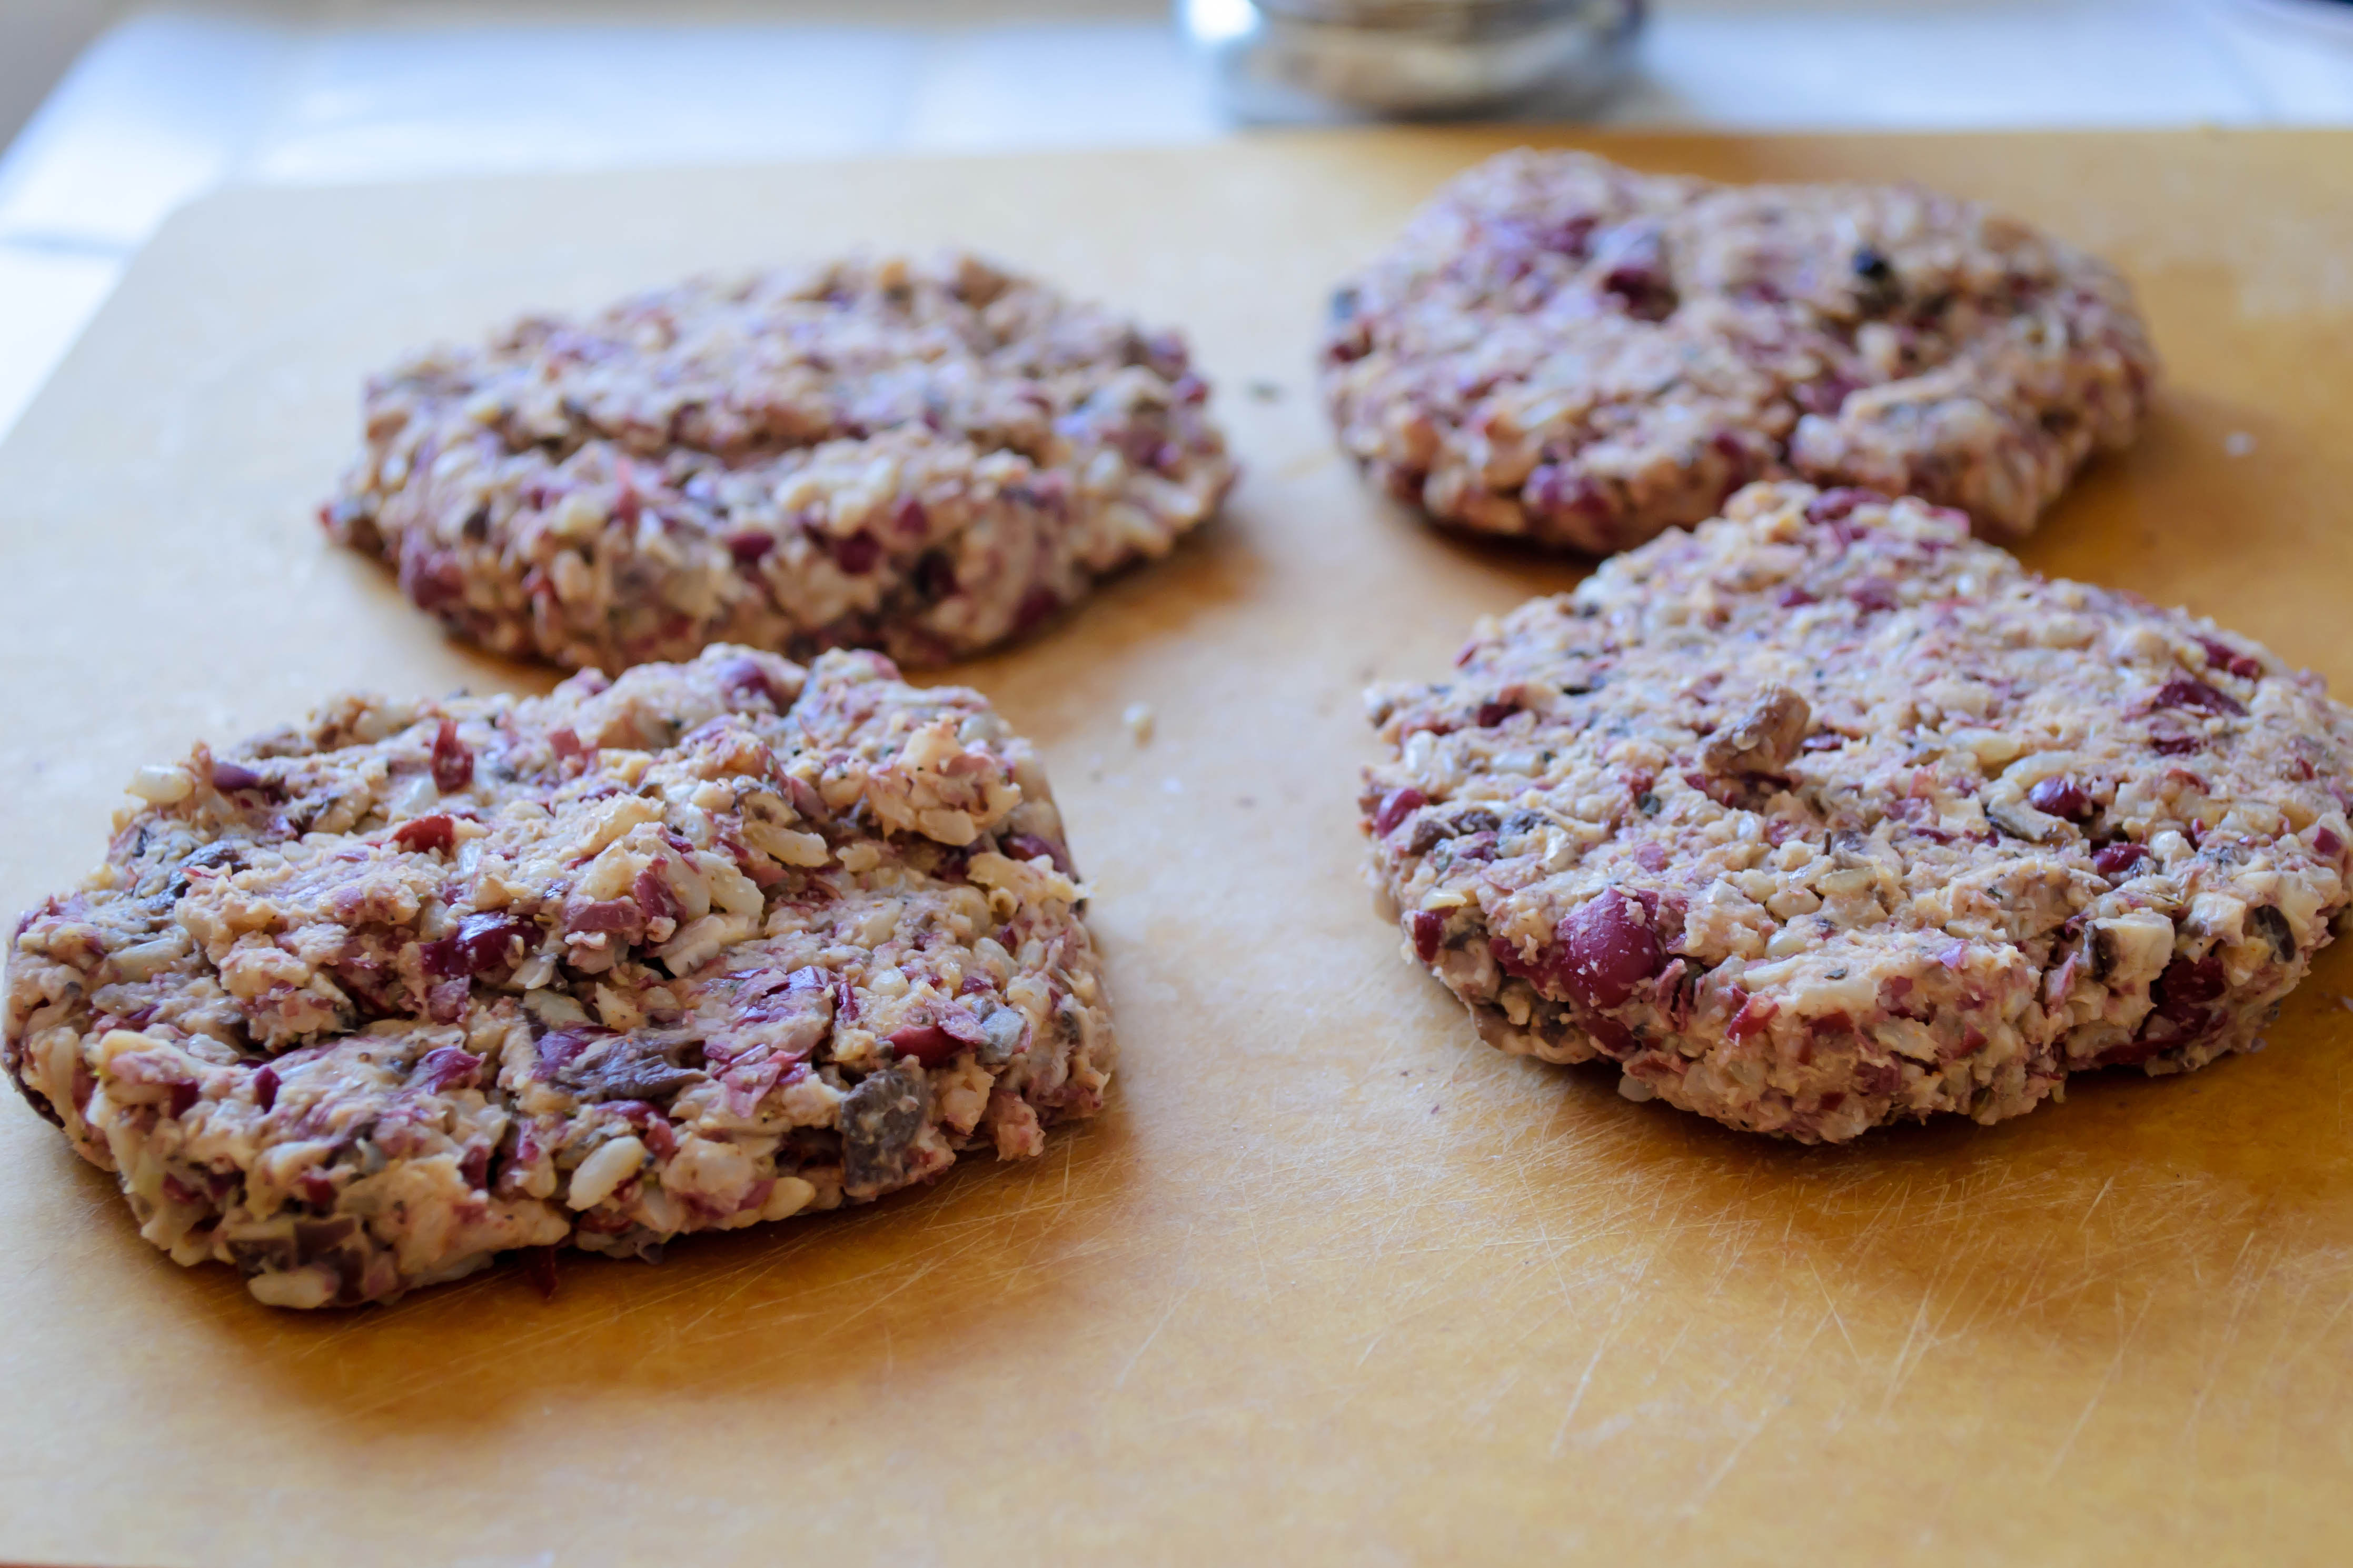
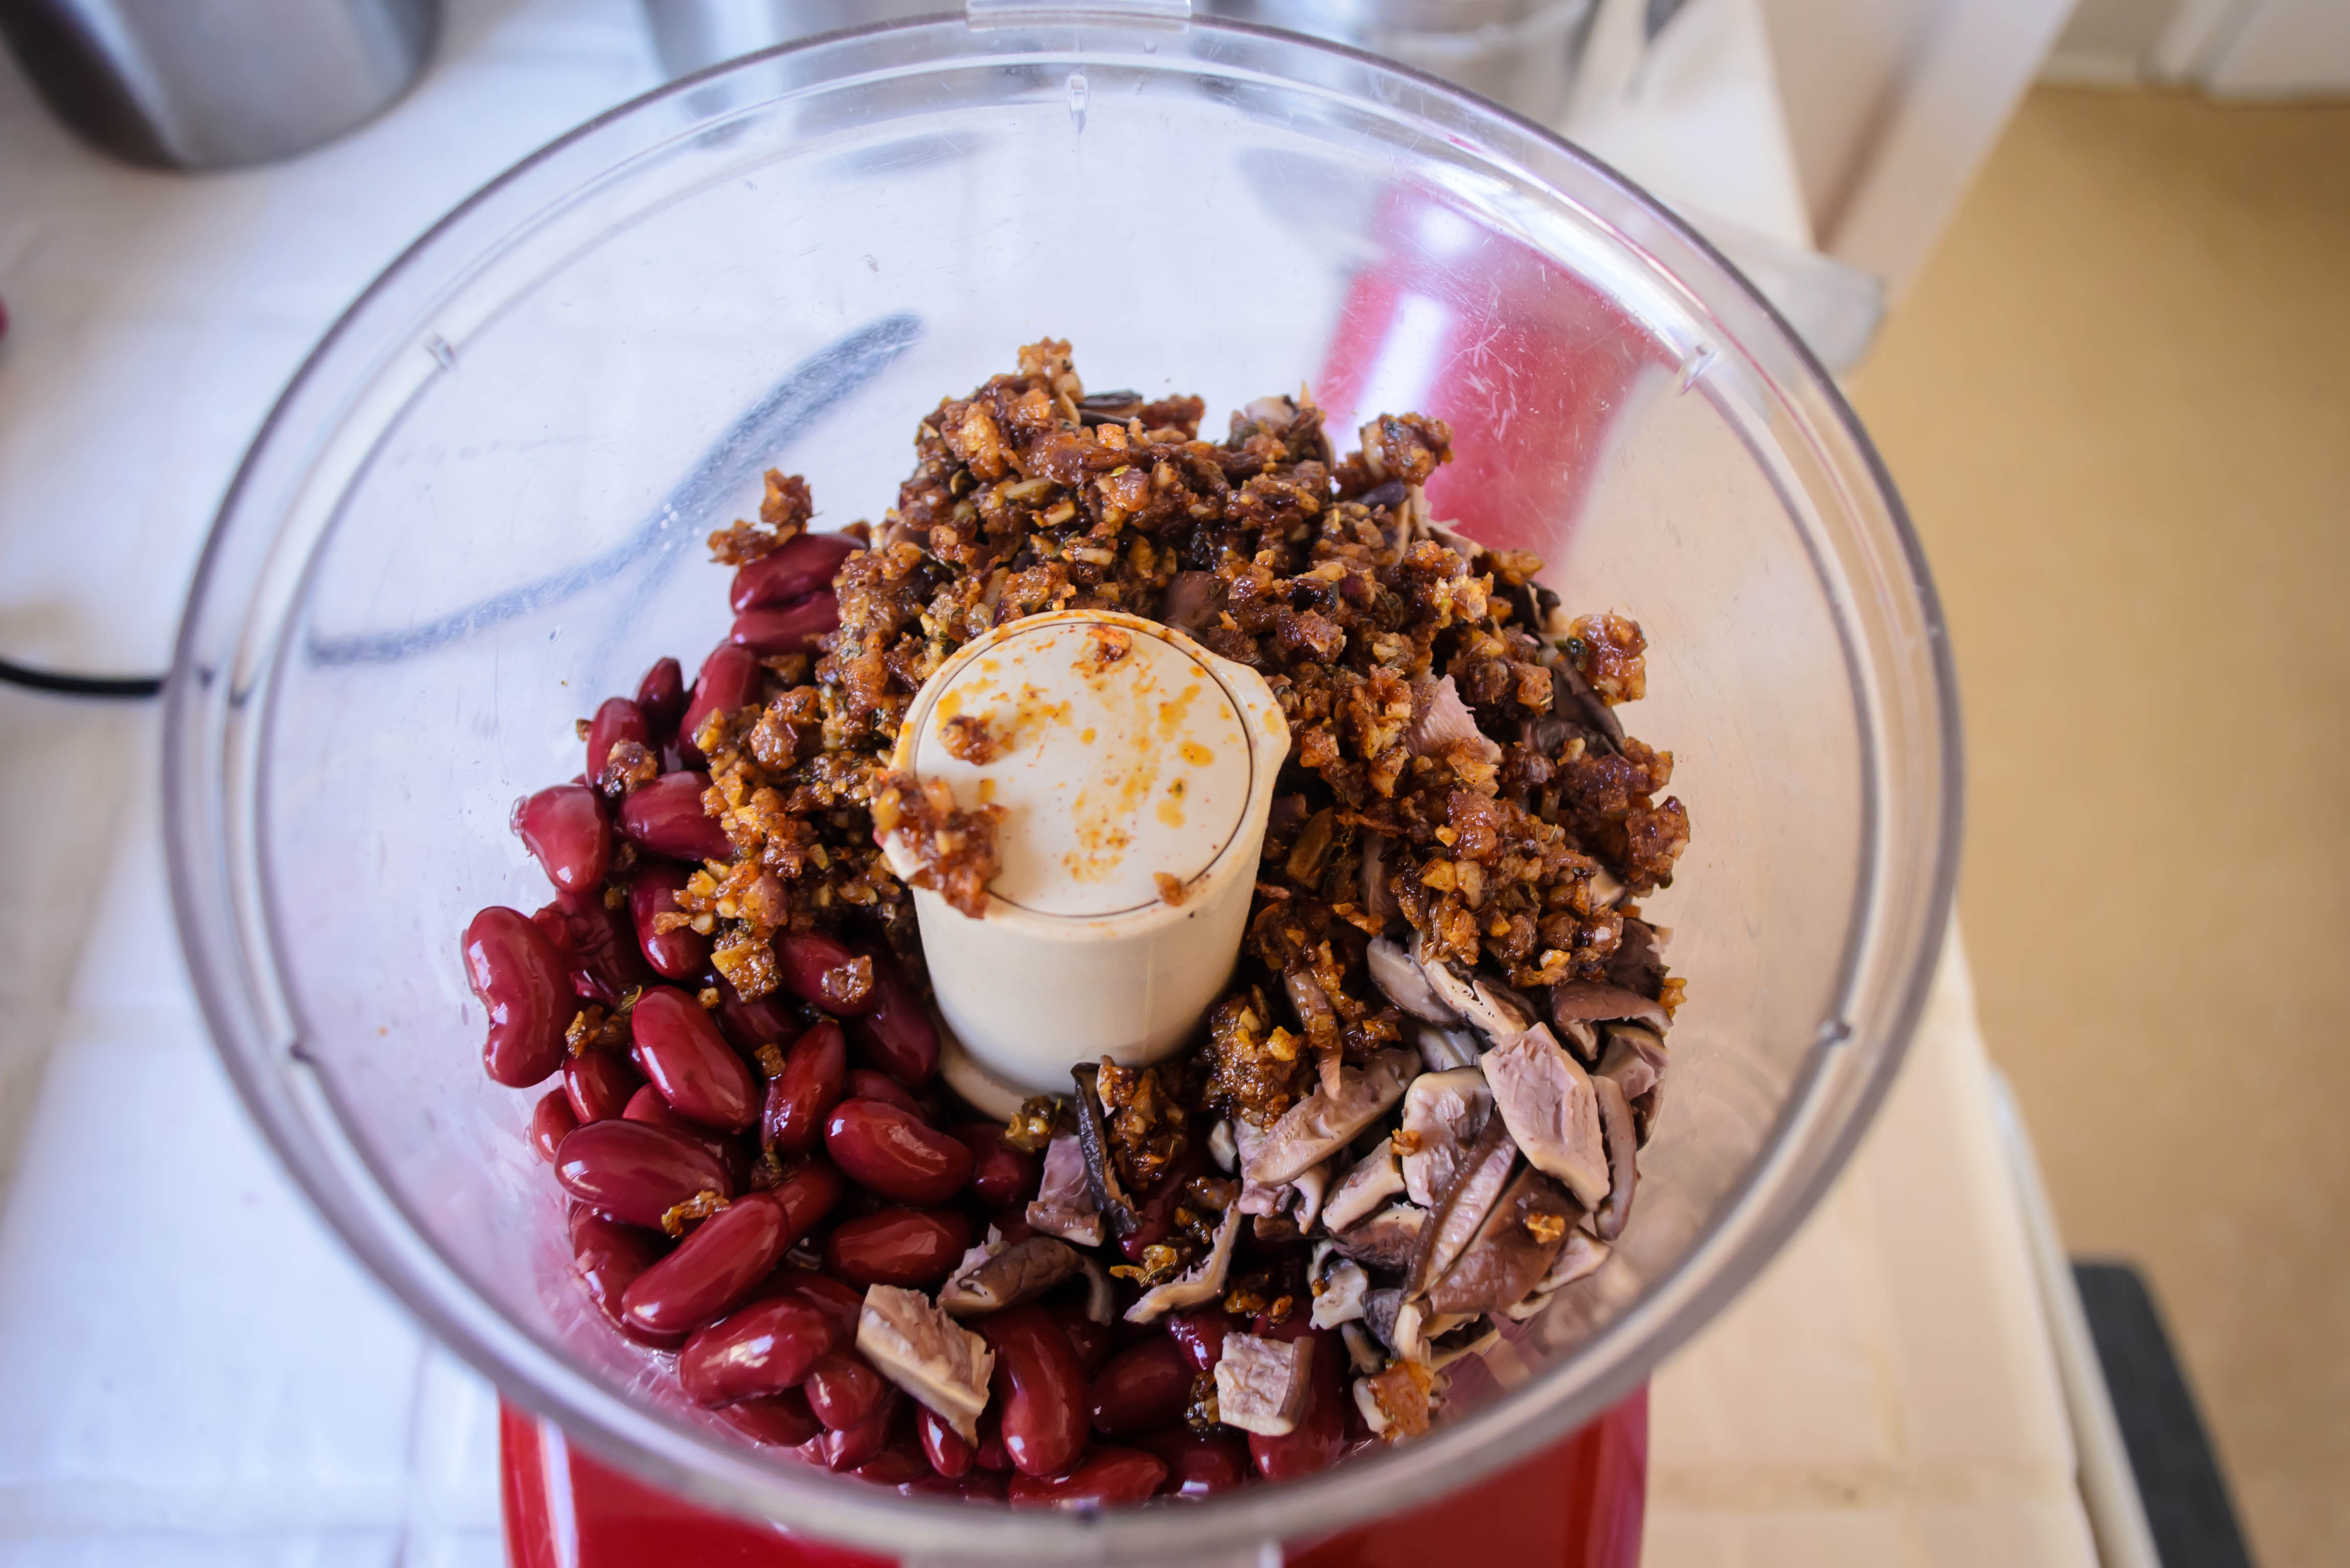 To bump up the flavor and add a little moisture, I added onions and garlic I’d sweated down with some warm, southwestern spices, and pulsed the whole thing in a food processor with a generous pinch of salt until it was willing to be molded, but not completely homogenized. The beans should be smashed but not totally pureed, and you should be able to discern the occasional grain of rice in your shaped patty. This adds texture and interest when you are chewing, and makes the finished product less like you’re chowing down on a fried patty of bean dip. Not that fried bean dip patties necessarily sound like a bad thing…
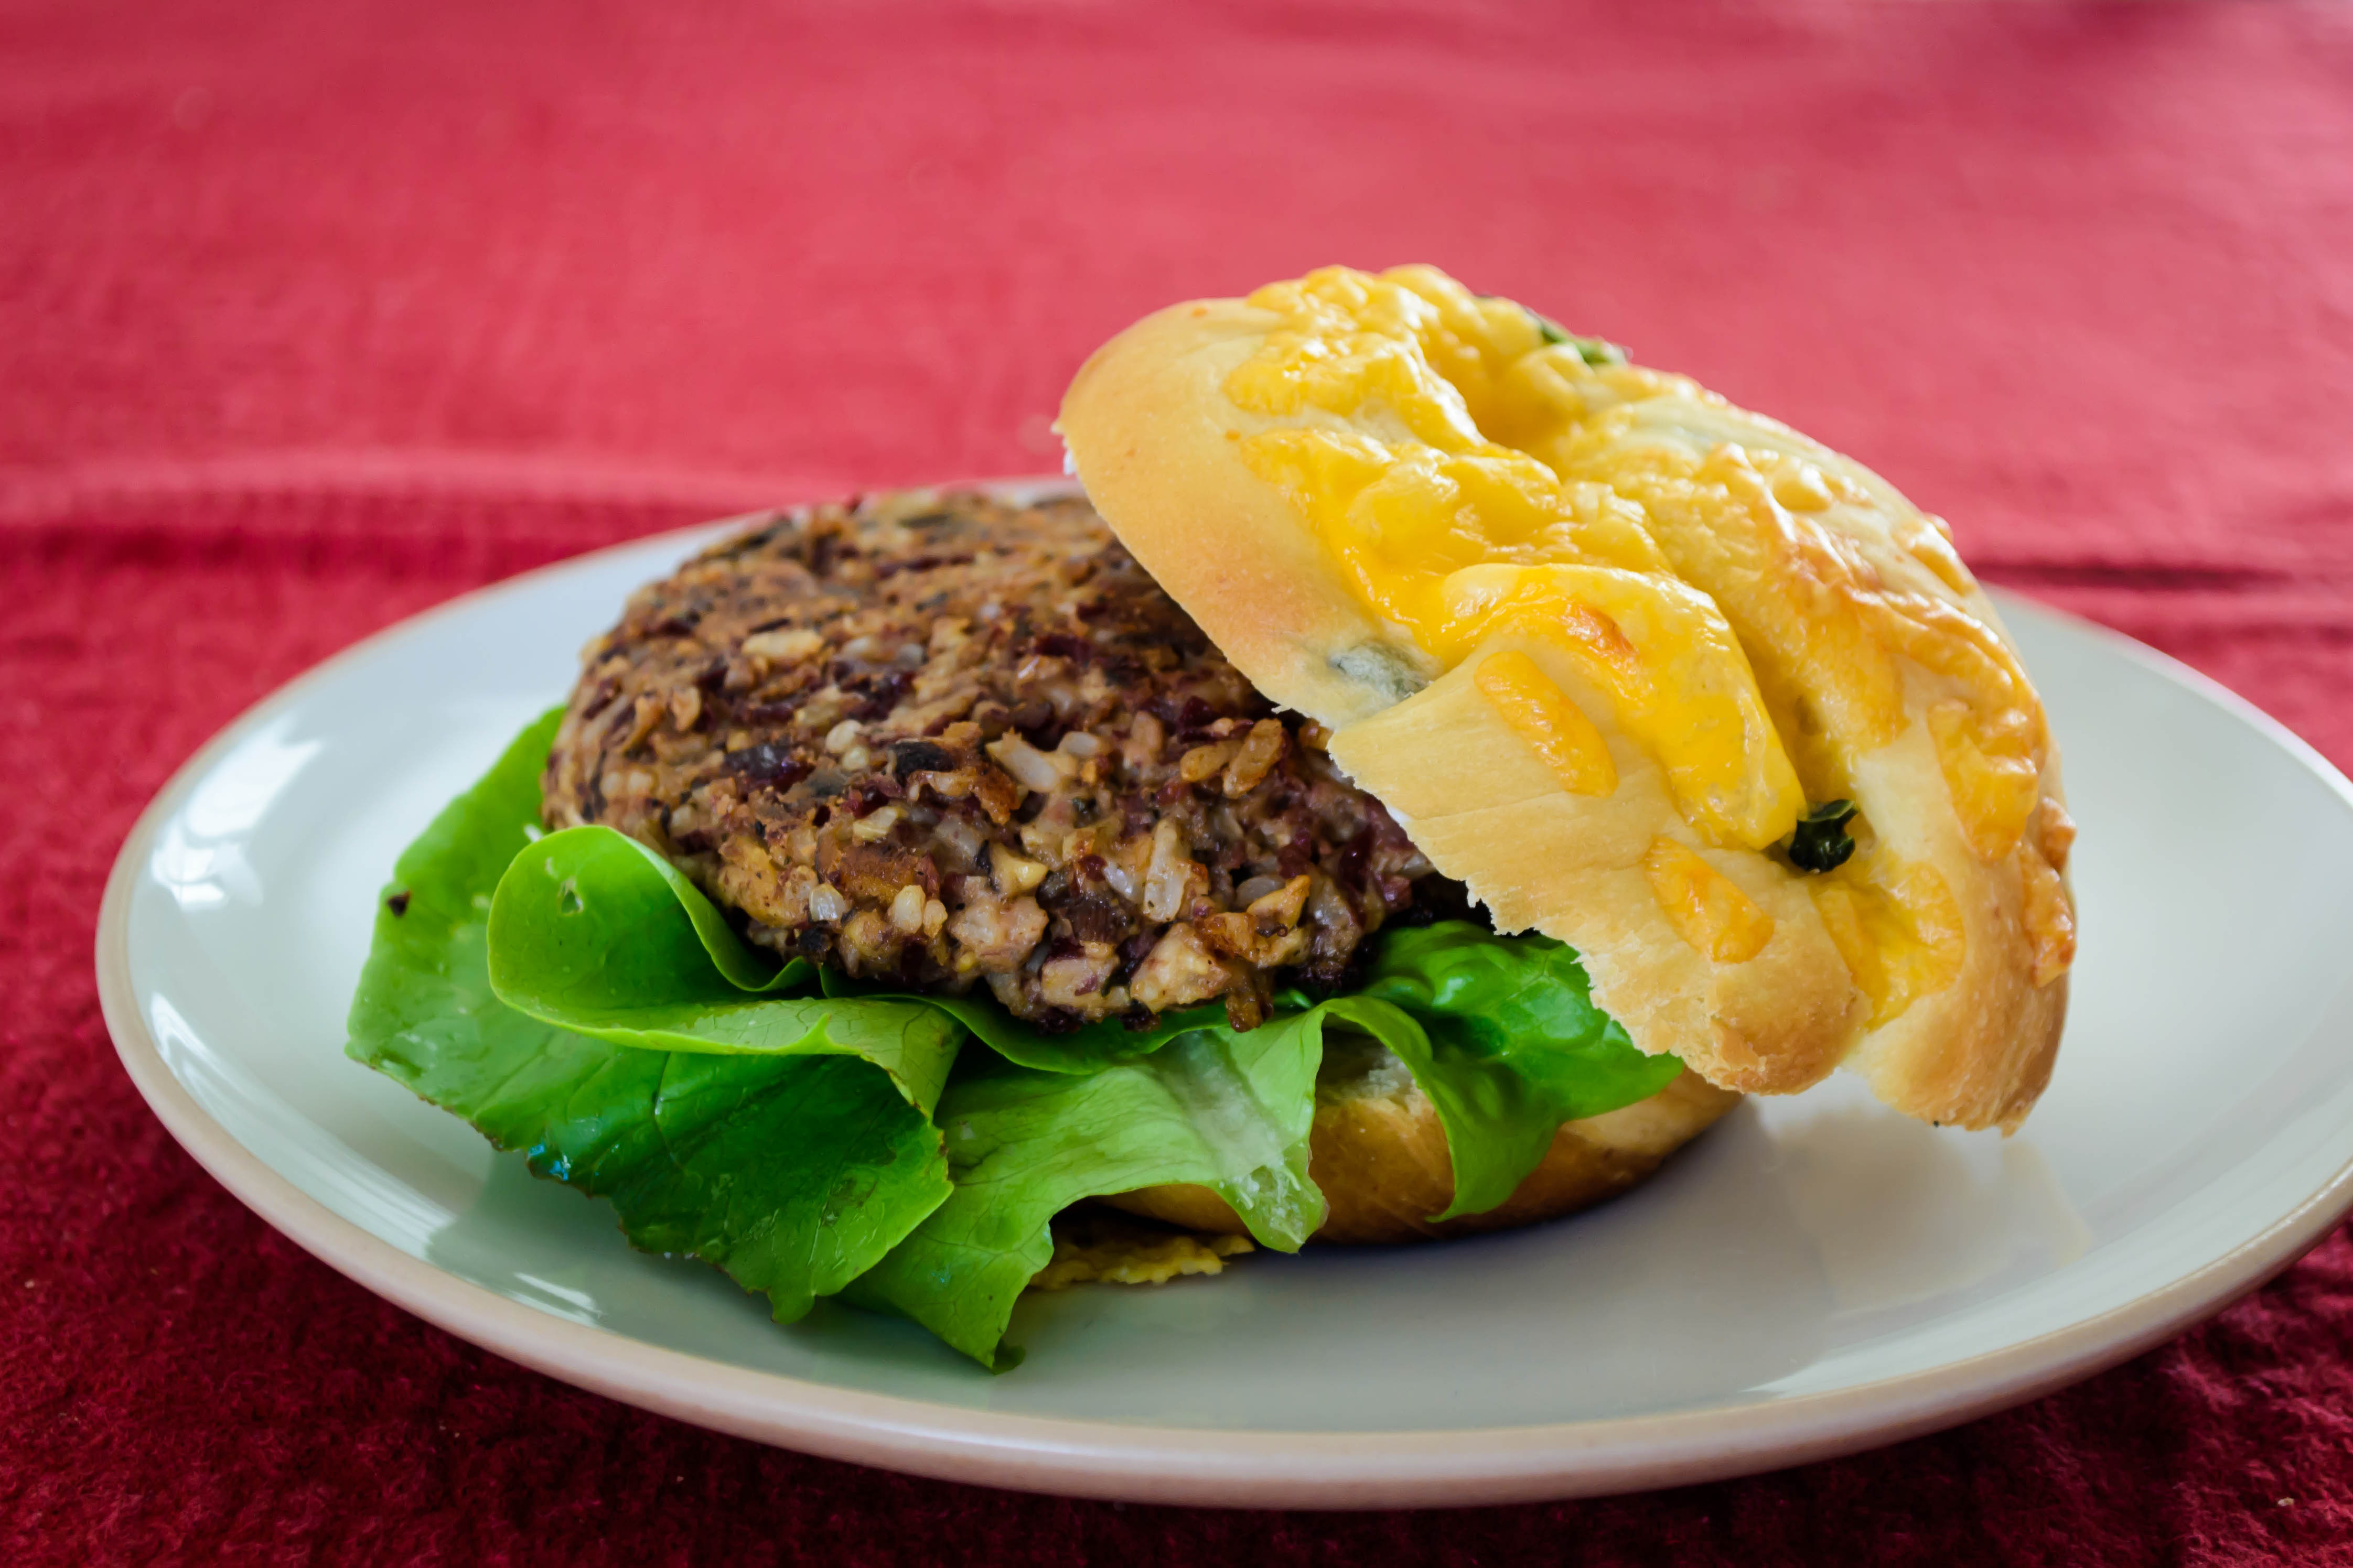
 N.’s one complaint about veggie burgers is that they are often smothered in cheese. It’s as though restaurants are trying to hide the flavor-that-isn’t-meat. That might be exactly what some people want, but for us, these non-cow flavors are just as interesting and tasty. To make this a burger (or vurger, as one of our Eugene favorites called it) worthy of N.’s preferences, I decided to skip the cheese on the actual patty, and incorporate it into the bun instead. Thus we settled our patties on homemade jalapeño cheese “kaiser” rolls, which I’m going to have to boast about… maybe next week…
For now, though, the patty itself: these are a bit dense and fairly filling, but the mushrooms really do add a delightful chewiness that I wouldn’t want to skip. Adding in some tempeh crumbles to replace or enhance these components would likely be delicious, though I haven’t tried this yet myself. The final addition of the barest squeeze of lime juice makes a surprising difference: it takes them from slightly heavy to a flavor I can only describe as somehow more awake.
 A few days ago Deb at Smitten Kitchen asked what her readers’ go-to dinners were. I thought about this for a while and decided ours were pizza, roasted vegetable tacos, and a lovely little one-bowl meal I learned from a friend called “Scatter Sushi.” I can tell you, though, based on the reaction these “vurgers” got at our house, they just joined that list.
Note: these patties are vegan (until you put them on a cheese roll), which means they lack the dependable binding power an egg typically brings to such a party. Therefore, I recommend shaping them and then letting them sit for half an hour or more before cooking, which will let the rice and beans soak up some of the moisture from the vegetables, and thereby hold together better. If they threaten to crumble on you or you’re frustrated or frightened by their potential fragility and not determined to keep them vegan, go ahead and add an egg to the mix.

Mushroom soaking contraption
Note: if the burgers look like they are falling apart, or if they threaten to break when you try to flip them, turn the heat up a little. This, bizarrely, helps keep them together because it sets the outside faster, so the surface of the patty is firmer.


A fabled land of farmers, farm shares, fancy (and not so fancy) restaurants, family meals, food projects and more.
cooking my way through my dissertation, one egg at a time
Fearless cooking from a tiny NYC kitchen.
food, in so many words.
Recreating the famous dishes of famous writers. Part recipe blog, part historical discussion, entirely unabashed love of books.
Epicurean Adventures from Eugene, Oregon
Celebrating the Harvest
Modern Iranian aka Persian Food & Culture Blog - Cuisine, Recipes, Stories , Photos, Pictures, DIY tutorials
Exploring Culinary Traditions of Africa, African America and the African Diaspora
food, in so many words.
food, in so many words.
food, in so many words.
Food-Stories-Recipes-Love
WordPress.com is the best place for your personal blog or business site.
