Smoked Salmon Burgers and Not-Ciabatta

In 2009, as N. and I were working through the Oral Examination phase of our graduate program – one of the most difficult aspects, as far as I’m concerned – a little restaurant opened on the south side of town.  Sharing space with a small bakery called the Humble Bagel, and run by the bagel shop owners’ daughter Anni and her husband Ari, the Humble Beagle quickly became our favorite restaurant in Eugene.  The feel is an intriguing blend: casual neighborhood gastropub, seasonal local food, layered with Israeli influence.  Macaroni and cheese, Caesar salad with amazingly lemony dressing, or penne with fresh pesto share menu space with shakshuka, house made pita, and lamb pizza dolloped with labneh.  In the summer, weekly specials are determined by what is producing best in Ari and Anni’s backyard garden.  In the winter, Ari makes his own pastrami and quick pickled cabbage for their take on a reuben.  The beers on tap are mostly from Oregon, and even the soft drink selection is carefully chosen for its local, natural ingredients.  The check comes with homemade, sugar dusted shortbread cookies.  It’s a pretty good example of the slow food movement in delicious action.  If you want a quick meal, don’t bother.  You’ll be there at least two hours.  If you want a place to bring your sixteen unannounced relatives, don’t show up without reservations.  This is a small, local pub, not a diner or high volume chain.  If you want tasty, thoughtful, belly-warming food at a relaxed pace, get in your car right now.  For a while, as N. and I neared the dates of our respective exams, we were going to the Beagle every Friday evening for dinner.  Almost without exception, I got the Fisherman’s Stew, a lovely collection of shellfish and moist, flaky halibut in a tomato and fennel broth with garlic aioli melting achingly over the top.  We could barely afford the luxury of these weekly visits, but we also couldn’t stay away.

The Beagle entertained us for the next three years.  We went there for birthdays – N.’s 30th, when Ari let me bring a cake I’d made at home, gave me the biggest chef’s knife I’ve ever seen to slice and serve it, and then took a leftover piece back to the kitchen where he shared it with the cooks.  We went there for the yearly day-after-Thanksgiving meal with my family.  One year, fifteen minutes into the meal we were the only patrons, and it was like our own private restaurant.  Ari came out and told us stories about his family’s holiday, and we were suddenly not in a restaurant anymore, but in the home of our friend.  We went there for dinner after my dissertation defense too, and even though we ended up being an annoying group – people arriving late and leaving early, special menu substitutions and requests, perhaps slightly-too-boisterous behavior – our server said it was okay, and that Ari had told him we were royalty.

On their Summer 2010 menu, the Beagle introduced an item I was instantly drawn to and still haven’t gotten enough of: the Smoked Chinook Patty.  This was a salmon burger on fresh ciabatta (made in the bakery next door), but what pulled me in was its blend of fresh and smoked salmon.  It’s immediately richer, deeper, brinier than any other salmon patty I’ve tasted.

This week, needing both a new dough challenge and a taste of that chilly, rain-soaked, allergen-laden city I still think of as home, I decided a recreation was in order.

Food Blog January 2013-0478

The Beagle’s patty comes on freshly made, perfectly crusted, well-toasted ciabatta rolls.  Looking in Ruhlman’s Ratio this week, I noted that the only difference he gives between ciabatta and a standard baguette or boule is the shape and cooking time.  This seemed promising and so, despite my claims last week about fear and being unready, I decided to dive in.  What else is a Thursday morning for?

Food Blog January 2013-0439

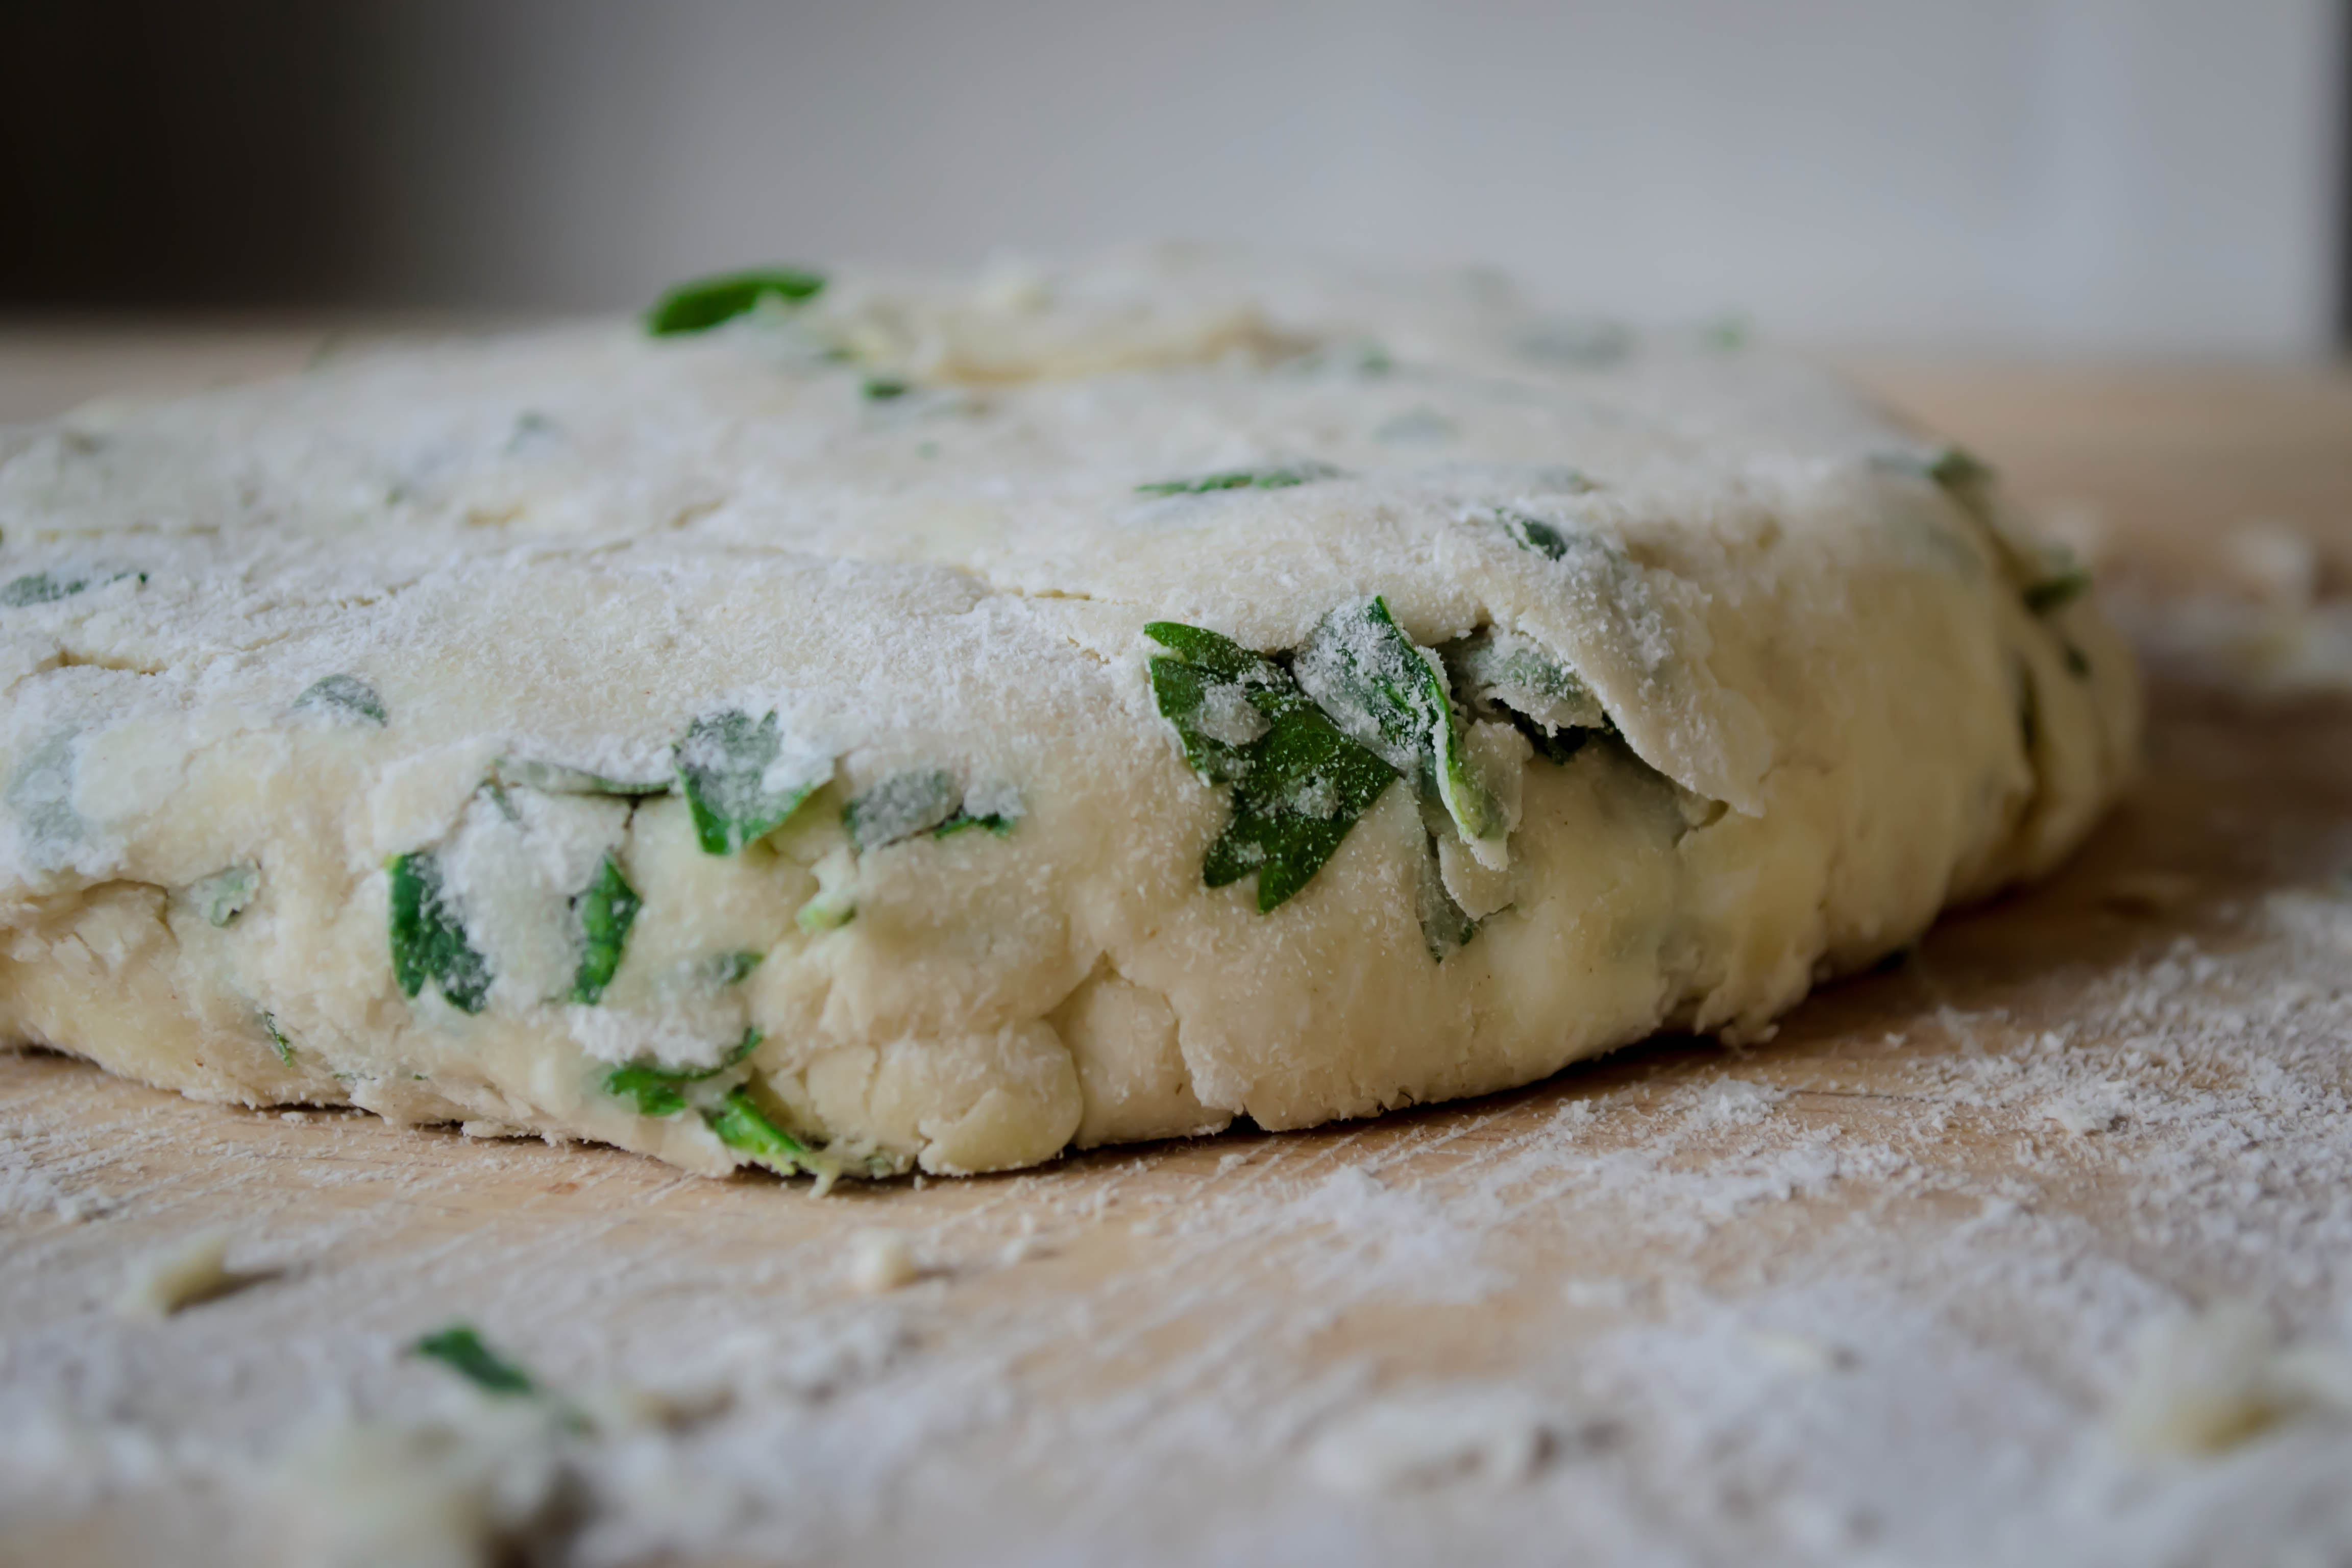
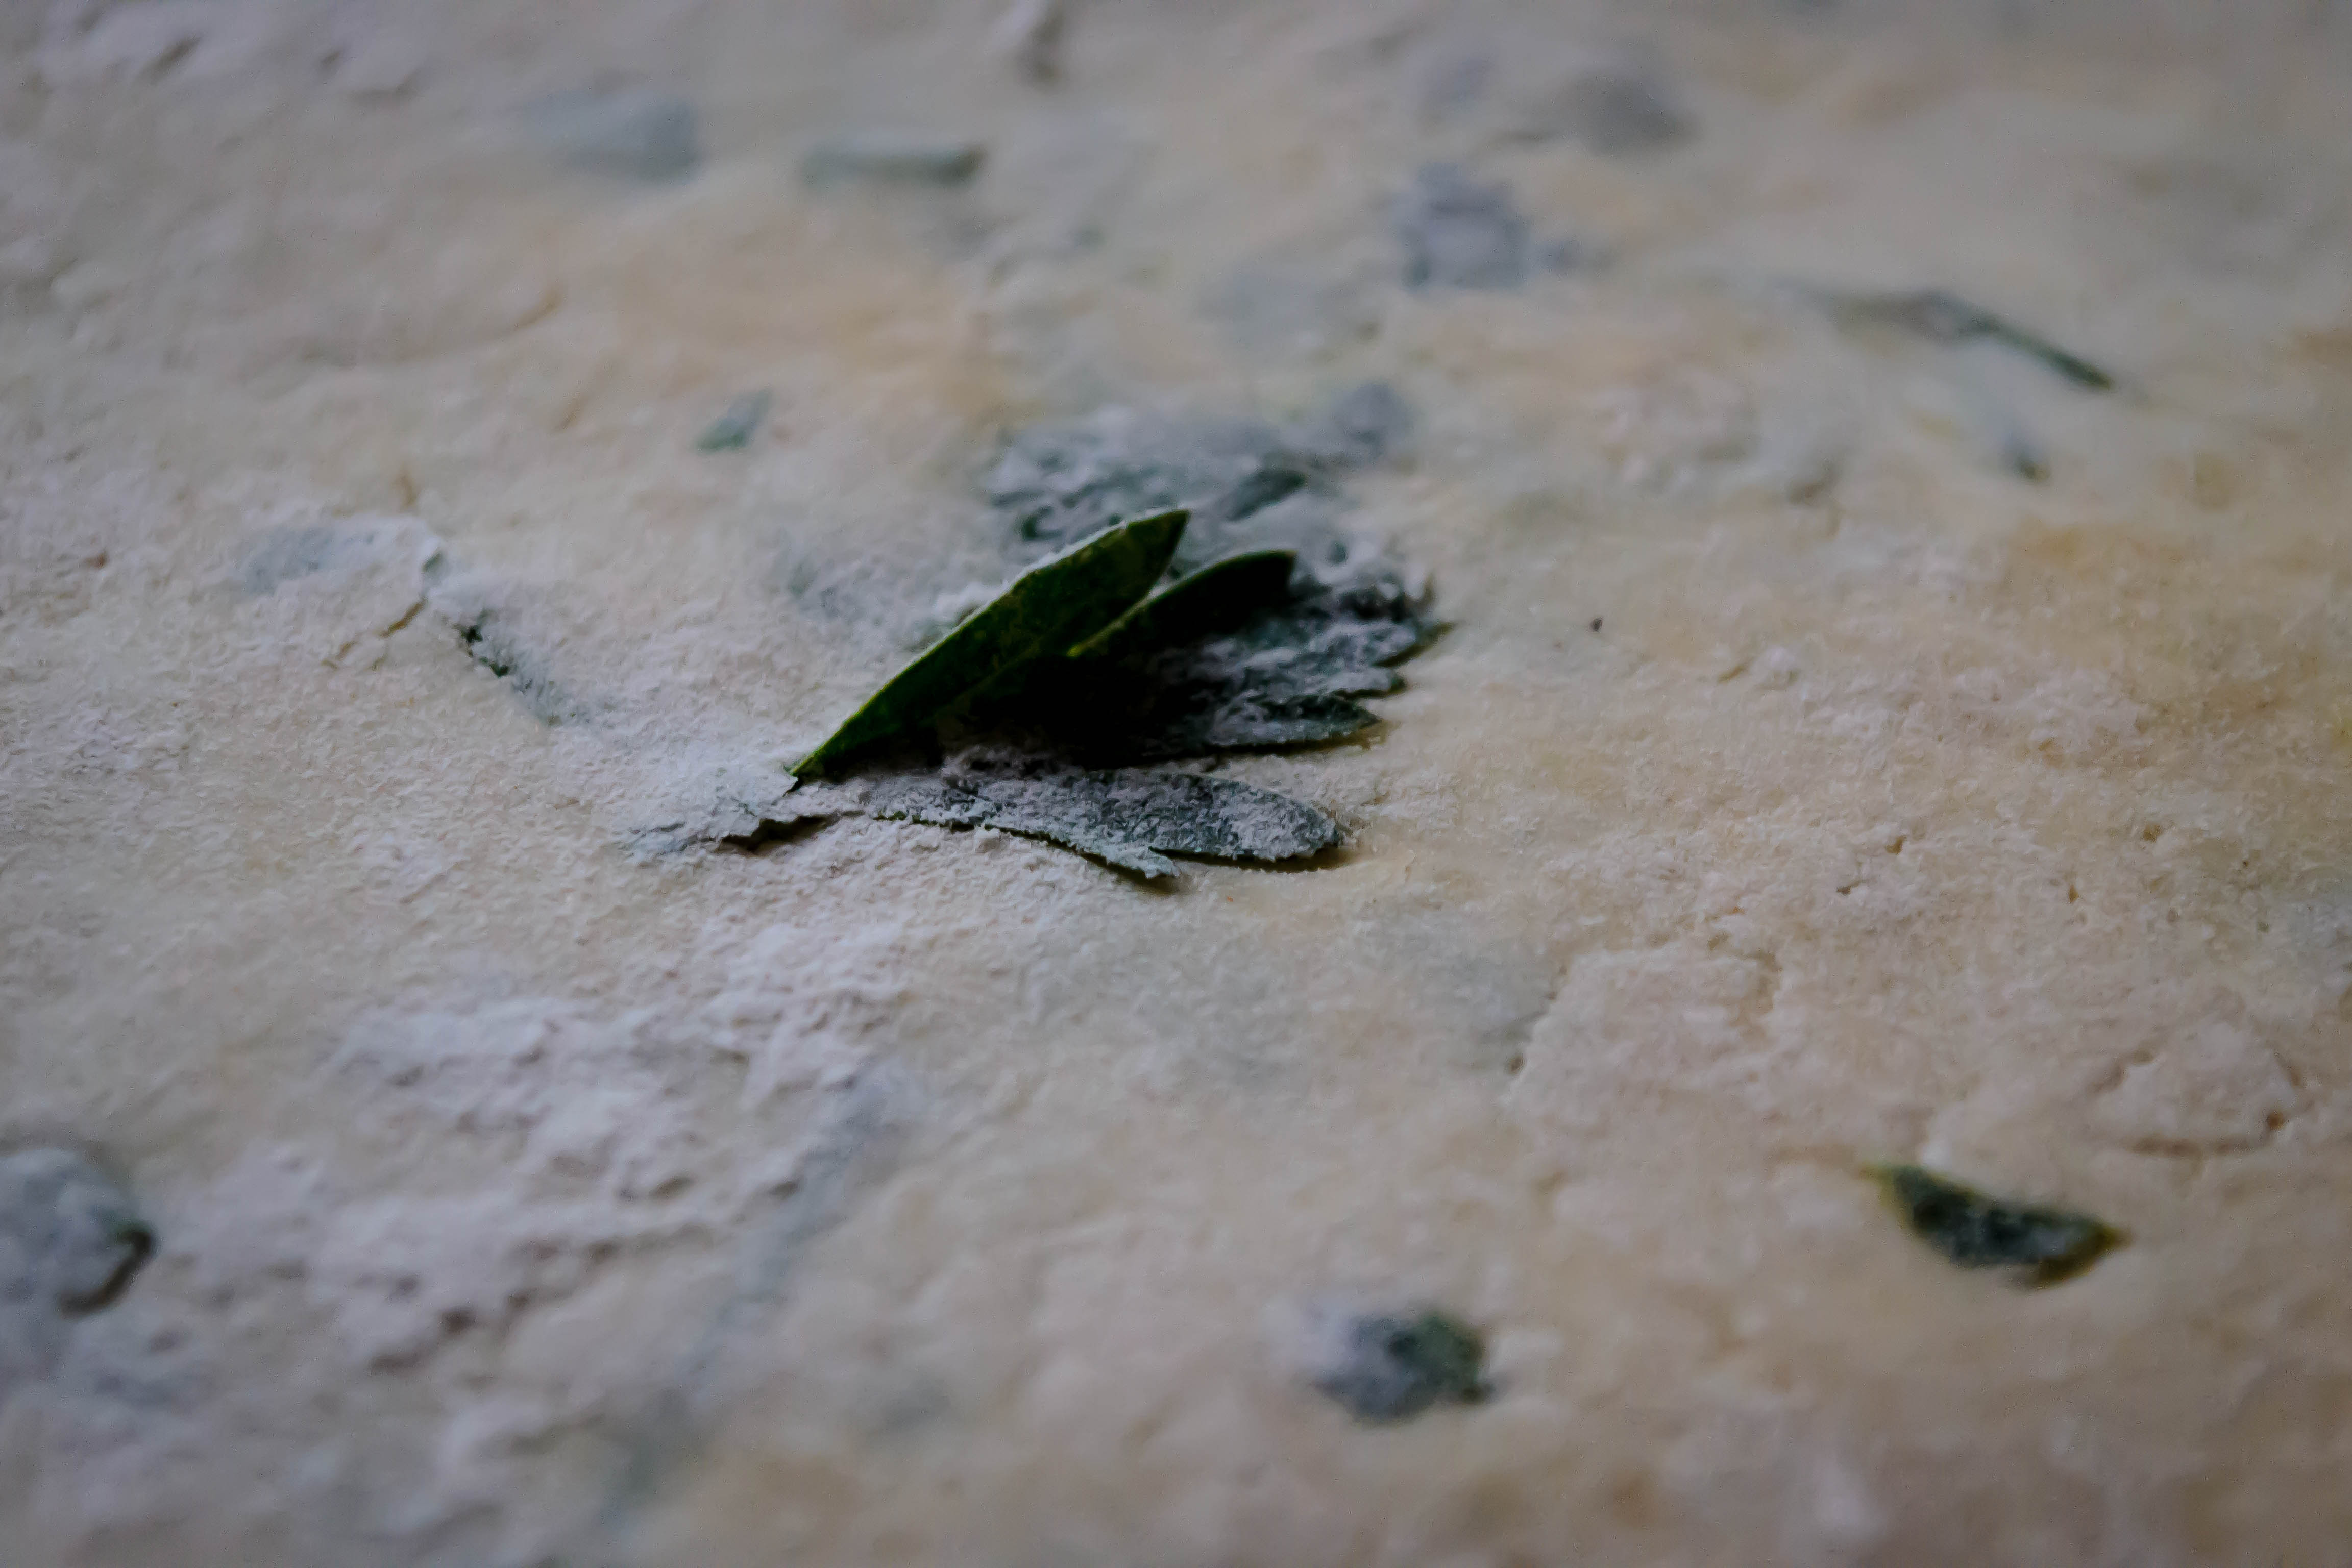
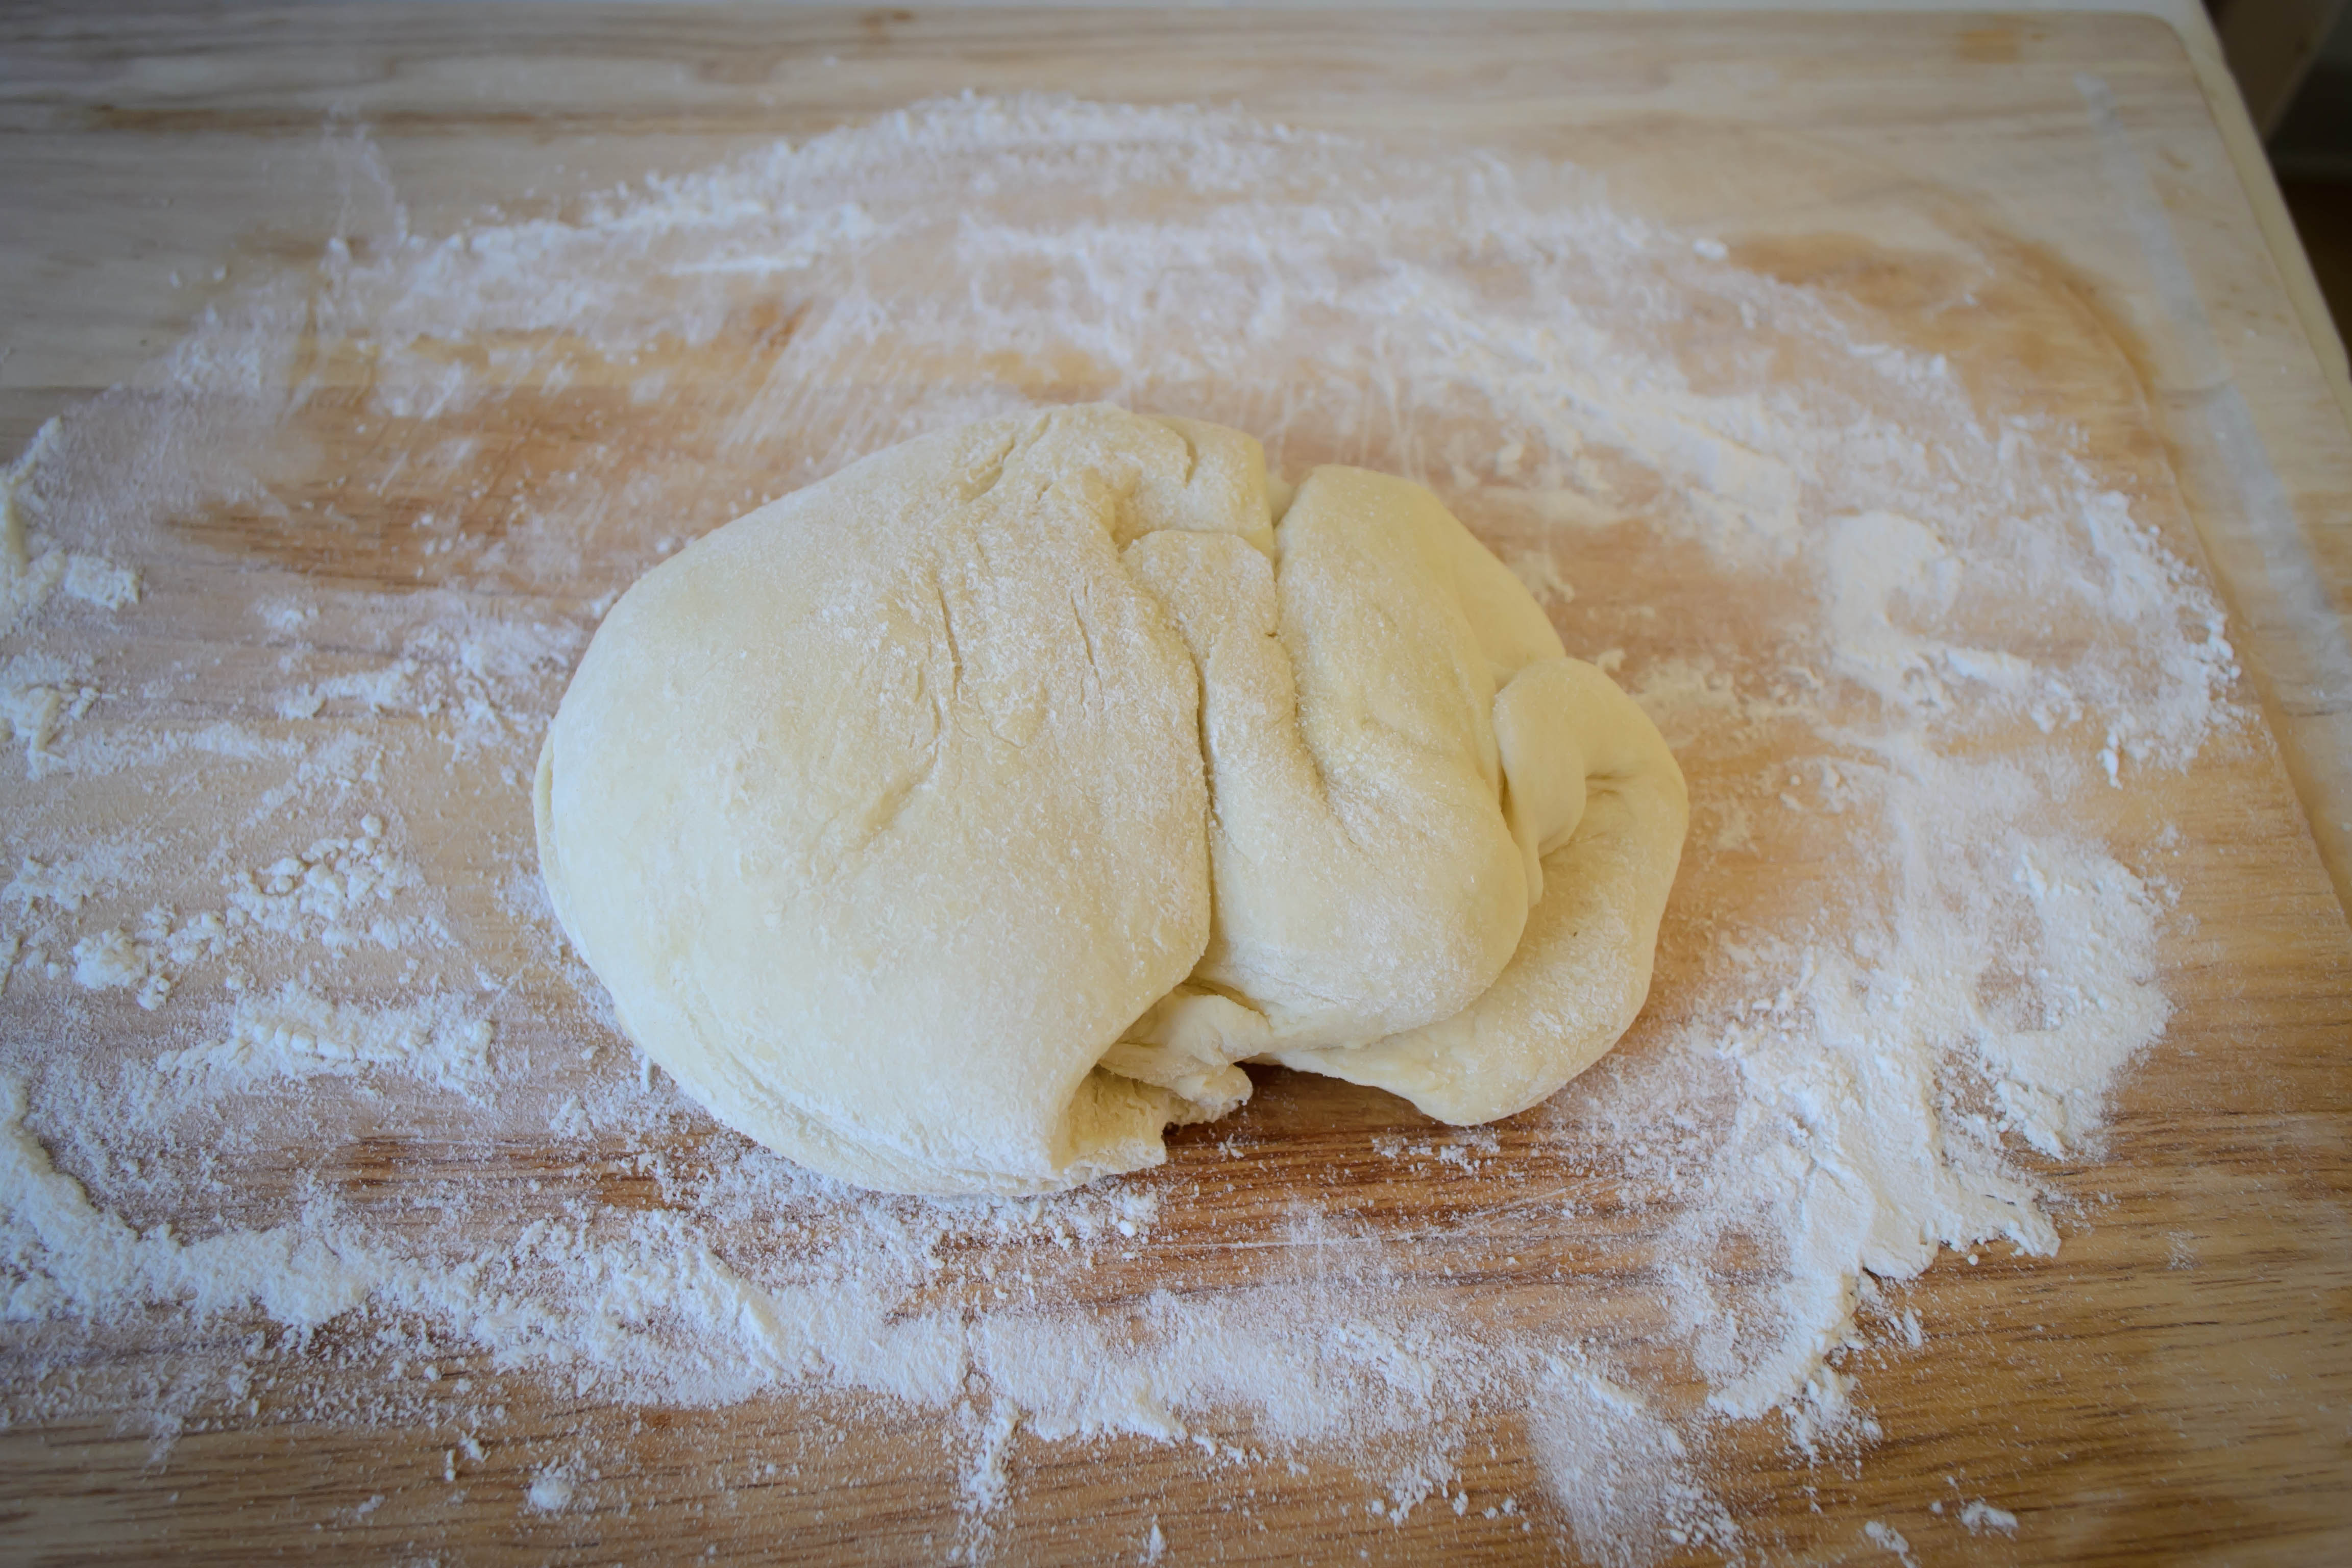
I dutifully mixed, then kneaded, bread flour, water, yeast, and salt.  I tore off a chunk to perform the windowpane test, and I cuddled my ball of smooth, elastic dough in an oiled bowl to rest and rise.

Food Blog January 2013-0446

Ruhlman doesn’t give any suggestion of how long to bake individual ciabatta rolls, only a full loaf, so I went to the internet for help.  I quickly discovered that what I was making wasn’t going to be the bread I’d had in mind: the tremendous bubbles that bake into cavernous holes, the flour-dusted, almost gravely crunch of the crust, and the soft, perfectly chewy texture of the interior are achieved through a slightly different ratio of ingredients, and a more involved process, as this article on The Kitchn depicts.  Since I was starting on the day of baking and didn’t have a biga waiting in the wings, I was just going to have to work with my mix.

Food Blog January 2013-0449

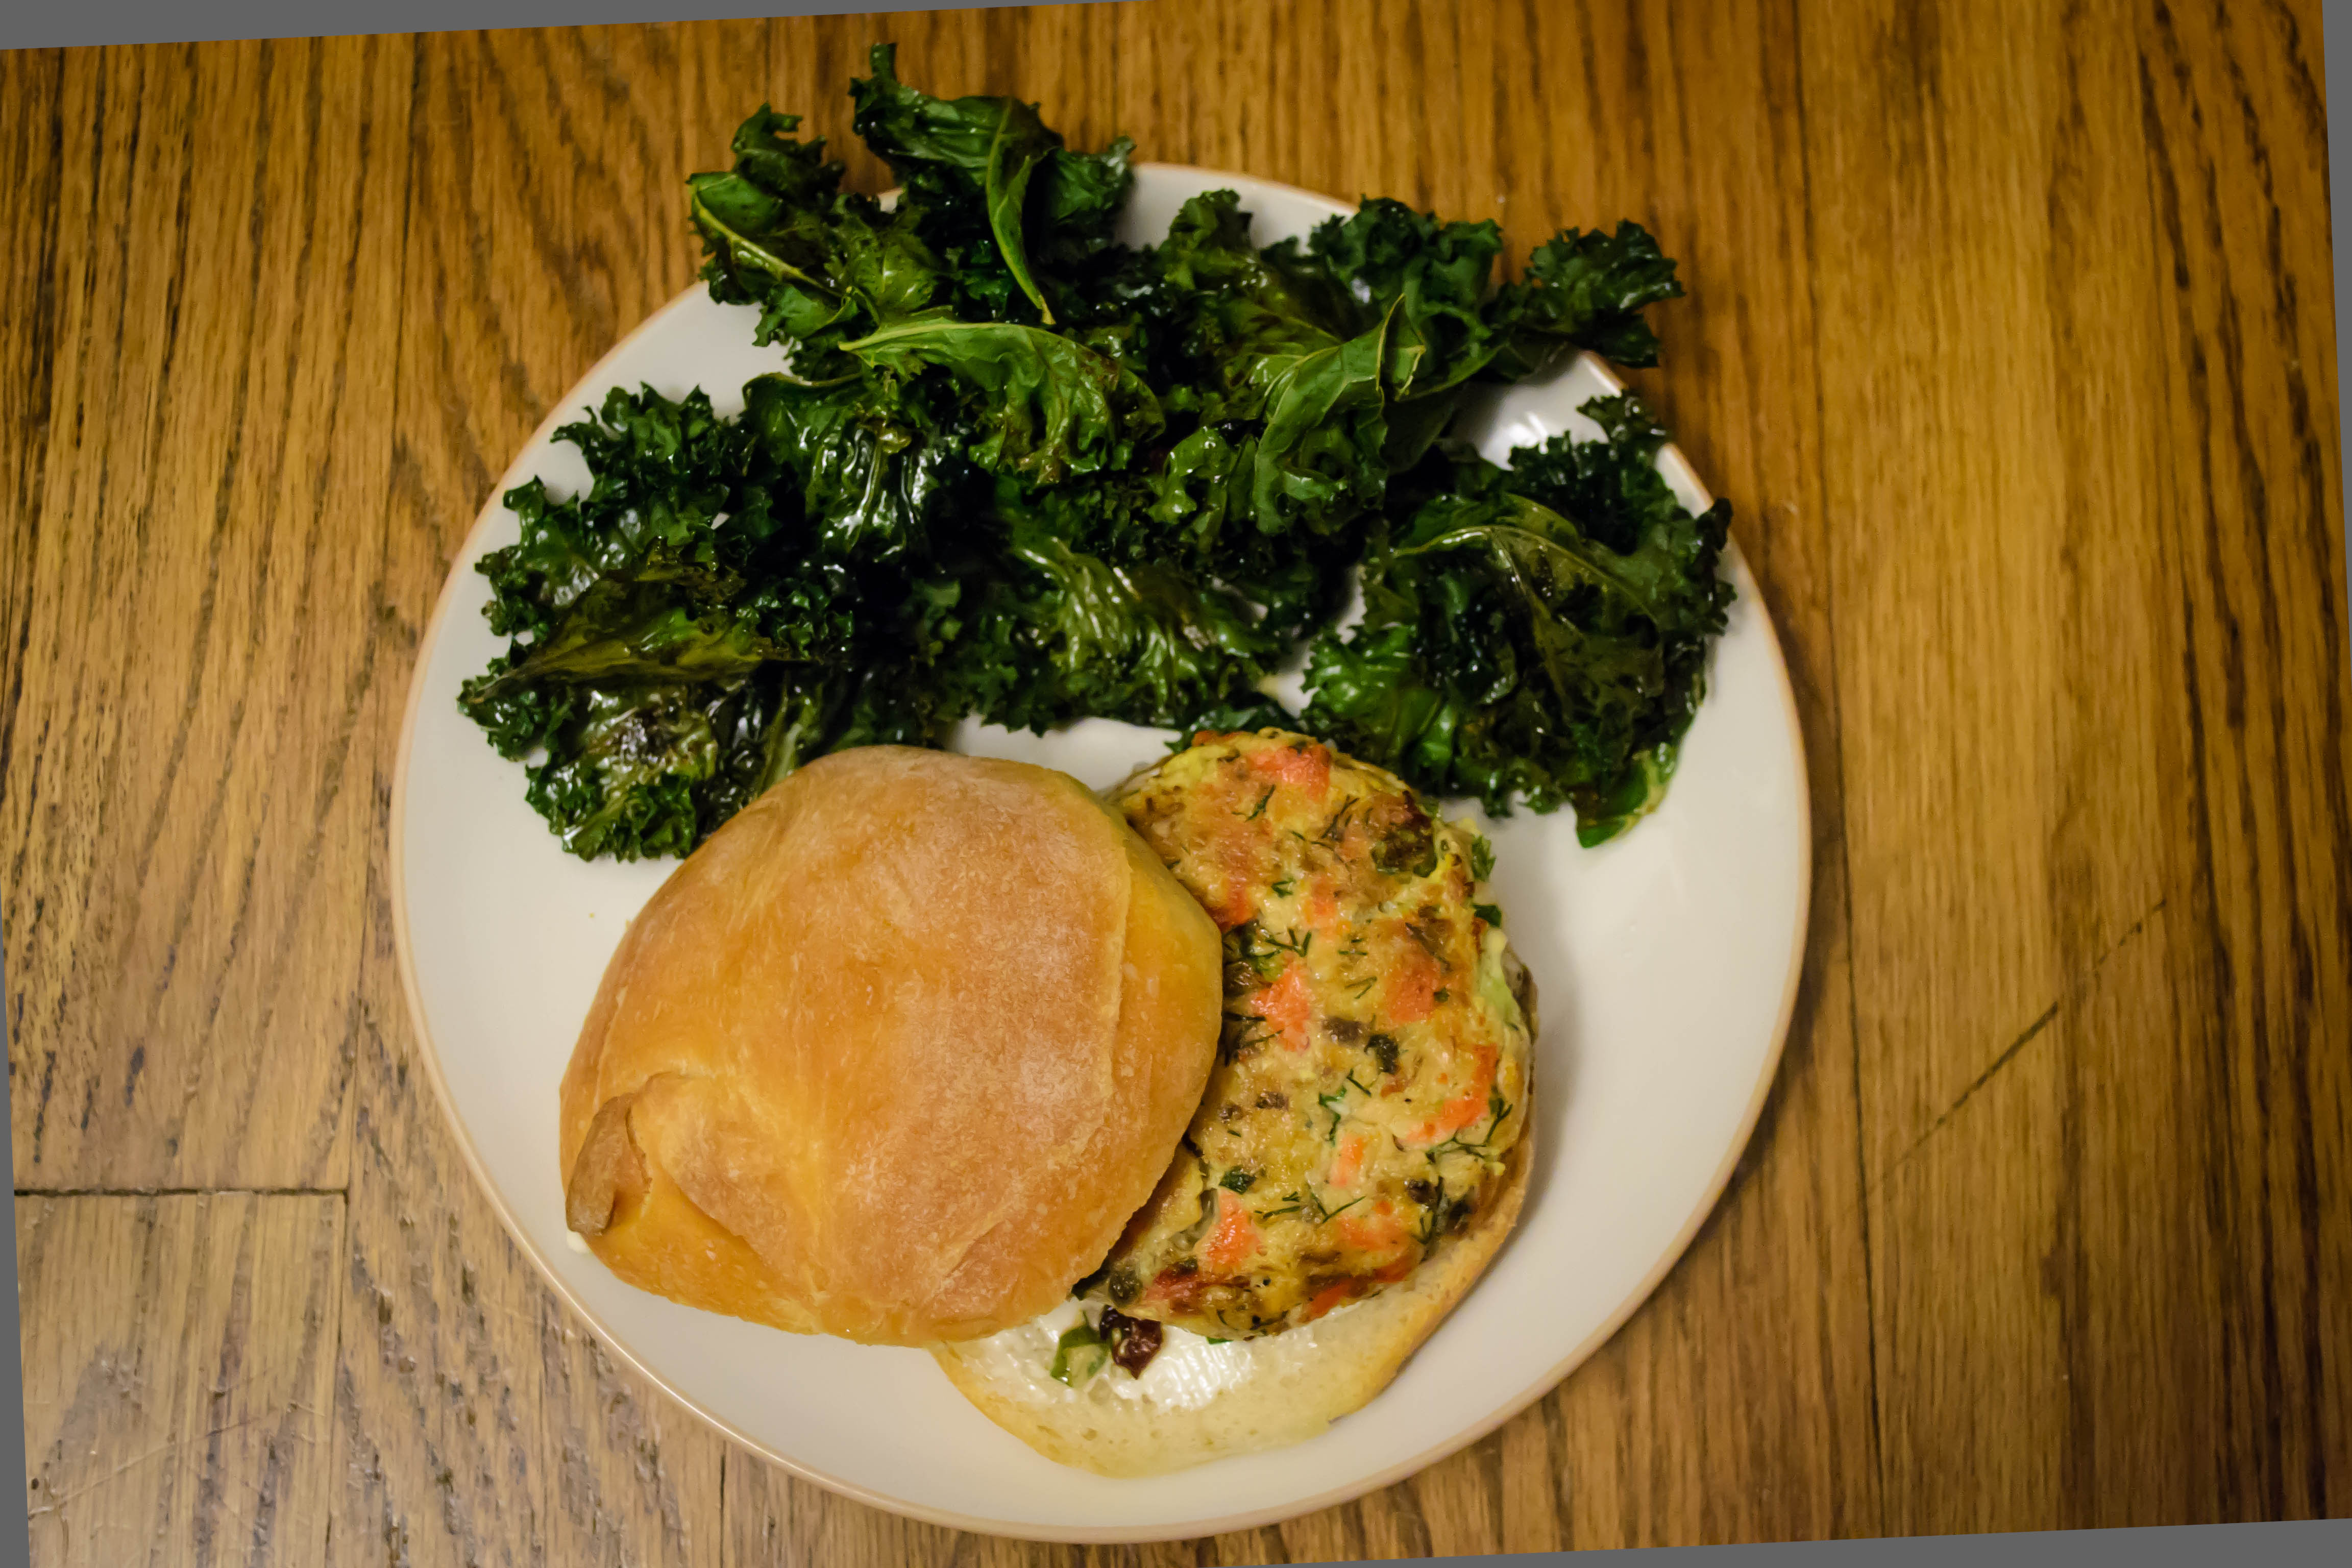
Ultimately, though what resulted was more like a super crunchy, slightly flat mini boule, it was crisp and buttery golden delicious and an excellent vehicle for the smoky/briny/rich/tastes-like-home burger it enclosed.

Food Blog January 2013-0456

Not-Ciabatta

10 ounces bread flour (or 2 cups)

6 ounces warm water

1 teaspoon salt

½ teaspoon active dry yeast

Sprinkle the yeast over the surface of the water and set it aside for five minutes or so to come back to life.

While you wait, whisk flour and salt in a mixing bowl.  Make a little well in the center and pour in the yeasted water.  If using a stand mixer, beat with the paddle attachment just until things come together, then switch to the dough hook and knead at medium speed for 10 minutes.  I had never executed this switch between tools before, but it worked really well.

After 10 minutes, the dough should be stretchy and lovely and firm, and all traces of unincorporated flour on the sides of the bowl will be gone.  Do the windowpane test to see if the bread is ready.  If it’s not, continue kneading.  If it is, transfer the ball of dough to a lightly oiled bowl and place in a warm, draft-free place to rise.  I like to put it in an oven that’s been warmed for five minutes, then turned off for five minutes.

Let the dough rise until doubled in size – mine took 1 hour and 45 minutes.

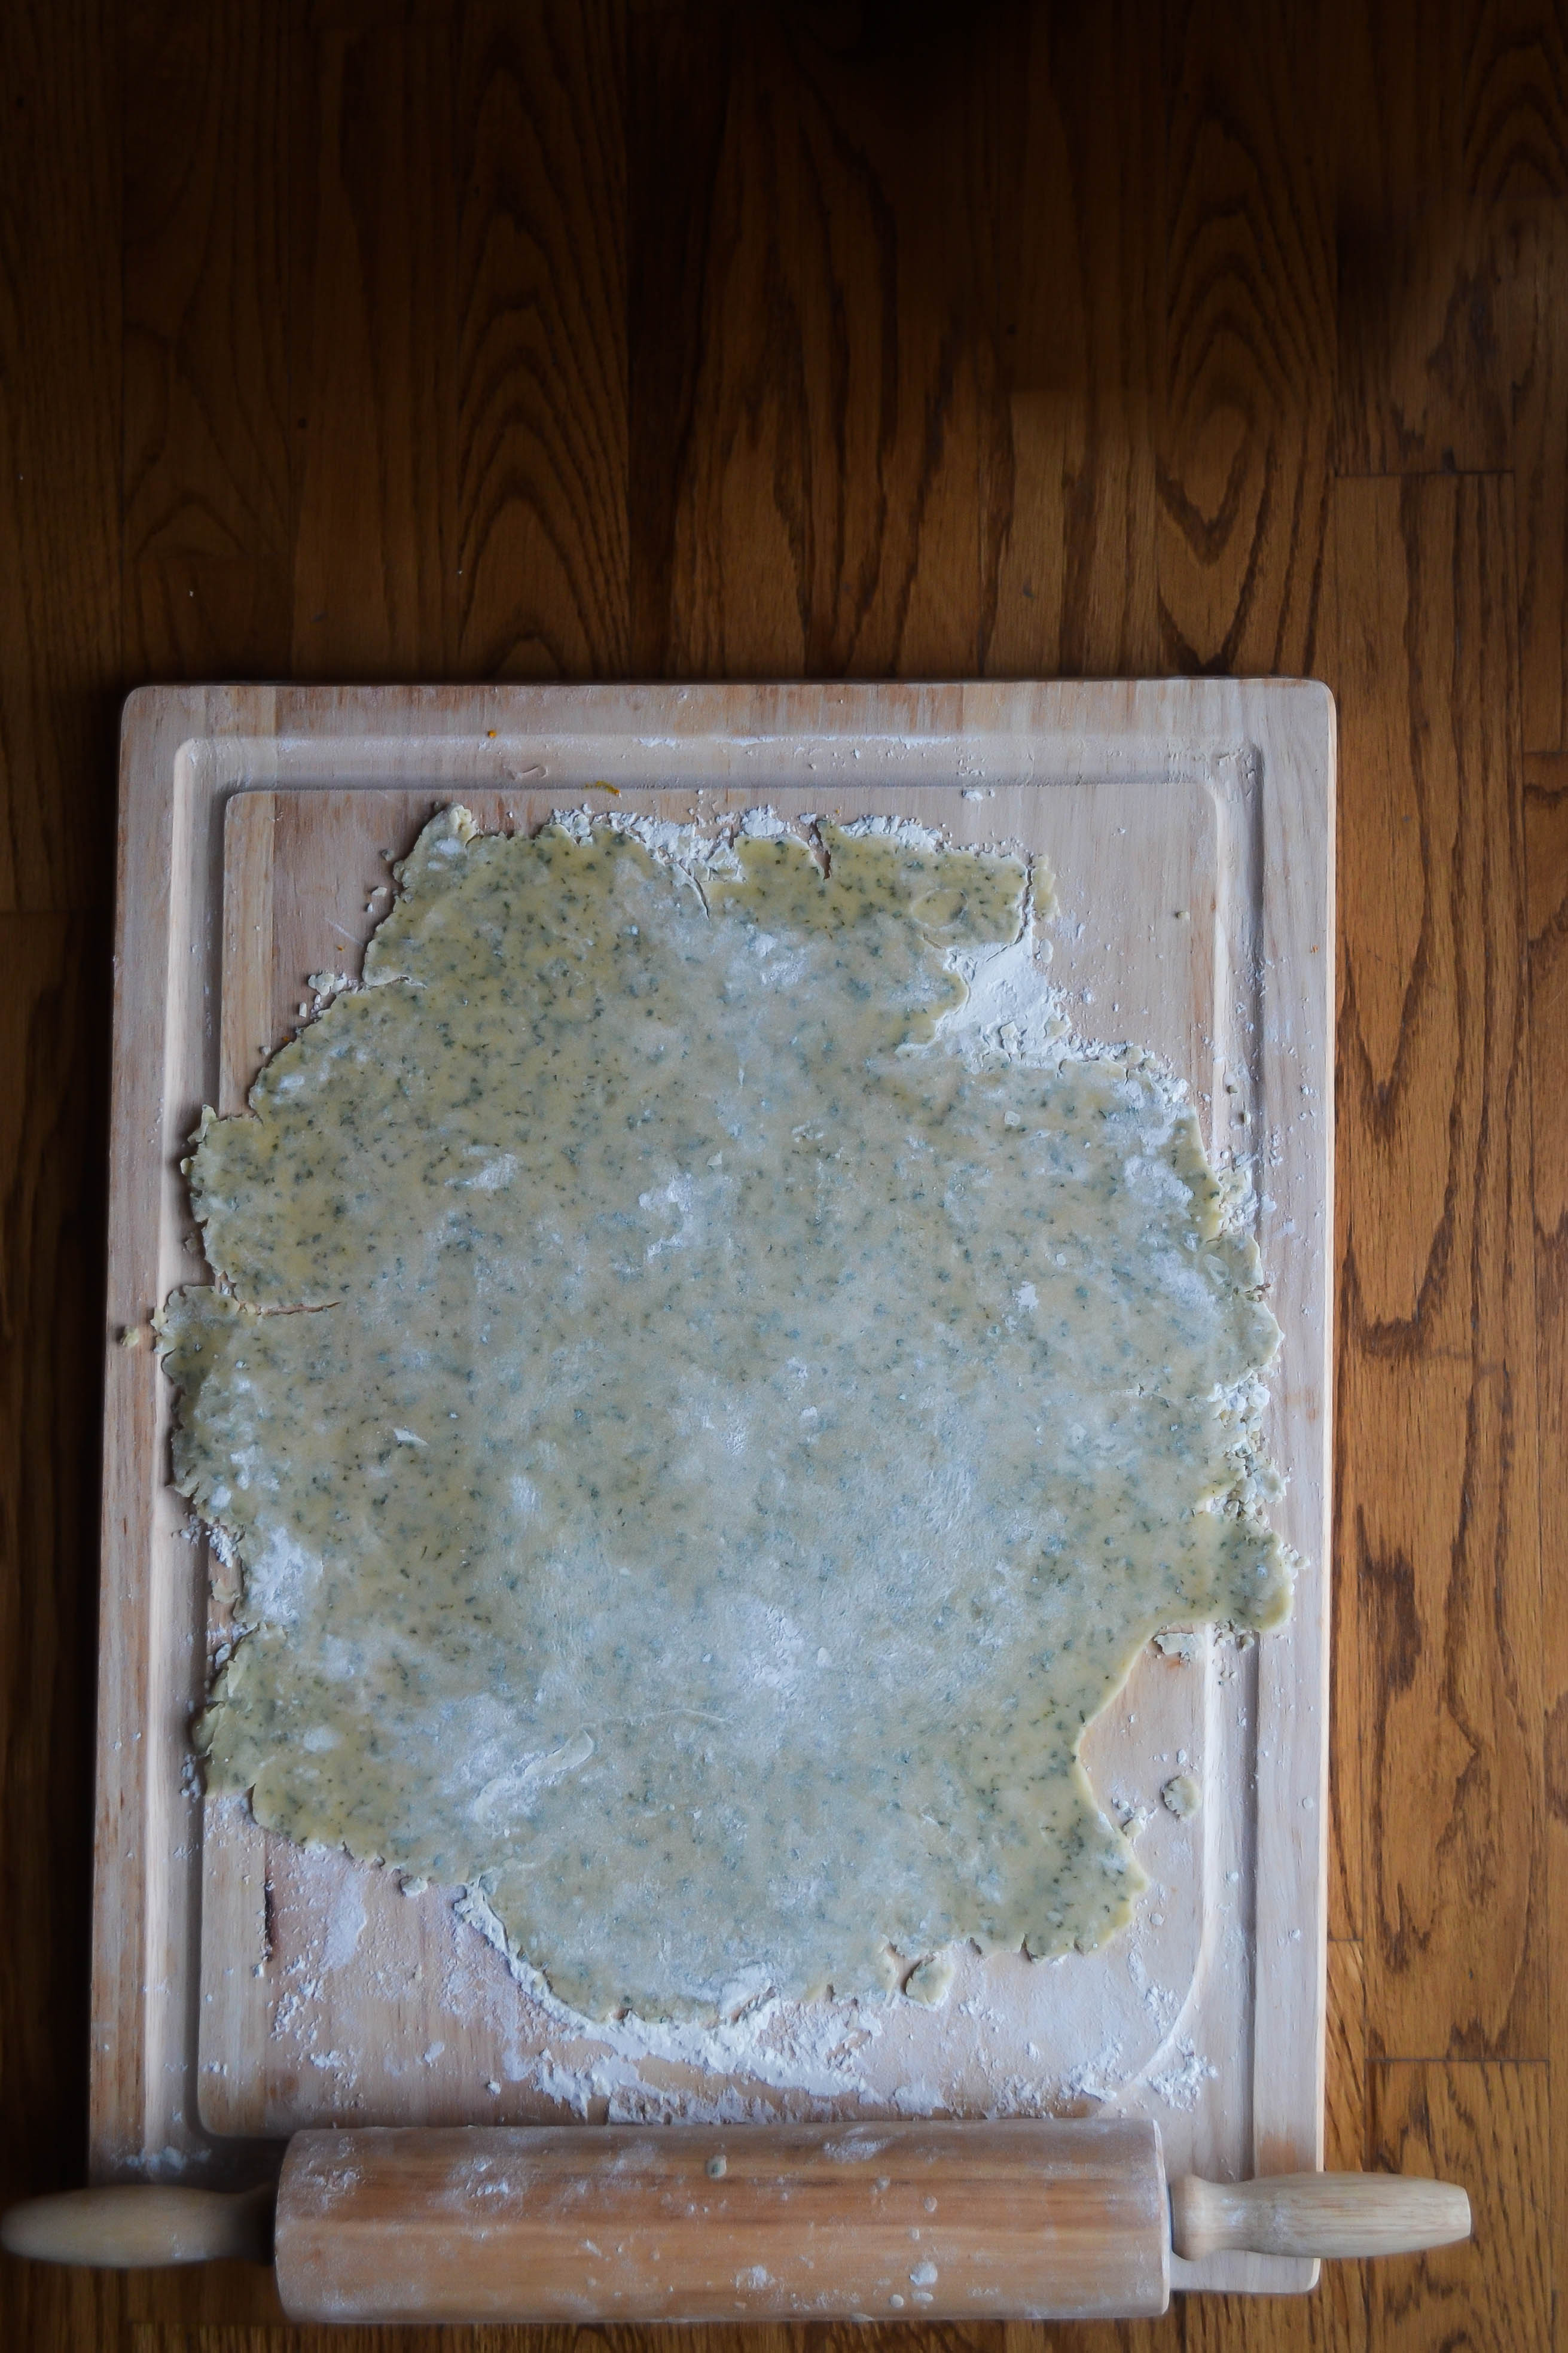
Punch down the dough gently and then knead it on a floured board for a minute or two to deflate it a bit.

Let it rest for 15 minutes.

At this point, divide the dough, shape it into the bun shapes you want, and let it rise on an oiled baking sheet for another 1½ – 2 hours.  I ended up with seven mismatched, homely little balls, but I lovingly covered them with a clean kitchen towel and went about my business.  (I think I went about my business a bit too long – 2 hours became almost 3½, and the resulting buns didn’t puff much during baking because they’d expended so much of their rising power as they sat on my counter.)

Food Blog January 2013-0448

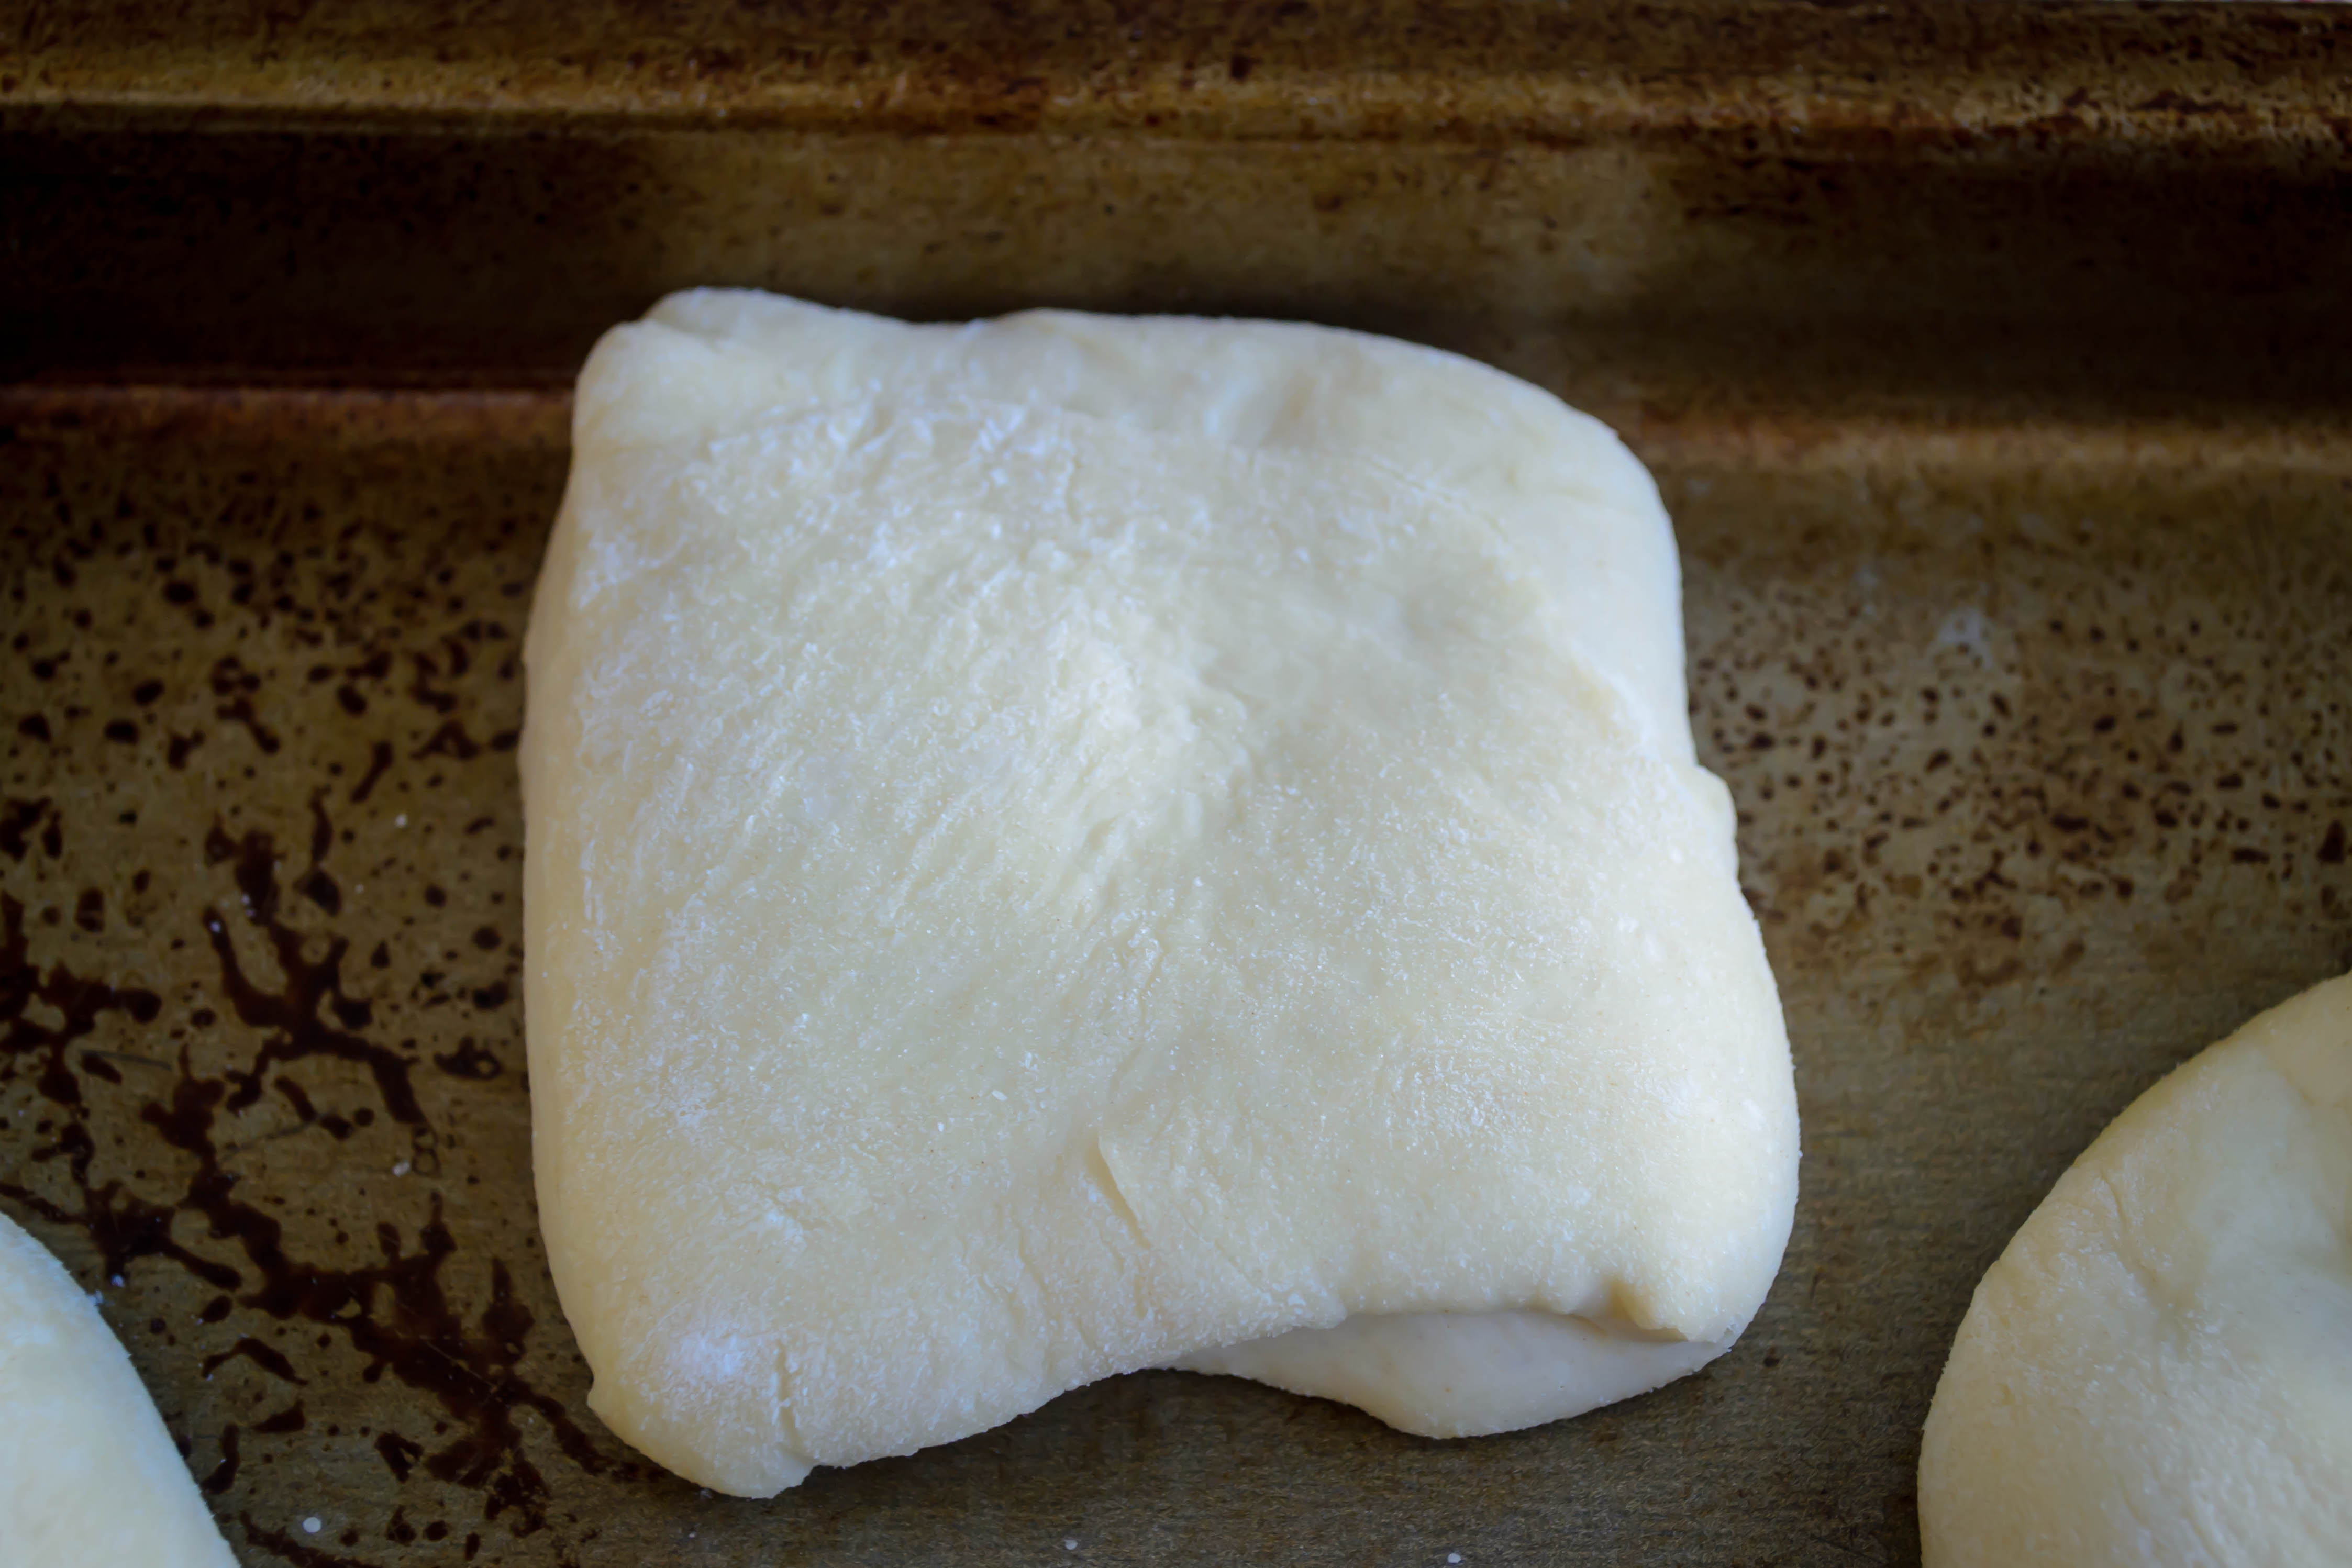
When the buns have risen again, drizzle them with olive oil and bake in a preheated 450F oven for 10 minutes, then turn the heat down to 375F and continue baking for another 20 minutes, or until golden brown and done in the center (with a full-size loaf you can thump the bottom and if it sounds hollow it’s done, but I suspect these are too small to yield satisfying results with this method.  Since I had 7, I just tore into one to see if it was done, and when it was, I ate it.  No one else has to know).

Food Blog January 2013-0461

Set aside to cool while you make the salmon patties.


Smoked Salmon Burgers

These are robust in flavor but, especially if you are using canned salmon, must be handled with some delicacy to prevent breakage.  They are, I think, a perfect blend: rich, fatty salmon, salty smoky deepness, and the sour zesty bite of capers and lemon.  If you don’t want to bother with the buns, you could certainly encase these in crisp leaves of butter lettuce.

15 oz. canned salmon, picked through and bones removed, or about 1 lb. fresh, finely chopped

4-6 oz. smoked salmon, flaked with a fork

2 cloves garlic, *pasted with salt or grated

3 green onions, finely diced

1 TB capers, minced

1 TB fresh dill, minced

1 tsp each lemon zest and lemon juice

Pepper to taste

1 egg, lightly beaten

If you are using canned salmon, combine all ingredients except the egg and taste for seasoning.  That way your mixture is perfectly seasoned before adding raw egg to the party.  You will likely not need any additional salt, because the smoked salmon and capers are briny already, and if you paste your garlic you will already be adding salt to the mixture.

Food Blog January 2013-0463

If you are using fresh salmon, combine all ingredients, mix well, and then fry about a tablespoon of the mixture until cooked through to taste for seasoning.

*To paste the garlic, mince cloves, then sprinkle with salt.  Using firm pressure, draw the blade of your knife across the garlic on the board several times.  It will begin to lose its integrity as the salt breaks it down, until you are left with a paste that is much easier to incorporate into your salmon mixture.

When it is seasoned to your liking, quarter the mixture and form four equal sized patties of 3-4 inches in diameter.  Pop these in the refrigerator for at least half an hour to let them firm up and meld – they will hold together in the pan much better this way.

Food Blog January 2013-0470

Before cooking, let your refrigerated patties stand at room temperature for about 10 minutes, just to take the chill off.

Food Blog January 2013-0468

Warm olive oil in a skillet over medium heat and gently fry the patties.  They should take 5-8 minutes per side.  Cooking time will depend upon whether you have used canned or fresh salmon and how plump your patties are.

To serve, enclose in buns lovingly with some spring mix and your choice of condiments.  I suggest horseradish or wasabi mayonnaise.  If you had homemade mayonnaise that would be a lovely splurge here.

Food Blog January 2013-0474

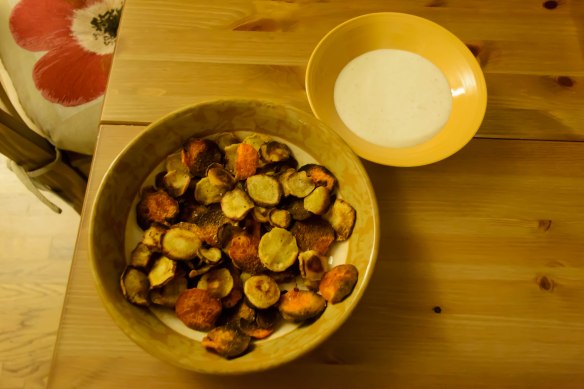
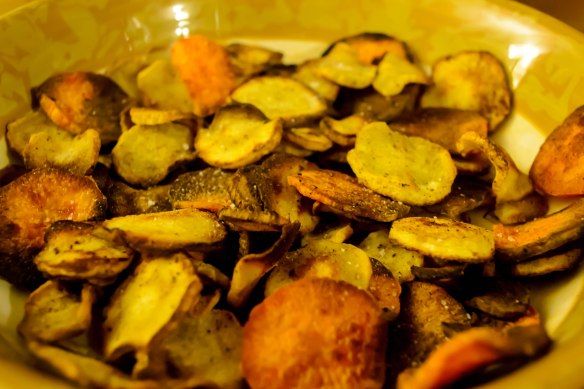
We had ours with paprika spiced kale chips, but to really get the Beagle experience you would need to serve with garlic French fries.

Food Blog January 2013-0479

Parsley Pie Crust

Food Blog January 2013-0412

I’ve never been one to start at the beginning.  Stories require backing up and wait- wait- let me explain who that was.  Dreams are recalled near the end, and only slowly do the initial details return.  Directions often skip a step or come in fuddled order.  I don’t know whether this is a consequence of a disorganized brain, or whether it’s a signal of confused genius (hah!).  The Odyssey, with its in media res trope, was an enormity to my teenage brain when I first encountered it during high school.  What a wonderful way to present information, and how validating and revelatory it was to find out that this was a classical method!

So it was no big surprise that, when facing the first week of my dough challenge, I couldn’t start at the beginning.  Ruhlman arranges Ratio with doughs first, true, but he seems to traverse the category in a solids-to-liquids order.  Bread comes first, pate-a-choux closes the chapter.  To me, this was even more intimidating than the idea of tackling dough at all.  Bread is something I want to build toward, not race into headfirst.

I flipped ahead in the book to take on my own personal Waterloo: pie crust.  Supposedly “easy as.”  But I’ve never found it that way.  My crust is somehow tough AND crumbly.  It collapses, it sticks, it refuses to roll in a smooth circle, it requires patching and crimping and pressing and it’s just easier to buy Pillsbury.  But now I’m in it, and I’ve got to conquer this thing.

Despite this personal beginning, it wasn’t enough for me to just make a pie crust.  You guys have probably all made pie crust.  How boring would it be for me to just report on the quiche I made?  At the end of the pie crust section, Ruhlman lists a number of alternatives and additions.  Ground nuts, cracked peppercorns, a dusting of spices, parmesan cheese?  I had never considered this.  I had to try it out.

Our quiche would have a parsley crust.  Coincidentally, this made my experimentation a perfect candidate for submission to Weekend Herb Blogging.

(I started with parsley, and then I started imagining adding lemon zest, and big particles of cracked black pepper, and then I realized that I just wanted some of the herbed buttermilk biscuits I so heralded when I made them for my Bittman project.  Biscuits are in our future, friends.)

The ratio for pie dough – at least this one – is 3, 2, 1.  Three parts flour, two parts fat, one part water.  This is by weight.  The problem here is, despite my desire to conquer this beast, and despite the impressive (read: verging on ridiculous) collection of kitchen tools I’ve amassed over the years (pot sticker press, anyone?), I don’t have a kitchen scale.  That makes it hard to work in weights.

Food Blog January 2013-0385

Fortunately, though he advocates it persistently, Ruhlman provides the general weight range for a cup of flour, so I worked with that.

Every pie crust recipe I’ve ever read, Ruhlman’s ratio included, calls for the water to be ice cold.  I get this: you want the fat to remain cold during this construction phase so it can melt and leave flaky pockets as it bakes.  Ice water keeps things frosty.  I decided to skip the ice cube middle man and stuck my water in the freezer for a few minutes.

Food Blog January 2013-0396

Usual procedure here: cut in the butter, add salt (and parsley, in this case), incorporate just enough water to bring things together, form into a disk and refrigerate to firm the fat back up.  Then you can roll out, fill, and bake.

Food Blog January 2013-0398

Food Blog January 2013-0401

That all sounds pretty simple, but somewhere in there things tend to go wrong for me.  This crust was (relatively) easy to work with.  It didn’t disintegrate, it didn’t melt, it didn’t even crack in too many places.  I think playing with biscuit and cracker doughs this past year accustomed me to the feeling and delicacy required to not destroy a circle of dough.  It was barely moist and not exactly elastic, but it did have a bit of give.  It baked to a lovely golden color, the flecks of green were intriguing and special, and the quiche that rested just wobbling between its sturdy walls was delicious.

Food Blog January 2013-0407

But the crust was tough.

I can assume a few reasons for this.

1.) It’s possible my ratio was off.  Because I didn’t weigh my flour, I may have had too much or too little in the mix.

2.) More likely, I overworked the dough.  I pressed and kneaded and folded until the dry bits at the bottom of my mixing bowl were willing to play along, and perhaps I was too insistent about that demand for inclusion.

Food Blog January 2013-0408

Like everything else, it seems pie crust needs a revisit to get it right.  The feeling of the dough between my fingers is familiar, but I have to learn its textural intricacies.  How much water is just enough?  How crumbly can it be and still hold together?  How much of the dryness do the fat and water absorb while the wrapped disk rests?  Without another attempt or three, I won’t know.

But it tasted good.  It crunched against the quiche and while it didn’t shatter at the slightest fork pressure, it did have that dryness against the teeth you expect from crust.  The parsley contributed a grassy freshness and made the flavor more complex, especially the following day.  I could see this working similarly well with dill, or thyme, or maybe even marjoram, all of which pair nicely with broccoli and mushrooms.

Onward, then.

Food Blog January 2013-0417

Broccoli mushroom quiche with parsley pie crust

(The quiche recipe is my mom’s.  I’m sure she got it from somewhere, but I don’t know that she even knows where anymore.  I’ve changed very little here, though her version usually contains bacon instead of mushrooms)

Crust:

1 heaping, lightly fluffed cup of flour (or 6 oz., if you’re doing this properly)

1 stick (8 TB, 4 oz., etc) butter, cut into 16 or so pieces

2-4 oz. very cold water

Pinch salt

2 TB chopped parsley (or dill, or oregano, or marjoram, or thyme… whatever you like best, I expect)

Filling:

1 cup small broccoli florets

6-8 crimini mushrooms, sliced thinly

¼ cup green onions, diced

Olive oil

Salt and pepper to taste

4 eggs

1 cup milk

1 ½ cups grated extra sharp cheddar cheese

½ cup grated swiss cheese

First, make the pie crust.  Measure out your water and put it into the freezer while you assemble your other ingredients.

In a bowl, combine the flour and butter pieces.  With your hands or a pastry blender (I always use the pastry blender – I hate the too-dry feeling of slowly crusting flour on my hands), cut the butter into the flour until it is pea-sized chunks and smaller.  Add the salt and herbs and combine gently.

Dribble in some water – 2 oz. to start with – and combine.  If the dough really isn’t coming together, add more water.  When you can press a few teaspoons of the dough between your fingertips and it stays together, turn the whole mass out onto a floured board and work lightly to bring it together into a disk.

Wrap the disk in plastic wrap and stow it in the fridge for half an hour or so.

When the dough disk is cold and firm, bring it back to your floured board and remove the plastic wrap.  Roll it out, moving a rolling pin (or wine bottle) in a few strokes straight away from you and back toward you only.  Avoid diagonal movements.  The dough will become a long oval.  Then, flip the dough over and turn it 90 degrees so you are facing a fat, flour-drenched oval instead.  Roll again, still moving the rolling pin straight away from and back toward you.  Repeat this process until you have a rough circle an inch or two larger than the diameter of your pie plate.

Lightly roll half of the dough around your rolling pin and drape it loosely into the pie plate, unrolling as you go, letting the crust settle into the dish.  Trim, crimp, or fold over any dangling edges as aesthetically as you are able.

Set aside (or perhaps return to the refrigerator?) while you make the filling.

Preheat the oven to 350F.

Heat some olive oil in a skillet over medium-high heat.  When it is shimmering, add the mushrooms and give them a good stir, taking care that as many as possible have contact with the bottom of the pan (that is, don’t leave them piled atop one another if you can help it).  Then leave them alone for a good five minutes, or until they begin to develop a golden crust.

While the mushrooms are getting golden, steam or microwave the broccoli florets until they are just crisp-tender and still very bright green.  Set them aside.

Turn your mushrooms and let them sizzle for another five minutes or so.  When they are golden on both sides, turn the heat down to medium and add the onions.  Cook until soft and translucent.  Toss the broccoli in the pan, then add salt and pepper to taste.  Mom often adds tarragon or marjoram at this point as well – start with ½ tsp and see what you like.  Remove from heat and set aside to cool for a few minutes.

While the vegetables cool, beat the eggs and milk together.  Add a dash of grated nutmeg, if you like, or some cracked black pepper.  As the quiche bakes, this will become a lovely firm custard.

To assemble, fill the pie crust with the vegetables, spreading them in an even layer.  Gently pour the custard over the vegetables.  Toss the shreds of cheese together and spread them evenly across the top of the filling.

Bake for 50-60 minutes, or until the cheese is golden and the quiche has puffed in the middle.  If it’s not puffed yet, it’s not done.  The ingredients will be cooked through, but when you cut into it you will find a disappointing watery layer at the bottom.  Give it another few minutes.

With the center puffed and the cheese sizzling, remove the quiche from the oven and let it sit for 5-10 minutes so the cheese can solidify a bit and doesn’t string all over when you try to cut through it.

Slice and serve. Food Blog January 2013-0418

Rolling in Dough

Okay, 2013, here we go.

OLYMPUS DIGITAL CAMERA

This year, I have a few changes to announce.  First, you may have noticed that we’re at a new address.  Update your bookmarks, if I’m lucky enough to be there, to http://blackberryeating.com.  As I understand it, the old address will still work, it will just redirect you here.  As I mentioned a few days ago, I’ve been wanted to upgrade to an address that makes more sense for what I’m doing here.  Blackberries, their mystery and decadence, remind me of all that is good about food: what is sweet, what is juicy, what is challenging, what is delicate, what is persnickety and strong.  The Galway Kinnell poem from which the title of this blog is taken celebrates juxtaposition and excess, likens these jeweled fruits to words and the consumption of those fruits to the search for meaning and significance.  This is a little piece of significance for me – this collection of words thrust with crossed fingers and squinted eyes out across the internet – and so I wanted to make it more connected, more applicable, but really, more mine.

Who ever thought so much consideration could go into a new address?

With the Bittman project over and a new address settled, it’s time to submerge myself in a new challenge.  As you know if you’ve been reading for a while, dough – particularly pie dough and yeasted dough – is one of my big fears.  What if it doesn’t rise?  What if it crumbles apart?  What if it tears or burns or collapses or comes out tough or doesn’t bake right?  What if it’s (gasp) imperfect?

DSC_0949

I decided I need to get over this.

This year, each week, I will make something out of dough.  It might be pie crust.  It might be cookies.  It might be pizza or foccaccia or flatbread.  It might, as terrifying as this is to me, be a real, honest-to-goodness loaf of bread, bloomed and kneaded, baked until crusty in a loaf pan.  I have a crazy notion that I want homemade bagels.  I have a yen to make doughnuts, and not just cake doughnuts, but the beautiful puff and chewy crumb of a good yeasted twist.

I don’t – and this is important to note – promise absolute success.  You’re going to see what crumbles along the way.  You’re going to see the scraps and scrapes and disasters I produce.  I think this is an important part of learning, and that’s part of what this blog is for me.

I have a few guides in this project, one hoped for and long awaited, one unexpected but delightful.  From my in-laws, I received Michael Ruhlman’s genius book Ratio.  This isn’t a cookbook.  It’s more than that.  It’s more exciting, it’s more foundational, and ultimately, I think, it’s more useful.  It doesn’t tell you how to make cherry pie, it tells you the essential equation of pie dough.  Three parts flour, two parts fat, one part water.  That will always equal pie dough.  Suddenly, you can use any kind of flour – more than one kind, if you want.  You can use lard instead of butter.  You can make one pie or you can make thirty-five pies, and you don’t have to think as hard about multiplying or adding or fractioning.  You have a ratio, and it is always going to work.

That’s the theory.  And I believe it, but I haven’t tried it out just yet.

From my parents, I received a bread machine.  I’ve never used a bread machine before, and while my immediate thought is that to really master dough, I will also have to make it by hand so I understand the kneading and the cycles of rising, and so I will come to know the feeling of the right kind of stretch and the windowpane test and the knowledge beneath my fingers that yes, this is bread, having a machine help me along the way is going to be nice.  The idea of dumping, in pajamas at 10pm, a series of ingredients into a pan, plugging in a machine, and telling it I want a fresh, hot loaf of bread at 7am, delights and astounds me.  I want to understand, but I also want the magic.

So that’s the plan.  If all goes well, it will mean more of this:

Food blog 2011-0097It will certainly mean more of this:

DSC_0959

It may even mean some of this:

IMG_0698

I don’t expect it will mean all dough, all the time, just as the past two years were not exclusively Bittman concoctions.  If something amazing comes along that doesn’t involve flour or eggs or butter, I will still report on it.  But the goal this year – the resolution, if you will – is to conquer this dough thing.  I want to have conversations with you about it.  I want your feedback and advice and experiences.  And I hope you enjoy.

Reflecting

The Bittman project is done.  I did it!  I took a list of 101 side dishes conceived to accompany a Thanksgiving turkey, whittled it down a bit into dishes N. and I would actually eat (this left us with a total of 82) and, over the course of two years, made and ate each one.  Before moving on to my next project, I wanted to stop and consider a bit.  This project was valuable in many ways and I don’t think it should be pushed aside like a last gasping bite before launching into the next thing.  I learned a lot about cooking, I think, both from the mistakes I made and from the little triumphs and successes I achieved.


The Mistakes:

Measuring is important.  If you don’t measure, if you don’t have the correct ratios, things don’t bake up the way they are supposed to.

Follow directions.  Roasting can’t happen with waterlogged ingredients, and adding items in the wrong order produces unintended results.  Of course, this is challenging with Bittman’s suggestions because they don’t always have exact directives.  But it has taught me a lot about how a recipe fits together, and how to organize and present information in a way that works – at least for me.

Pairings matter.  Learning how to cook a dish is one thing.  But you’re probably always going to be serving it to someone (or multiple someones) as part of a meal.  Crossing flavors in strange ways – Italian sausage with soy-glazed vegetables, Southwestern spices with Middle Eastern preparations, too much sweet with too little savory – doesn’t produce a very satisfying eating experience.

I just don’t like yellow curry.  I can tolerate it, but I’d much rather have garam masala, or tumeric, or cumin, or just straight black pepper.

Give yourself time.  Charging headfirst into an unfamiliar recipe with only twenty minutes until dinnertime is almost always going to lead to frustration, mistakes, and unsatisfying results.  This sounds very preachy, but read the recipe beforehand, make sure you understand what it is asking, and budget your time accordingly.

WRITE THINGS DOWN!  This isn’t the first – or the only – time I will make this mistake.  But I’m trying.  If you don’t write it down, chances are good you won’t remember it.  And then that perfect amount of nutmeg, or salt, or the temperature you used, is lost.  And that makes it unrepeatable.


The Triumphs:

Repurposing works.  If something doesn’t come out right – or to your liking – there is no sense in throwing it away if you can imagine transforming it into something better.  If that means adding booze and wrapping it in pie dough, then so be it!

Acid saves.  If your dish is missing something but you don’t want to add more salt and you’re not sure about upping the spice quotient, try a squeeze of lemon juice or a dash of red wine vinegar.  There’s something about the brightness and verve this brings to a dish that really changes it.  (Hell, it even tones down the overbearing sweetness of buttercream. )

I can, if I take my time and don’t freak out, make a successful dough.  It’s not pretty yet, and it’s not error-free, but it comes together and rolls out and tastes pretty good too.  That’s something.  That’s more than I expected.

Soup is easy.  I grew up on two kinds of soup: the overprocessed, condensed kind that came in cans, and the long-simmering stew and chili kind.  This led me to believe that homemade soup was a time consuming process.  Watching cooking shows that talk about extracting flavors from bones and babysitting a stock for hours furthered this assumption.  But since I’ve started making my own chicken stock from the carcasses of roast chickens, and since I realized that Bittman’s soup recipes mostly go the same way (sweat vegetables, add flavoring, add broth and heat through), soup became a quick and simple venture.  Onions, garlic, carrots, celery, and chicken broth, and you’re 75% there already.  During the year I even invented my own, which N. and I will be having again next week with the addition of ramen noodles.


The Favorites:

As seems inevitable with a project like this, there are some ingredient combinations N. and I will never have the desire to return to.  But there are some that we will crave again and again.  Some, in fact, have already graced our table on multiple occasions.  I just want to point out a few of these.

Sweet.  This combo of sweet potatoes and green onions, roasted until caramelized and perfectly salted, is an achingly beautiful side dish still in search of the perfect accompaniment.  But it dances solo just fine.  I’d have these for lunch any day.  I’d have them for dessert too.

Sausage, kale, and white beans (and cheddar cheese or Parmesan rind, too, if you really want to comfort it up) are a beautiful combination that deserve revisiting.  This soup is warm and satisfying and should be eaten at least once per winter.  Nicely spiced tempeh crumbles might make an adequate substitution for the sausage, if you aren’t into pig.

Herbed buttermilk biscuits, especially with the addition of lemon zest, are all I want in the biscuit world right now.  They are crisp and tender and have just the right crunch.  They are breakfast ready.  They would accept cream gravy.  They would mop up a savory sauce.  They would provide the perfect vehicle for jam or honey or sweetened goat cheese.  They freeze perfectly and, frozen solid and plopped onto parchment paper, require only a few extra minutes in the oven to cook.

Ginger-Apricot Chutney.  This spicy-sweet condiment would be a suitable topper for the Herbed Buttermilk Biscuits I just got weak-kneed over.  But it also pairs well with grilled or roasted chicken, and would probably be delectable as a fresh take on a Christmas ham glaze.  Or, you know, on sandwiches with lunchmeat or cream cheese, or as an interesting filling for chocolate truffles.  Now I want to make this again immediately.  I wonder if I have any ginger in the freezer…

Perhaps the crowning glory of the whole project, the beer-y cornbread stuffing laced with tomatoes, green onions, and corn kernels is a genius combination I have already revisited on multiple occasions.  My sister has used this as a Thanksgiving stuffing alternative for her celery-hating boyfriend (seriously, almost every stuffing I’ve ever made has a base of onions and celery.  Hit the shelves.  Look for one without that notorious stringy green stalk).  It’s yeasty and deep and golden and glorious, and it gives you an excuse to toast and taste a few cubes of cornbread along the way.  It is, even if you don’t like beer, not to be missed.


The News:

I have a few things planned for the year on which we’ve just embarked.  First, we need a new project.  I’ve decided.  It’s going to be bad for my waistline but good for my confidence in the kitchen.  I hope you’ll like it.  I’ll get to that next week.

Second, I think we need a new place to meet each week.  I started this blog intending to write about fancy things I’d made.  I didn’t know how much I would enjoy sharing even my mistakes.  I didn’t know how much I was going to learn about cooking and photography and writing about food.  “shornrapunzel,” a moniker picked up from my last days in college when I went from three feet of hair to less than one (I’m back in the three feet range now), was the username on my first blog – a livejournal I used as a writing exercise and an attempt to stay in touch with friends pre-Facebook.  Eventually, all I was posting there were long, drippy descriptions of food I had eaten or wanted to eat, and I decided to start this little venture as a more appropriate way of addressing this obsession.  So “shornrapunzel” was an easy name to saddle a url with because it was familiar and connected with me, but it never really had any relevance to this blog or its topics.  Blackberries, given their literary suggestions of adventure and unexpectedness, still seem to fit well the kind of cooking and sharing I’m doing here.  So they get to stay.  In this next week, I’m moving this little kitchen corner to a new domain for continued blackberrying.  I hope everything transfers over okay.  I’ve never done this before.  But then, that’s nothing new.

See you on the other side!

Happy New Year!

Food Blog 2011-2013-0362

Oh friends, it happened.  I made it.  Yesterday I made the last two Bittmans on my list and completed, albeit a year later than I’d originally intended, my project.  I have reflections to share, certainly, and I have changes and excitement and promises for the new year, but first, I think, let’s work with the program.  Two Bittmans.  Two reports:

“14. Steam or poach 2 cups of pumpkin cubes until tender. Meanwhile, sauté 1 cup sliced shiitake mushroom caps in vegetable oil with a few drops of sesame oil. Boil 4 cups water and whisk some of it with ⅓ to ½ cup of miso. Stir miso mixture, pumpkin and mushrooms into water and heat everything through, then serve, drizzled with more sesame oil.”

Because we were planning to reach midnight by eating as many snacks as possible eating our way to midnight snacking, I wanted a light dinner to precede the countdown.  This seemed to fit the bill.  And it had to, after all, since it was the only soup left and the calendar was screaming December 31st.

2 cups peeled, cubed butternut squash (I had some in the fridge, and suspected pumpkin would be hard to find)

1 1 oz. package dried shiitake mushrooms

1 TB vegetable oil

¼ tsp (or to taste) toasted sesame oil, plus some for drizzling

3 packets instant tofu miso soup mix (all I could find at my grocery store)

water

white wine

To reconstitute my shiitake mushrooms, I soaked them in a mixture of white wine and almost boiling water for 15-20 minutes, until they were plump and soft.

While the mushrooms soaked, I cubed up my butternut squash and submerged the pieces in a pan of salted water.  I brought this to a bare simmer and cooked it just until the squash pieces were tender – 10-15 minutes – then drained the pieces in a colander.  Don’t overcook them, because they will start to fall apart.  Set the squash pieces aside.

When the mushrooms were tender, I scooped them out of their bath and decided the remnants shouldn’t go to waste.  I poured the soaking broth into a little pot to bring to a boil, so I could use this already flavored liquid as the base for my soup.  While it heated, I stemmed and sliced the mushrooms.

Since the shiitakes were now basically cooked, I probably could have skipped Bittman’s sautéing step.  But honestly, I’m not one to pass up the opportunity to ingest sesame oil, so I dutifully dribbled vegetable oil with a few (or a few more than a few) drops of sesame oil in the (drained and dried) pan I’d used to simmer my squash and sautéed the mushroom slices over medium heat until they dried out a bit and started to take on some color.

While this colorization happened, slowly and so aromatically, I made the broth.  I poured all three miso soup seasoning packets – tofu and seaweed and all – into a small dish, then mixed in about ½ cup of my heated mushroom soaking liquid and whisked gently to dissolve the powdery soup mix.  This created a slightly thickened slurry, which I poured with the rest of the liquid and the butternut squash cubes into the mushroom pan.

Food Blog 2011-2013-0341

After a few moments of reheating, we dipped up bowlfuls and ate.

Food Blog 2011-2013-0343

N. wasn’t sure (he sometimes takes issue with the texture of reconstituted mushrooms), but I inhaled it with devotion.  I love the flavor of miso soup, and the mild sweetness of butternut squash against the salty umami and fleshy squish of the mushrooms was lovely.

Food Blog 2011-2013-0347

It was light but still satisfying, and the tofu and vegetables from the soup mix were so welcome that I’d advise you, if you are using straight miso rather than a pre-mixed, additive laden packet, to consider adding some tofu or seaweed or green onion just to contribute a little substance and contrast to the soup.

Food Blog 2011-2013-0348

Dinner done, we moved on to the second stage of the evening.

“89. Vegetable crackers: Slice beets, sweet potatoes, plantains or parsnips or all of the above into 1/8-inch disks (a mandoline is helpful) and toss lightly in olive oil. Spread the slices on baking sheets, sprinkle with salt, pepper and, if you like, other seasonings and bake at 400 degrees for 10 to 12 minutes. When browned, flip the chips over and bake for another 10 minutes or so.”

This sounded tasty, and I’d always intended to make it for a party.  With a dear friend coming over to ring in the new year with us, and since hunks of cheese alone might be deemed a slightly imbalanced offering (though so, so delicious…), this seemed like a perfect opportunity.  Beets were out of the question (N.’s nemeses since childhood), and I couldn’t find plantains in my grocery store’s produce section, so we were left with the nutty herbiness of parsnips and the always dependable earthy sweetness of sweet potato.

3 medium parsnips, peeled

½ large sweet potato, peeled

generous dose of olive oil (maybe ¼ cup?), plus more to grease the cookie sheets

1 tsp each (or to taste) salt, pepper, and garam masala

To prepare for roasting, preheat the oven to 400F and line two cookie sheets with aluminum foil.  Drizzle with olive oil and spread to cover the surface of the foil evenly.

While the oven preheats, tackle the vegetables.  I don’t have a mandoline, but I do have a ruler, and I must confess I did bring it to the kitchen to give myself a better idea of what 1/8 inch looks like.  My slices were not quite even, but they did verge on passable.  I tossed them – big coins of harvest orange and speckled white – in a glass bowl with the olive oil and the spices until they were evenly coated.

Food Blog 2011-2013-0339

Spread the vegetable coins across the cookie sheets in a single layer, not overlapping, not in piles.  If they cook in a stack, they will soften but not brown or crisp.  Stow them in the oven for 12-15 minutes, or until they are just beginning to brown.

This next step is a true exercise in patience.  Unless you are far more talented with a spatula than I, you will have to flip each piece over individually.  You have to, because otherwise one side will burn and the other side will flutter limply into cooked-but-not-crisp status.  Trust me on this one.  When you have laboriously flipped each coin, shove the tray back into the oven for another 10-12 minutes.

Food Blog 2011-2013-0342

At this point, you’ll have to use your judgment.  My offerings were, after this additional time, cooked through but not remotely cracker-like in texture.  Another five minutes in the oven might have done the trick.  Putting them back in, failing to set a timer, and heading to the couch to eat dinner (I was trying to multitask) is not advisable.  I didn’t remember them until I smelled the slightly spicy aroma of parsnips, and by then it was too late – many of the little coins had gone from crackers to briquets.

I decided to pick out the worst offenders – Lucy reports that she didn’t mind a bit of charred flavor – and eat the salvageable ones anyway.

Food Blog 2011-2013-0356

To make them a bit more exciting (and disguise any lingering burned taste) I made a little dipping sauce.  You’ll need:

juice from 1 lime

2 TB honey

1 tsp garam masala

½ – 1 cup Greek yogurt

Whisk the first three ingredients together with a fork until they are smooth.  In increments, add Greek yogurt until your sauce reaches the desired thickness.  Mine was about the consistency of ranch dressing, but much more interesting in flavor.

Food Blog 2011-2013-0349

These crackers (with and without the sauce) were – if you were able to overlook the overcooking – a nice alternative to crudites or store-bought crackers.  They weren’t quite as crispy (except the ones that were too crispy), but they had a lovely deep flavor and none of the powdery, processed taste some crackers can have.  They are also a gluten-free offering and, minus the yogurt and honey sauce, vegan as well.

Food Blog 2011-2013-0350

I served them alongside a cheese platter,

Food Blog 2011-2013-0353

Food Blog 2011-2013-0354

Joy the Baker’s chili spiced sharp cheddar cheese crackers,

Food Blog 2011-2013-0352

assorted sweets,

Food Blog 2011-2013-0355

and my appetizer version of Bittman’s “Marshmallow Topping for Adults” dish: thick discs of sweet potato roasted until tender, topped with a dollop of cream cheese and sprinkled with a pecan brown sugar blend before being broiled until the sugar bubbles and the cheese slackens toward melting.

Food Blog 2011-2013-0357

Food Blog 2011-2013-0359

And champagne, of course.

Food Blog 2011-2013-0361

Happy New Year.  I hope you celebrate your achievements, meet your goals, and find happiness in your own self.  I’ll be checking in again later this week with some reflections and announcements.  Welcome to 2013.

Finish line

The problem with cramming for final exams – as many of my students were doing only a few weeks ago – is that you end up trying to process too much information, and just as quickly as you learn new things, the old things you thought you knew start sliding away. That’s the glory and the power of writing. Once it’s on the page, it’s solid. No matter how many holiday dinners you eat (I’m onto my third or fourth at this point), those words will still tell you exactly what you did and (sometimes) how you felt about it.

I feel like I’m cramming for my final. Last week, before the holiday, before the family time, before the outpouring of memories and laughter and swallowed tears of all kinds and barking and yelling and joy, I made three Bittmans in a desperate bid to stay on top of the project.

42. Brussels Sprout Sliders: Trim and halve large brussels sprouts, toss with olive oil and roast at 400 degrees until tender but not mushy. Using the brussels sprout halves as you would hamburger buns, sandwich them around a piece of crispy bacon or ham, maybe a little caramelized onion, and a dab of whole grain mustard. Keep everything in place with toothpicks.”

I always intended to make this one for a Halloween party. It seemed fitting: for some, brussels sprouts are a frightening, disdained vegetable. But this new perspective on them makes them fun and perhaps even appetizing to those disbelievers who see them only as a bitter waterlogged grenade of disappointment. But I never did. So they became an appetizer for two:

6 brussels sprouts, trimmed and halved

2 strips bacon, cut into eight even pieces (you’ll use six for the brussels. Eat the other two, or share with a tall, handsome somebody who shows up in the kitchen when the smell becomes too enticing to ignore)

dab (maybe 1 tsp total?) whole grain mustard

Preheat the oven to 400F.

Line a small baking dish (I used a 9” cake pan) with aluminum foil and drizzle the foil with olive oil. Brush or rub the olive oil into an even layer so every millimeter of foil is covered.

Set the sprouts, cut side down, on the oiled foil, spacing them evenly so none are touching. This will ensure even roasting rather than steaming.

Food%2520Blog%25202011-2013-0204

Roast for 15 minutes, until the cut edges are browned and just crisp. Using tongs, flip over each sprout so they teeter on their curved sides. Roast for another 15 minutes.

While sprouts are roasting, cook the bacon. Mine was already cooked – saved from another porky occasion – so during the last five minutes of sprout roasting I added the bacon pieces to the pan to heat them up a little.

When the sprouts are browned and lightly tender, set them aside until they are cool enough to handle. As soon as you can bear to touch them, add a tiny spread of mustard across one cut edge, seat the bacon atop it, and place another sprout half on top to complete the sandwich. Drive a toothpick through the whole thing and serve as an hors d’oeuvre.

Food%2520Blog%25202011-2013-0205

We gobbled these down like we hadn’t eaten in weeks. They were delightful and I highly recommend them as a party item: crisp bacon, zesty mustard, and the nutty crunchy slight bitterness of roasted brussels sprouts, all collected together in one perfect bite. Perhaps a New Year’s Eve treat to help the hours pass.

Food%2520Blog%25202011-2013-0210


Soup and bread seemed like a good meal to follow our sprouts.

82. Cornmeal Flatbread with Onion and Sage: Mix 1 cup cornmeal with 1 teaspoon salt; slowly whisk in 1½ cups water. Cover and let sit for an hour (or up to 12 hours in the refrigerator). Put ¼ cup olive oil in a 12-inch ovenproof skillet along with a thinly sliced red onion; stir. Heat the skillet in a 400-degree oven for a few minutes, then stir and pour in the batter. Bake at 375 degrees until the flatbread is crisp at the edges and releases easily from the pan, about 45 minutes.”

I followed these directions fairly exactly, with the exception that I used only half an onion. The olive oil and onion went into the oven for five minutes at 400F, at which point the onion slices were sizzling and the oil was shimmering beautifully.

Bittman neglects to note where and when to add the sage, so I stirred a tablespoon of finely chopped fresh sage into the batter just before adding it to the skillet.

Food%2520Blog%25202011-2013-0203

This concoction baked for 45 minutes, until it was set, the onions were crisp-tender, and the whole thing loosened easily from the skillet and slid almost gracefully onto a serving tray.

Food%2520Blog%25202011-2013-0212

We cut large wedges and tasted. It was unlike any other bread I’ve come across – more like baked squares of polenta than anything else, which made sense when I stopped and thought about it. Were I renaming this dish, I think I would call it Polenta Pizza. It was well oiled and spongy in texture, squishing pleasingly between our teeth and driving us back for additional tastes. N. wasn’t sure he liked it at first, but then he went back for a second slice and then a third. When I ribbed him about this, he said he was still deciding what he really thought, and needed more samples to truly make up his mind.

Food%2520Blog%25202011-2013-0214

This odd little bread course could easily be dunked in saucers of warmed marinara sauce, or sprinkled with mozzarella or parmesan for a pleasing salty bite. Though the onions and sage were good, you could probably saute almost anything in that skillet before adding the batter: sausage, peppers, mushrooms… anything you’d put on a pizza.

A decadent appetizer and a well-oiled pizza/bread need a sober, sensible kind of soup to balance them out.

19. Saute chopped onions, garlic, celery and carrots in olive oil, then add chopped tomatoes (boxed are fine) with their juice, lentils and stock or water to cover. When everything is soft, add a squeeze of lemon juice or a splash of red wine vinegar. Garnish with parsley.”

Since we were leaving town the next day, I didn’t want huge quantities. (This still made enough for four, but I froze the leftovers so nothing was lost)

½ red onion (left from the flatbread, so convenient), diced

4-6 small cloves garlic, minced

1/3 cup each celery and carrots, sliced

¾ cup lentils

13.5 oz can petite diced tomatoes

2½ cups chicken broth (or vegetable broth, or water)

1 TB lemon juice

2 TB fresh, finely chopped parsley

salt and pepper to taste

I heated 2 TB olive oil over medium heat, then tossed in the onions to sweat for a minute or two before adding the garlic and the other vegetables. When the onions were translucent and tender, I added the tomatoes, lentils, and broth and turned the heat up to medium high until the whole pot came to a boil.

Once boiling, I gave it a healthy stir and then turned the heat down so the soup would just simmer, letting the lentils soften gently and the vegetables tenderize.

Simmer for at least 35 minutes, then taste the lentils to see if they are tender enough for your taste. We like them soft but not mushy, with minimal resistance but still able to hold their shape.

Just before serving, squeeze in the lemon juice, stir gently, and dip into serving bowls. Scatter the surface with a grassy sprinkle of parsley.

Food%2520Blog%25202011-2013-0215

We liked this, though it wasn’t the best lentil soup I’ve ever had. The flavors were enticing and the lemon juice made it a bright, rather than heavy, soup. The problem with it was that I like my lentil soup more like a stew or a chili. The brightness of the lemon made the shower of shredded pepperjack cheese I was considering adding seem extraneous and out of place, and I tend to get crotchety when denied cheese. But alongside the flatbread and the richness of the brussels sprouts, it was hearty but didn’t weigh us down.

2012 is fading like the last sheen of daylight across the hills in winter. 2013 charges toward us, all mystery and sharp promise. I thought about cheating and saying I was done; these three dishes are the final three, I made it, all boxes are checked, all questions answered, funtoosh, kaput (extra points if you can name my source!), but I just can’t. I’m too close. This final exam is too important. This resolution needs to be one I keep. I have two dishes left. I have two days, one of which will be spent driving from the Sierra Nevada foothills where N.’s parents live back to Los Angeles and my little house. I hope I’m going to make it. The finish line is in sight. Now I just have to stagger across it.