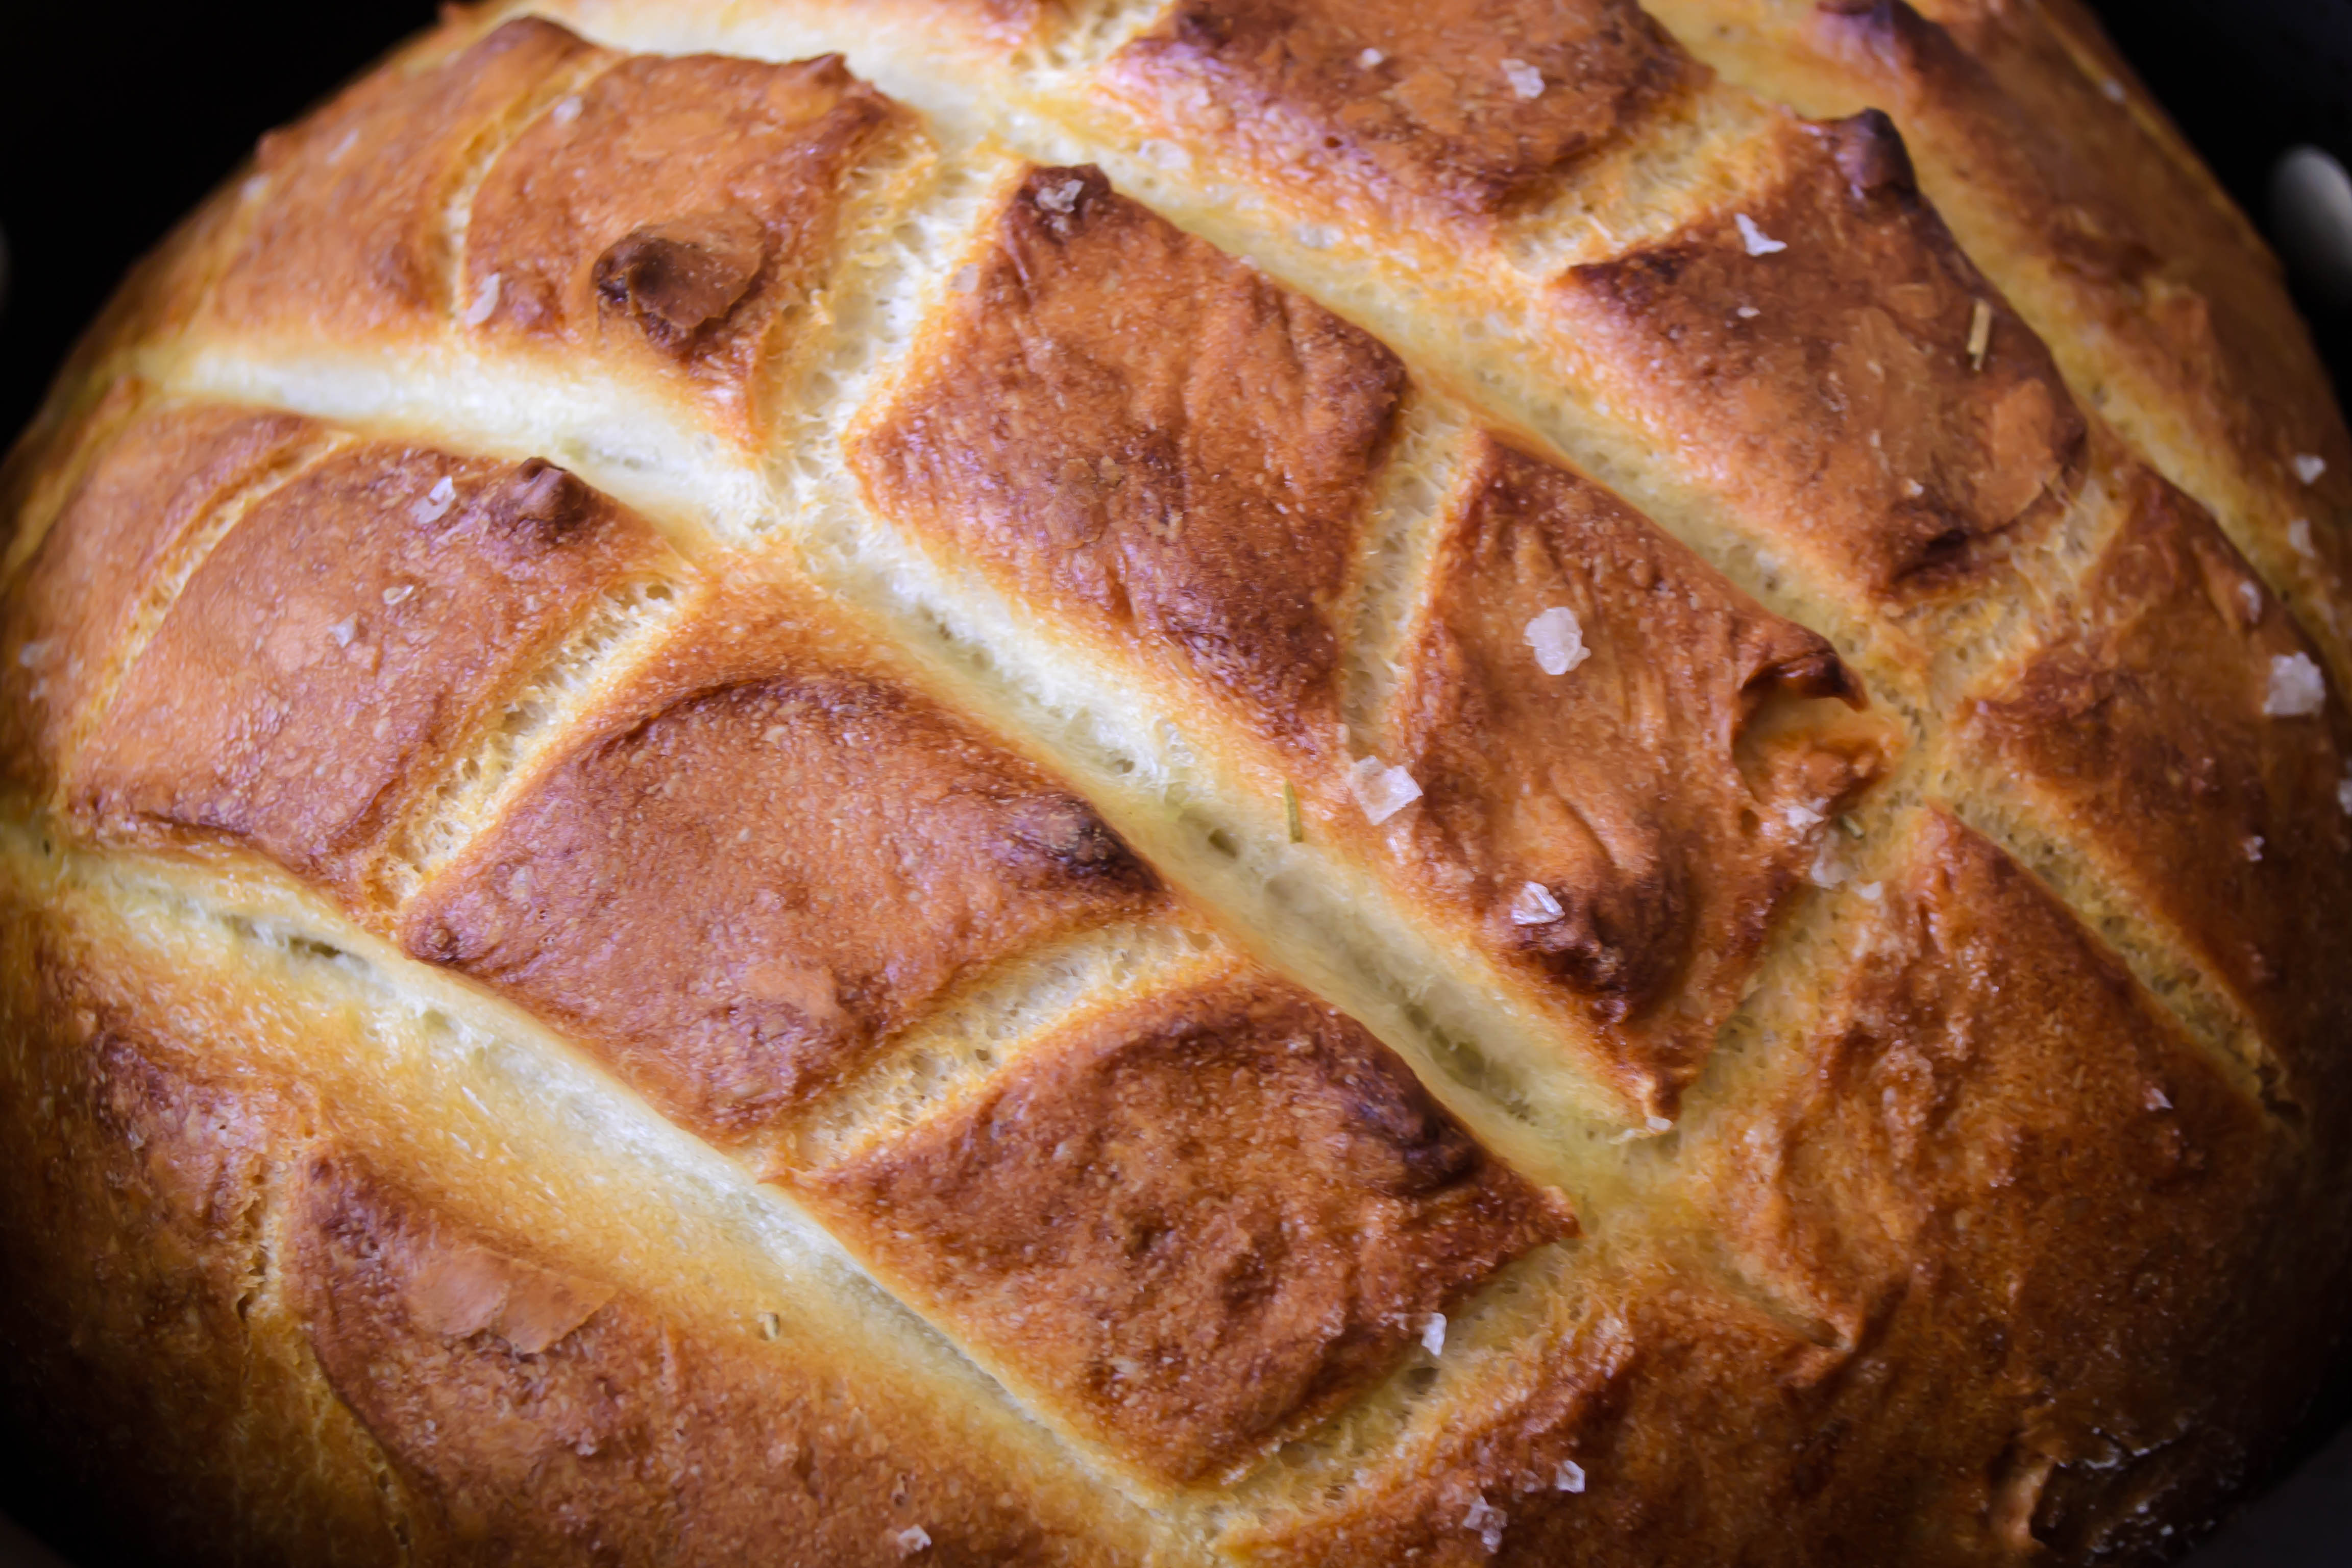
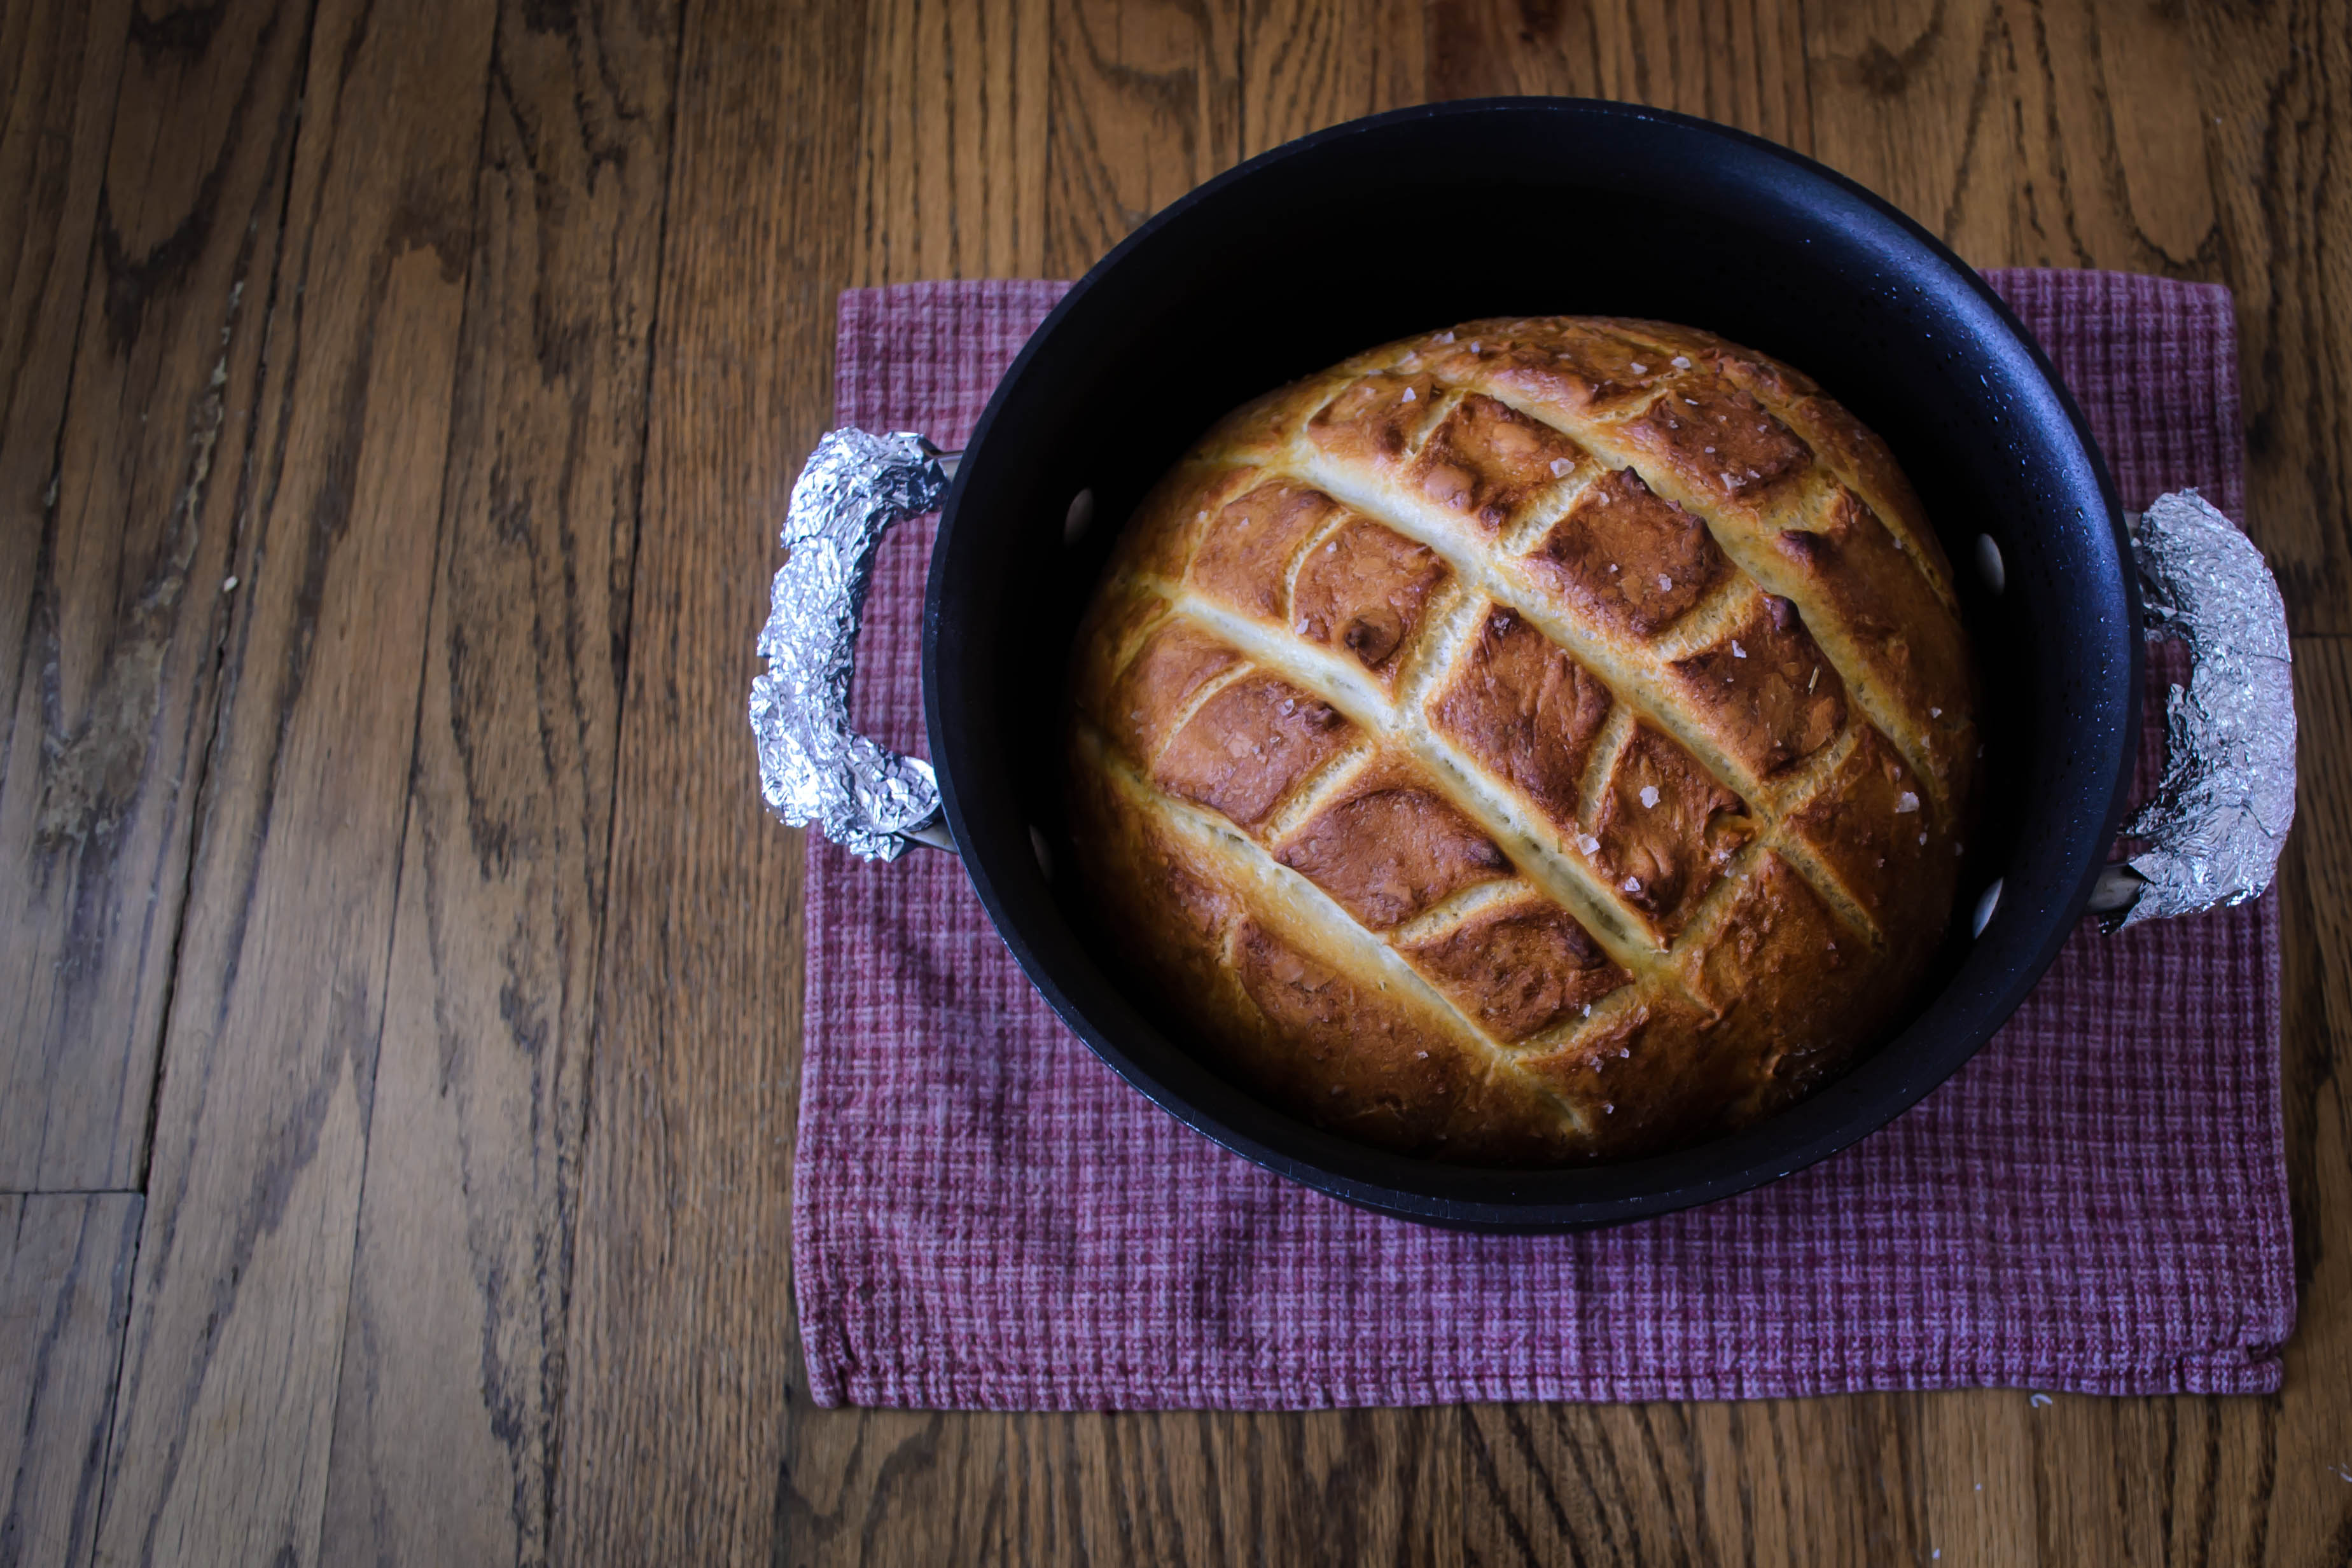
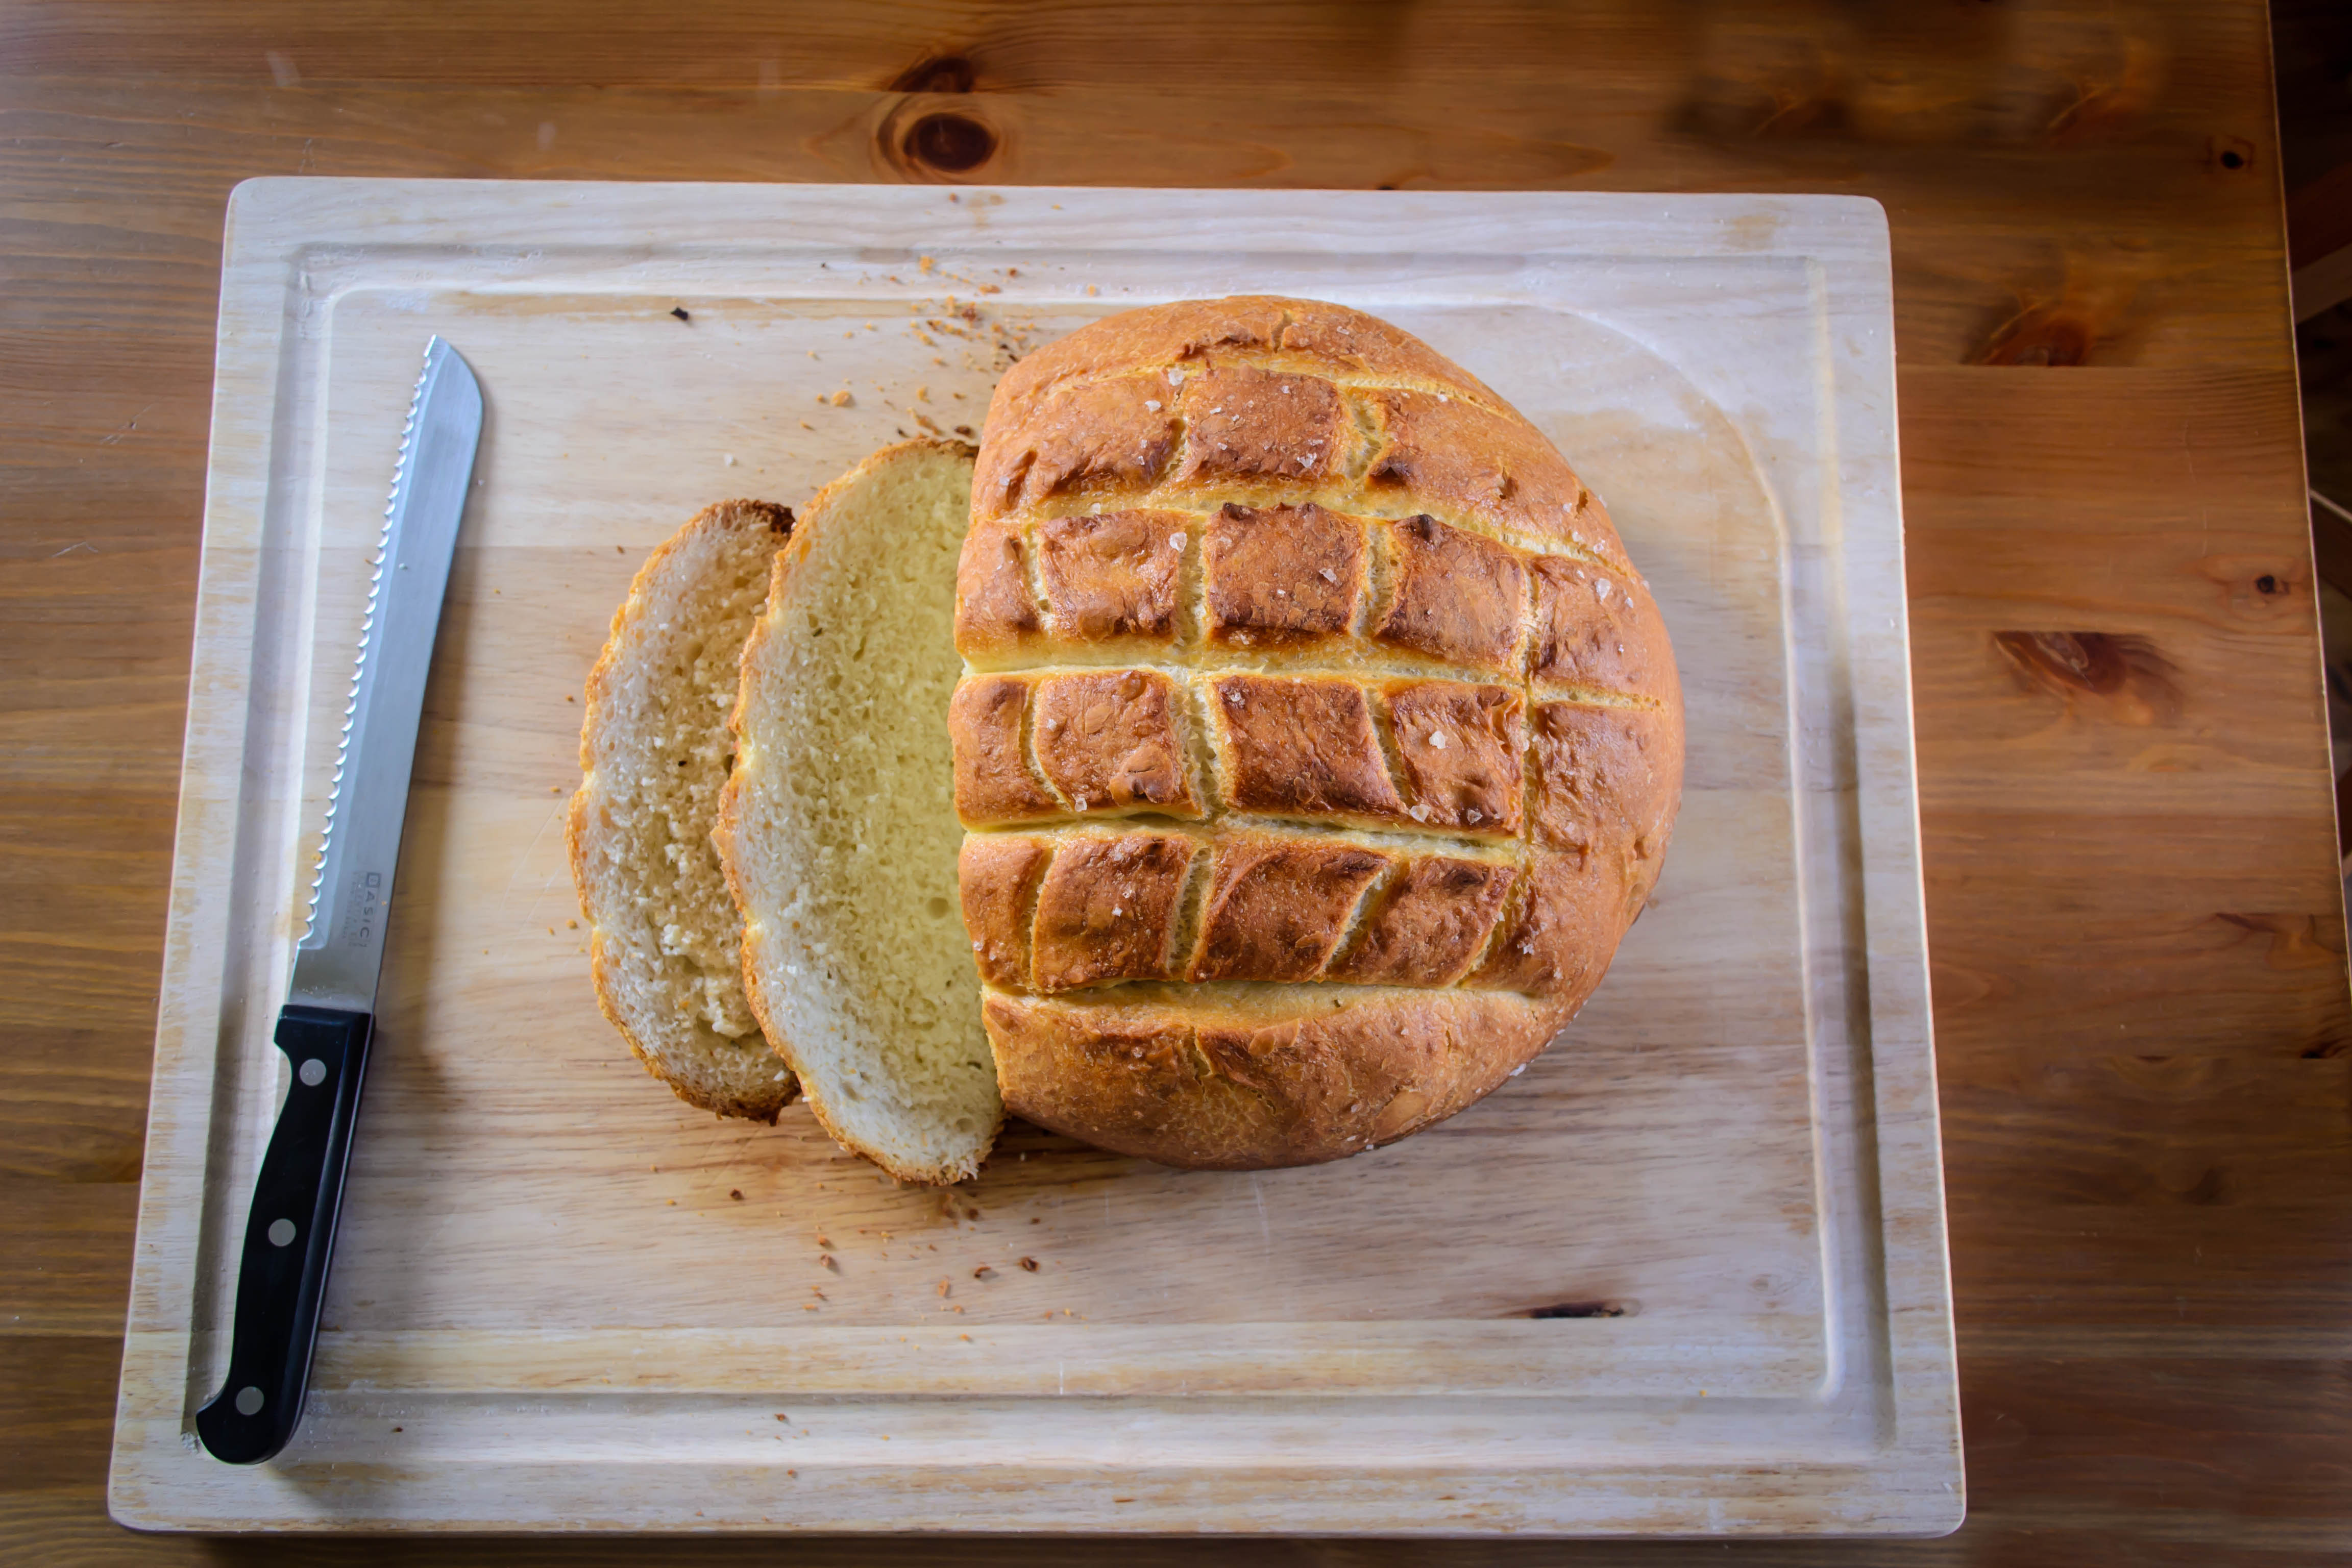
Go-To Dough 1
2


When it rains in Los Angeles, the whole atmosphere of the city changes. The earth sighs acceptance and glee, and the ordinary dustiness of every other person’s front yard glimmers with emerald slickness: life! Reprieve from the desert we pretend we haven’t built over! The roads become jagged, glistering, tar and oil stained slip’n’slides on which people drive either too slowly – avoiding disaster through excess caution – or too quickly – rushing to get off the highways as soon as possible. The sky is unused to gray billows here, or at least it seems that way.

But for me, the end of this week felt like home. It was a strange mix of homesickness and invigoration. I am accustomed to working in this climate. It feels natural. Habitual. My fingers and my brain and my skin – they fit into this overcast world.
Seeking the comfort of familiarity, I decided to leave yeast alone for this week and fall back on something I know: biscuits. Butter. Flour. Buttermilk. Salt. Baking powder. The blessed fundamentals. But I know the fundamentals. I wanted more.

In Ratio, Ruhlman calls these Chicago biscuits because their ratio 3-1-2 is Chicago’s area code. 3 parts flour, 1 part fat, 2 parts liquid. I’m calling them Uncommon because their pairing – brown sugar and extra sharp cheddar cheese – might not be anyone’s first inclination. It made sense to me, though, if you reinsert the missing link of apple pie in the middle. Cheese and apples are perfect. Brown sugar and apples are perfect. What would happen if you took the apples out of the equation and left the savory richness of cheese chewing against the molasses-deep hum of brown sugar? They are also Uncommon because they take a little extra time (almost 3 hours from start to finish) and produce a slightly different product than your ordinary dinner biscuit.
Adapted, obviously, from Ruhlman’s Ratio 312 Biscuits.
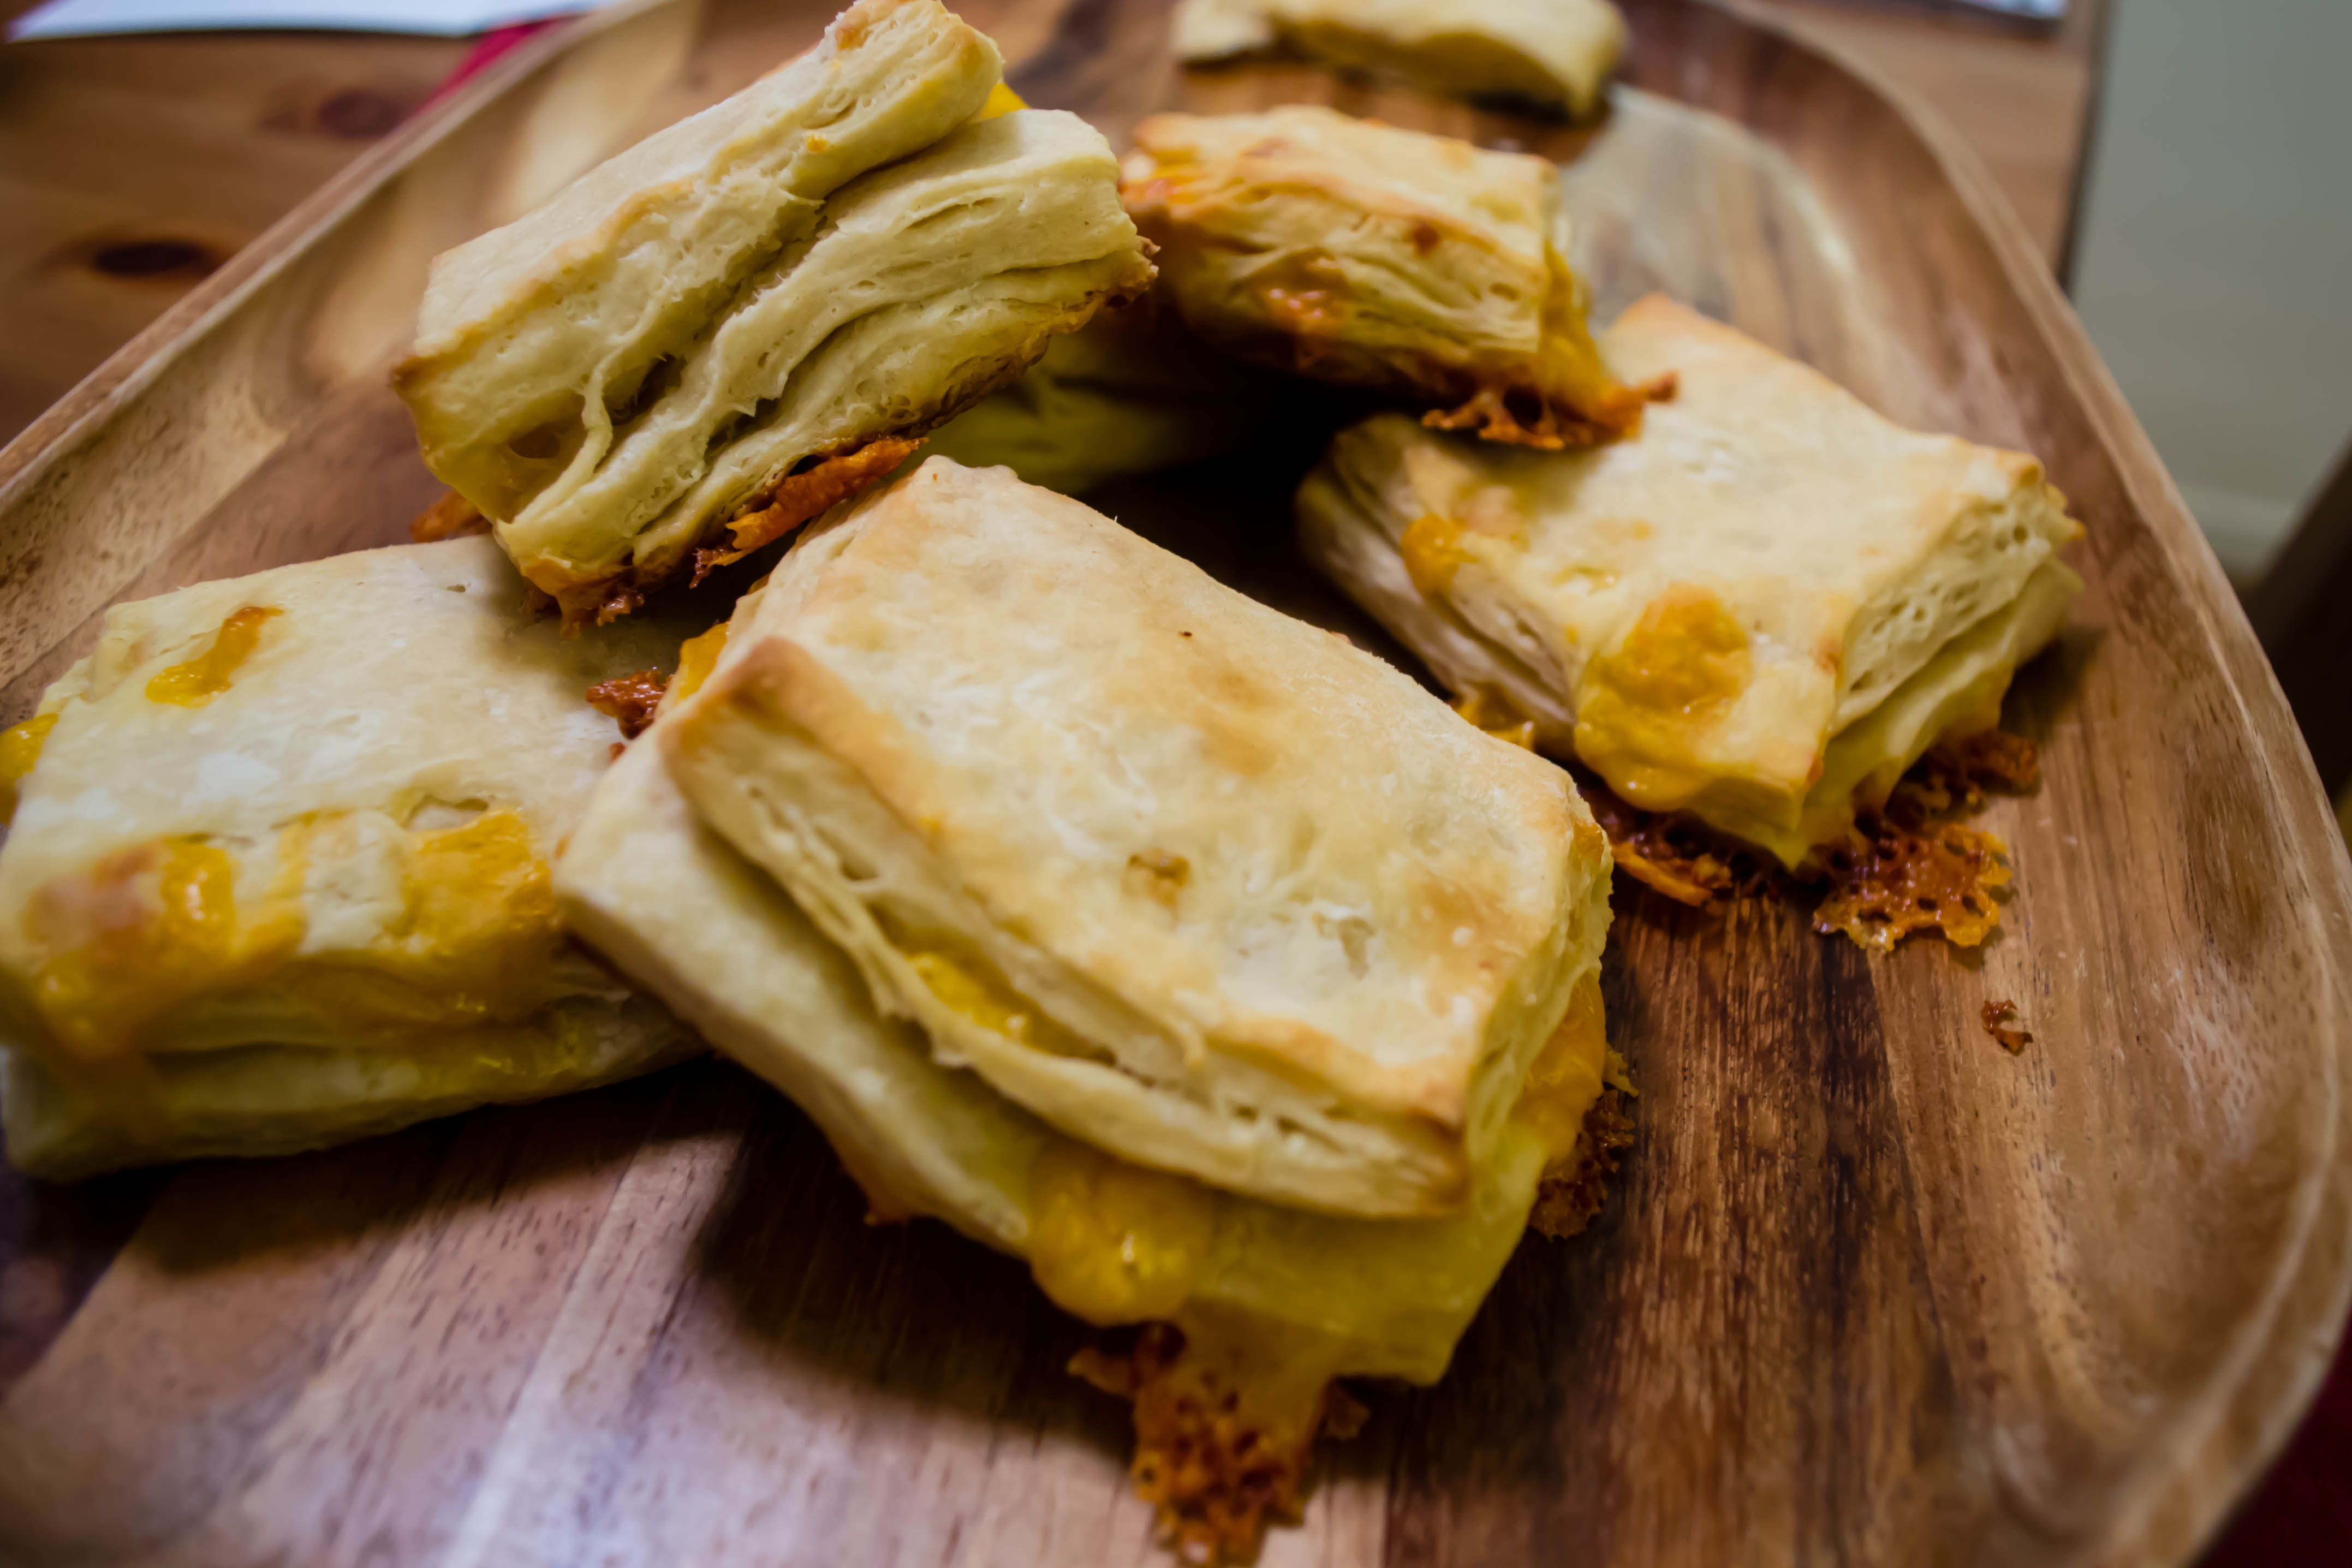
Uncommon Brown Sugar Cheddar Biscuits
scant 2 cups flour (9 oz)
1 tsp salt
2 tsp baking powder
2 TB brown sugar
6 TB butter (3 oz)
½ cup ¼-inch chunks of cheddar cheese, the sharper the better
¾ cups buttermilk (6 oz)
In a medium bowl, whisk together the flour, salt, baking powder, and brown sugar.
Using a pastry blender or your fingers, cut in the butter until it is incorporated throughout in chunks the size of small peas.
Add the cheddar cheese and buttermilk and mix to combine into a rough, sticky dough. I find using a fork works well for this step.

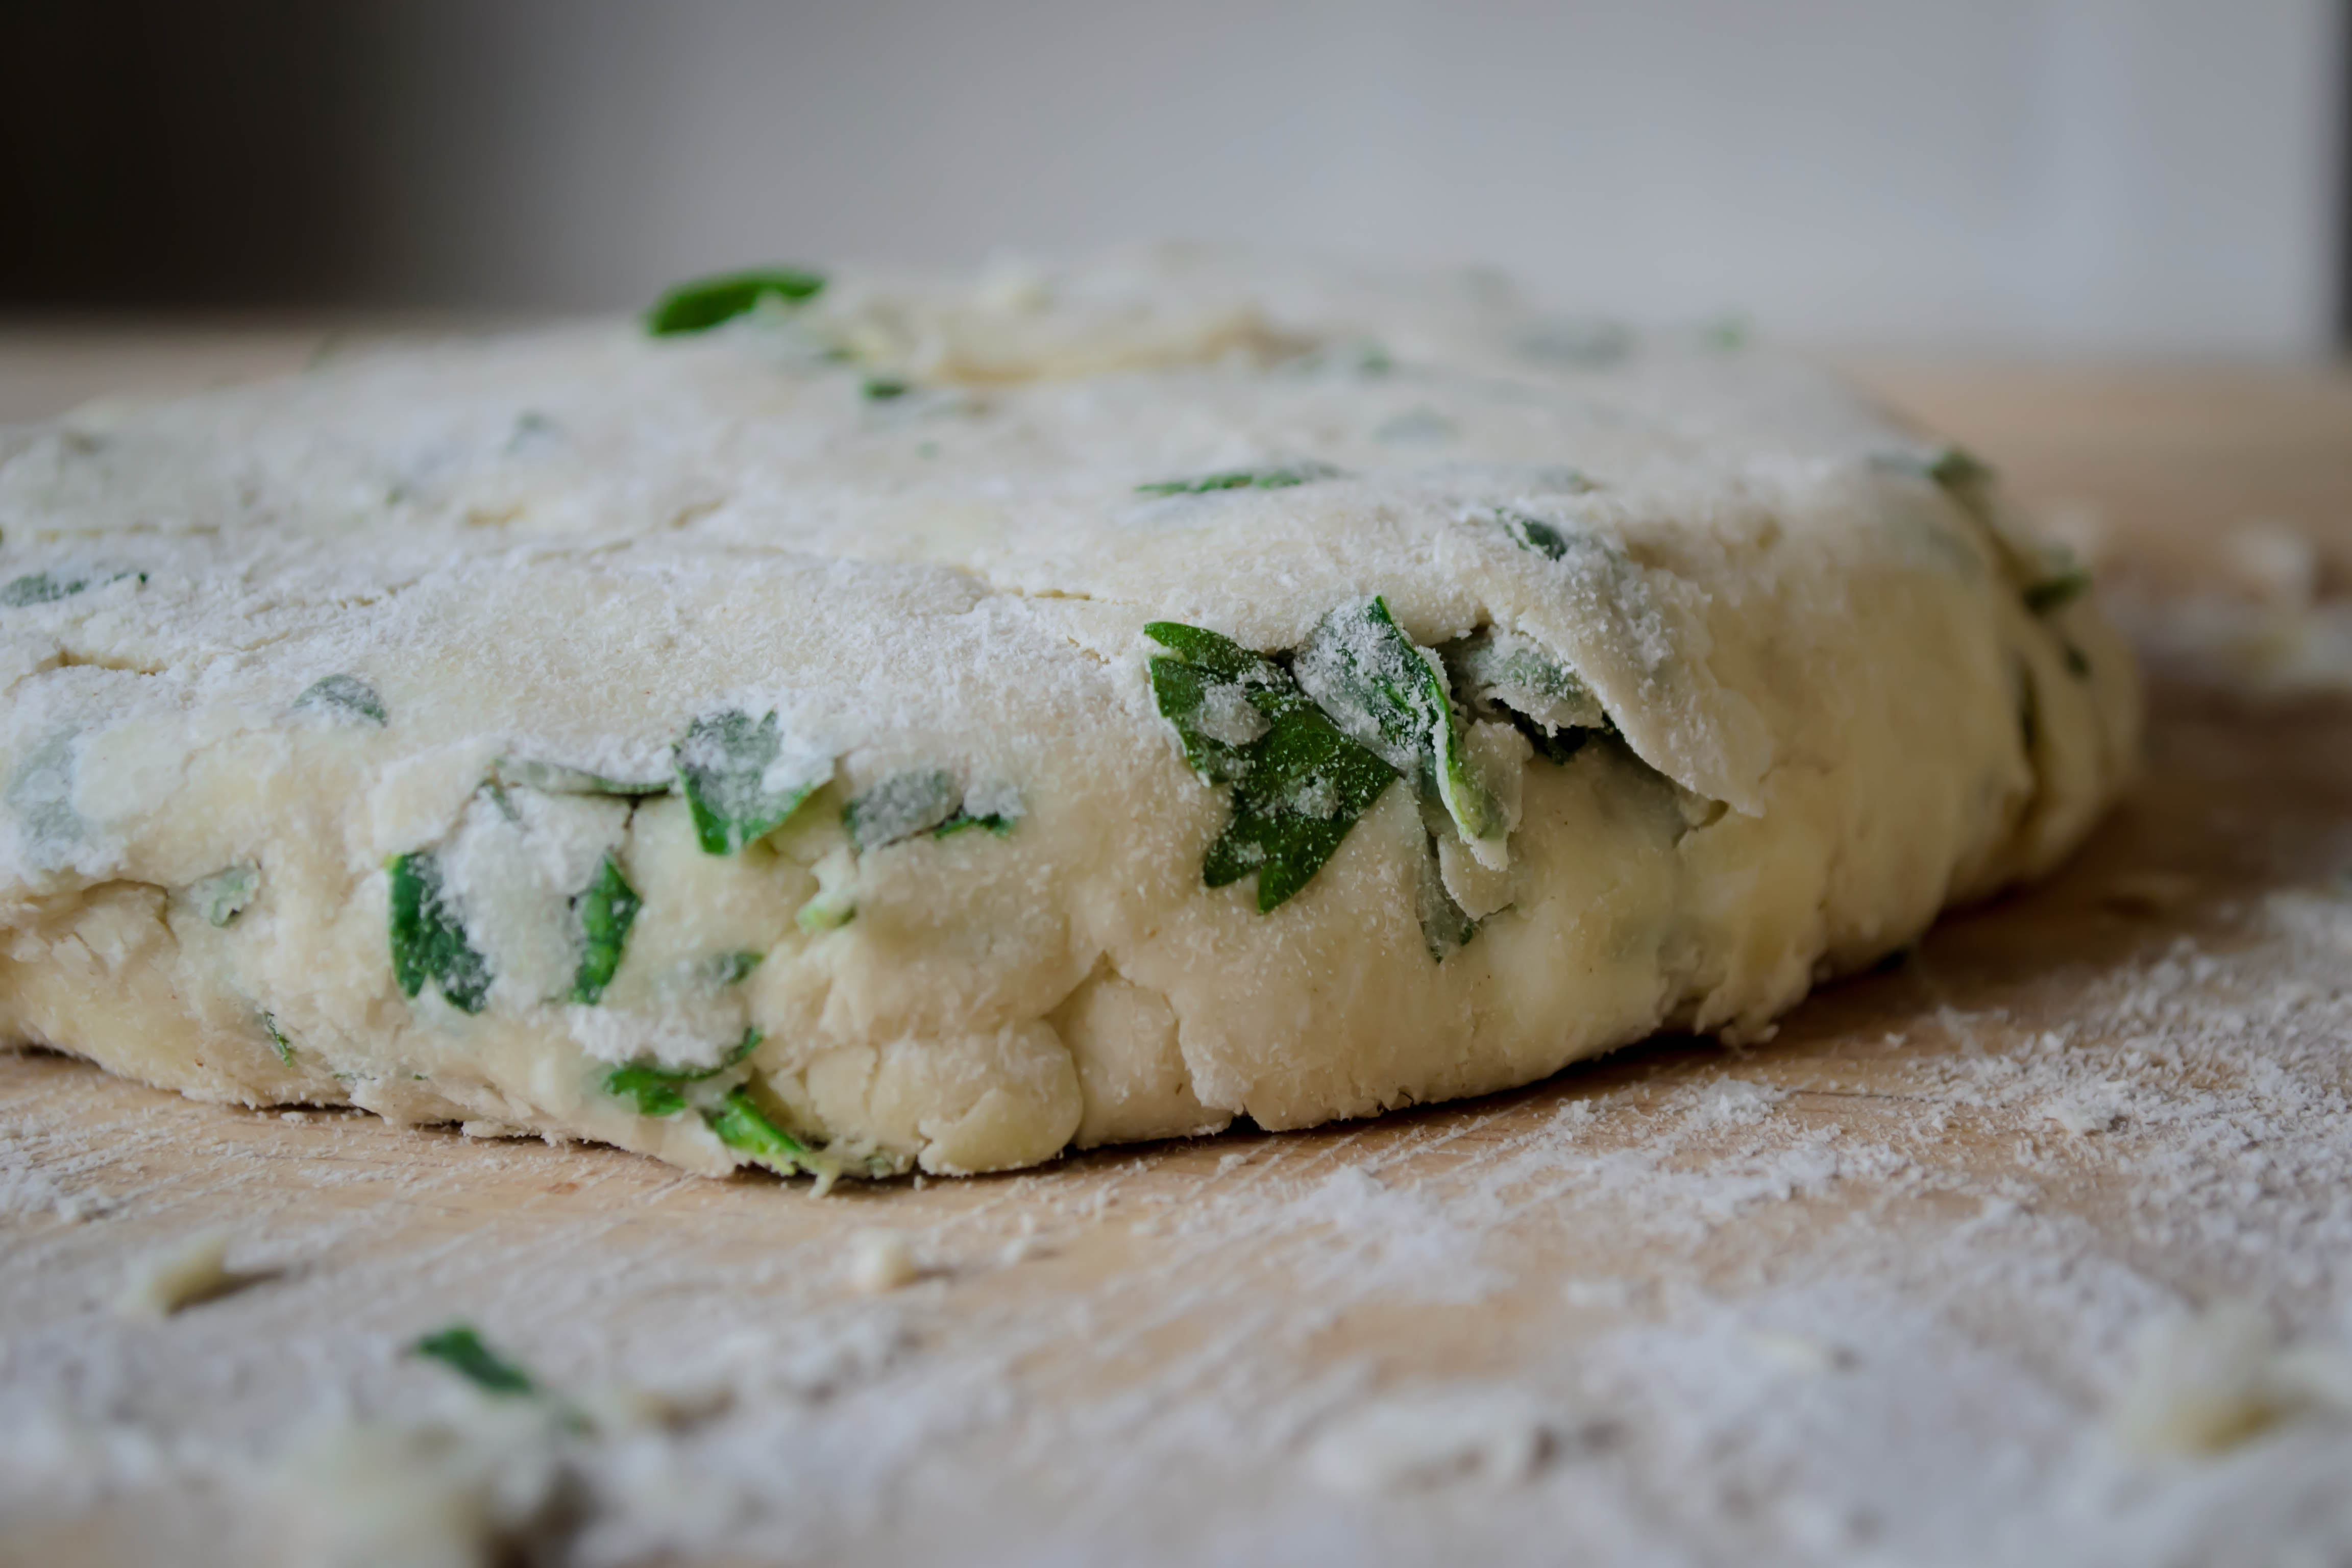
Here’s where things change up a bit. Instead of rolling this out and cutting rounds, stretch a piece of plastic wrap across your counter and dump the dough onto it. Using the plastic wrap, form the dough into a rectangle of approximately 4×6 inches. Mine was bigger because I am impatient. This didn’t seem to have dire consequences. Once the dough is shaped, wrap it in the plastic wrap and refrigerate for at least 1 hour.

After an hour, the butter has firmed up again and the dough has relaxed. Pull it out and free it from the plastic, plopping it carefully onto a well floured board. It’s a very sticky dough, so flour your rolling pin and the top of the dough itself well to avoid irritation. Roll the dough out until it is three times its original size, maintaining the rectangular shape. Fold it into thirds, press down well, and then roll it out again. Fold it into thirds for a second time. I did mine in the opposite direction of the first fold, which was probably wrong, but again, produced no discernible taste consequences. Press down firmly, wrap up the dough in plastic wrap again, and put it back into the fridge for another hour.

While it chills, here’s what’s happening with all this bother: you are creating something akin to one of those biscuits that comes out of the tube. You know, the cardboard tube you anxiously peel the wrapper from to reveal a twisting seam, then judiciously smack on the edge of the counter until it pops and dough appears in great bulges? Those biscuits are composed of dozens of flaky layers, and that’s what you are doing by folding and rolling and folding and rolling. You are, Ruhlman notes, following a similar procedure to that used for making puff pastry, except in our case the butter is irregularly placed, which results in craggy puffs, whereas puff pastry requires a smooth, even layer of butter in between each floury fold to reach its incredible signature height.
With another hour gone, liberate the dough from fridge and plastic, return it to your well floured board, and repeat the procedure: roll out, fold in thirds, roll out, fold in thirds again. At this point, you should also preheat the oven to 400F.

You’ve now folded your dough a total of four times, which means you’ve made twelve layers. Now, roll it out to ½ inch thick and cut it into 6 pieces. You could do rounds with a biscuit cutter, but it seems easier and less wasteful to just trim up the edges (which you could roll into a homely little extra biscuit to taste on the sly) and then cut into squares.

Pop these onto a greased baking sheet and into the oven for 20-25 minutes. They will emerge lightly golden on top, with cheese oozing out from between the layers to form crispy lacy edges against the cookie sheet.

We ate these as an accompaniment to a honey mustard roasted acorn squash and chicken apple sausages. I know, I had to get the apple back in there somehow. My assessment? They were delightful. The exterior was flaky and crisp, and I was impressed by how the layers really did make a difference in the texture of the biscuit: they were moist and chewy and distinct. The cheese wasn’t as noticeable as I’d thought it would be, though the crispy edge bits were lovely – much like the lacy brulée that adorns the outside edges of a good cheese bagel. At first I thought I couldn’t taste the brown sugar at all, but as I took my third and fourth bite, gasping around the steam, I realized that the complex lingering warmth at the end of each bite was probably the effect of the brown sugar. It carried the depth and richness of a caramel without being sweet.

So the verdict is: if you need biscuits to go with a weekday meal, these are probably not the ones for you. It’s asking a bit much to devote three hours to six biscuits, when you could just roll, cut, and bake the same ingredients straight from the mixing bowl. But if you are planning for something special, or if you were thinking of baking bread anyway and are willing to replace rise time with refrigeration time, try these instead. The layers are really remarkable, they stay warm for some time, they are all kinds of tasty, and they would reheat – I suspect – very well in a toaster oven, though they are best on the day they are made. But you probably won’t have any left over, so that’s an issue barely worth discussing.
I hope you are warm and well, wherever you are.

I’ve never been one to start at the beginning. Stories require backing up and wait- wait- let me explain who that was. Dreams are recalled near the end, and only slowly do the initial details return. Directions often skip a step or come in fuddled order. I don’t know whether this is a consequence of a disorganized brain, or whether it’s a signal of confused genius (hah!). The Odyssey, with its in media res trope, was an enormity to my teenage brain when I first encountered it during high school. What a wonderful way to present information, and how validating and revelatory it was to find out that this was a classical method!
So it was no big surprise that, when facing the first week of my dough challenge, I couldn’t start at the beginning. Ruhlman arranges Ratio with doughs first, true, but he seems to traverse the category in a solids-to-liquids order. Bread comes first, pate-a-choux closes the chapter. To me, this was even more intimidating than the idea of tackling dough at all. Bread is something I want to build toward, not race into headfirst.
I flipped ahead in the book to take on my own personal Waterloo: pie crust. Supposedly “easy as.” But I’ve never found it that way. My crust is somehow tough AND crumbly. It collapses, it sticks, it refuses to roll in a smooth circle, it requires patching and crimping and pressing and it’s just easier to buy Pillsbury. But now I’m in it, and I’ve got to conquer this thing.
Despite this personal beginning, it wasn’t enough for me to just make a pie crust. You guys have probably all made pie crust. How boring would it be for me to just report on the quiche I made? At the end of the pie crust section, Ruhlman lists a number of alternatives and additions. Ground nuts, cracked peppercorns, a dusting of spices, parmesan cheese? I had never considered this. I had to try it out.
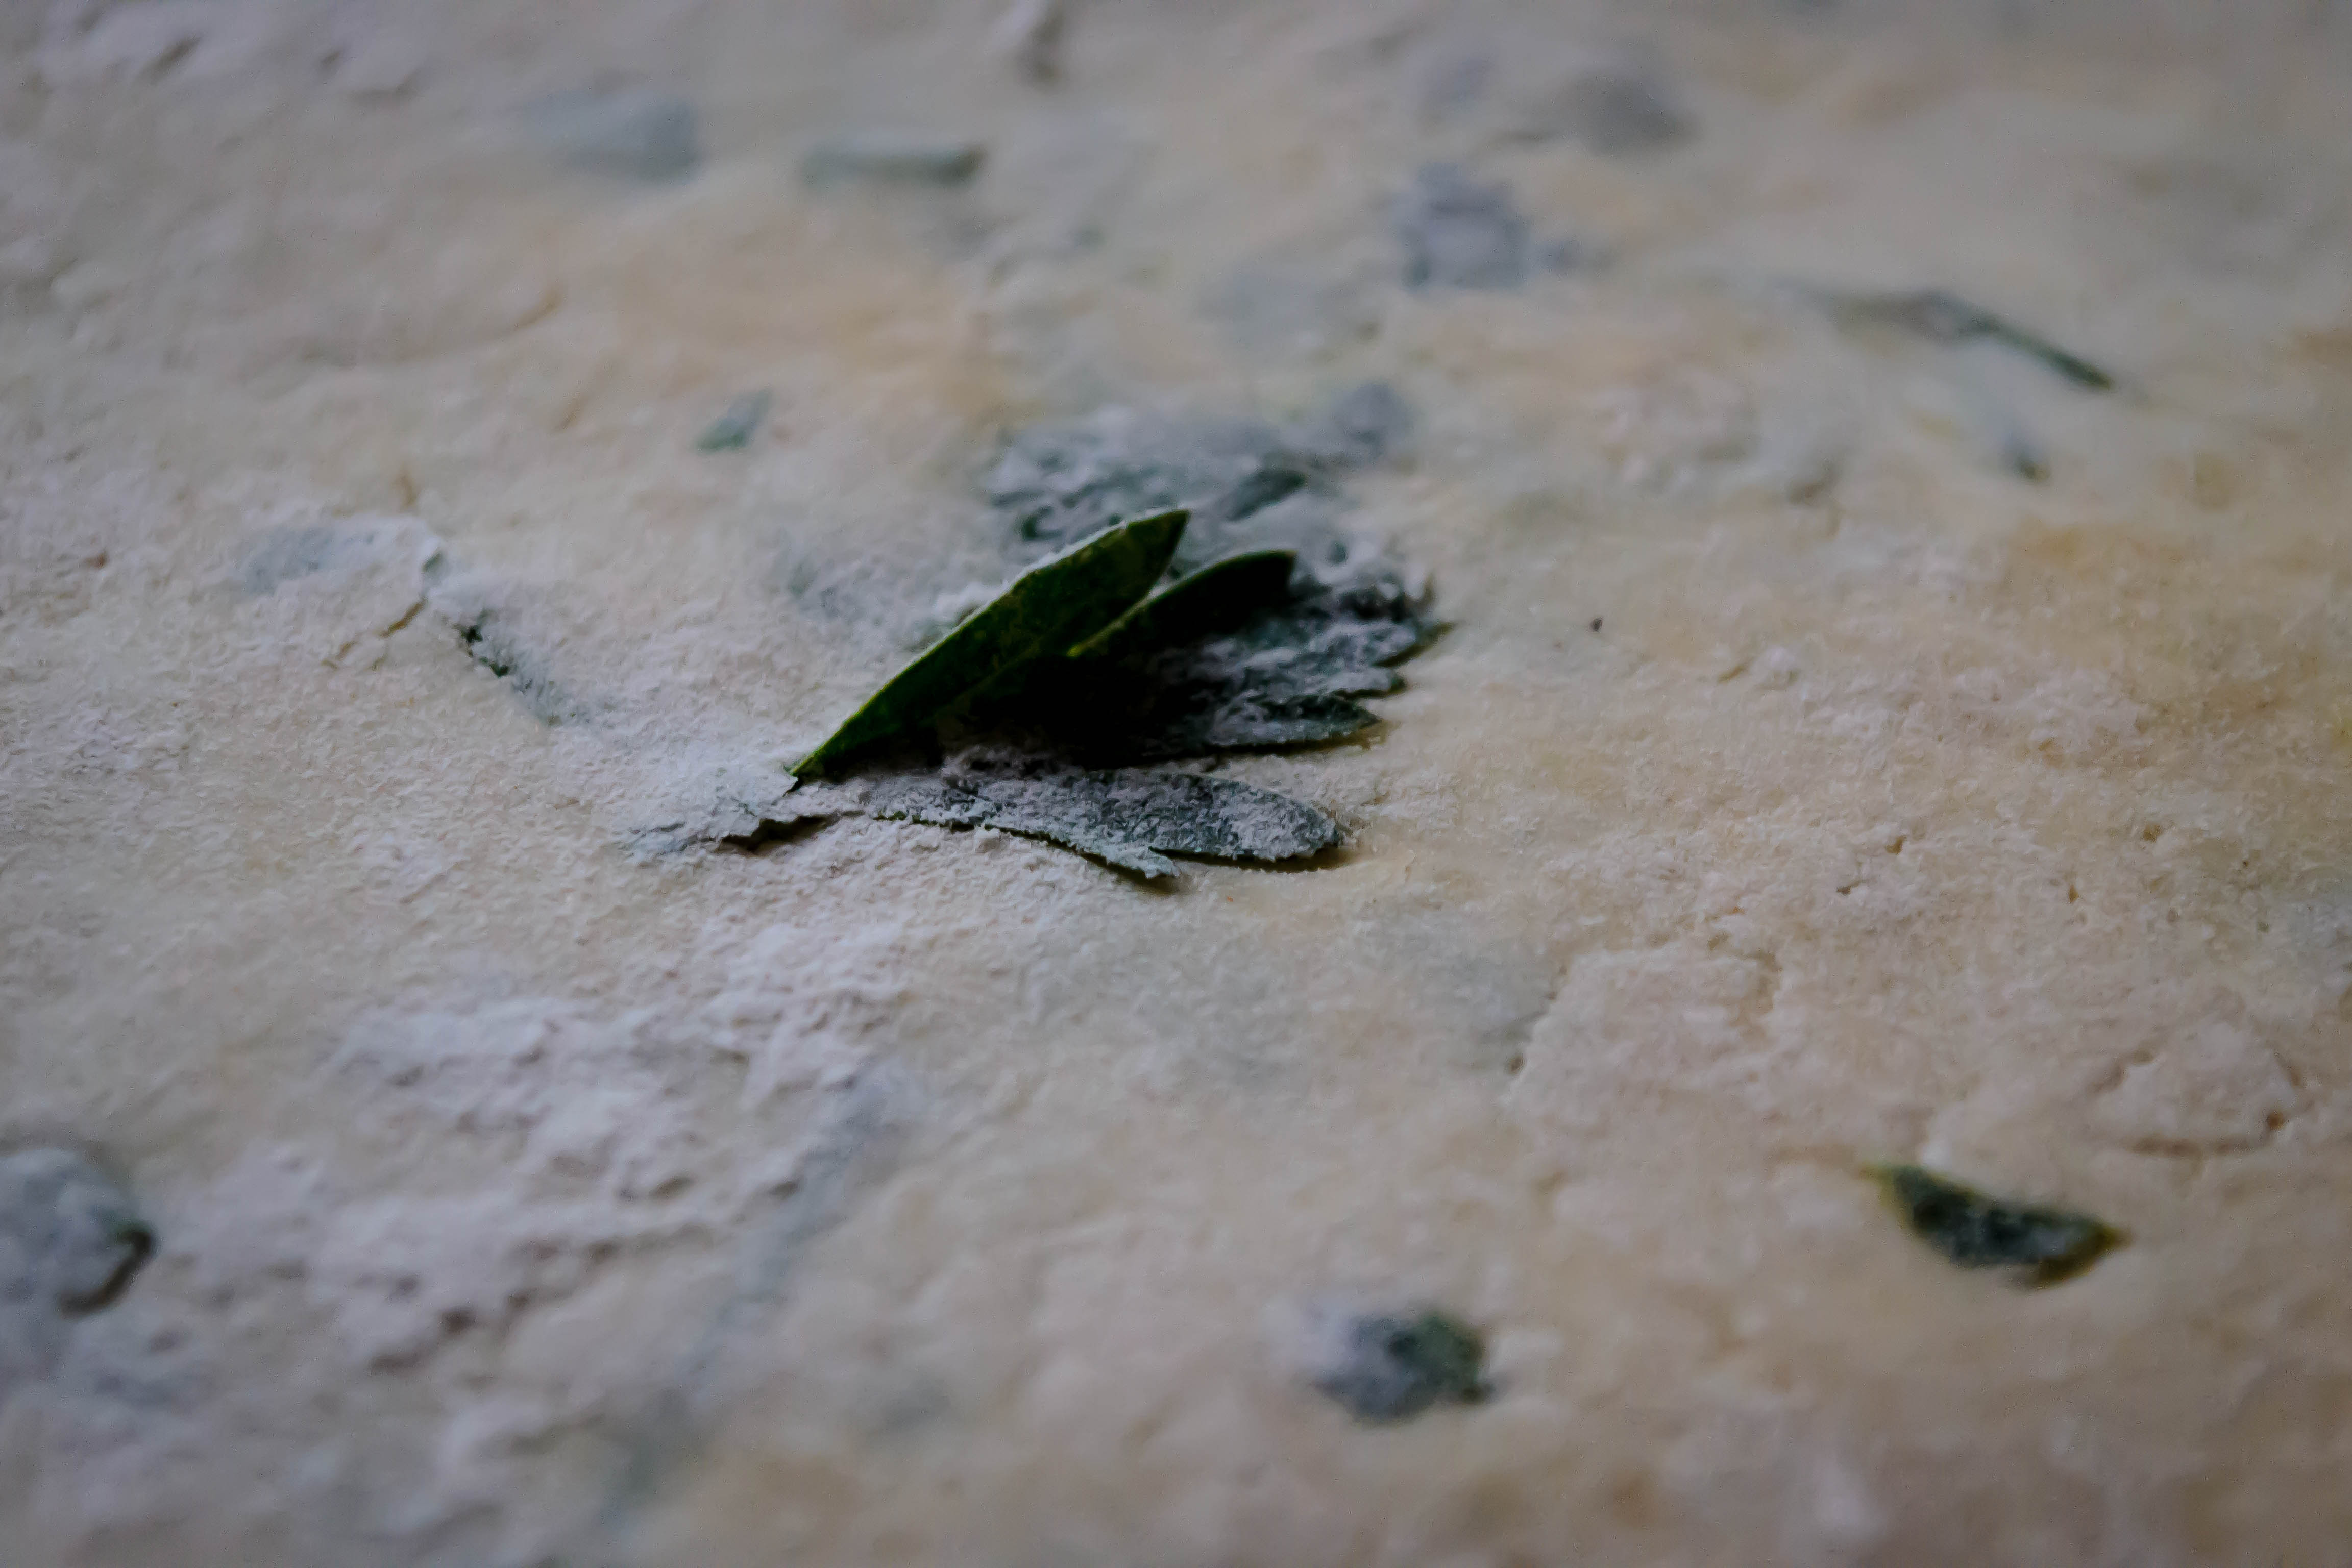
Our quiche would have a parsley crust. Coincidentally, this made my experimentation a perfect candidate for submission to Weekend Herb Blogging.
(I started with parsley, and then I started imagining adding lemon zest, and big particles of cracked black pepper, and then I realized that I just wanted some of the herbed buttermilk biscuits I so heralded when I made them for my Bittman project. Biscuits are in our future, friends.)
The ratio for pie dough – at least this one – is 3, 2, 1. Three parts flour, two parts fat, one part water. This is by weight. The problem here is, despite my desire to conquer this beast, and despite the impressive (read: verging on ridiculous) collection of kitchen tools I’ve amassed over the years (pot sticker press, anyone?), I don’t have a kitchen scale. That makes it hard to work in weights.

Fortunately, though he advocates it persistently, Ruhlman provides the general weight range for a cup of flour, so I worked with that.
Every pie crust recipe I’ve ever read, Ruhlman’s ratio included, calls for the water to be ice cold. I get this: you want the fat to remain cold during this construction phase so it can melt and leave flaky pockets as it bakes. Ice water keeps things frosty. I decided to skip the ice cube middle man and stuck my water in the freezer for a few minutes.

Usual procedure here: cut in the butter, add salt (and parsley, in this case), incorporate just enough water to bring things together, form into a disk and refrigerate to firm the fat back up. Then you can roll out, fill, and bake.

That all sounds pretty simple, but somewhere in there things tend to go wrong for me. This crust was (relatively) easy to work with. It didn’t disintegrate, it didn’t melt, it didn’t even crack in too many places. I think playing with biscuit and cracker doughs this past year accustomed me to the feeling and delicacy required to not destroy a circle of dough. It was barely moist and not exactly elastic, but it did have a bit of give. It baked to a lovely golden color, the flecks of green were intriguing and special, and the quiche that rested just wobbling between its sturdy walls was delicious.
But the crust was tough.
I can assume a few reasons for this.
1.) It’s possible my ratio was off. Because I didn’t weigh my flour, I may have had too much or too little in the mix.
2.) More likely, I overworked the dough. I pressed and kneaded and folded until the dry bits at the bottom of my mixing bowl were willing to play along, and perhaps I was too insistent about that demand for inclusion.

Like everything else, it seems pie crust needs a revisit to get it right. The feeling of the dough between my fingers is familiar, but I have to learn its textural intricacies. How much water is just enough? How crumbly can it be and still hold together? How much of the dryness do the fat and water absorb while the wrapped disk rests? Without another attempt or three, I won’t know.
But it tasted good. It crunched against the quiche and while it didn’t shatter at the slightest fork pressure, it did have that dryness against the teeth you expect from crust. The parsley contributed a grassy freshness and made the flavor more complex, especially the following day. I could see this working similarly well with dill, or thyme, or maybe even marjoram, all of which pair nicely with broccoli and mushrooms.
Onward, then.
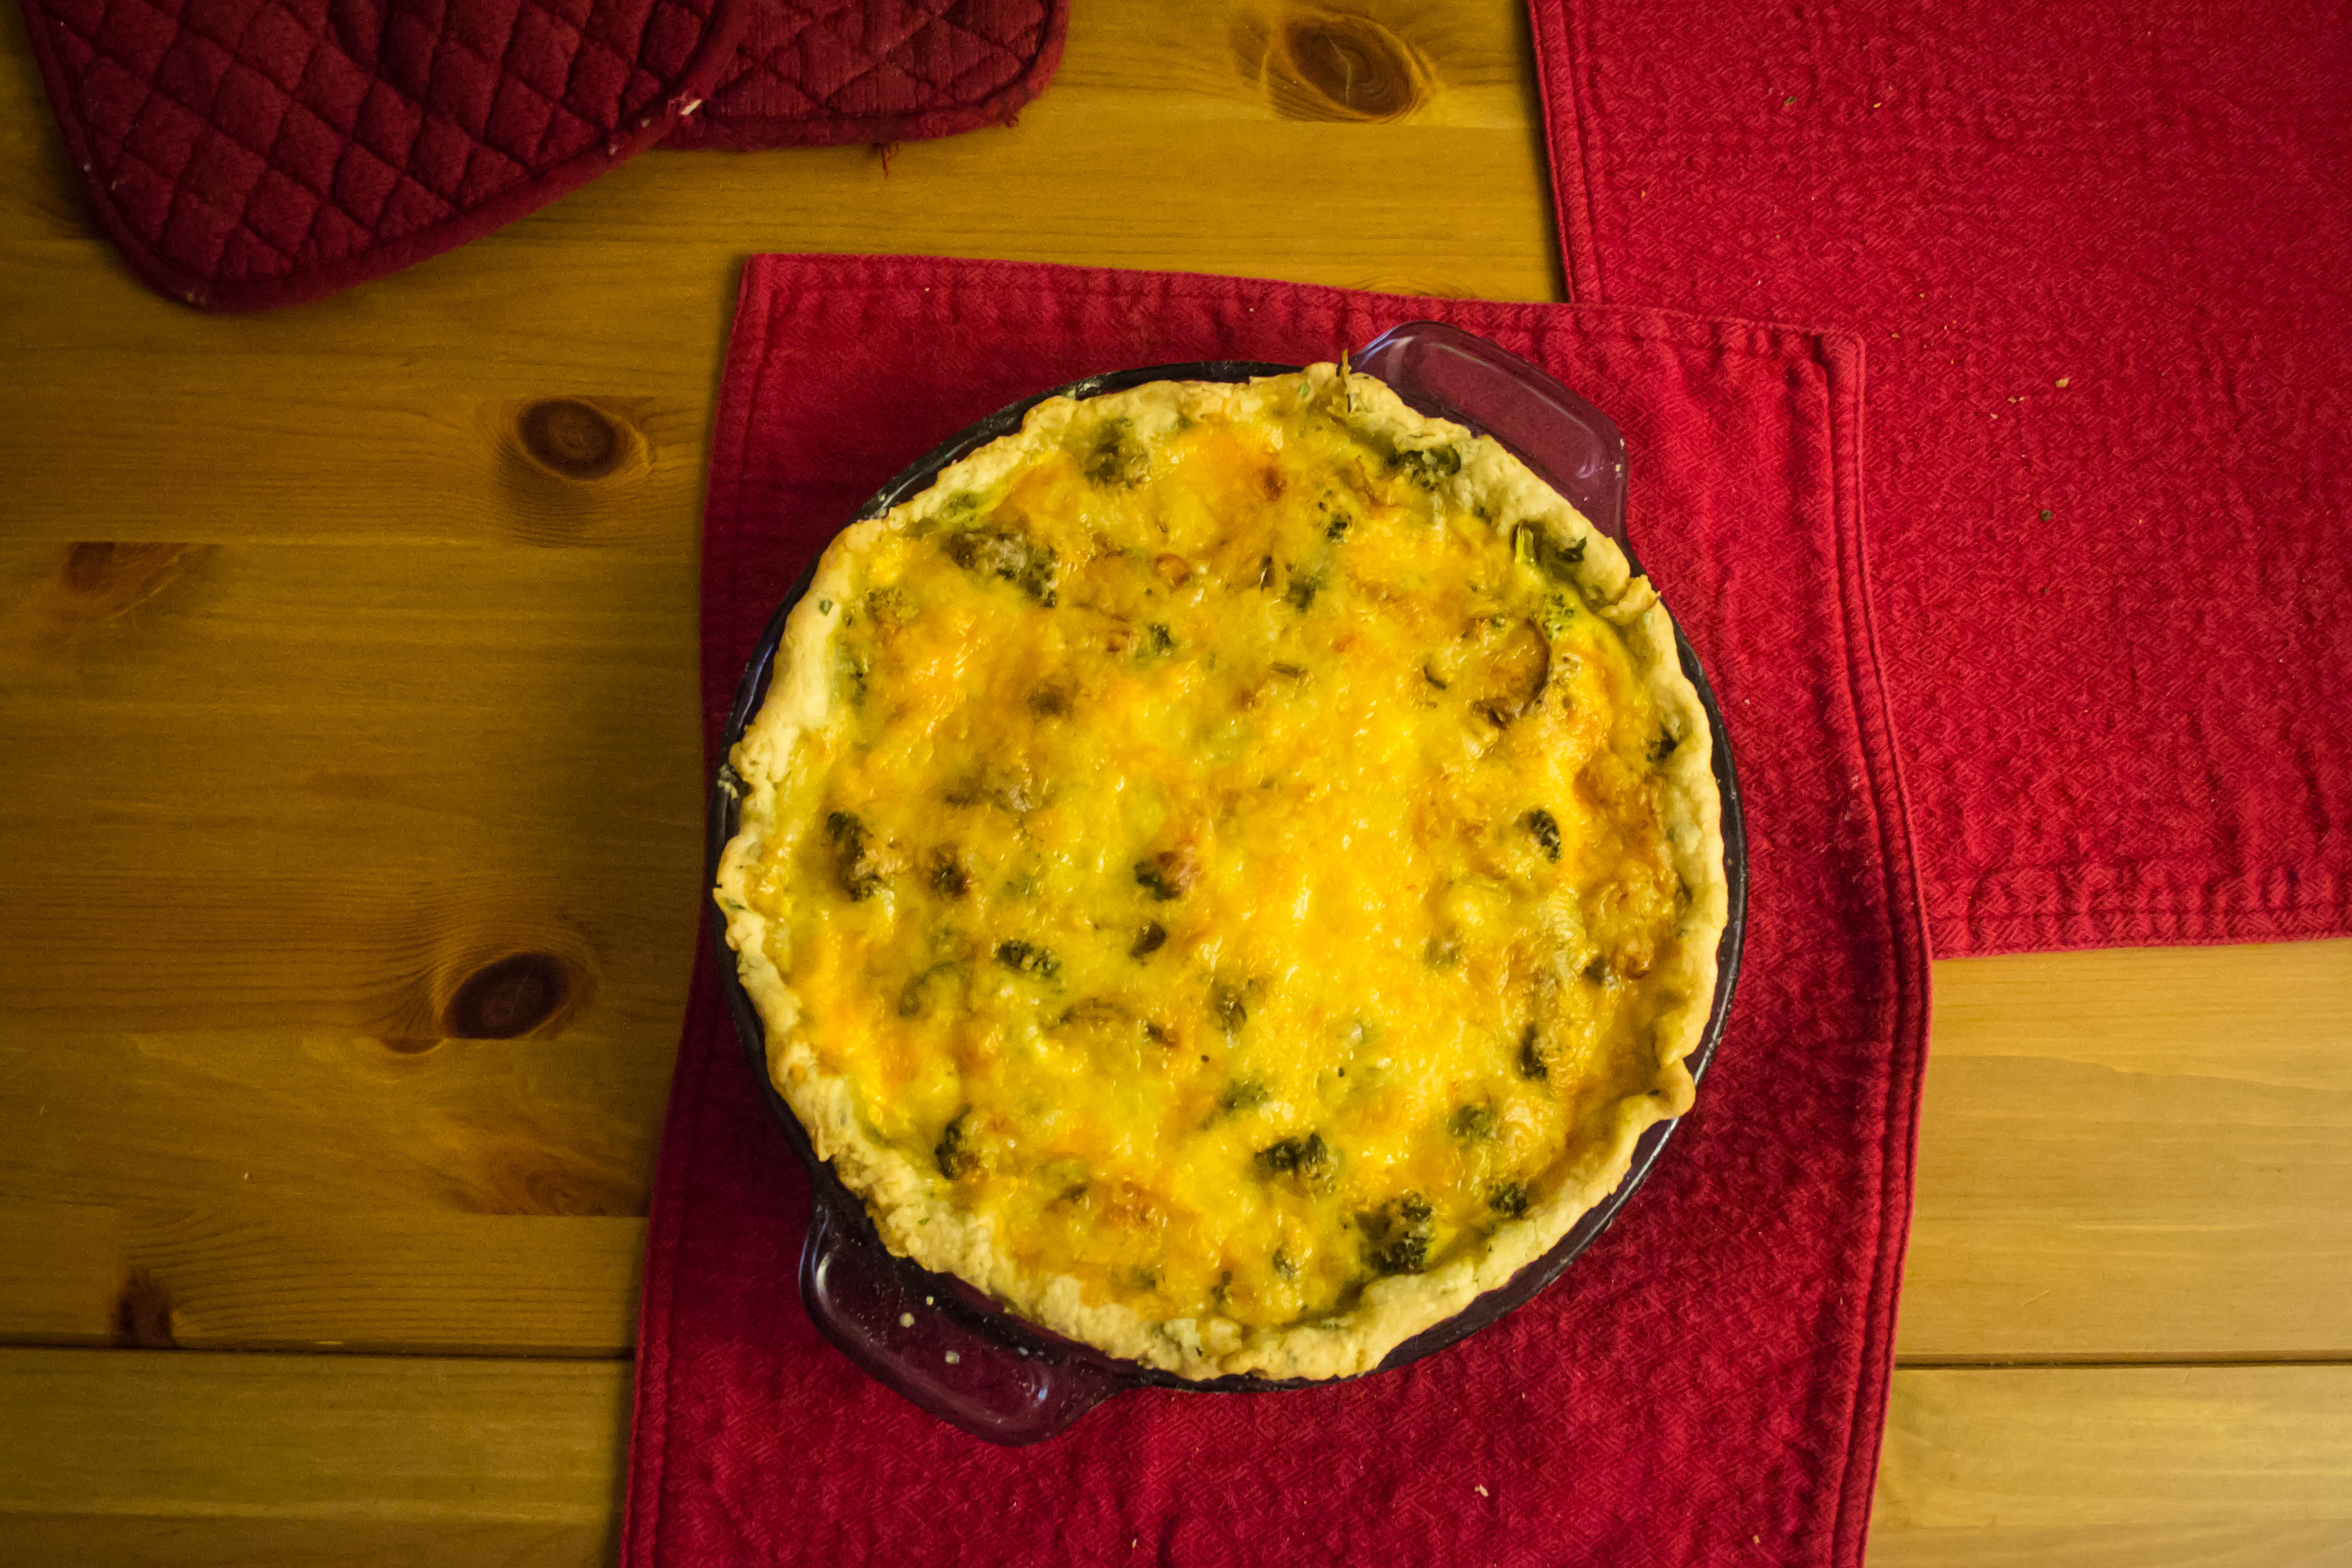
Broccoli mushroom quiche with parsley pie crust
(The quiche recipe is my mom’s. I’m sure she got it from somewhere, but I don’t know that she even knows where anymore. I’ve changed very little here, though her version usually contains bacon instead of mushrooms)
Crust:
1 heaping, lightly fluffed cup of flour (or 6 oz., if you’re doing this properly)
1 stick (8 TB, 4 oz., etc) butter, cut into 16 or so pieces
2-4 oz. very cold water
Pinch salt
2 TB chopped parsley (or dill, or oregano, or marjoram, or thyme… whatever you like best, I expect)
Filling:
1 cup small broccoli florets
6-8 crimini mushrooms, sliced thinly
¼ cup green onions, diced
Olive oil
Salt and pepper to taste
4 eggs
1 cup milk
1 ½ cups grated extra sharp cheddar cheese
½ cup grated swiss cheese
First, make the pie crust. Measure out your water and put it into the freezer while you assemble your other ingredients.
In a bowl, combine the flour and butter pieces. With your hands or a pastry blender (I always use the pastry blender – I hate the too-dry feeling of slowly crusting flour on my hands), cut the butter into the flour until it is pea-sized chunks and smaller. Add the salt and herbs and combine gently.
Dribble in some water – 2 oz. to start with – and combine. If the dough really isn’t coming together, add more water. When you can press a few teaspoons of the dough between your fingertips and it stays together, turn the whole mass out onto a floured board and work lightly to bring it together into a disk.
Wrap the disk in plastic wrap and stow it in the fridge for half an hour or so.
When the dough disk is cold and firm, bring it back to your floured board and remove the plastic wrap. Roll it out, moving a rolling pin (or wine bottle) in a few strokes straight away from you and back toward you only. Avoid diagonal movements. The dough will become a long oval. Then, flip the dough over and turn it 90 degrees so you are facing a fat, flour-drenched oval instead. Roll again, still moving the rolling pin straight away from and back toward you. Repeat this process until you have a rough circle an inch or two larger than the diameter of your pie plate.
Lightly roll half of the dough around your rolling pin and drape it loosely into the pie plate, unrolling as you go, letting the crust settle into the dish. Trim, crimp, or fold over any dangling edges as aesthetically as you are able.
Set aside (or perhaps return to the refrigerator?) while you make the filling.
Preheat the oven to 350F.
Heat some olive oil in a skillet over medium-high heat. When it is shimmering, add the mushrooms and give them a good stir, taking care that as many as possible have contact with the bottom of the pan (that is, don’t leave them piled atop one another if you can help it). Then leave them alone for a good five minutes, or until they begin to develop a golden crust.
While the mushrooms are getting golden, steam or microwave the broccoli florets until they are just crisp-tender and still very bright green. Set them aside.
Turn your mushrooms and let them sizzle for another five minutes or so. When they are golden on both sides, turn the heat down to medium and add the onions. Cook until soft and translucent. Toss the broccoli in the pan, then add salt and pepper to taste. Mom often adds tarragon or marjoram at this point as well – start with ½ tsp and see what you like. Remove from heat and set aside to cool for a few minutes.
While the vegetables cool, beat the eggs and milk together. Add a dash of grated nutmeg, if you like, or some cracked black pepper. As the quiche bakes, this will become a lovely firm custard.
To assemble, fill the pie crust with the vegetables, spreading them in an even layer. Gently pour the custard over the vegetables. Toss the shreds of cheese together and spread them evenly across the top of the filling.
Bake for 50-60 minutes, or until the cheese is golden and the quiche has puffed in the middle. If it’s not puffed yet, it’s not done. The ingredients will be cooked through, but when you cut into it you will find a disappointing watery layer at the bottom. Give it another few minutes.
With the center puffed and the cheese sizzling, remove the quiche from the oven and let it sit for 5-10 minutes so the cheese can solidify a bit and doesn’t string all over when you try to cut through it.
Slice and serve. 

Oh friends, it happened. I made it. Yesterday I made the last two Bittmans on my list and completed, albeit a year later than I’d originally intended, my project. I have reflections to share, certainly, and I have changes and excitement and promises for the new year, but first, I think, let’s work with the program. Two Bittmans. Two reports:
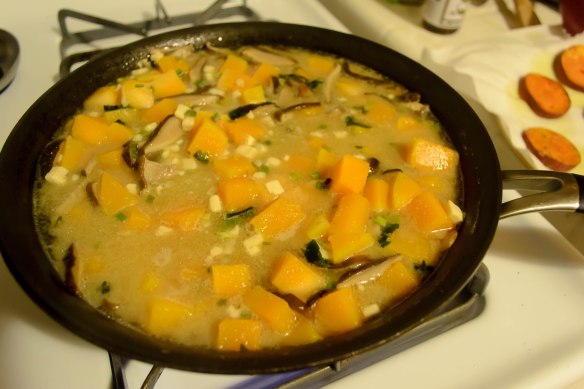
“14. Steam or poach 2 cups of pumpkin cubes until tender. Meanwhile, sauté 1 cup sliced shiitake mushroom caps in vegetable oil with a few drops of sesame oil. Boil 4 cups water and whisk some of it with ⅓ to ½ cup of miso. Stir miso mixture, pumpkin and mushrooms into water and heat everything through, then serve, drizzled with more sesame oil.”
Because we were planning to reach midnight by eating as many snacks as possible eating our way to midnight snacking, I wanted a light dinner to precede the countdown. This seemed to fit the bill. And it had to, after all, since it was the only soup left and the calendar was screaming December 31st.
2 cups peeled, cubed butternut squash (I had some in the fridge, and suspected pumpkin would be hard to find)
1 1 oz. package dried shiitake mushrooms
1 TB vegetable oil
¼ tsp (or to taste) toasted sesame oil, plus some for drizzling
3 packets instant tofu miso soup mix (all I could find at my grocery store)
water
white wine
To reconstitute my shiitake mushrooms, I soaked them in a mixture of white wine and almost boiling water for 15-20 minutes, until they were plump and soft.
While the mushrooms soaked, I cubed up my butternut squash and submerged the pieces in a pan of salted water. I brought this to a bare simmer and cooked it just until the squash pieces were tender – 10-15 minutes – then drained the pieces in a colander. Don’t overcook them, because they will start to fall apart. Set the squash pieces aside.
When the mushrooms were tender, I scooped them out of their bath and decided the remnants shouldn’t go to waste. I poured the soaking broth into a little pot to bring to a boil, so I could use this already flavored liquid as the base for my soup. While it heated, I stemmed and sliced the mushrooms.
Since the shiitakes were now basically cooked, I probably could have skipped Bittman’s sautéing step. But honestly, I’m not one to pass up the opportunity to ingest sesame oil, so I dutifully dribbled vegetable oil with a few (or a few more than a few) drops of sesame oil in the (drained and dried) pan I’d used to simmer my squash and sautéed the mushroom slices over medium heat until they dried out a bit and started to take on some color.
While this colorization happened, slowly and so aromatically, I made the broth. I poured all three miso soup seasoning packets – tofu and seaweed and all – into a small dish, then mixed in about ½ cup of my heated mushroom soaking liquid and whisked gently to dissolve the powdery soup mix. This created a slightly thickened slurry, which I poured with the rest of the liquid and the butternut squash cubes into the mushroom pan.
After a few moments of reheating, we dipped up bowlfuls and ate.

N. wasn’t sure (he sometimes takes issue with the texture of reconstituted mushrooms), but I inhaled it with devotion. I love the flavor of miso soup, and the mild sweetness of butternut squash against the salty umami and fleshy squish of the mushrooms was lovely.

It was light but still satisfying, and the tofu and vegetables from the soup mix were so welcome that I’d advise you, if you are using straight miso rather than a pre-mixed, additive laden packet, to consider adding some tofu or seaweed or green onion just to contribute a little substance and contrast to the soup.
Dinner done, we moved on to the second stage of the evening.
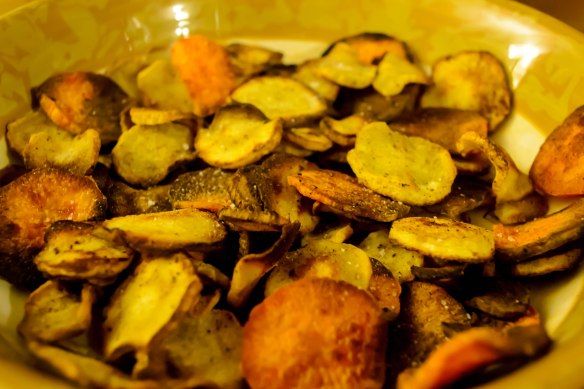
“89. Vegetable crackers: Slice beets, sweet potatoes, plantains or parsnips or all of the above into 1/8-inch disks (a mandoline is helpful) and toss lightly in olive oil. Spread the slices on baking sheets, sprinkle with salt, pepper and, if you like, other seasonings and bake at 400 degrees for 10 to 12 minutes. When browned, flip the chips over and bake for another 10 minutes or so.”
This sounded tasty, and I’d always intended to make it for a party. With a dear friend coming over to ring in the new year with us, and since hunks of cheese alone might be deemed a slightly imbalanced offering (though so, so delicious…), this seemed like a perfect opportunity. Beets were out of the question (N.’s nemeses since childhood), and I couldn’t find plantains in my grocery store’s produce section, so we were left with the nutty herbiness of parsnips and the always dependable earthy sweetness of sweet potato.
3 medium parsnips, peeled
½ large sweet potato, peeled
generous dose of olive oil (maybe ¼ cup?), plus more to grease the cookie sheets
1 tsp each (or to taste) salt, pepper, and garam masala
To prepare for roasting, preheat the oven to 400F and line two cookie sheets with aluminum foil. Drizzle with olive oil and spread to cover the surface of the foil evenly.
While the oven preheats, tackle the vegetables. I don’t have a mandoline, but I do have a ruler, and I must confess I did bring it to the kitchen to give myself a better idea of what 1/8 inch looks like. My slices were not quite even, but they did verge on passable. I tossed them – big coins of harvest orange and speckled white – in a glass bowl with the olive oil and the spices until they were evenly coated.

Spread the vegetable coins across the cookie sheets in a single layer, not overlapping, not in piles. If they cook in a stack, they will soften but not brown or crisp. Stow them in the oven for 12-15 minutes, or until they are just beginning to brown.
This next step is a true exercise in patience. Unless you are far more talented with a spatula than I, you will have to flip each piece over individually. You have to, because otherwise one side will burn and the other side will flutter limply into cooked-but-not-crisp status. Trust me on this one. When you have laboriously flipped each coin, shove the tray back into the oven for another 10-12 minutes.

At this point, you’ll have to use your judgment. My offerings were, after this additional time, cooked through but not remotely cracker-like in texture. Another five minutes in the oven might have done the trick. Putting them back in, failing to set a timer, and heading to the couch to eat dinner (I was trying to multitask) is not advisable. I didn’t remember them until I smelled the slightly spicy aroma of parsnips, and by then it was too late – many of the little coins had gone from crackers to briquets.
I decided to pick out the worst offenders – Lucy reports that she didn’t mind a bit of charred flavor – and eat the salvageable ones anyway.

To make them a bit more exciting (and disguise any lingering burned taste) I made a little dipping sauce. You’ll need:
juice from 1 lime
2 TB honey
1 tsp garam masala
½ – 1 cup Greek yogurt
Whisk the first three ingredients together with a fork until they are smooth. In increments, add Greek yogurt until your sauce reaches the desired thickness. Mine was about the consistency of ranch dressing, but much more interesting in flavor.
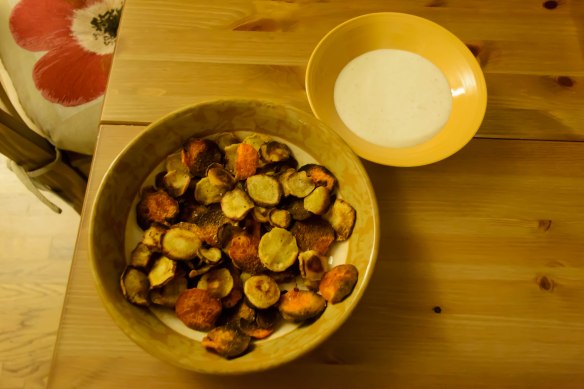
These crackers (with and without the sauce) were – if you were able to overlook the overcooking – a nice alternative to crudites or store-bought crackers. They weren’t quite as crispy (except the ones that were too crispy), but they had a lovely deep flavor and none of the powdery, processed taste some crackers can have. They are also a gluten-free offering and, minus the yogurt and honey sauce, vegan as well.
I served them alongside a cheese platter,
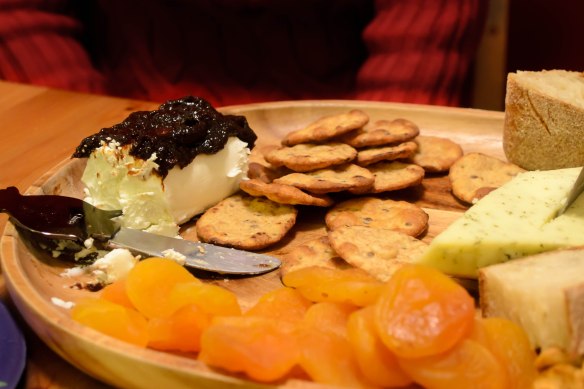

Joy the Baker’s chili spiced sharp cheddar cheese crackers,
assorted sweets,

and my appetizer version of Bittman’s “Marshmallow Topping for Adults” dish: thick discs of sweet potato roasted until tender, topped with a dollop of cream cheese and sprinkled with a pecan brown sugar blend before being broiled until the sugar bubbles and the cheese slackens toward melting.


And champagne, of course.

Happy New Year. I hope you celebrate your achievements, meet your goals, and find happiness in your own self. I’ll be checking in again later this week with some reflections and announcements. Welcome to 2013.
At our house, a box of See’s chocolates was standard holiday fare. They were special – the white box, the ruffled, rustling brown wraps that made it all but impossible to sneak a selection without someone overhearing – and all too quickly gone. But they were special for good and for bad reasons. As Forrest Gump so wisely told us, you never knew what you were going to get. It might be a luscious square of soft, fudgy dark chocolate studded with walnuts, or it might be the dreaded maple nougat. My cousin J. loves caramel, and when she was little she developed a surefire way to determine which mysterious See’s square to choose: bite the bottoms off, and if you don’t like the filling inside, put it back in the box. No one could see the intrusion, at least not until that piece was selected again.
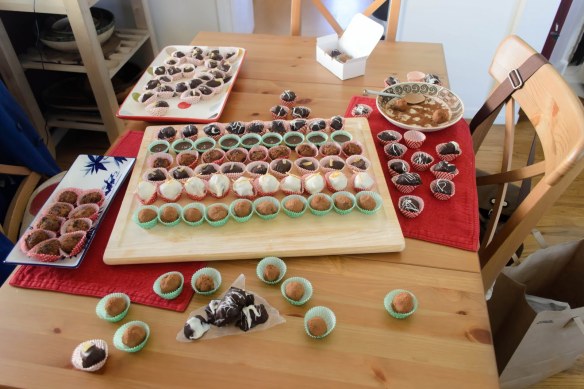
For the past few years, I’ve made truffles for my officemates at the end of the term. Squares of ganache flavored with fruits, nuts, and liqueurs, robed lovingly in melted chocolate and stuffed carefully into pretty little boxes make excellent, always well-received holiday gifts. I’ve experimented with ginger, apricots, amaretto, peppermint, almond butter, dark, white, and bittersweet chocolate. To my delight, Bittman has a truffle (or at least a truffle-like) recipe among his 101. With no officemates to share with this year, I decided to make a selection of truffles for my husband to give his department at his school.
I went a little overboard.
“Cranberry Truffles: Heat ½ cup simple syrup and ½ cup bourbon or water; add 2 cups dried cranberries and steep until soft, 10 to 15 minutes. Drain, reserving the liquid. Pulse the fruit in a food processor, adding just enough liquid so the mixture comes together. Roll spoonfuls of the cranberry filling into balls, then roll them in cocoa, mixed with pulverized nuts if you like.”
This sounded decadent and very adult – an excellent addition to truffle flavor combinations I was planning like Chambord with dried raspberries and Grand Marnier with candied orange peel. I used:
 ½ cup bourbon (I used Knob Creek)
½ cup simple syrup (I had some ginger syrup kicking around, so why not?)
2 cups dried cranberries (use reduced sugar, if you can find them)
½ cup cocoa powder
½ cup hazelnuts (optional)
I was pleased to find reduced sugar Craisins to use here – the bourbon has its own kind of sweetness, and the ginger syrup I was using instead of a simple syrup was tooth-twingingly sweet. I heated the liquids together in a small pot over medium heat until they came to the barest simmer.
As Bittman directs, I steeped the Craisins in the bourbon and syrup for fifteen minutes or so. I wasn’t sure what temperature “steeping” actually is, so I decided on a barely bubbling simmer. The syrup seeped into the cranberries, giving them a slightly fleshy texture. The bourbon wafted headily through my kitchen, making me think 10am might have been on the early side to take on this project so clearly meant for a Friday evening.

Fifteen minutes of simmering down, and I dumped my swelling craisins into a strainer over a pot to catch the liquid. Don’t lose all the liquid; you’re going to need a tablespoon or two of it later. Let the craisins drain and cool for at least ten or fifteen minutes. While they cooled, I put half a cup of hazelnuts in my food processor and let it rip until they were almost all pulverized into a powder.
When they were cool and had (emitted) plenty of bourbon infused syrup, I moved the craisins to the clean-scraped food processor and let it run. The little ruby jewels came together into a whirring relish of red, and as the bits began to clump in the bowl of my food processor, I added a tablespoon of the bourbon syrup, and then another. The cranberry bits now clung stickily together and I decided they were stable enough to scoop.

I mixed my powdered hazelnuts with cocoa powder in a shallow bowl, then laid out a piece of wax paper for the finished balls. I spooned out rounds slightly smaller than ping-pong balls and rolled them gently in the nut and cocoa mixture, then set them gently on the wax paper to set or firm up or whatever it was they were going to decide to do.
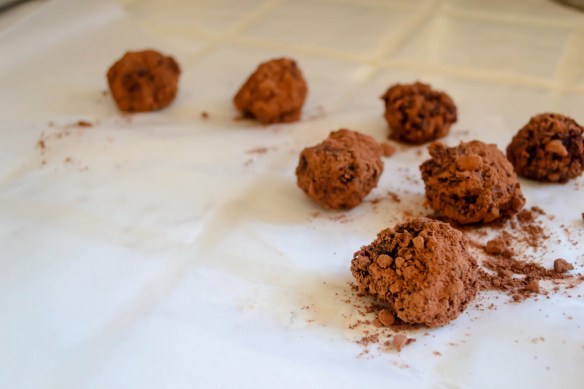
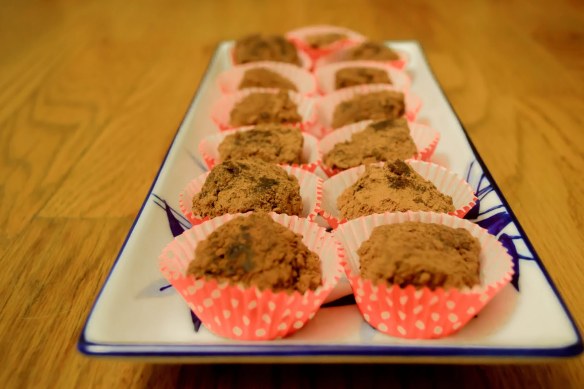
When I let myself taste one (I waited until after lunch, out of respect for the bourbon), I was glad to have waited. These, folks, are strong. They are utterly delicious, but extremely intense. The cranberries absorb all the flavor and warmth and musty floral overtones of the alcohol, and the cocoa adds just the right hint of matte bitterness to combat the sweetness and tartness of the cranberries. I set them gently in mini cupcake wrappers.
Once completed, the bourbon balls joined the rest of the bejeweled collection, which consisted of:
Apricot and almond bits in white chocolate, spiked with amaretto and then dipped in dark chocolate.
Bittersweet ganache with orange liqueur, threaded with candied orange peel, dunked in white chocolate and garnished with a piece of sugared rind.
Dark chocolate with candied ginger and ginger syrup, dressed with semi-sweet chocolate and topped with a piece of ginger.
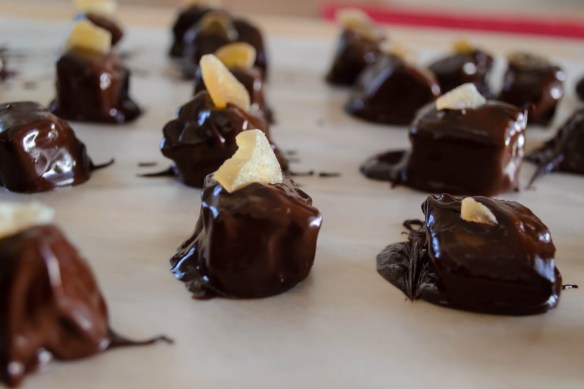
Chocolate ganache flavored with chambord and studded with freeze dried raspberries, which contributed a really intriguing crunchy intensity.
Crunchy flaxseed and almond butter cups, topped with a sprinkle of sea salt.

Happy Holidays!

Tragedy, when it strikes, whether it be national and sweeping or personal and held tight against you – and I have experienced both this week – plunges you into strangeness. There is shock, there is disbelief, there are weighty moments of contemplation, there is knowledge of helplessness. There is the feeling of being alone.
When I feel the chill and the incomprehensible wounding of tragedy, I want my belly full of warmth and familiarity and comfort. And while it may seem trivial or even juvenile to want to write about food in the aftermath of gut-twisting pain, I think there is an important connection to be made. As Shauna said shortly after Hurricane Sandy, one of the ways food is important is that it brings us together. Her post moved me deeply, and made me feel that it’s not trivial or disrespectful to feel the need to talk about humble little food in the aftermath of disaster. The loneliness and helplessness of pain can be beaten back by community. When we come together, we are able to offer one another comfort, even if it is slight, and the metaphorical warmth of our togetherness can often eclipse physical heat. Food bridges that gap. It offers a physical warming, yes, in that it nurtures us and fills us and helps us carry on as individuals. But it also links us – we eat together, we break bread, and in eating together we share ourselves with each other in meaningful ways, even if we didn’t realize that sharing took place. It binds us in communities, however small, and having fellows in a bad situation, whether they are fellow mourners or whether they are comforters and supporters, gives us the opportunity for light and warmth, if we are able to feel that connection.
So when I talk about food today, I want to talk about food that warms us. I want the fullness of soup and the richness of dessert. I want the clinking of spoons and the sprinkling of spice that stabilizes and relaxes and envelopes us. I want us to be able to feel the warmth of love which, to me, is most easily expressed through a transfer of food: if I feed you, it’s a good bet I care about you. It’s a small thing, and you may think it’s a silly thing or an unimportant thing, but it is perhaps the only thing I can do in this moment to reach across the feeling-less blips of the net-scape and offer you warmth. But I mean it. Take this warmth.
“95. Indian Pudding: Combine 3 cups of milk and 1/3 cup of cornmeal in a saucepan over medium heat. Bring to a simmer; stir in 1/3 cup of molasses, 1 tablespoon sugar, ¼ teaspoon salt, 1 teaspoon ginger and ½ teaspoon cinnamon and simmer, stirring occasionally, until thick. Add 1 tablespoon of butter and stir until melted. Pour pudding into buttered baking dish and bake at 300 degrees for about 2 hours, uncovered, until golden brown and set in the middle. Serve with ice cream or whipped cream.
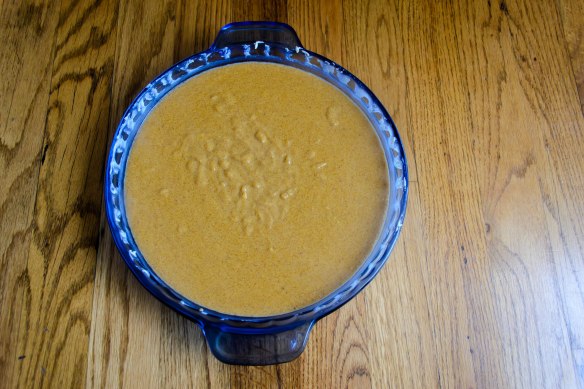
Stirred sternly, this mixture took on the texture and the color of pumpkin pie filling. It began to spit and burble like a pot of grits (which, in a somewhat removed way, it was), and I decided it had done its time. Into the oven with it.
I think I overbaked this. Just the barest firmness across the top, like a good cheesecake, is what is needed. Mine was stiffly set. I also think I chose the wrong cooking vessel. I used a glass pie dish. Serviceable, sturdy, but too wide. The pudding came out an odd inch or so thick. A deep mass of wobbly richness would have been preferable.

Despite these fallbacks, it was still very, very good. Perhaps it was the color and the texture, but it really did remind me of crustless pumpkin pie. The cornmeal and milk became a custard, and the rich deepness of molasses and autumnal spices left me wanting to douse this with a healthy dollop of Reddi-whip. I settled for vanilla ice cream instead.

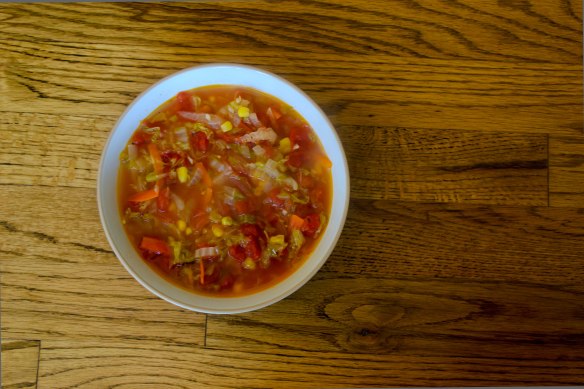
“18. Hot and Sour Vegetable Soup: Sauté chopped onions and garlic in vegetable oil until soft. Add chopped or shredded carrots, cabbage, and daikon or turnip, frozen corn, chopped boxed tomatoes with their juice and stock to cover; bring to a boil. Simmer for 15 minutes, then finish with about a tablespoon of rice wine vinegar per 2 cups of soup and loads of black pepper.”
Soup warms the belly like very little else. This one, with the copious quantities of black pepper and the inevitable sour burn of the rice vinegar, promised a cauldron of comfort. Quantities listed here make enough for two large bowls – quite enough for a deep December lunch.
2 TB vegetable oil
¼ large onion, diced
4 cloves garlic, minced
1 carrot
½ medium turnip
8 napa cabbage leaves
½ cup frozen corn kernels
14.5 oz can of petite diced tomatoes
2-3 cups chicken or vegetable broth
2 TB rice vinegar
½ tsp salt
½ pepper to start – add more to your liking
Heat the vegetable oil over medium heat and sauté the onion and garlic for a few minutes, until the onions just begin to pick up color.
Meanwhile (or beforehand, if you are not speedy with your vegetable prep), peel the carrot and turnip. Once you have disposed of the scraps, continue to peel the carrot into thin strips with your vegetable peeler. Cut the pile of ribbons in half or in quarters to create bite-sized pieces.
Cut the turnip in half from root to tip, then crosswise into thin slices. Julienne each thin slice so you have slim matchstick pieces.
Stack the napa cabbage leaves, then roll into a thick cigar and slice as thinly as possible.
Add the vegetables to the onion and garlic.
Add the corn kernels and the broth and simmer the whole pot for 15-20 minutes, or until all vegetables are tender and everything is warmed through.
Add the rice vinegar, salt, and pepper, stir gently, and serve.
I loved everything about this soup except the tomatoes. They weren’t a bad addition, there were just too many of them. Were I making this again, I might decrease the quantity, or just drain the can and add only the liquid for the color and acidity. The strings of carrot and turnip kept a minimal bite, and the combination of vinegar and pepper was near perfect. The puckering sourness played against and contributed to the bland crunch of the vegetables, and alongside a hastily prepared hunk of garlic toast, this was a satisfying lunch on a chill day: it was heat, and comfort, where both were needed.
Be well, all.
A fabled land of farmers, farm shares, fancy (and not so fancy) restaurants, family meals, food projects and more.
cooking my way through my dissertation, one egg at a time
Fearless cooking from a tiny NYC kitchen.
food, in so many words.
Recreating the famous dishes of famous writers. Part recipe blog, part historical discussion, entirely unabashed love of books.
Epicurean Adventures from Eugene, Oregon
Celebrating the Harvest
Modern Iranian aka Persian Food & Culture Blog - Cuisine, Recipes, Stories , Photos, Pictures, DIY tutorials
Exploring Culinary Traditions of Africa, African America and the African Diaspora
food, in so many words.
food, in so many words.
food, in so many words.
Food-Stories-Recipes-Love
WordPress.com is the best place for your personal blog or business site.
