Honesty and Irish Soda Bread

Food Blog March 2013-0878
It seems like admission and honesty are the motifs of the moment in many of the blogs I read.  A few weeks ago Joy the Baker created a beautiful list of things to remember while blogging – things like despairing over the cuteness of other people’s pages isn’t worth it.  Things like not stressing over ratings, and remembering that the internet is always changing, which means it’s okay to not be involved in every single new trend.  She has just ended a week on that most humble and most basic of vehicles for deliciousness: toast.  Simple.  Honest.  Real.  (Also, can you tell I’m kind of crushing on Joy the Baker right now?  This is about honesty, after all…).  Shauna on Gluten-free Girl and the Chef has been writing for herself lately, not for ratings or comments or trends.  In fact, she has closed comments on her blog; she’s writing in the undisturbed beauty of what is important to her, not what is important to others making demands on her.  Just Monday, Irvin at Eat the Love published a beautiful, real, excruciatingly honest piece he’d been sitting on for over a year about jealousy and perfection and measuring up in the blogging world.  (Lately I’m crushing on Irvin too; he just seems so nice!  And sometimes he responds to my tweets!  Squee…).
Food Blog March 2013-0854These are courageous posts.  It’s hard to be real here in this virtual world.  It’s hard to admit to imperfection or doubt or dissatisfaction or envy.  These are ugly ideas.  Yet we have them, and our impulse is to hide them behind the veneer of beautifully crafted pages, or photos with the white balance adjusted, and cropped just right to edit out the dish soap we forgot to move, or fluffy, romantic sentences with words like “mouth-feel” or “buttery crumb” or “silky texture.”
Food Blog March 2013-0858
And I do it too.  Despite my assertion that you are going to see imperfect products or read about unsuccessful attempts, of course I want every item I post about here to be beautiful and balanced and insurmountably delicious.  Of course I don’t want to admit to the doubts and worries and sneaky hate spirals that sometimes result from something as simple as turning away from grading papers to bake a loaf of bread and then half an hour later I’m trembling before a monster of despair that maybe by cooking instead of researching I’m throwing away all that work I did on my PhD because my dissertation might never become a book.  That by insisting on making dinner every night and posting every week, I’m sabotaging my own search for a better job and therefore I’m never going to “make it” in the adult world.  That I’m wasting my time as a blogger because I don’t have – and will likely never have – the same kind of following as Deb or Ree.  That there are a billion food blogs out there and I’m just adding to the clamor without bringing anything original or special or any of the things I hoped to be when I started writing.

Food Blog March 2013-0861

But I don’t want to tell you all that.  Despite my doubts, I, too, want to be a “good blogger,” a “popular blogger” with a following and cooing comments over the little messes I arrange just right so they look like masterpieces on screen, so I try to do the things that will make this happen.  I want to be an authority.  I want to spring to people’s minds when they think of food sites they like.  I want to talk about food and I want to be real, but I still want to find that magical, imaginary combination of words and photos and style and design that pulls people here in droves.  Those days where my little stats bar doesn’t even tick from zero to one are too real.  I never tell you that.
Food Blog March 2013-0862But I think this desperate, ugly, gasping kind of honesty can be a good thing, even if it only emerges now and then.  It’s a sign of strength and a sign of independence.  It forces you – it forces me – to reassess, to remember that I am doing what makes me happy for the reasons it makes me happy.  And maybe that is part of what Spring is about: cleaning out your assumptions.  Stripping down the need for perfection and presenting a more naked, more truthful, more real version of yourself to your audience.  Even if that version is a little ugly.
Let’s call it mental Spring cleaning.

Food Blog March 2013-0851

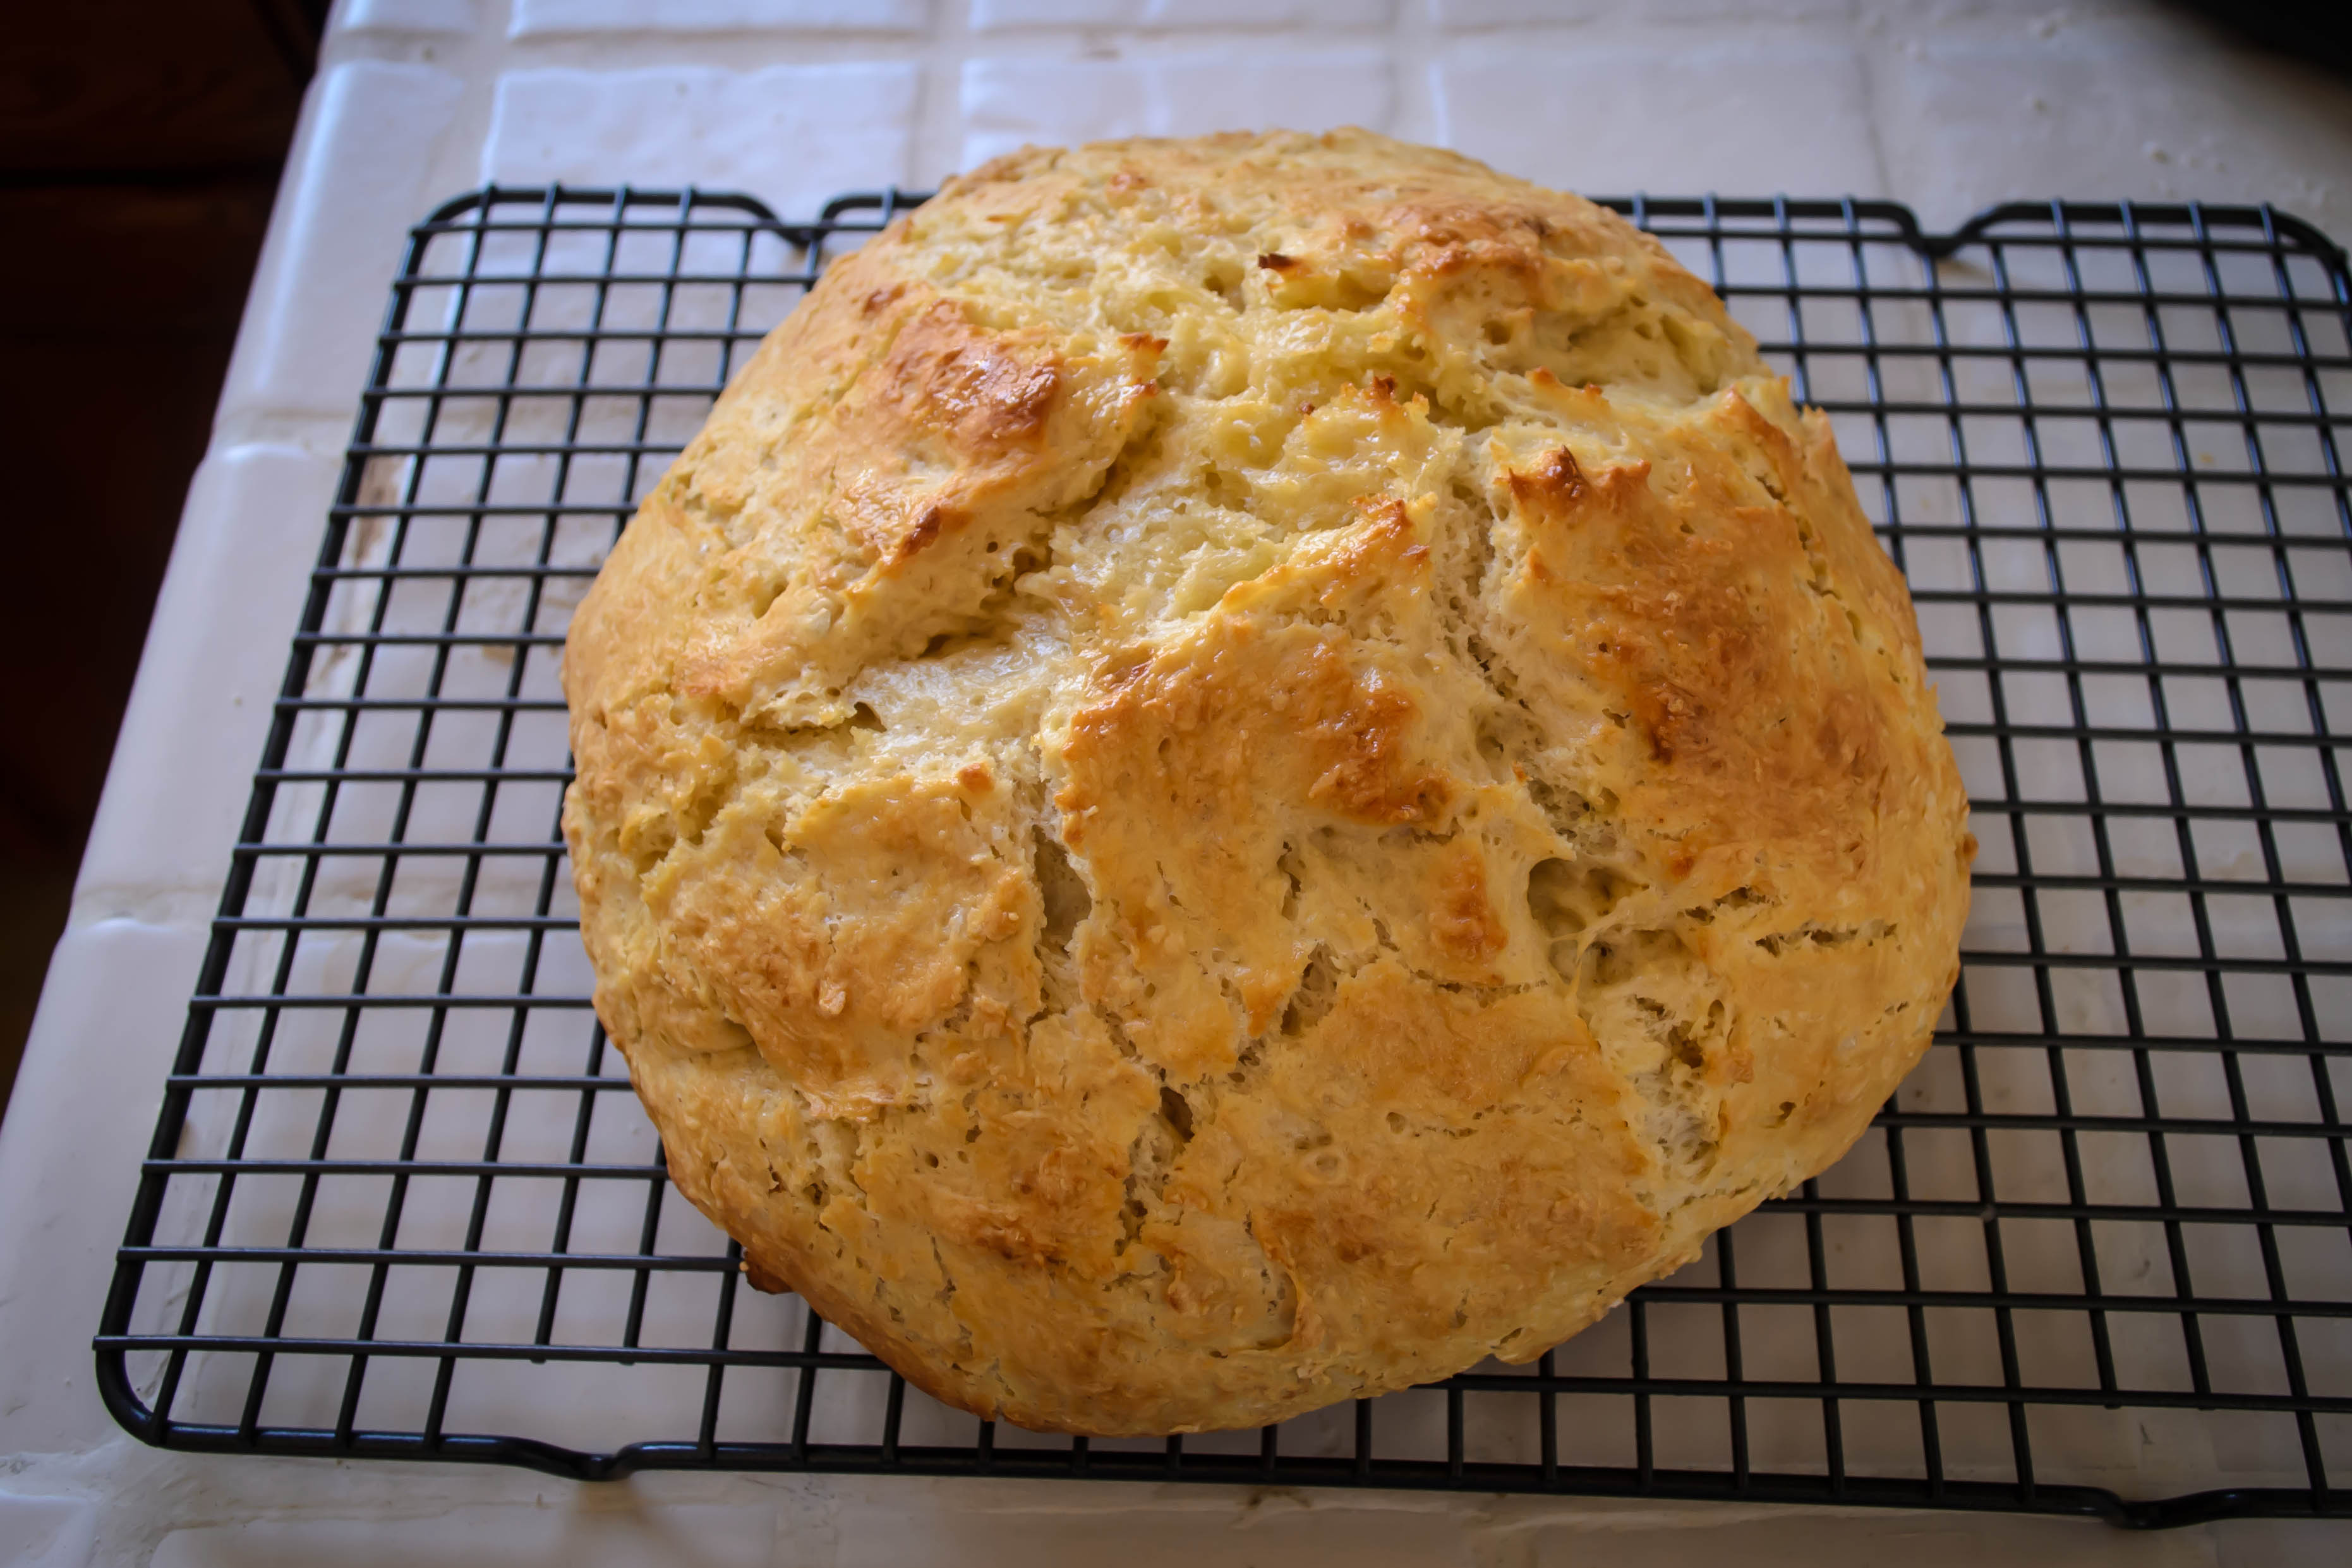
This week I made Irish Soda Bread.  Simple, rustic, honest.  Lumpy.  Rough.  Uneven.  No yeast, no eggs, no herbs or dried fruit or fancy techniques or browned butter or sifting.  I didn’t even wipe down the counters first to make you think my kitchen is always spotless.  I shuffled through a few recipes and found suggested combinations like golden raisin and rosemary, or candied orange peel and bittersweet chocolate.  Those didn’t feel truthful.  They were too dressed up – too showy.  So I turned to the most basic, most honest cookbook I have: Baking Illustrated.  BI is willing not only to present you with a recipe, but to explain why they made the choices they made, and what happened when they tried things in other ways.  They talk about the cakes that came out gummy or runny.  They talk about overly eggy batters and dry loaves and dense biscuits.  They show you what a less-than-perfect product looks like.  And then they tell you how to fix it.  This was the kind of Springtime honesty I needed.

Food Blog March 2013-0866

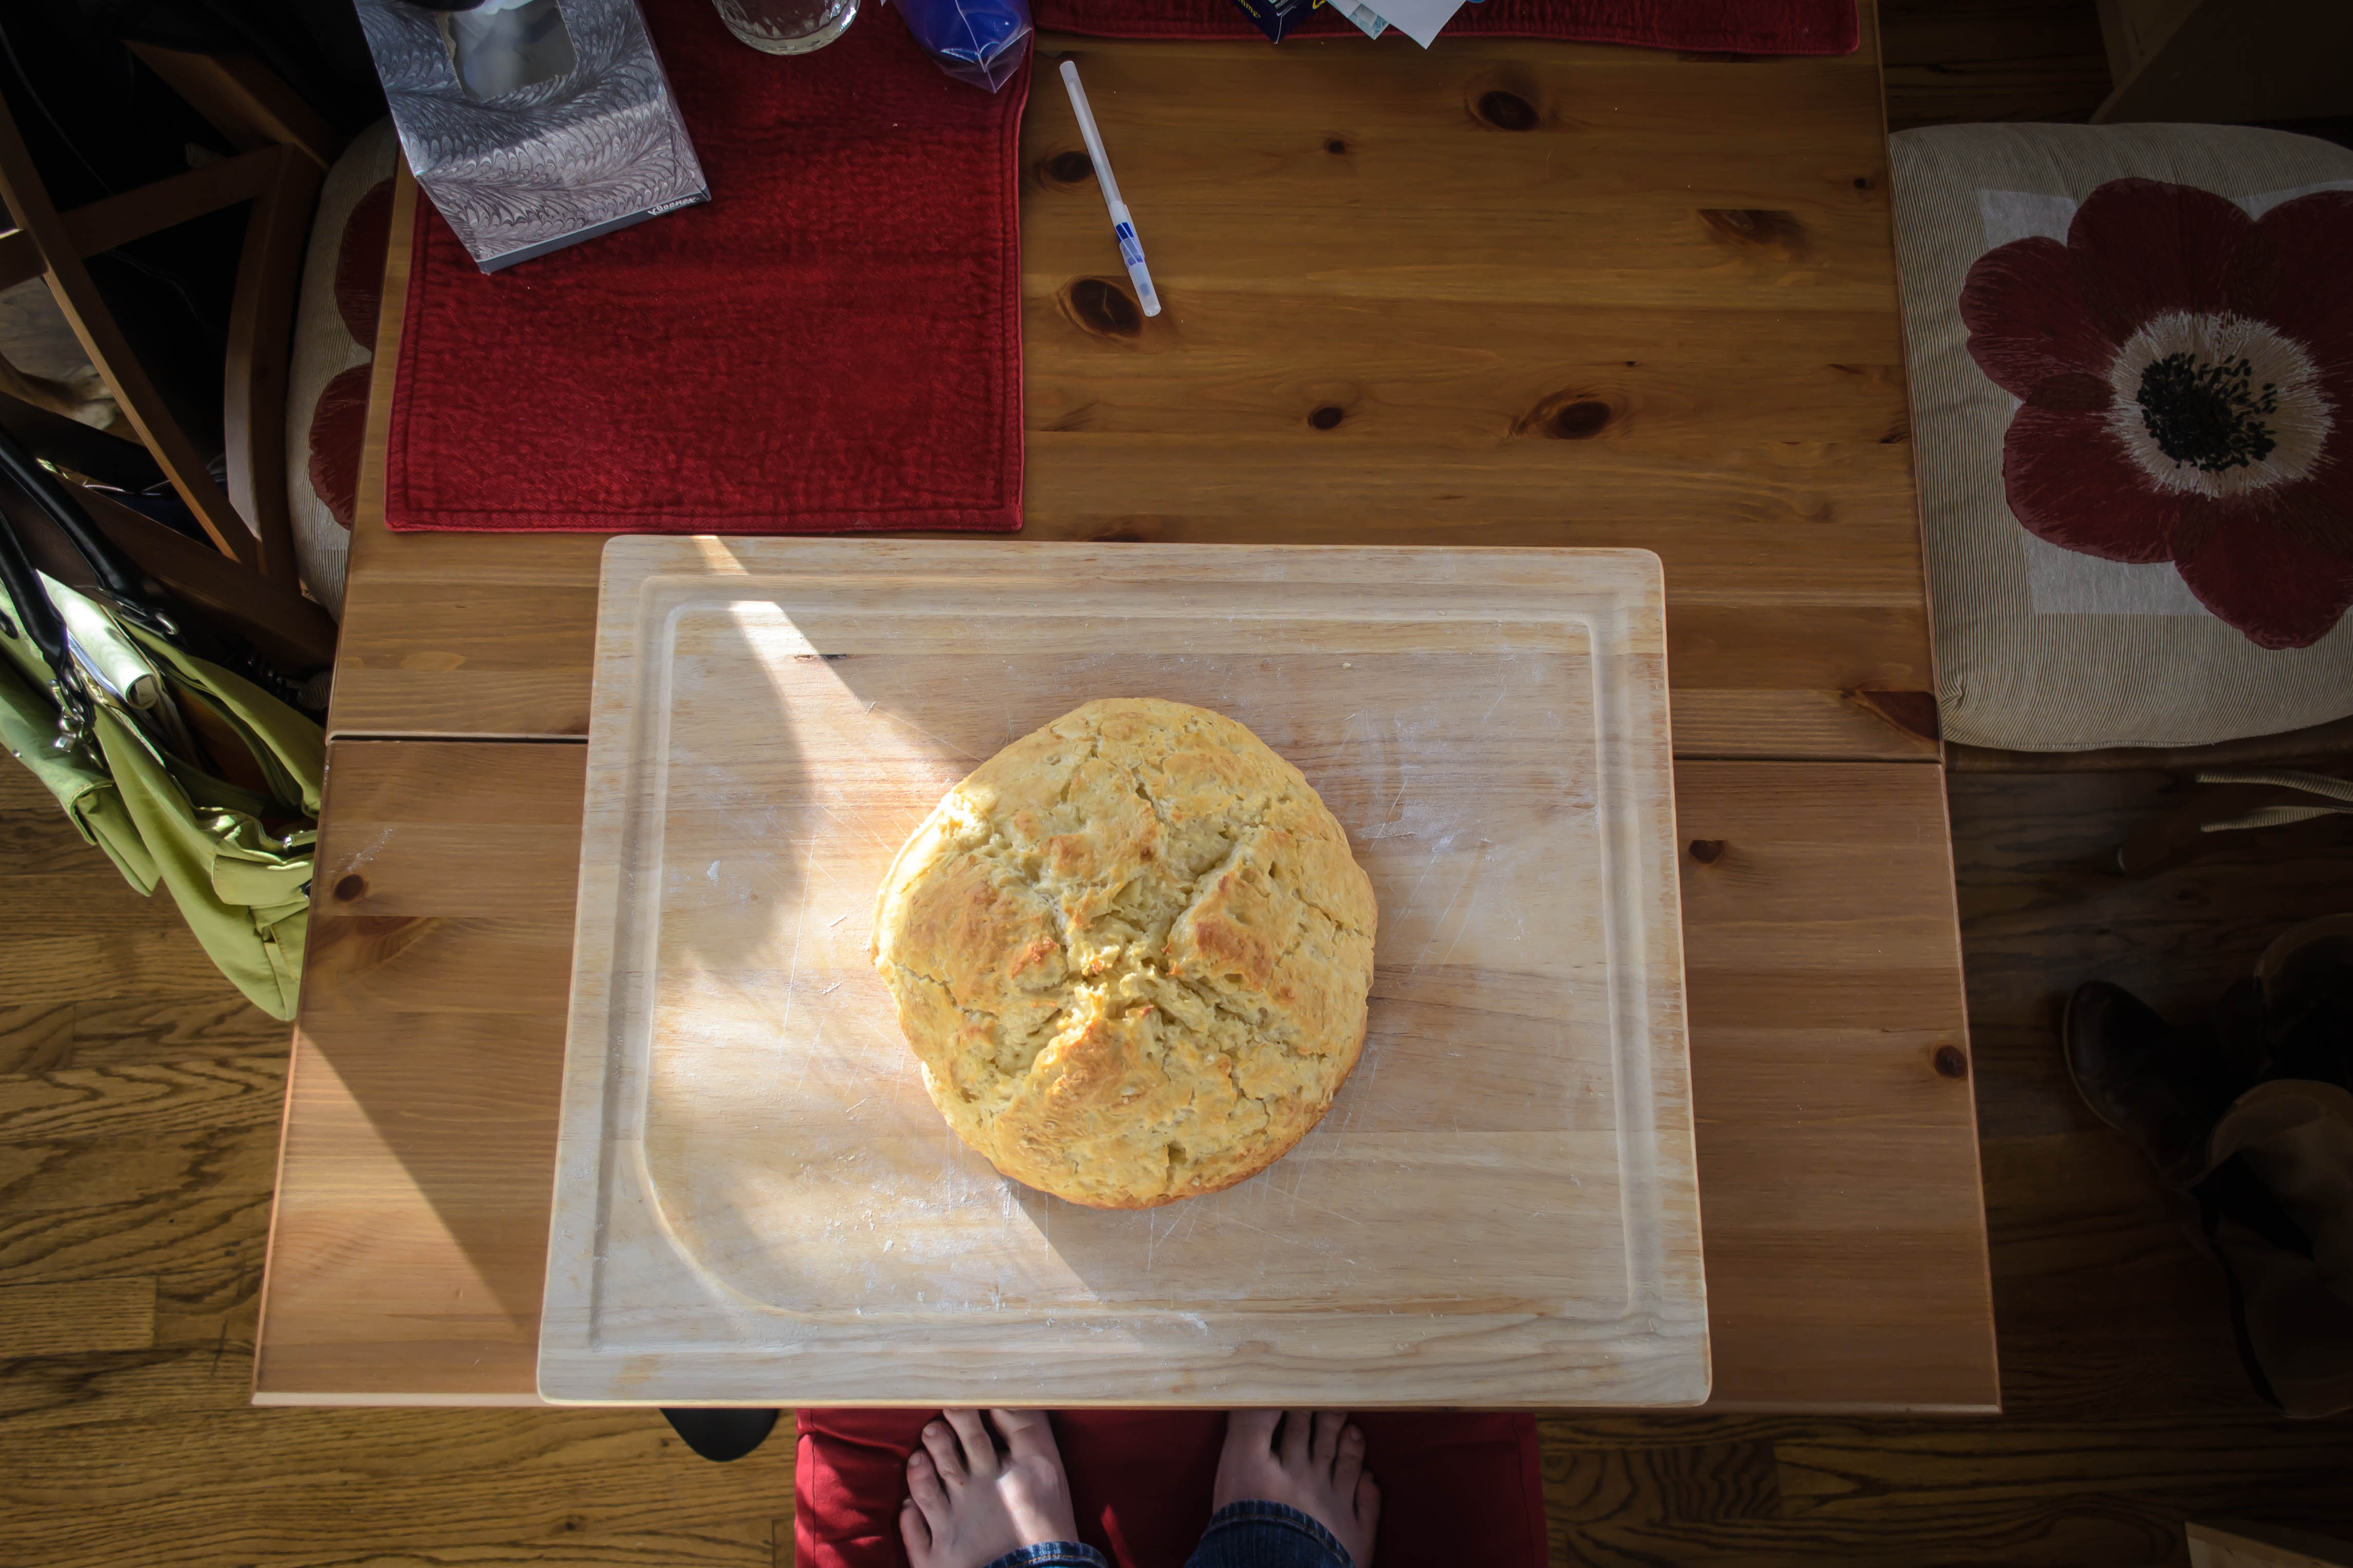
I changed very little from the original recipe, only using brown sugar in place of white granulated sugar for a deeper flavor, and taking up the suggestion to bake the loaf in a deep covered pot to enhance the texture of the crust.  Since I’ve been doing that with success in my yeast experiments, it seemed worth trying out here too, and I have to recommend it highly.  Our loaf was surprisingly tender – almost like a giant scone – and the crust was springy and buttery – it felt like it must be loaded with eggs even though there are none in the recipe.  I like the flavor the baking soda provides, which is a different kind of tangy breadiness than yeast.  After weeks of churning out loaves that require hours and hours and multiple rise times, it was nice to have a quick-bread that rose just enough on baking time alone, and left behind concerns like proofing and kneading and windowpanes and tucking and shaping.  Honestly.
 Food Blog March 2013-0868
Irish Soda Bread
adapted from Baking Illustrated
3 cups all-purpose flour (BI recommends one with a relatively low protein content, like Gold Medal or Pillsbury) plus a scattering for your work surface
1 cup cake flour (even lower protein, which makes for a more tender end product)
2 TB brown sugar
1½ tsp baking soda
1½ tsp cream of tartar
1 tsp salt
2 TB softened butter
1½ cups buttermilk
3 additional TB butter, divided
Food Blog March 2013-0872

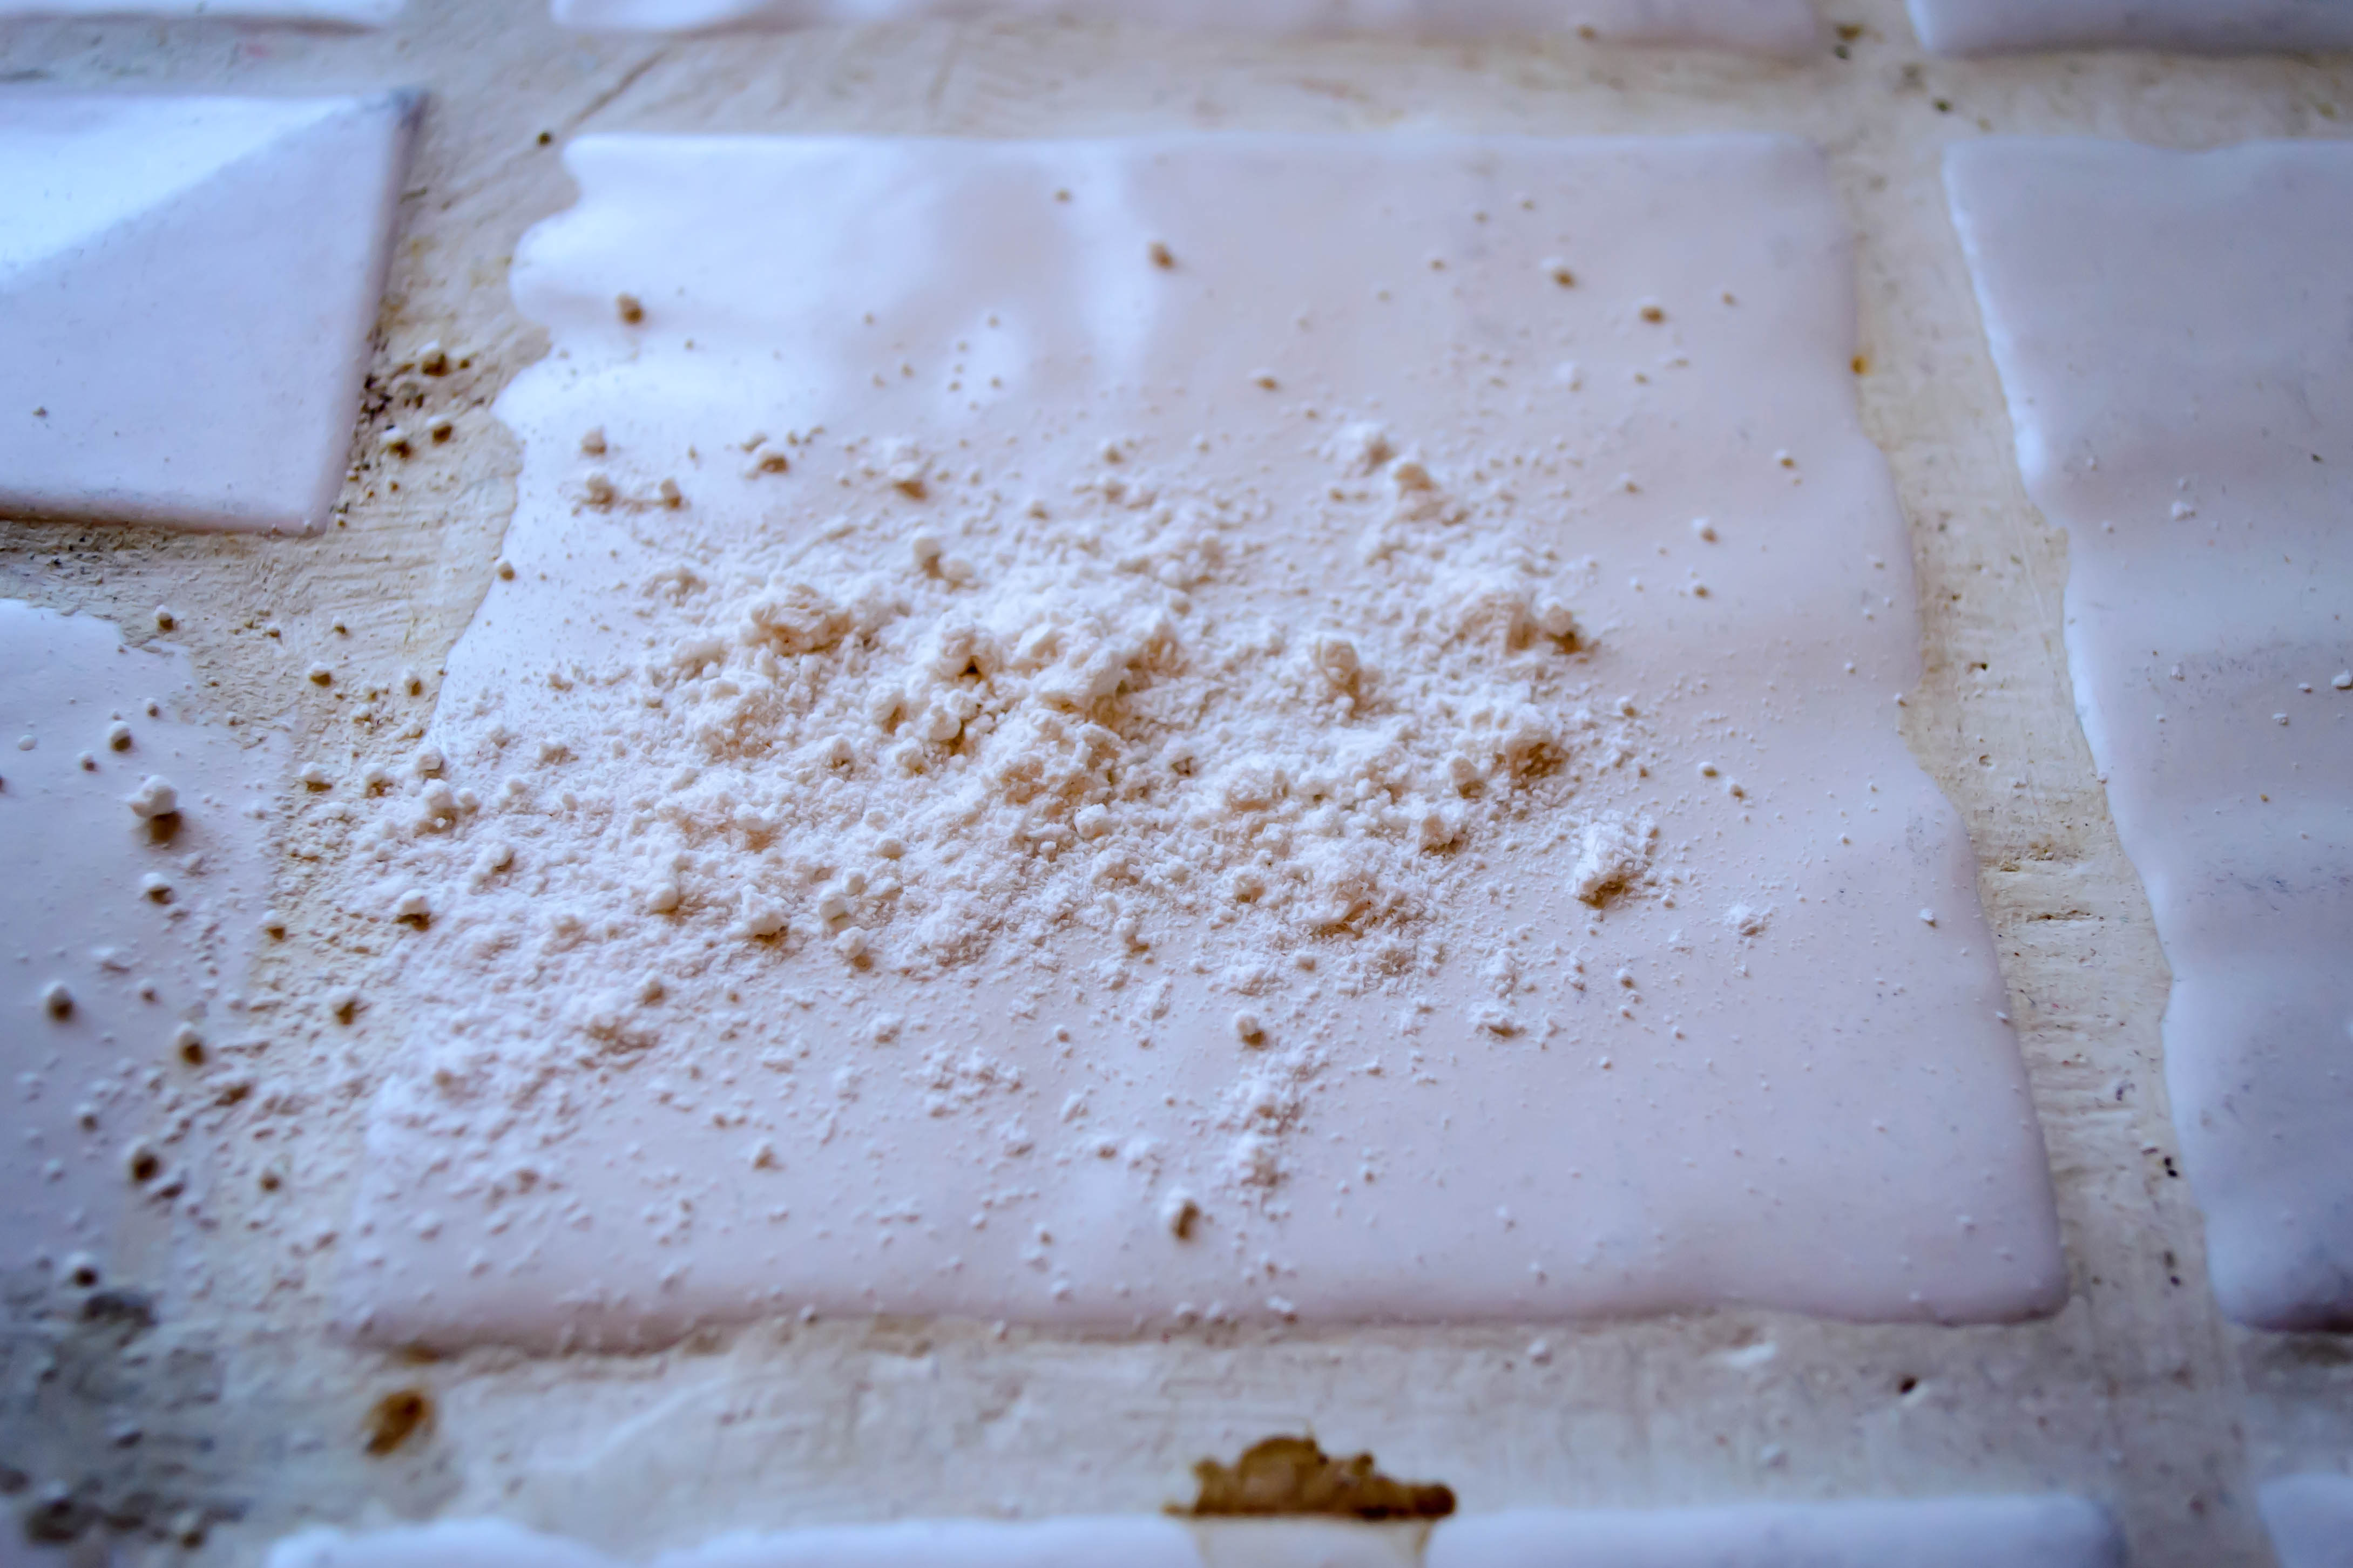
Here’s the final product, when I edit and trim.

Food Blog March 2013-0873

But since we’re being honest here, this is the set-up; I just push all that other stuff aside and crop it out…

Preheat your oven to 400F.  BI says to position a rack in the upper middle portion of your oven, but I left mine near the bottom and things turned out fine.
Whisk the dry ingredients together in a large bowl.
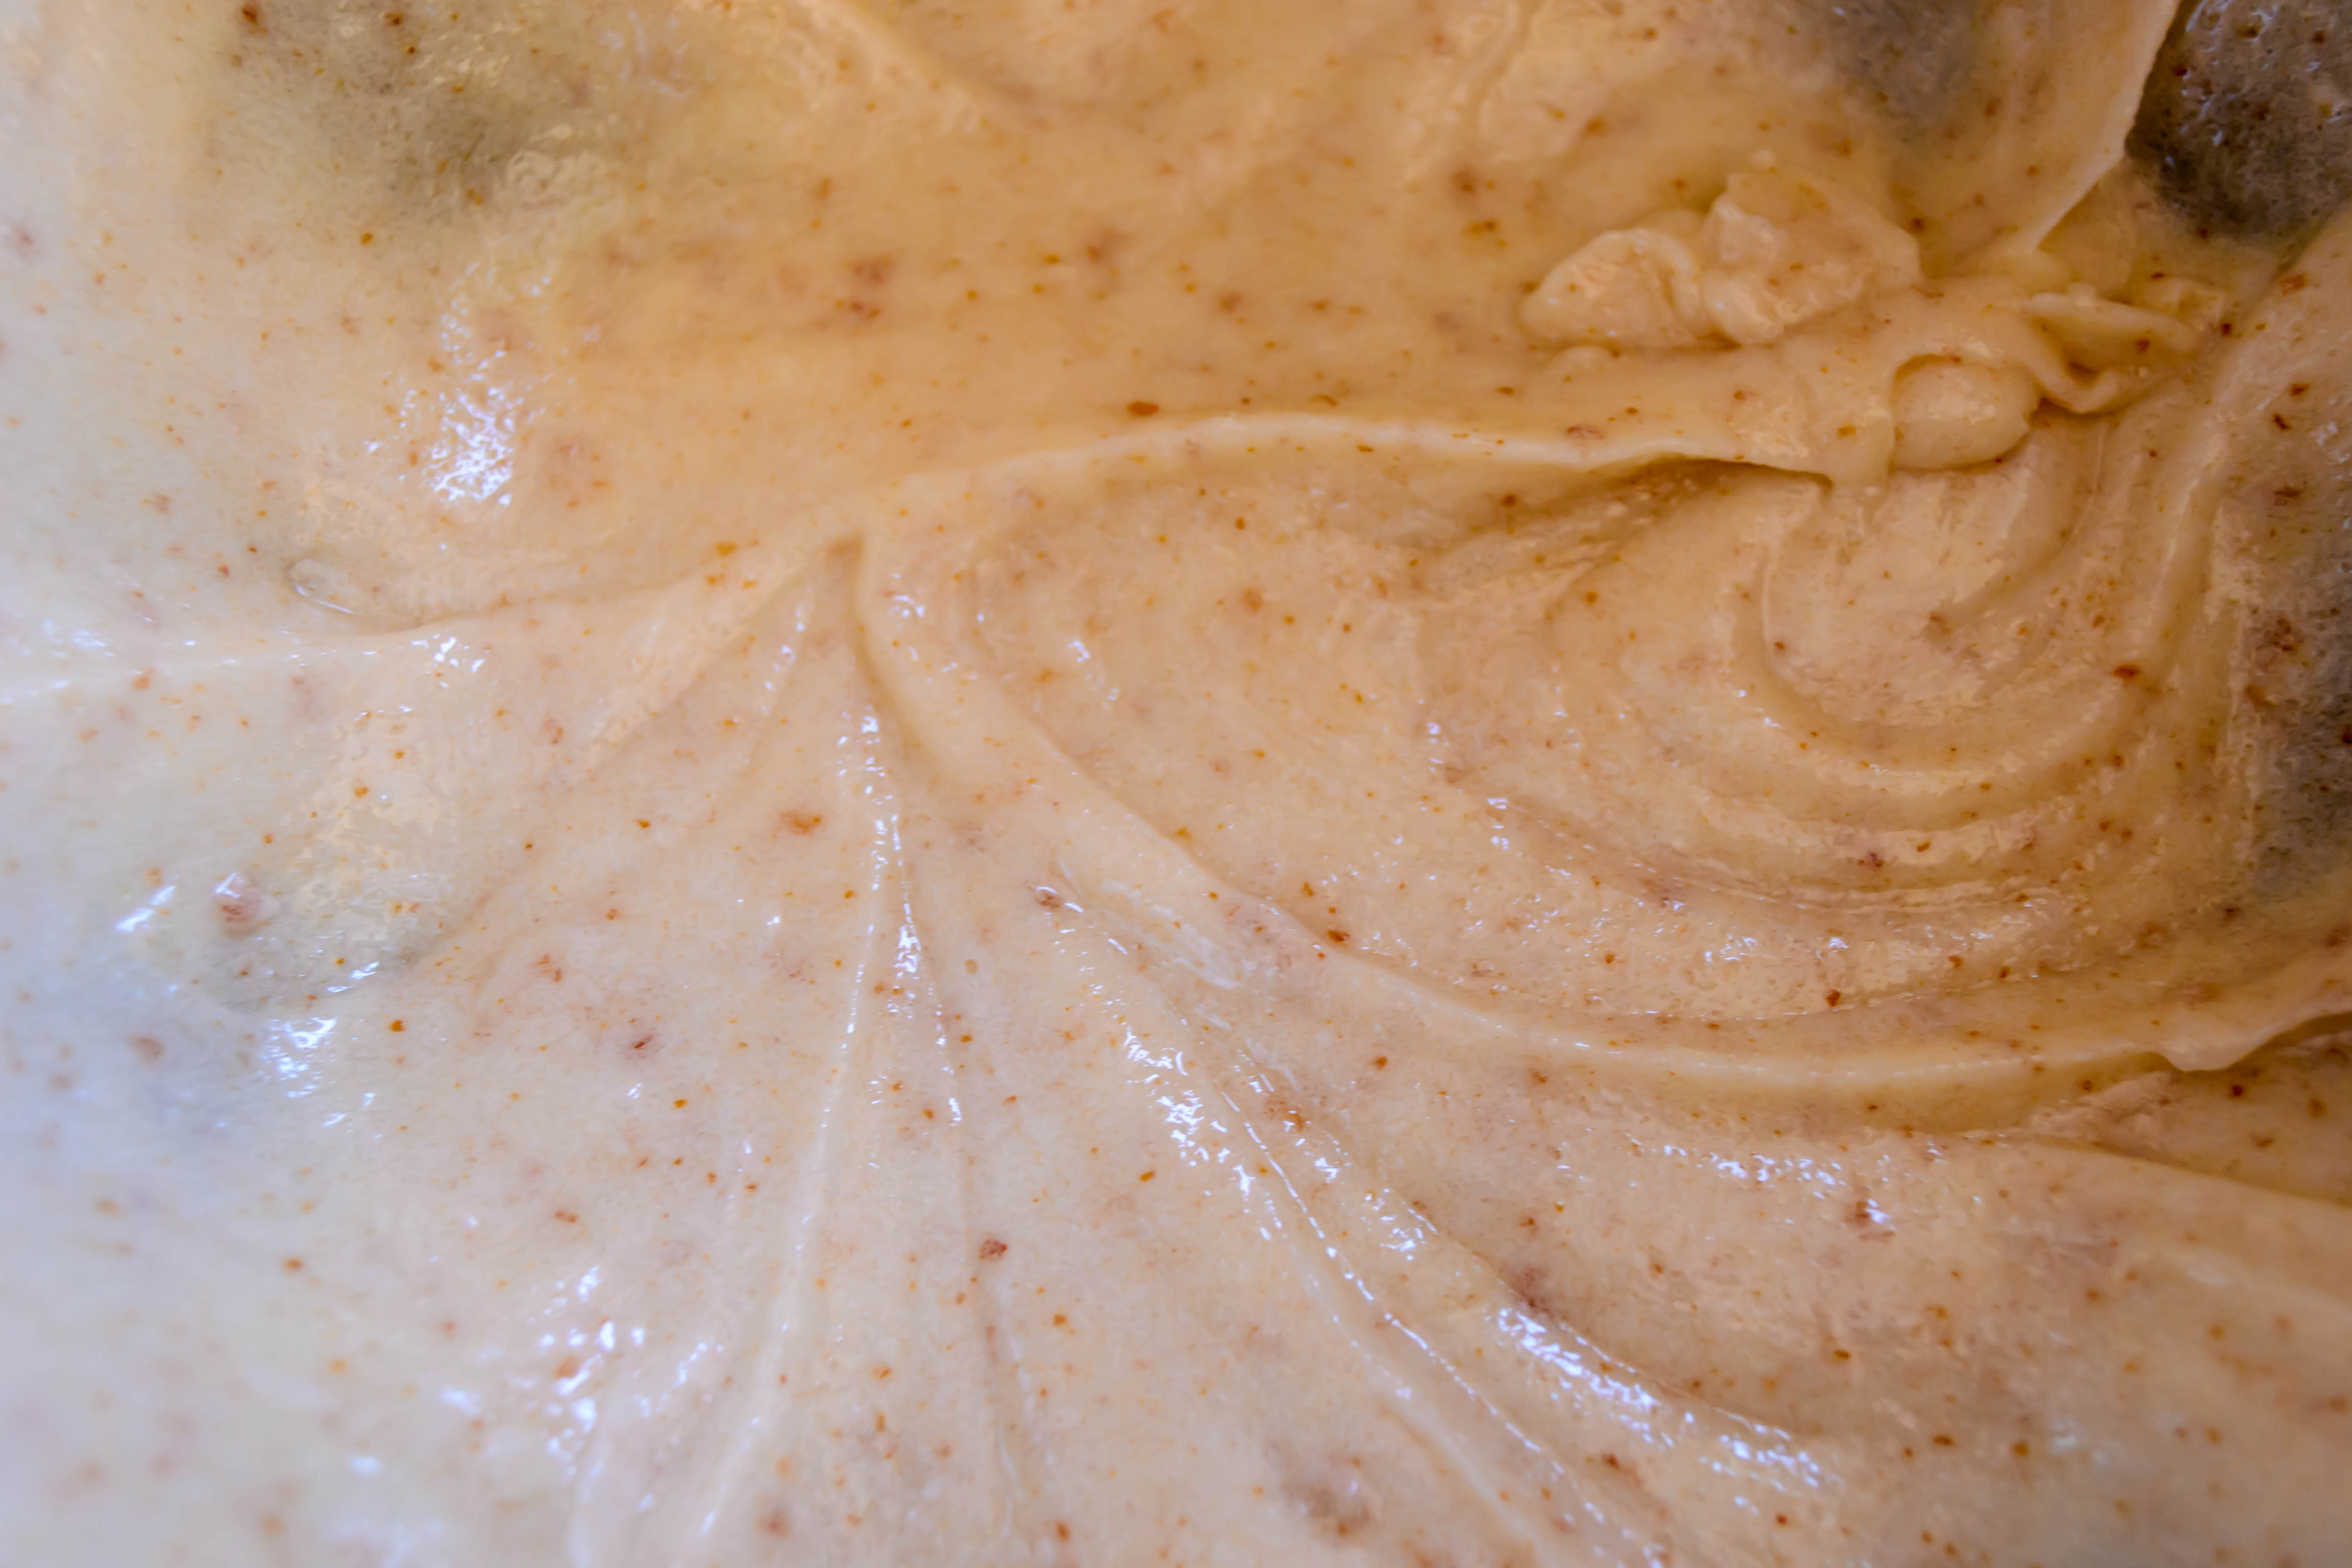
Cut in the softened butter with a fork, your fingers, or a pastry blender until it is distributed in small crumbly bits.  The mixture, BI says, should resemble coarse crumbs.
Add the buttermilk and combine with a fork just until the mixture begins to come together – the coarse crumbs should clump into slightly wet crags.
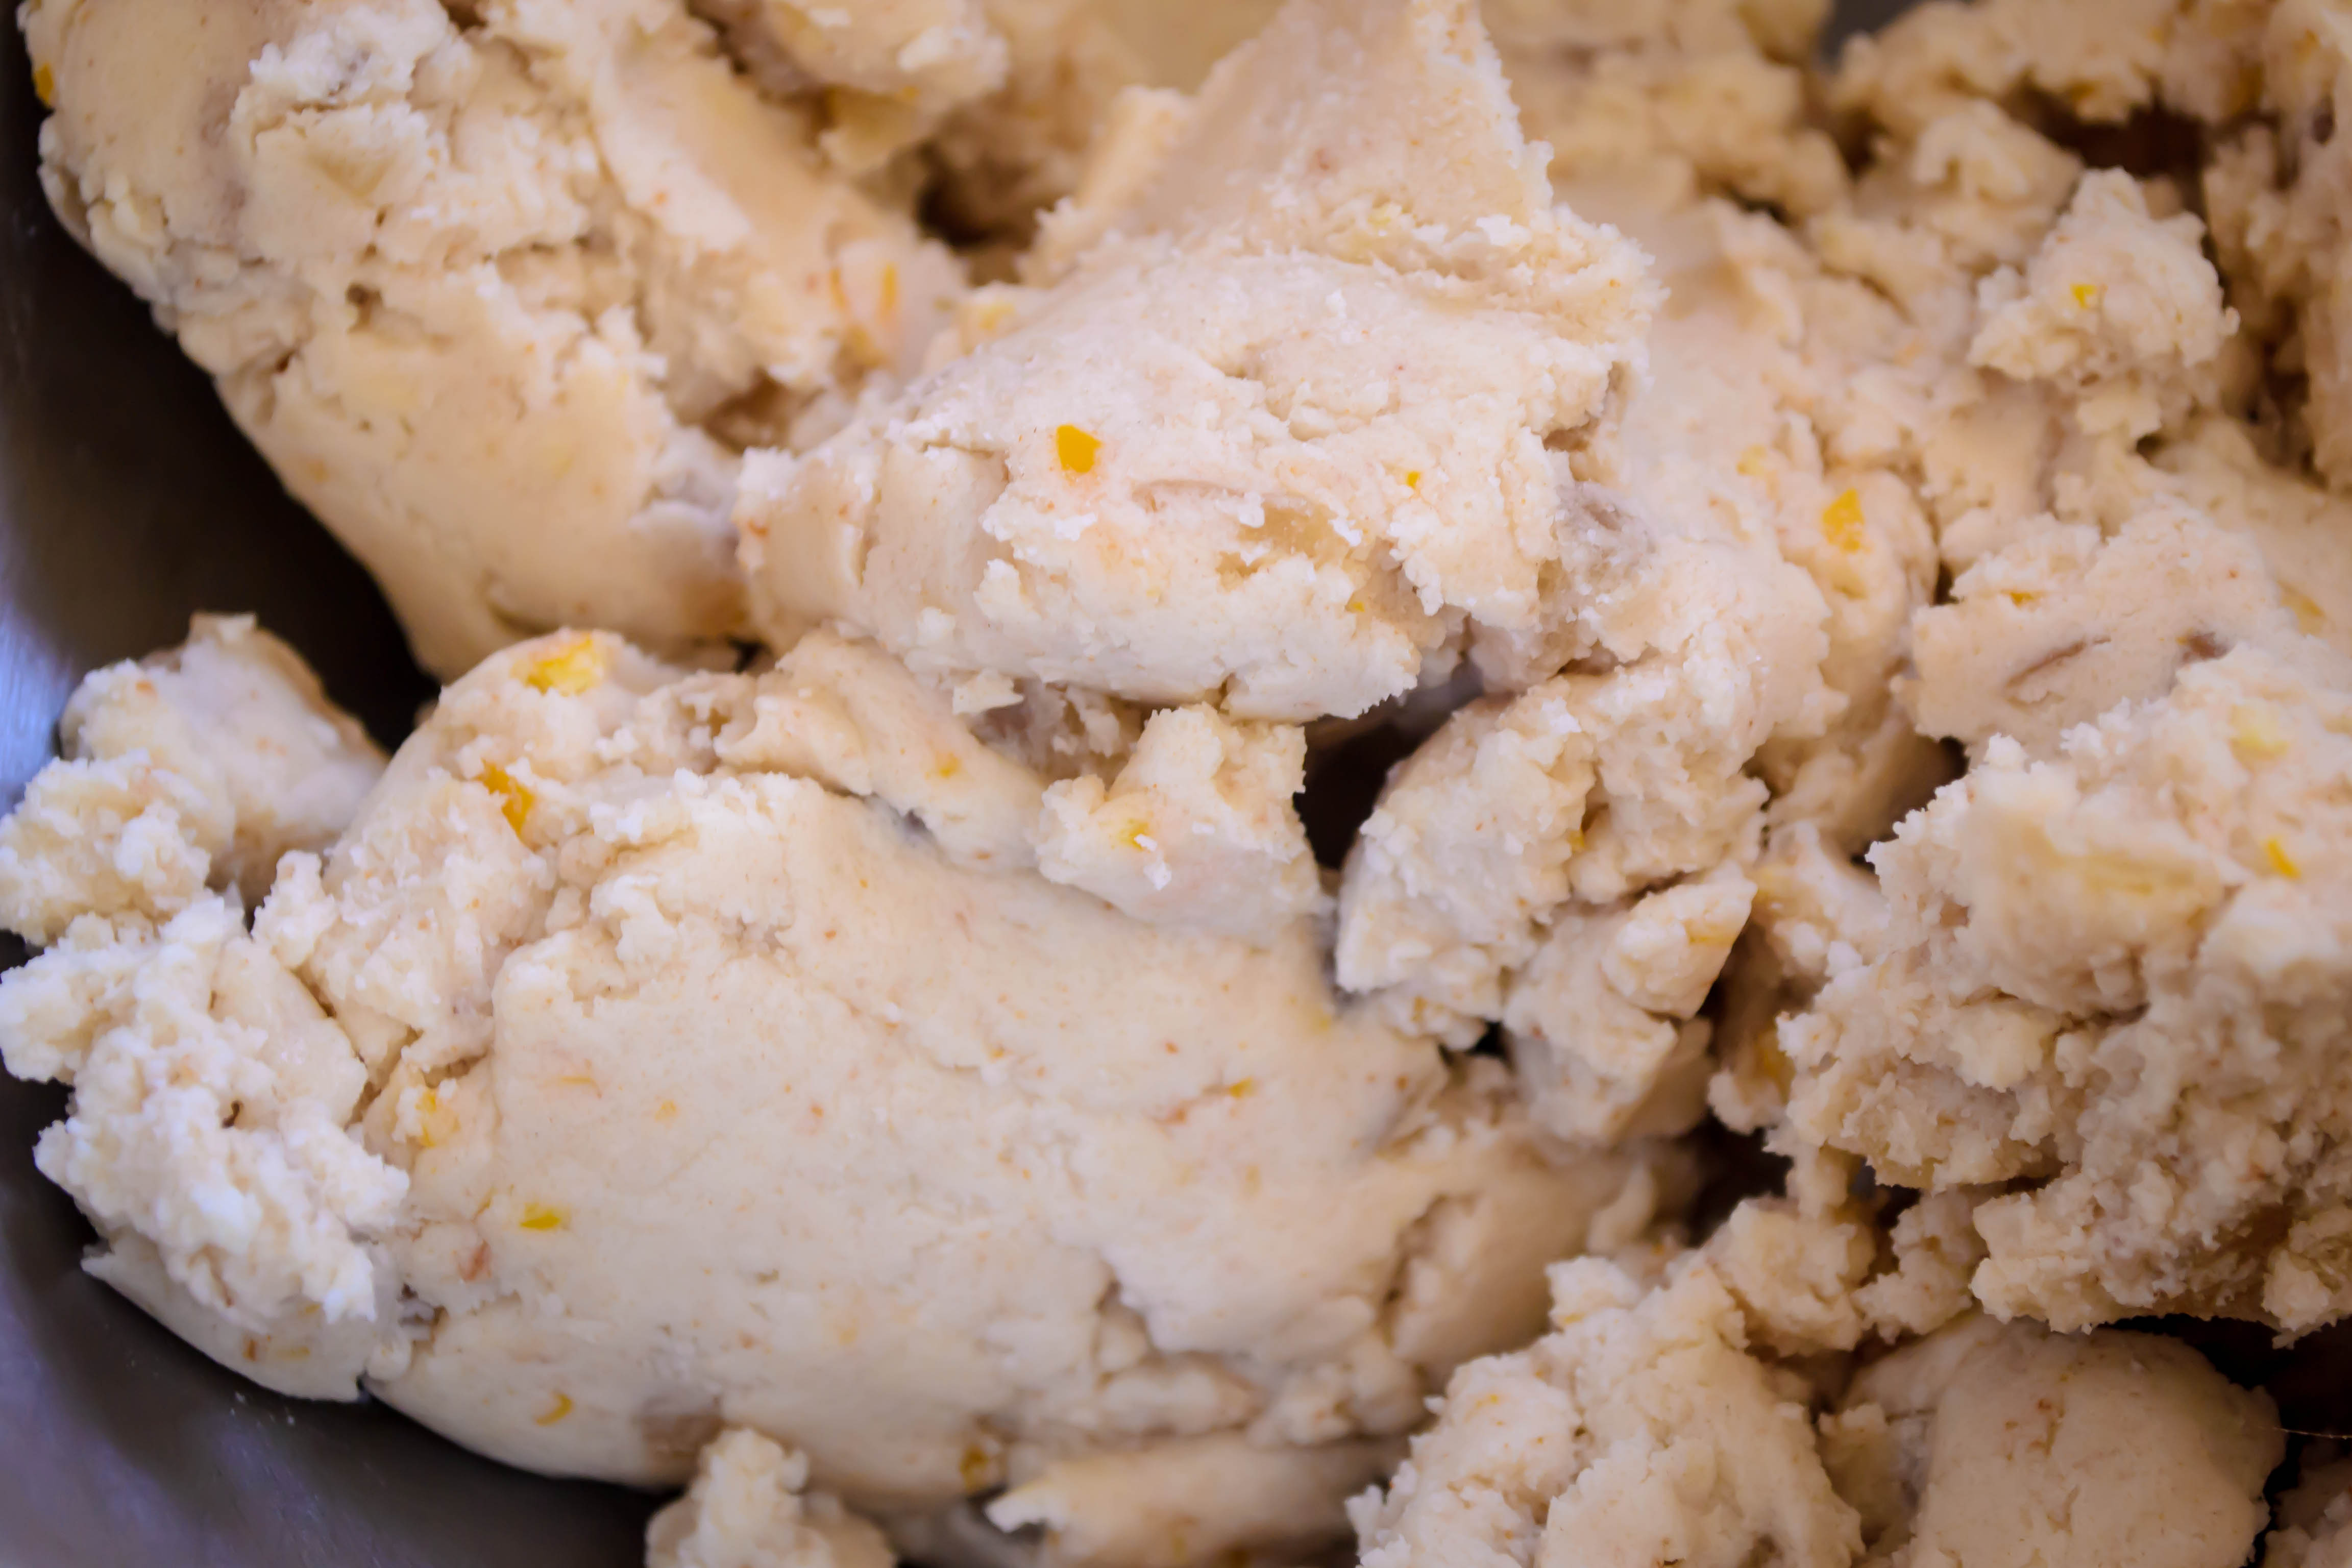
Turn out onto a floured board and knead slightly – 12 to 14 turns – just till the dough becomes “cohesive and bumpy” (43).  You don’t want to overknead this bread because it will become tough.  The intent here is not to stimulate gluten production, as it would be in a yeast dough.  We just want a homogenous mass that stays together.
Pat the dough into a 6 inch round (about 2 inches high) and score an X in the center with a sharp knife; use 2 TB of the additional butter to grease the bottom and sides of a dutch oven or similar covered pot.  Place the loaf carefully inside, cover, and bake with the lid on for 30 minutes.  Then remove the lid and continue baking for an additional 10 minutes, or until the internal temperature is 180F.
Melt the final TB of butter.  As soon as you remove the loaf from the oven, brush the top with the melted butter to keep the crust soft and tender.
Wait about half an hour before you attack it – this bread is delicate and it needs the extra structural support gained by cooling.  Earlier slicing will result in squashing and crumbling, and as honest as that is, we’d rather have nice slices or, as N. and I prefer, thick wedges for dunking.

Food Blog March 2013-0875Food Blog March 2013-0877

Go-to Dough III – Orange and Rosemary loaf

First, thank you.  Thank you to you lovely people and the lovely way you responded to last week’s post about my sweet rolls and my Nana.  Old friends, new friends, family, it warmed me to see your comments.  I so appreciate you making yourselves known and sharing your own experiences and memories – I’m motivated to delve into more old family recipes and more new experiments.  That probably sounds a little cheesy, but I mean it.


Food Blog March 2013-0755
So I suppose you could call this a thank you loaf.  It was delicious, it was easy (well, as easy as baking bread can be, I suppose), and I made it for you.
I wanted, as I’ve noted, a basic recipe, though I can’t resist adding a tweak or two to keep things interesting.  My first boule was overbrowned; my second utilized an overnight leavening procedure I didn’t think added all that much to the final product.  So the third had to be just right – the charm, you might say – and I really do think it was.  Goldilocks bread.


Food Blog March 2013-0761
I went back to Ruhlman’s directions for cooking the loaf in a pot.  This strategy for maintaining the shape and for holding in moisture by using a lid makes so much sense, and I wanted to give it another shot.
This time I decided to add some fat to the bread in the form of olive oil.  This made the crumb a bit moister and I think it kept the bread tasting fresh longer.  To make the yeast extra happy, I proofed it (them?  Is yeast grammatically plural?) with a few tablespoons of honey.  This didn’t contribute noticeable sweetness to the final product, but it did make for an extra foamy yeast party.  You could probably increase the honey if you wanted a sweeter end product.  Since I was still on a high from the orange marmalade triumph, I decided this bread would benefit from some orange zest and, just for fun, some fresh rosemary too.  I ended up with a really beautiful loaf: puffed, thin but crisp crust, moist dense crumb.  The orange and rosemary creep up on you – perfumed subtlety lingering in the background until you’re almost finished chewing.  Then they suddenly become present.  It’s not a punch, it’s a slow sloping into flavor.
This was perfect for sopping up sauce from baked beans (it would make stellar toast for beans on toast), complementing the sweetness and the fatty bacon flavor with its subtle herbaceousness.  I could see adding some dried cranberries to the dough for a wintry take on a breakfast slice.  It dances well with a slick of salted butter, plain and simple, but its shining moment this week was as an open faced sandwich spread thickly with cream cheese and fig preserves.  The orange and rosemary played beautiful back-up to the cream cheese and the fig, and I bolted it before I even considered taking a photo to share the triumph.  If you make this bread – and you should, oh you should – don’t miss this combination.


Food Blog March 2013-0738
Orange and Rosemary loaf
12 oz. warm water
2 TB honey
2 tsp yeast
2 TB olive oil
20 oz. bread flour (or 4 cups, give or take)
2 tsp salt (I’m currently obsessed with a gray French sea salt, which I found at Cost Plus World Market)
2 TB fresh rosemary leaves, minced
zest from 2 oranges


Food Blog March 2013-0740
Combine the warm water, honey, and yeast in a small bowl or a measuring cup, and stir lightly.  Set aside for 5 minutes or so to let the yeast revive from its hibernation.


Food Blog March 2013-0741
In a medium bowl (I use my stand mixer), combine the flour, salt, orange zest, and rosemary.
When the yeast is bubbly and smells of bread and beer and awesome, add the olive oil to the wet mixture and stir lightly.
Pour the wet yeast mixture carefully into the dry ingredients, then stir to combine until you have a wet, shaggy mixture (if you are using a stand mixer, try the paddle attachment.  I know it’s one extra thing to wash, but it brings the mixture together much more quickly than a dough hook).
Once the dough is shaggy but workable, knead for 8-10 minutes or until a small knob can be stretched gently between your fingers to a point of translucency.  This is called the windowpane test.  If you’re getting help from a stand mixer, use your dough hook and knead on medium speed, checking after 6-7 minutes.
Your dough should be warm, elastic, and smooth.  Turn it into an oiled bowl and flip it around until all sides are lightly oiled.  Let it rise in a warm, draft-free environment until doubled, 60-75 minutes (My preferred method is to turn my oven on for five minutes, turn it off, wait for five minutes, and then put the dough inside.  This creates an environment warm enough to help it rise, but not warm enough to start it cooking already).
After the dough has doubled in bulk, push it down gently with your fist to release the gasses trapped inside, then let it rest for 10 minutes to get its breath back.
On a floured board, shape your bread.  Since we are going for a round loaf, spin the dough in a circle, pushing it away from you with one hand, and using the other hand to tuck it under so you form a smooth, round ball.  (There are a lot of videos and complex step-by-step series for this procedure, involving pinching seams, smoothing and pulling, spreading and folding and turning the dough, and a host of others to prevent the loaf from spreading rather than maintaining its round shape.  Letting it rise and then baking it in a round pot takes care of many of these concerns.  I haven’t been particularly firm about pinching seams, and my loaves have turned out nicely rounded.)


Food Blog March 2013-0746
Transfer the loaf to a dutch oven or similar lidded pot and let it rise for another 90 minutes.  I lined my baking vessel with parchment paper this time so I wouldn’t have to use olive oil, which I suspect made my previous attempt too brown on the bottom.  This seemed to work fairly well.
When your dough has risen again, it will be puffed and pushing against the sides of the pot.  It’s now time to score it with a sharp knife, drizzle it with olive oil and sprinkle it with salt, then bake it with the lid on in a preheated 450F oven for 30 minutes.  Keeping the lid on traps some of the moisture inside, so you don’t have to bother with flicking or spraying the inside of the oven, or even with adding a pan of water.
After half an hour, remove the lid and continue baking for 15-30 additional minutes, or until the bread is done (it should register 180-200F on an instant-read thermometer and sound hollow when you tap the bottom).  Mine only took an additional 15 minutes before it tested done.


Food Blog March 2013-0751
Let the bread cool for 10-15 minutes, if you can stand it, before slicing.  This gives the center time to cool a bit and helps it stay together better.


Food Blog March 2013-0760
Or, you know, just tear off chunks and eat them blisteringly hot.  I won’t tell anyone.


Food Blog March 2013-0764

Orange Marmalade and Almond Sweet Rolls

Food Blog February 2013-0720
Guys, I’m pretty excited about this one.  It’s a mile marker for me in a couple of ways.  One, it’s a sweet application of yeast dough, which I’ve never tried before.  Two, I’m well into the second month of this project and I haven’t had any true disasters yet or fallen off the horse, which buoys my confidence.  Three, except for temperature and cooking time, which I had no idea about, I didn’t consult the internet a single time for clues about how to make this.  But four, and unquestionably most important, this is an adaptation of one of my Nana’s recipes, and I made it successfully.
Food Blog February 2013-0632
Nana was a cook.  She was an old-fashioned, from home, meat/starch/veg-that-sometimes-came-from-a-can kind of cook.  She was a clean-your-plate-before-you-can-have-dessert and sometimes a there-are-starving-children-out-there kind of cook.  But that was her era.  She raised her three kids on three square meals a day plus cookies.  She taught my two aunts how to cook, she cooked for our Pap almost up until the day he died, and she sent out a yearly box of Christmas cookies until I was almost through college.  My freshman year I remember getting a slip in my mailbox that meant I had a package to pick up, and finding, after returning to my room and tearing at it feverishly, that it was filled with sweets.  Chocolate dipped apricots, cream horns, which we called ladylocks, nut rolls, seven layer bars, pizzelle; these were how Nana sent us her love.  I always meant to send one back to her, when I was “grown up.”  It tugs at me a little that I never did.
Food Blog February 2013-0648
When she heard I was learning how to cook, she gave me my first cookbook: The Complete Guide to Country Cooking, along with a subscription to Taste of Home magazine.  One summer when we came to visit, I offered to help with the menu and she told her friends her granddaughter was going to be her cook for the week.  She said it was good, too.
In 2007, when I was about to get married, I received a large red photo album from my female relatives, featuring favorite recipes from their own kitchens.  Nana couldn’t attend my wedding – she was on oxygen and too weak for the plane ride across the country from Pennsylvania – but she had contributed recipes to this book, and even as I cherished her contributions I never thought I would make most of them myself: I was too inexperienced to try these dishes she had clearly mastered – lemon meringue pie and yeasted sweet dough were beyond my capabilities.
Food Blog February 2013-0628
But when I thought about cooking this past week, I thought about that stretch of dough from my dill bread and in its place saw cinnamon rolls.  They are, after all, filled and constructed in a similar way.    I love cinnamon rolls, but sometimes the dripping gush of cinnamon pooled in pounds of sugared butter is just too sweet for me.  Orange marmalade came into my mind, and with it, almonds.  They seemed like such a nice pairing, and as I wondered how to make them I found myself back in Nana’s section of my big red cookbook, staring at directions that now seemed less intimidating than they did six years ago.
Food Blog February 2013-0657
This is a beautiful, elastic, slightly sweet dough.  It is smooth and rich and expansive, and it makes a glorious roll.  It sighs like a feather pillow when you punch it down.  It wants very little from you – just a massage with melted butter, a liberal smear of marmalade and almonds, and gentle, careful rolling.  Inside, after baking, the orange and almond marry well, since the jammy part of the marmalade pools against the dough, but the zest and the almonds retain texture for the teeth to play with.
I doused one pan with a glaze made from fresh orange juice and powdered sugar, but I think that overdid the sweetness factor a bit too much: the glaze tasted like liquified orange Pez.  Better, I would say, would be a slick of soft cream cheese, perhaps whipped with a little brown sugar if you absolutely must.  But plain, browned, warm out of the oven, and a little sticky with its own sweetness, is just perfect all by itself for breakfast, for dessert, for mid-morning snack.  For any time that is right now, really.  Thanks, Nana.
Food Blog February 2013-0697
Orange Marmalade and Almond Sweet Rolls
Dough:
¼ cup warm water
2 tsp yeast
¼ cup scalded whole milk (heated to just below boiling – 45 seconds in the microwave does the trick)
¼ cup sugar
½ tsp salt
1 egg
¼ cup soft or melted butter
2 ¼ cups flour (you probably won’t need all of it – I ended up using a total of 1 ¾ cups)
Filling:
¼ cup melted butter
1 cup orange marmalade, warmed slightly
1 cup sliced almonds
Food Blog February 2013-0682
In the bottom of your mixing bowl, combine the yeast and water and stir gently.  Let it sit for at least 5 minutes so the yeast wakes up a bit.
Meanwhile, heat your milk, then cool it down.  You can hasten the cooling process if you forgot to soften your butter: just drop the still-cold stick right into your warm milk and swirl.  You’ll cool the milk and soften the butter simultaneously.
When the yeast bubbles and smells bready, add the cooled milk, softened or melted butter, sugar, and egg.  Stir to combine.  When the mixture has homogenized a bit, add 1 cup of the flour and the salt and stir again.  You will have a soggy, unworkable mixture.
Continue to add the flour ¼ cup at a time, stirring after each addition (if you are using a stand mixer, use the paddle attachment and just keep it on low speed until things come together).  When it starts to look like bread dough – pieces begin to have that floured, torn texture and hold together – and becomes just workable, don’t add any more flour to the mix.  Switch to your dough hook or a well floured board, and knead until smooth and elastic, about 5 minutes.
Once kneaded, put your shiny, smooth ball of dough in a lightly greased bowl and roll it over so all sides are moistened by the oil.  Let it rise in a warm place until it doubles – at least an hour and a half.  I like to heat my oven to 200F (my lowest setting) for a few minutes, then turn it off and let it cool for another few minutes before stowing my dough inside.
Food Blog February 2013-0658
When the dough is ready, it will have doubled in size, and the bottom will be covered with puffy little bubbles like the ones that let you know your pancake is ready to flip.  Punch it down by pushing your fist gently into the middle to let the gas escape.  Turn it out onto a floured board and roll gently, forming a rectangle of probably 2 feet by 3 feet.  Maybe 3 by 3, if it seems willing.  It should be ¼ – ½ inch all the way around.  My board was, clearly, a bit on the small side for this undertaking.
Food Blog February 2013-0663
Food Blog February 2013-0664
Give your layer of dough a massage with the ¼ cup melted butter, spreading it evenly over the surface until it’s gleaming, but leaving an inch or so margin around the edges.  This will help prevent spillage of the inevitable ooze when you start rolling.
Food Blog February 2013-0666
Spread the warmed marmalade over the buttered dough, again respecting the inch margin.  Warming it up by microwaving it for just 30 seconds or so helps it spread more evenly.  Sprinkle on the sliced almonds and get ready to roll.
Food Blog February 2013-0668
Food Blog February 2013-0675Food Blog February 2013-0677You have to do the rolling in small stages, I found.  Begin at the middle of the longer edge of your dough rectangle and make a few tight rolls, but then move to the edges and help them catch up.  They don’t roll on their own, since the piece of dough you are working with is so big, so your fingers will be busy (and no doubt sticky) flying from side to middle to side again.  Continue this process until you have created a long, tight roll of dough.  Some filling will unavoidably ooze out the ends, but if you’ve left a margin around all sides this should be minimal.  Turn the tube gently so the outer edge faces up, then pinch it gently into the next layer to create a seam so your rolls don’t become unrolls.
Food Blog February 2013-0679
Food Blog February 2013-0680
Carefully slice your rolled tube into individual portions.  I ended up with about a dozen squashy, messy, less-than-round offerings.  Deb at Smitten Kitchen suggests using a serrated knife and sawing gently, letting only the weight of the knife move down through the dough, to prevent the squashing I experienced.
Food Blog February 2013-0684Food Blog February 2013-0687Food Blog February 2013-0691
Nestle your rolls filling side up in greased baking trays – I used 9 inch cake pans – and let them rise again for 30 minutes.  This would also be a good time to preheat your oven to 375F.
Food Blog February 2013-0702Food Blog February 2013-0706
Stow your pans in the preheated oven for about 18 minutes, at which point the tops will be golden, the exposed marmalade will be somewhere between dripping and caramelizing, and the edges of each roll will have puffed against each other, some adhering thanks to the sticky filling.
Food Blog February 2013-0708
While they are warm, you can drench them in glaze or icing if you wish, or you can just gently liberate them from their pans and eat them with fork or fingers.  I like to unroll mine as I eat, saving the extra buttery, extra jammy middle bit – which everyone knows is the best part – for absolutely last.
Food Blog February 2013-0714Food Blog February 2013-0725
Most of the photo credit on this one goes to N., who got really into his job as stand-in photographer this week!  Thanks, honey.

Lemon Ginger Shortbread with Hazelnut “Crust”

Inspired by numerous sources, but mostly the deep golden orbs on my backyard lemon tree and a winter-blues-banishing post from Hannah at Inherit the Spoon, this post had to be about shortbread.  This is a cookie of the most basic sort, crisp and sandy, with only the three essentials: flour, butter, and sugar.  No leavening to worry about, no eggs to tussle with (incidentally, do you know how hard it is to crack eggs without making a mess when you’ve sliced the tip of your thumb and  it’s therefore awkwardly bandaged?), just the base, the sweetener, and the fat.
Food Blog February 2013-0584
These are, as Ruhlman points out in Ratio, an “adult” sort of cookie.  Dry, unadorned, plain, but equally ideal for a dunk in tea or chocolate ganache, and amenable to all sorts of attempts to “play dress-up,” which makes them  not just easy and tasty, but suitable for kids-at-heart.
Recently I’ve become obsessed with the combination of lemon and ginger.  Hannah’s citrus shortbread and my tree with its laboring, weighty boughs all but begged me to try this combination.  When a quick web search turned up only recipes featuring one or the other, I knew I had to insist on their marriage in my version.

Food Blog February 2013-0480

Then insanity struck.  I got the ridiculous notion that I wanted to create a hazelnut “crust” for these cookies.  Yes, that’s right, I decided to add a crust to a cookie that is commonly used itself as a crust.  I’m not sure where this idea came from, although if I must place blame it’s going to be on my sister, who commented at Thanksgiving that I should pursue the lemon-ginger-hazelnut flavor combo because it sounded so outstanding.  So really, R., these are for you.
Food Blog February 2013-0484I scoured multiple recipes to put this dough together, checking the likes of Martha Stewart, Ina Garten, Paula Deen (who I was surprised doesn’t have more sweet versions), and of course Deb Perelman.  But with the exception of a few technique ideas, I came back to Ruhlman’s basic 1-2-3 cookie dough as my backbone (1 part sugar, 2 parts fat, 3 parts flour).
The butter, I decided, needed to be browned (another recent obsession).  This would add depth and nuttiness in case the crazy hazelnut idea didn’t work out.  The ginger would be candied and minced into a sticky pile, and the lemon would be zested into mild spritzy confetti.  This made for a dough that, while delicious, was perhaps not the easiest to work with – I refrigerated it too long and was then impatient to roll it out, so there were cracks.  I rolled it quite thin, which made the cracking worse, and created a painfully delicate cookie.  The chunks of ginger, too sticky to mince very finely, stood up like carbuncles through the buttery dough and made slicing difficult.

Food Blog February 2013-0574

The hazelnuts I pulverized in the food processor with some ground ginger (in case the candied chunks didn’t come through) and a healthy sprinkling of turbinado sugar.  Faced with a bread board of delicate cookies on one side and a pie plate full of hazelnut crumbs on the other, I almost opted to forget the whole “crust” idea altogether, but I’m glad I didn’t.  You can transfer crumbs to cookie in a number of ways, including pressing the cookie into the crumbs, which I don’t recommend  (they adhere only reluctantly and the raw dough tends to break), or mounding crumbs on top of the cookies and pressing them in with a rolling pin, which I do recommend.  Then you can gently lift the cookie and flip it quickly and firmly onto a parchment lined baking sheet so the hazelnut layer is on the bottom.  The crumbs will try to scatter.  Don’t let them!  Press the cookie down lightly but firmly back into the crumbs, and they will adhere as they bake.
When they came out of the oven, they were too soft to move.  They needed a good five minutes alone on their baking sheet, undisturbed, to cool and crisp.  But once crisp, they were perfectly sandy and satisfying, tasting of – I can’t think of a better description – powdered butter.  At first I couldn’t detect the ginger or lemon, aside from the now chewy bits of candy distributed through the dough, but a day later, and then two days later, the more delicate flavors started to shine past the overwhelming richness of the brown butter.  The hazelnuts, with their earthy crunch, were perfect the whole time.  You could probably mix the nut crumbs in with the rest of the ingredients and save yourself a bit of time and frustration, but I loved the way they looked as a crisp layer on the bottom.  Cookies with their own crust.  Glorious.  My sister got to taste them during an unexpected visit, and pronounced them delicious.  The lemon-ginger-hazelnut trifecta is a triumph.  And the leftover ginger-spiked hazelnut crumbs make an excellent topping for oatmeal.
 Food Blog February 2013-0578
Lemon Ginger Shortbread with Hazelnut “Crust”
8 oz. butter (1 cup, or 2 sticks)
4 oz. sugar (1/2 cup + 1 TB)
12 oz. flour (2 – 2½ cups)
½ cup chopped candied ginger
Rind from 1 lemon, finely chopped (some pith is okay)  (about ¼ cup)
1 cup hazelnuts
1 TB ground ginger
2 TB raw sugar, like turbinado or demerrara
Melt the butter in a small saucepan, swirling gently on occasion, over medium to medium-low heat.  Once melted, the butter will foam up, then clear slightly, and then the magic: the solids will sink to the bottom of the pan and begin to brown slightly.  At this point, turn off the heat.  You want this beautiful browning, but you don’t want those solids to burn.  There is only a small window between browning and burning, so watch carefully as the butter reaches this stage.
Pour the melted butter and browned bits (which you may have to scrape off the bottom of the pan) into the bowl you will use to make the cookies.  I used my stand mixer bowl.  Stow it in the fridge for 10-15 minutes, or until the butter gets sludgy.

Food Blog February 2013-0562

When the butter has solidified a bit, pull it back out and add the sugar, then cream (or goo) well until everything is incorporated and has become a beautiful flecked mixture the rough consistency of frosting.
Add the flour and mix until crumbly.

Food Blog February 2013-0563

Add the lemon zest and the ginger and mix again.  First the dough will become large crumbs, then come together into something more like wet sand.  This takes a minute or two.  If it isn’t coming together right away, don’t worry.  The wet sugar and butter mixture needs some time to moisten the flour.

Food Blog February 2013-0564

Once the dough is the consistency of wet, packable sand, dump it out of the bowl onto a sheet of plastic wrap.  Using the plastic wrap to help you, shape the dough into a rectangle of 5×8 inches or so, wrap up securely, and refrigerate for about 30 minutes.

Food Blog February 2013-0568

While the dough chills, pulverize the hazelnuts, ground ginger, and raw sugar crystals in a food processor (or chop finely with a sharp knife) until some of the hazelnuts are reduced to powder and some remain in very small bits.  Don’t overprocess – you don’t want this to turn into nut butter.  Stop before it becomes moist.
When your dough has had a chance to chill, unwrap it onto a floured board and roll or press out to about ¼ inch thick.  This takes a bit of patience, especially if you, like me, let it chill for too long and try to roll it out before it’s ready.  Cold rolling results in cracking.  Just relax, let the dough warm up a tiny bit, and roll gently with a floured rolling pin, patching cracks as you go.  This would also be a good time to preheat your oven to 350F.

Food Blog February 2013-0570

Once you’ve achieved even thickness (minus the odd tall chunk of ginger), use a pizza cutter to trim off uneven edges, and slice the remaining rectangle into smaller rectangles the size of your choosing.  Mine were probably about 1×3 inches, which seemed like a nice sized cookie.
Now it’s time to add the hazelnut crust.  As noted above, you can do this in a number of ways.  You can, if you wish, lift the cookies, place them into a dish of crumbs, and press down, hoping for adherence without breaking the cookie itself.  This method requires almost excruciating gentleness.  You can also press handfuls of the hazelnut crumbs down on top of the cookies on the board, applying firm but gentle pressure, and then lift the cookies one at a time and invert them onto a parchment lined baking sheet.  As you flip, some of the hazelnut crumbs will loosen.  That’s okay.  Just get your cookie settled on the baking sheet and then press down again gently but firmly to re-stick the crumbs.  They will adhere better as they bake.

Food Blog February 2013-0571

Once you have a full baking sheet (mine each fit 15-18 cookies in various arrangements), pierce the cookies gently with a fork to achieve that pricked look so popular in shortbread, and bake for 18 minutes.  The cookies will become lightly golden all over, and the hazelnut crumbs will darken and get a bit toasty.

Food Blog February 2013-0576

At 18 minutes, take them out of the oven, set the baking sheet on a cooking rack, and walk away.  The cookies need 4-5 minutes to set before you try to move them.  They are much too soft at their moment of emergence to transport intact.  As they cool, they will deflate and crisp up a bit, and you can move them to a cooling rack or a marble countertop or surface of your choice.

Food Blog February 2013-0583

You can certainly eat these warm, but I liked them better completely cooled.  In fact, I liked them better the next day, once the flavors had melded and developed.

Food Blog February 2013-0580

Stored in an airtight container, these keep deliciously for over a week.  They even, wrapped carefully, stay crisp and fresh through the mail.
This recipe probably made about 3 dozen cookies, and could have made more if I had eaten less of the dough scraps.  I, alas, didn’t make a count before I started sampling, which is always a tasty, tasty mistake.

Swing

Summer into fall into summer.  Salads and grilled vegetables into casseroles dabbled with cream into fresh raw dips.  Luxurious stretches into curled legs under blankets into stressed grading sessions into sampling new half-fizzed white wine.

Sometimes this is called Indian Summer.  I like to think of it as Swing Season.

Two Bittmans for you this week.

77. Trim and dice fresh tomatillos; peel and julienne jicama (or daikon or kohlrabi). For dressing, combine lemon and lime juices, olive oil and chopped cilantro. Pour over salad, top with toasted sesame seeds.

This sounded like a good late summer/early fall salad.  I found tomatillos at the grocery store, but no jicama, no daikon, and no kohlrabi.  And then we went to our Farmers’ Market, and I found all three!  Huge daikons, alien baseball sized kohlrabis and, hidden between stacks of beets and the tiniest fingerling potatoes I’ve ever seen, a pile of grubby little tubers with vine-y stems still attached.  Eureka, jicama!  Back at home, I assembled the troops:

1 TB toasted sesame seeds

2 small jicama

6 medium tomatillos

(really, the number of jicama and tomatillos isn’t super important as long as the quantities are roughly equal once you’ve cut them up.  Start with maybe 1 cup of each, see what you think, and then add more if that’s what makes you happy)

2 TB chopped cilantro

1 lemon

1 lime

Olive oil

Salt

I’ve tasted jicama, but it has been a long time.  And I’ve certainly had tomatillos, but mostly only after they were roasted and processed into salsa.  I wasn’t sure how they would be raw.  This – a lovely fresh slaw/salsa/salad hybrid – sounded so bright and tart and lovely that I wasn’t too nervous.

Before anything else, I toasted the sesame seeds and set them aside.  They give off such a lovely roasty scent when they are just browned and starting to release some oils.

I peeled, then sliced the jicama into rounds.  Then I stacked up the rounds and made thin slices across until my two little aliens were a pile of matchsticks across my board.  Into the bowl with you.

Next I quartered and diced the tomatillo.  Because they are still underripe when green (apparently they can turn purple and get very sweet when they ripen, but I’ve never seen them in that state), their skins were quite resilient – it took some pressure to get my knife through them.  Carefully chunked into miniscule cubes, they joined the white confetti in my bowl.

A quick squeeze of lemon and lime, a whisking pour of olive oil, and a handful of chopped cilantro feathers later, and the dressing was done.  And then a sprinkle of salt, and it was perfect.  It was a little more than needed to moisten the salad, but it’s hard to know how much juice citrus will have secreted away inside it, so it’s always going to be a guessing game.

I mounded the white and green on my plate, then added a generous scoop of Mexican rice and a quartered cheddar cheese quesadilla.  Simple simple.  At this point, you should ideally sprinkle the sesame seeds you so carefully toasted atop the salad, but I forgot until after I’d already subjected it to a photo shoot.

I was surprised and pleased by the flavor of this dish.  I can’t imagine eating it as a Thanksgiving side dish, but it was a bright burst of summer on a day that began in drizzly autumnal terms.  Jicama is crisp and juicy with the barest hint of starchiness, and its flavor reminds me most closely of an Asian pear.  The tomatillos were very tart, but the pairing tamed them.  Imagine a granny smith apple crossed with an underripe tomato and you’re approaching the brightness we experienced.

This was good as a salad, though its tartness necessitates a small portion.  It was also good heaped atop our quesadillas, like a raw salsa.  It contrasted nicely against the melted cheddar and the just crisped corn tortillas.  But where it would really shine, N. and I agreed, would be as a kind of mirepoix for guacamole.  Dicing the jicama instead of leaving it in strips and folding the whole salad gently into chunks of ripe, buttery avocado would make for the perfect chip dip.  Tart, creamy, crunchy, with the right kind of salty sourness from the dressing, and all you’d need was a frosted Corona and a pool to dip your toes into.  Summer.

But things never end there.  At least we hope not!  Days of sweating and hiding inside and waiting till after sunset to go out always, inevitably (even if it’s taking FOREVER, Los Angeles…) relax and cool and crystallize into Autumn.

35. Pumpkin-Noodle Kugel: Cook a half-pound of egg noodles in salted water until not quite done; drain and put them into a buttered baking dish. Whisk together 4 cups milk, 4 eggs, 1 cup pureed cooked pumpkin (canned is fine), ¼ cup melted butter and a pinch each of cinnamon and salt. Pour over the noodles and sprinkle with bread crumbs (or, for added kitsch, corn flake crumbs). Bake 45 minutes to an hour, or until a knife inserted into the middle comes out clean.

I had no idea how to serve this dish.  I’ve heard of kugels, but I’ve never even eaten one, let alone made one.  I wasn’t sure, as usual, what to serve it with, so I asked a few friends and did some research on the good ol’ internet.  At the point that I read Smitten Kitchen’s version (okay, so this one is written by her mom, but seriously, that woman has cooked everything, and all of it sounds and looks outrageously delicious), this sounded more like a dessert than a dinner side dish.  It would be, I decided, dessert and weekend breakfast.  Sweet, autumnal, nicely spiced, and custardy.  “It’s going to be like a rice pudding but with noodles.  And pumpkin,” I told N.  He still wasn’t sure.

8 oz. egg noodles 

4 cups milk

4 eggs

1 cup pumpkin puree (I used Libby’s)

¼ cup melted butter (I put this in, but I’m not sure it was really necessary)

¾ cups sugar

¾ cups golden raisins

½ tsp cinnamon

½ tsp salt

2 cups corn flakes, well crunched (who am I to pass up added kitsch?!)

It wasn’t until I had collected ingredients that I realized Bittman’s recipe doesn’t call for sugar.  But I was already on the dessert/breakfast kick, and I couldn’t quite envision this as a savory dish, so I dumped in my sugar estimation anyway, along with the golden raisins that aren’t part of the original.

I cooked my noodles for 5 minutes and then let them cool for 10.  They probably needed to be cooked for only 4 minutes, because they keep on cooking not only while they are in the oven, but on the counter as they cool as well.

Yes, I take these photos from the floor. But it’s a nice wood floor, and the light is so good, and I promise Lucy stayed on the other side of the room the whole time…

With the custard whisked together and the noodles evenly spread in a buttered 9×13” glass baking dish, I preheated my oven to 375F and assessed the corn flakes situation.  Whenever an ingredient needs to be crushed, crunched, or pulverized on Chopped, I yell at the chefs for using their hands, knives, or a rolling pin instead of just bringing over the food processor.  But they don’t have to wash all the dishes they make, and I do, so my pretty little scarlet processor stayed on its shelf.  I crushed up the cereal with my hands, feeling a kind of satisfaction as the flakes became bits and then powder.  I topped the noodly custard with a generous layer of crumbs and carefully slid it into the oven.

An hour later, the custard had set and the smell flashed me forward to Thanksgiving.  I’m convinced we as a society don’t really know what pumpkin tastes like, because what we experience is texture and spices.  If this kugel didn’t have a sprinkle of cinnamon in it, I’m not sure I would know it had pumpkin either.

Dinner came and went, the kugel cooled a bit, and I dug out a too-big portion for myself, and neglected to feel any kind of remorse about it.  It was too good for that.  The noodles had melded together as the pumpkin infused liquid cooked, making a solid, scoopable, sliceable custard.  The corn flakes on top were perfect: aggressively crunchy against the soft interior.  I wouldn’t omit the golden raisins either; they were a really nice textural contrast to both the softness of the noodles and the crunchy crumbs, and their complex sweetness added some depth to my dessert casserole.  It was warm, and sweet, and perfectly comforting as I tucked my feet under me on the couch and waiting for the approach of Project Runway (don’t judge, every girl needs a little reality TV now and then).

The leftovers are delicious too, though the dish does lose something in relinquishing its crunch to the microwave.  In another universe where I’m a Southern cook, I could see doing crazy things like frying squares of this in butter and then drizzling hot maple syrup over the top.  But I’ll refrain.  Because from my window, I can see my basil wilting beneath the curiously, cruelly hot-for-mid-October sun: back to summer, so it seems!  And here I was considering making soup…

Swing season indeed.

Three for One

Sometimes you are faced with not enough: not enough time, not enough money, not enough to do…

And sometimes you are faced with too much: too much bounty, too much responsibility, too much joy.  These are both their own kind of problem.  And if I have to choose, faced with these Januses, I will always go for too much.  Even if I fall short.

Last week I only managed one Bittman.  This week, in a startling display of ambition and motivation, I did three.

One of the biggest challenges of this project (aside from cooking, photographing, and writing about the food… you know… actually doing it…) has been deciding what to serve these dishes with.  I’m not up for roasting a chicken or a turkey every week to emulate the Thanksgiving spirit of the project, so I try to piece them together with other entrees.  As you’ve seen, if you’ve been following the project for any length of time, sometimes I choose well, and sometimes I decidedly don’t.

This week, riffling through the slowly diminishing options, it occurred to me for the first time that I could serve them as complements to each other.  They were all, after all, conceived for the same imagined table.  They should work together quite nicely.

“7. Cranberry-Orange Sauce: Cook a bag of fresh cranberries with orange and lemon zest, cut up (peeled) orange segments, ¼ cup sugar (or to taste) and a bit of minced jalapeño or chipotle.”

This sounded good and, with the slightly cooler temperatures we’ve been privileged to receive lately, a nice symbol of our entry into Fall.  Cranberries and oranges are a frequent couple – almost too expected – but there’s a reason they appear together so frequently.  And with the addition of lemon juice and some spice, this seemed far enough from traditional to avoid being boring.

1 bag cranberries (probably 1 pound?)

Zest of 1 lemon

Zest of 1 large or two small oranges (mine were little Valencias from our Farmers’ Market)

Segments of 1 large or two small oranges

¼ – ½ cup sugar, depending on your taste and the tartness of your berries

Dash of spice, depending on your taste

I bounced the cranberries into a pot, zested the lemon and oranges over them, and then cut the peel from the orange and sliced out supremes.  For good measure, I squeezed as much juice from the wasted scraps of orange as I could, then topped the mix with sugar and a dusting of cayenne (I had neither jalapeno or chipotle available) and pushed it onto the back burner.

I let the pot come to a boil over medium heat, stirring occasionally to melt the sugar evenly and prevent it from burning until the cranberries released some juice to protect the mixture.  Once it boiled, I lowered the heat and let the whole thing simmer for about 20 minutes.  At one point I tasted, decided there wasn’t enough sugar or cayenne, and added more of both.  The addition of sugar was a good thing.  The addition of more cayenne was less so.  I’d caution you to start with less than you think you will want.  The mixture does not taste at all spicy while it’s hot.  When it cools, though, it becomes fiery.  It was still tasty, though.  We ate it sticky and thick and room temperature, dabbing up popped clusters of ruby and letting it linger on our tongues – but not too long – enough to wake our taste buds from the spice.  As an autumnal side, this works very well and is a pleasant update to the traditional cranberry sauce.  It would also make a glorious topping for a baked brie, perhaps with some rosemary or red wine glugged in for good measure.

While the cranberry sauce was heating, I turned my attention to its companion.

“59. Blanch thinly sliced potato and leeks until tender but not mushy; drain well. Layer the vegetables in an oiled or buttered baking dish, then top with a mixture of bread crumbs and lightly sautéed chopped bacon (some cheese mixed in is pretty good, too). Broil until golden brown.”

Potatoes and leeks are a combination that, a mere year or so ago, I didn’t realize existed.  Now it’s such a natural pairing I can’t believe I never knew about it before.  Sliced blanched potatoes and sautéed leeks now fill every frittata I make.  I collected:

2 russet potatoes, peeled

1 massive leek, tough tops and root ends removed, halved vertically (rinse it out well at this point) and sliced into slim, slim, oh-so-slim half moons

1 lb. bacon

½ – 1 cup bread crumbs (I used Italian seasoned)

Knowing how good leeks can be when they are sweated and barely brown, and conscious that the beauty of bacon grease shouldn’t go to waste, I made a few changes to Bittman’s directions.

First I cooked the bacon.  You likely don’t need a whole pound of it, but this guaranteed an appetizer: one still sizzling slice each for N. and for me.  If you aren’t cooking for or with someone else, go wild and have two all by your lonesome.

While the bacon cooked and the cranberries simmered and popped, I put a pot of water on to boil.  When its aggressive bubbling demanded attention, I carefully lowered in the potato slices and gave them free reign for five or ten minutes.

When it was edging toward crisp, I set the bacon aside to cool and drain a bit on a paper towel lined plate.  I dumped the potatoes into a colander when they were barely cooked through.

Time for the leeks.  I scraped my board free of the slender, just green shards, capturing a satisfying fizz as the vegetation hit the pan.  You want to stir with some frequency here, and not raise the heat above medium; we’re looking for a light sauté, not a heavy brown.

The shards collapsed into resistant-less ribbons, and I pushed them to one side to add the drained, cooling potatoes.  With adept wooden spoon manipulation, I managed to achieve something like layering: half the potatoes flat on the bottom of the pan, the leeks draped across them, and the rest of the potato slices on top.

I turned on my broiler, and while it heated I crumbled the bacon, tossed it with bread crumbs, and dusted the potatoes with the mixture.  But dust wasn’t enough.  They required a landslide.  I drizzled the top with olive oil, knowing the bread crumbs would need it to brown, and slid the whole pan into the broiler (note: if you use a skillet or pan for this, rather than a casserole dish, be sure you wrap any plastic or rubber with aluminum foil before you put it into the broiler.  We don’t want your nice pan handles to melt…).

Five minutes later, the parts of the crumble I had oiled were beautiful brown (the other parts remained sandy and unaltered, much to my chagrin) and the dog was close by, nose moist with curiosity and the urge to assist.

We loaded our plates, completing the meal with a completely unnecessary slice of toasted jalapeno cheese bread, and ate.

As has proved often the case with Bittman’s layered vegetable dishes, I expected this one to be a gratin, and it just wasn’t.  Some cream, some cheddar cheese, some binding between the vegetables, would have been ideal.  But not crucial.  They weren’t supposed to be scalloped potatoes, after all.  The bacon and bread crumbs made them exciting, and the leeks were almost creamy nestled between the thick slices.  Honestly, forgetting to salt the water I boiled the potatoes in was the only real unfortunate mistake.  Two down, with only one mistake (two, I suppose, if you count the overly spicy cranberries, which I suppose I do), is pretty promising.


To make this a trifecta, on another night I chose another autumnal option.

“64. Mushroom Bread Pudding: Put 6 cups of good bread (day-old is best) cut into 1-inch chunks into a buttered baking dish. Beat 4 eggs with 2 cups of milk and ½ cup grated Parmesan and pour over the bread. Sauté 4 cups of sliced mushrooms until tender with a teaspoon or two fresh thyme leaves and mix into the bread. Bake until just set, about 40 minutes.”

Mushrooms and thyme are so nice together.  They are earthy and deep and musty, like the back of a dark pantry into which no anxious hands have reached for some time.  Since they were more precise than usual, I followed Bittman’s ingredient quantities almost to the letter.

I sautéed the mushrooms and thyme in butter, taking time to let the slices soak up the butter, then expel their own liquid.  Only after that, as the moisture from the mushrooms evaporates from the pan, can the mushrooms take on the same kind of crisp brown sear as a steak pressed into a screamingly hot pan.

While the mushrooms cooled, I tore up the crusts of a month’s worth of sourdough bread (I keep them in the freezer for just these sorts of occasions) and pressed them gently into a buttered square glass baking dish.  I grated cheese – swiss and parmesan – and cracked eggs from the Farmers’ Market into a bowl, marveling at the rich orange yolks you just can’t get in the grocery store.  I stabbed them, flooded them with milk, and whisked in the cheese.

I turned to assembly.  First, mushrooms must be tossed with bread.  Attempt even distribution.  Then, a careful, rich pour of the dairy component, taking care to attend to the corners, until the bread almost floated in a puddle of would-be custard.


One of the things I’ve learned in my years of bread pudding production is that pressure and soaking time yield the best results.  I carefully pressed a layer of plastic wrap over the top of my pudding and set it in the fridge for an hour, while N. and I answered the velvet brown eyes begging for “walkies.”

Upon our return, it was as simple as preheating the oven to 375F (pull the pudding out of the fridge and let it approach room temperature as your oven heats), sliding the baking dish onto a rack, and reluctantly grading a paper or two as 45 minutes ticked by (I like my bread pudding a little more than “just” set).

A puff in the center signifies doneness.  Mine levitated just barely in the middle, but the custard was set and the edges of bread not submerged were crisp and darkly golden.

The serving spoon broke sharply through the crisp top but then exhaled through the custard underneath.  Piled on our plates next to an amazing skillet casserole of deeply browned sautéed Brussels sprouts and chopped walnuts drizzled with a balsamic glaze, we accepted its golden softness.  With a higher ratio of eggs to milk than most bread puddings I’ve made, this had almost a soufflé quality, though vastly more substantial.  It was rich and earthy and savory, and I suspect it will be just as good for breakfast as it was for dinner. 

Three more down.  This can be done.  2012 has already been a year of many accomplishments.  Why not go for too many, rather than hesitating at not enough?